Well, I need to say it right off the bat: JetEngine or the whole Crocoblock is not a ready-to-go membership plugin (at least in the traditional understanding of this word). Yet, you can build such functionality using it. Moreover, you can create something more complicated where membership is one of the components.
The key here is to have a well-thought-out structure before building a website. It depends on your project and goals: sometimes, it’s easier to use a dedicated membership plugin with JetEngine, but in many cases, Crocoblock is enough, and this membership site is a great example. There are also dynamic templates where membership is involved to a certain extent, for example, a Job Board one.
Table of Contents
Setting Up a Goal
Building a membership website is a serious task. Because, for starters, you will deal with a lot of members, so everything has to be perfect; otherwise, you are in trouble, right?
So, let’s start from the basics: what is a membership website?
There can be varieties:
- a site where some content is restricted from reading (or watching) for certain visitors;
- a site where some types or categories of content are restricted from being posted (or uploaded);
- a site where the website owner can make a profit and charge members for specific actions.
This is a brief outline of what a membership website can look like, but certainly, there are much more varieties. Let’s go hands-on and see what we can do, and remember that it’s only my little example, while for you, the sky is the limit.
I will create a membership website for the travel community with three types of membership plans:
- Expert – the most expensive plan that allows members to post their own Experiences (services similar to Airbnb Experiences) plus everything that lower plans include.
- Guide. This plan allows members to create a profile with contact information and post their city guides and articles, plus everything the Traveler plan includes.
- Traveler. It’s a free plan. Travelers can add comments and bookmark (or add to Favorites) Experiences and Articles.
The membership payment is recurring and charged monthly.
Other functionality:
- Filters for Experiences and Articles.
I will not spend too much time on a detailed explanation of every step to not turn this article into a book, but there will be a lot of really useful links.
Membership website specification
This is a brief outline of what I will need for the website and what I will create.
Plugins:
- Crocoblock plugins (almost all the plugins, except those for WooCommerce, JetBooking, and JetAppointment. Actually, JetBooking might be really useful if you go a little further and make Experiences bookable via the website. And WooCommerce functionality might also come in handy in many cases).
- User Roles plugin (any of such plugins that allow adding custom user roles and assigning their capabilities).
- JetFormBuilder for creating members from the front end. And also, it should be the Pro version with premium add-ons (because I need an add-on for recurring payments).
- Elementor (you can choose Gutenberg for the core functionality, but I want to use some Crocoblock plugins for Elementor, such as JetBlocks, JetElements, and JetTricks).
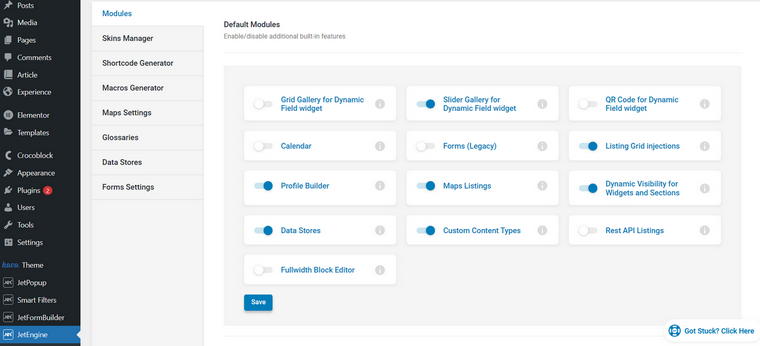
Also, the following JetEngine modules must be activated: Profile Builder, Dynamic Visibility for Widgets and Sections (and Custom Visibility Conditions add-on, if needed), Listing Grid Injections (optionally), Slider Gallery for Dynamic Field widget (optionally, depending on your design), Map Listings, Data Stores.
Custom post types and Taxonomies to be created:
- Experiences.
- Articles (I want them to be separated from default posts because the admin will create posts for a blog, so it’s better if they will not mix up).
- Custom taxonomies for Articles and Experiences.
Custom user roles:
Meta Boxes:
JetEngine lets you create Meta Boxes – sets of meta fields – and assign them to a few post types (including existing default ones), taxonomies, or users. While it also has the functionality to add meta fields when creating a custom post type – so don’t get confused. Here, I will need the Meta Boxes’ functionality because I want to assign custom fields to Users.
So, I will create a set of meta fields for Guides and Experts where they can specify their city or region, experience, photo, bio, contact information, etc.
Pages:
- Sign In, Sign Up, and Welcome pages for Members.
- Pages with forms (some can be the JetPopup block).
- Archive pages for Articles and Experiences with a filter block (JetSmartFilters).
- Individual pages for Article and Experience.
- Home page and others.
Forms:
They will be created with JetFormBuilder:
- Register Traveler;
- Register Guide;
- Register Expert;
- Add Article;
- Add Experience.
All of those forms should have their almost fully duplicated versions with the Edit post-submit action so that members can change information about them, as well as Articles and Experiences.
Filters:
- One set of filters for Experiences;
- Another set of filters for Articles.
Comments:
- A custom comment system where users can rate the post (Article or Experience), upvote others’ comments, etc.
Setting Up User Roles
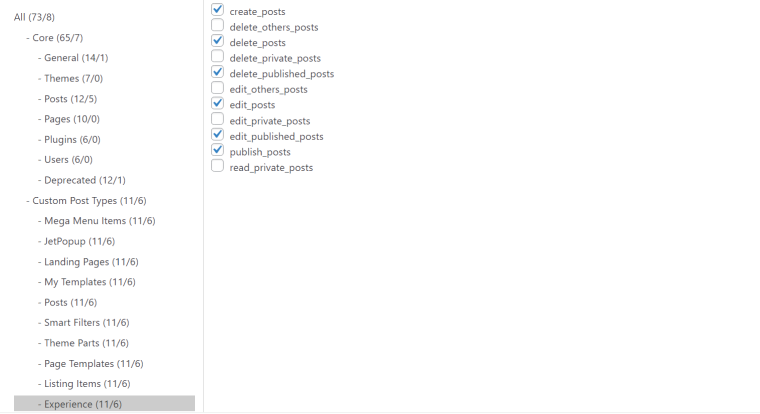
I will use a free User Role Editor plugin and add all the needed capabilities for particular posts, including the newly created custom post types. In the Deprecated tab, flag the level_0 permission and switch off the Admin Panel for the custom user roles.
These are the permissions for the Expert user role for the Experience post type, and you will need a Pro version to restrict access to a particular custom post type:
Pro tip
If you want to fully restrict a user from viewing a certain post type, you can do it from JetEngine > Profile Builder > Advanced
Creating Custom Post Types and Taxonomies
I will create two custom post types (Articles and Experiences) by going to JetEngine > Custom Post Types and creating post types and meta fields for each of them.
The Article post type is for writing travel guides or personal experiences, so this CPT will have Title, Content, Map, Gallery, Country, and City meta fields.
I want Country to be a Select field, to avoid mistypes and be nice and filterable. It’s easy to do with the Glossary JetEngine feature, which is basically a list of options for the Select field.
Go to JetEngine’s main settings, create a new glossary by uploading a file with all the countries, and then select this glossary as a source for the Select field for the Article CPT.
Or add them manually if you deal with a limited number of countries.
Pro tip
The list of countries can be found on GitHub.
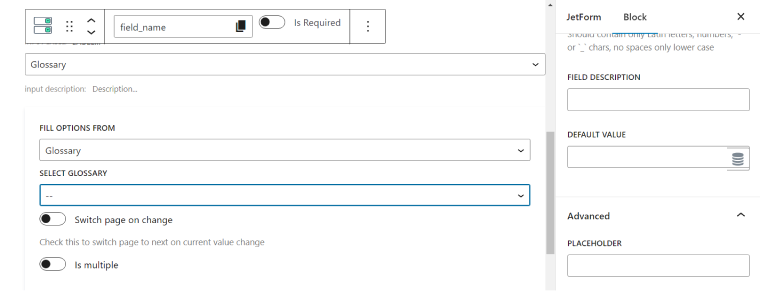
Then, when creating submission forms, add the Select field and choose Glossary as a source of options:
For Experiences, there will be a bigger list of meta fields, and because I’m taking Airbnb Experiences as a reference, it will be something like this, but instead of the “Book” button, there will be a “Contact an Expert” with an Expert’s e-mail address active link. To make this block sticky, use a Sticky Column widget (JetTricks).
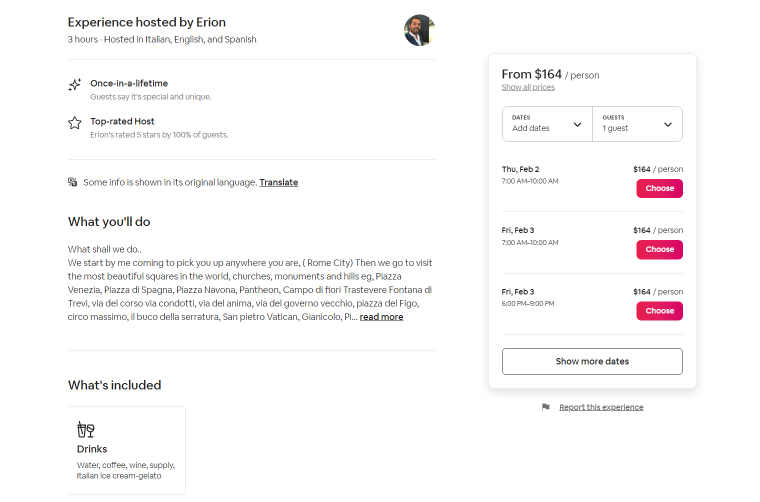
As you can see, Glossaries will definitely come in handy here to keep as many fields as possible standardized.
Pro tip
For adding blocks with icons (like “Drinks” or “Once-in-a-lifetime” in the example above), create taxonomies with Media meta fields and upload the icons you want to use for each category. And then, assign Experiences to this taxonomy, so members can select them when submitting an Experience. Later, you will be able to fetch those media fields when creating Listings with the Dynamic Image widget and insert them wherever your design requires.
I will add an Article Type taxonomy with two categories: My Adventure and Travel Guide for Articles and much more for Experiences.
Creating Forms
There are two types of forms that this website should have: registration forms and submission forms for adding Articles and Experiences (for Guide and Expert user roles).
Registration forms
After creating additional fields in JetEngine > Meta Box and assigning them to the proper user roles, it’s time to create registration forms. After adding all the fields, don’t forget to go to JetForm > Post Submit Actions and select “Register User,” press the pencil-like icon and do field mapping. Also, assign the field names to the custom meta fields created in the Meta Box menu.
In addition, you can create a “JetPopup” post-submit action and connect the previously created “Congratulations, you are registered” pop-up with all the information you want to add there. Remember that you can add as many post-submit actions as you need (send e-mail, call webhook, etc.), and don’t forget to always hit the pencil-like button to set up all the details about those actions. What also can be useful here is the Related Items action.
It’s a piece of cake when we deal with free users, but two of the member types are actually paid ones. To create recurring payments, configure the PayPal Recurring Payments Addon. And instead of the “Submit” button, I will make a “Subscribe Now” one that will lead to the payment page.
Submission forms
For adding Articles and Experiences, there must be front-end submission forms, so let’s create them. Add the fields the corresponding CPT and its taxonomies have. For example, for Articles:
- Title;
- Content;
- Map Field;
- Media field for Gallery (with several photos allowed to be uploaded);
- Country;
- City;
- Media field (for the Featured image);
- Select field for Category.
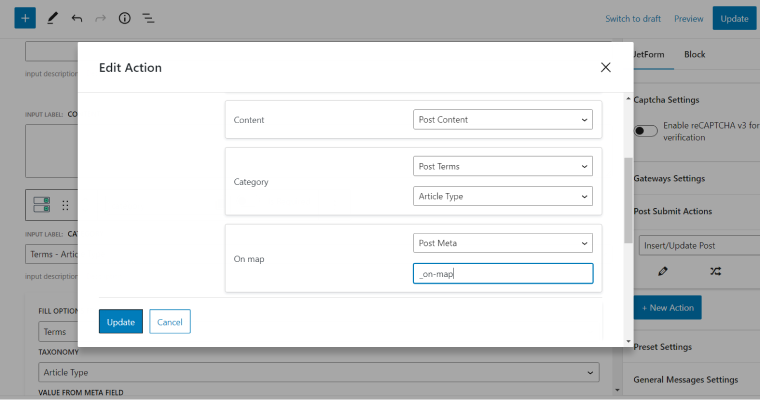
After adding all those fields, on the right panel, choose Post-Submit Actions and select Insert/Update Post. Then press the pencil-like button and add all the settings: select an Article post type and complete a field mapping, assigning the form fields to the corresponding meta fields of the Article CPT.
If you can’t find the right field in the drop-down list, it means you are looking for a custom meta field. So, choose Meta Field and write the corresponding field key.
Duplicate this form and name it Update Article, then slightly change the post-submit settings – it will serve for updating and editing Articles.
Creating User Dashboards for Members
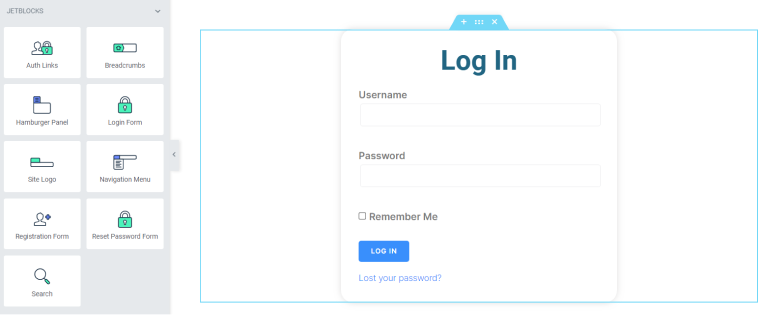
I will build a User Dashboard for members with the help of the JetEngine Profile Builder module. But first, I need to create some pages and set up subpages (for Profile settings, adding and editing Experiences and Articles, etc.) that the dashboard would refer to, plus Log In and Register pages.
It’s very easy with JetBlocks, as it already has all the necessary widgets:
Now, let’s create dashboards for each member role using Profile Builder.
Making Listings and Pages
Finally, we can proceed to create a beautiful front end. But actually, all the building blocks are ready already; all we need to do is to assemble them the way the design requires.
First, create JetEngine listings, and for more fine-tuned results, you can use Query Builder. They will become a basis for Listing Grids (basically, loops) and some page templates.
Talking about templates: of course, I will need to create nice templates for Articles, Experiences, and other pages. Crocoblock got us covered, and there is the JetThemeCore plugin with its advanced conditional functionality that brings dynamic content to another level. Go to Dashboard > Crocoblock > Theme Builder to create templates and assign them to the pages you want.
Setting Advanced Filters
Filters are essential for the All Experiences page and highly suggested for the All Articles one. There, I will use Select Filters (JetSmartFilters plugin) for the Country field and Article Type taxonomy (Guide / My Adventure). Also, it would be cool to place those stories on the map, and for this, I will use Map Listing. However, for Articles, it’s an optional block, while it’s almost essential for Experiences.
Talking about which because it will have much more fields and taxonomies, and there will be several Checkbox Filters. Also, for users’ convenience, I will place a Search Filter for manual search and a Sorting Filter to show the results the way users prefer.
For the mobile version, it’s recommended to place filters in the pop-up window.
Bonus: make the Admin Dashboard look cool and sortable
If everything goes well and your members are active, you will also need navigation on the admin side. That’s why don’t forget to set up admin filters. They have nothing to do with JetSmartFilters, it’s purely the JetEngine thing, but I’m placing it here as a reminder. Also, while adding custom post types, don’t forget to add all the admin columns you want to have.
Dynamic Visibility
Talking about conditions and flexibility, it’s important not to forget about the very useful tool for any membership website – JetEngine Dynamic Visibility Module. You can customize the content for different user roles of the entire page or some parts or show different content to different roles on the same page. A website built with JetEngine allows you to hide not only text content but any files published on the site.
Also, using this module, you can make the site much more interactive, for example, by adding badges to users’ profiles, marking new posts, and much more.
Any community can’t exist without comments and discussions. So, let’s build this functionality and bring it to another level compared to default WordPress comments. There are two main ways to do it with Crocoblock:
Setting Up a Wishlist Page
The final touch is adding an Add to Favorite functionality. And again, it can be done with JetEngine, and no other plugins are required. The functionality is called Data Stores; it’s a module that should be switched on.
Except for the Wishlist (or Favorites) page that members will automatically get after adding certain Articles and Experiences to Favorites by hitting the Like button, the likes counter can be displayed next to the Articles and Experiences, which is an essential thing for creating interactivity and showing what is popular.
Creating the Home Page
Finally, when everything is ready under the hood, it’s time to create the Home Page. I will just briefly outline which blocks and plugins will be essential or useful here:
- JetElements plugin for a lot of things, but definitely for Pricing Tables for members. Also, a Post Grid with featured Articles and Experiences looks very cool there, as well as Slider and Banner widgets.
- Don’t forget that JetEngine can show listings as sliders, it’s a built-in functionality, and a Home Page is a good place to use it.
- My personal favorite is JetTricks with Unfold and Sticky Column functionality.
The Bottom Line
As you can see, it’s fun to build a membership website with Crocoblock, and there are all the necessary tools available. The key is a well-considered structure.
The last small suggestion: to have a good performance, switch off all unused widgets after you finish building your website. To do this, go to Dashboard > Crocoblock > JetPlugins Settings. There, check the tab of each plugin.
JetPlugins are made the way they are perfectly compatible with each other and extend each other’s functionality. So, I wish you to enjoy the process and the result.