Trying to learn how to create a dentist website?
When you first open your dental practice, you may rely on foot traffic and word-of-mouth to grow your business. Alternatively, you can start marketing your services online to expand your reach and gain new clients. However, you might not know how to create a dentist website.
With the free WordPress software, anyone can build a dentist website – no code needed. 😎
After you install WordPress, you’ll be able to create web pages that promote your services and highlight your exceptional team members. By activating the right theme and plugins, your site will be fully ready to accept new appointment bookings.
In this post, we’ll show you how to create a dentist website with WordPress. Let’s get started!
How to create a dentist website
- Purchase web hosting and set up your website
- Select a WordPress theme
- Design your core pages
- Install essential WordPress plugins
- Enable appointment booking
1. Purchase web hosting and set up your website
Although WordPress was first developed for blog owners, it is now used to power everything from e-commerce stores to photography portfolios. Since this platform is so flexible and beginner-friendly, it enables you to quickly create an online presence for your dental practice.
First, you’ll need to purchase web hosting for your WordPress site.
Although there are many providers on the market, we recommend Bluehost for new WordPress users. This web host will automatically install WordPress for you:
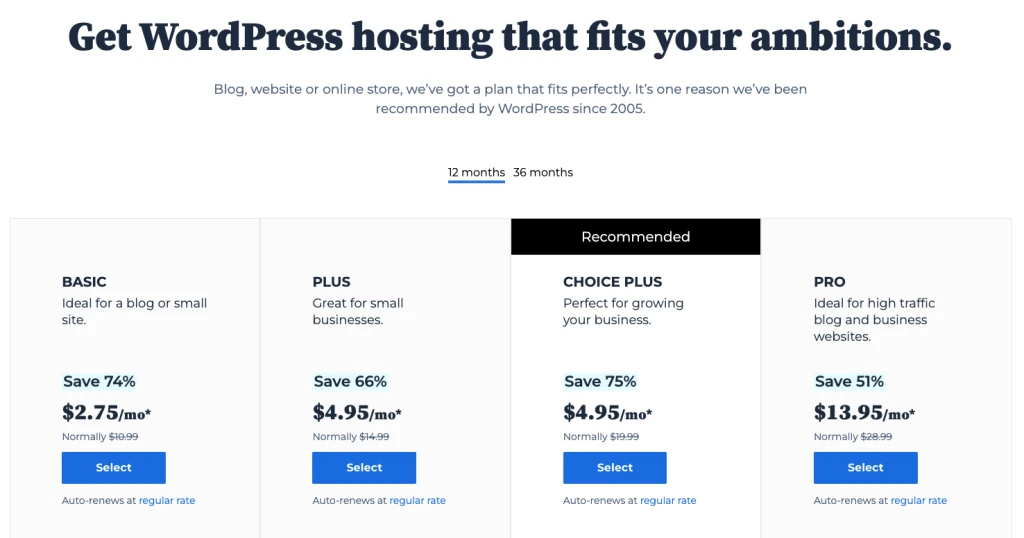
Bluehost is also one of the cheapest hosting options you can find. Its WordPress plans start at just $2.75 per month. The basic plan comes with support for custom themes, a free SSL certificate to keep your patients’ data secure, and 24/7 customer service.
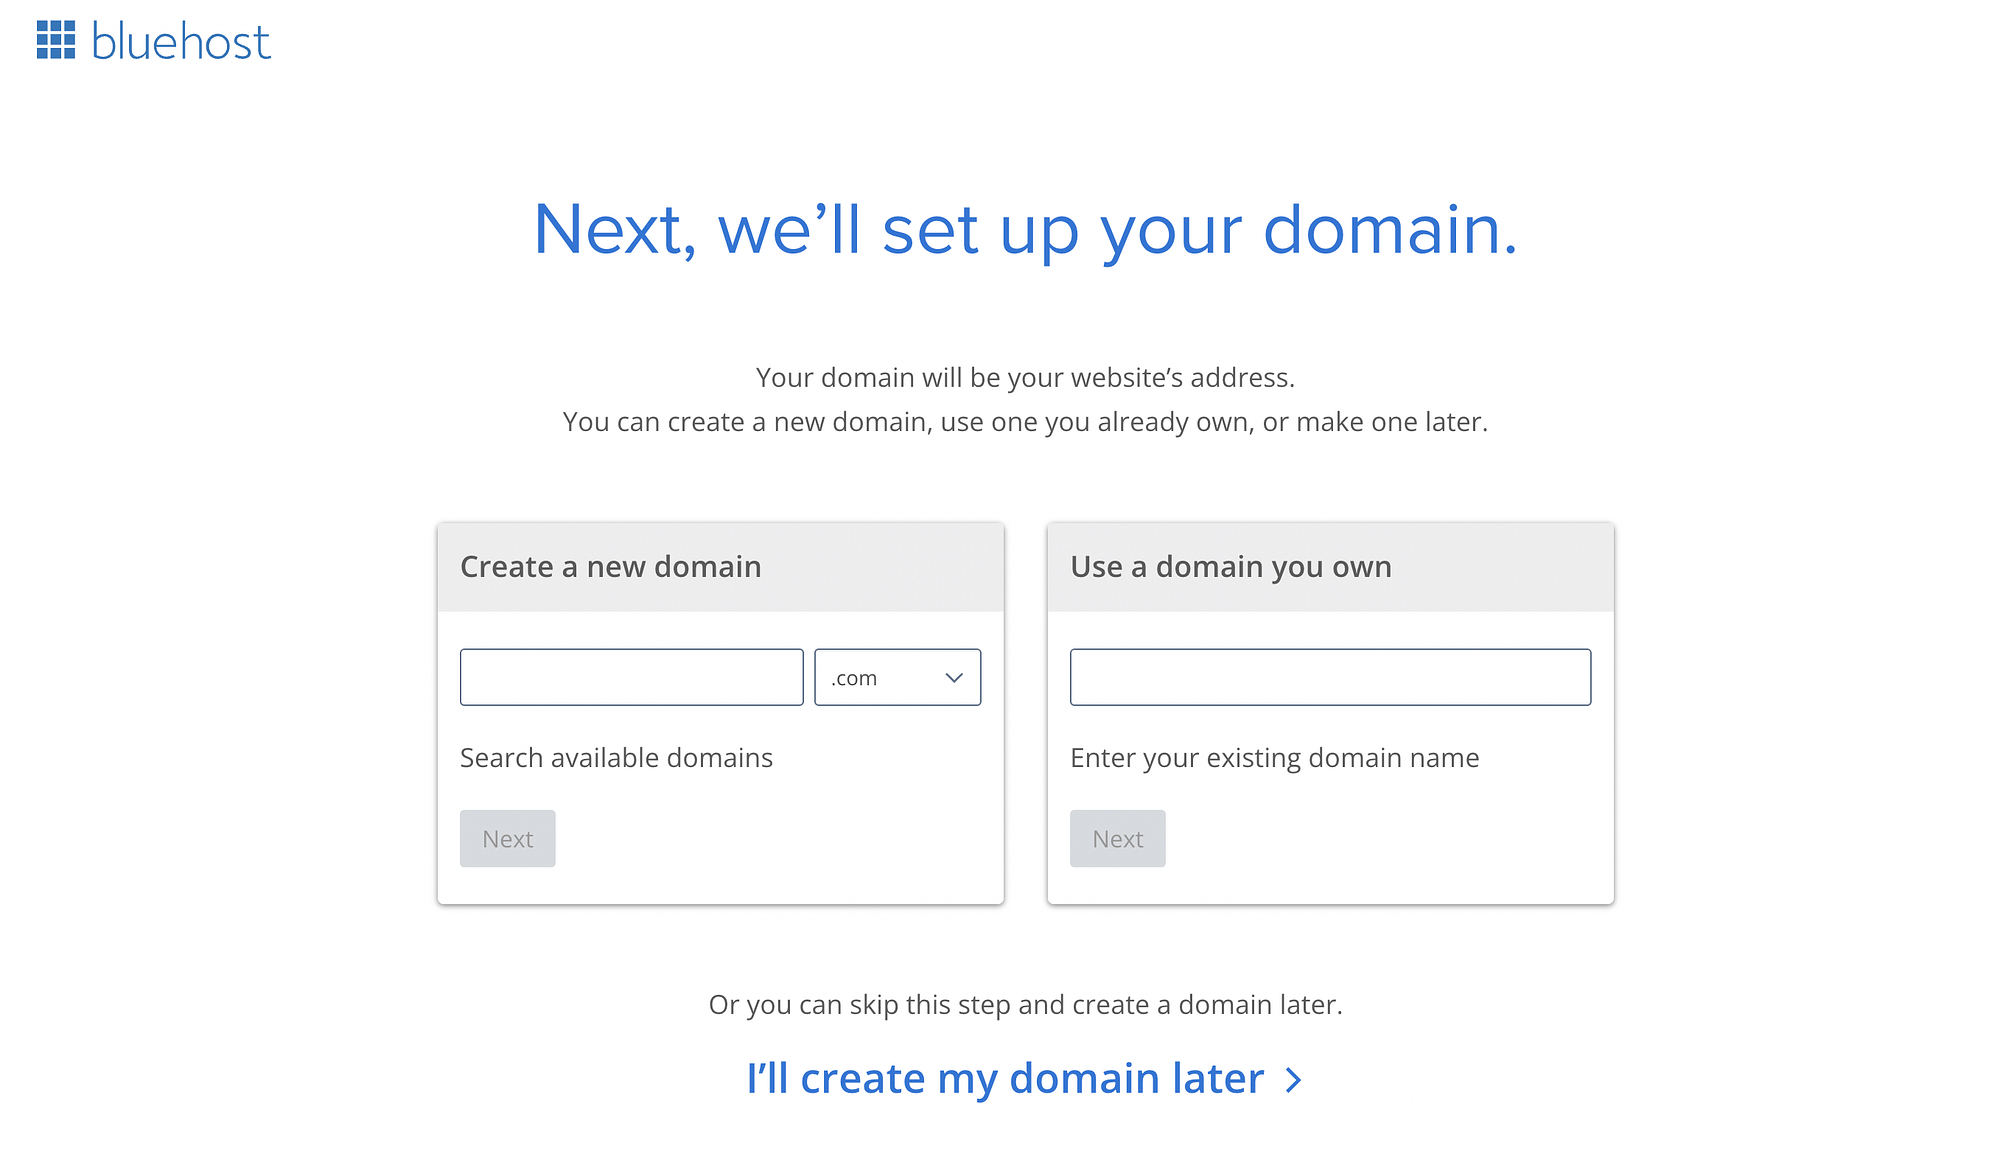
After you sign up for Bluehost, you can choose a domain name for your new website. This is your site’s address:
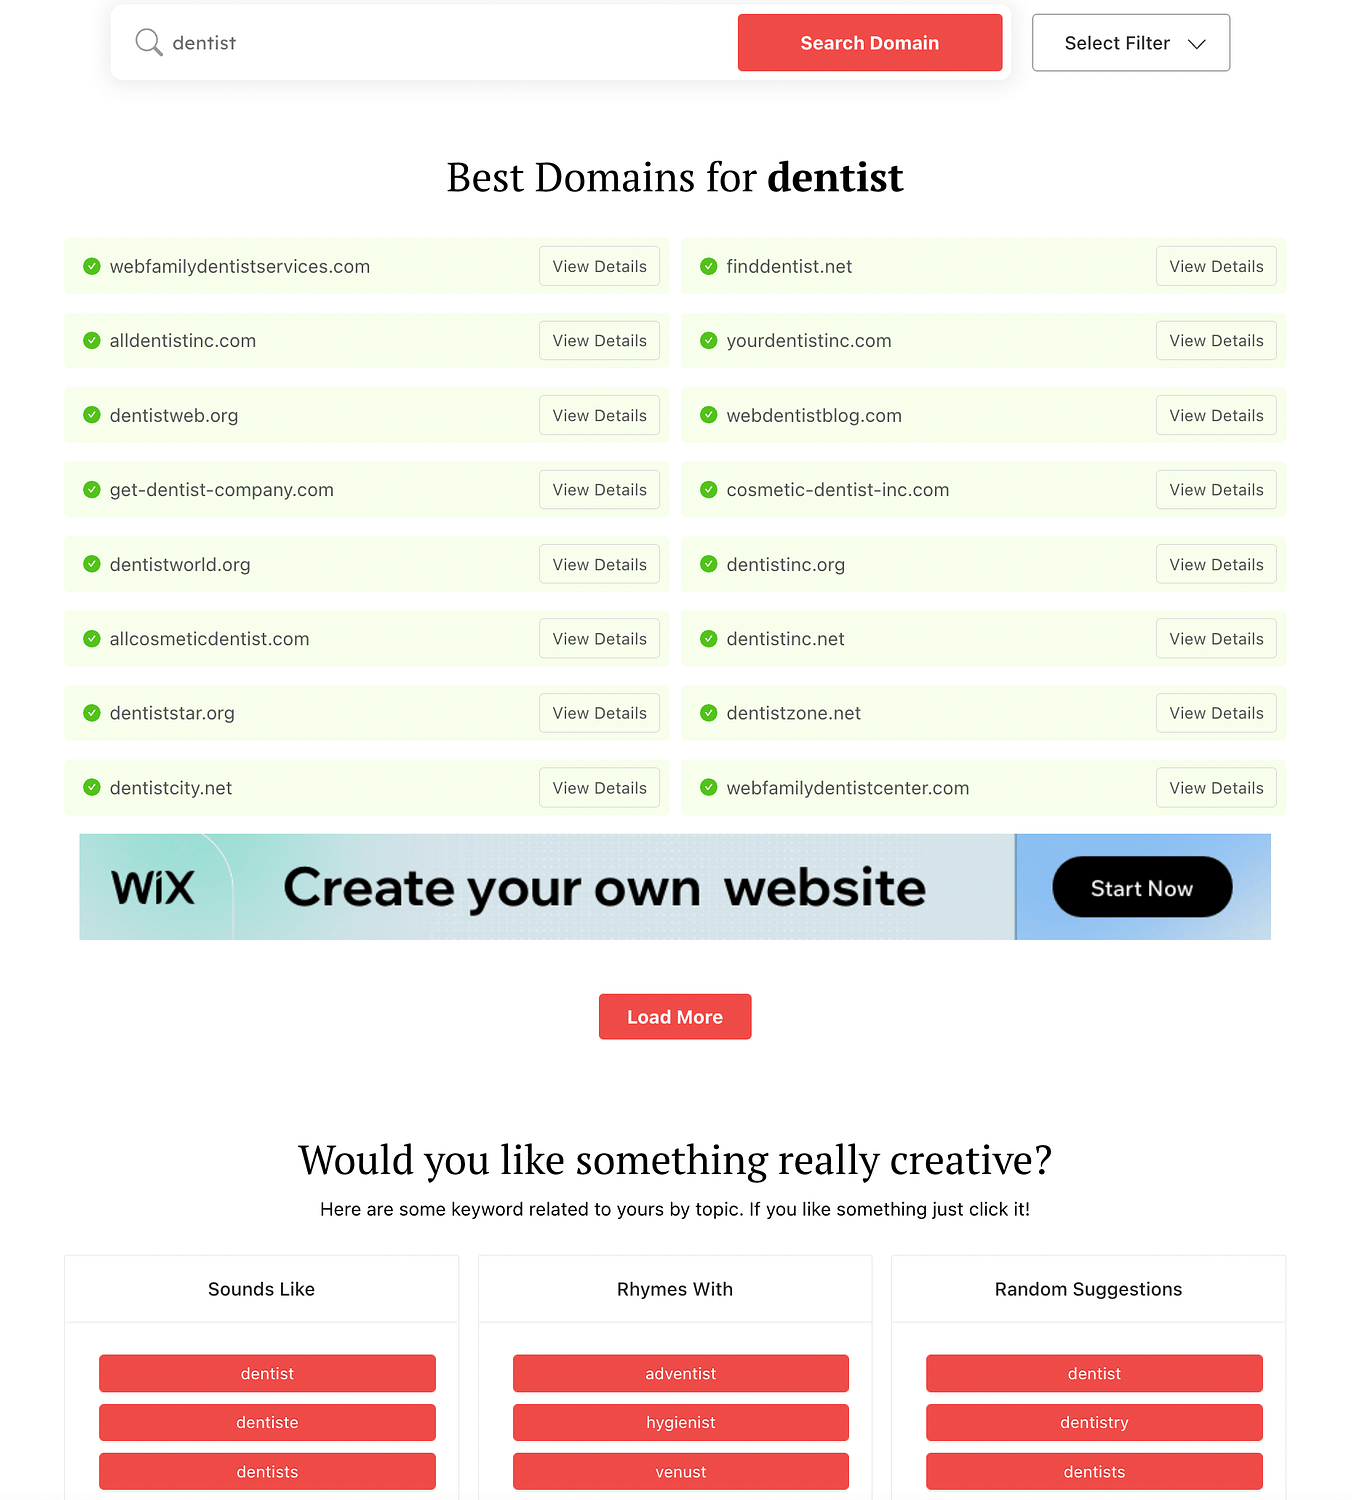
You’ll want a domain that is unique, catchy, and memorable. If you need some ideas, we recommend using a Business Domain Name Generator:

By searching for a keyword like “dentist,” this tool will generate different domain options for you. We recommend using common domain extensions like “.com,” “.net,” or “.org” to boost your credibility:
Once you find a domain you like, you can go ahead and register it through Bluehost. Your hosting provider will then install WordPress and give you your login credentials. Now, you can use these details to sign into your new website!
2. Select a WordPress theme
An important step in learning how to create a dentist website is selecting a theme. In WordPress, themes determine the appearance and layout of your web pages. To make your site responsive and mobile-friendly, it’s important to install the right option.
In your WordPress dashboard, navigate to Appearance > Themes > Add New. Then, search for themes in your dentistry niche:

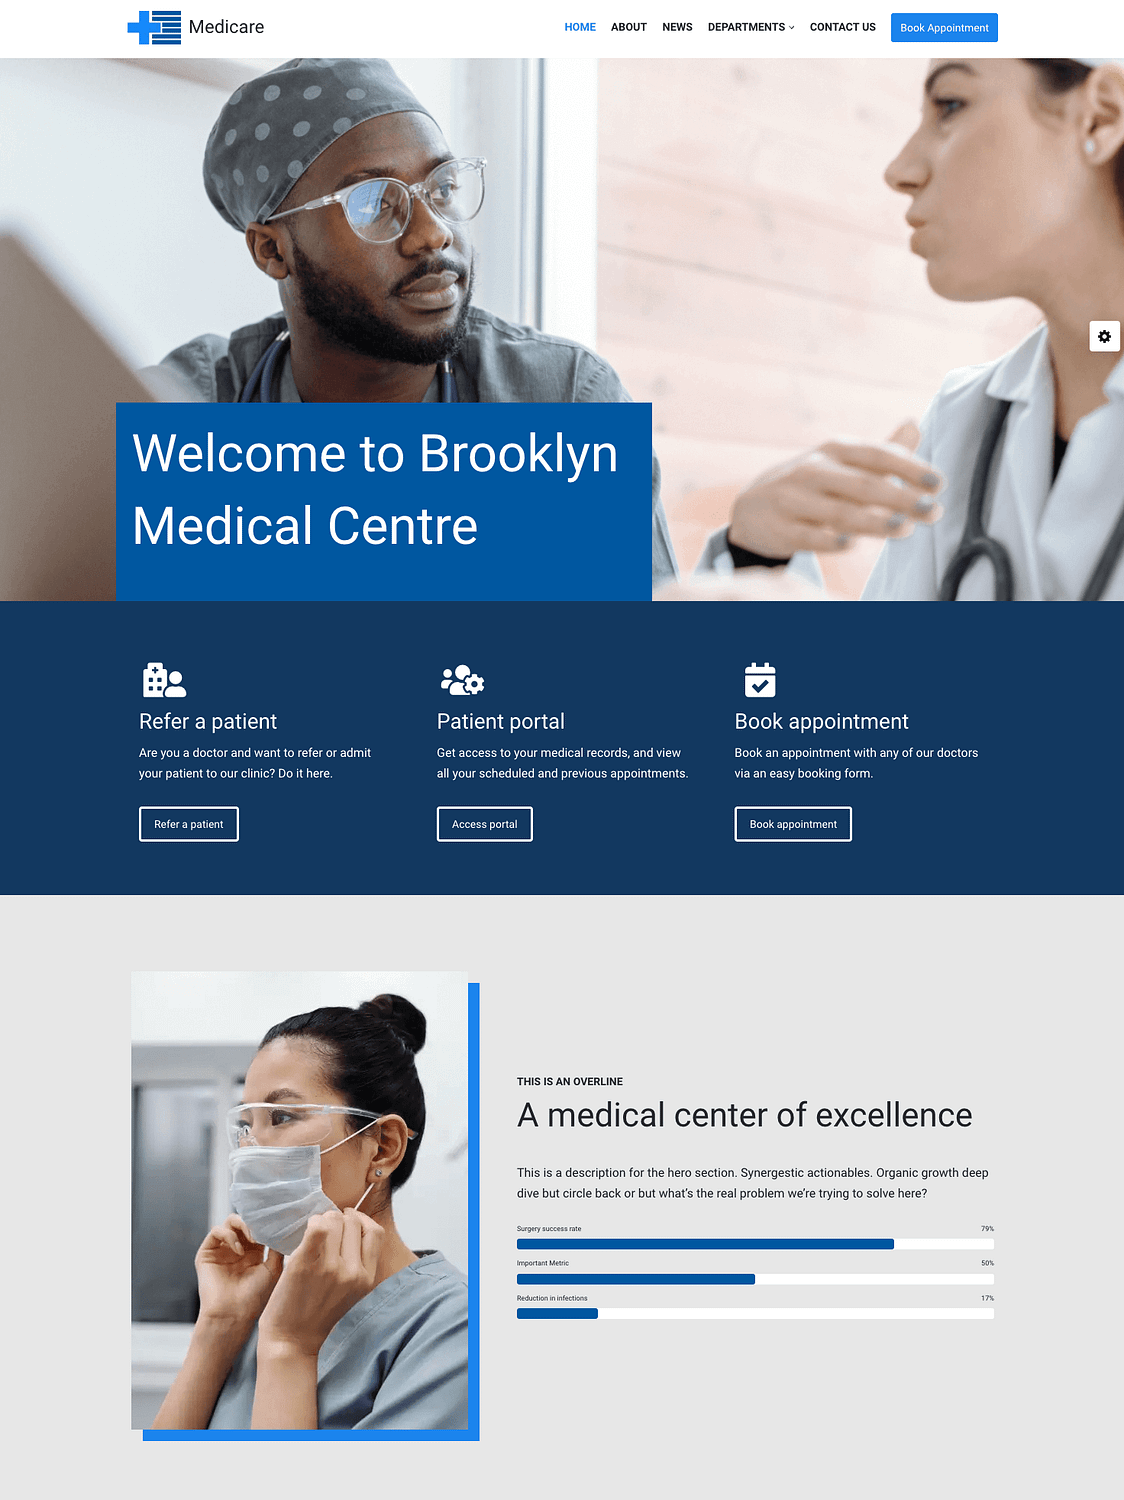
However, a premium theme can make it easier to design your website. For example, our Neve theme has over 100 fully designed starter sites.
By applying the Medicare template, your website will automatically be outfitted with necessary features like service pages, contact forms, and appointment booking:
Unlike other themes, Neve is built to be fast and lightweight.
Since it loads in less than one second, you won’t leave potential patients waiting for long.
This can help reduce bounce rates and grow your client base.
3. Design your core pages
When users visit your website, they’ll be looking for information about your dental practice. This will help them decide whether to book your services. To answer any general questions, it’s important to create a few basic web pages.
The home page is the first thing visitors will see on your website. Here, you can feature a brief overview of your clinic and what makes it unique:
It’s also a good idea to display the services you offer. When someone visits a dental website, they’ll immediately want to know whether you can help them with their medical needs:
Ultimately, your home page should give just enough information to draw people in. Then, you can go into further detail with a dedicated Services page:
On this page, you’ll want to explain what patients can expect when coming in for an appointment. You may also want to include call-to-action buttons so that users can easily book a specific service.
Often, people may not know which dentist’s office is right for them. In an About page, you can explain what sets you apart from competitors. This is also a great place to feature your team members:
Here are some other pages you can include on your dentist website:
During this process, you’ll want to consider what your target audience is looking for. It’s important to answer any common questions and provide essential details about your dentistry. This way, users will be comfortable enough to book appointments.
4. Install essential WordPress plugins
The two central elements of any WordPress website are themes and plugins. While a theme will set up the basic layout and appearance of your website, it may not add specific features. When you need additional functionality, you can install a WordPress plugin.
For example, you may want to use the default WordPress Block Editor to create your posts and pages. Although this comes with many options, it may not have the specific element you’re looking for.
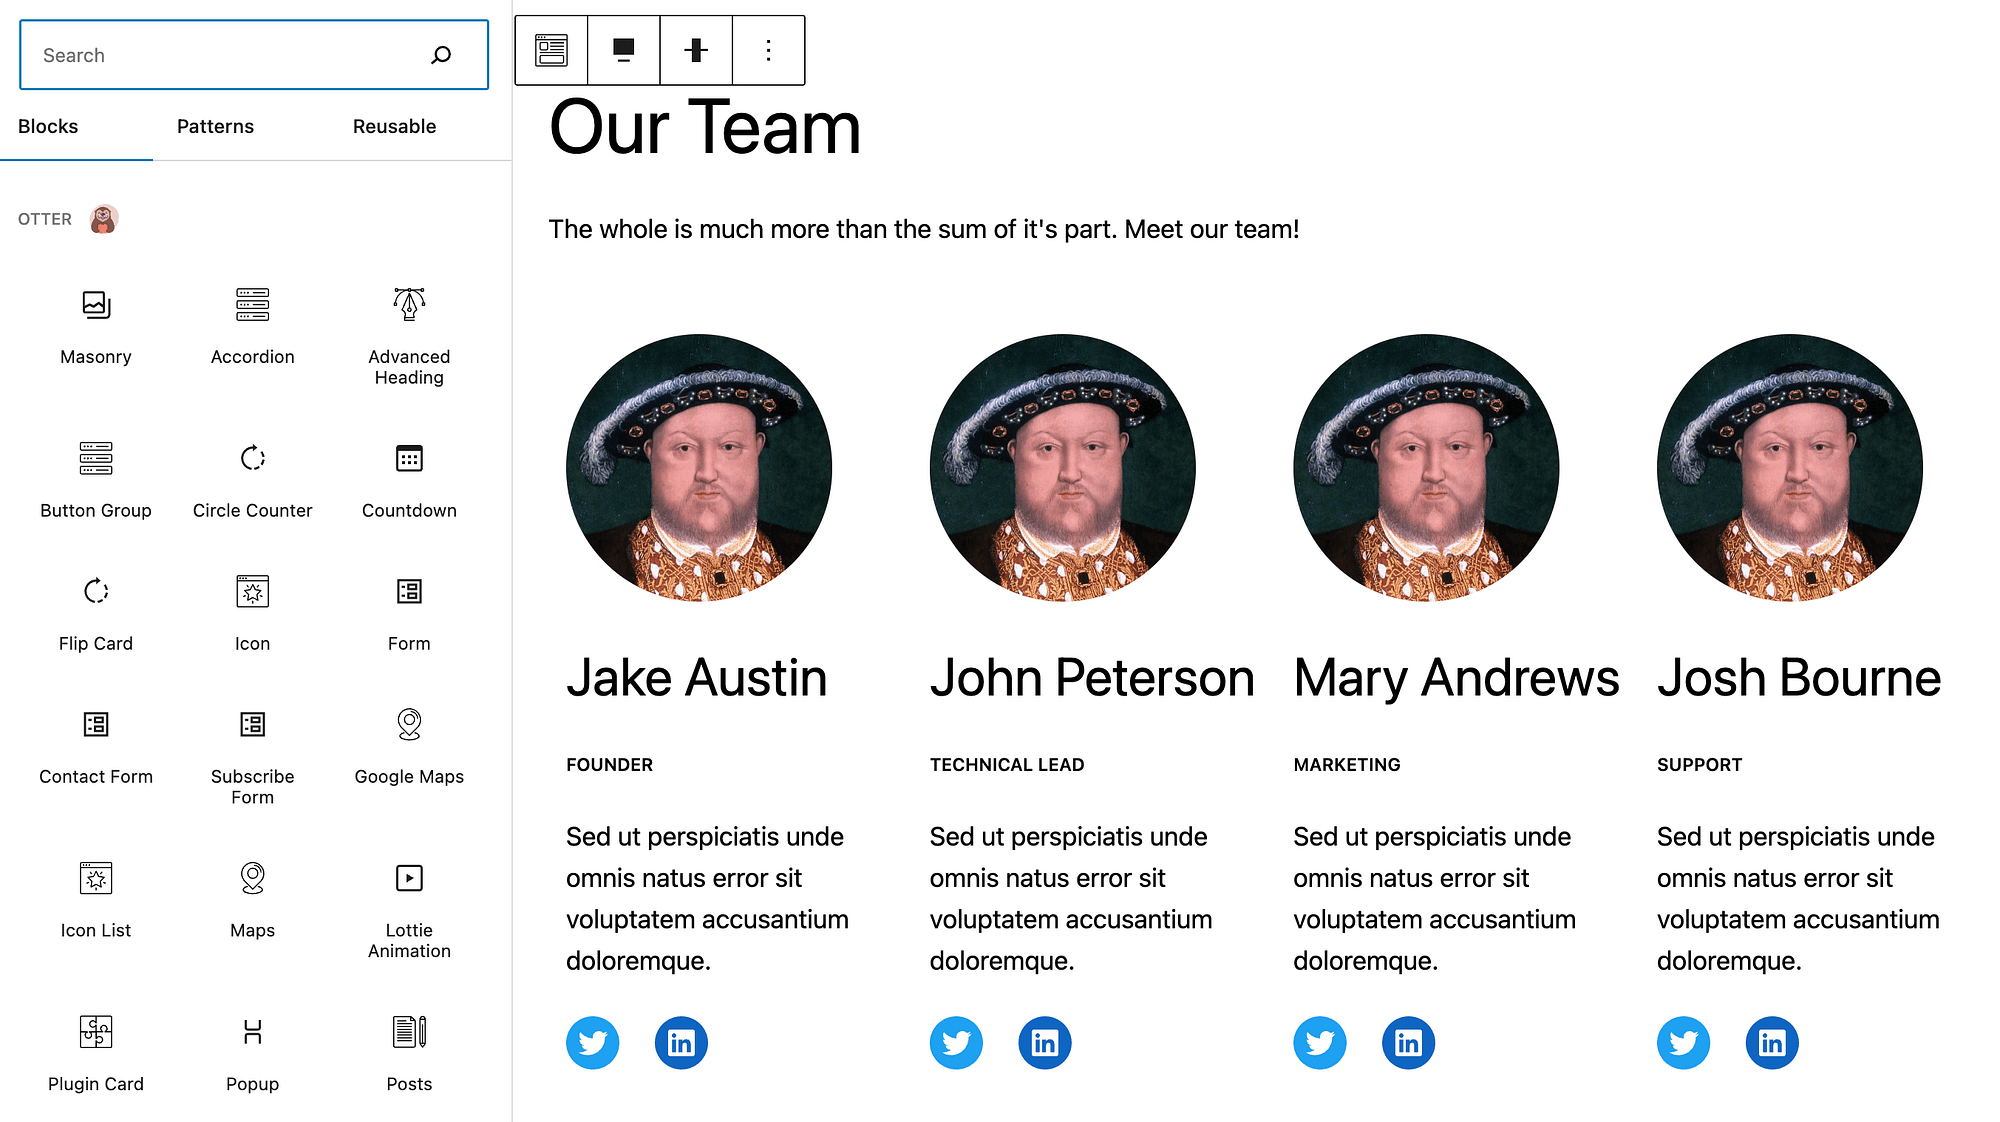
By installing our Otter Blocks plugin, you can extend the functionality of WordPress. This tool enables you to add features like contact forms, add-to-cart buttons, and countdown timers without the need to install multiple third-party plugins:
When you’re writing new posts, you’ll want to focus on search engine optimization (SEO). Improving your content for search visibility can be the key to gaining new clients.
As a beginner, you can install Yoast SEO to help you rank higher in search results:
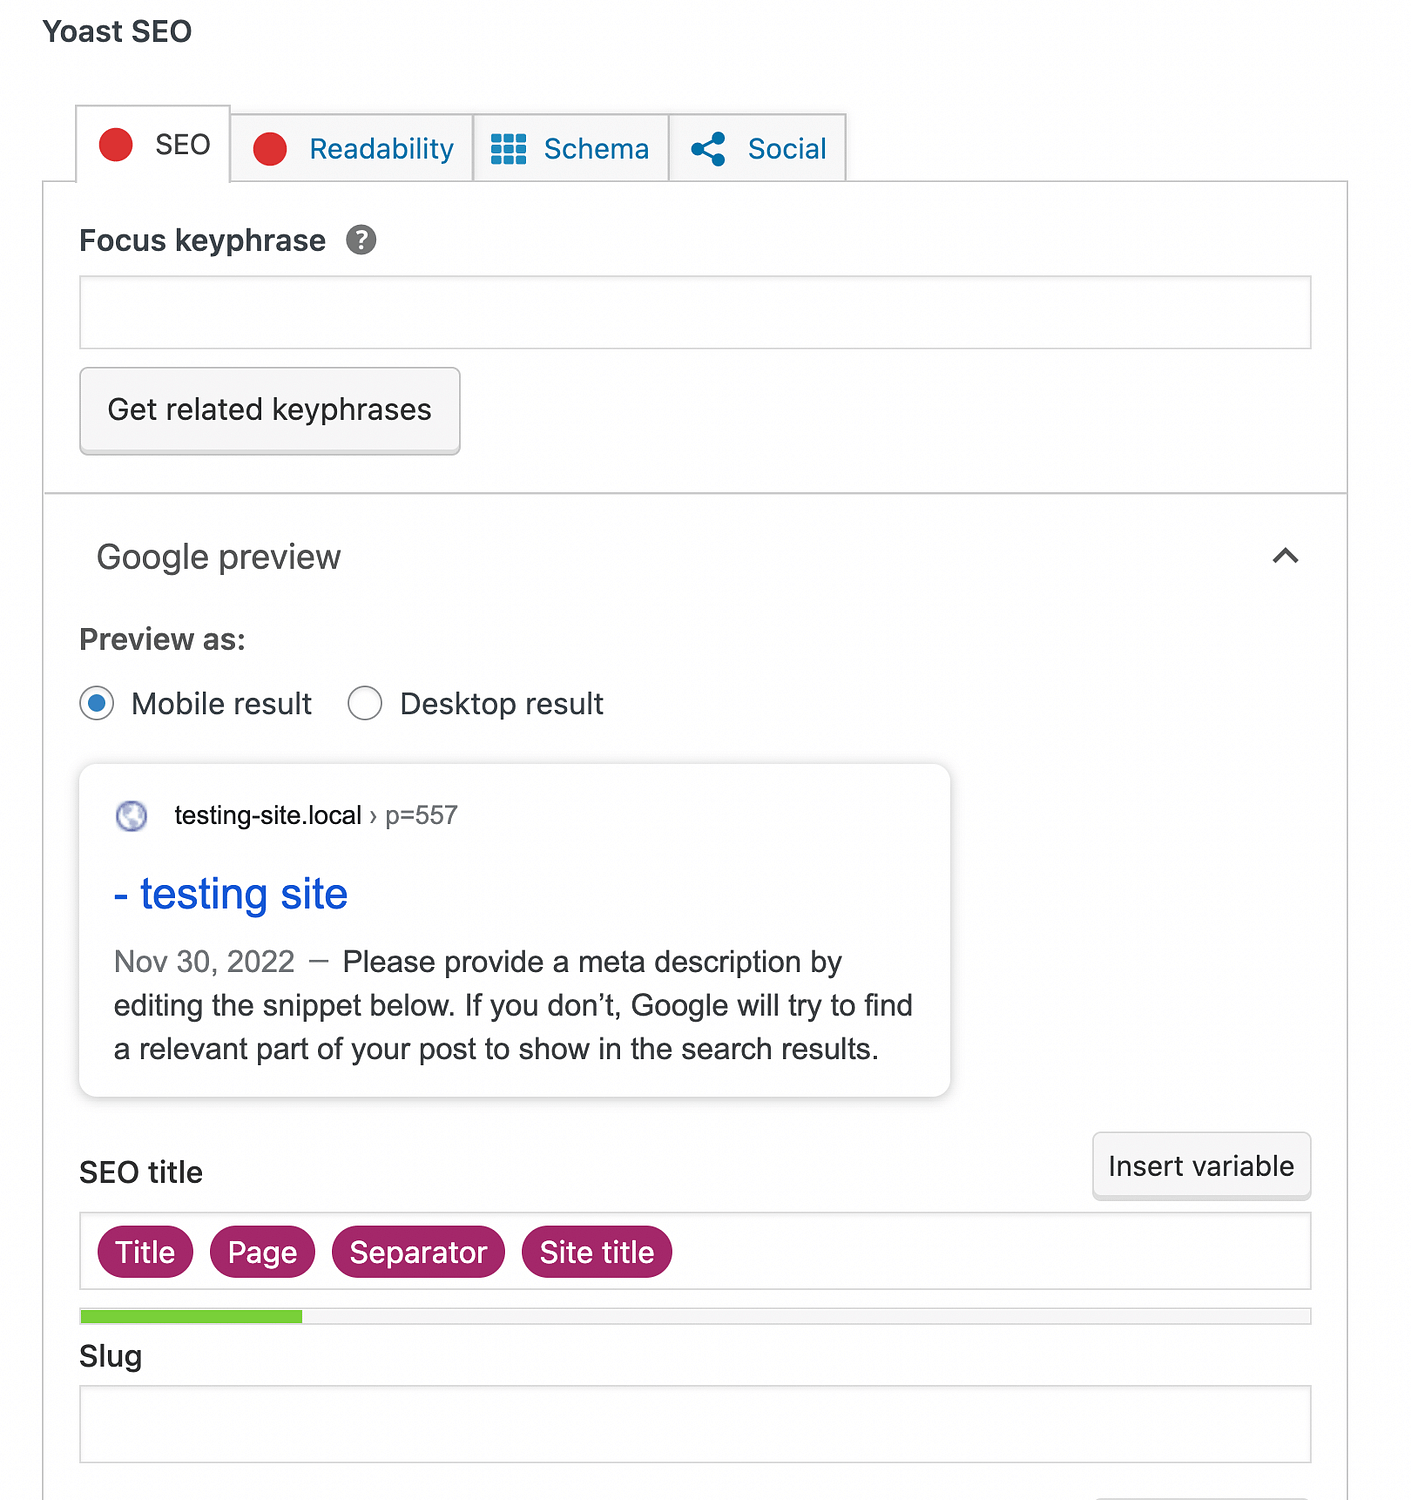
Yoast SEO will analyze each of your posts and pages and give you tips on improving SEO. You’ll be able to find the right keywords for your content, add structured data, and much more.
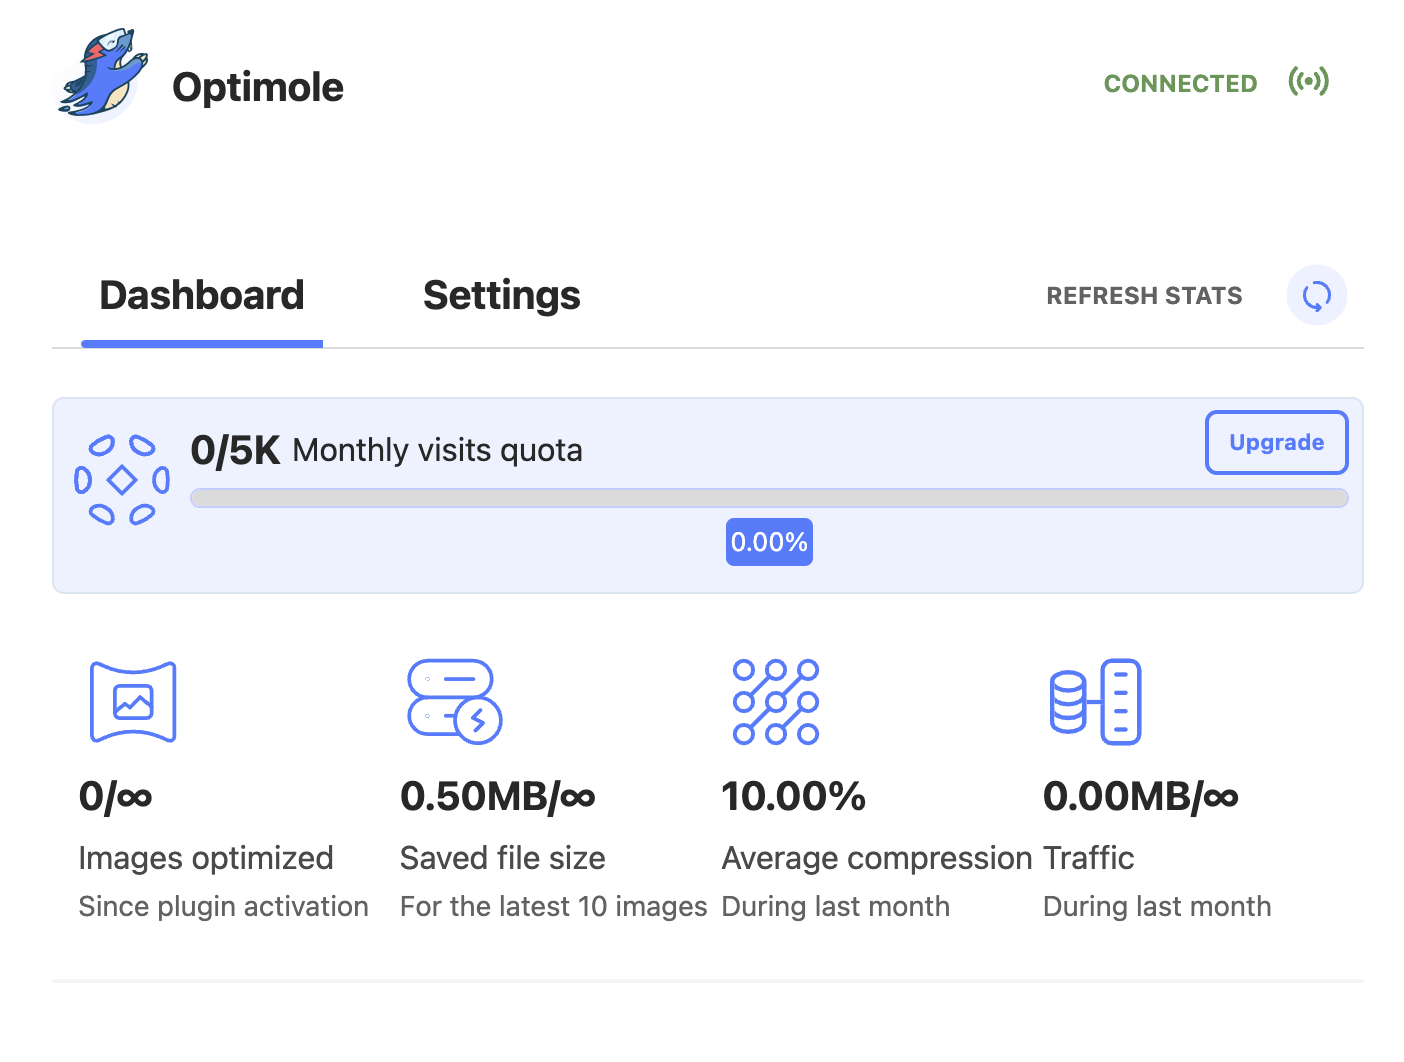
Another important site management task is Optimole, you can speed up your website by compressing images in real-time.
This way, you won’t have to deal with slow loading times:
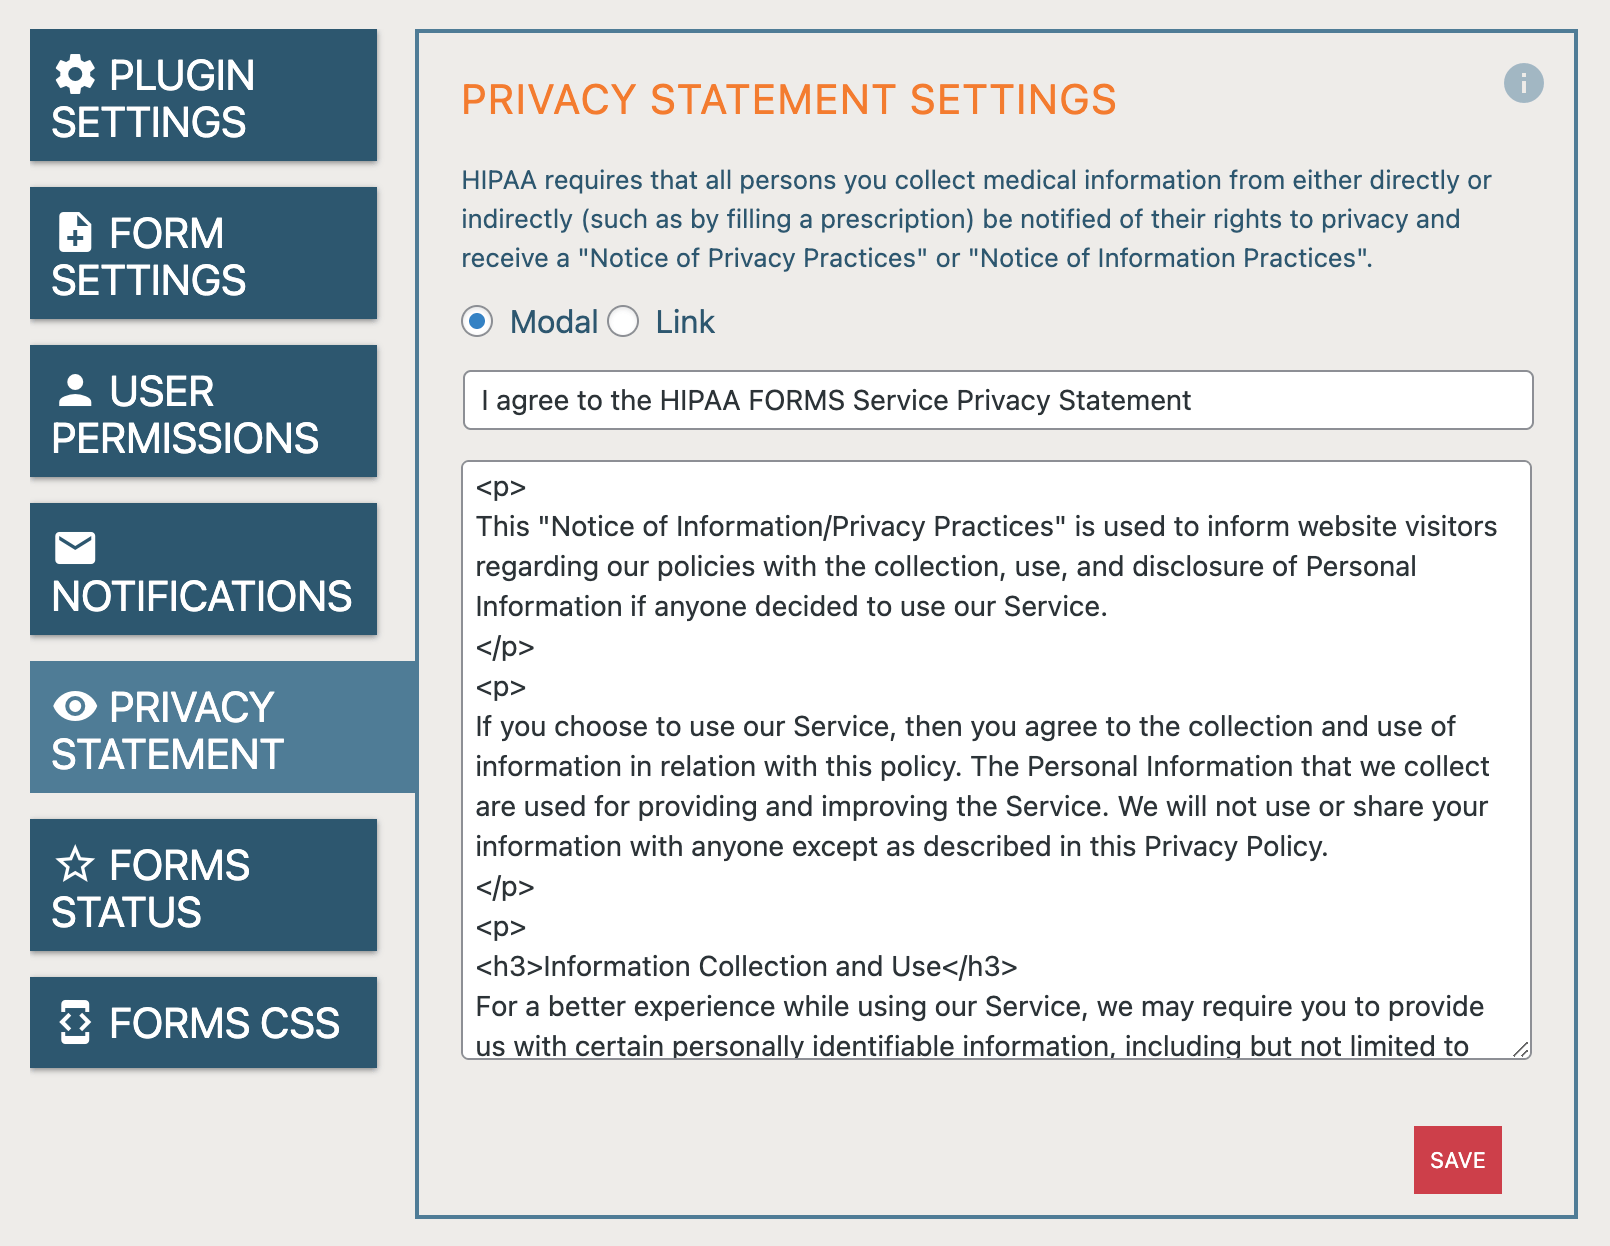
Additionally, there are plugins designed specifically for medical websites. HIPAA Forms is a tool that can help you create HIPAA-compliant web forms.
This protects your patients’ data and avoids any legal complications:
Since every website is unique, there is no required list of plugins. Simply put, you’ll have to evaluate your needs and install tools to help you reach your goals!
5. Enable appointment booking
According to research done by GetApp, 67 percent of people prefer to book appointments online [1]. Often, phone calls leave potential clients on hold, which can be frustrating to deal with.
To provide the best experience for your clients, you can set up appointment scheduling on your website. Rather than having to email or place a phone call, online visitors can simply fill out a form to select an available appointment date:
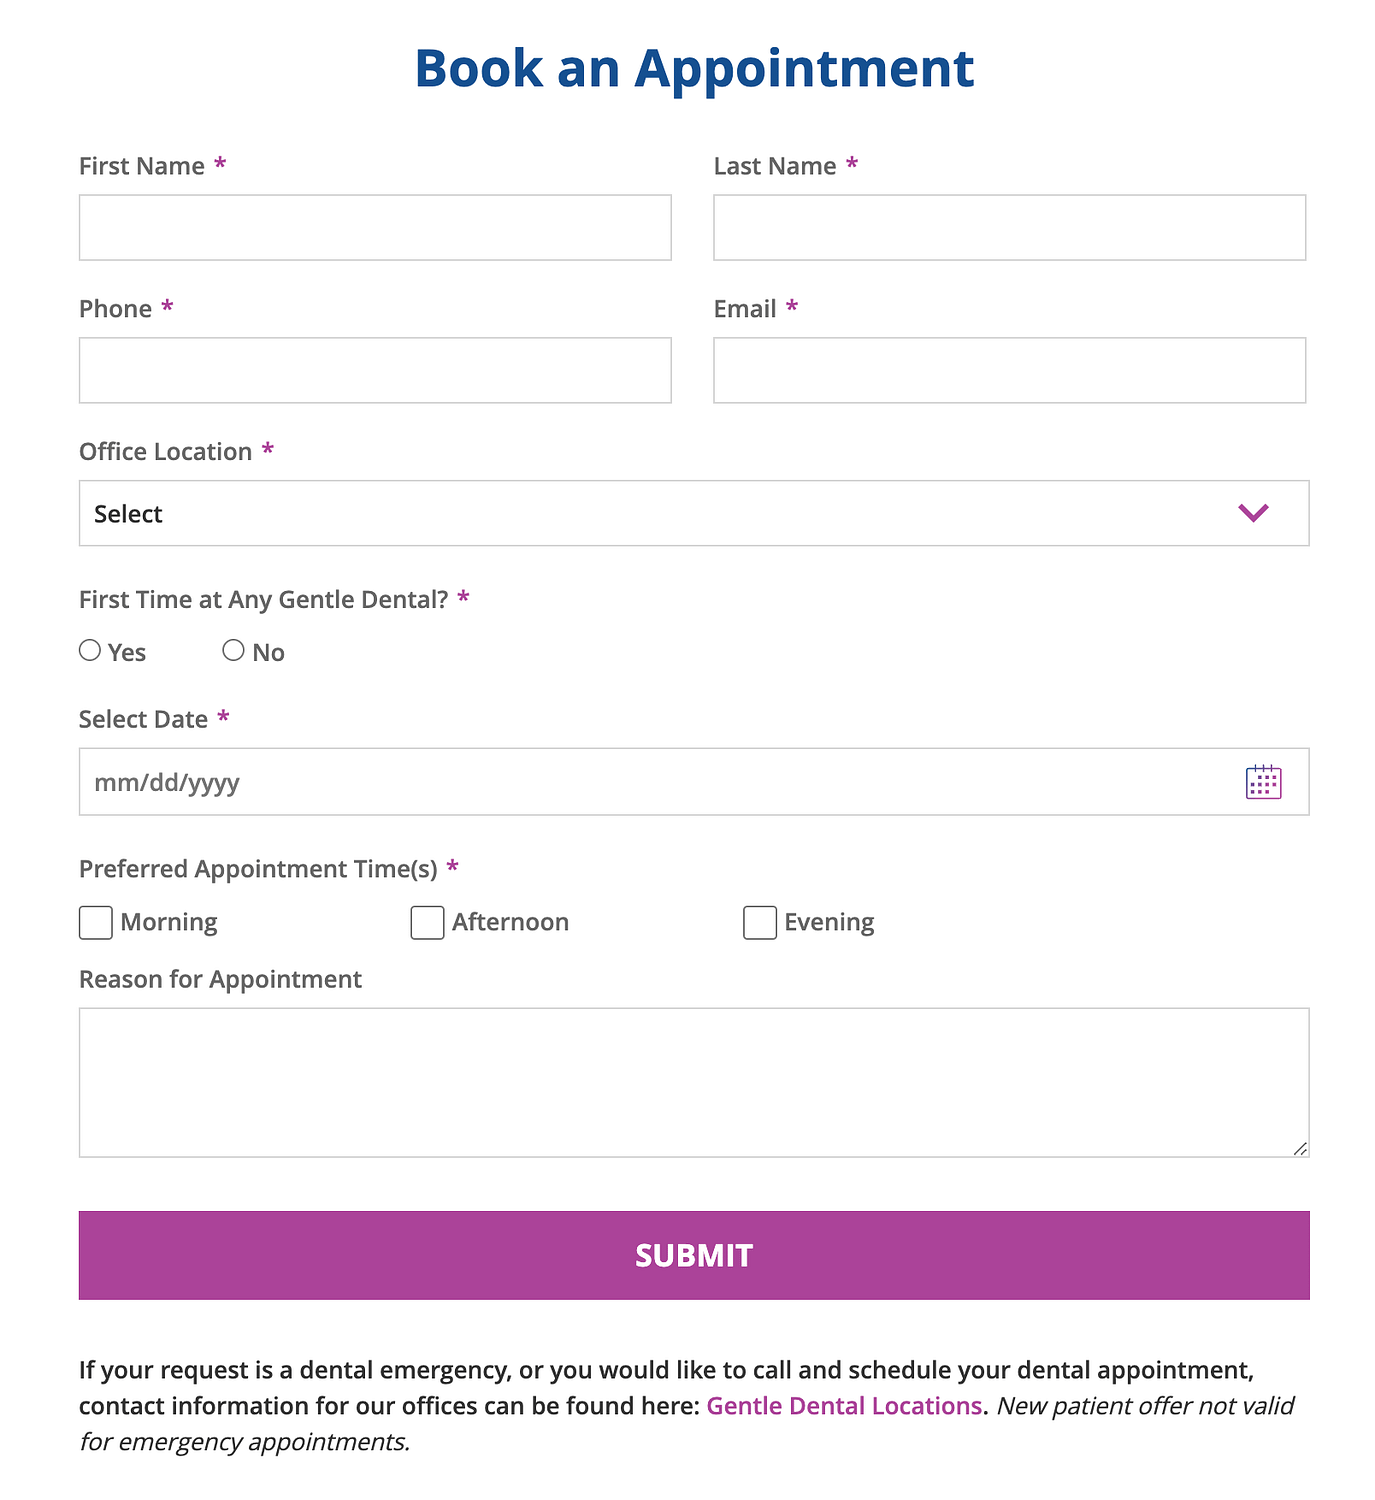
This enables clients to make appointments at their convenience. They won’t have to wait for your opening hours to call your receptionist. With this user-friendly feature, you likely won’t need to spend as much time answering phone calls and emails.
Plus, GetApp found that users are more likely to choose a service provider with online booking features. This can help you stand apart from other dentist offices.
To easily enable appointment booking on your website, you can install KiviCare. This plugin comes with appointment booking, payment integrations, custom email templates, and more:
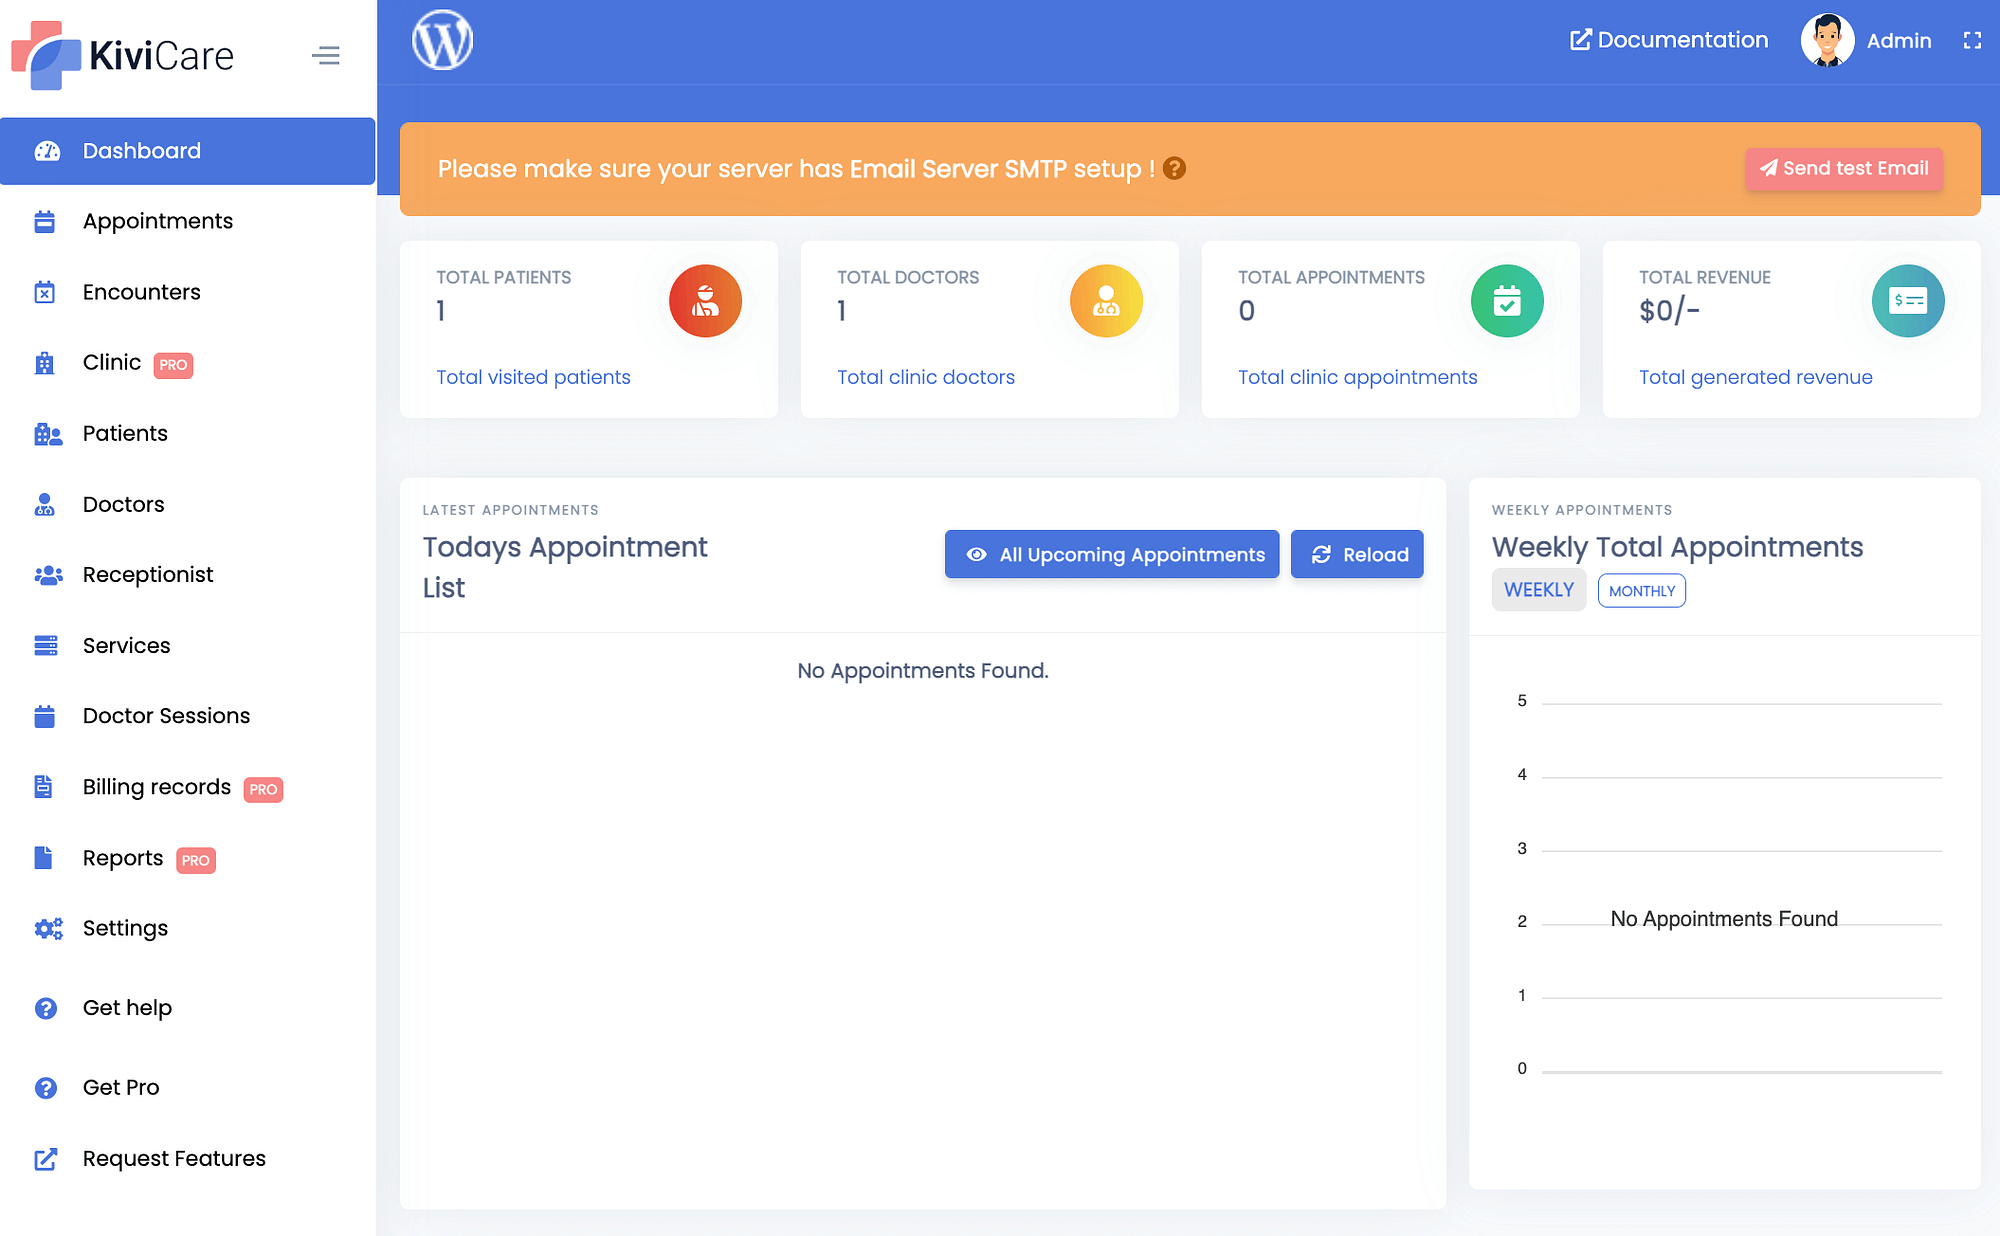
Although there are many alternative tools available, KiviCare was developed for healthcare websites. It enables you to keep track of patient records, including appointment notes and previous prescriptions. This can help you develop a well-functioning dentist office!
That’s how to create a dentist website!
By getting your dental practice online, you can reach new patients outside your local area. The right tools will help you advertise your services and enable visitors to book appointments easily.
To review, here’s how to create a dentist website with WordPress:
- Purchase web hosting and set up your website with Bluehost. 🛒
- Select a WordPress theme like Neve 🎨.
- Design your web pages. 🖱️
- Install WordPress plugins such as Otter Blocks, Yoast SEO, Optimole, and HIPAA Forms. 🚧
- Enable appointment booking with KiviCare. 🖥️
Once you launch your dentist website, you can follow our guide on 👉 how to increase website organic traffic to start connecting with new patients via your site.
Do you have any questions about how to create a dentist website? Let us know in the comments section below!