Do you want to learn how to install WordPress locally? If yes, then you’re in the right place.
Setting up WordPress locally means creating a local server on your computer where you can develop, test, and run your WordPress website. It enables you to build a WordPress site with all features on your own device. That too, without spending a penny.
But there are many options even within the local servers. Among them, XAMPP is one of the most popular local servers to date.
That’s why today we present you with a step-by-step guide on installing WordPress locally using XAMPP.
Let’s begin!
Understanding Localhost and XAMPP
Before starting our tutorial on installing WordPress locally, let’s know what local servers like XAMPP are and what they do.
In simple words, the local server is a virtual server built locally on your computer. Like a web hosting server, it lets you run site-building software like WordPress and design a website.
Also, it lets you test your website as many times as you need before uploading.

XAMPP is one of the widely used platforms for creating and running local web servers. The name XAMPP stands for:
- X as Cross-Platform; means it can work on platforms like Windows, Mac, and Linux
- A as Apache, a web server
- M as MySQL, a database management system
- P as PHP, a backend scripting language
- P as Perl, a programming language used for web development
XAMPP is a completely free and open-source software package. Developed by Apache Friends, it’s super light, easy to install, and ready to use. After its installation, it starts acting like a web server allowing you to build WordPress sites offline.
XAMPP supports various tests and verification of various tasks based on the components mentioned above. It also comes with other core elements to run a local server environment.
All these features of XAMPP make it a perfect choice for the local installation of WordPress.
Why Install WordPress Locally Using XAMPP?
Installing WordPress Locally using XAMPP has its own benefits. It’s worth every effort you put into it. The process is thus getting more common among website developers and professionals.
To list out here are some major reasons why you should install WordPress locally using XAMPP.
1. Meets All The Requirements to Run WordPress
For WordPress to work, you will need a web server, database management technology, and a programming language. Installing each of them is a complicated task. Thus, just downloading XAMPP can meet all these prerequisites without any difficulty.
2. Testing Flexibility
This is a major reason why anyone would opt for the local installation of WordPress before they go live. You can freely experiment with upgrades & customizations, often related to design and coding.
It also provides a good environment to create, modify, and try out new WordPress plugins and themes. These testing flexibilities enable you to verify what is useful for your site and what is not.
3. Saves Time
Local installation using XAMPP lets you set up WordPress in a flash. Likewise, there’s no delay in making important changes. You can load everything, and they’ll instantly come alive on the browser.
4. Cross-Platform
As a cross-platform, XAMPP supports the configuration of various operating systems like Windows, Linux, and Mac. The typical feature of XAMPP helps to increase the utility and cover a large audience.
Also, XAMPP comes with a Mercury mail server, phpMyAdmin, OpenSSL, etc., for enhancing overall functioning.
5. Security and Privacy
Developing your site locally is not only easy & fast but also safe & secured. A local WordPress installation using XAMPP is accessible only to your computer. Thus, you can safely explore, develop, and test your site’s service away from potential threats without risking its data and settings.
Now that you know about XAMPP and its significance, let’s head on to our tutorial part.
How to Install WordPress Locally Using XAMPP? (Step-by-Step Guide)
This simple and comprehensive step-by-step guide will teach you how to install WordPress locally using XAMPP. Thus, you’ll be able to easily craft your own local WordPress with XAMPP after reading this article. So, let’s dive into the steps now.
Step 1: Download and Setup XAMPP on Your Computer
To start off, your first step for installing WordPress locally would be to download and set up the latest version of XAMPP.
You can download it from the Apache Friends website. There, you can find different PHP versions for different operating systems.
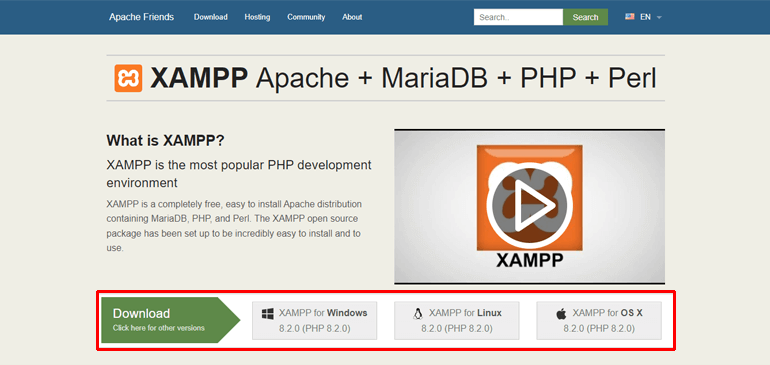
Since we are installing XAMPP for Windows, we’ll download the Windows version of the software. Depending on your operating system, you can select other options. The process is very similar for Mac. However, the screenshots shown here are exclusively for Windows.
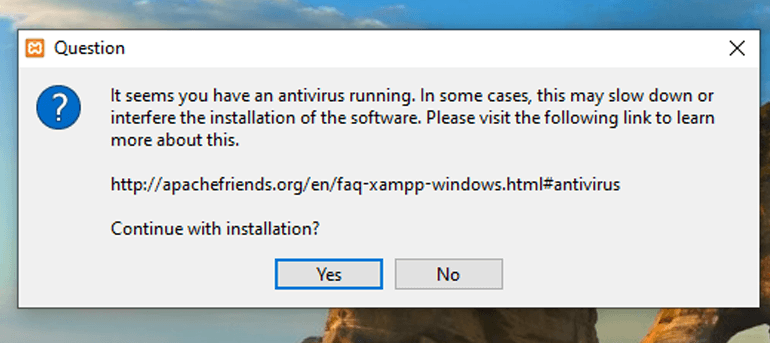
Once the download completes, click and run the XAMPP setup file as an administrator.
If any warning signs pop up, click “Yes” to continue. These notifications are for administrative verification purposes as you’re launching an installation.
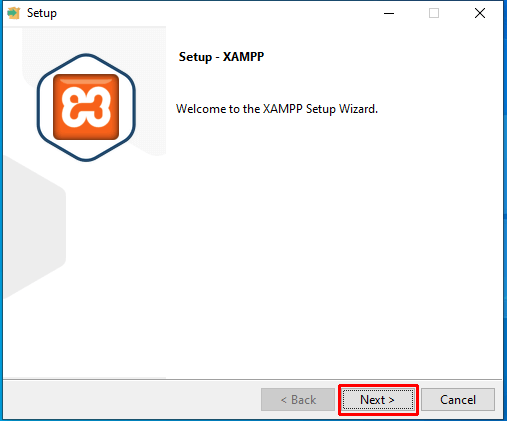
Continuing with the alerts, the standard installer screen appears. Click on the “Next” button.
Next, you have to select the components you want to install. For installing a WordPress site with XAMPP, you need to a checkmark the following:
- Apache
- MySQL
- PHP
- phpMyAdmin
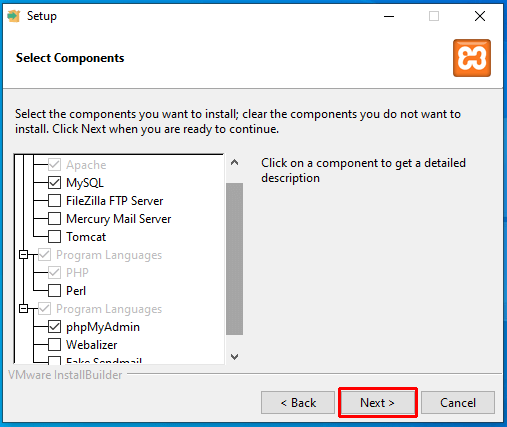
You can clear all the other components selected by default, then click “Next” to continue.
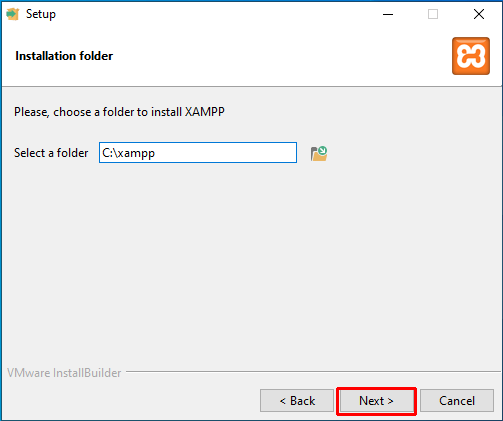
Now, you have to select the folder where XAMPP will be installed. Continue with the default option (i.e., C:\xampp) and hit the ‘Next’ button.
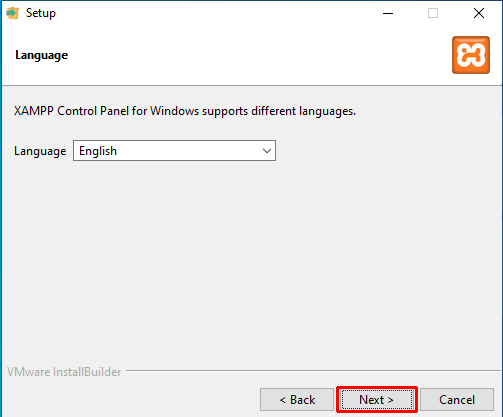
Again, select the preferred language and hit the “Next” button.
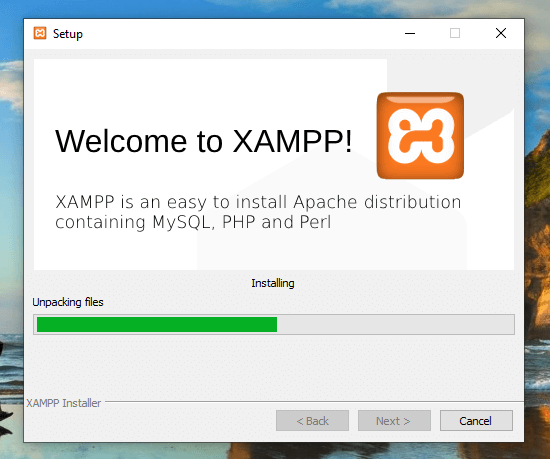
Now, you’re ready to begin the installation, which might take a few minutes.
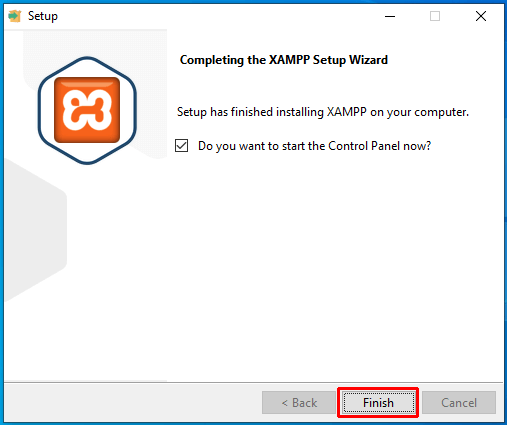
At last, click on the “Finish” button to launch the XAMPP control panel and start working.
Important Note on Starting XAMPP Modules
While you begin to work, make sure you start Apache and MySQL. This part is important because Apache runs as a local server, and MySQL is your database server.
Thus, go to XAMPP Control Panel and click their respective “Start” button.
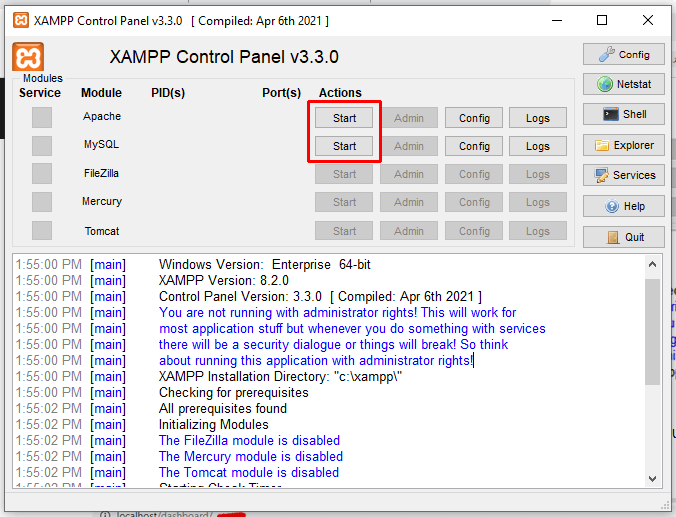
The colors of these modules turn green once started.

After you start those modules, go to http://localhost from your browser. When you do that, you should see a XAMPP welcome page like the one below.
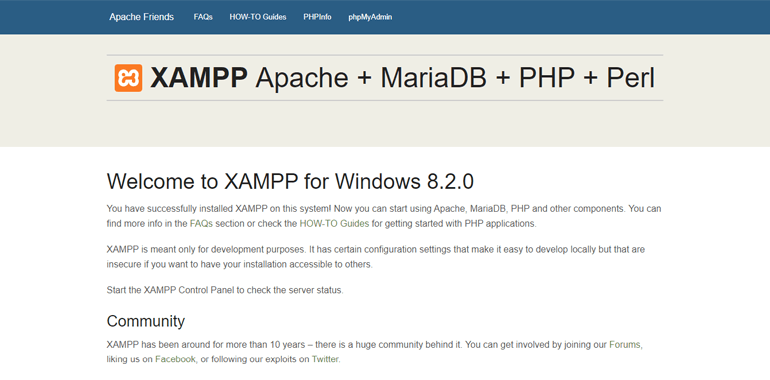
This page confirms that your XAMPP is functional. Hence, you can proceed with the next steps now.
Step 2: Download WordPress and Extract the Files to XAMPP Registry
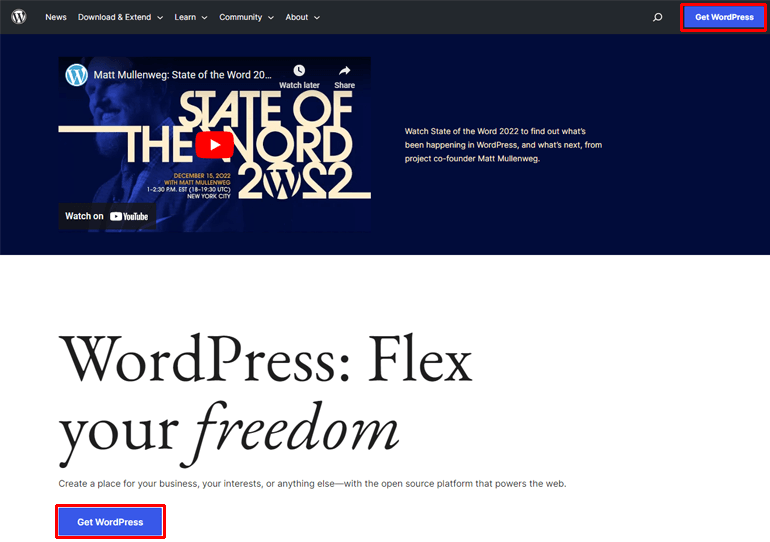
In the next step, head to WordPress.org, an official WordPress site. And click on “Get WordPress” and download the latest version of WordPress.
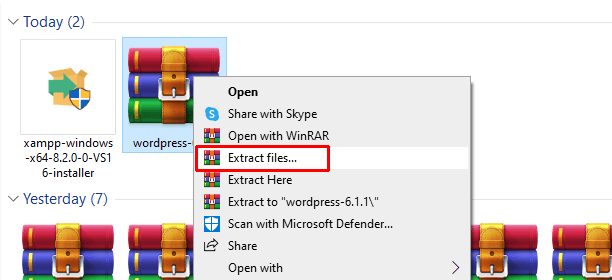
It downloads as a zip file. So first, you need to extract the file. It’s a simple process, as you only have to right-click on the downloaded file. And go to the “Extract files” option.
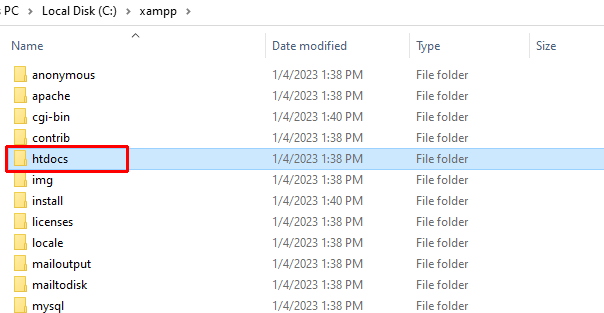
After that, copy the extracted folder and navigate to the location where you installed the XAMPP file (which would be “C://xampp”). Now, open the XAMPP folder and go to its subfolder labeled “htdocs”.
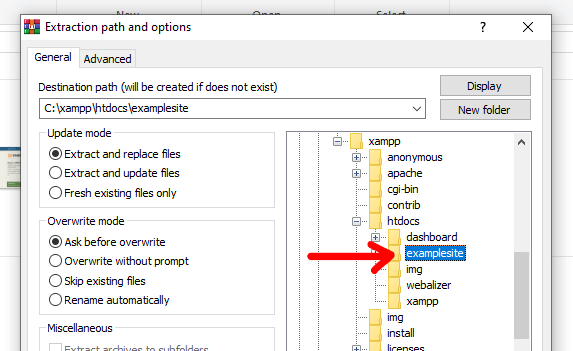
Within the htdocs, create a new folder with a proper name for your test site. The name is important as you’ll use it to access your site later. For example, if we give the name “examplesite” to the folder, then its local address will be “localhost/examplesite”.
Now, paste the extracted files into the created folder, here examplesite.

Contrarily, you can directly extract the zipped WordPress file inside the same created folder too. This way, you don’t have to copy & paste.
You’ve successfully downloaded WordPress and extracted the file to the XAMPP registry. Also, you’ve launched the website in the browser following this process.
To continue forward and start using WordPress, you’ll need to set up a database which we’ll discuss in the next step.
Step 3: Create a New Database for Your WordPress Installation
Another step of our tutorial on installing WordPress locally using XAMPP is creating your WordPress database. As you’re using XAMPP for the local installation, MySQL is your database management system.
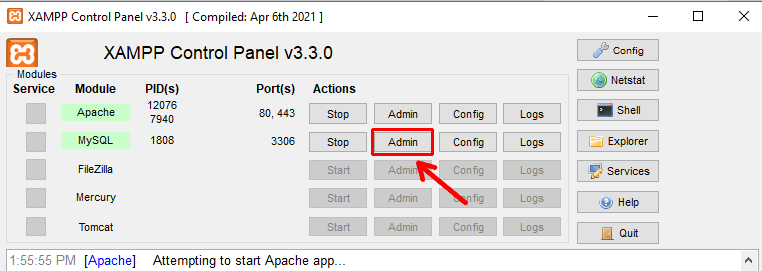
To create a MySQL database, navigate back to the XAMPP panel. Click the “Admin” button in the MySQL section. A new tab showcasing the phpMyAdmin application opens up on your browser.
Now, go to the “Databases” tab and create a new database by providing any name for it.
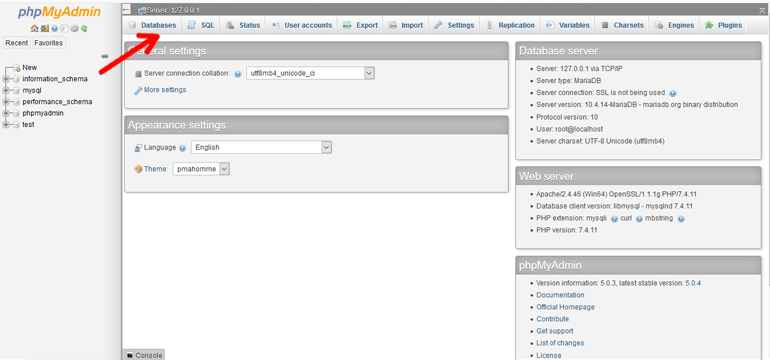
Be sure you don’t forget the name, as you’ll need it for WordPress installation later on. After renaming the folder, don’t forget to click “Create”.
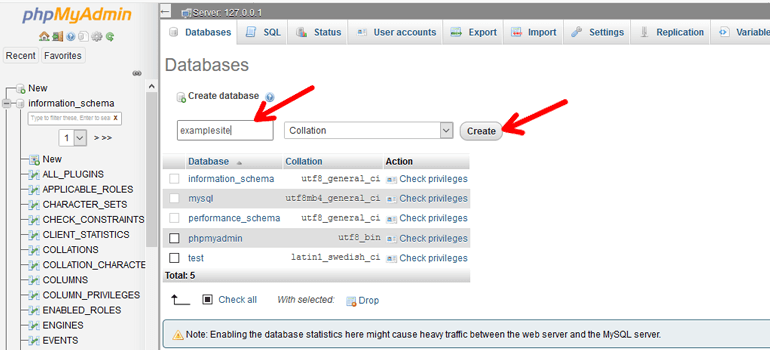
While installing WordPress from other methods, you also need to create a new database user. For a local type of installation, it’s not required.
Step 4: Install WordPress Locally via On-Screen Installer
To continue with the WordPress installation on XAMPP, type your site’s URL in the browser, i.e., http://localhost/examplesite/wp-admin/setup-config.php in our case. Remember to replace examplesite with your own test site name when you type your site’s URL.
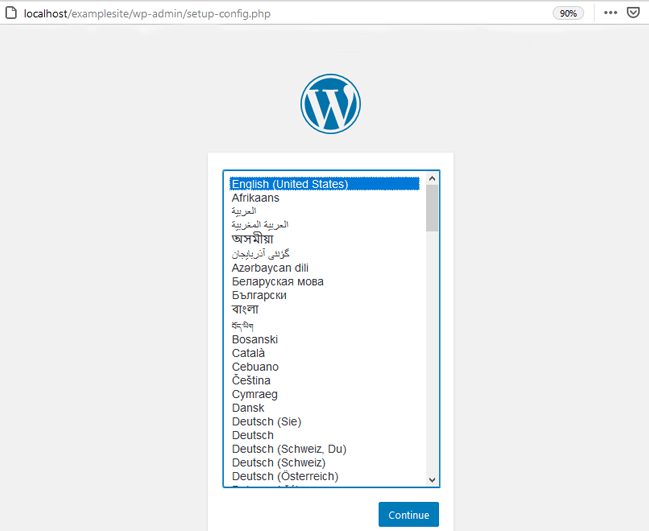
You can see the WordPress installation’s language selection screen load this time. Select the website language of your choice and click on “Continue”.
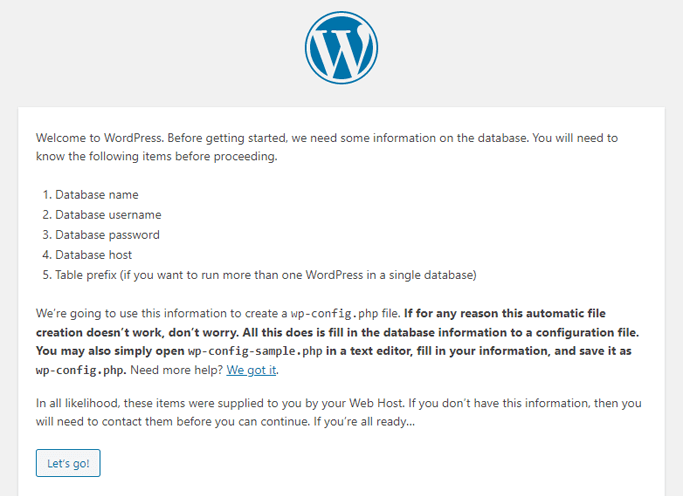
In the next phase, the installer presents you with some database-connection information. Read it well and hit “Let’s go”.
Now comes an important section where you need to enter your database details. Here is what you should fill in the gaps with:
- Database Name: Name of the database created in phpMyAdmin
- Username: “root”
- Password: – (not required)
- Database Host: localhost
- Table Prefix: wp_
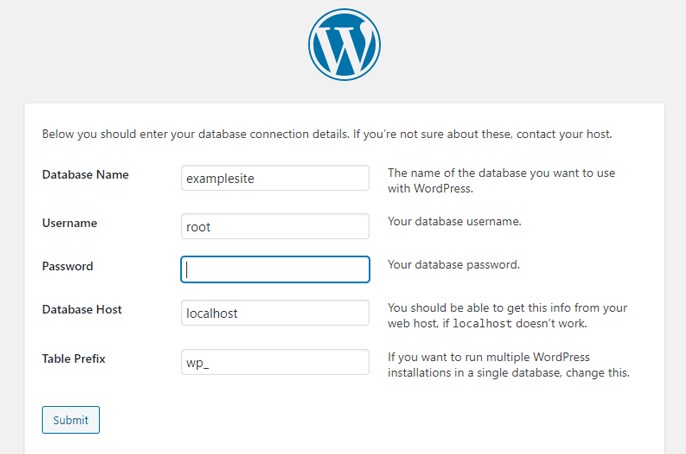
Once you’re done, “Submit” this information.
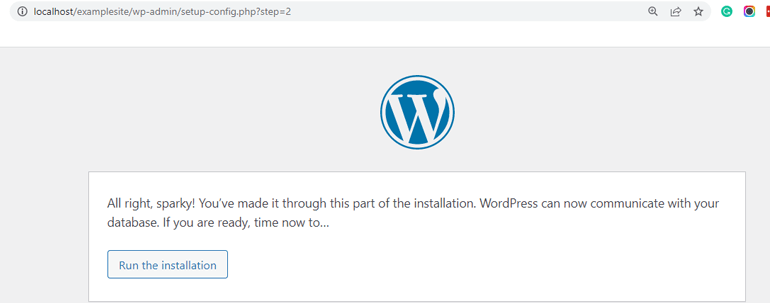
Soon after that, you’ll be able to “Run the installation”. In Windows, WordPress will keep this information safely in your WordPress configuration. Such a collection of data refers to the wp-config.php file.
Finally, a welcome prompt appears where you must enter some necessary information. It includes:
- Site Title (The name of your new WordPress website)
- Administrator Username
- Login Password
- Email Address
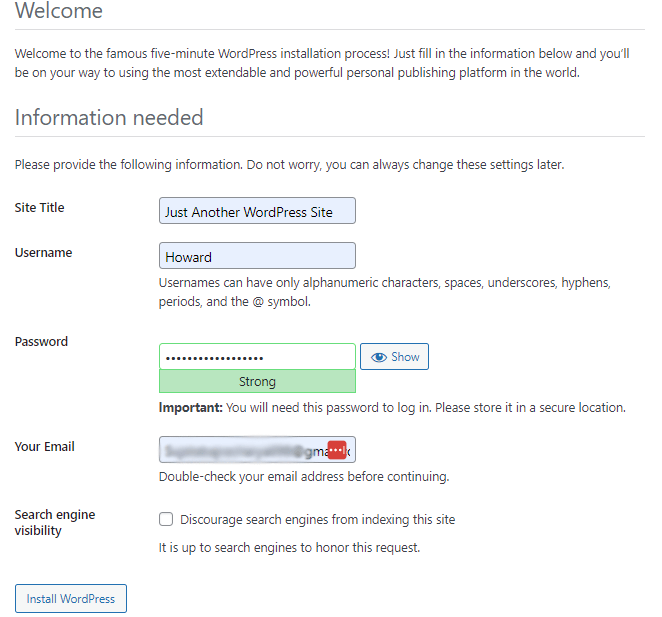
Also, there is an option for Search Engine Visibility at the end. Since your site is for offline purposes, this option isn’t applicable. Thus, you can ignore it. Once you complete filling up the information, click the “Install WordPress” button.
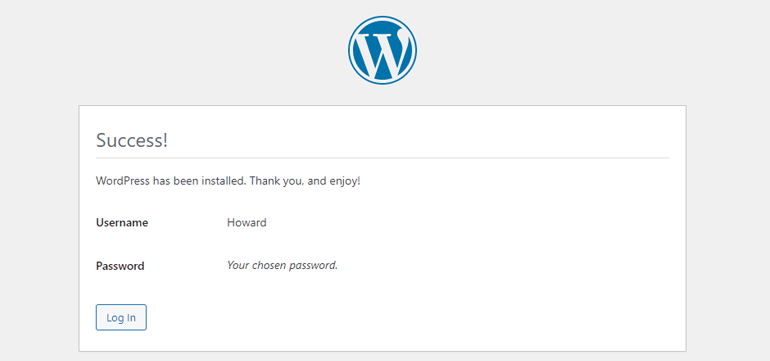
Congratulations! You’ve successfully installed WordPress locally on your computer using XAMPP. Now, you can log in to your local website.
Step 5: Log Into Your Local Website & Start Customizing
After running the final installation, a WordPress login page appears. So, enter the username and password you created/used during the installation process to login to your local site.
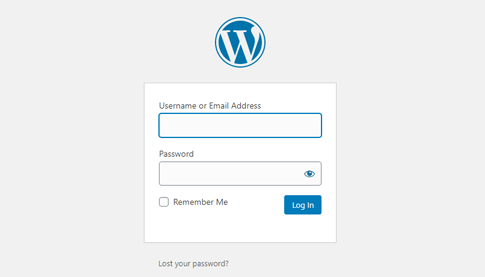
You can log in to the created test site anytime and from any device. All you need to do is go through the WordPress admin area via the “https://localhost/yourwebsitename/wp-admin” page in any web browser.
Then, use your respective username & password to log in, and you are good to go.
Once you log in, the WordPress Dashboard will appear on your screen, which looks something like this:
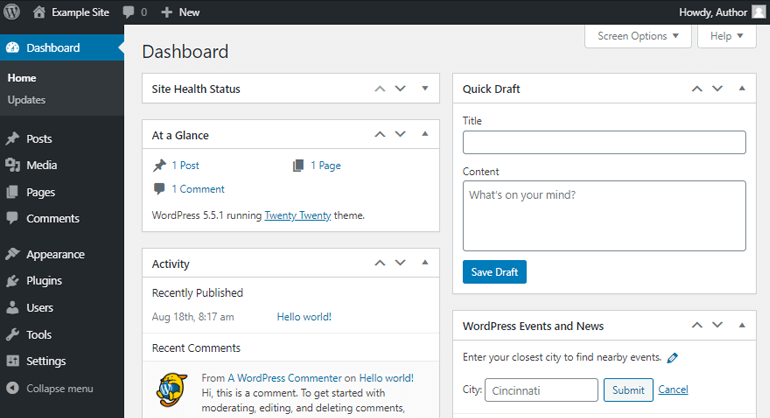
Since the installation process is fully completed, you can start exploring your WordPress dashboard. There are guides and help sections at every step. So, even if you’re a beginner, you’ll get along easily.
Contrarily, if you are an experienced user, don’t delay and start customizing your test site immediately. If you’re confused about where to begin, you can start by installing WordPress themes for several free themes you can try.
Likewise, you can also test and trial several WordPress plugins. You can refer to our article on installing WordPress plugins if you need help.
Wrapping Up!
So, this was our step-by-step tutorial on how to install WordPress locally using XAMPP. We hope this article will be helpful for anyone struggling with such an installation.
If you have some queries/confusion or need assistance to resolve any installation issue, let us know in the comments below. We’ll try to solve them and help in any way possible.
Note that if you want to move your local site to a live site, you can also do that. Purchase the best hosting and domain name provider, and you can do so.
Check our step-by-step guide on creating a WordPress site from scratch for complete guidance.
Also, follow us on Facebook and Twitter for more WordPress-related article updates.