You must have come across websites that require you to register (or subscribe to their email newsletter) to access specific content types or even pay to see an entire article you want to read (commonly known as a paywall).
As a general practice, this type of website would allow users to view only a tiny portion of the content to understand its value and make it mandatory for you to become a subscriber to access the rest of the content.
If you’ve ever wondered how this type of content lock is technically possible, then read on, this article is for you.
Table of Contents
There are many tools out there that provide restricted content functionality. Among about a dozen WordPress page builders currently on the market (see the full list here), Elementor is one of the most popular.
However, Elementor allows hiding content only by employing passwords, which is barely enough to create a functional and user-friendly site with restricted content. For covering all possible scenarios when content restriction might be necessary, it’s best to use a powerful plugin such as JetEngine. It can strengthen Elementor with tools like Profile and Query builder, allowing you to monetize your content and enhance UX.
Let’s first look at situations where content restriction is necessary and then explain how it is done using Elementor and JetEngine.
Content Restriction Use Cases
Restrict content unless the user pays
You can create a membership site that has primary and premium (paid) users. That said, you intend to restrict basic users from accessing content only meant for paid subscribers. After assigning roles to paid users, you can decide what content will be visible to them.
The other way to monetize your website is to create Elementor paywall content which is easy with JetEngine.
Basically, you must create a meta field for users, and when users submit a payment form and make a payment, that meta field will be assigned a specific value. Then you have to choose which of your site’s content can be accessed only by users with that meta field checked.
Availability based on user status
As an e-commerce store owner, you should showcase unique promo banners and exclusive discounts only to registered or logged-in users. That means those not logged in won’t see the offers.
Check out: How to show content only for registered users
With the simple dynamic visibility tools, you can create more complex functionality and improve user experience. Consider building a WordPress trading platform. You’d have to allow buyers on your platform to be able to edit their posts. For the best results, add an Edit button to the post and set its visibility condition to Current Post Author.
By applying restricted content, you make it much easier for the users to work on your site; they can find their items or blogs faster and avoid clicking the wrong buttons.
Section visibility on click
If you offer an online course on your website, you might want to look at the learning platform Studocu. You can give out the course content in parts. For example, when a student completes a specific lesson and clicks “complete,” you let them see a link to the next lesson and more menu items. Although some online course platforms may have this feature built-in, you still need to find an external solution for others.
By combining JetFormBuilder forms and dynamic visibility properties, you can create a platform where users can proceed to every next lesson or course only after completing quizzes. By employing conditional logic, the students may receive different results based on their answers and be allowed to open the next course, be asked to pay for it, or to take the quiz again.
Find out: How to hide content if the user doesn’t renew a subscription
Hide Elementor sections with no items
You can employ a “Query Has Items” option either to hide empty elements or to show elements with items, and such functionality is helpful in many cases. For your WooCommerce project, you can restrict product sections with no items in stock from users, remove “Add to Cart” buttons, or the widget showing the number of items in stock.
Using JetEngine’s Query Builder, you can personalize conditions for restricting Elementor sections. For example, users will see Favorites or Recently Viewed Items sections only if they picked certain items before. The absence of empty lists will result in a cleaner interface.
Prioritizing content for mobile users
Elementor can restrict content based on the type of device used, and this is important for making mobile interfaces simple and prioritizing certain content. Content elements that are not essential have no room on small screens, and the easiest way for designers to organize the web page smartly is to restrict such content from mobile screens.
Restricting content based on age
Do you run a store that provides products to both adult and underage customers? You can restrict underage users from seeing liquor and tobacco products, for example. You could achieve this by hiding the mega menu, promo banners, and footer menu products.
These are all common scenarios for restricted content, but this list is not exhaustive, and there can be other scenarios.
In any case, if you need to have restricted content on your WordPress website, you can use Elementor for this.
So, how do you restrict content in Elementor?
Steps for Restricting Content in Elementor
Step 1: Install Elementor
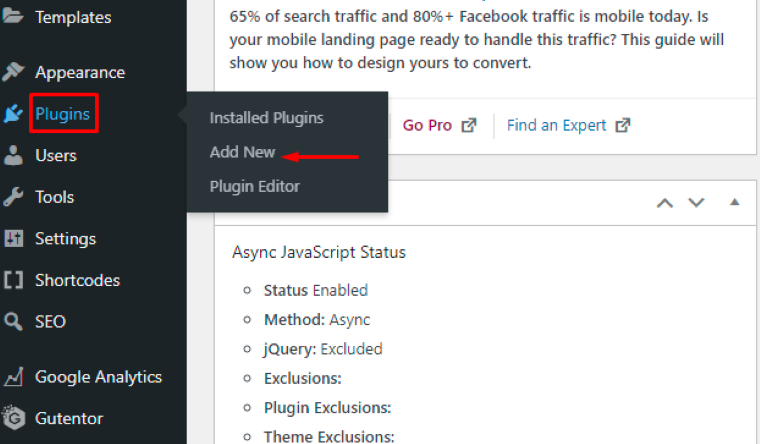
If you haven’t installed Elementor already, head over to the WordPress dashboard, then to Plugins > Add New, and type Elementor in the keyword search bar.
Install and activate the plugin.
Step 2: Install the JetEngine plugin
JetEngine is a powerful plugin that lets you build a dynamic website architecture, create listing items, explore various dynamic features, set a data store, glossary, and dynamic visibility, among other functions.
For this post, I’ll use JetEngine’s Dynamic Visibility module to help us restrict content access on specific pages based on various rules (more on that in a minute).
Step 3: Turn the Dynamic Visibility module on in JetEngine’s options
Start by logging into the dashboard and head to the JetEngine options, then choose the first option – JetEngine.
Now, go to the modules section and scroll down to Dynamic Visibility for Widgets and Sections. Enable the module.
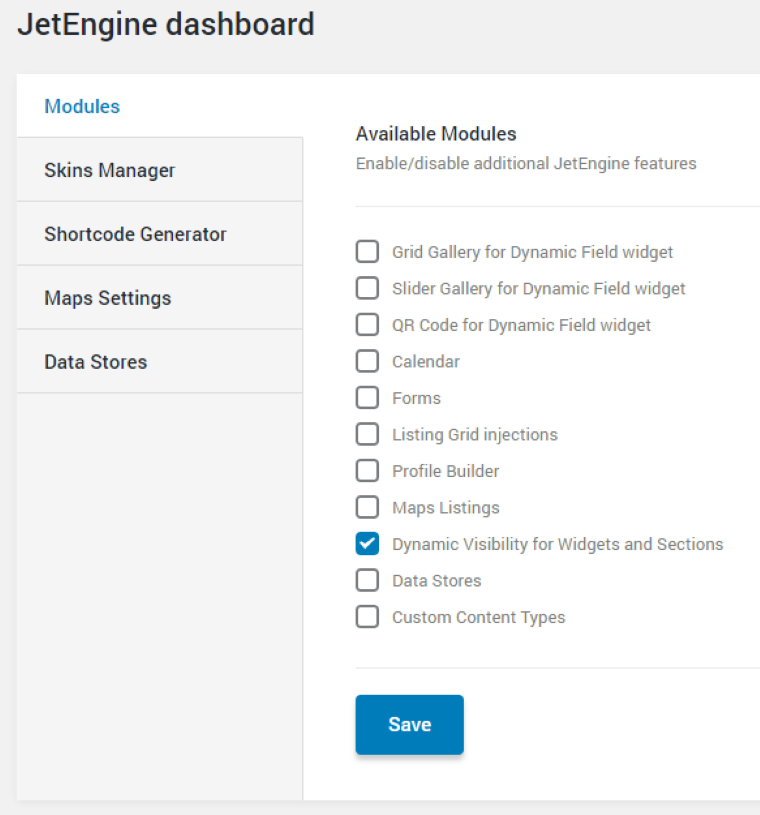
Hit “Save” to make it available in Elementor.
Step 4: Enable the module in Elementor
Go to All Pages > New or click on an existing page (or post) and click “Edit with Elementor.”
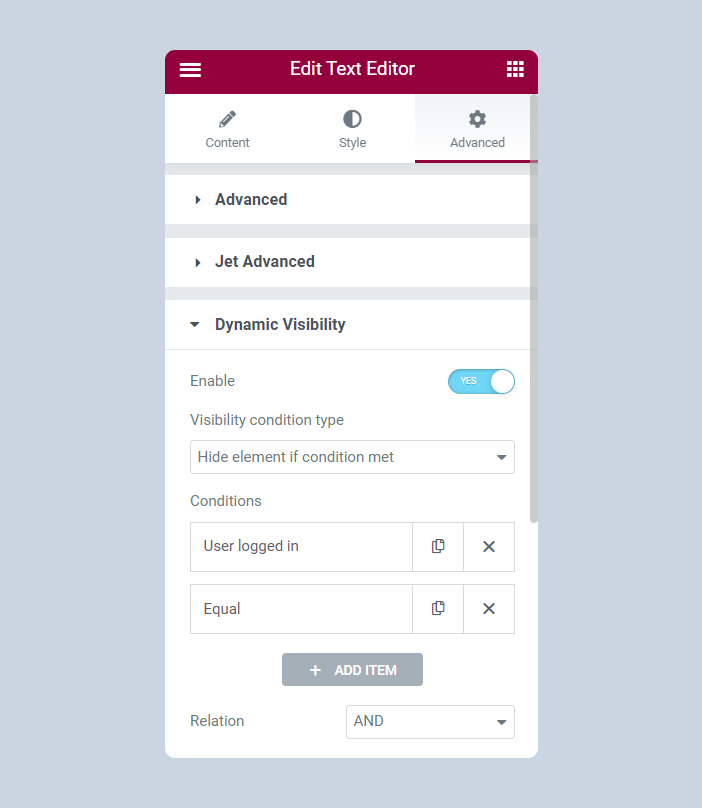
Please select one of the elements on your page (let’s work with a section) and head to Advanced > Dynamic Visibility, and enable it.
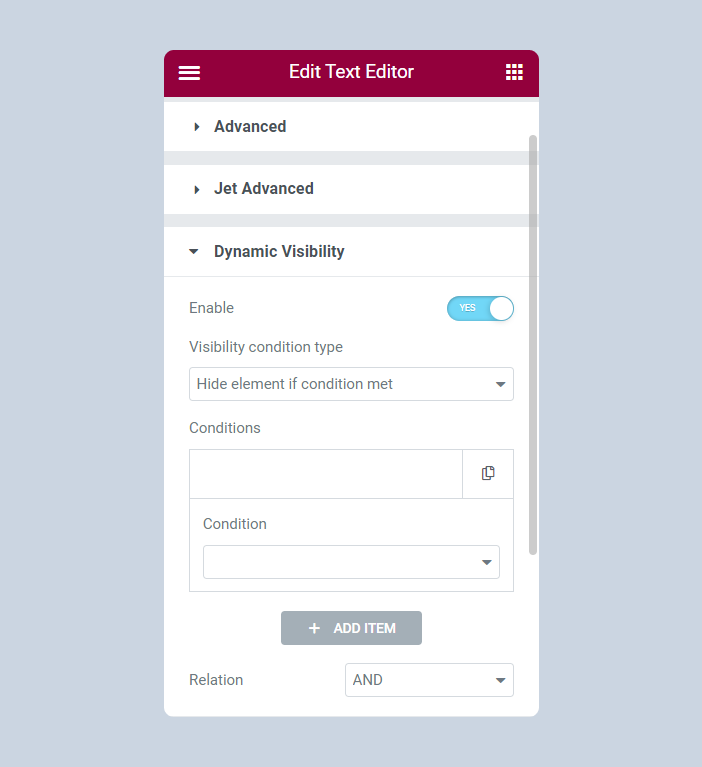
From here, you can now change the visibility parameters for a content element.
Step 5: Define the Visibility Condition type
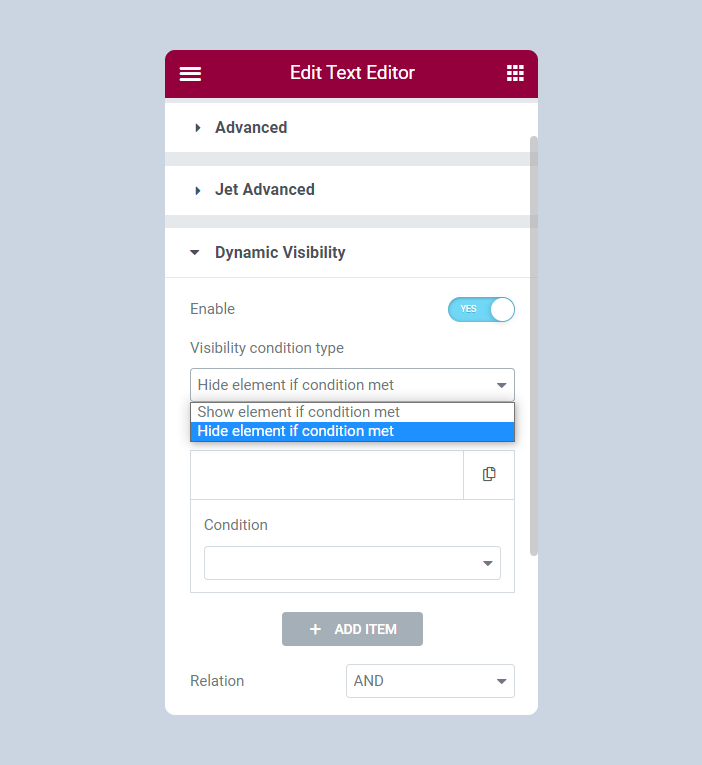
Below the “Enable” option, you’ll see the “Visibility Condition Type” setting with a drop-down menu. Under the drop-down menu, there are two conditions:
- Show element if the set condition is met
- Hide element if the set condition is met
Let’s go with the first option.
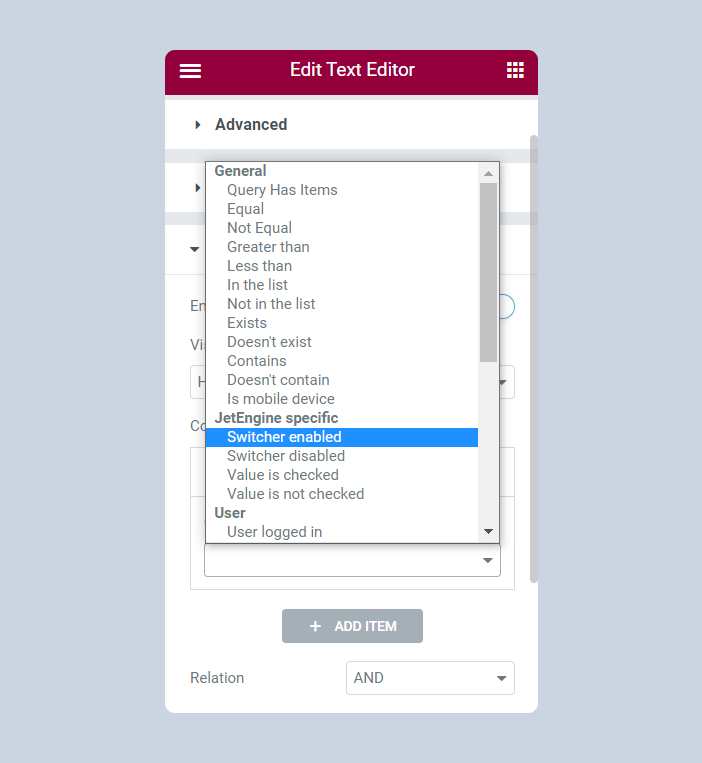
Step 6: Select conditions
You can set lots of conditions to restrict content on a page. Be careful when doing this, as some conditions may look similar, but they aren’t.
The conditions are categorized into:
- General
- JetEngine specific
- User
- Posts
I’ll discuss the sub-conditions under the User condition, as they work well when you want to restrict content on a page using Elementor.
The sub-conditions under this condition include:
- User Can Add Posts – You can restrict specific users from publishing certain posts; the Profile Builder maintenance window lets you achieve this. According to this condition, only users with permission to publish a particular post can see that post.
- User logged in – Only logged-in users can see the content. This is the best condition to set on a membership site where premium users can log in.
- User not logged in – Only non-authorized users can see the element. This can apply to membership sites where you have teaser content that you’d like to showcase to non-registered members to give them a hint of what they’ll get (what hidden pages contain) if they choose to register.
- User role is – This element is only visible to users with a particular role assigned to them. For example, if you run a subscription-only website, you may assign the subscriber role to paid members and let them access content that other people won’t.
You can also assign the admin role to a user, which allows them to create, delete, or edit content, manage themes and plugins, delete accounts for other users, and edit code.
- User role is not – This element is only visible to users who don’t match those mentioned.
- User ID is – You can type ID numbers into the User IDs field to let users of these IDs see the content.
- User ID is not – the content won’t be visible to users whose ID numbers you’ll enter in the User IDs field. These could be basic members of a premium subscription site, so you wouldn’t want them to access paid content.
Step 7: Choose a suitable relation
Lastly, choose either of the two features to define a relation:
AND – The selected visibility condition only works if all your defined conditions are met.
OR – The chosen visibility condition only works if any of your defined conditions are met.
The second option is easy to work with, isn’t it?
FAQ
To restrict any content, you must enable the visibility settings using the JetEngine plugin and set the conditions under which the content will be visible.
A paywall is a method allowing the restriction of certain content from access by users who don’t pay a set fee.
Dynamic Visibility is a module by Crocoblock that enables you to define visibility logic for most Elementor website elements.
Conclusion
Elementor is one of the most powerful WordPress page and website builder plugins available today. Not only does it help you to create WordPress pages and posts, but it also helps you to create restricted pages on your website (and tons of other valuable things).
With the JetEngine plugin for Elementor, you can restrict specific pages or widgets and create a membership site that generates recurring revenue for you. You can also improve the site’s user experience by utilizing numerous dynamic visibility features.