Are you looking for a way to add extra product options to WooCommerce?
WooCommerce, by default, doesn’t let you add extra options to products.
It lets you display additional options as product variations but there’s no option to directly add extra options to your products like checkboxes, color swatches, or date pickers.
Creating lots of product variations isn’t practical, especially when you want to offer multiple product options.
In this article, we’ll discuss WooCommerce product options to better understand WooCommerce’s limitations. After that, we’ll see how a plugin can help overcome these challenges.
Let’s begin!
The Default WooCommerce Product Options
The default WooCommerce lacks the dedicated product options feature. The product options in WooCommerce are essentially just the product variations feature.
Instead of creating a simple product, WooCommerce lets you set up a variable product with custom attributes and variations.
While this works for displaying product variations and letting shoppers select the options they need, it can be very time-consuming to set up more complex, customizable products on your online store.
For instance, let’s say you want to create a pizza box product that lets shoppers select everything from the pizza crust to the toppings they want on their pizza.
With the default WooCommerce variations feature, you’d have to rely entirely on dropdowns to let customers select their pizza. This leads to a cluttered and confusing user experience.
In addition to this, it’s difficult to create customizable products in default WooCommerce because you have to add each variation separately for a combination of options.
For products that can be customized in dozens of ways, it becomes difficult for store owners to set up using the default variations feature.
Having said that now let’s learn how to add extra product options in WooCommerce.
Adding WooCommerce Extra Product Options Using a plugin
The best way to add WooCommerce extra product options is by using a dedicated product customizer plugin like WooCommerce Product Options.

It offers an all-in-one solution for adding extra options to your WooCommerce products.
Using an intuitive point-and-click interface, you can quickly add advanced product options like checkboxes, radio buttons, upload fields, color swatches, and text fields to any product on your WooCommerce site.
As a result, you have to do less work to set up more WooCommerce product options than you’d be able to do with the default WooCommerce variations feature.
In addition to this, you also have access to advanced features like conditional logic.
This way, you can show or hide specific WooCommerce product options based on the customer’s input or selection. This helps create a more personalized and optimized shopping experience on your WooCommerce site.
The WooCommerce Product Options plugin also integrates seamlessly with one of the most popular WordPress themes, Zakra.

Installing this theme enables store owners to create attractive-looking product pages and add fully responsive product add-ons to their online store.
Now, let’s go to the step-by-step process of adding extra product options using the WooCommerce Product Options plugin and the Zakra theme.
Step #1: Install and Activate the WooCommerce Product Options Plugin
Get the WooCommerce Product Options plugin and install it on your WooCommerce site. To do this, navigate to Plugins → Add New and upload the plugin’s ZIP file to the Upload meta box.
Click the Activate this plugin link once the installation process is complete. The plugin wizard will guide you through the setup process.

Enter the license key given to you at the time of purchase in the License key text field and click the Next button to continue.
Step #2: Create a Customizable Product and Add Extra Options
With the WooCommerce Product Options plugin installed, it’s time to start setting up a customizable product on your WooCommerce site with extra options.
For this, navigate to Products → Add New from the WordPress admin panel.
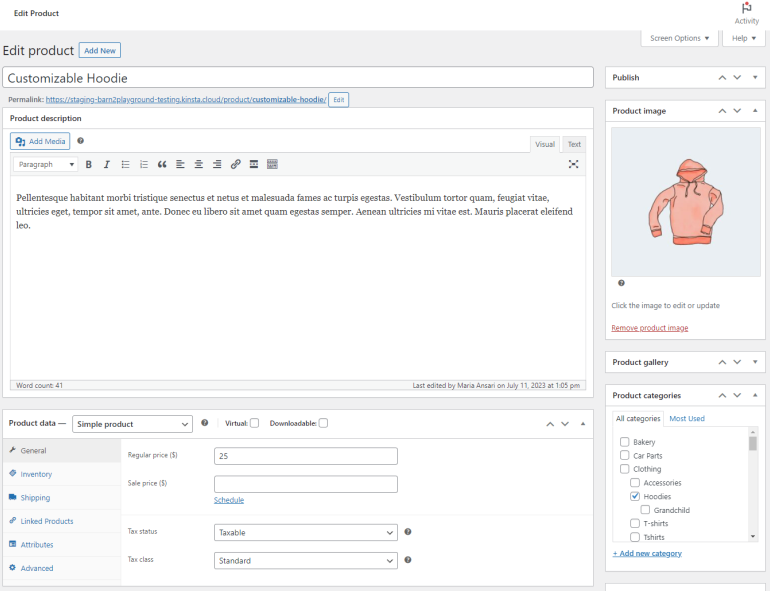
Once you set up the product and add basic details like the product description and product price, click on the Publish button to continue.
This allows the WooCommerce Product Options plugin to recognize your newly added customizable product and lets you set up extra product options.
Now, navigate to Products → Product Options and click on the Add Group button.
Start by giving the extra product options group a display name that will appear on the front end of your online store by selecting the Display checkbox.
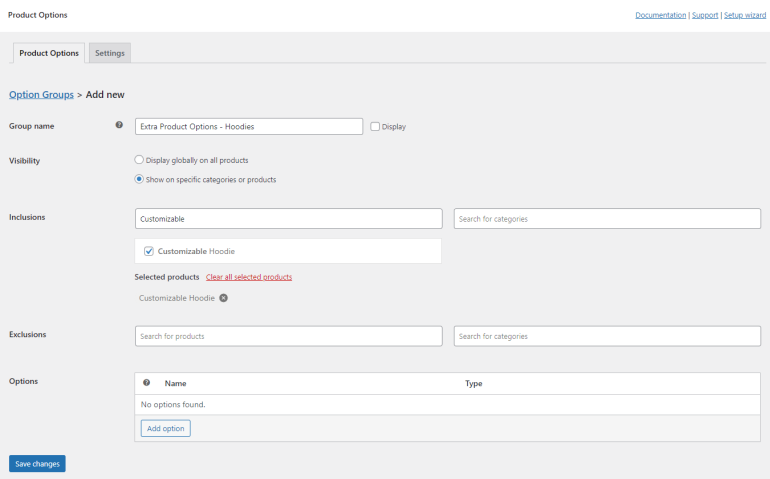
The Visibility radio buttons let you either display the extra product options globally for all products on your WooCommerce site or for specific products only.
Once you select the Show on specific products or categories option, you can select the customizable product using the Inclusions field. You can also add multiple products to this field.
For instance, if you sell similar customizable apparel products, you can set up extra product options once and display them for all apparel products on your online store.
Once the customizable product is selected, click on the Add option button at the bottom to start setting up extra product options.
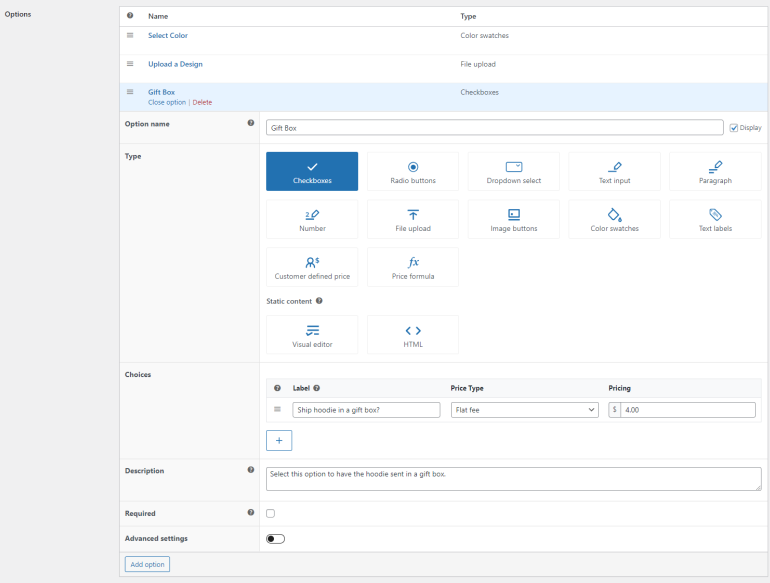
Using the Type section, you can select what type of extra field you want to show on the product page.
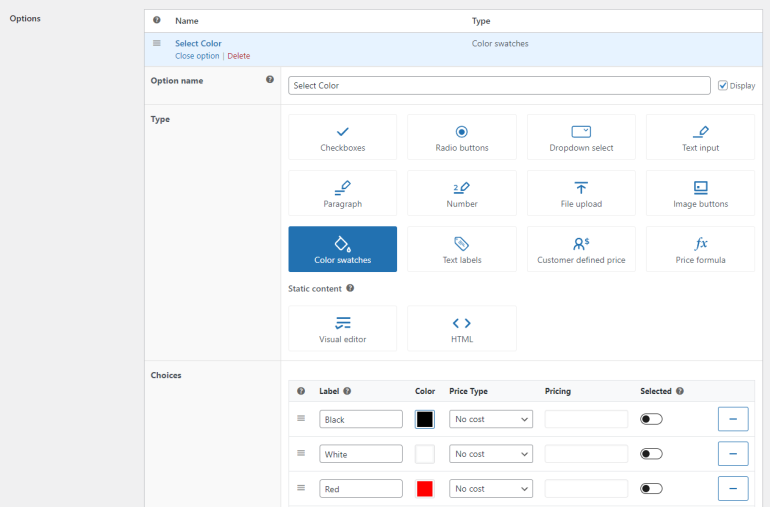
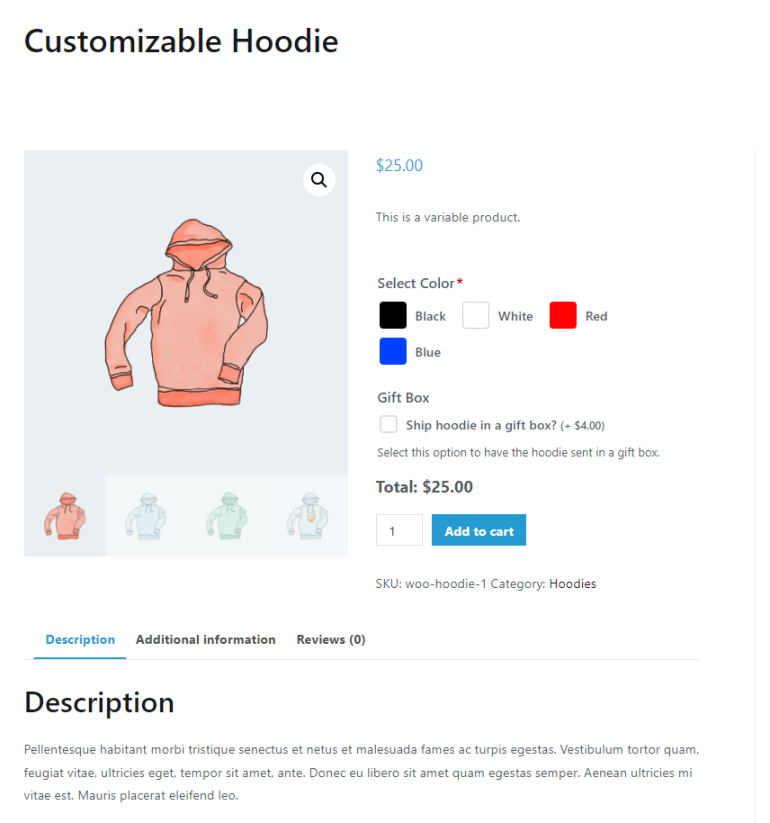
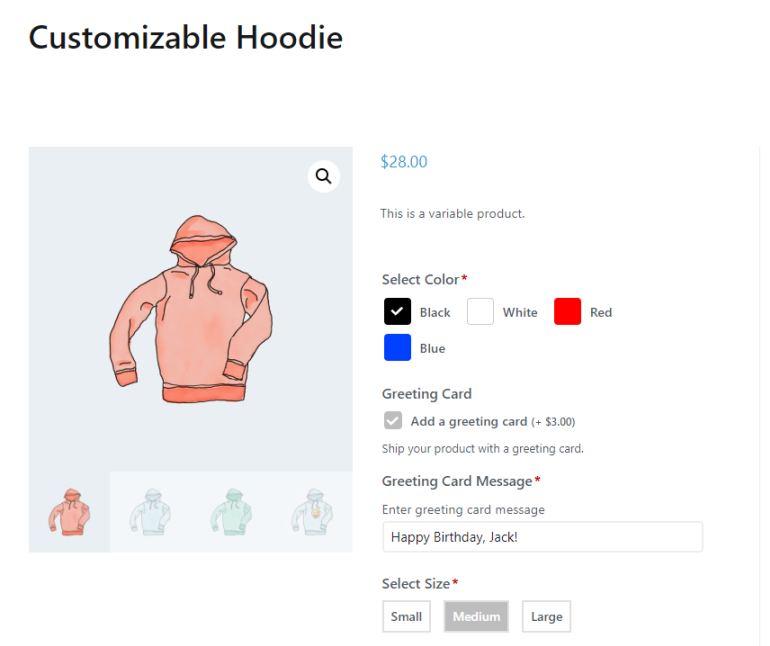
For example, we can set up the Color Swatches field to let customers select the color of the hoodie they want to purchase.
Similarly, you can also use the File Upload field type to let customers upload a design to be printed on the hoodie.
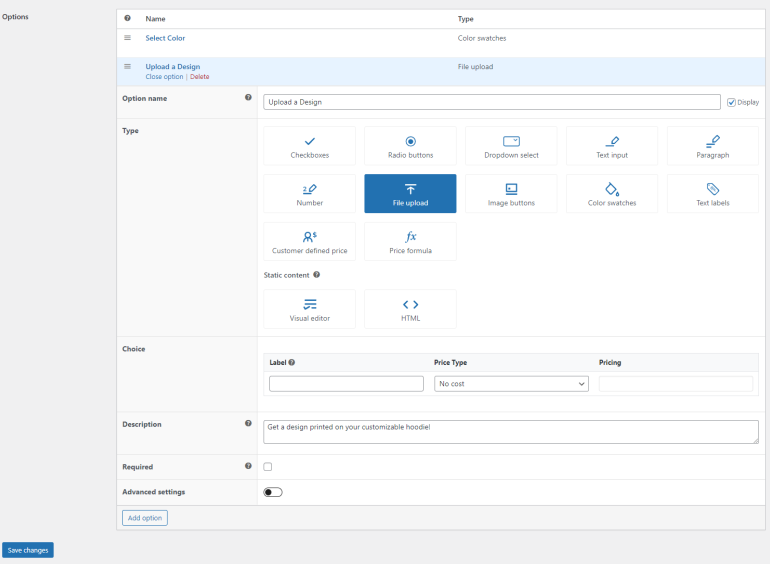
In addition to this, you can create more premium extra options like a gift box or offer extra fast delivery.
Using the Checkboxes field type, you can offer premium gift options to your shoppers and charge a small fee when they select these options.
Once you’re ready, click the Save button at the bottom to continue.
Step #3: Design Your Product Page
With the customizable product created, it’s time to start designing your product page using the Zakra theme to further optimize the shopping experience on your WooCommerce site.
For this, click on the Customize button from the top to view theme options.
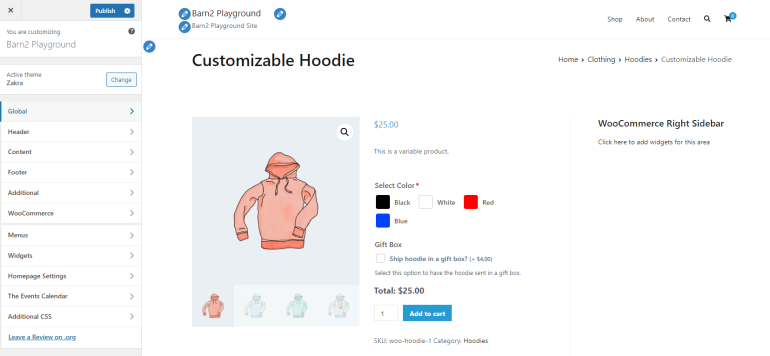
Extra fields added using the WooCommerce Product Options plugin are fully optimized to work with most WordPress themes.
This means you can freely customize the page’s layout according to your brand’s unique aesthetics and colors without worrying about the extra product options not working properly.
The Zakra theme also lets you display various widgets on either side of your WooCommerce product pages or main shop pages.
For this, navigate to Widgets → WooCommerce Right Sidebar and click on the “+” icon to start adding Gutenberg blocks to the sidebar on your single product pages.
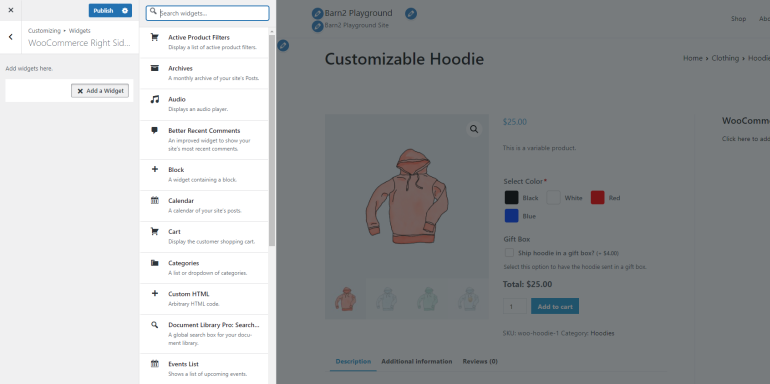
Once you’re ready, click on the Publish button to continue.
This way, you not only create more attractive-looking product pages but also make it easy for customers to navigate through your store.

Best Practices for Managing Your WooCommerce Extra Product Options
Creating and managing extra WooCommerce product options can be challenging, especially if this is your first time doing so.
For this reason, let’s dive into some of the best practices you can follow to better manage WooCommerce extra product options on your eCommerce store.
1. Showcase Extra Options in Unique Ways
Instead of using the default WooCommerce functionality to display basic product options like (size or color) for your variable products, use the WooCommerce Product Options plugin to showcase extra options in unique ways.
For example, for your apparel products, you can let shoppers select their desired sizes using text labels instead of using a dropdown menu.

2. Use Conditional Logic to Improve User Experience
The WooCommerce Product Options plugin also lets you use conditional logic features to showcase extra options for a product based on user inputs.
This way, you can show or hide extra product options from your single product pages to eliminate clutter and encourage shoppers to add products to their carts quickly.
Only shoppers who want to further customize their product or select extra options will see the hidden fields.
For example, you can only showcase the text field for adding text to a gift card only when shoppers select the “Add a gift card” checkbox.
3. Showcase Upsells to Encourage More Purchases
Displaying upsells directly on single product pages encourages more purchases on your WooCommerce site.
The WooCommerce Product Options plugin lets you showcase product images and titles using extra fields or directly in the product options section.
You can add product images to extra fields so it’s easier for customers to quickly add product upsells or cross-sells to their carts.

Conclusion
If you want to sell customizable products, the default WooCommerce functionality will not work for you. This is because it’ll take you a lot of time and manual labor to add product options as variations.
In addition to this, you’ll have to set up variations for each combination of options yourself which is difficult to manage.
The best way to add extra product options to your WooCommerce products is by using a dedicated plugin like WooCommerce Product Options in combination with the stunning Zakra theme.
It takes out the hard work of manually adding each combination of product options and lets you quickly add and customize extra fields for your products, even if you’re not very tech-savvy.
This way, you can showcase extra product options in a way that delivers a good user experience.
This is a Guest Post.
Co-Founder and CEO at Barn2 Plugins, Katie is an active member of the WordPress community. She loves helping people to get the most out of WordPress and WooCommerce.