What is the first thing a user sees when they land on a website? It’s a header.
That’s why making a functional and intuitive header is vital. You can place all the essential information inside it, and it should never leave the user’s eyesight: a button for a quick order, contact links, the ability to go to the catalog, etc. It will be up to you, but the sticky header has enormous potential.
Luckily, Elementor lets you create such an element rapidly and without writing any code.
Let’s take a closer look. 👇
Table of Contents
A sticky header on a WordPress website refers to a design element where the website’s header, typically containing the site’s logo, navigation menu, and other important information, remains visible and “sticks” to the top of the screen as a user scrolls down the page. It means that even as visitors scroll through your website’s content, the header stays in view at the top of the browser window rather than disappearing off the screen.
There are several reasons why developers often choose to implement a sticky header on a WordPress website:
- Improved navigation. Sticky headers provide a fixed navigation menu, making it easy for users to access essential pages and features no matter where they are on the page. It enhances the overall user experience and encourages visitors to explore more content.
- Brand visibility. A sticky header reinforces brand identity by keeping the site’s logo and branding elements fixed at the top and ensures that users always know which website they are on. It can be crucial for brand recognition.
- Call-to-action accessibility. If your website has prominent call-to-action buttons or links in the header (e.g., “Contact Us,” “Shop Now”), a sticky header ensures that these CTAs are always visible, keeping the users engaged and conversions.
- Enhanced user engagement. WordPress sticky headers encourage users to interact with your website and navigate to different sections or pages. It can lead to longer session durations and reduced bounce rates, as users find it convenient to explore your content.
- Responsive design. When designed well, sticky headers can adapt to different screen sizes and devices, maintaining functionality and aesthetics across various platforms, including desktops, tablets, and mobile devices.
- Scroll progress indicator. Some sticky headers incorporate a scroll progress indicator, showing users how far they’ve scrolled through the page. It can be a helpful visual cue, especially for long-scrolling sites.
- Quick access to important information. If your website contains critical information or features in the header, such as contact details or a search bar, a sticky header ensures that users can access these elements without needing to scroll back up.
- Professional look: Many modern websites use sticky headers as they offer a sleek look. It can make your website seem more polished and modern.
There is no specific list of what you should definitely add. You can use those elements that seem essential to you. In general, it’s a good practice to include a logo, company name, search bar, call-to-action button, and contact information.
Here is a good example of such a sticky header:
Now, to the main question: how can you create a professional sticky header?
Unfortunately, you can’t make a sticky header using only free Elementor. You need some extra add-ons. For example, you can use ElementsKit. If you opt for it, stick to the following instructions:
Step 1. Install ElementsKit and Sticky Header Effects plugins and activate them.
Step 2. Open your website’s dashboard and go to Appearance > Menus.
Step 3. Create the header and name it.
Step 4. Add necessary elements to your header menu.
Step 5. Then, open the ElementsKit section from the left side of the admin panel.
Step 6. Enable the Header Footer module.
Step 7. Add a new header template, name it, and save.
Step 8. Then, open the newly created template with Elementor and press the ElementsKit icon in the editor.

Step 9. Choose the Section tab and save it.
Step 10. Open the navigation menu of the header, click on the Menu Settings, and choose Sticky Header Menu in the Select Menu field.
Step 11. Update the page and then go to the six dots at the top of the screen.
Step 12. Choose Advanced and click on the Sticky Header Effects. Toggle it on.
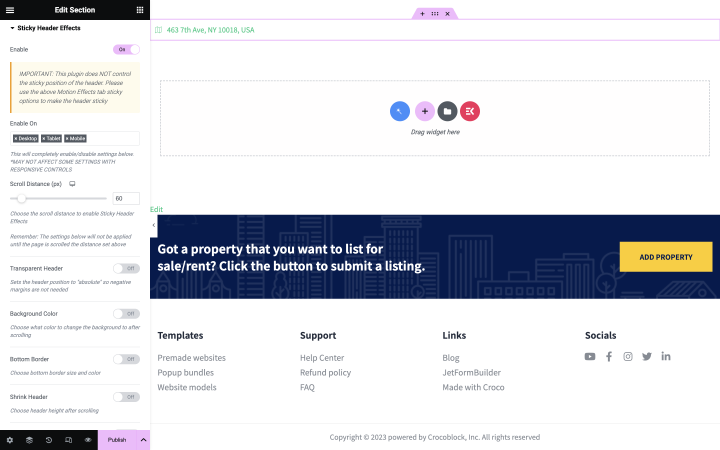
Ready! You can style your sticky header and use it on your website.
If you are a confident Elementor PRO user, you already know how to make a practical sticky header. But – just in case – here is a short instruction.
Step 1. Go to the Header section at Elementor.
Step 2. Add needed elements to the header: logo, contacts, buttons, etc.
Step 3. Click on the Advanced tab and choose “Motion Effects.” Here, you can find “Sticky.”
Step 4. Set up your sticky section’s position and choose the devices where users will see the sticky header.
💡 This method is not always convenient because if you need to put a sticky header on several sites simultaneously, you will have to create it over and over again for each page.
If you haven’t got Elementor PRO yet, you can use another method. For example, you can use JetSticky functionality from JetBlocks. It works with Elementor’s free version, which is very fortunate for those not ready to buy PRO.
The process is similar to creating such a header with Elementor PRO, but you can add the created header to all or some pages at once as you wish.
To create a sticky header:
- Go to Crocoblock > Theme Builder > Header.
- Select the desired template and open it in the Elementor page builder.
- Set the desired parameters and style the section using Sticky Section Style.
The video below will walk you through the entire process step by step:
Pro tip
If you want all crucial information to remain in the user’s field of view at all times, you need a sticky column.
The column will always stay visible while scrolling down the page. You can make such a section using JetTricks. Similarly to the sticky header, you can choose where and how the column will be placed, how it will look, and on which pages and devices it will appear. Every little thing is under your control. 👌🏼
If you are an advanced developer willing to spend some time writing code, then the following instructions are for you.
Step 1. Go to your WordPress website’s dashboard.
Step 2. Choose Appearance > Customize.
Step 3. Find Additional CSS.
Step 4. Add the following piece of code:
nav
  background:#ffff;
  height:40px;
  z-index:999;
  margin:0 auto;
  border-bottom: 1px solid #dadada;
  width:100%
  position:fixed;
  top:0;
  left:0;
  right:0;
As you can see, there are many options for creating a sticky header, from using dedicated header plugins to coding. Choose one that suits you the best.
FAQ
This header type stays at the top of the screen, and all necessary links, menus, and logos stay within sight when the user scrolls down your site’s content. It is very convenient because it helps users get to the correct website section without scrolling back to the top. You can add a sticky header to every site page or just the homepage.
For such a task, you can use coding, Elementor PRO, or another plugin with the ability to create a sticky header, such as ElementsKit or JetBlocks. You can find the necessary steps in the article.
When creating a sticky header, you can set effects, header transparency, size, etc. Use a transparent background to make the content visible through the header and get the trending design you want.
Finally
If you are considering making a static header or sticky, choose the sticky one. Not only because it is in line with the latest web design trends but also because it is very user-friendly.
Imagine a customer came to your website, studied all the information, and wanted to contact you urgently or place an order. To do this, they will have to scroll all the way back to the top. In the case of a sticky header, they can immediately click on the “Order” button or go to another website section.
So, if you haven’t tried to apply a sticky header template to your WordPress website yet, now is the time to try it. 😉