Meta tags can help search engines crawl and index your pages. In addition, you can incorporate keywords into your meta tags to gain higher search rankings. However, the default installation of WordPress doesn’t contain meta tag data. Therefore, you might be wondering how to add meta tags in WordPress.
Fortunately, there are three ways to add meta tags in WordPress. For advanced users, you can edit your header.php file to manually add meta tags. Or, you can use a handy plugin to take care of this for you.
Meta tags can help search engines better understand your content. For example, when you publish a post or page, you can assign tags that contain the language, meta description, author, and other relevant information.
These tags consist of HTML code that is hidden in your content for search engines and crawlers to find. So, a meta tag that assigns a piece of content to a particular type of document looks like this:
<meta name="resource-type" content="document" />
Meanwhile, a meta tag that contains information about the author will look like this:
<meta name="author" content="John Hughes" />As such, you can implement specific keywords in your meta tags to optimize your site. This way, search engines will serve your pages to people that use those specific key terms or phrases to find content.
Additionally, meta tags can make it easier for search engines to crawl and index your pages. Plus, since the meta data is displayed in the search results, it can help human visitors decide whether they want to access your site.
However, by default, WordPress doesn’t produce most of the common meta tag data that is valuable from an SEO point of view. For instance, you won’t find the tags for the description or the keywords. You’ll need to add this data yourself if you want to add meta tags in WordPress. This is what the following sections are going to show you how to do:
Now that you know a bit more about meta tags, here’s how to add meta tags in WordPress.
1. Add meta tags manually 🔧
If you’re wondering how to add meta tags in WordPress and you’re an intermediate or advanced user, you can do it manually. This involves editing important site files, which can be risky. Therefore, it’s a good idea to make a backup of your site before you begin.
You can access your site files through File Manager. Or, you can connect to your site files using FTP.
Alternatively, go to Appearance > Theme File Editor from your WordPress dashboard. Then, in the Theme Files column, find the header.php option:
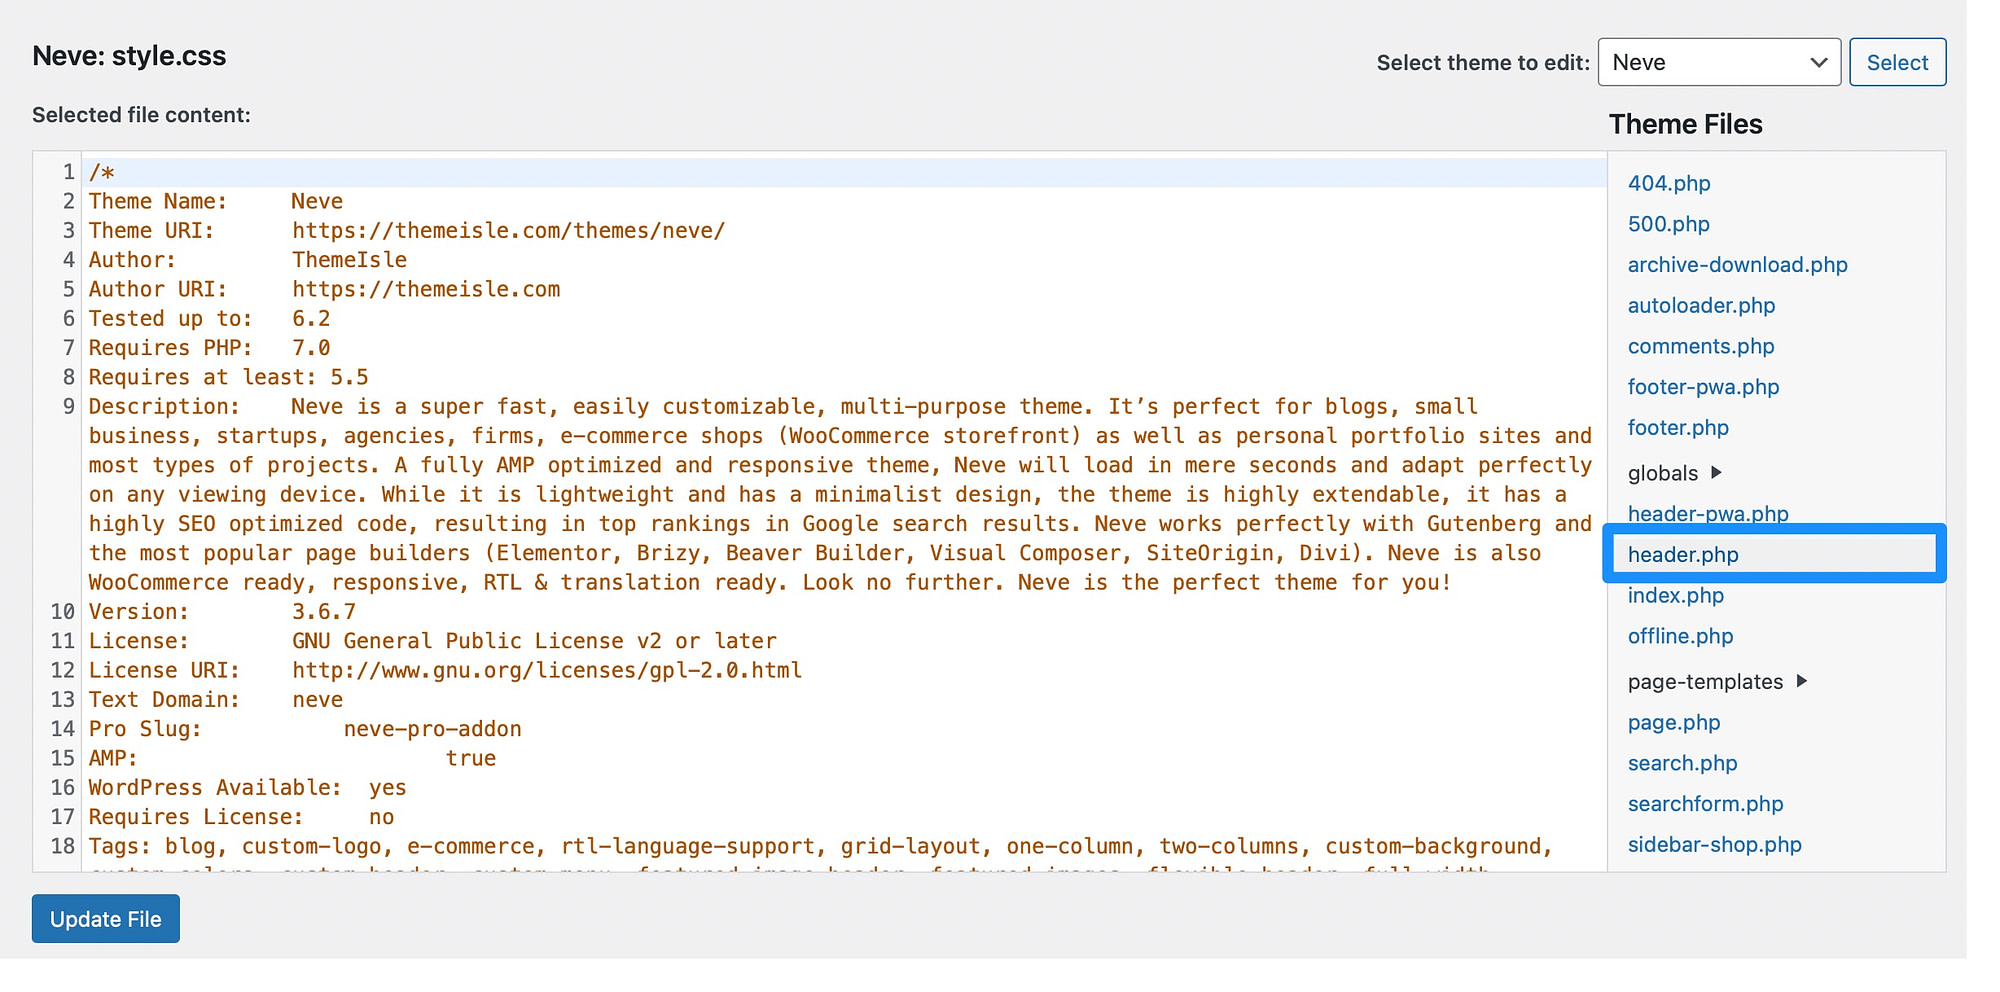
Open the file and add your meta tags in the head section between <head></head>.
As we’ve mentioned, there are plenty of meta tags you can add to your site [1]. For instance, if you want to add a meta description, you’ll use the following tag:
<meta name="description" content="write your meta description here" />
Meanwhile, if you want to add a meta tag that contains your copyright notice, you’ll enter this tag:
<meta name="copyright" content="Copyright (c) 1997-2004 John Hughes. All Rights Reserved." />
Then, click on Update File to save your changes.
⚠️ A note of caution. If you’re going to use this method, keep in mind that whenever you update your theme, the header.php file will be updated along with it and will be overwritten. Any manual changes made to the file, including the addition of meta tags, will be lost.
To mitigate this risk, it is recommended to create a child theme in WordPress and make the necessary modifications to the header.php file in the child theme instead of the parent theme. This way, when the original theme is updated, the modifications made in the child theme will remain intact. Using a child theme ensures that any customizations, including the manual addition of meta tags, are preserved during updates and keeps the core WordPress files untouched.
2. Add meta tags using a general plugin 🔌
Now, if you’re a beginner, you might be wondering how to add meta tags using a plugin since this is a more beginner-friendly option. There are plenty of WordPress SEO plugins that provide this functionality, like Yoast SEO and All in One SEO (AIOSEO).
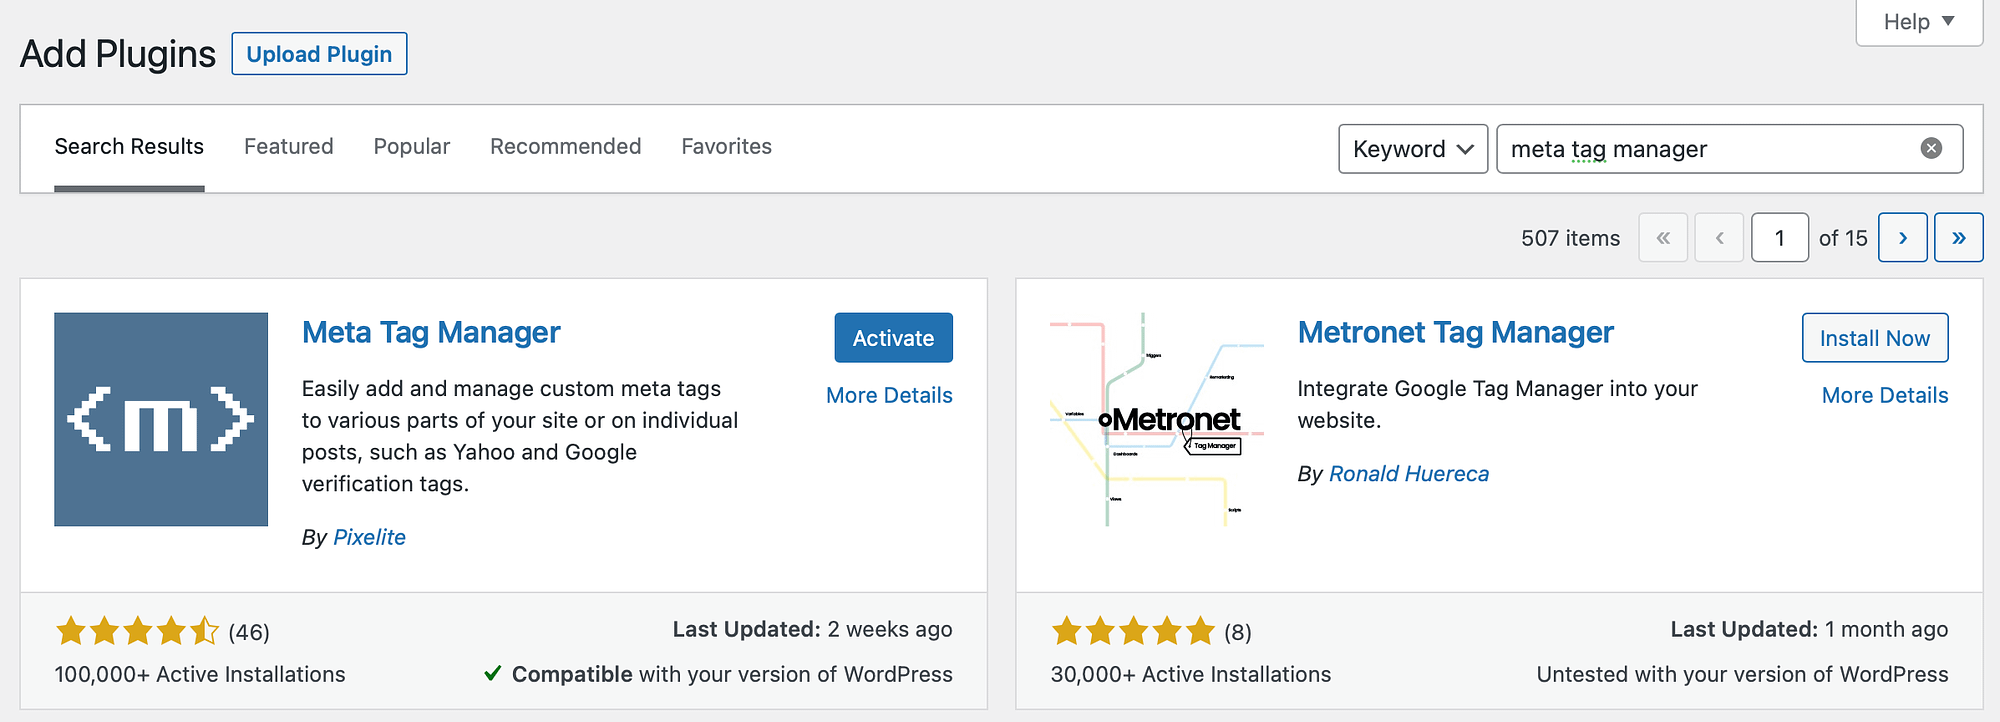
However, you can also use a dedicated plugin like Meta Tag Manager. To get started, you’ll need to go to Plugins > Add New. Then, search for the plugin and click on Install Now > Activate:
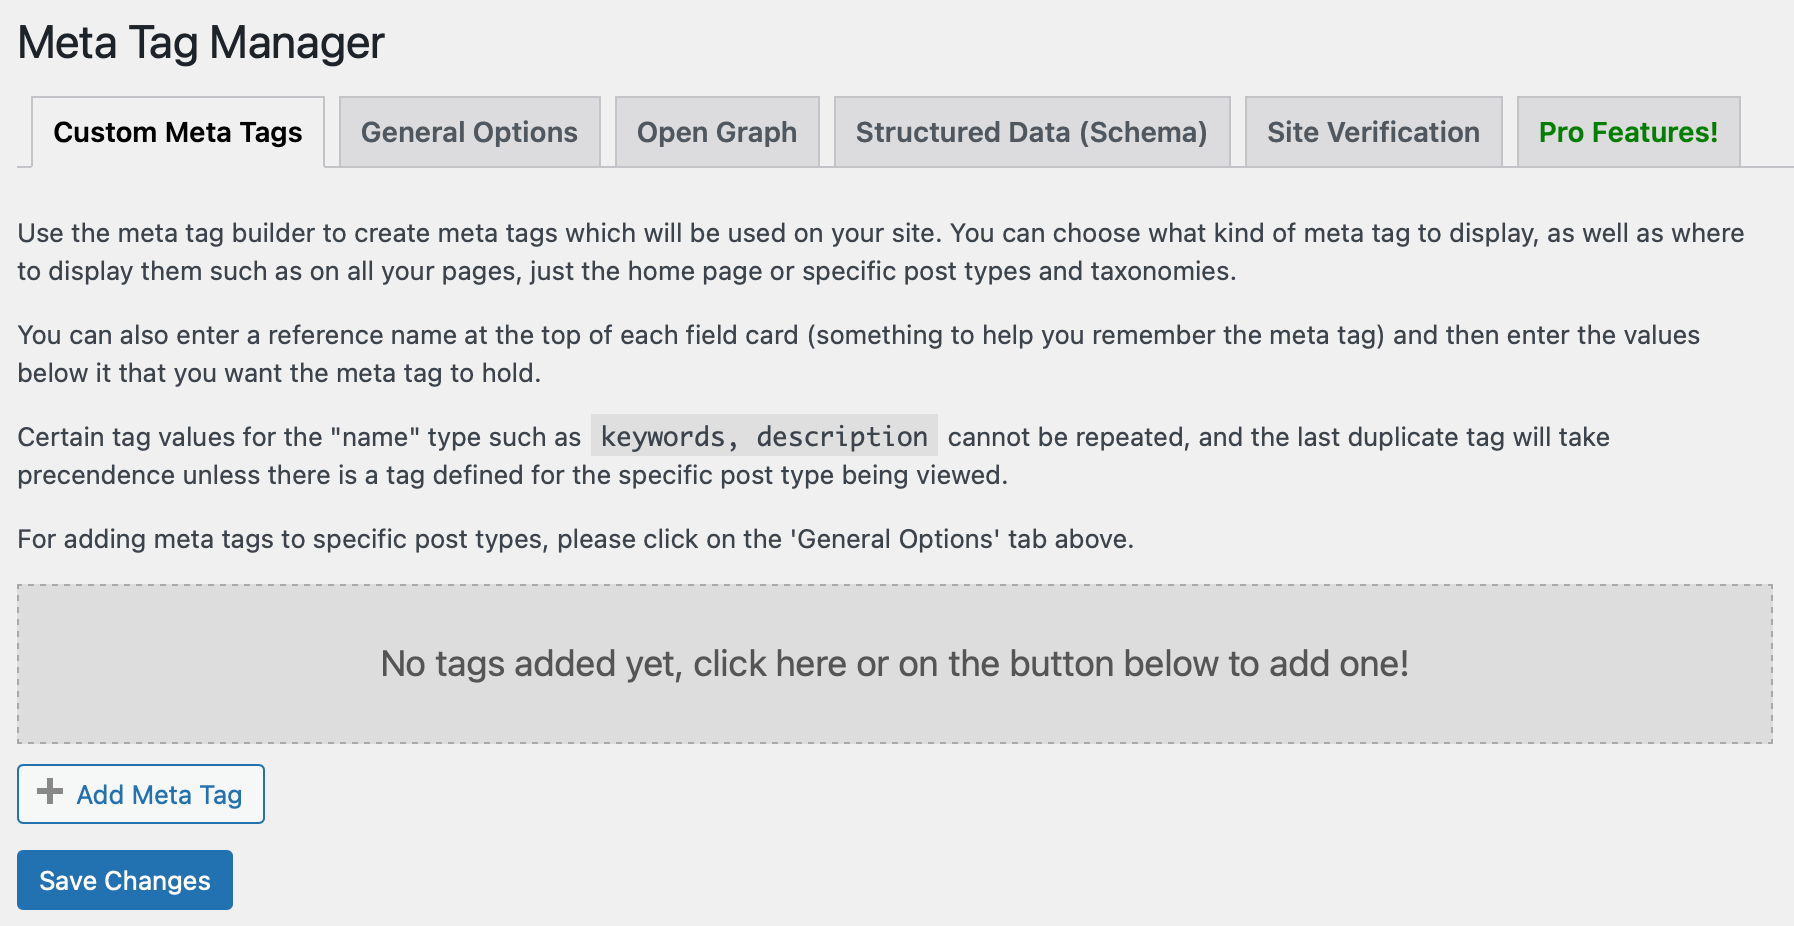
Upon successful activation, go to Settings > Meta Tag Manager. Now, you can start creating custom meta tags and assigning them to different parts of your website.
So, click on Add Meta Tag:
You can add a reference name at the top of the section. Then, use the dropdown menu to select a tag type (such as name) and then choose a value (such as author).
In the Content Attribute box, enter the content that corresponds to your tag. So in this case, we’ll enter the author name:
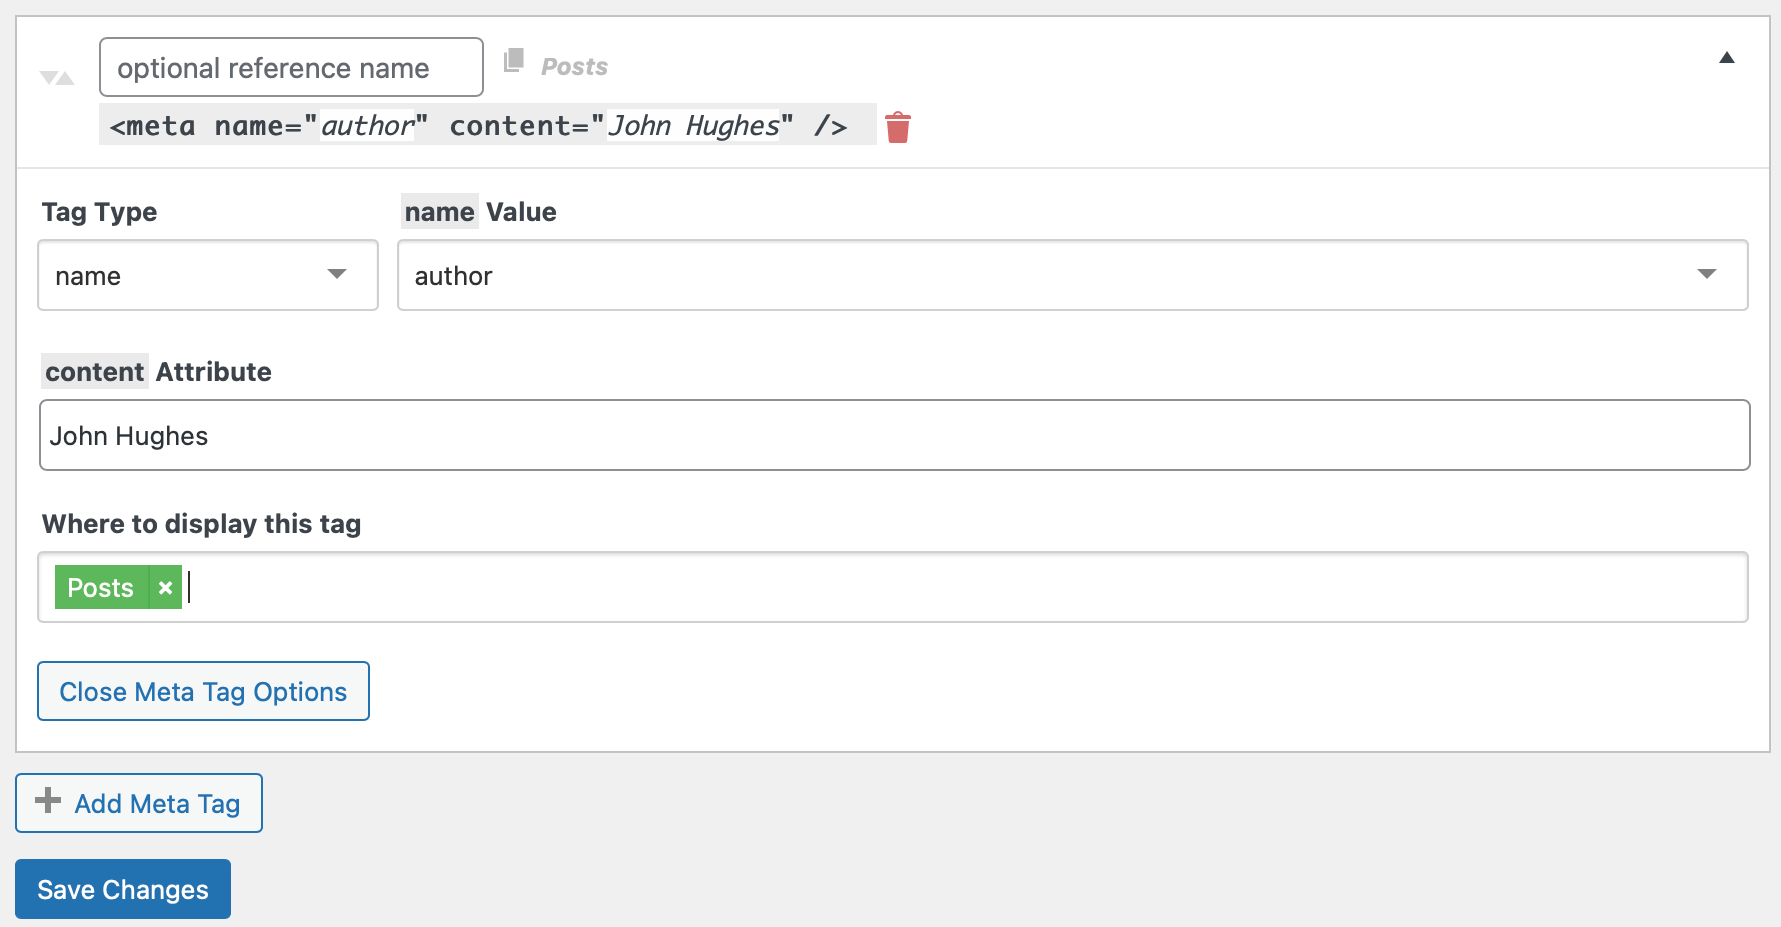
Lastly, you’ll need to determine where you want to display the tag. For instance, you can display the tag across posts, pages, media, and more. Click on Save Changes.
Now, switch over to the General Options tab. Here, make sure that posts, pages, and media are listed under Post Type Support:
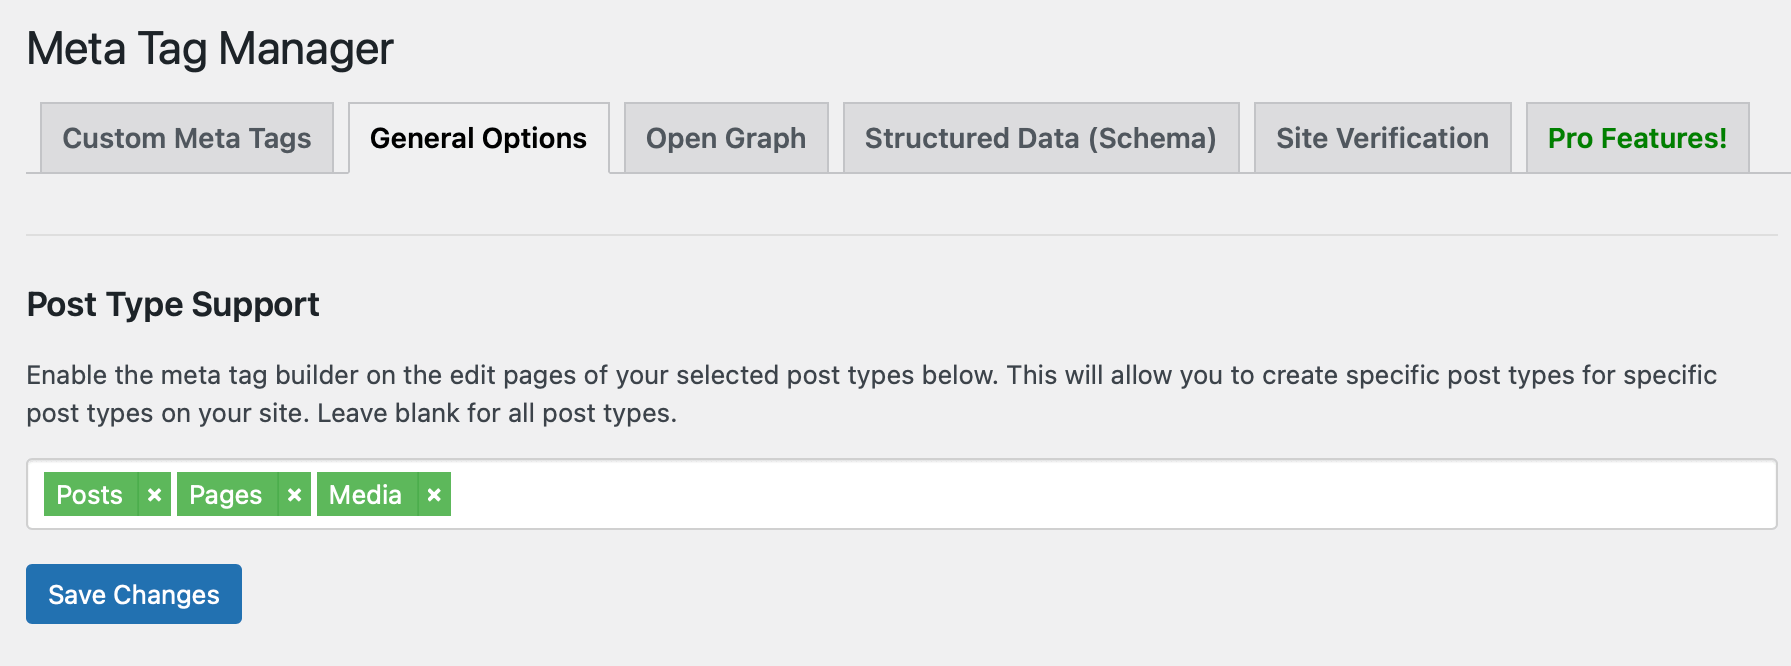
This way, you can add meta tags that will only be displayed on the specific item while you edit a post, page, or media file.
You’ll find the Meta Tag Manager meta box beneath the WordPress editor:
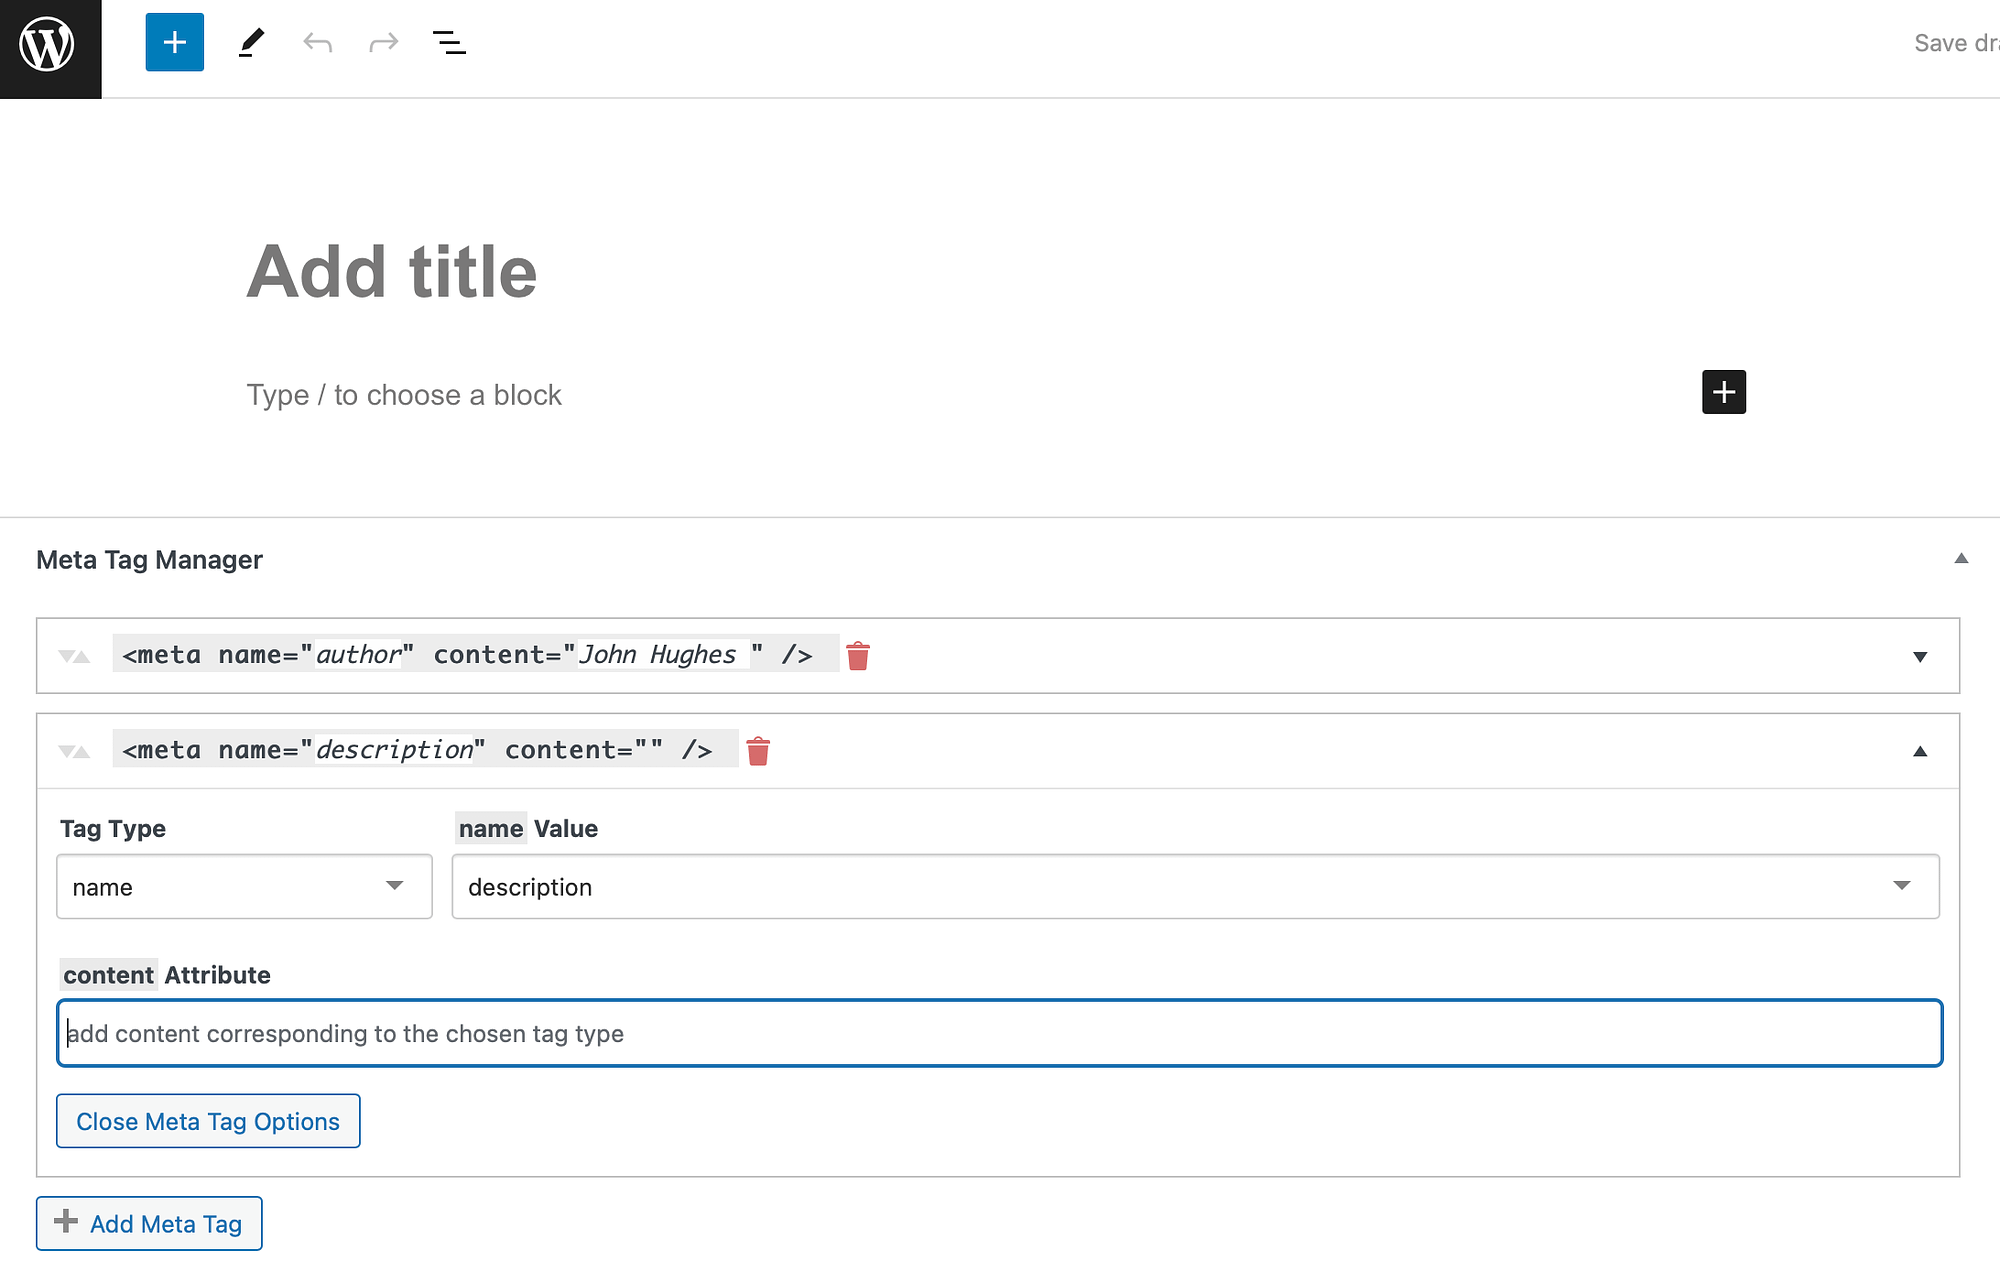
Here, you can create custom meta tags for your individual posts and pages.
3. Add meta tags using an SEO plugin 💡🔌
Most SEO plugins out there have the option to add meta tags in WordPress – at least the most common ones from an SEO point of view, which in most cases means the title and description tags.
The good thing about it is that you can also set custom tags for each piece of content on your site individually.
It’s all pretty simple to integrate as well. Let’s use Yoast SEO as an example – it’s one of the most popular SEO plugins for WordPress.
After you have the plugin installed and activated, you can visit any post or page on your site, go into editing, and look for this section beneath the editor box:
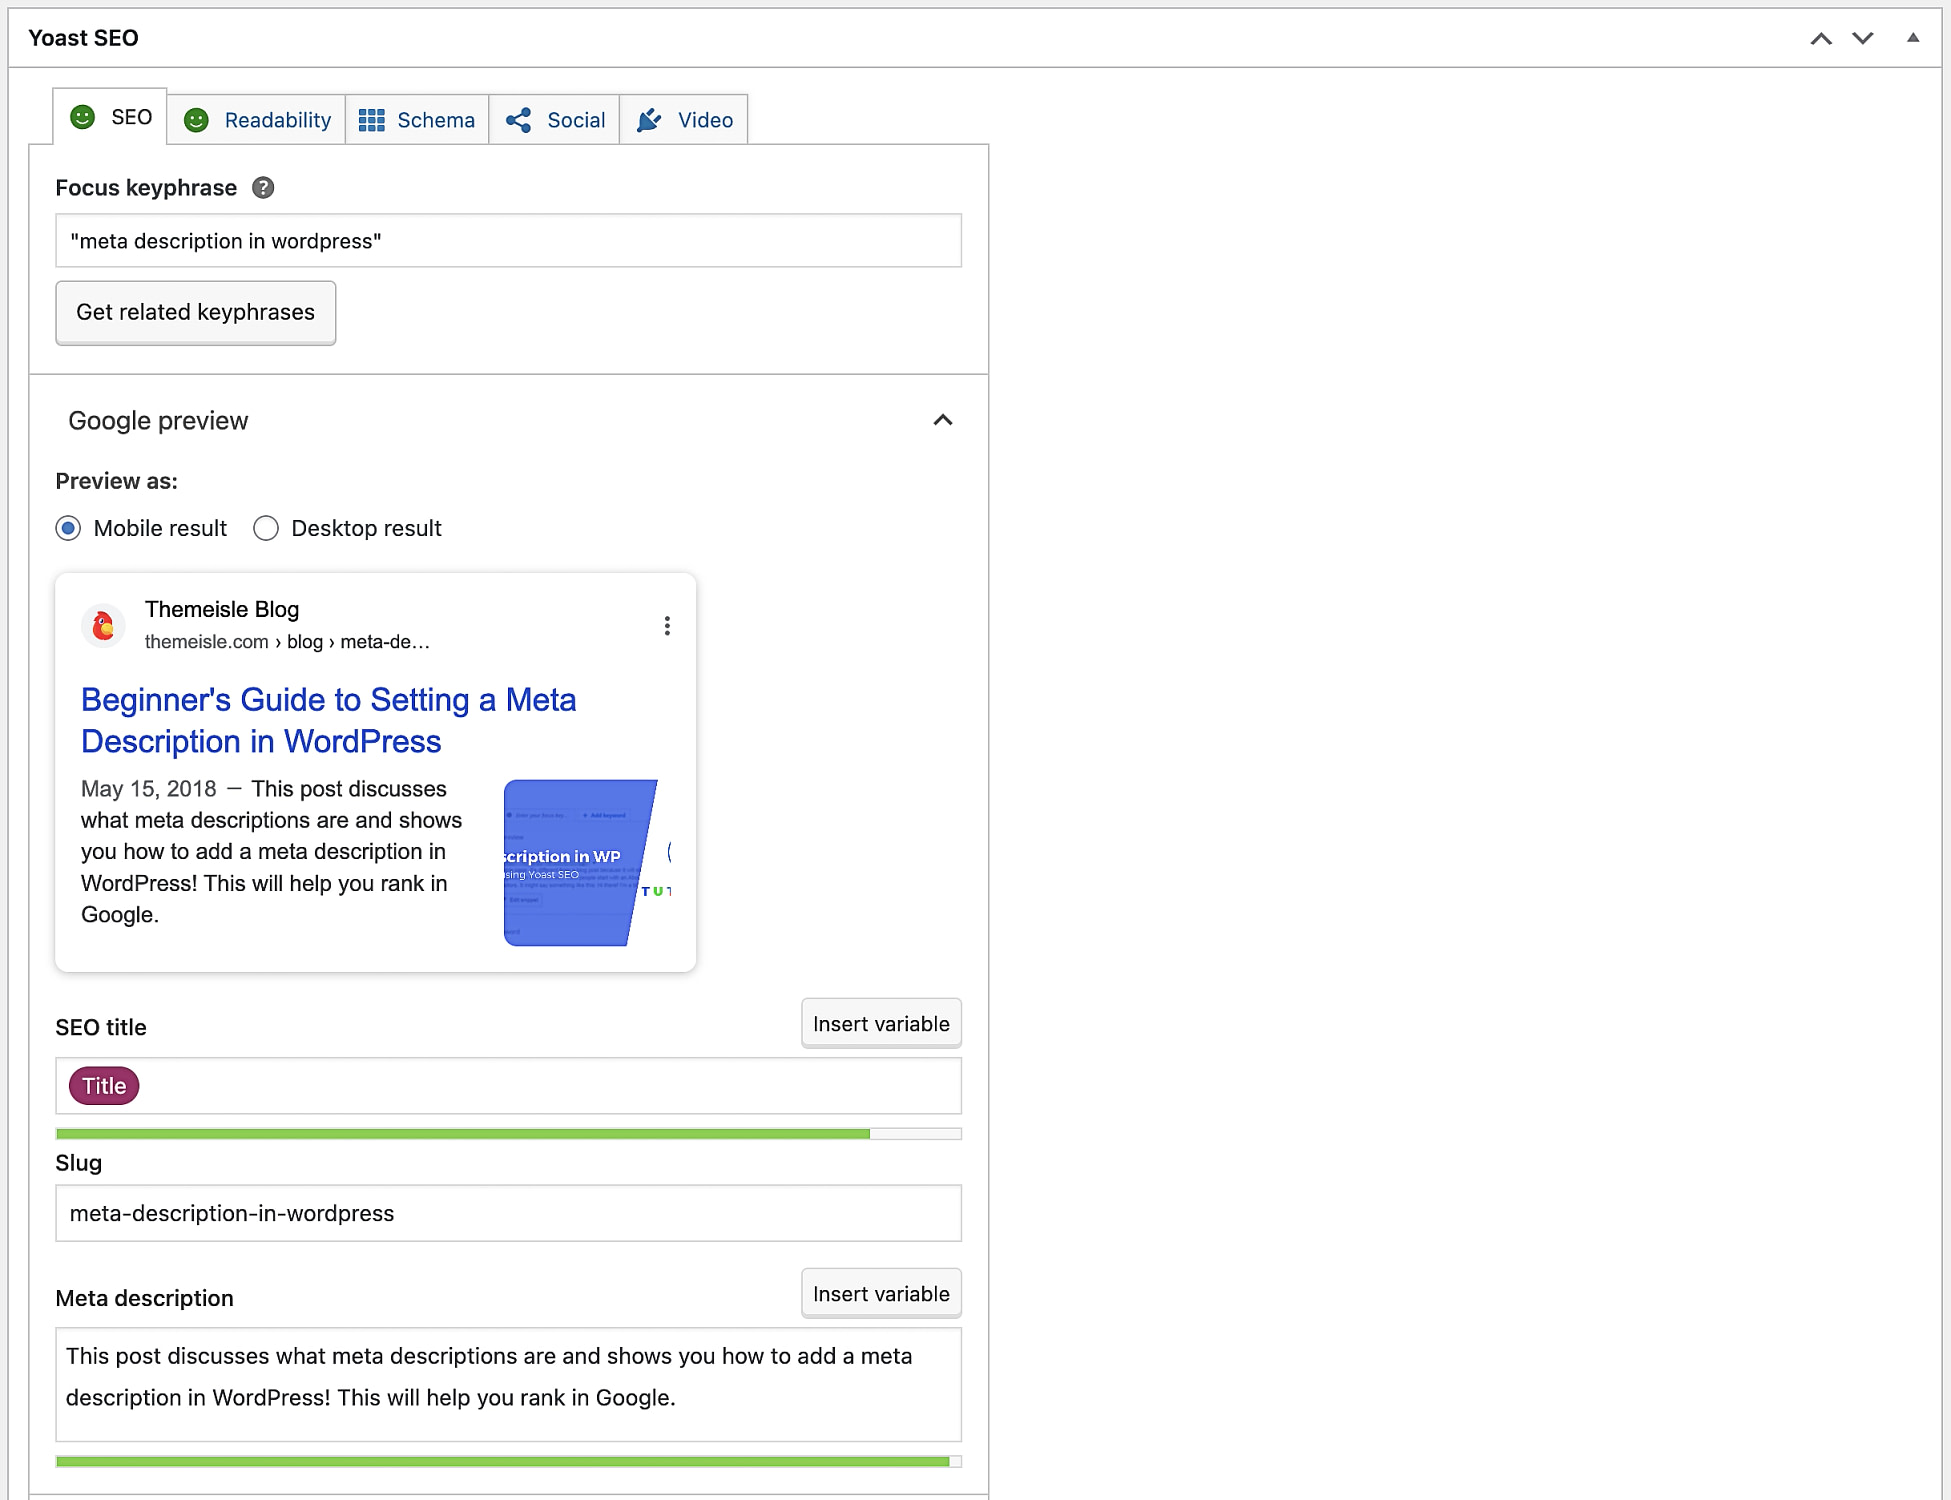
This is where you can set both the custom SEO title and SEO description of your post or page. When you’re done, just save the post normally.
If you want to learn more on how to go through this process in Yoast, read this in-depth guide.
How to optimize meta tags in WordPress
Now that you know how to add meta tags in WordPress, let’s take a look at some ways to optimize meta tags to gain higher rankings in the search results. First off, when writing meta descriptions, it’s important to consider the content length.
Typically, search engines display 120–160 characters on the results page. So it’s a good idea to aim for roughly 150 characters in your meta description.
However, you can also “front-load” your most essential content so that it’s the first thing visitors see. Plus, even if the search engine displays just 120 characters, you can ensure that the most critical details remain visible.
What’s more, meta tags provide extra opportunities to insert keywords into your pages and posts. You can find relevant keywords using a tool like Google Keyword Planner. However, since meta descriptions are so short, it’s best to incorporate your primary keyword just once to avoid keyword stuffing.
Better yet, to improve your click-through rate, it’s vital to help readers instantly understand what they’ll gain from reading your blog post or article. Plus, you can set the tone and mood for your content here, which is a great way to reflect your brand’s personality.
Conclusion 🧐
As it is, WordPress doesn’t contain meta tag data. However, it’s a good idea to add meta tags in WordPress to help search engines better understand your content. This way, your site will be easier to crawl, index, and rank.
🍎 To recap, here’s how to add meta tags in WordPress:
- Add meta tags manually by editing your
header.phpfile. - Add meta tags using a meta tag plugin like Meta Tag Manager.
- Add meta tags using an SEO plugin.
Do you have any questions about how to add meta tags in WordPress? Let us know in the comments below!