If you run an ecommerce business, it’s important to take advantage of every opportunity to help customers find your products in Google. While a strong SEO strategy may help with that, it can still be challenging to make it to the top of search results. Therefore, you might be wondering how to add products to Google Shopping.
This is highly beneficial for improving your store’s visibility. Luckily, adding products to Google shopping is pretty straightforward. You’ll just need to optimize your products, create a Google Merchant Center account, and configure your tools. 🧰
Before we dive into how you can add products to Google Shopping, let’s first understand how it works. To do that, we’ll look at an example of products featured on Google Shopping.
To access products in Google Shopping, you simply have to search for an item in Google. Then, click on the Shopping filter in the horizontal menu just above the general results:
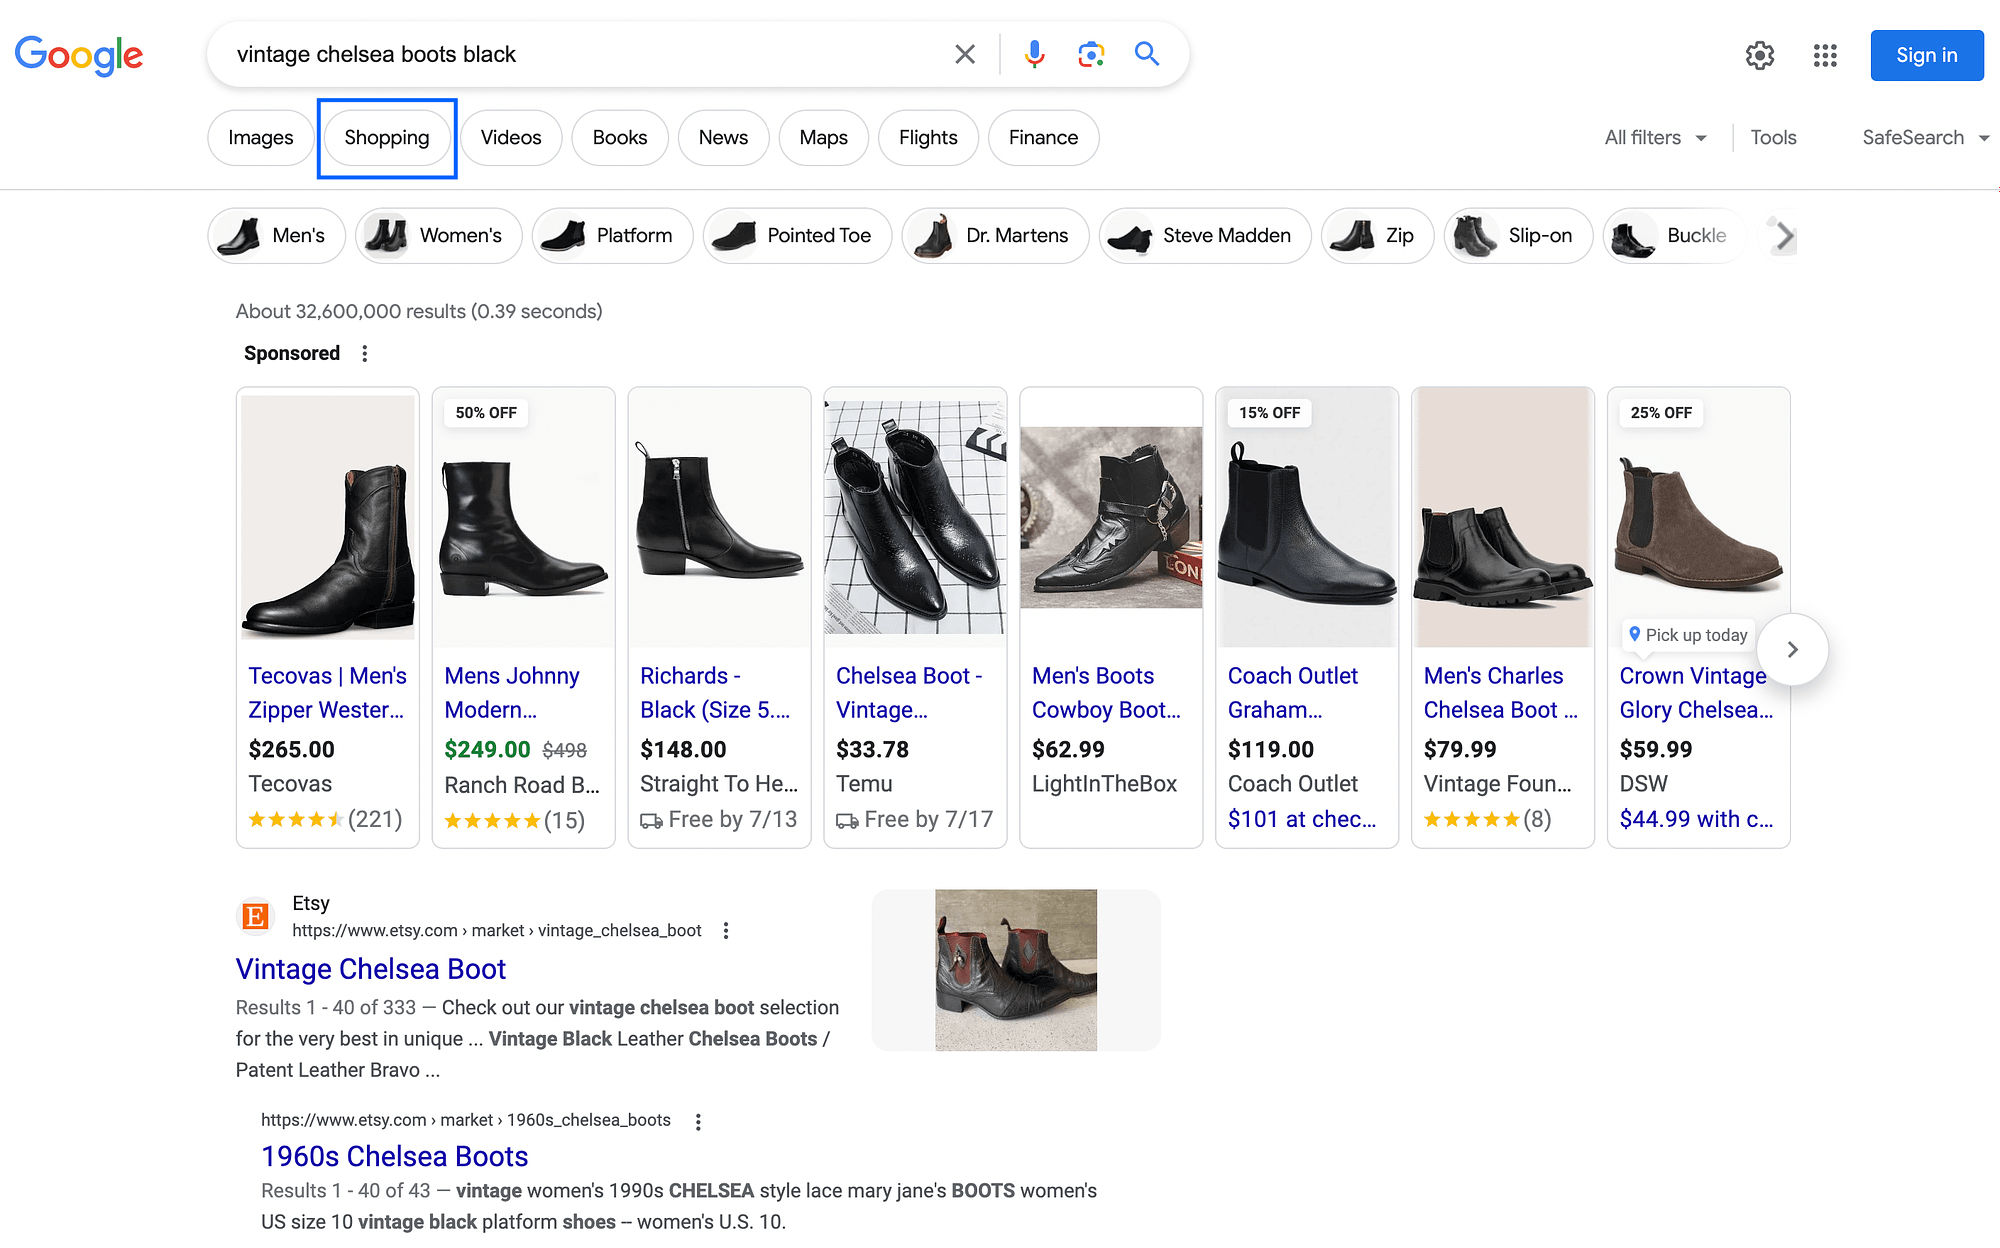
Once you do that, you should see something that looks like this:

As you can see, shoppers can filter products by color, brand, department, and more. You’ll also notice that at the top of the search results, there is the Sponsored section.
Products featured here are paid advertisements. If you’d like to know how to get your products here, you can consult our beginner’s guide on how to set up WooCommerce Google Shopping ads.
However, if you don’t have the budget for sponsored ads, don’t worry! The cool thing is, users can click through this sponsored products using an arrow.
That means, by design, paid ads can’t hog all the prime real estate on the page. All the products below this first row are being featured for free. So, in other words, when you add products to Google Shopping, you’re essentially getting them featured in a free directory.
There are tons of benefits to doing this. It can boost search engine optimization (SEO) on your site. Consequently, it can help customers easily discover your products, resulting in an increase in sales.
It’s important to note that users can also navigate directly to the Google Shopping page in order to complete a search:

They can conduct searches 🔎 and get results in the same way as the above.
How to add products to Google Shopping in WordPress (in 4 steps)
Now that you know a bit more about Google Shopping, we’re going to show you how to add products to the platform in just four simple steps!
👉 Here’s a high-level look at the process – keep reading for detailed instructions:
- Optimize your WooCommerce product images and details
- Sign up for a free Google Merchant Center account
- Install and configure the Elex WooCommerce Google Shopping plugin
- Submit your feed to Google Merchant Center
1. Optimize your WooCommerce product images and details 📈🖼️
Once shoppers actually click on a product in Google Shopping, they’ll see a preview of your product’s details. This will include a brief product description and a larger version of the product image:

Users can click on the View product details link for more information:

This will provide them with even more information, including a more lengthy description and reviews (if there are any).
Therefore, before you add products to Google Shopping, you’ll want to make sure they are optimized for the platform. In particular, you’ll want to make sure images are the optimal size and you’re featuring relevant keywords in the product description.
You can consult Google’s minimum requirements and make sure you fulfill them:

This way, you can ensure that your product images will be compatible with the platform.
Additionally, you may want to follow some of Google’s tips for optimizing product data. For instance, you can highlight key product details by putting them at the front of the product title.
⚠️ Make sure you complete these changes directly in your WooCommerce product pages.
2. Sign up for a free Google Merchant Center account 🧑💻
Once your WooCommerce product pages are up to par, you’re ready to sign up for your Google Merchant Center. As we mentioned, this is totally free:

To get started, just click on the Sign up for free button. If you’re not already, you’ll need to login to your Google Account:

If you don’t have a Google Account, you’ll need to create one. Then, you’ll provide some basic information about your business:

After that, you’ll see some general information about how the platform works and what you’ll need to get started:

Next, enter your business name and the country it’s located in:

On the next page, hit Continue. You’ll then see a list of tasks that you need to complete on the left:

At this point, 💡 you should complete the steps under the Add business details section and the Verify & claim website tab. However, we won’t be going to the Add products section just yet.
3. Install and configure the Elex WooCommerce Google Shopping plugin 👨💻🔧
Once you’re set up with Google Merchant Center, there are a few ways you can add products to Google Shopping. However, when you’re working with WordPress and WooCommerce, the easiest way to do this is using a plugin.
👉 Elex WooCommerce Google Shopping allows you to easily generate a Google Shopping feed:
That means you’ll be able to add products to Google Shopping automatically as you create them (as WooCommerce products).
This can be super convenient. Just keep in mind that you’ll want to make sure you continue to optimize new products (as we did in step one).
After you install and activate the plugin, you should see a new Elex Google Shopping Feed tab in the left-hand menu of your WordPress dashboard. Click on the tab and then go to Create Feed:

Fortunately, the plugin is highly straightforward. Simply follow the steps in the setup wizard:

Just keep in mind that the free version of Elex WooCommerce Google Shopping only supports simple products. That means if you have complex products with variations, you’ll need the premium plugin.
Once you’re done mapping your categories and attributes, and setting up filtering options, you’ll be able to generate your feed. It’s as simple as that!
Step 4: Submit your feed to Google Merchant Center 🖱️💵
After you’ve finished configuring the Elex WooCommerce Google Shopping plugin and generated your feed, you’re ready for the final step! All that’s left is to submit your feed to the Google Merchant Center.
To do this, go to Elex Google Shopping Feed > Manage Feeds:

Here, you should be able to see the feed you created in the previous step. Simply hit the download button (highlighted above).
After you’ve downloaded your feed as an XML, return to Google Merchant Center. Go to Products, and then click on Create a feed (advanced option) at the very bottom of the screen:

Then, follow the setup instructions for your new feed. First, you’ll need to enter some basic information like target countries and language. Next, select your listing destinations. After that, hit Continue:

Here, give your feed a name, select the Upload option, and hit Continue again:

Now, enter the name of your feed file and expand the Upload a file now (optional) section:

Click on BROWSE to locate and select the XML file you downloaded to your computer a moment ago. Then, click on Create feed. And that’s it! 😎
Conclusion 🧐
With so much competition, getting your products in front of online shoppers can be a challenge. Even if you’ve optimized your site for peak performance and geared it to the right audience, it still may be difficult for people to find your goods.
Fortunately, you can add products to Google Shopping for free. This way, your merchandise will be more likely to appear in Google’s search results. All you have to do is optimize your products and sign up for a Google Merchant Center account. Then, you can use the Elex WooCommerce Google Shopping plugin to import your products onto the platform automatically using a feed.
Do you have any questions about how to add products to Google Shopping? Let us know in the comments section below!