Learning how to build an ecommerce website with WordPress is easier than you might think. A big part of the process is using the right plugin for the job – preferably WooCommerce.
There are other things you’ll need besides an ecommerce plugin, such as great hosting. Combine that with a game plan that covers how you’ll handle shipping and payments, and you have the foundation for an amazing online store. 😎
In this article, we’ll show you how to build an ecommerce website with WordPress in a few steps. Throughout the process, we’ll link to several of our other guides in case you need more instructions. Let’s get to it!
📚 Table of contents:
Step 1: Set up WordPress
The first step you need to take when learning how to build an ecommerce website with WordPress is to install it. There are several ways to install WordPress. Which method you use will largely depend on your web host and what kind of plan you’re using.
🪐 Those methods are:
- Installing WordPress manually. This method involves downloading the WordPress core files, uploading them to your server, and running an installer. It’s only necessary if your web host doesn’t offer automatic installation options.
- Using a software manager to install WordPress. If your web host offers a control panel such as cPanel, you’ll have the option to install WordPress using a software manager.
- Using a web host that installs WordPress for you. Some web hosts will automatically install WordPress for you. This is particularly common among managed web hosts.
The easiest approach, in most cases, is to use web hosting that sets up WordPress for you. In any case, installing the WordPress content management system (CMS) isn’t complicated.
Step 2: Select an ecommerce plugin
There are a lot of ecommerce plugins you can choose from when thinking of how to build an ecommerce website with WordPress. However, the default option for most users is WooCommerce.
With WooCommerce, you can sell digital and physical products. The plugin supports multiple payment and shipping methods. It’s easily customizable and highly extendable, thanks to the hundreds of available add-ons.
WooCommerce is free. The base plugin includes all the features you need to run a successful online store. Several WooCommerce extensions require payment, but they tend to focus on advanced features most stores might not need.
WooCommerce also has the added benefit of a massive community. The plugin is so popular, you’ll have an easy time finding tutorials for anything you need to do, from optimizing product pages to creating an app for your store.
If you’re ready to proceed, go ahead and install and activate WooCommerce.
💡 Note: Check out our list of recommended WooCommerce add-ons for expanding your online store in the future.
Finally, if you find WooCommerce isn’t your style, check out some of the many other WordPress ecommerce plugins available for unique selling situations.
Step 3: Configure payment methods
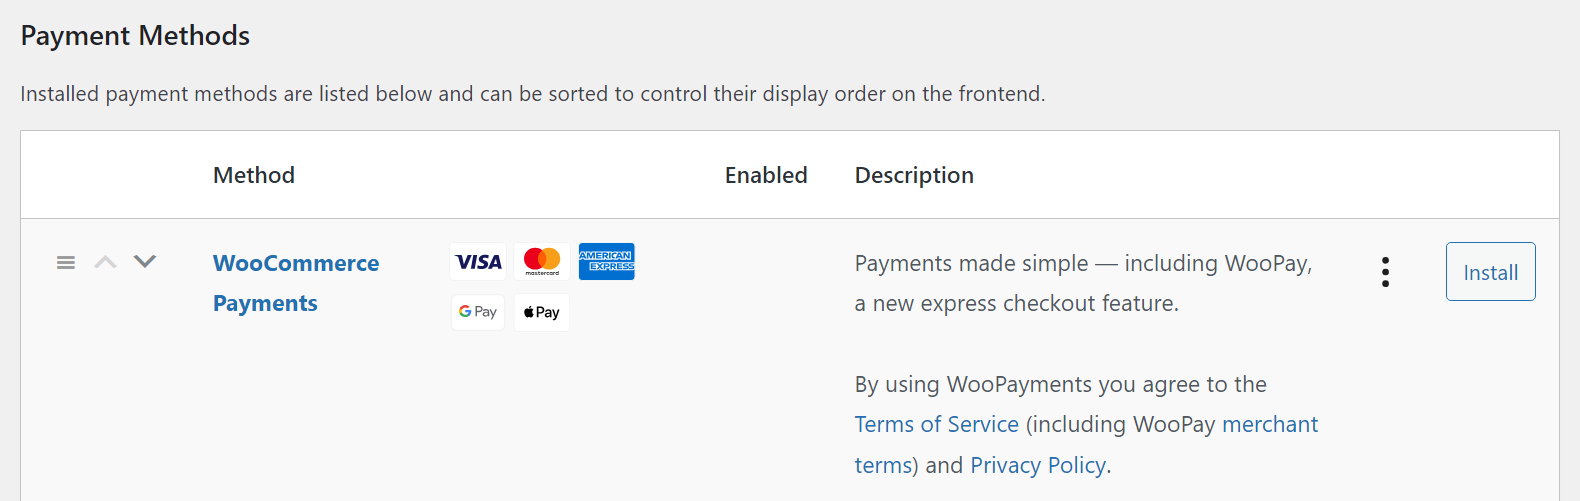
If you skip the WooCommerce setup wizard, you can configure the plugin by going to the WooCommerce > Settings page. To get started, jump to the Payments tab.
The Payments tab includes the payment methods you can use. By default, WooCommerce will want you to use WooCommerce Payments, which is their payment gateway.
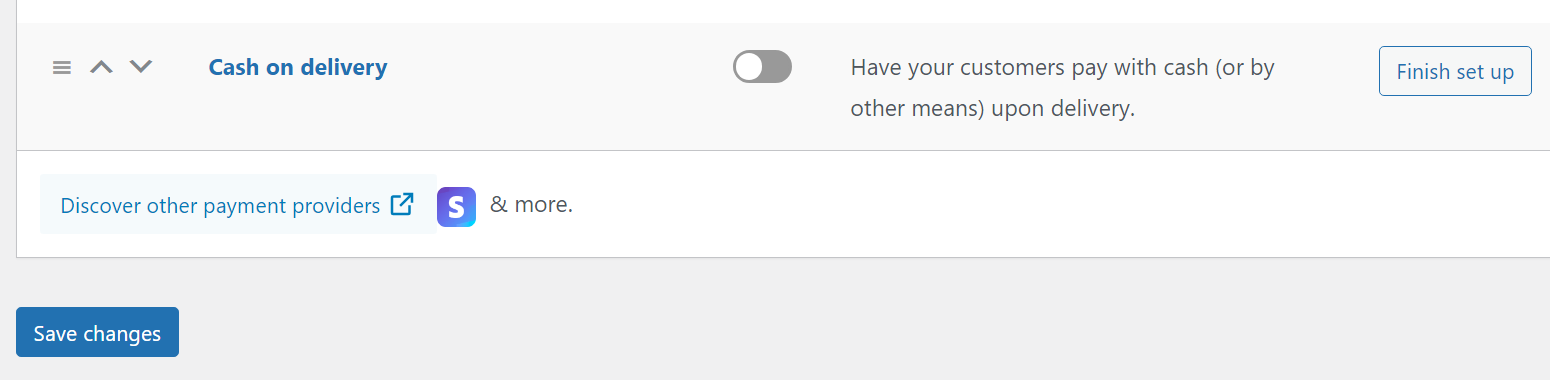
You also have the option of configuring payment methods directly instead of going through WooCommerce Payments. To do this, click on Discover other payment providers at the bottom of the screen:
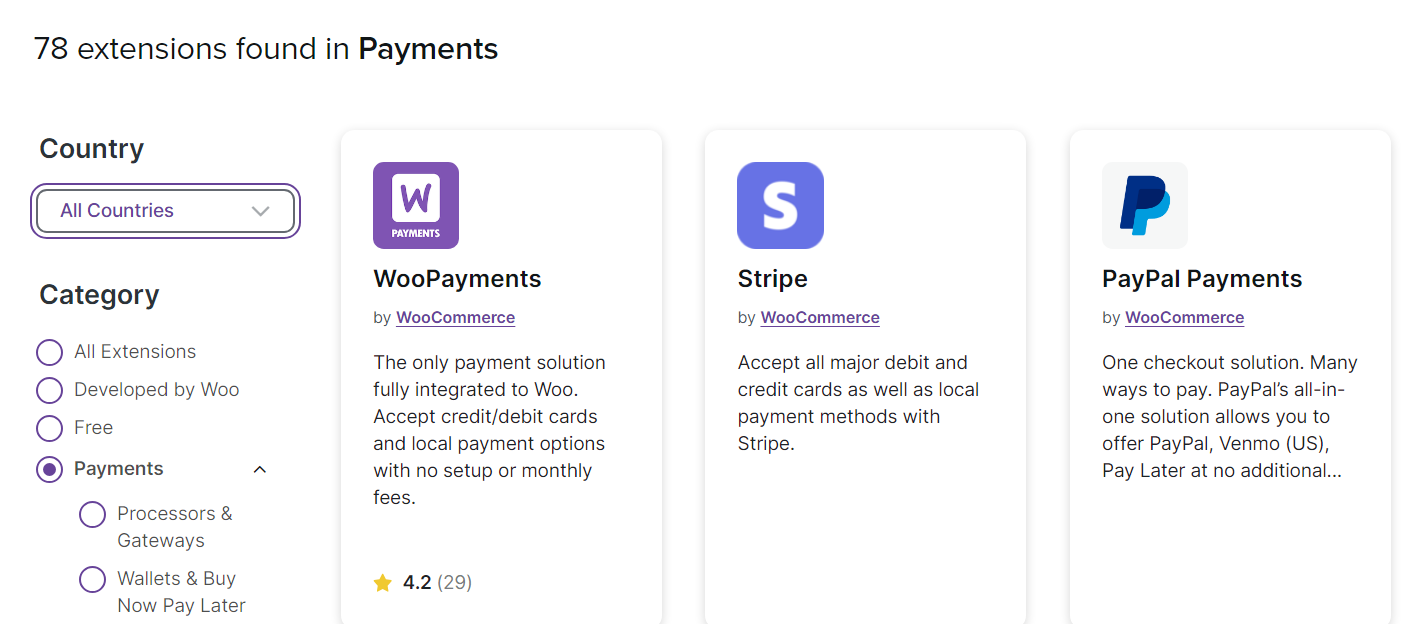
WooCommerce will take you to its extension repository. Here you’ll find free extensions for the most popular payment providers, including options such as Stripe, Square, and PayPal Payments:
Find the extension you want, download it, and upload it to WordPress. In our case, we downloaded the official PayPal extension for WooCommerce. After activating, it’ll appear under the Payments tab on the WooCommerce settings page.
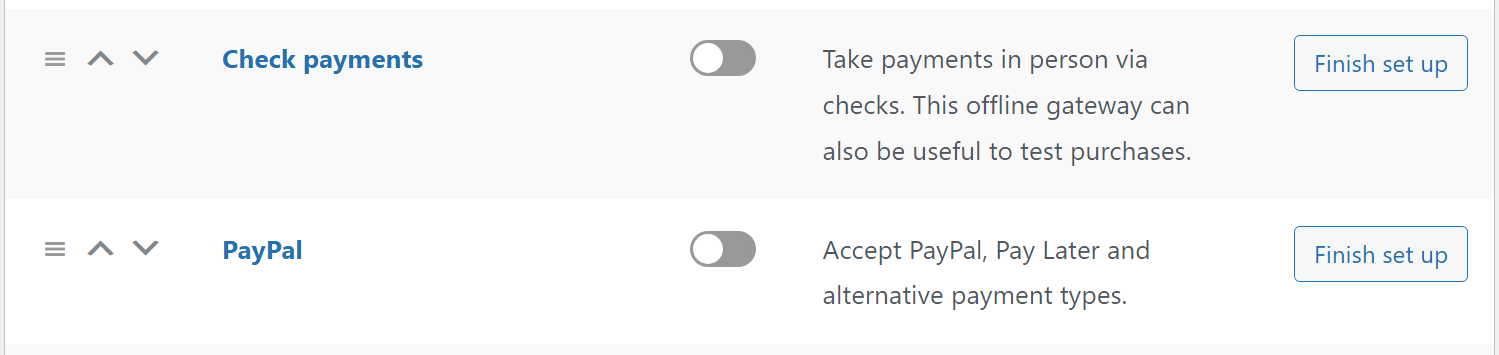
Click on Finish set up, and WooCommerce will ask you to enter your PayPal account details to start using the payment gateway.
This same process applies to any other payment methods you want to add to the store. In most cases, you’ll want to offer more than one option. Which options you pick will depend on your preferences (and those of your customers).
👉 Here are some alternative WooCommerce payment plugins to try if you need something more than the usual payment gateway:
Step 4: Set up shipping methods
A big part of managing an online store has to do with shipping. So, if you’re wondering how to build an ecommerce website with WordPress, you need to figure out how much to charge for shipping and which methods to offer depending on the user’s location.
👉 WooCommerce offers several features that help you deal with shipping. Namely, the plugin lets you choose from two types of shipping rates:
- Flat rate. With this option, you charge users a flat rate for shipping. This rate can vary depending on their shipping “zone.”
- Free shipping. WooCommerce enables you to offer free shipping for specific situations or products. For example, you can set up coupons that offer free shipping.
There’s also a local pickup option you can enable if you have a mostly local clientele. With this option, you can save on shipping costs and give customers the choice to pick up their purchase when they want.
WooCommerce gives you the option to set up shipping zones. These are regions or locations for which specific shipping rules and rates apply.
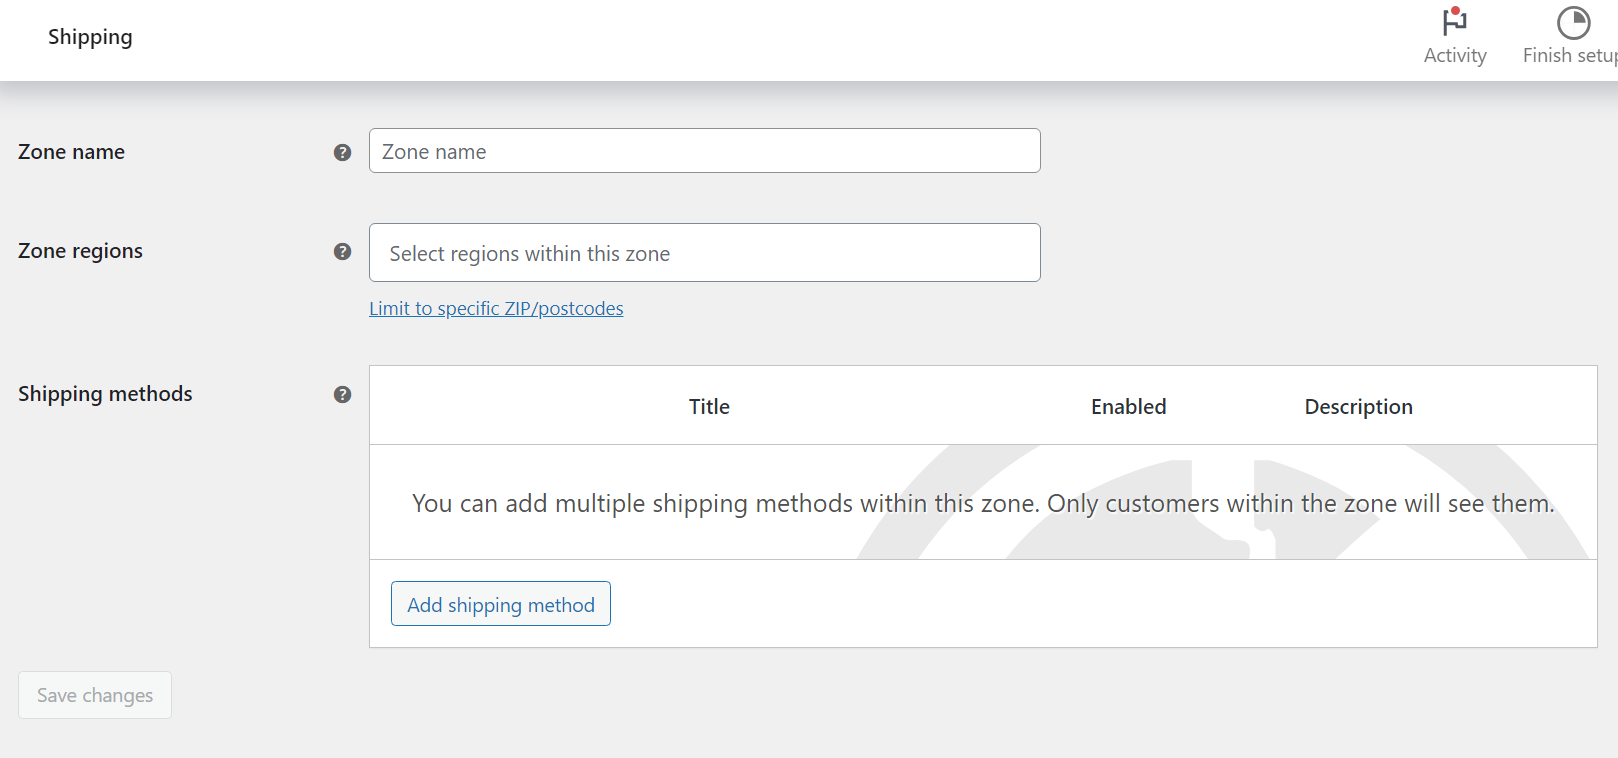
For example, you might offer one- or two-day delivery for local purchases at a flat fee. Customers that are outside the city area will fall under another “zone” and have to pay a different fee.
We have a full guide on how to set up WooCommerce shipping zones. Look at it for instructions, and go ahead and set up the initial shipping zones for your store.
For more advanced control over WooCommerce shipping (like label printing and real-time rates from USPS and other providers), consider the WooCommerce Shipping plugin along with specific carrier plugins for USPS, UPS, and FedEx. You can also check out our guide to the best WooCommerce shipping plugins on the market.
💡 Note: You can disregard shipping zones if your store will only sell digital products.
Step 5: Configure your store’s taxes
Another important step you need to take when figuring out how to build an ecommerce website with WordPress is to configure your store’s taxes. Before you sell products online, you need to stop and consider taxes. Which taxes you’re subject to will depend on where you’re located and what products you’re selling.
If you’re not sure what you should charge in terms of taxes, we recommend you check it out right now. Consult a local accountant if you can’t find the information online, but don’t start selling without taking taxes into consideration.
To enable tax calculations in WooCommerce, go to WooCommerce → Settings → General. Look for the option that says Enable taxes:
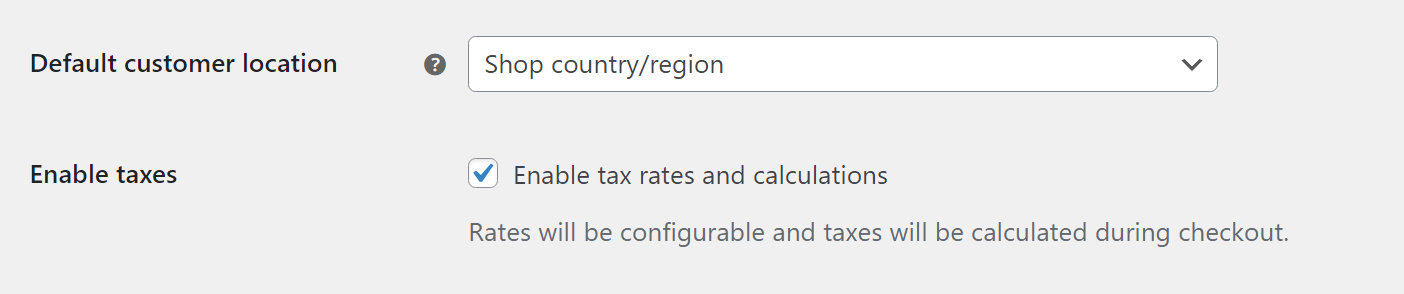
A new Tax tab will appear at the top of the screen; click on it, and you’ll get to decide whether to include taxes as part of prices or not show them until checkout:
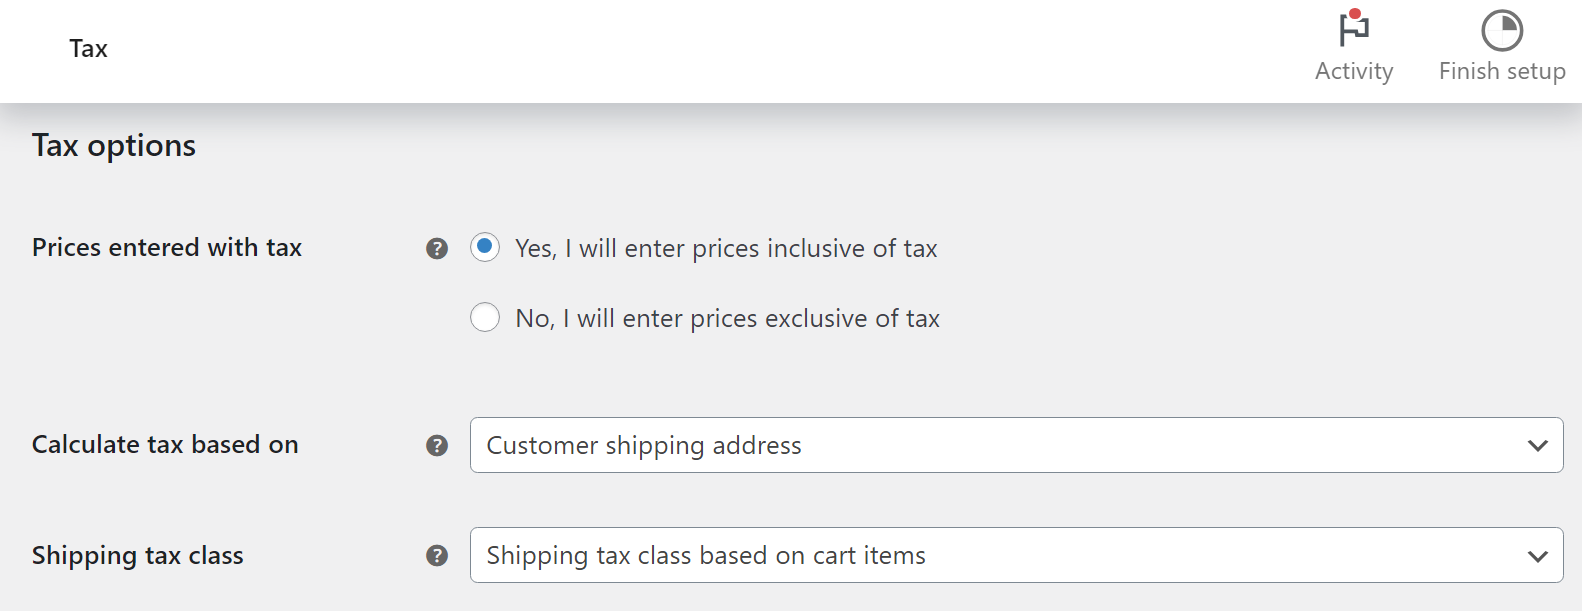
You can also configure whether to calculate taxes based on customer addresses or your store’s location.
Moving on, you can go into the Standard rates, Reduced rate rates, and Zero rate rates to configure tax rates for specific locations. WooCommerce lets you set unique rates for different locations if taxes vary based on where customers are located.
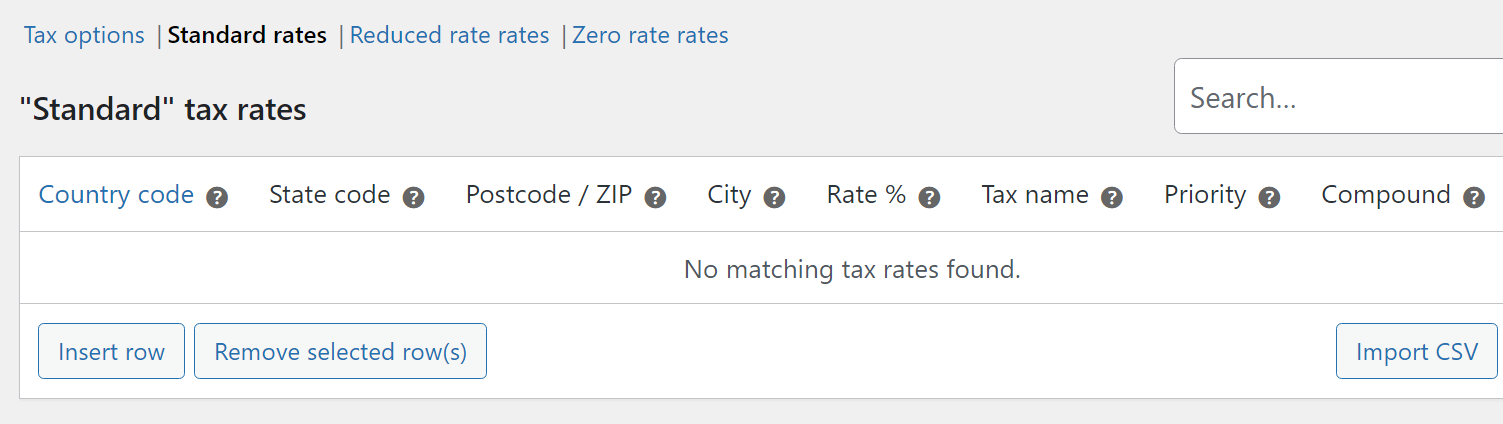
The core tax features of WooCommerce require a significant amount of manual work. If you’d rather streamline the process, install a free WooCommerce tax extension like WooCommerce Tax or WooCommerce Shipping and Tax. Both provide an option to automate tax calculations by country, state, or city.
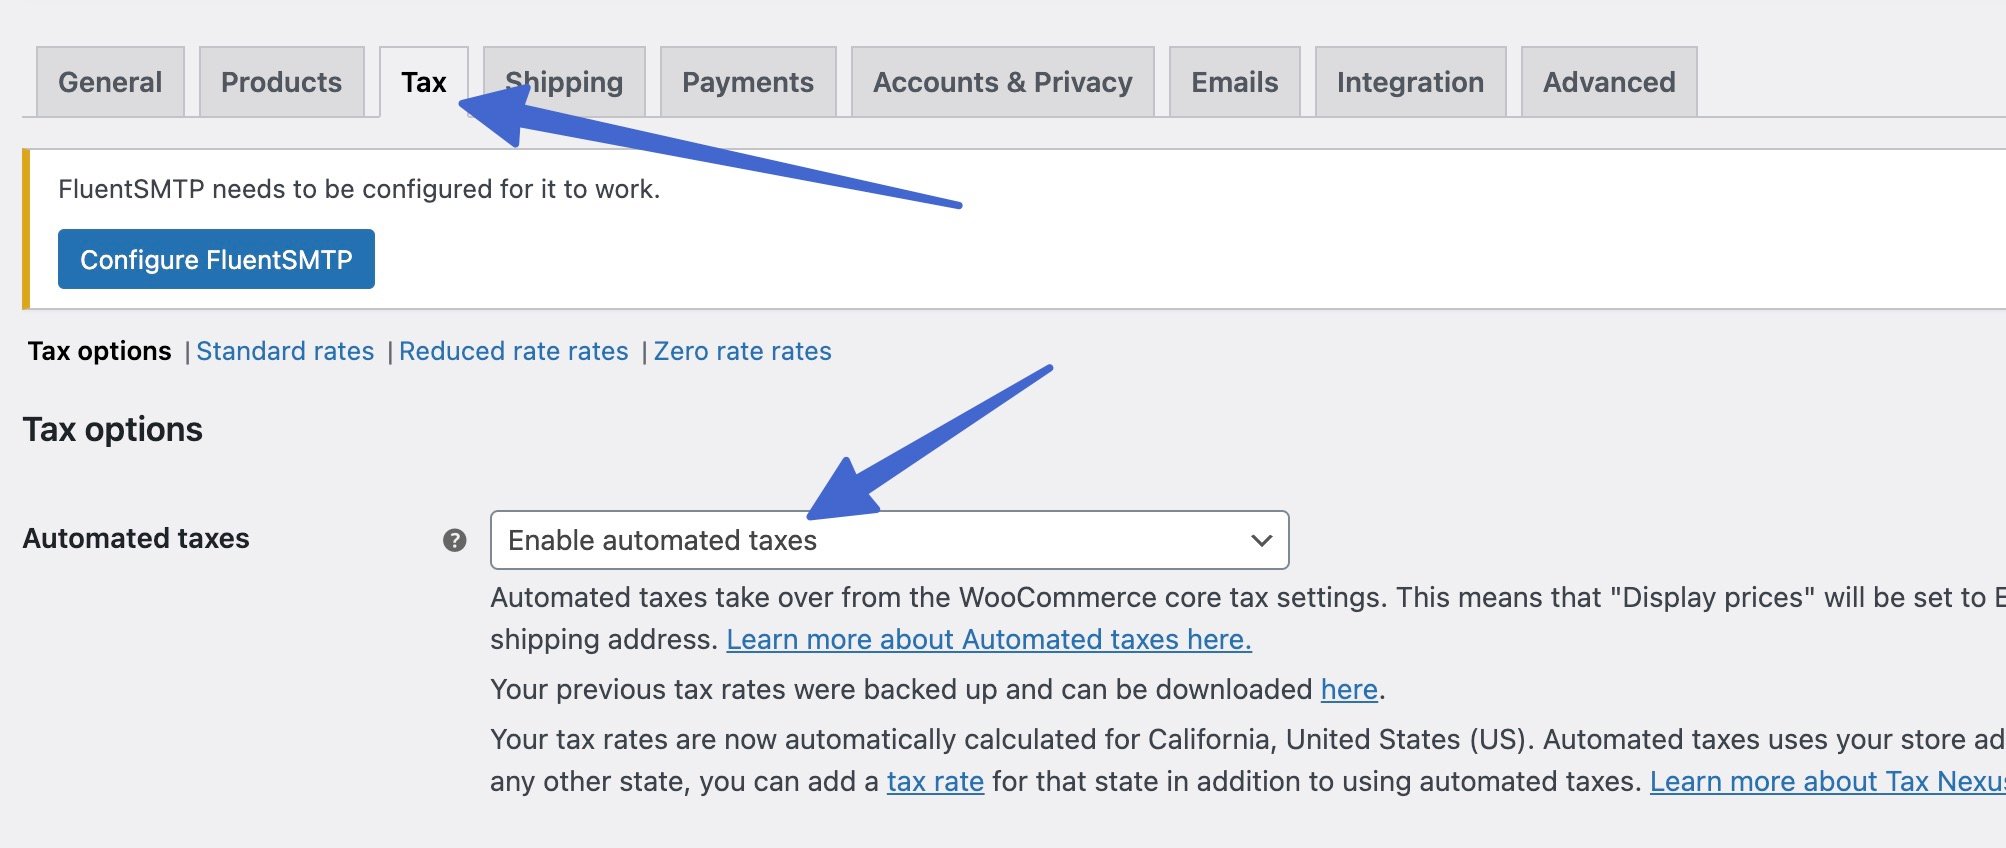
After you’ve installed one of those plugins, go to WooCommerce → Settings → Tax, then choose Enable Automated Taxes.
This guide on how to configure WooCommerce taxes covers everything else you need to know. It includes information on setting up rates for US customers and other plugins you can use to help you with taxes.
Step 6: Choose a theme for your ecommerce site
Choosing a theme for a WordPress site is always a challenge. This goes double for ecommerce sites since you need to consider additional sets of features.
Whichever theme you choose needs to be compatible with WooCommerce. That means it should include product and shop pages, as well as other elements you’d see on an ecommerce website.
If you plan on using a page builder (which we’ll discuss next), the theme also needs to be compatible with it. This will make it easier for you to build custom product pages and other sections for your store.
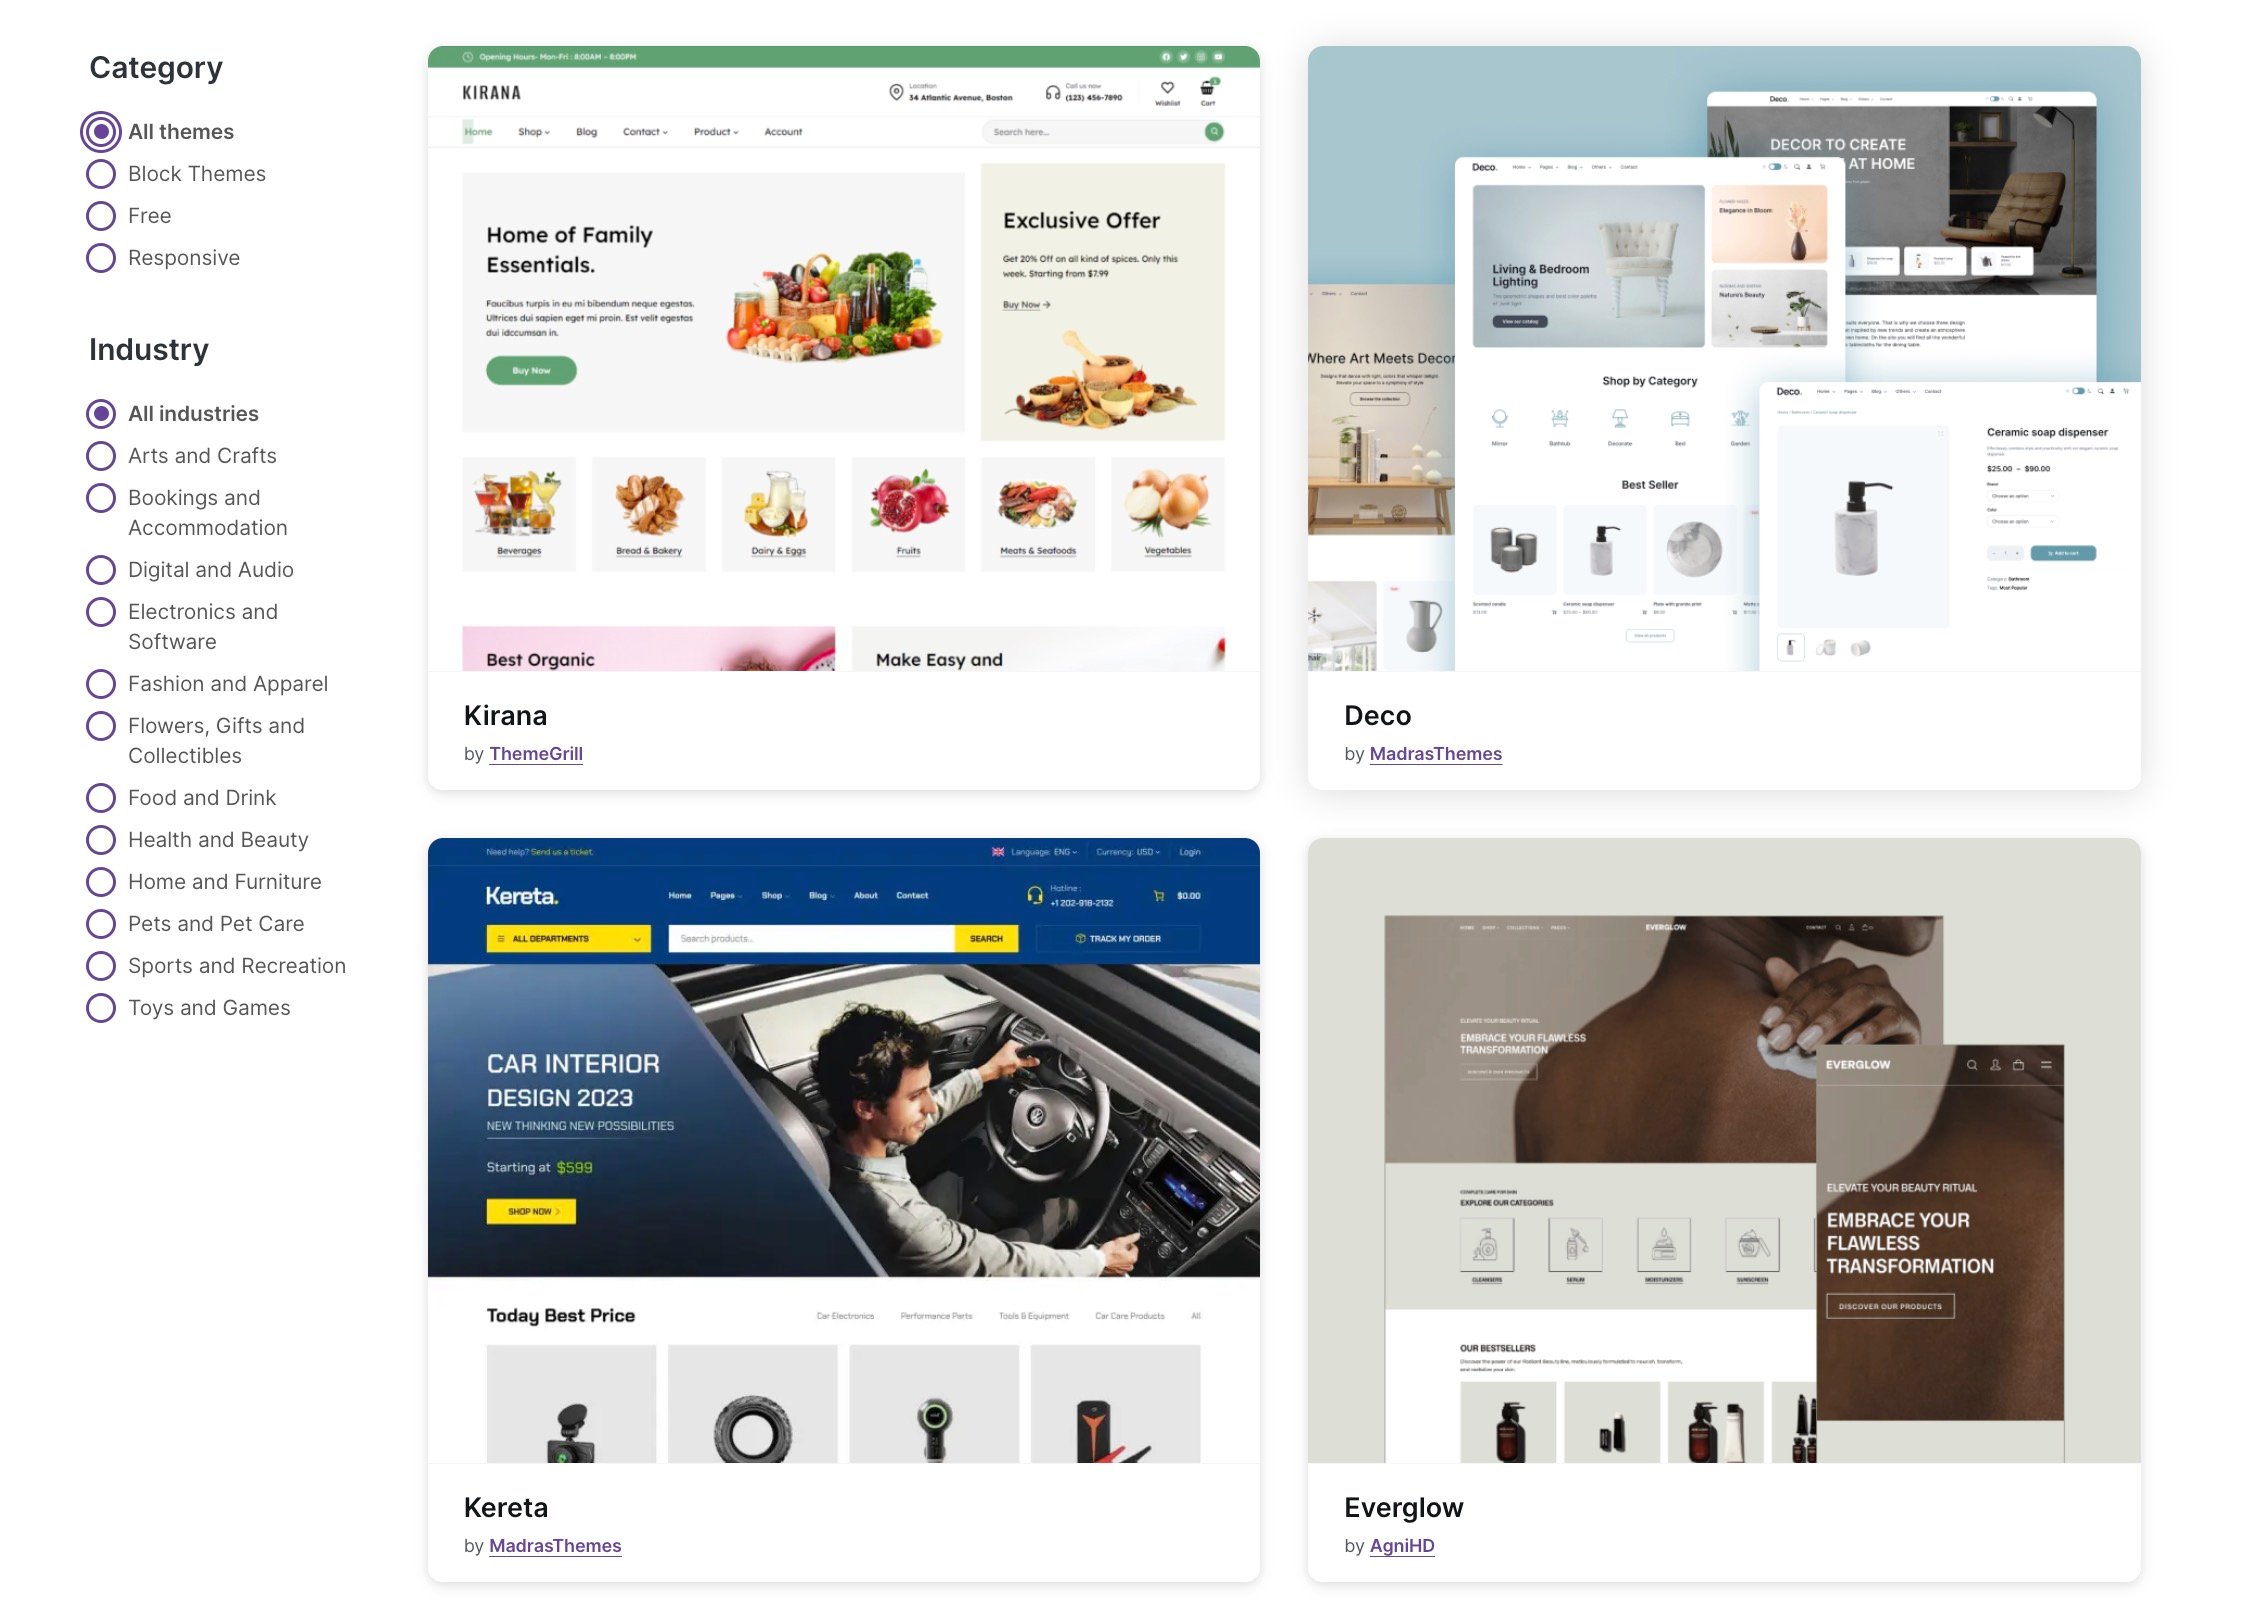
👉 Since choosing the right theme is hard, we went ahead and rounded up some of the best picks for WooCommerce. Plus, here’s a guide on how to choose the right theme for your WooCommerce store:
- Choose the right WooCommerce theme
- Our favorite free WooCommerce themes
- A review of the “official” WooCommerce theme, Storefront
If this is your first time using WooCommerce, stick with a free theme. Before you spend any money on premium themes, we recommend getting to know WooCommerce and how it works. That way, you’ll know what features you’re looking for in a theme if you decide to switch down the line.
Step 7: Use a page builder to design the store
At this point, you have all the components of a working ecommerce website. There’s WooCommerce and WordPress powering it all, a theme that works with your site, and payment, shipping, and tax settings all set up.
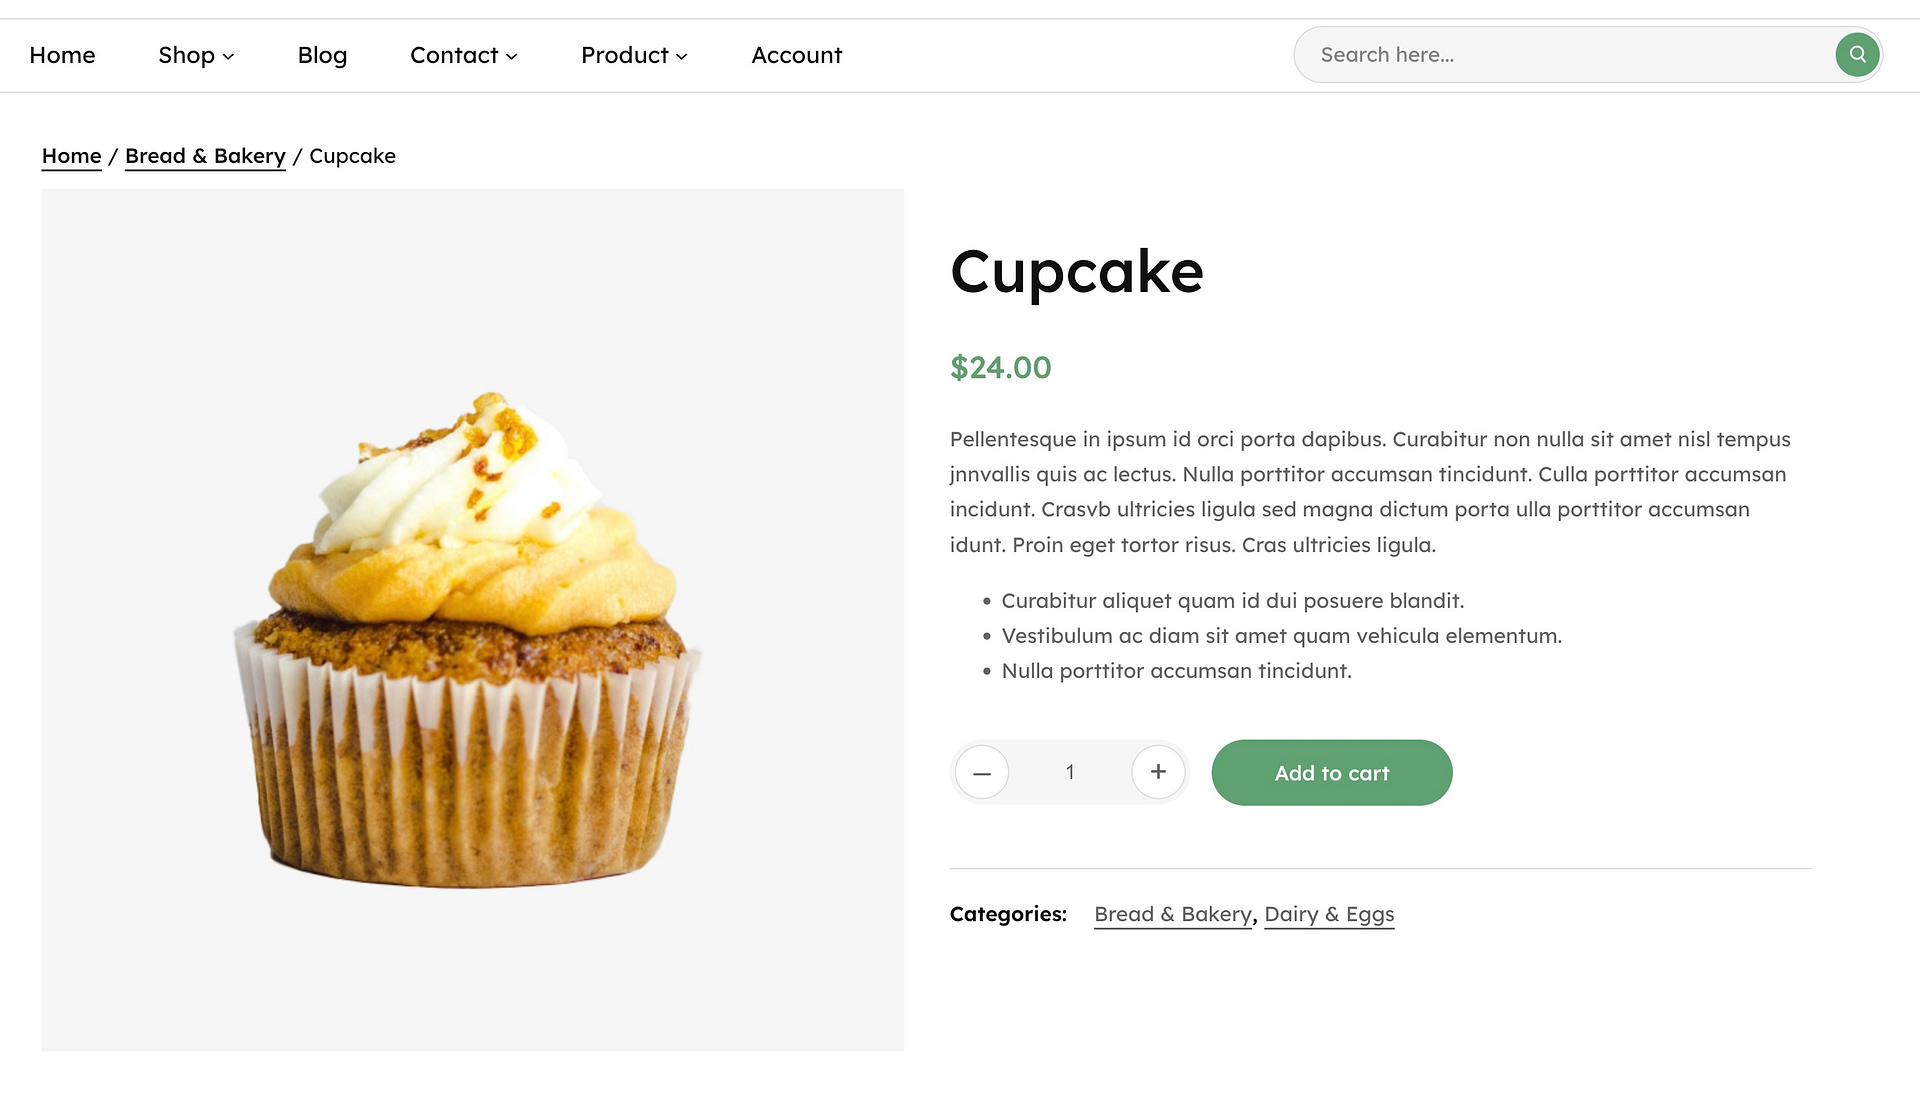
There are two steps to go now. The first is to get to work on your store’s design. WooCommerce will automatically set up Shop, Product, Cart, and Checkout pages for you. However, you still need to create a homepage, tweak your site’s design, and make sure everything looks just the way you want it to.
If you’re new to using WordPress, and to building websites in general, your best bet is to use a page builder plugin. These are tools that enable you to create pages using pre-built elements and drag-and-drop functionality. Our recommendation for the job is Elementor (read our review of the plugin):

👉 Elementor is easy to get started with. We encourage you to tinker with the page builder on your own, but also check out these guides to get you started with Elementor and other page builders:
- Build an Elementor landing page. Here we show you how to create a landing page using Elementor. You can apply this knowledge to make a homepage for your store.
- Create WooCommerce product pages. If you want to change how product pages look on your site with Elementor, this guide will show you how to do it.
- Make a WooCommerce “Thank You” page. This is ideal for customizing the look of your “Thank You” page and getting customers to come back.
- Customize the WooCommerce “Login” page. Add branding and other fields to the login page used by admins and customers.
- Designing the WooCommerce “Checkout” page. WooCommerce hardly lets you customize the “Checkout” page with its core features, so this tutorial teaches you how to get around that.
- How to make a beautiful WooCommerce “Shop” page. Learn to generate a “Shop” page that not only shows all your products but also helps customers navigate.
This process of designing your store will take you a while. There are a lot of features and tools you can tinker with when using Elementor and you’ll need time to get your store’s pages to look exactly how you want them to.
Our recommendation is, don’t rush building your store. You can always make changes to its design down the line, but you want it to look good as soon as you start publishing products for sale.
Step 8: Add products to the store
All that’s left to do now is to get to work adding products to WooCommerce. The plugin makes it easy to add products, and we have a full tutorial on how to do it. You can find the link to that tutorial below as well as other guides for optimizing WooCommerce product pages:
Setting up products can be time-consuming if you’re planning on selling a lot of different items. To speed up that process, consider bulk importing and bulk editing plugins for WooCommerce.
Our conclusion on how to build an ecommerce website with WordPress 🛍️
We hope this tutorial will ease the process of learning how to build an ecommerce website with WordPress. Although WordPress is not an ecommerce solution, it can be one if you use the right plugin. WooCommerce is the obvious choice for most people. It supports digital and physical products; you can configure it to use multiple payment gateways; and it can handle shipping and taxes.
Once you install WordPress and WooCommerce, it’s just a matter of configuring the plugin and getting to work on building the pages your store needs (Elementor can help here). When you’re ready, you can start adding products to the store, and then it’s all a matter of finding customers. 🙋♂️🙋♀️
Do you have any questions about how to build an ecommerce website with WordPress? Let’s talk about them in the comments section below!