Are you wondering how to change the WordPress login URL on your website? If so, you’ve come to the right place.
In this article, we’ll discuss the complete process of changing the WordPress site’s default login page URL.
Among the various security measures for WordPress, one of the most important is to change WordPress login page URL because of its easy access.
When you change the wp-admin URL of the WordPress site, you add an extra layer of security to your site.
So, make sure you read this article to the end to find the best solution to change WordPress login page for your site.
Let’s start!
Why Change WordPress Login URL?
WordPress is the best content management system (CMS) for anyone who wants to launch a site on the Internet.
It’s loved and adored by users as it’s beginner-friendly and allows you to build your website with no hassle.
Although WordPress is free, it has disadvantages in terms of security.
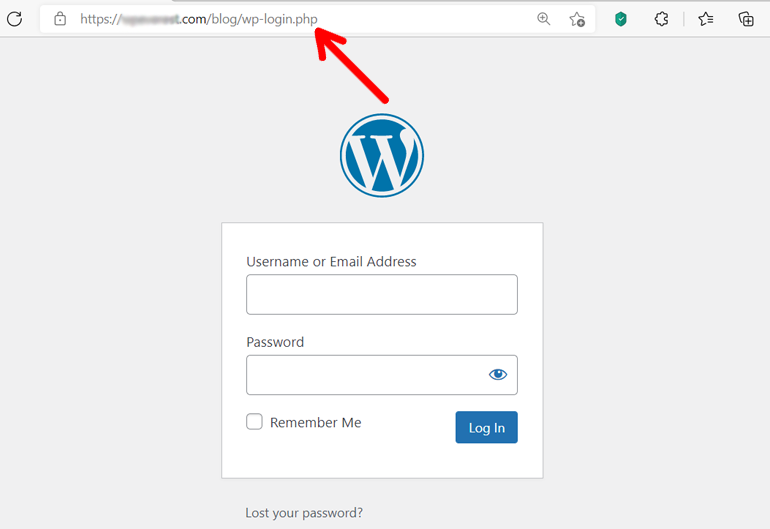
Every WordPress site’s default login page URL is either yourwebsite.com/wp-admin or yourwebsite.com/wp-login.
These URLs are known to everyone, including hackers, bots, and other attackers. Hence, when they access the login page, it’s easy for them to access your site because all they require is your password.
And talking about passwords, most sites use weak passwords. So, considering this, attackers have a high chance of getting into your site through the default login page.
Thus, when you change wp-admin URL to a custom URL, hackers will find it difficult to access your login page, which eventually improves your WordPress site’s security.
The custom login page can also improve the user experience. You can customize the WordPress login page to fit your site’s theme or brand.
With that said, let’s explore how to find the login URL.
How to Find Default WordPress Login URL?
Before discussing the steps to change WordPress login URL, you must first know how to find the WordPress login URL.
As we discussed in the above section, the default WordPress login page is found by adding /wp-admin/ or /admin to the end of your site’s domain name.
For example, if your domain name is www.abcd.com, your login page URL would be www.abcd.com/admin or www.abcd.com/wp-admin.
Another method for finding your WordPress site login page is by adding /wp-login.php at the end of your site’s domain name.
For example, if your site’s domain name is www.xyx.com, the login page URL is www.xyx.com/wp-login.php.
This method works for most sites. Thus, anyone can access your login page URL using these methods. That’s why we’re recommending to change WordPress login page URL.
So, use the methods mentioned below to change wp-admin URL or disable WordPress wp-login.php.
Methods to Change WordPress Login URL
WordPress plugins are handy when adding functionality or modifying the existing functions of a WordPress site.
Using the plugin is the best bet for even to change WordPress login URL to a custom URL.
Although the plugins don’t guarantee complete security against hackers, they do provide an extra layer of security to your WordPress site.
Some plugins you can use to change WordPress login URL are User Registration, WPS Hide Login, and iThemes Security.
1. How to Change WordPress Login URL Using Plugin?
Among various WordPress plugins used to change wp-admin URL to something else, we’ve chosen User Registration.
It’s the best and most user-friendly plugin for beginners and experts. The User Registration plugin effortlessly allows you to rename the login page on your WordPress site.
Besides, it comes with a My Account and Registration page with a built-in form for registering users. The plugin also allows you to create a custom user registration form in WordPress.
Here’s how to use User Registration to change WordPress login URL.
Step 1: Install and Activate User Registration
First of all, you’ve to install the plugin on your WordPress site. To do this, log in to your WordPress dashboard and go to Plugins >> Add New.
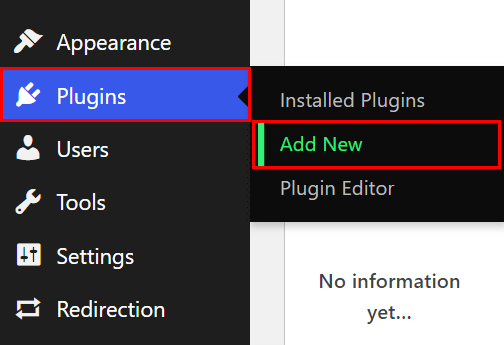
From here, go to the search bar and search for the User Registration. When the plugin appears in your search results, click the Install Now button.
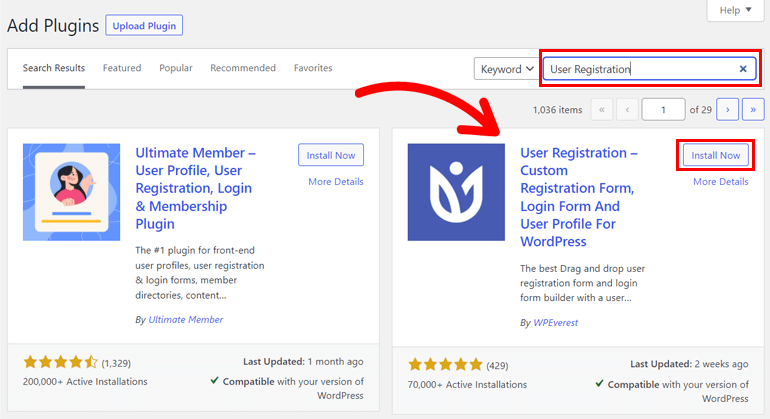
Immediately when you see the Activate button, hit the button to activate the plugin on your site.
In the meantime, you should turn on the Membership option on your WordPress site to allow users to register.
To perform this, navigate to Settings >> General Settings on the dashboard and check if Anyone can register. Now, hit on the Save Changes button at the end.
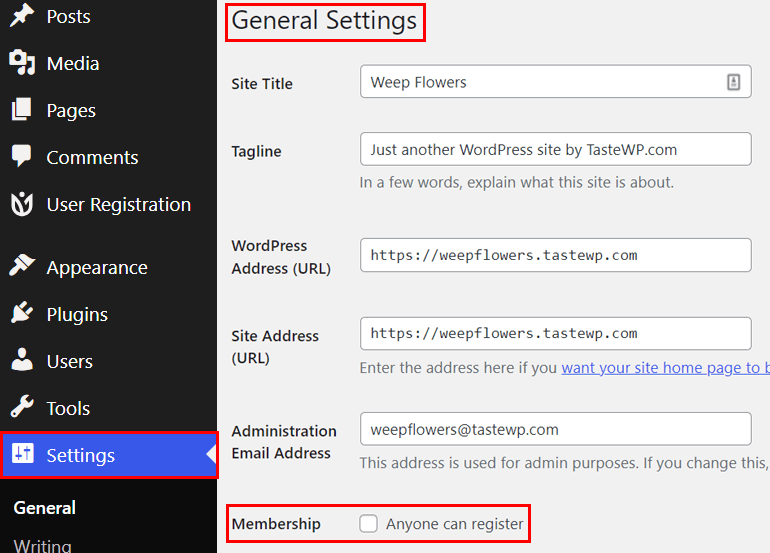
If you don’t want users to register from the frontend form, you can uncheck.
Step 2: Install User Registration Pages
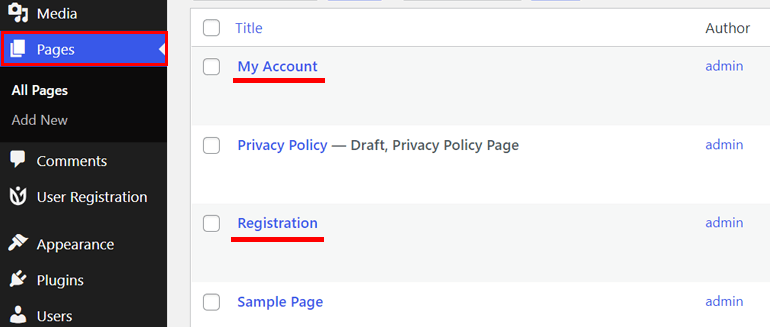
Since you’ve completed the activation, a new notice appears at the top, offering the option of installing User Registration Pages.
It has a built-in My Account page and Registration page, as we mentioned above.

Hit the button, and you’ll have those pages on your WordPress site.
Step 3: Create a Login Page for Your Site and Customize It
Since User Registration has a sample page available, you don’t need to create a new login page if you’re willing to use the sample pages.
Simply use the My Account page through which logged-out users can fill out the form to log in.
Meanwhile, we’re also showing you the steps for creating a new login page using the User Registration from scratch.
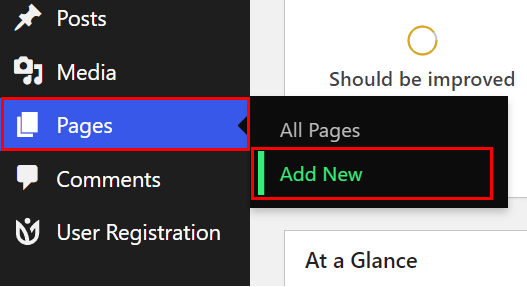
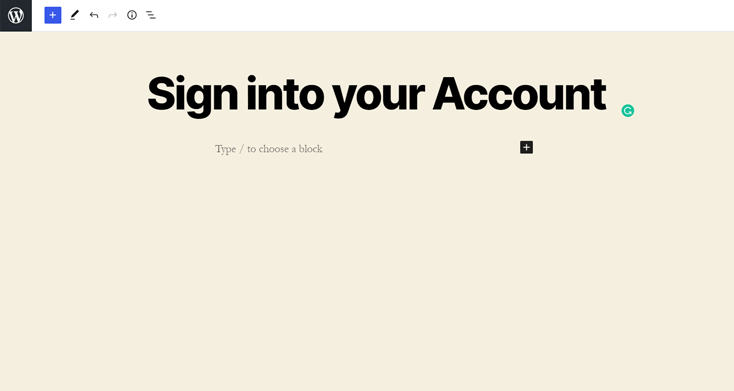
So, go to the Pages >> Add New to create a new page in your WordPress dashboard.
You’ll now be required to give the page a title. We’ve provided a title: Sign into your account, as you can see below.
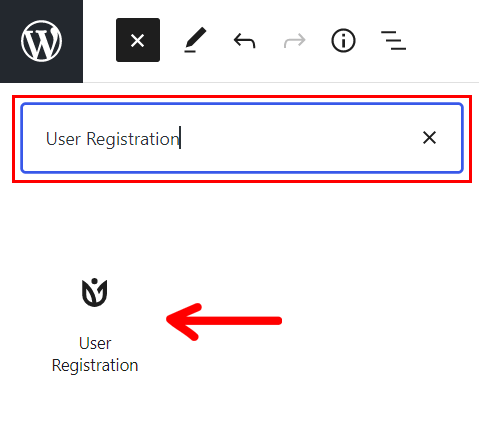
Next, click on the [+] icon to add the User Registration block.

Now, search for the User Registration block using the search bar.
The User Registration block has two options: Registration Form and Login Form. Select the Login Form from the block to build a login page. Also, using the drop-down, select the My Account Shortcode.
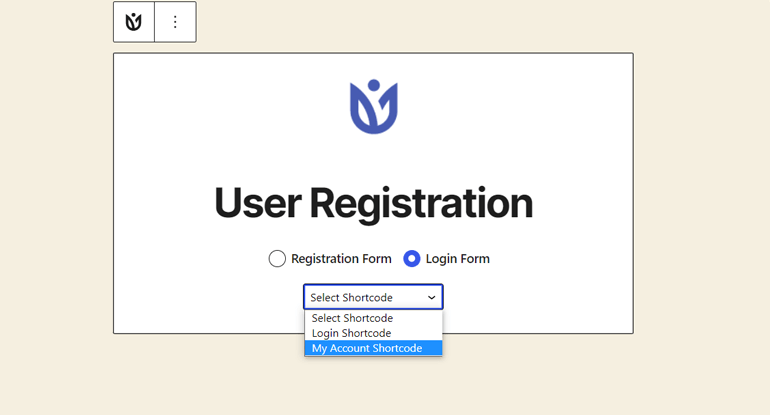
It will add the login form to your page. Meanwhile, if you’d chosen the Login Shortcode, it would display the login form but not the account for the user profile when the user logs in.
In addition, you’d require redirecting them to the user’s custom profile page.
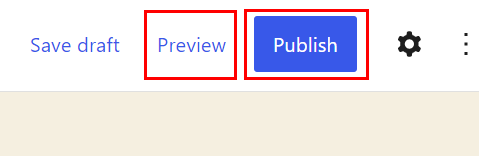
Once you’re done, publish the page by hitting the Publish button at the top-right corner. You can also preview the page by clicking the Preview button before publishing.
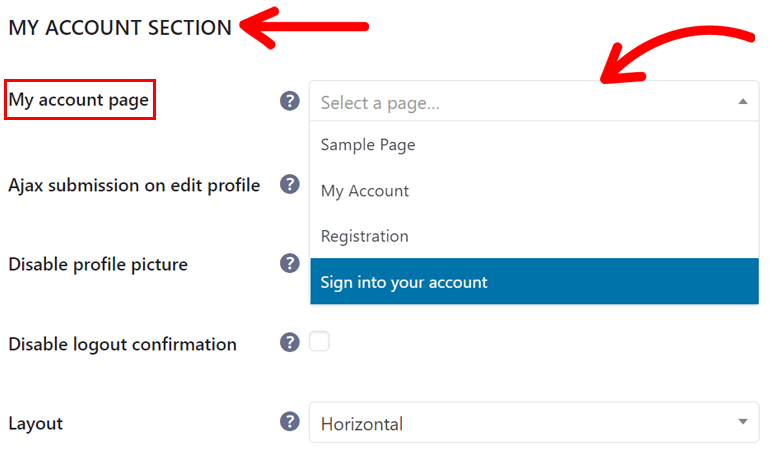
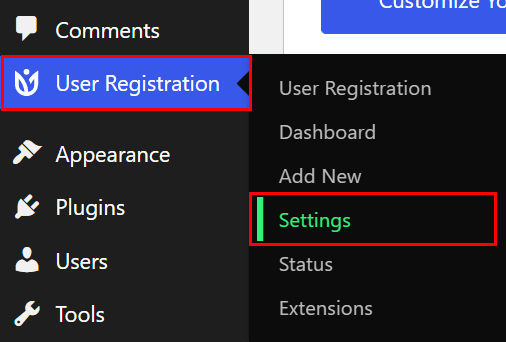
Now, go to the User Registration >> Settings and scroll down until you reach the My Account Section.
Then, use the drop-down menu on My Account to select the new login page you just created. Again, remember to save the changes.
If you’re curious to see how your page looks from the front end, navigate to Pages >> All Pages. Next, hover over the page you created and click on the view.
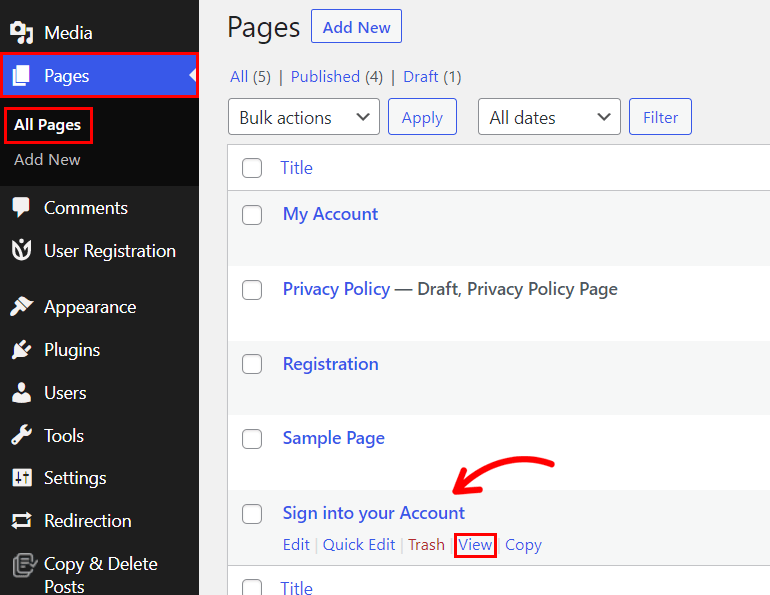
You’ll see the new login page with the admin’s user profile. It’s because you’ve been logged in as an admin of your site. For those who haven’t logged in, the page might look like this:

Meanwhile, you can access this page using the manual URL or by adding it to your site’s menu. To edit the URL, simply open the page and go to the page settings at the top-right corner.
Now, scroll below to find the URL Slug. From here, you can edit the URL of the page.
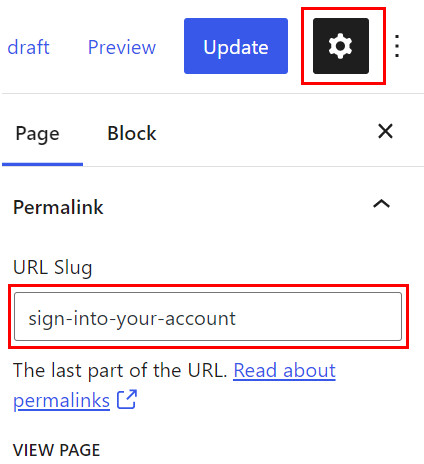
Update the page after you finish the task.
Step 4: Configure Login Options Setting
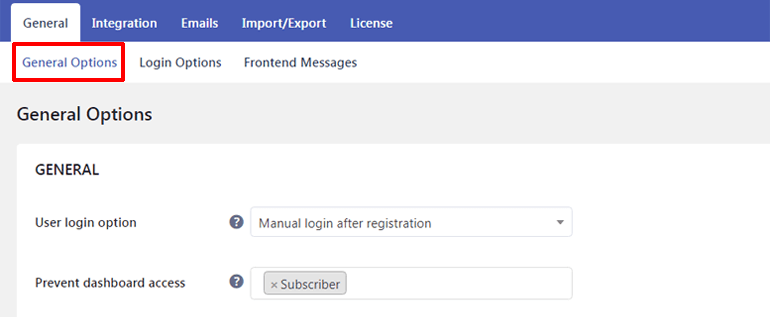
At this point, you’ll now be required to configure the settings through User Registrations >> Settings.
The General Options lets you define who can’t access the dashboard, provides the option to hide/show passwords, and so on. Also, the settings for the My Account page and ENDPOINT SECTION are available.
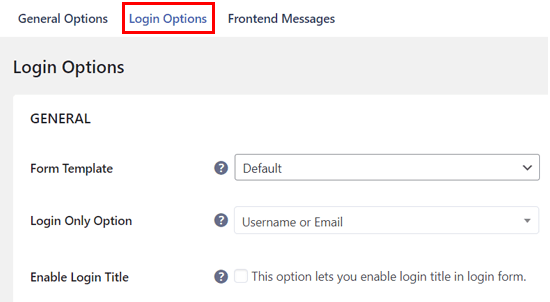
The Login Options lets you perform settings like enabling login title, ajax login, remember me, and lost password.
From here, you can also edit the labels for your login form’s fields, use the placeholders in the fields, and edit messages for the fields.
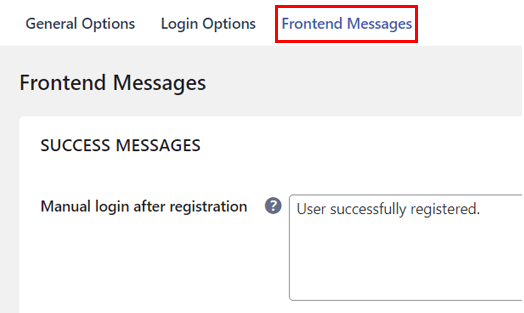
Next, Frontend Messages lets you customize the messages for the fields.
All of these are the general settings for your User Registration login form.
Step 5: Replace Default Login Page with Newly Created Login Page
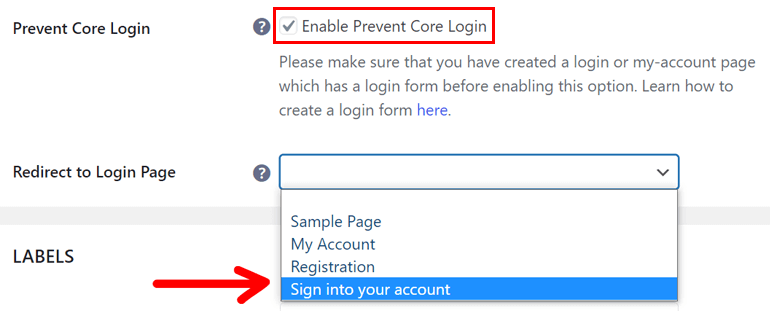
From User Registration >> Settings, click on the Login Options under the General settings tab to change wp-admin URL of the WordPress site by replacing the default login page.
Scroll down until you see Prevent Core Login. Since we’ve created a login page titled “Sign into your Account,” enable the option to replace the default login page with the newly created page.
Now, as you enable the option, a new row will appear: Redirect to the Login Page. Using the drop-down menu, select the page you just created to which you want to redirect the default login page.
Save the changes made.
Now, whenever you visit your site’s core login page, you’ll be redirected to the new login page that you just created. The default login page will be displayed as below, with a new login page URL.

Step 6: Strengthen Your WordPress Login Security
Since the entire process of changing your WordPress login page URL is purely to provide more security to the WordPress site, let’s work on it.
User Registration supports Google reCaptcha, a free security service from Google that helps protect sites from abuse and registration spam.
It blocks automated software and bots from accessing your sites, and humans can enter them without any difficulty.
Register your site with Google’s overview page to add the Google reCaptcha to your login form. From here, you can generate the Site Key and Secret Key.
Now, visit your WordPress dashboard and navigate to User Registration >> Settings >> Integrations. Next, choose the reCaptcha type for your site.
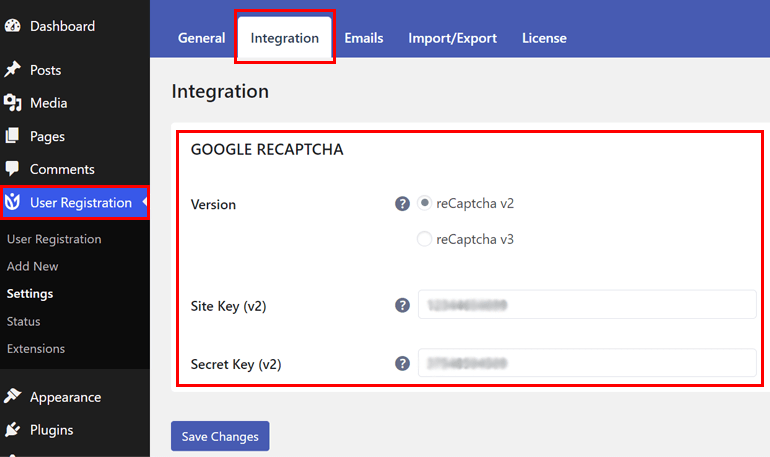
There are two types of reCaptcha: reCaptcha v2 and reCaptcha v3.
- reCaptcha v2: It tracks users’ actions and identifies the bots.
- reCaptcha v3: It returns a score ranging from 0.0 to 0.1 for each request. The score helps to pass the valid requests.
Enter your Site Key and Secret Key after selecting the reCaptcha version.
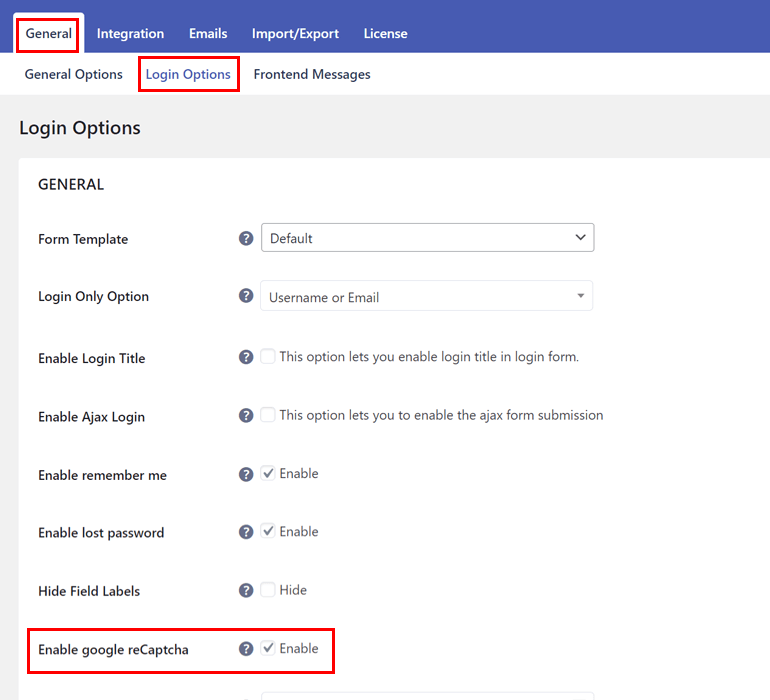
Now go to General >> Login Options. As you scroll down the interface, you’ll see the option Enable Google reCaptcha. Enable the option and save the settings.
2. How to ChangeWordPress Login URL without a Plugin?
People mostly hide their wp-admin or wp login.php page to outsmart bots and hackers and prevent attacks. When everybody is getting smarter, we can’t say that nobody can guess your password and attempt to log in.
And when somebody is likely to guess your username and password, it’s better to prevent them from accessing your login page.
See this guide for a list of the 12 best WordPress backup plugins.
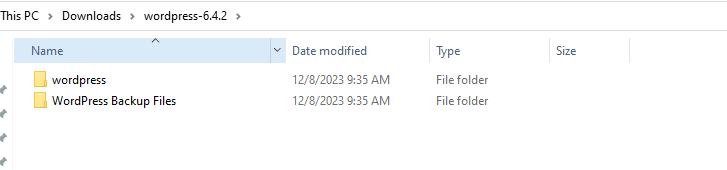
The next step is to edit your WordPress core files to change WordPress login page. Before doing this, make sure to back up your current WordPress setup.
You’ll also need to download a text editor to follow this guide. We’re using Notepad++ Text, but plenty of other text editors are available, like Sublime Text, Atom, and more.
Let’s discuss it in brief.
Step 1: Backup Your WP-Login.php
First of all, you should back up the wp-login.php file before changing it. This way, if you need to undo your changes, especially if you’ve edited this file before, you can easily do so.
Start by backing up your entire WordPress site, including all files and databases.
Step 2: Rename WP-Login.php
Once the backup process of wp-login.php is done, the next step is to rename it. Locate `wp-login.php` in your WordPress root directory.
To rename, change the name of `wp-login.php` to something unique, like “my-secret-login.php.”

Step 3: Update References in the Renamed File
Updating references allows us to easily replace all references to wp-login with a new login URL path.
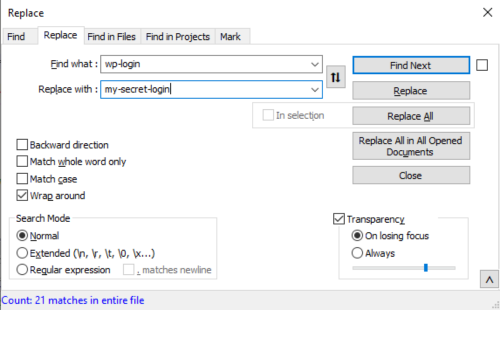
Edit the File: Open your newly renamed login file in a text editor.
Find and Replace: Use the editor’s find and replace function to substitute all instances.
In the Find field, enter wp-login.
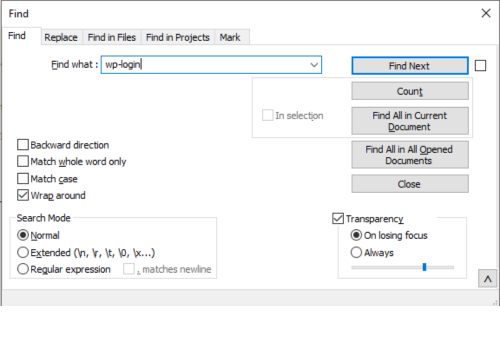
In the Replace field, enter your new URL path, e.g., my-secret-login.
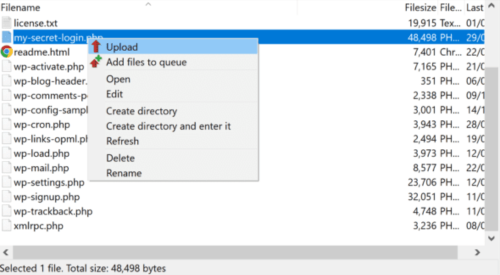
Step 4: Upload your new login file
Now that you’ve updated the login file with a new URL, you can upload it back to your WordPress website.
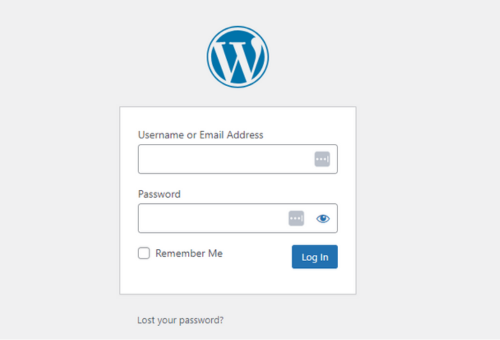
Step 5: Test Your New Login URL
If you’ve completed all the steps accurately, you should now be able to log in using the new login URL successfully. Additionally, when you log out, you’ll be redirected back to this new login URL.
Step 6: Delete the login file
To complete this method, you should delete the current wp-login.php file from your website. This will disable the standard login page, leading to a 404 not found page for anyone trying to log in through that URL.

That’s all, and you’re done.
Wrapping Up How to Change WordPress Login URL Guide!
When you go live on the internet, you should always be aware of the path through which unauthorized people can get into your site.
The WordPress login page URL is one of the easiest ways for hackers and spammers to access the site.
But, as we discussed, there are ways to get protection against the attacks. Hence, protect your site using the methods mentioned above.
On top of that, these methods are easy and take only a few minutes of your time. If you’re willing to change WordPress login page URL, you should try the User Registration plugin.
It’s simple to use and offers immediate results. Also, changing the wp-admin URL gives you a sense of being protected.
That’s all for now. Write to us in the comment section if you’re confused about any of the above details. You can also read more about adding a contact form to your site.
Disclaimer: Some of the links in the post may be affiliate links. So if you purchase anything using the link, we will earn affiliate commission.