Forms are a great way to let visitors send information or get in touch with your brand. However, sometimes, you might need more detail that can only be gained through a media file or document. Therefore, you might be wondering how to create a file upload form in WordPress. 😎
Fortunately, it’s relatively straightforward to enable this functionality on your website. With the right tools, you can collect resumes, spreadsheets, and PDFs. Plus, you can let customers upload media files like images and videos.
Why create a file upload form in WordPress
Standard forms allow you to collect customer details like email addresses, telephone numbers, and feedback. However, there are times when you might need to accept files of different types on your site.
For example, if you’re hiring new employees, you might need a way for candidates to attach their resumes. Additionally, you might work with clients. In which case, it can be useful to allow prospects to attach spreadsheets or other documents about the project.
What’s more, while customer support forms provide an easy way for shoppers to get in touch with your business, file uploads can make the process more efficient. This way, customers can attach photographs of the products to give you more detail about the issue(s). 🥎
How to create a file upload form in WordPress
Now that you know why it’s a good idea to create a file upload form in WordPress, let’s take a look at five simple steps to add a form to your website.
Step 1: Install and activate Contact Form 7 in WordPress 🖱️
There are tons of WordPress forms plugins that enable you to create custom forms for your site including WPForms, Formidable Forms, and Ninja Forms. The problem is that the file upload feature is only available with the premium versions of each of these tools.
However, Contact Form 7 is a free form plugin that lets you create a file upload form in WordPress.
It’s important to note that while Contact Form 7 is a well-established form plugin, it can be tricky to get to grips with (especially for beginners). There’s no visual drag-and-drop builder. Instead, you’ll customize your form content using simple markup.
But, if you do get stuck, there’s tons of documentation to read through. Meanwhile, the support forum is super active, so you can usually find a quick solution to your problem.
Since the plugin is totally free, you can install it straight from your WordPress dashboard. All you need to do is head to Plugins > Add New. Search for the plugin and select Install Now > Activate.
Step 2: Add a new form or edit an existing template 🧾
With Contact Form 7 installed on your site, you’re ready to create a file upload form in WordPress. If the activation was successful, you should see a Contact tab appear in your admin panel.
Click on the Contact tab and select Contact Forms:
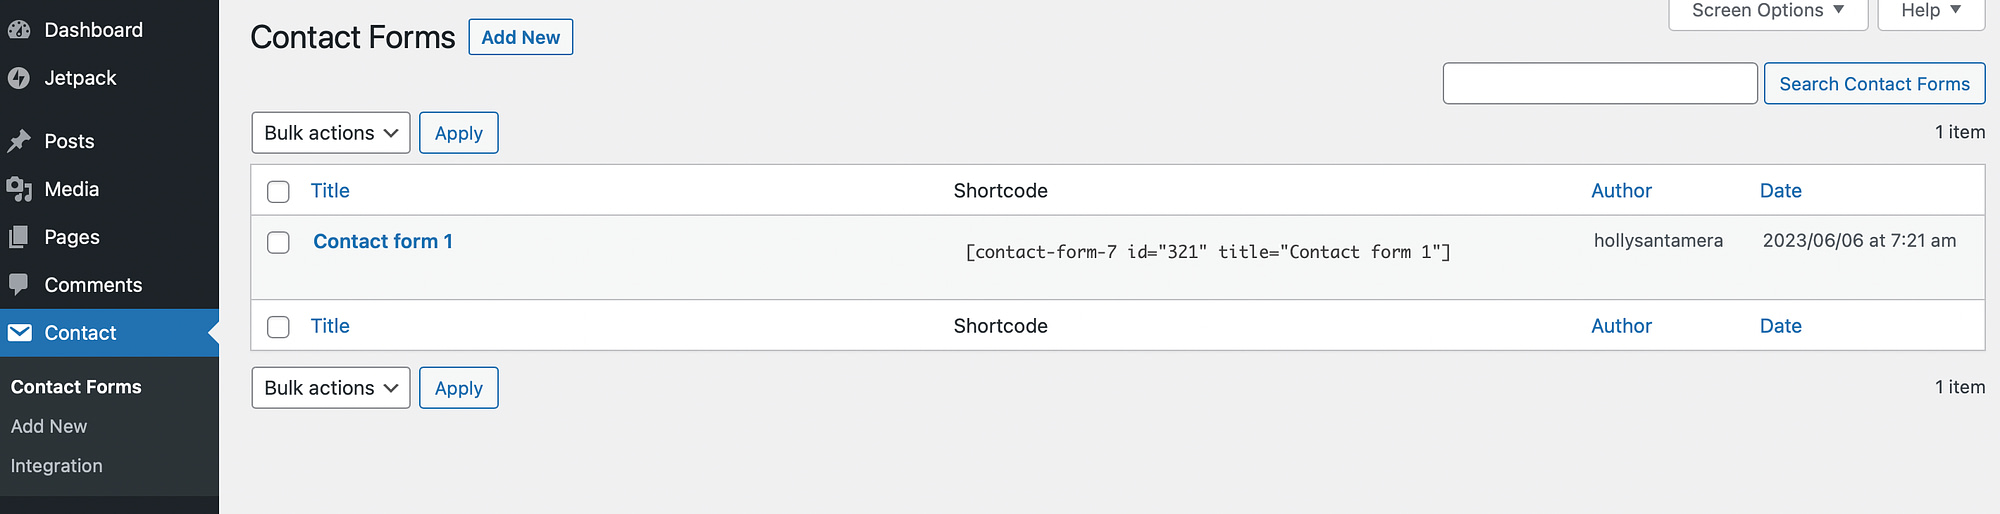
If you want to create a file upload form from scratch, click on Add New. However, you’ll find a default contact form template listed here. Ours is labelled “Contact form 1.”
Since this template already contains useful form fields, it can be a great place to start for beginners. Therefore, go ahead and click on Edit to open the form in the editor:

You might like to change the name of your contact form at the top of the page. Then, scroll down to the form template.
As you can see, the form currently has various text fields like name, subject, and message. But, you’ll also find an email field and a submit button:

You can remove any of these fields by deleting the text. Or, change the field label by typing something new besides the <label> tag.
You might also like to include additional fields. For example, if you’re creating a contact form for potential clients, it can be a good idea to add a URL field so that you can view the client’s current website. To do this, select the relevant tag from the available options at the top of the editor.
Step 3: Create a file upload form in WordPress 📤
Now, you’re ready to add the file upload feature to your contact form. Therefore, you’ll need to make room for your field within the editor.
Then, select the file tag from the options listed across the top:

At this point, you’ll see a pop-up where you can configure the file upload feature:

First off, you can make the field a requirement by ticking the checkbox. Meanwhile, you can also change the file name.
The two most important settings are the File size limit and Acceptable file types. Without tweaking these settings, people are able to upload very large files, and malicious scripts that can infect your computer.
Although the File size limit is determined using bytes, you can add the suffix “mb” to work in megabytes. So, you might enter “10mb” into the box:

Next, choose which file types you want to accept on your form. If you’re asking users to upload images, you might include jpeg, jpg, png, and gif. Or, if you’re accepting resumes, you might stick with doc and pdf.
You can separate the file types using the pipe character:

It’s essential to make a note of the file tag at the bottom of the pop-up, as you’ll be needing this in the next stage. So, you can copy this down now to use later.
Once you’ve completed the file details, click on Insert Tag, and you’ll see the field appear in the editor:

Now, you can add a label to the field so that users know what to do. So, go ahead and add a <label> tag. Then, simply type the text that you want visitors to see:

Now, select Save at the bottom of the page.
Step 4: Insert your file tag to receive attachments by email 📧
With Contact Form 7, you’ll receive your form submissions via email. Therefore, any time a user completes one of your forms, you can view the message from the email address that’s associated with your WordPress account.
However, in order to receive the file attachments, you’ll need to add the file tag to the Mail tab. Hopefully, you copied down the file tag in the previous step.
If not, you can find the file tag in the form editor:

Copy the tag and switch to the Mail tab:

Here, scroll down until you see File attachments:

Paste the file tag into the box and click on Save to update the settings.
Step 5: Embed your form and test the file upload feature ⚙️
Now that you’ve created a file upload form in WordPress, you’re ready to add it to any page, post, or even a widget area. You’ll need to embed the form using a shortcode.
You can find the shortcode for your form at the top of the editor:

However, you can also quickly copy down the shortcode from the Contact Forms page:

Next, open an existing page or post on your WordPress site or create a new one. You’ll need to add a shortcode block to the page, so click on the + icon and search for “shortcode.”
Add the block to your page and copy in your form’s shortcode:

Now, save the page and select Preview to see how your form will display to visitors:

It’s also a good idea to test the file upload feature to make sure it’s working as you expect. Therefore, click on the Choose File button and add one of the accepted file types that you configured in the form settings.
If you have any required fields, you’ll also need to complete these. Then, click on Submit.
If your file upload form works, you’ll receive a confirmation message at the bottom of the screen:

Then, the submission will be delivered to the email associated with your WordPress account.
Conclusion 🧐
If you want to accept resumes, PDFs, or media files on your site, it’s a great idea to create a file upload form in WordPress. Better yet, it’s super easy to achieve with the help of a handy plugin.
👉 To recap, below are the five steps you need to follow in order to create a file upload form in WordPress:
- Install and activate CF 7 (Contact Form 7) 🖱️.
- Add a new form or edit an existing template. 🧾
- Create a file upload form in WordPress. 📤
- Insert your file tag to receive attachments by email. 📧
- Embed your form and test the file upload feature. ⚙️
Do you have any questions about how to create a file upload form in WordPress? Let us know in the comments section below!