A WordPress alert banner is a type of notification bar that appears at the top or bottom of a website. Plus, it is one of the best ways to notify customers about updates, sales, product launches, and more instantly. However, without coding experience, you might not know how to achieve this on your site.
Fortunately, you can find handy plugins that let you display a notification bar across all your web pages. Better yet, you can fully customize the bar so that it slots in nicely with the rest of your website.
Why create an alert banner in WordPress
An alert banner sits right at the top of your website, so it’s the prime location for important information that you want visitors to know instantly. For example, you might want to display details about your opening times or inform customers about changes to your business. You can also use alert banners to collect email contacts or encourage people to follow your social media accounts.
Additionally, if you run an ecommerce store, a WordPress alert banner is a great way to notify customers about sale events:

Plus, you can even feature relevant coupons and discount codes to make them easily accessible.
Of course, you can always display this information on your homepage. However, this isn’t as effective since visitors may skip the homepage and go straight to a landing page from the search results. With a notification bar, all customers will see the banner no matter where they are on your site.
How to create a WordPress alert banner in four steps
Now that you know why it’s a good idea to create a WordPress alert banner, let’s take a look at a few easy steps to set this up on your site.
- Install and activate WPFront Notification Bar
- Configure the alert bar settings
- Customize the appearance of the alert banner
- Publish your WordPress alert banner
1. Install and activate WPFront Notification Bar 🔌
Typically, if you want to create a WordPress alert banner, you’d need knowledge of HTML and CSS. Fortunately, there are some useful plugins that enable you to set up a notification bar in a more beginner-friendly way.
One of the best plugins for this task is WPFront Notification Bar. This is a free WordPress plugin, so you can go right ahead and install it through the WordPress dashboard.
Simply head to Plugins → Add New. Enter the plugin name in the search bar. Then, click on Install Now → Activate:
Immediately, you’ll be redirected to the WPFront Notification Bar settings. Under the Display section, check the Enabled box:
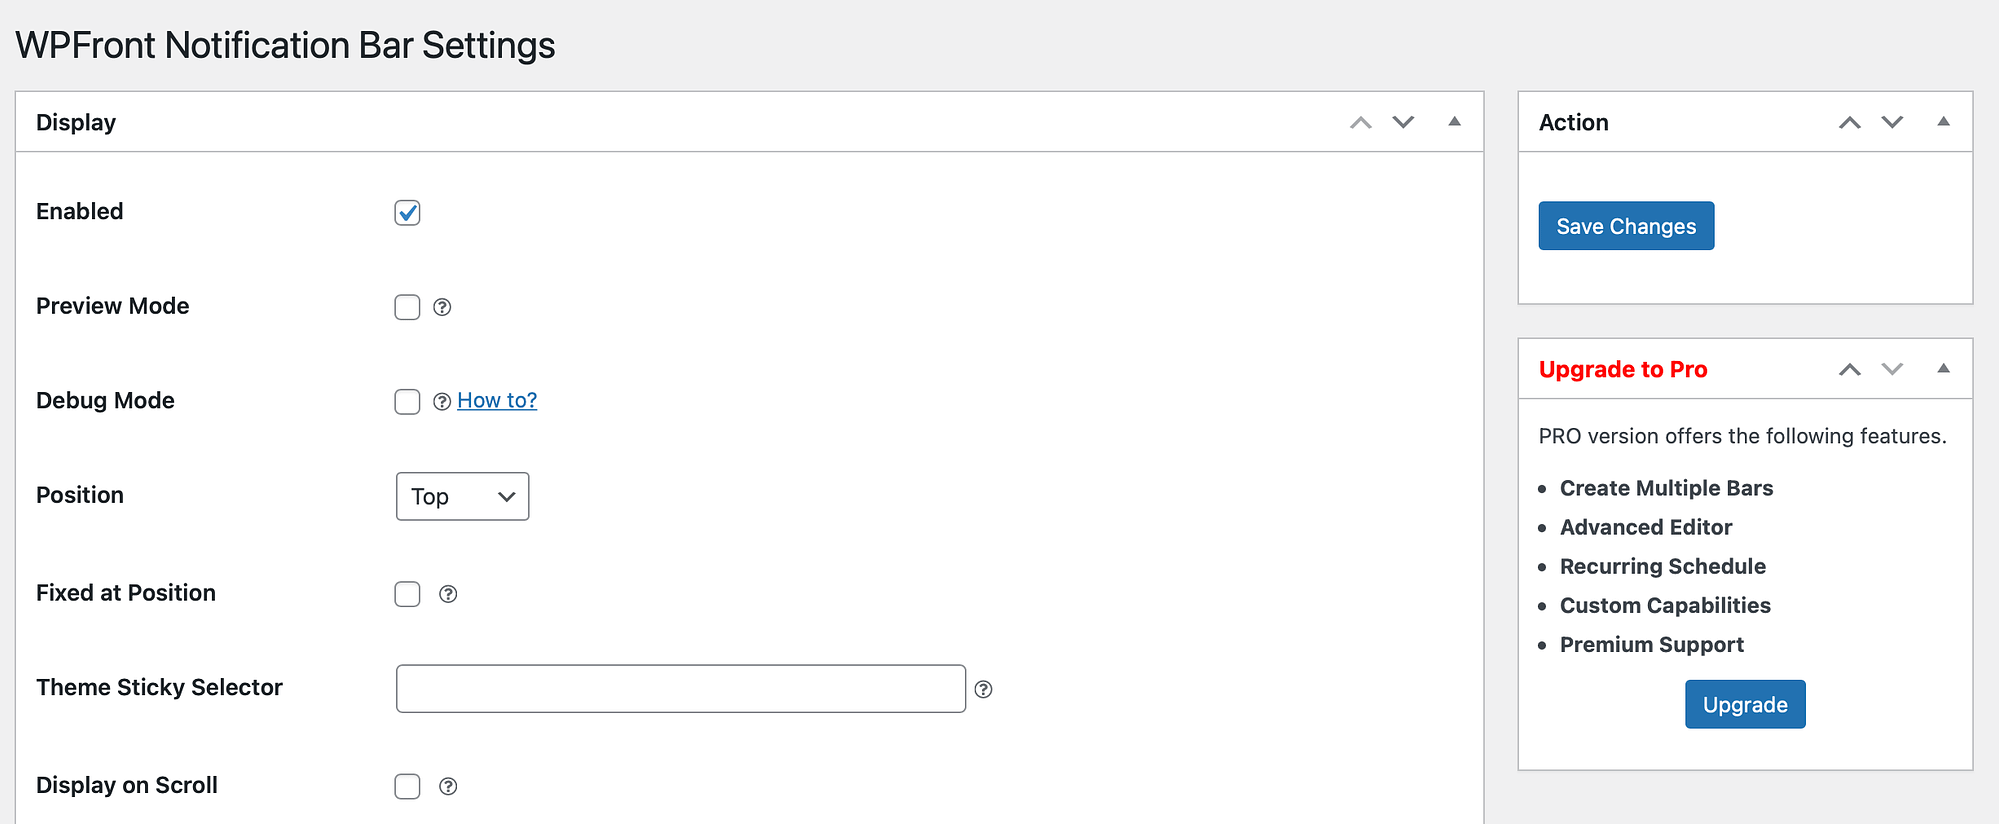
Or, if you don’t want to enable the notification banner until it’s complete, check the Preview Mode box.
Then, select Save Changes. At this point, your WordPress alert banner will be active, but you’ll still need to add content and customize the appearance.
2. Configure the alert bar settings ⚙️
Now that the WordPress alert banner is enabled on your site, you’re ready to configure some important settings. To do this, go to Settings → Notification Bar from the WordPress dashboard.
In the Display section, you can use the Position dropdown to display your notification bar at the top or bottom of your site:
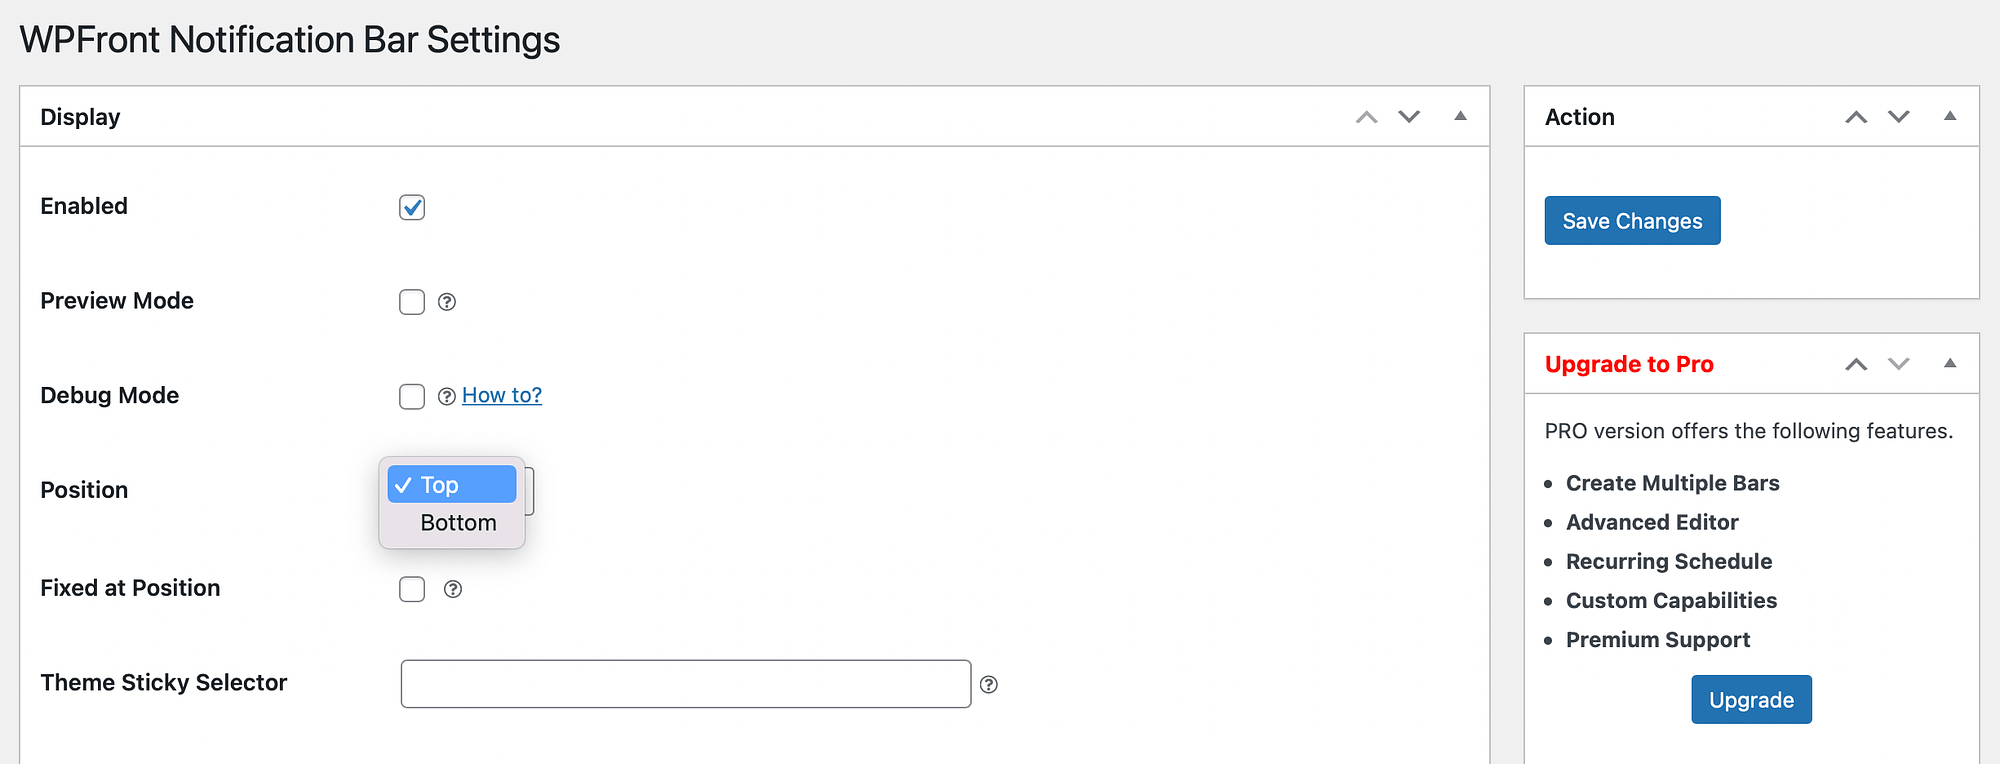
Meanwhile, you can fix the banner in position so that even when visitors scroll, the alert bar will stay in place. It’s also essential to set the right bar height so that the banner doesn’t interfere too much with your page content.
Additionally, you can enable a Close button so that visitors can get rid of the banner easily. You can also auto-close the notification bar after a specified period.
One of the best features is that you can set a maximum number of views:
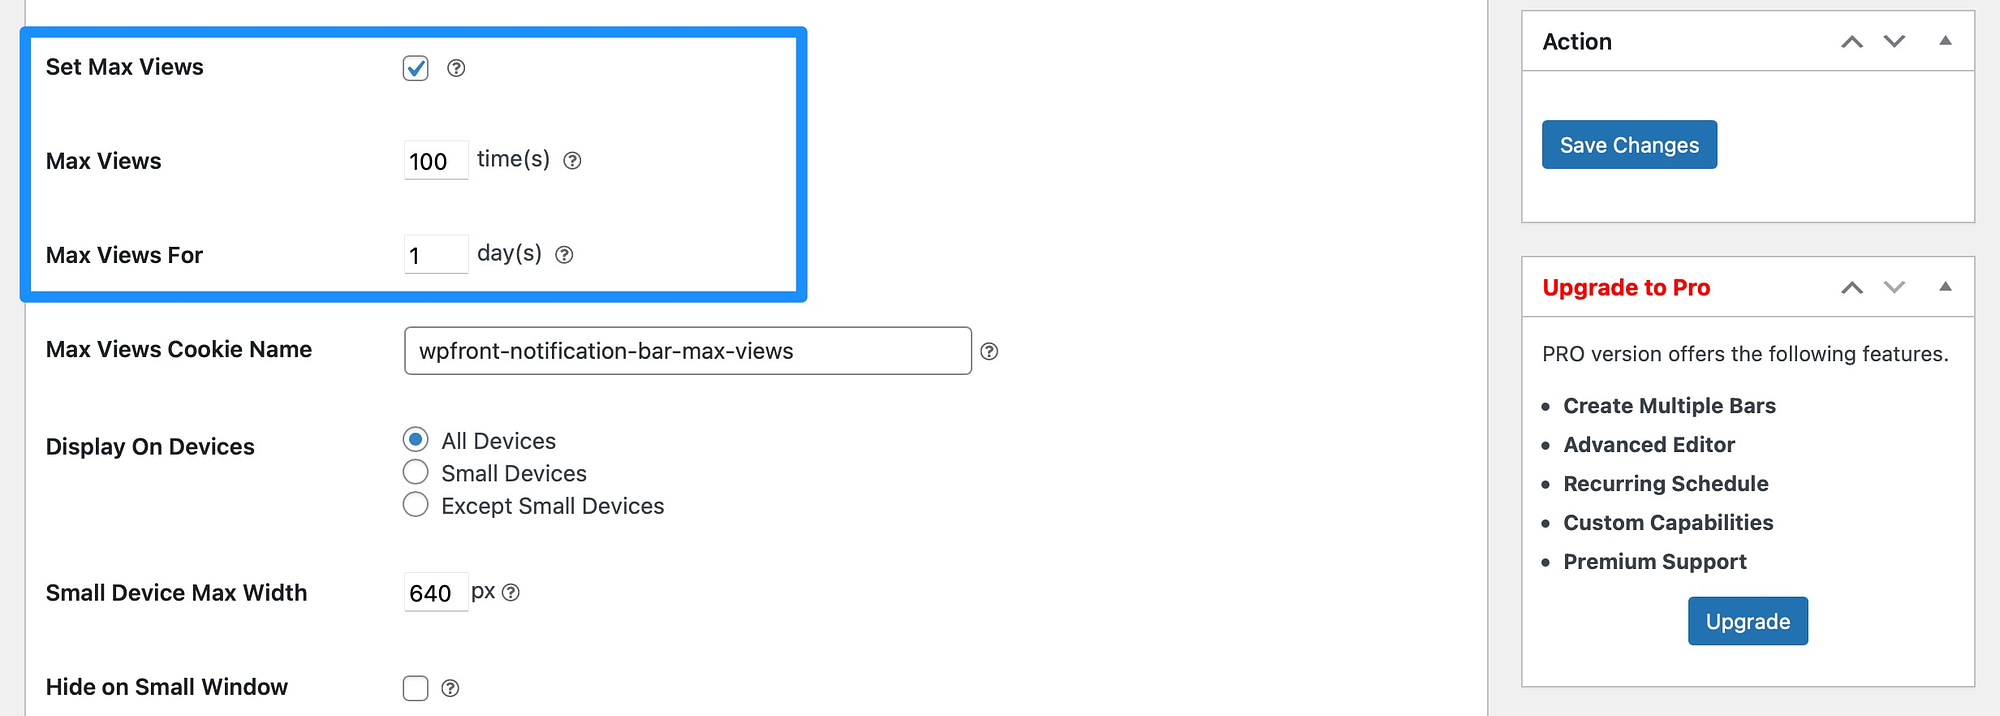
This setting is useful if you’re offering a discount that’s only available to a limited number of customers. For instance, you might provide a 20 percent discount on a new product for the first 100 visitors.
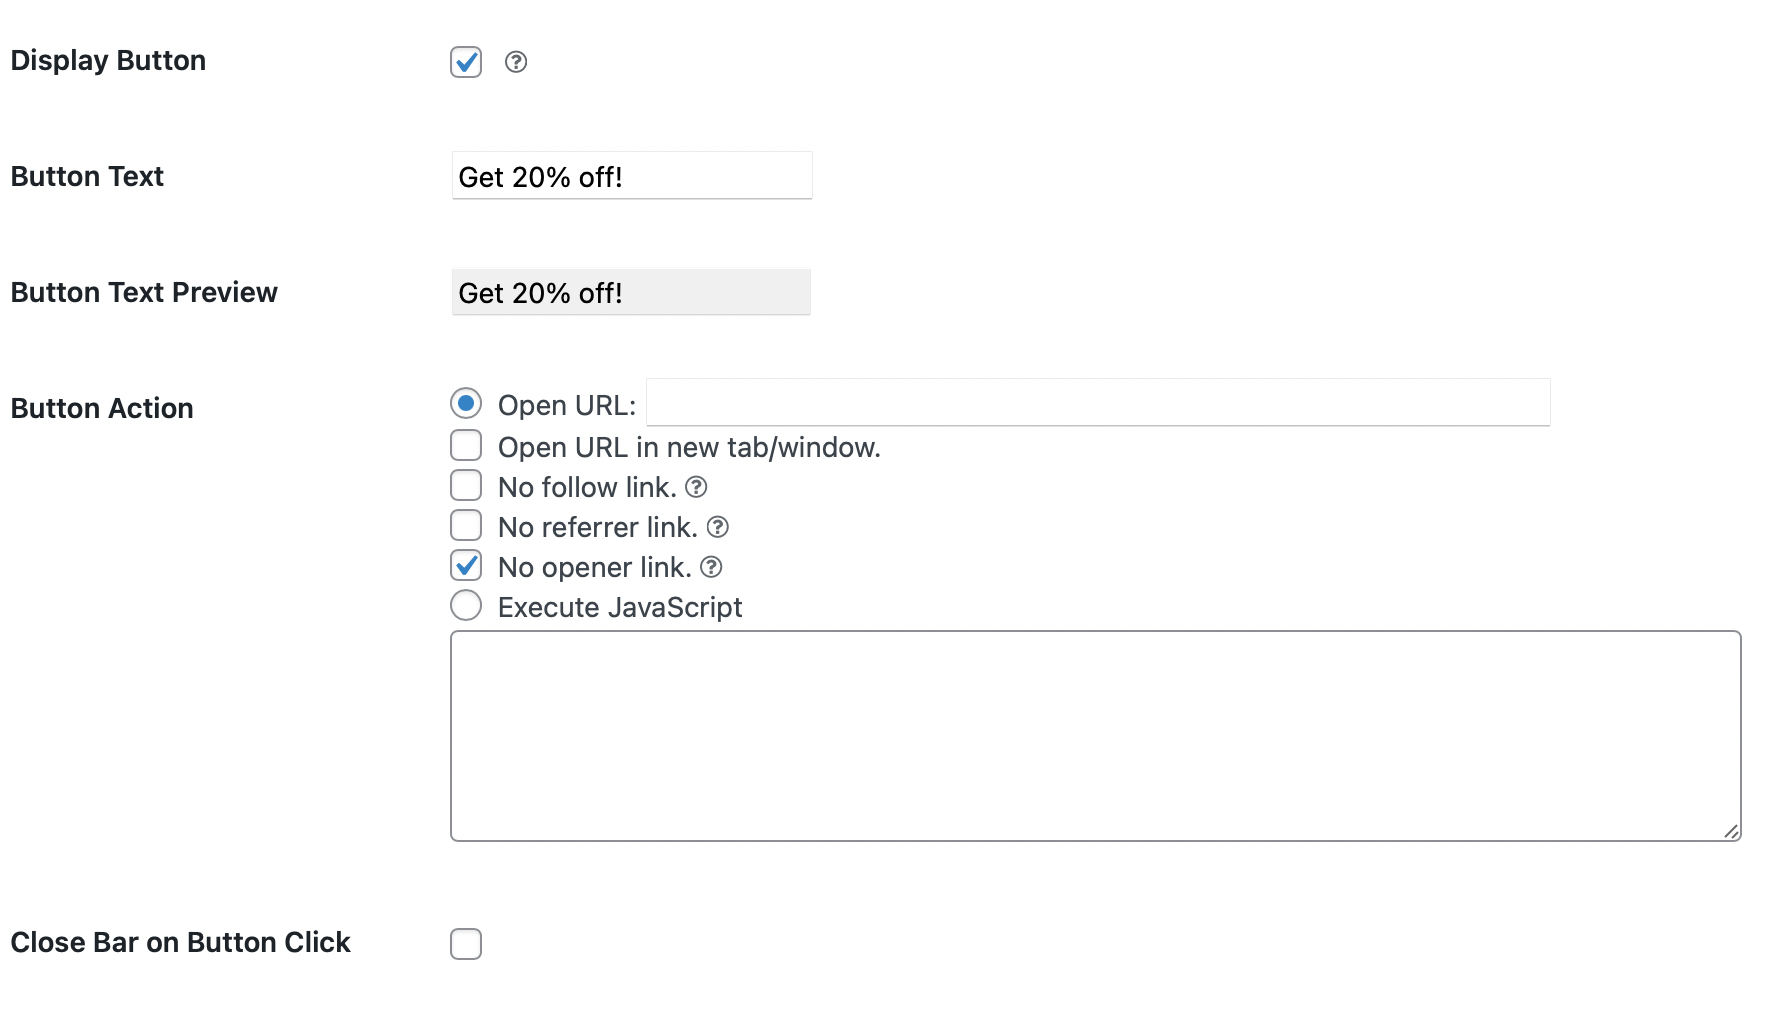
The Content section is where you’ll enter the message that you want to display in the alert banner:
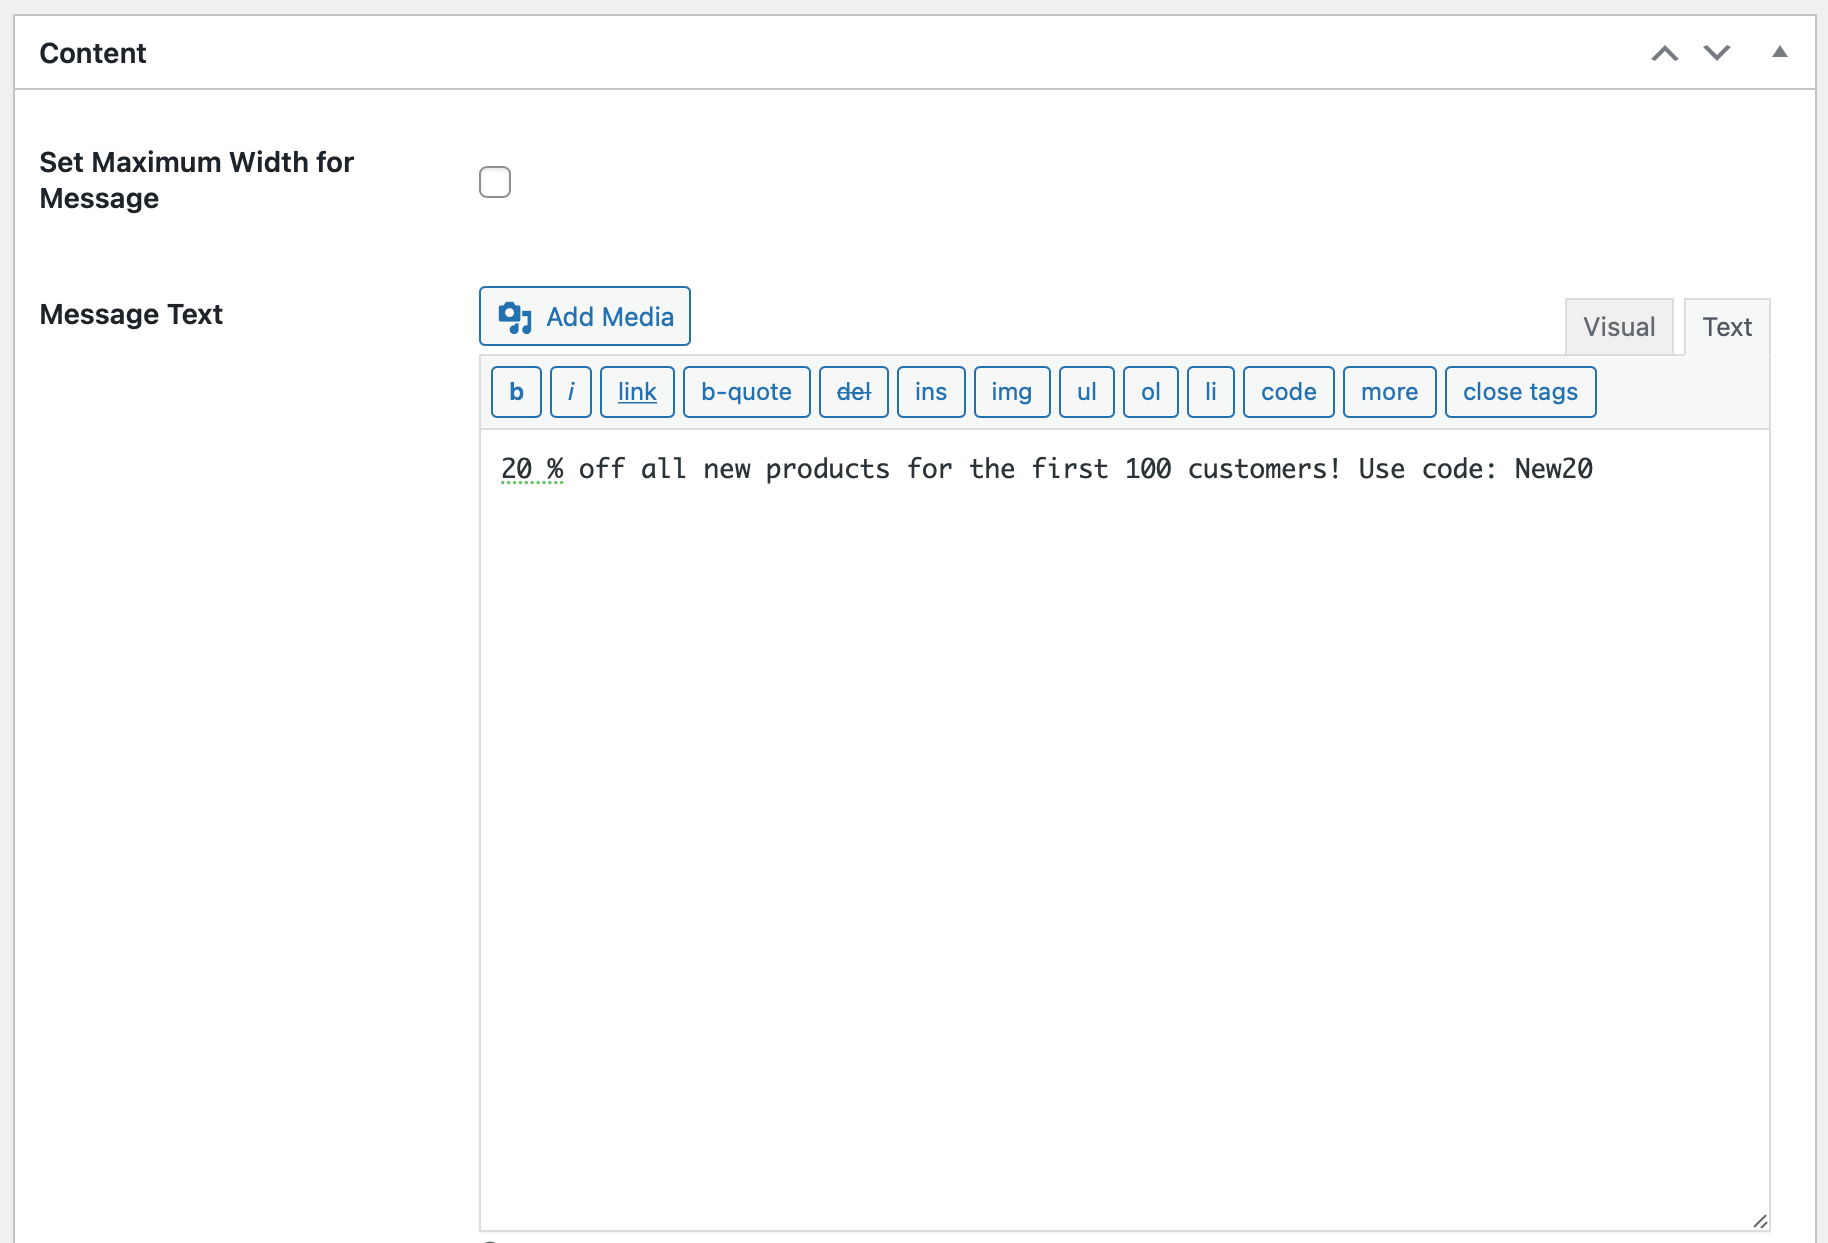
Besides text, you can include images, links, and tags. Better yet, you can enable a Display button, change the button text, and select a button action (such as opening a URL or executing JavaScript):
Then, use the options in the Filter section to select a start and end date. Or, select None if you want your banner to remain active until you manually disable it:
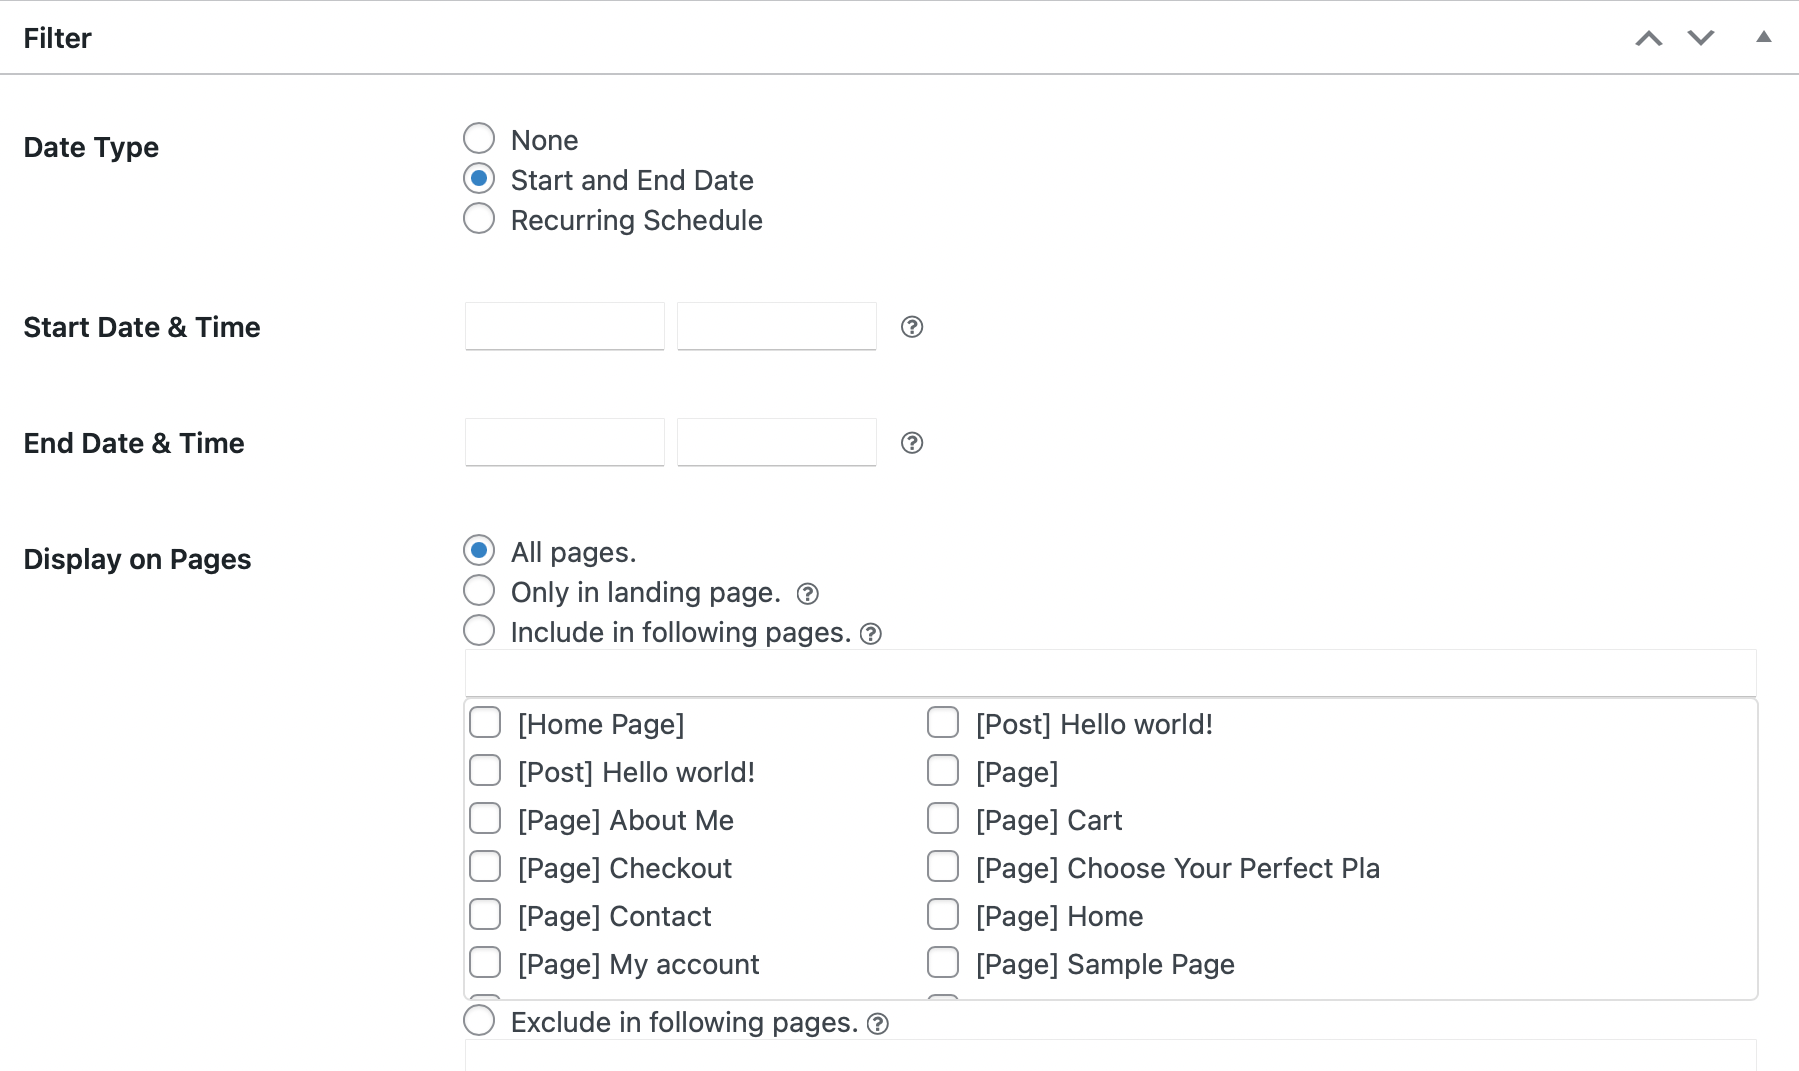
Here, you can also specify certain pages where you’ll display the alert bar. And you can determine which user roles can view the bar.
3. Customize the appearance of the alert banner 🎨
At this point, you’ve created a WordPress alert banner. However, it’s important to customize the appearance of the bar so that it matches your current WordPress theme and branding.
Again, visit the WPFront Notification Bar settings to do this. Then, scroll down to the Color section.
Here, you can enter custom hex codes for the bar, message, and buttons:

If you’re not sure about the exact shade, you can click on the current option and experiment with the color picker tool.
When choosing a color scheme, it’s a good idea to create a contrast between the bar color and the message and buttons so that the details are clearly visible. If you want to add any CSS to your alert bar, you can do this in the section below.
4. Publish your WordPress alert banner 📰
Now that your WordPress alert bar is all set up, it’s time to preview the changes you’ve made. If you selected Preview Mode at the start, you’ll find a dedicated URL listed in the plugin’s settings page.
Alternatively, if you enabled the alert banner in the settings, you can open your website in a fresh tab to view the finished results:

It’s a good idea to test out some of the settings that you applied to the alert banner. For example, if you configured the banner to close after a certain period, wait for this to take place.
Additionally, if you set up a button action, click on the button to make sure this is working correctly. Meanwhile, check certain landing pages which you might have excluded from the alert bar settings.
Once you’ve made sure that your WordPress alert banner is functioning properly, it’s time to publish the bar on your website. If the bar is currently enabled, you won’t need to do anything at this stage. Otherwise, visit the Settings page and check the Enabled box.
Conclusion 🧐
A WordPress alert banner is a versatile tool that can be used to display important notices, collect email addresses, promote social media accounts, sale announcements, and more.
Fortunately, it’s easy to create a WordPress alert banner using a plugin like WPFront Notification Bar.
⚠️ To recap, here’s four steps to create a WordPress alert banner:
- 🔌 Install and activate WPFront Notification Bar
- ⚙️ Configure the alert bar settings
- 🎨 Customize the appearance of the alert bar
- 📰 Publish your WordPress alert banner
💡 On a final note, if you run an ecommerce store and you use WooCommerce, then you can also consider using a premium tool like Sparks for WooCommerce to add an alert banner to your site. The alert banner feature in Sparks is called “multi-announcement bars“, but the advantage to using Sparks is that you’ll also get seven other modules to enhance conversions on your online store. Check it out!
Do you have any questions about how to create a WordPress alert banner? Let us know in the comments below!