Images are an easy way to spruce up your pages. However, if you have lots of them, it can disrupt the flow of your content and be distracting for visitors. Instead, you can create an image carousel in WordPress.
This way, you can organize your photos in a compact carousel which automatically rotates. Therefore, you can display tons of images without them taking up too much space. Plus, visitors can interact with the carousel which makes your site more engaging. 🎈
What is an image carousel?
An image carousel (or image slider) provides one of the simplest ways to display lots of images from just one compact element. Typically, a carousel rotates automatically, but visitors can also manually scroll through the photos:

As such, an image carousel lets you showcase your assets without taking up too much space on the page. Plus, the dynamic nature of the feature makes your site more engaging.
If you run an ecommerce site, you might use a carousel to display your latest products or highlight specific services. Or, for portfolio or photography sites, a carousel is a great way to present image galleries.
However, there are other ways to utilize carousels besides images. You might include customer reviews, testimonials, or create a logo carousel to gain the trust of visitors. Alternatively, you can arrange a featured slider with your social media or blog posts to drive traffic between platforms.
How to create an image carousel in WordPress
Now that you know a bit more about image carousels, let’s take a look at how to create an image carousel in WordPress in five steps.
- Install a carousel plugin like Smart Slider 3
- Create your first image carousel
- Add your images
- Customize the image carousel design
- Add your image carousel in WordPress
1. Install a carousel plugin like Smart Slider 3 🔌
Unless you know how to code, the simplest way to create an image carousel in WordPress is to install a plugin. There are many plugins to choose from but Smart Slider 3 makes an excellent option.
With this plugin, you’re able to design your carousel visually using an intuitive drag-and-drop editor. Plus, you can access a range of pre-designed templates and customization options.
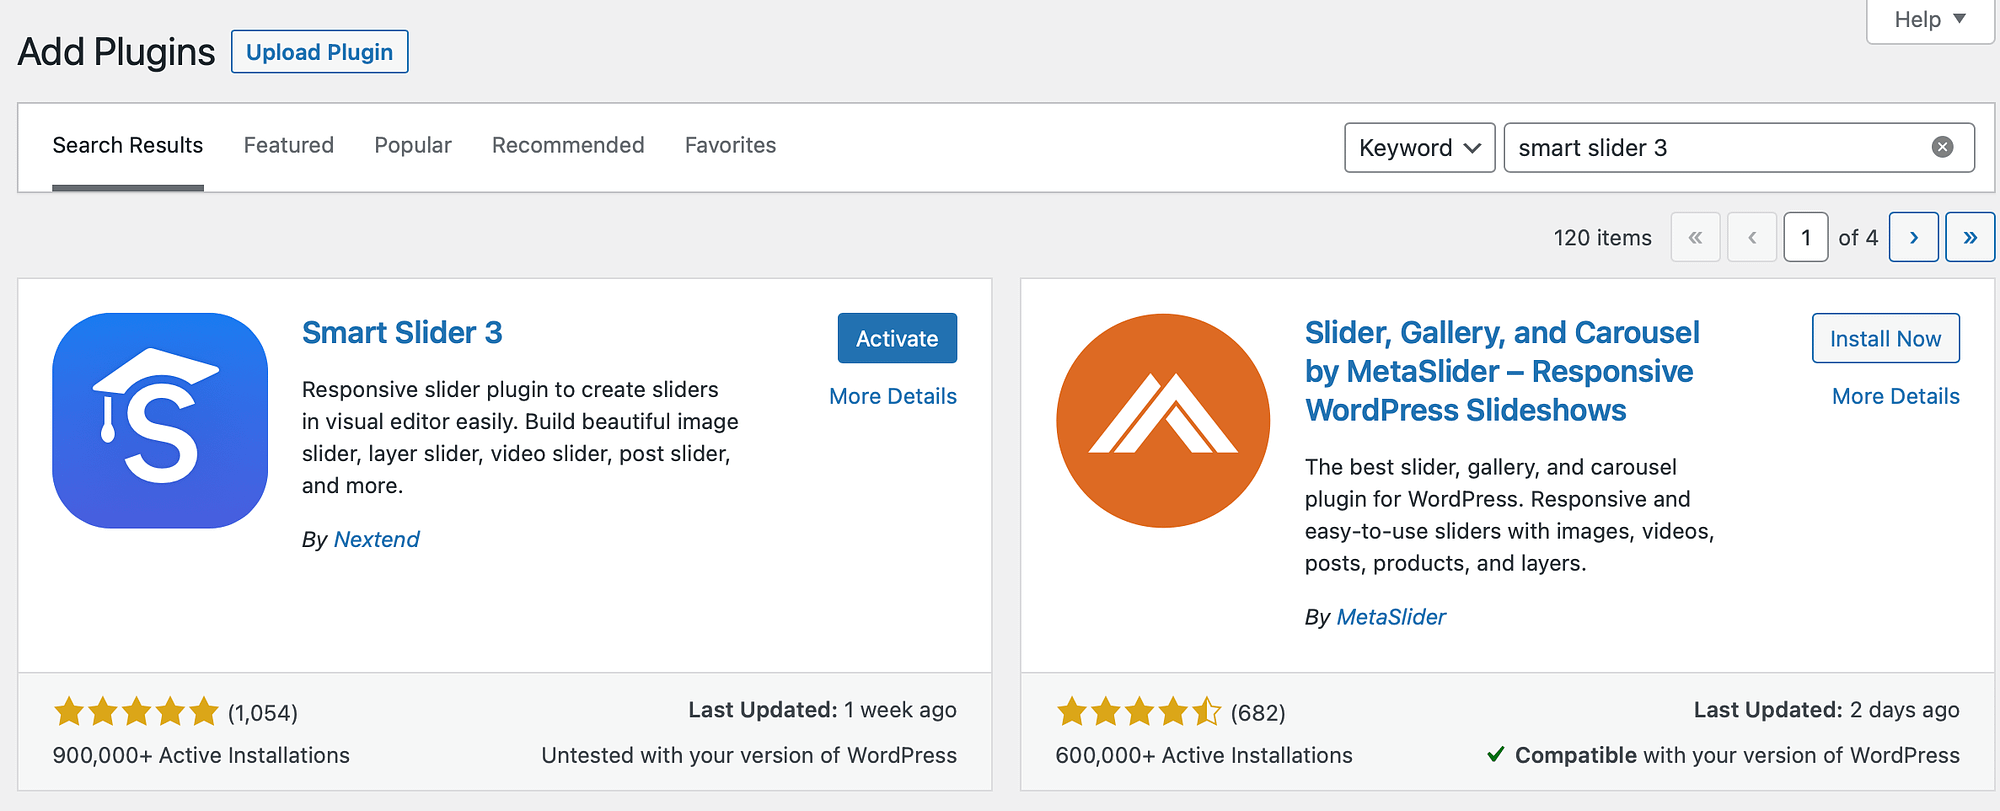
To get started, head to Plugins within your WordPress dashboard. Click on Add New and enter the plugin’s name in the search bar. Now, select Install Now → Activate:
At this point, you should see a Smart Slider tab appear in your WordPress sidebar. If this doesn’t happen automatically, you might need to refresh the page.
2. Create your first image carousel 🎨
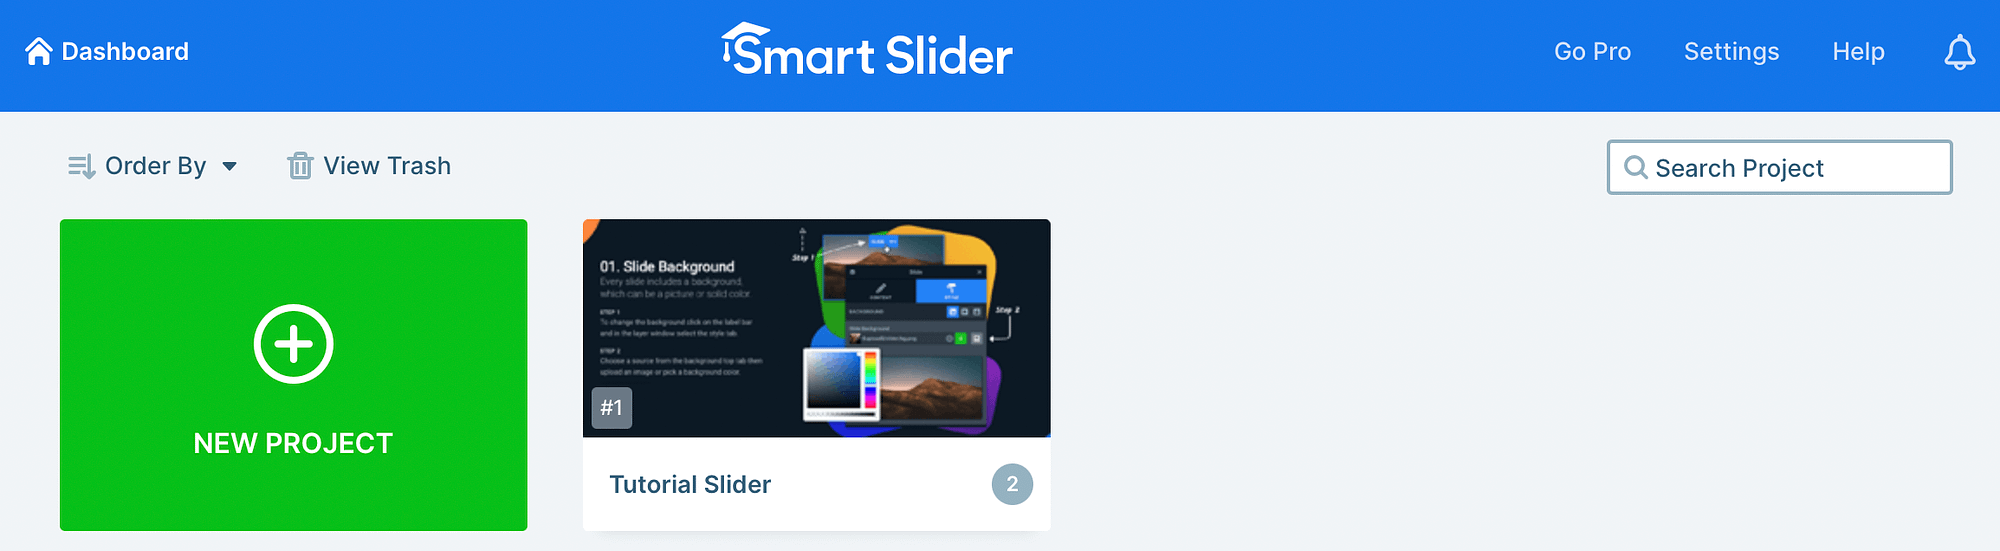
Now that you’ve successfully installed the Smart Slider 3 plugin, click on the Smart Slider tab in your WordPress sidebar. You can watch the welcome video or click on Go to dashboard.
Now, click on the New Project button to create an image carousel in WordPress:
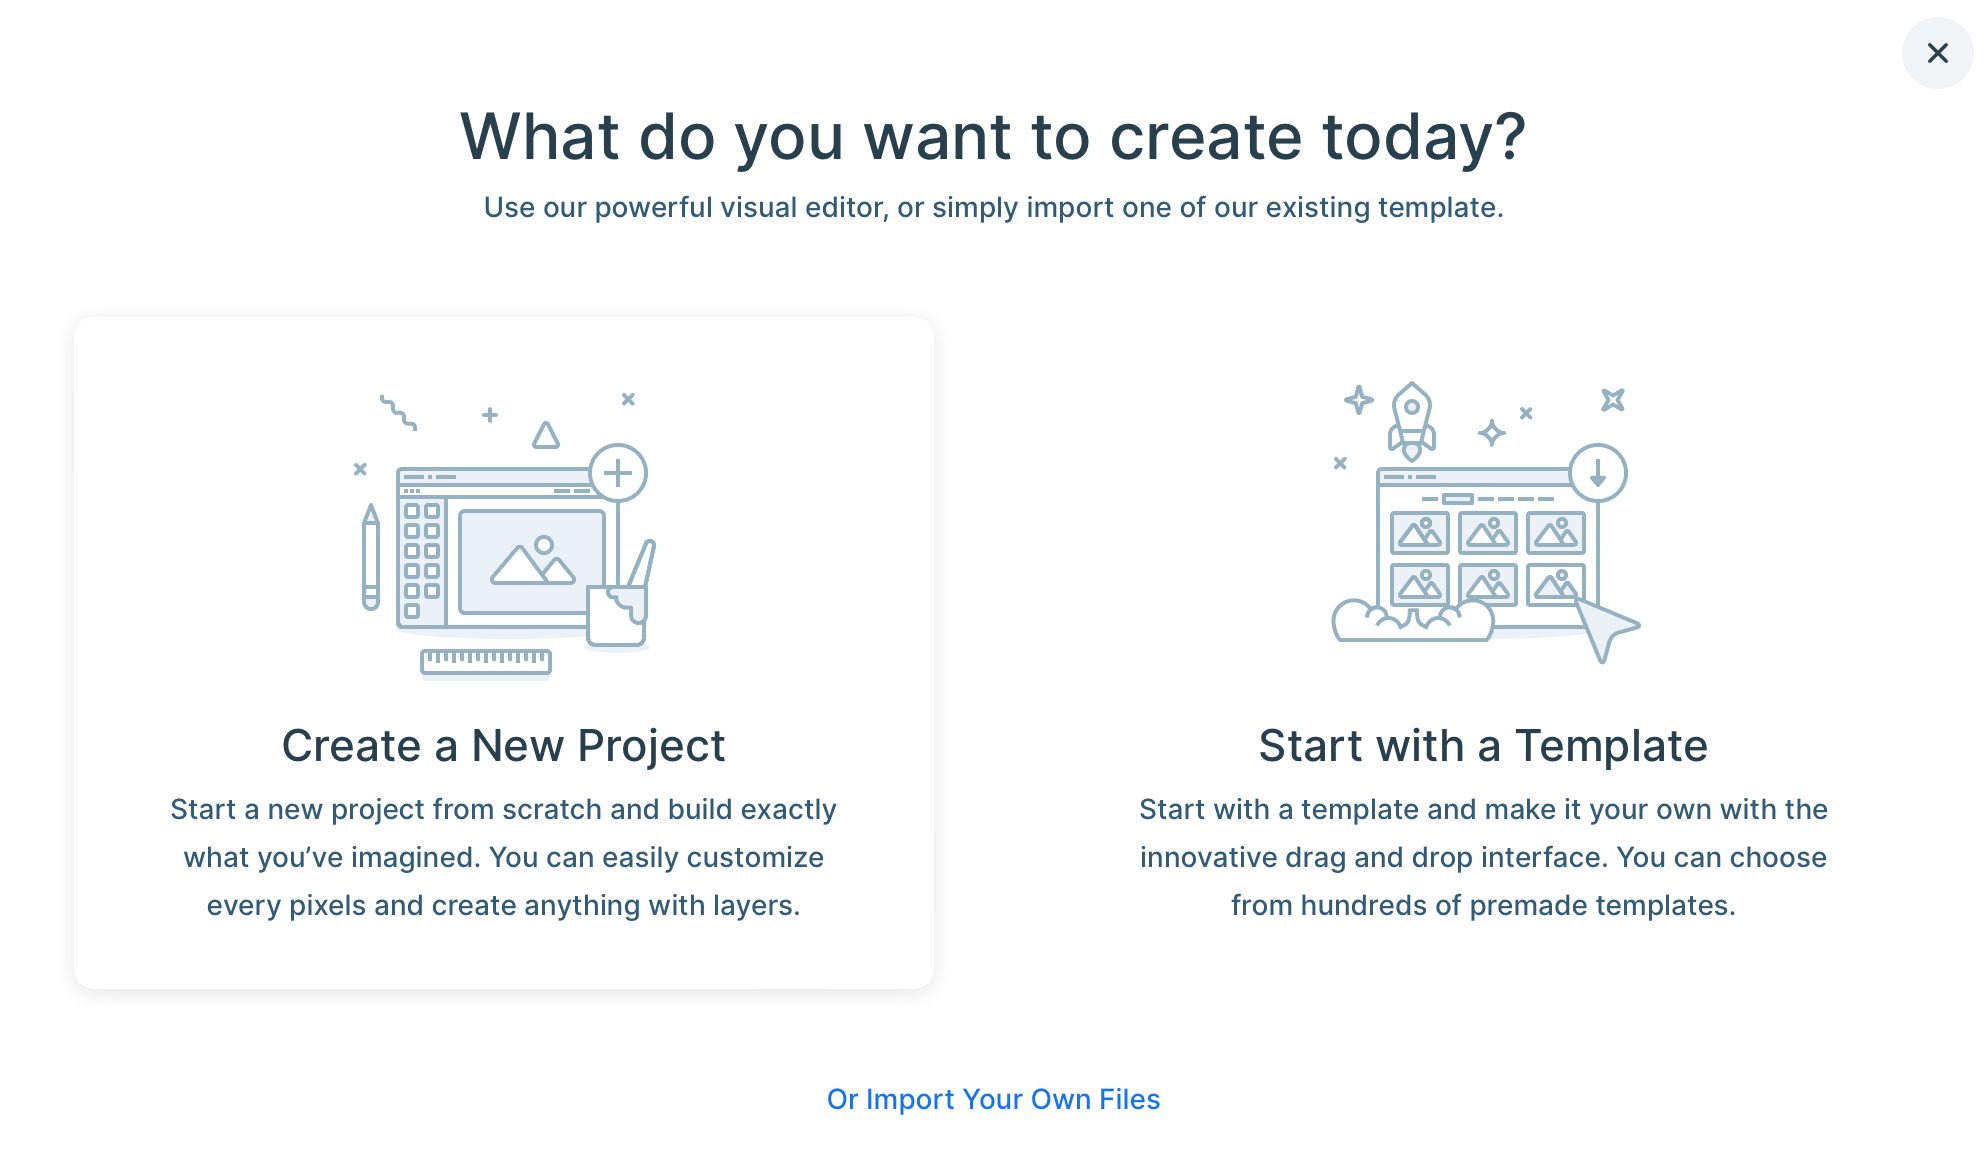
A popup will appear where you can choose to proceed in three ways. You can either select a pre-made template, import your own files, or click on Create a New Project to design an image carousel from scratch.
We’re going to continue with the latter option:
Now, under Project Type, click on Slider. Then, select your preferred slider type:
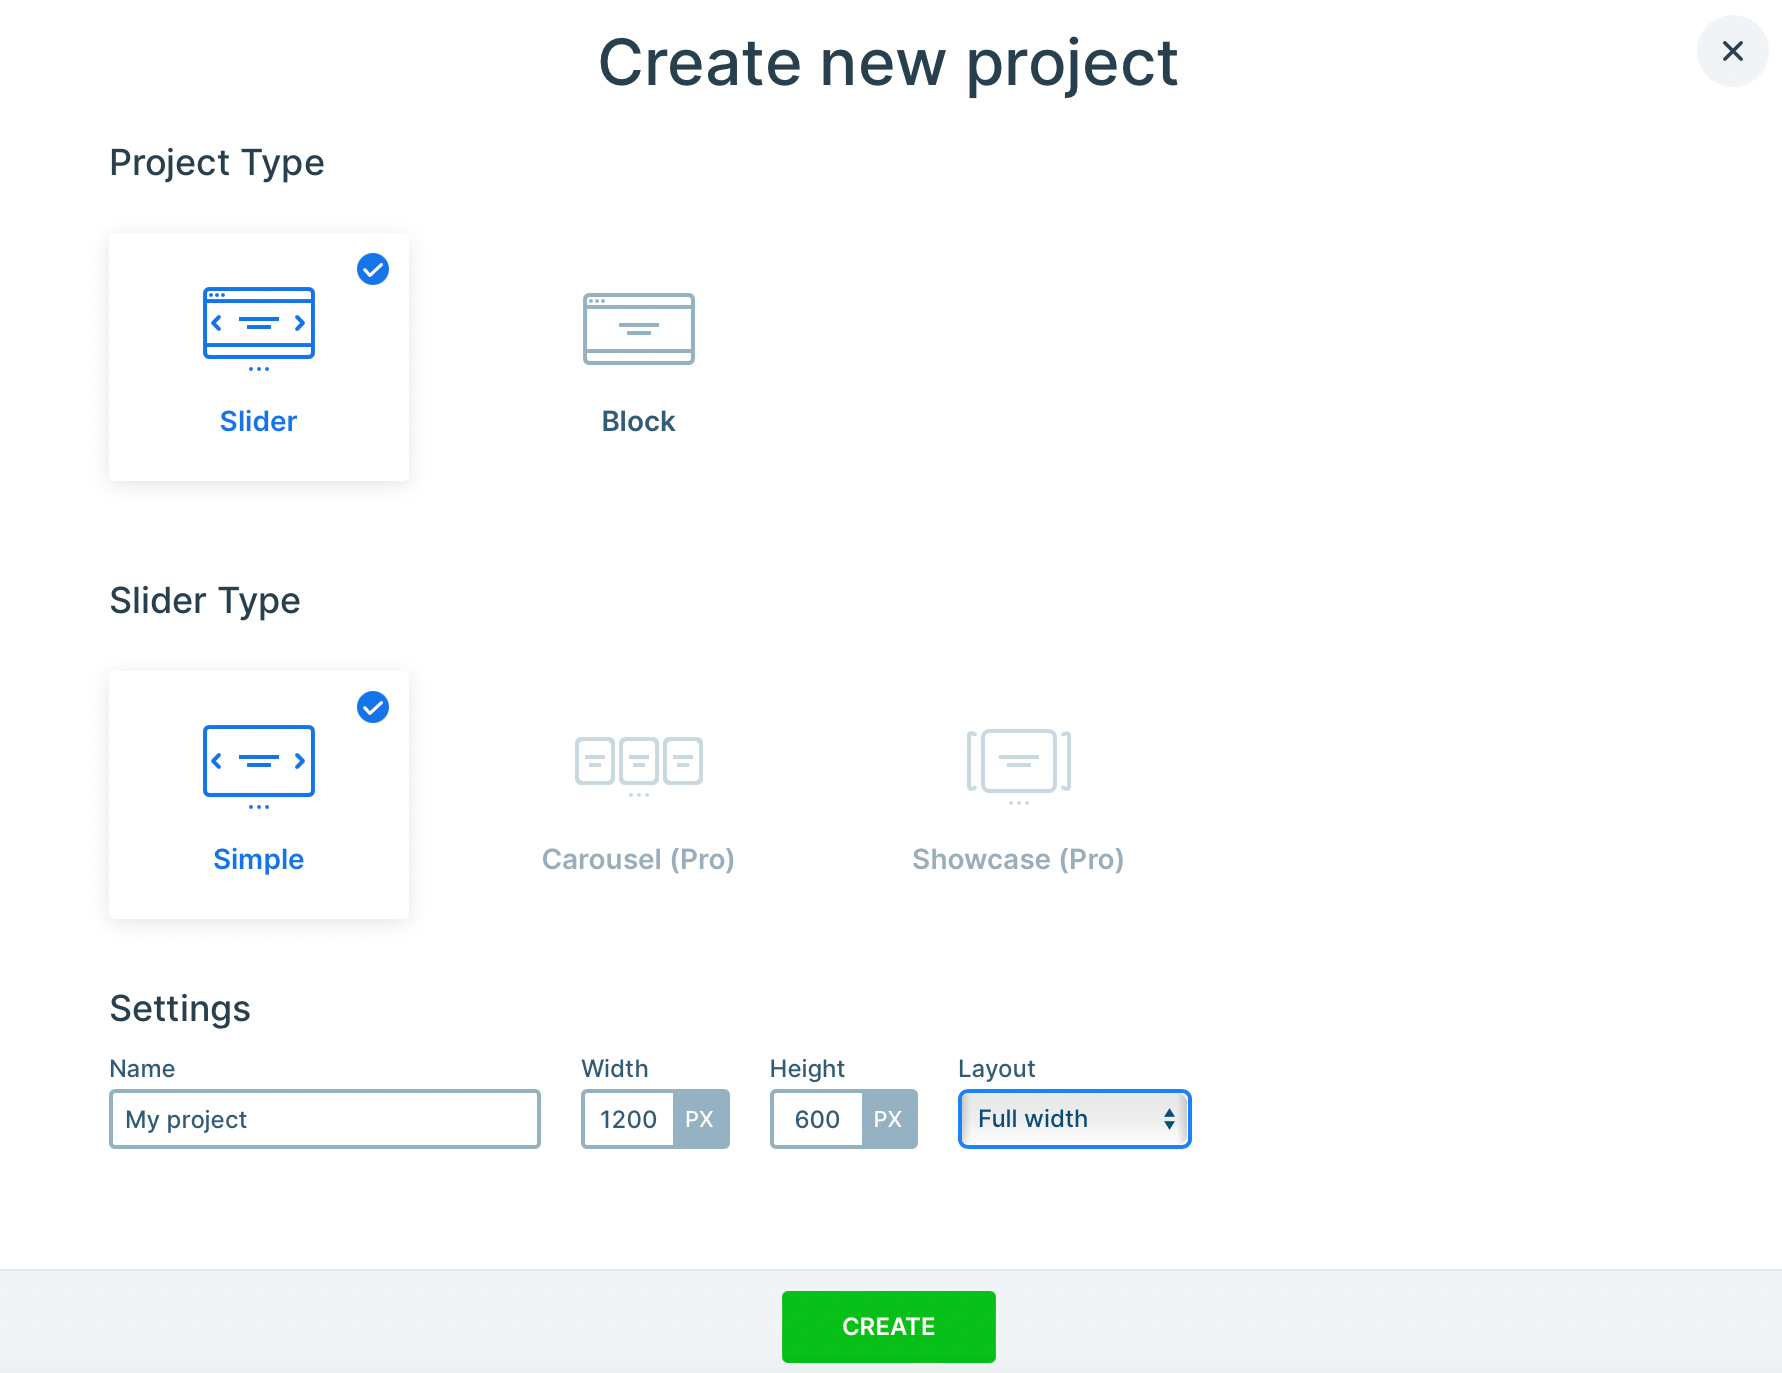
With the free plugin, you’re limited to the Simple slider option. But if you’re using the Pro plugin, you can build a premium carousel or showcase.
Make your selection and give your project a name. There is also the possibility to set custom dimensions for the height and width of your carousel.
Plus, you can choose between a boxed or full width layout. Once you’re happy with your choices, click on Create.
3. Add your images 🖱️
At this point, you’ve set up the basis for your image carousel, so it’s time to add your images. All you need to do is click on the Add Slide button:
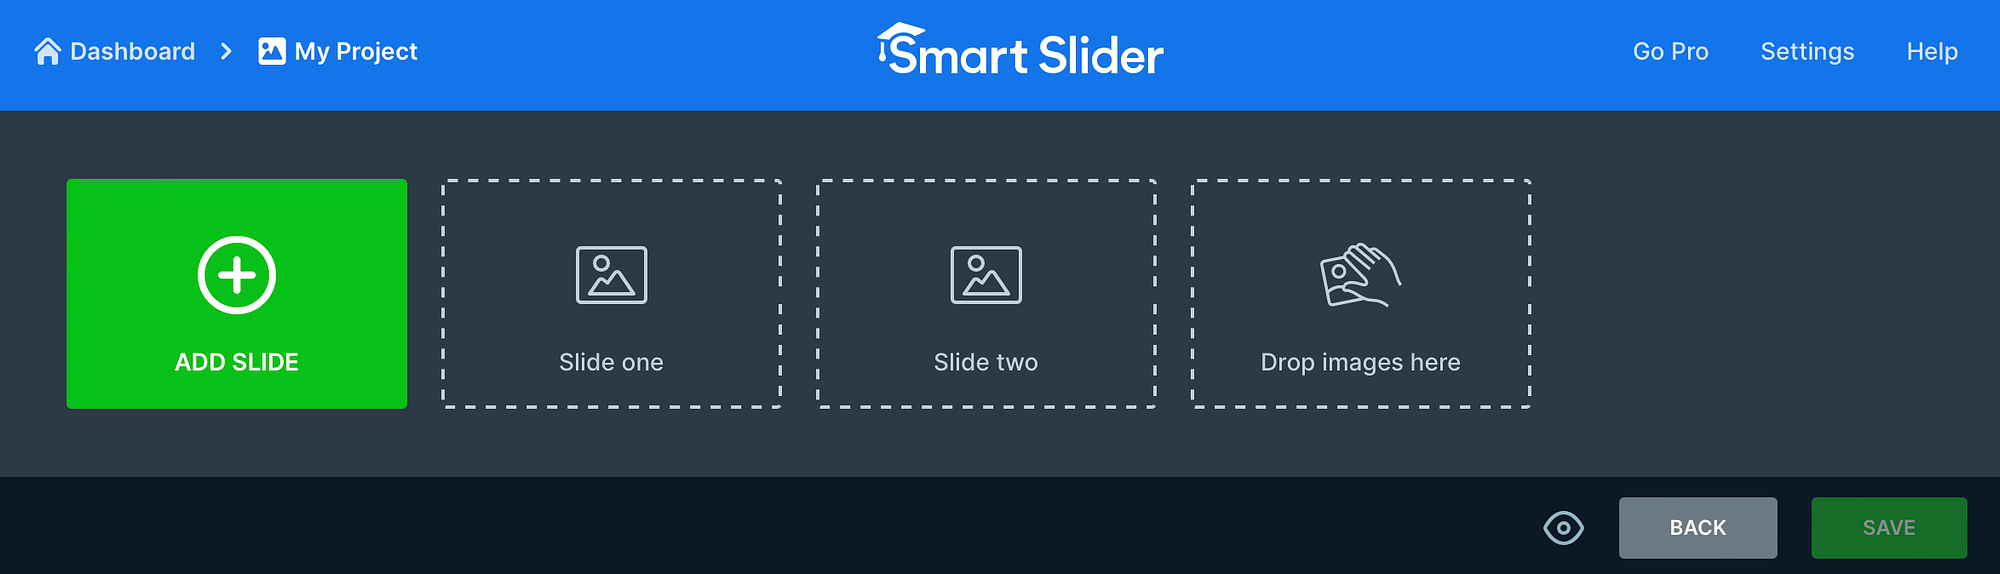
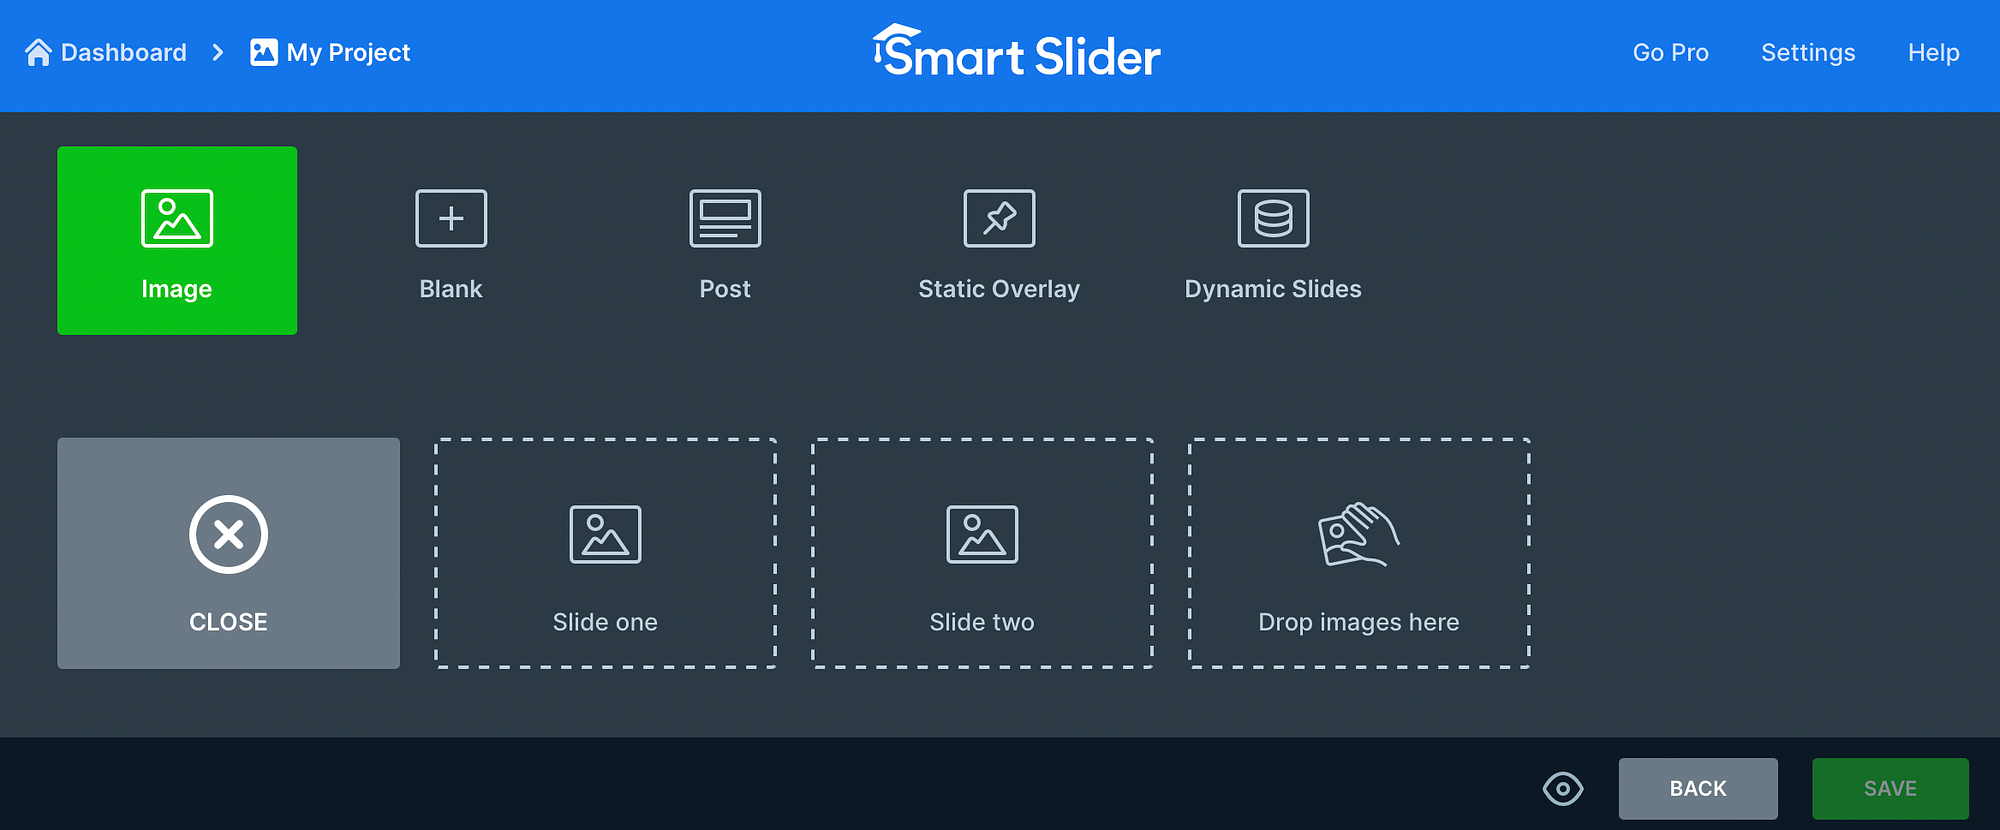
Then, choose the relevant option. For instance, you can add images, posts, dynamic slides, and more. Select the Image option to drop or upload files from your computer:
Or, switch to the Media Library tab to choose images that are saved to your WordPress site. When you’ve found the right photo, click on Select to add it to your project:
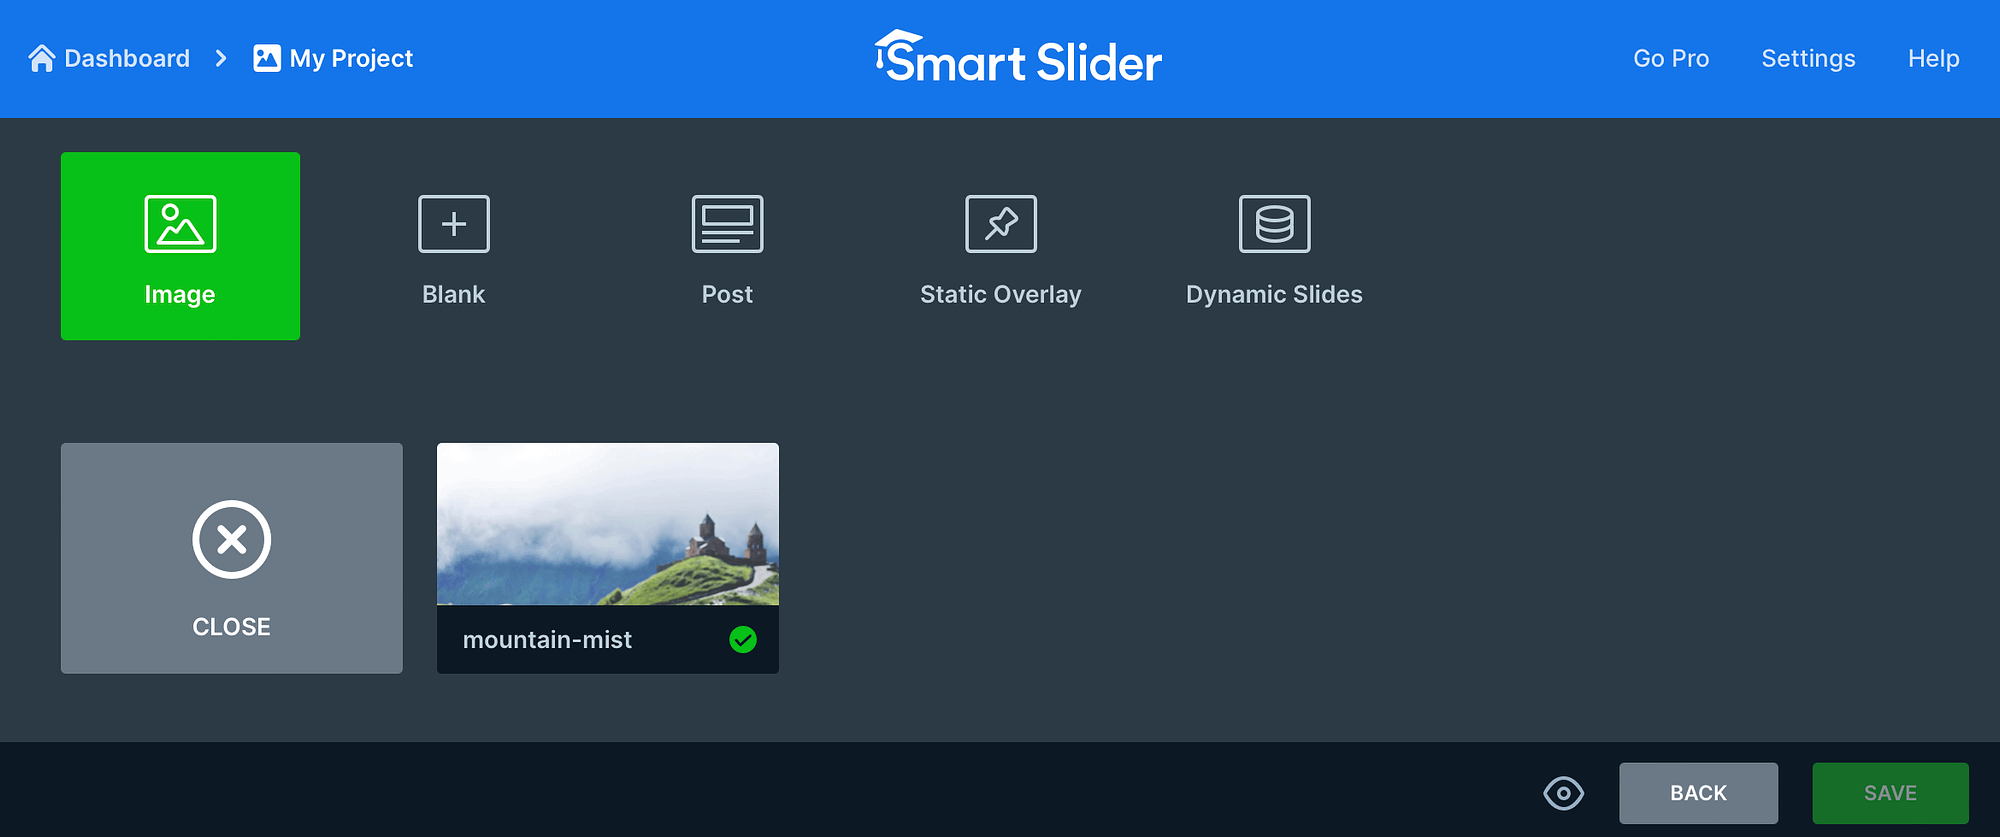
Now, continue the process until you’ve added all of your images.
One of the best parts about Smart Slider is that you can even edit individual images. So if you want to customize a specific image, hover over the photo and select Edit:
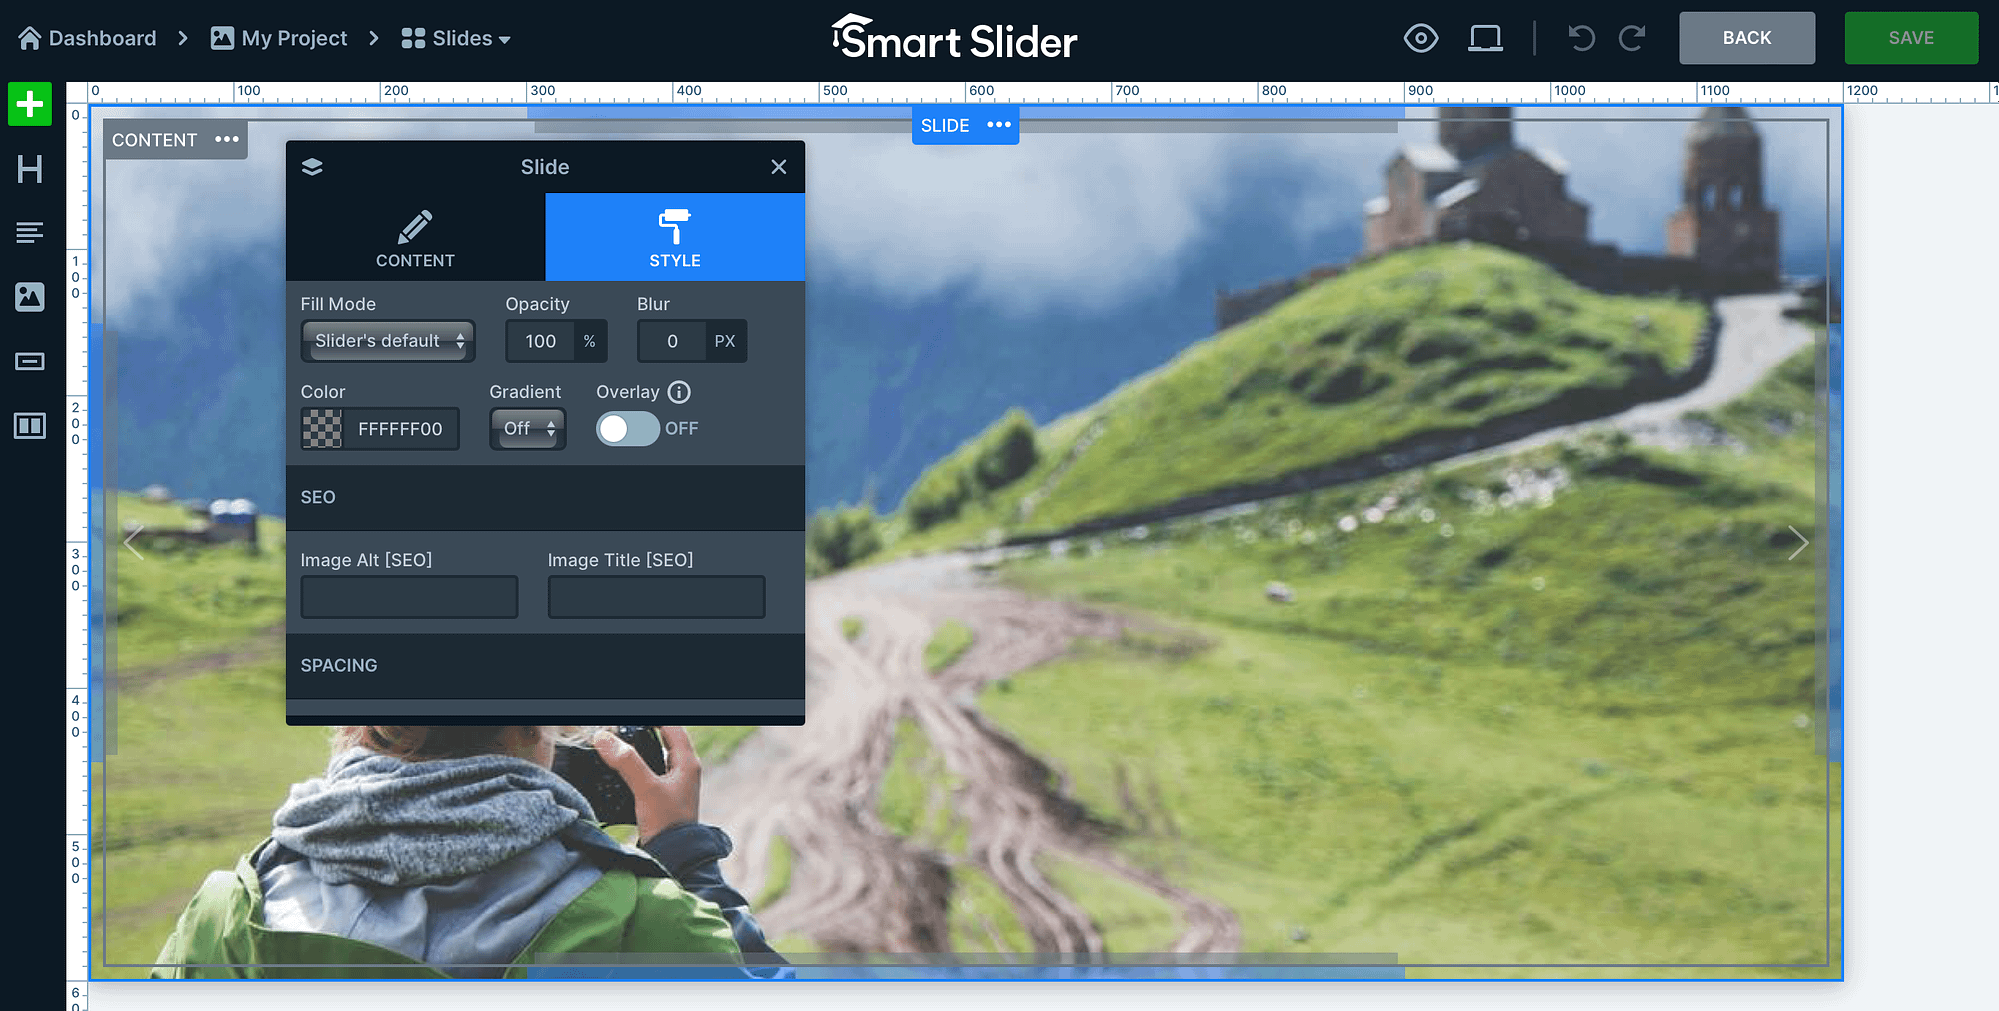
Here, you can adjust the focus of the image, apply a background color, and add image SEO details like alt tags and titles. In the Content tab, you can also add a link which is ideal if you’re adding product photos that lead to a product page.
Additionally, you can use the links to the left side of the editor to add headings, text, and buttons over your picture. Then, click on Save to update the slide.
4. Customize the image carousel design 📐
After you’ve added all your photos to the image carousel, you can customize the design so that it displays nicely on your page. Scroll down to the General section where you can add a thumbnail and change the alignment of your slide design.
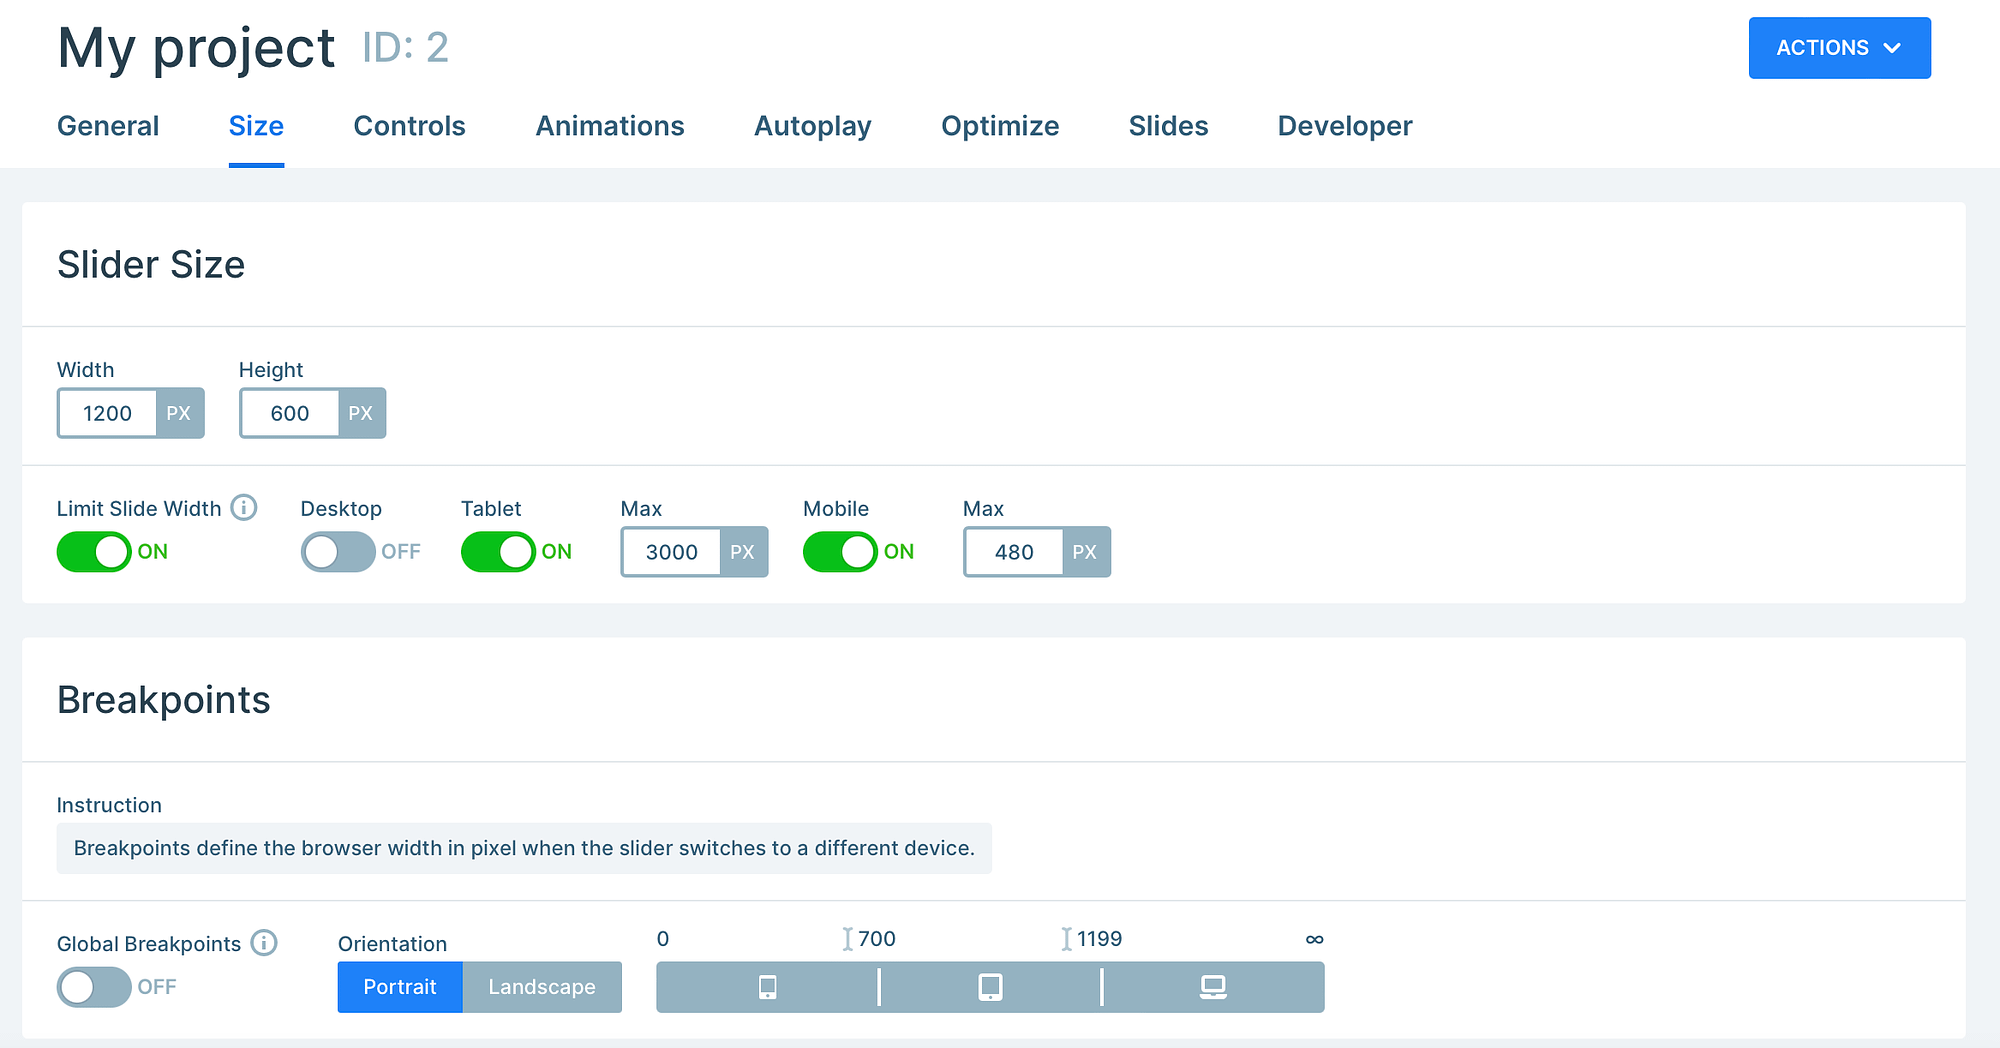
If you switch to the Size tab, you can change the layout type (boxed, full width), define custom dimensions for different devices, and insert breakpoints to create a fully responsive image carousel:
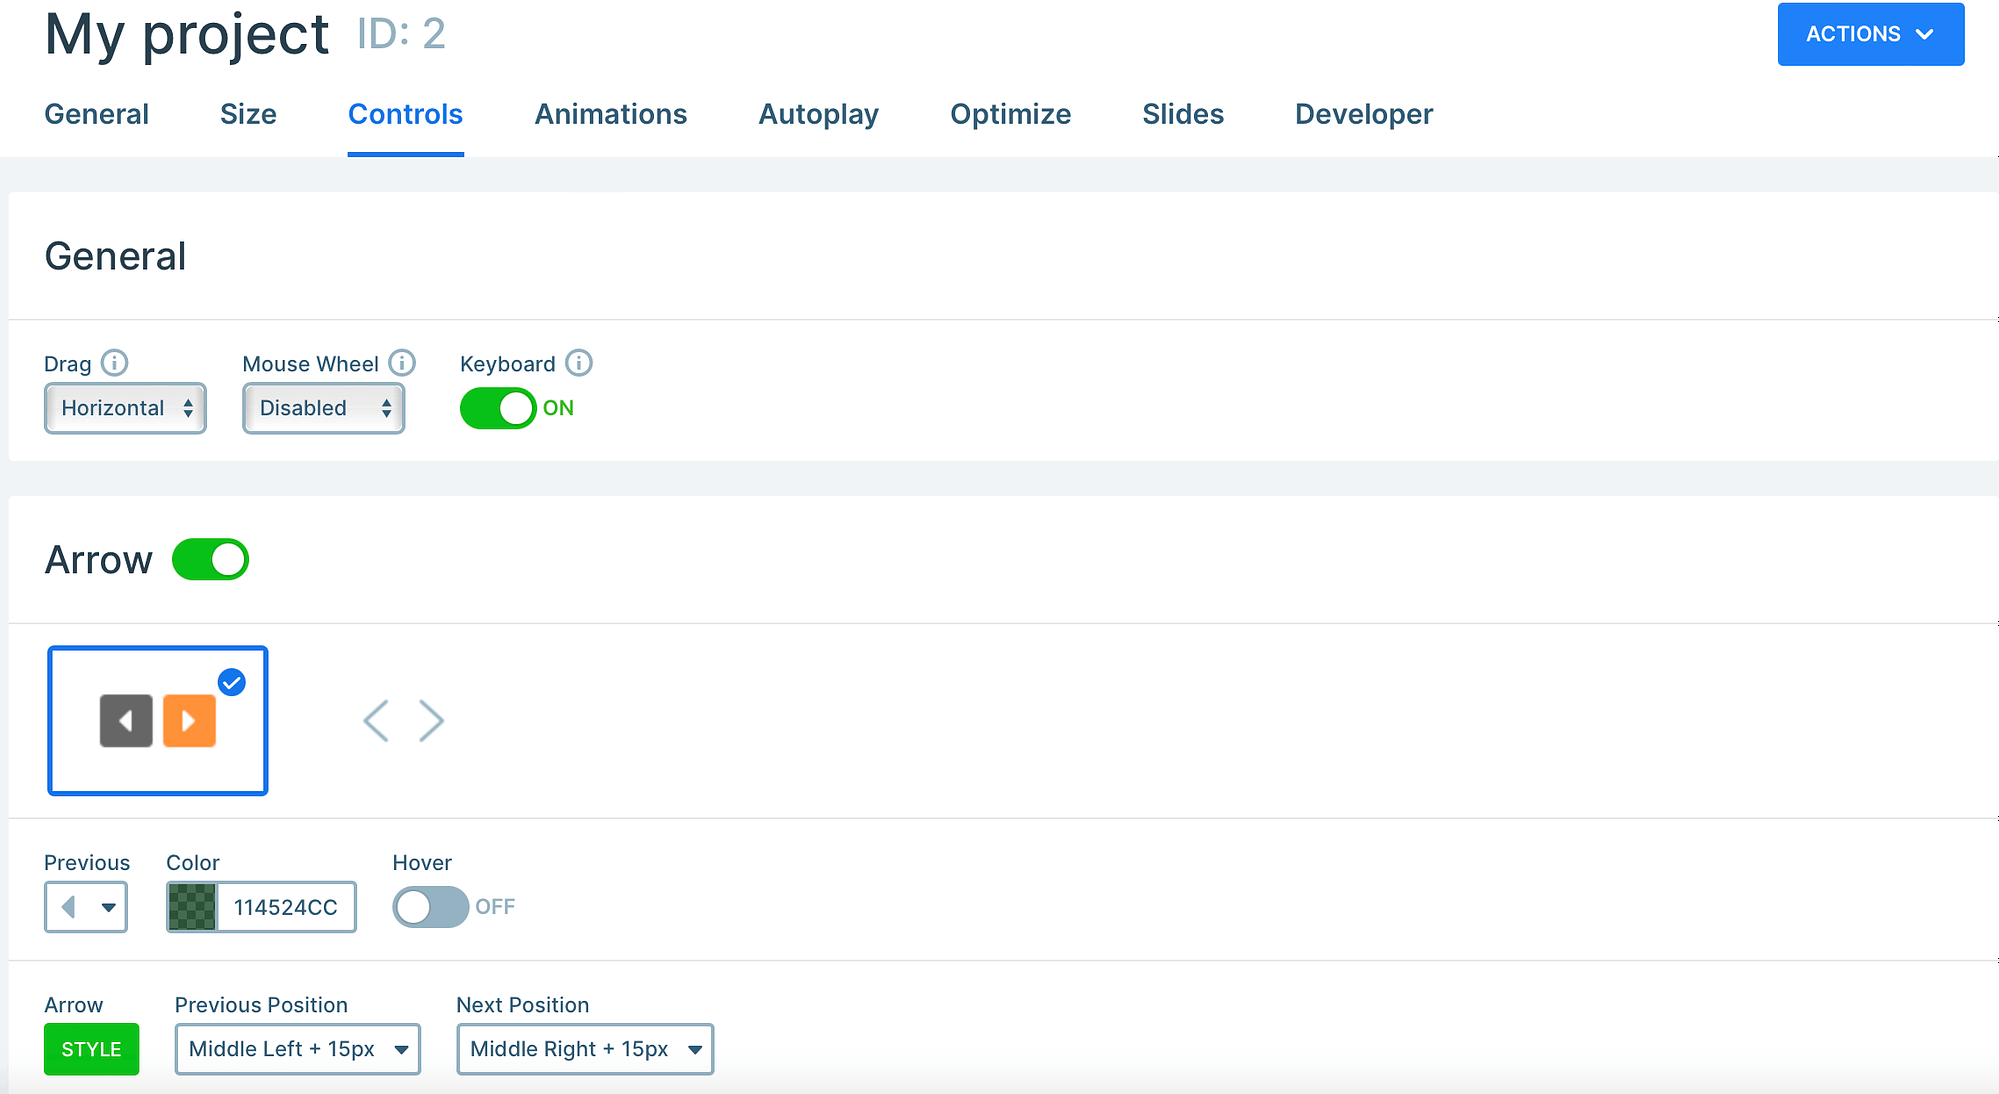
Meanwhile, the Controls section allows you to determine the drag (and touch) direction for your slider, customize the appearance of the arrow, and enable text bars, thumbnails, shadows, and more:
If you want to make your image carousel rotate automatically between slides, head to the Autoplay section to enable this functionality. Besides that, you can optimize your slide by determining when and how the carousel loads and displays.
Now, click on the small eye icon to preview your image carousel:
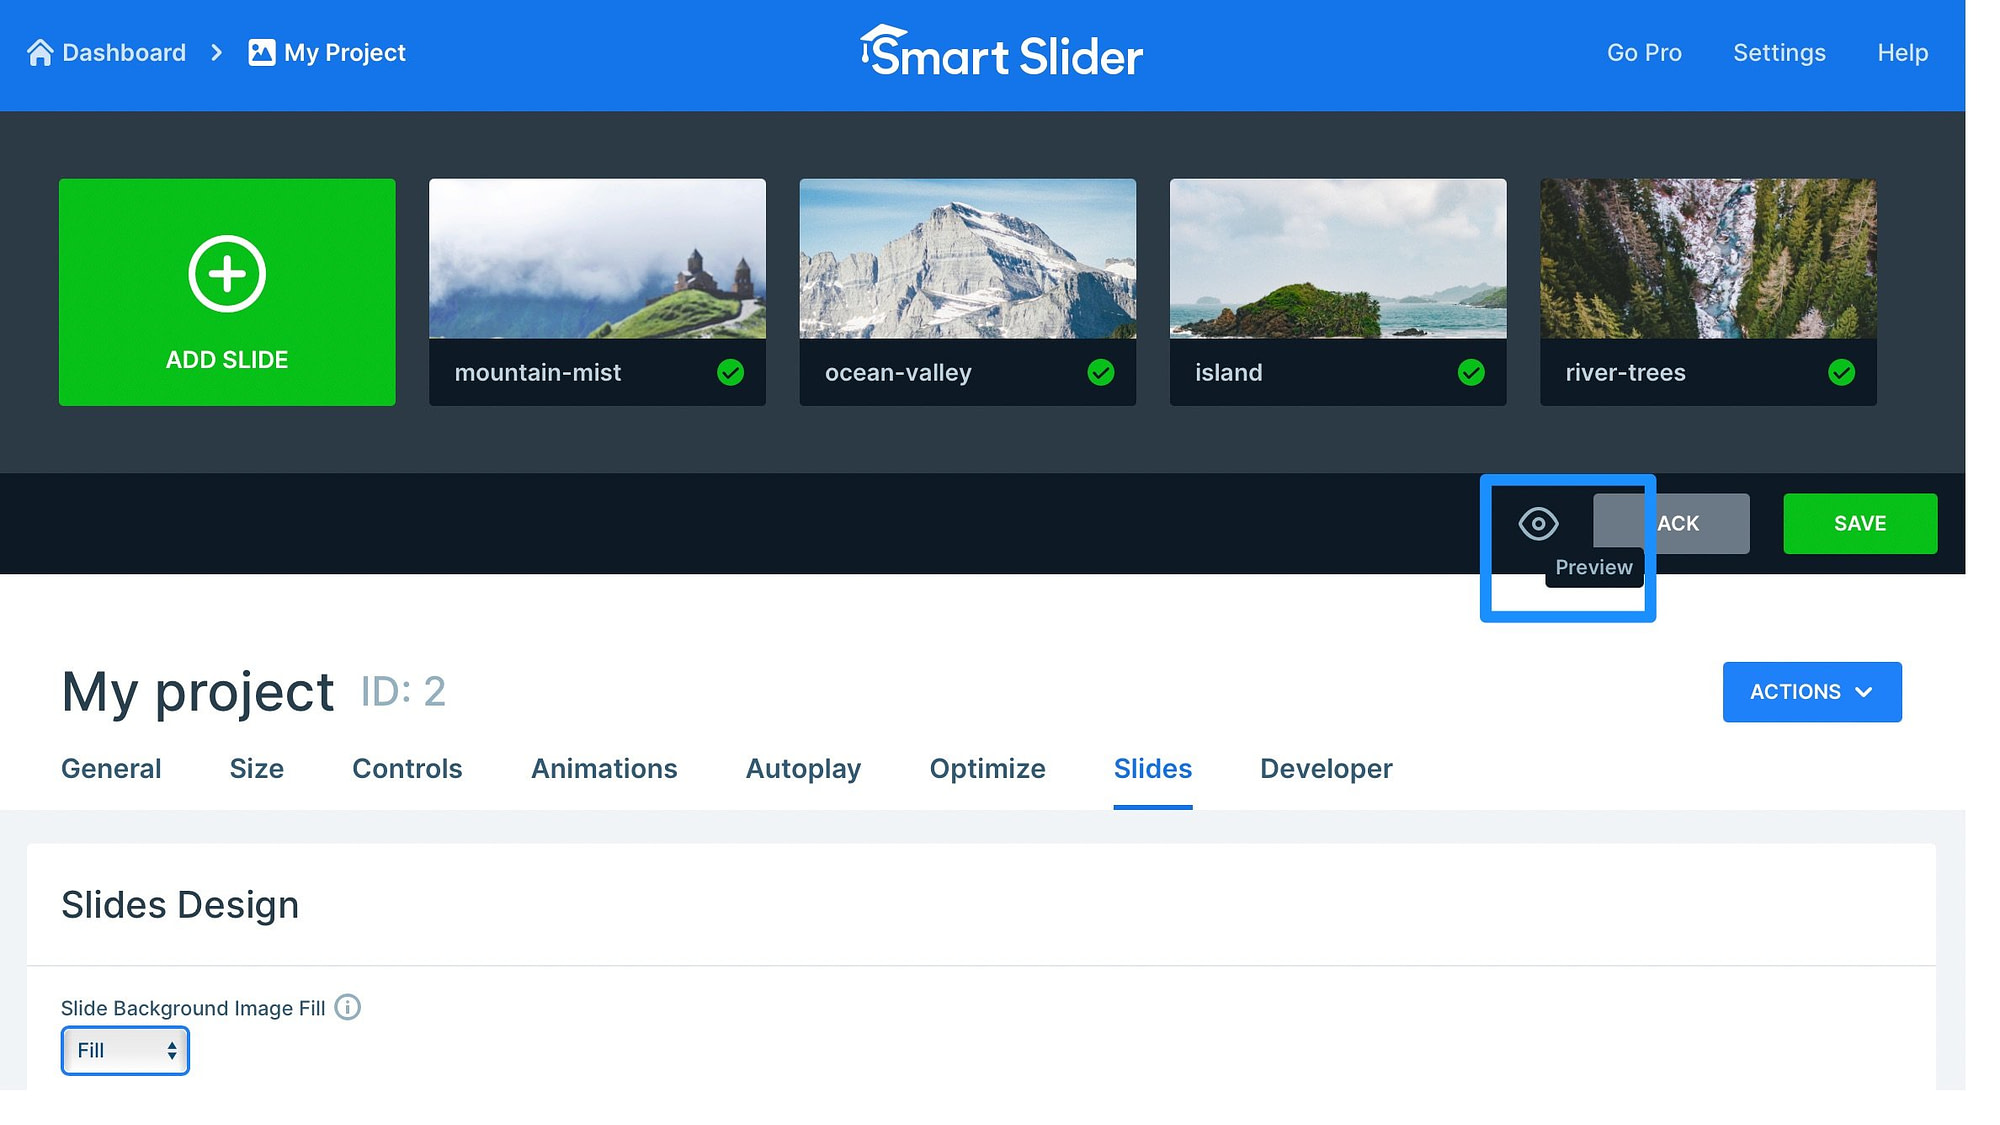
Then, if you’re happy with the carousel design, click on Save.
5. Add your image carousel in WordPress 🚧
At this point, you’ve created an image carousel in WordPress, but you still need to add the slider to a page or post on your site. If you head back to the General section beneath the editor, you can see all the ways that you can embed the carousel.
For instance, you can use shortcode or PHP code (to add to your theme’s file). However, the easiest way is to add your carousel as a block/widget. Better yet, Smart Slider 3 integrates with all popular page-builders so you aren’t limited to the Block editor.
To get started, open the page or post where you want to insert your image carousel. Now, select a new block and search for “slider.” Click on the Smart Slider 3 option:

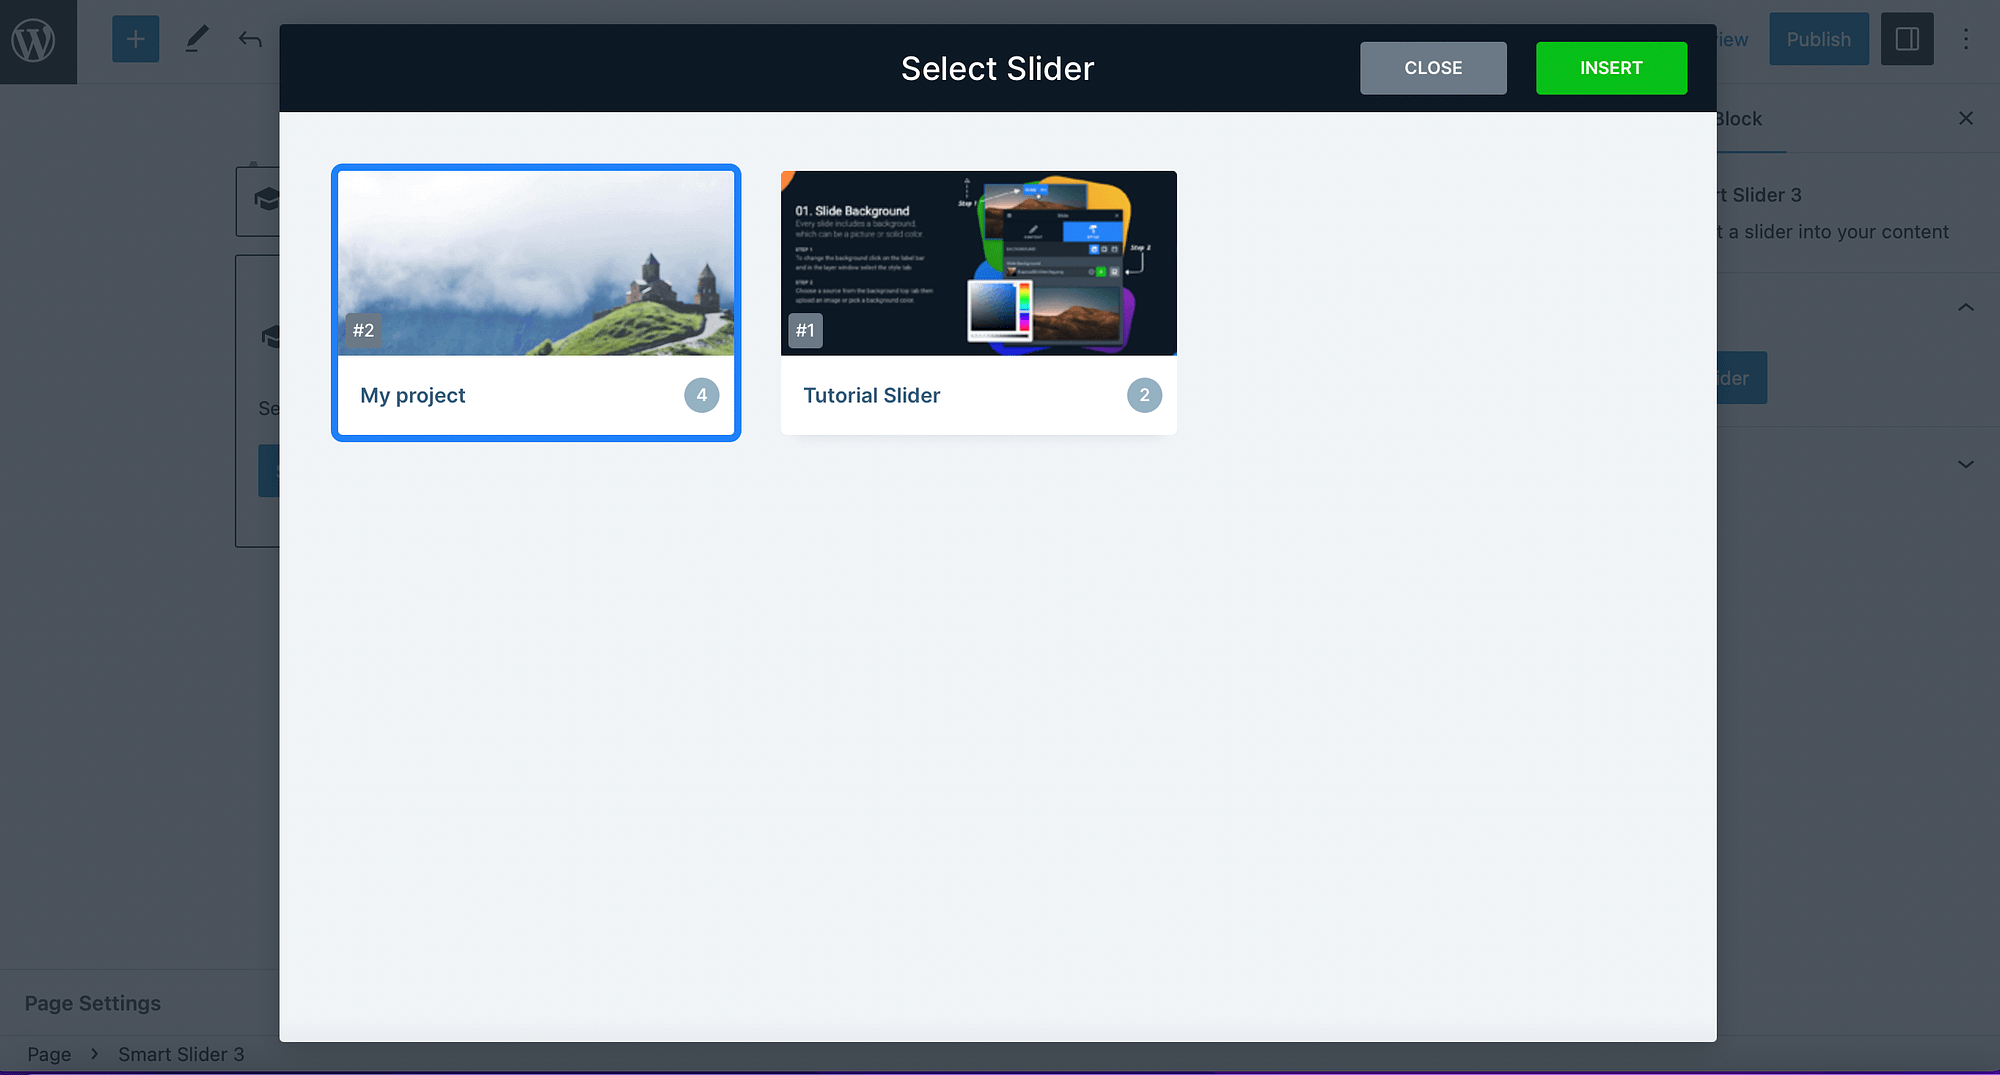
Then, click on Select Slider and find the carousel that you just created:
Now, select Insert to add the carousel to your page. Then, you can preview your page on the frontend to see if it displays correctly:

If you need to edit the slider, simply click on the pencil icon in the toolbar or select Edit from the Block settings. Otherwise, you can save or publish your page.
Conclusion 🧐
An image carousel is an excellent way to add lots of images to your site without taking up too much space. Plus, your visitors can easily browse through the photos which makes your site more interactive.
🎢 To recap, here’s how to create an image carousel in WordPress:
- 🔌 Install a carousel plugin like Smart Slider 3.
- 🎨 Create your first image carousel
- 🖱️ Add your images
- 📐 Customize the image carousel design
- 🚧 Add your image carousel in WordPress
Do you have any questions about how to create an image carousel in WordPress? Let us know in the comments below!