The “DNS Server Not Responding” error is a common WordPress issue, though it can affect access to non-WordPress sites as well.
Fortunately, with a few troubleshooting steps, it’s relatively straightforward to clear the error and access your site. For example, you might simply need to check your internet connection. Or, the solution might be slightly more complex and require you to change your DNS server or flush the DNS cache.
An introduction to the DNS Server Not Responding error
The DNS Server Not Responding error is a common WordPress error, though it’s not limited to WordPress and it can also affect your access to non-WordPress sites.
The error can be very frustrating to encounter since it blocks you from accessing your own site. Instead, you’ll likely receive a warning message that says something like “This site can’t be reached.”
The DNS Server Not Responding error means that your web browser is not able to connect to the DNS server of the website that you’re trying to access, either because the server is not responding or your web browser doesn’t have internet access.
DNS plays an essential role in connecting your web browser with a website’s server. So, if your web browser is not able to access the DNS server, it will not be able to load the website.
👉 Here are some of the most common causes of the DNS Server Not Responding error:
- The DNS provider is unavailable
- You’ve lost your internet connection
- Your firewall or antivirus software is blocking the connection
- There’s an issue with the web browser
- Your DNS cache is outdated
It can be difficult to determine the cause of the DNS Server Not Responding error. That’s why it’s a good idea to make your way through some useful WordPress troubleshooting methods until you clear the error. We’ll walk you through the methods to fix this error in the next section.
How to fix the DNS Server Not Responding error (five ways)
Now that you know a bit more about the DNS Server Not Responding error, let’s take a look at five troubleshooting tips you can try to fix the problem.
- Check your internet connection
- Visit your website in a different browser
- Disable your antivirus or firewall
- Change the default DNS server address
- Flush your DNS cache
1. Check your internet connection
As discussed, you might see the DNS Server Not Responding error if you’re not connected to the internet. Therefore, you’ll need to check that the connection is still working properly.
First, make sure that you are still connected to the internet, as it’s possible that your connection might have dropped for some reason.
If that’s not the problem, you can further troubleshoot network problems by configuring wireless diagnostics. First, close all of your applications.
Then, for Mac users, you’ll need to hold down the Options key and select the Wi-Fi icon in your menu bar.
Then, choose Open Wireless Diagnostics:
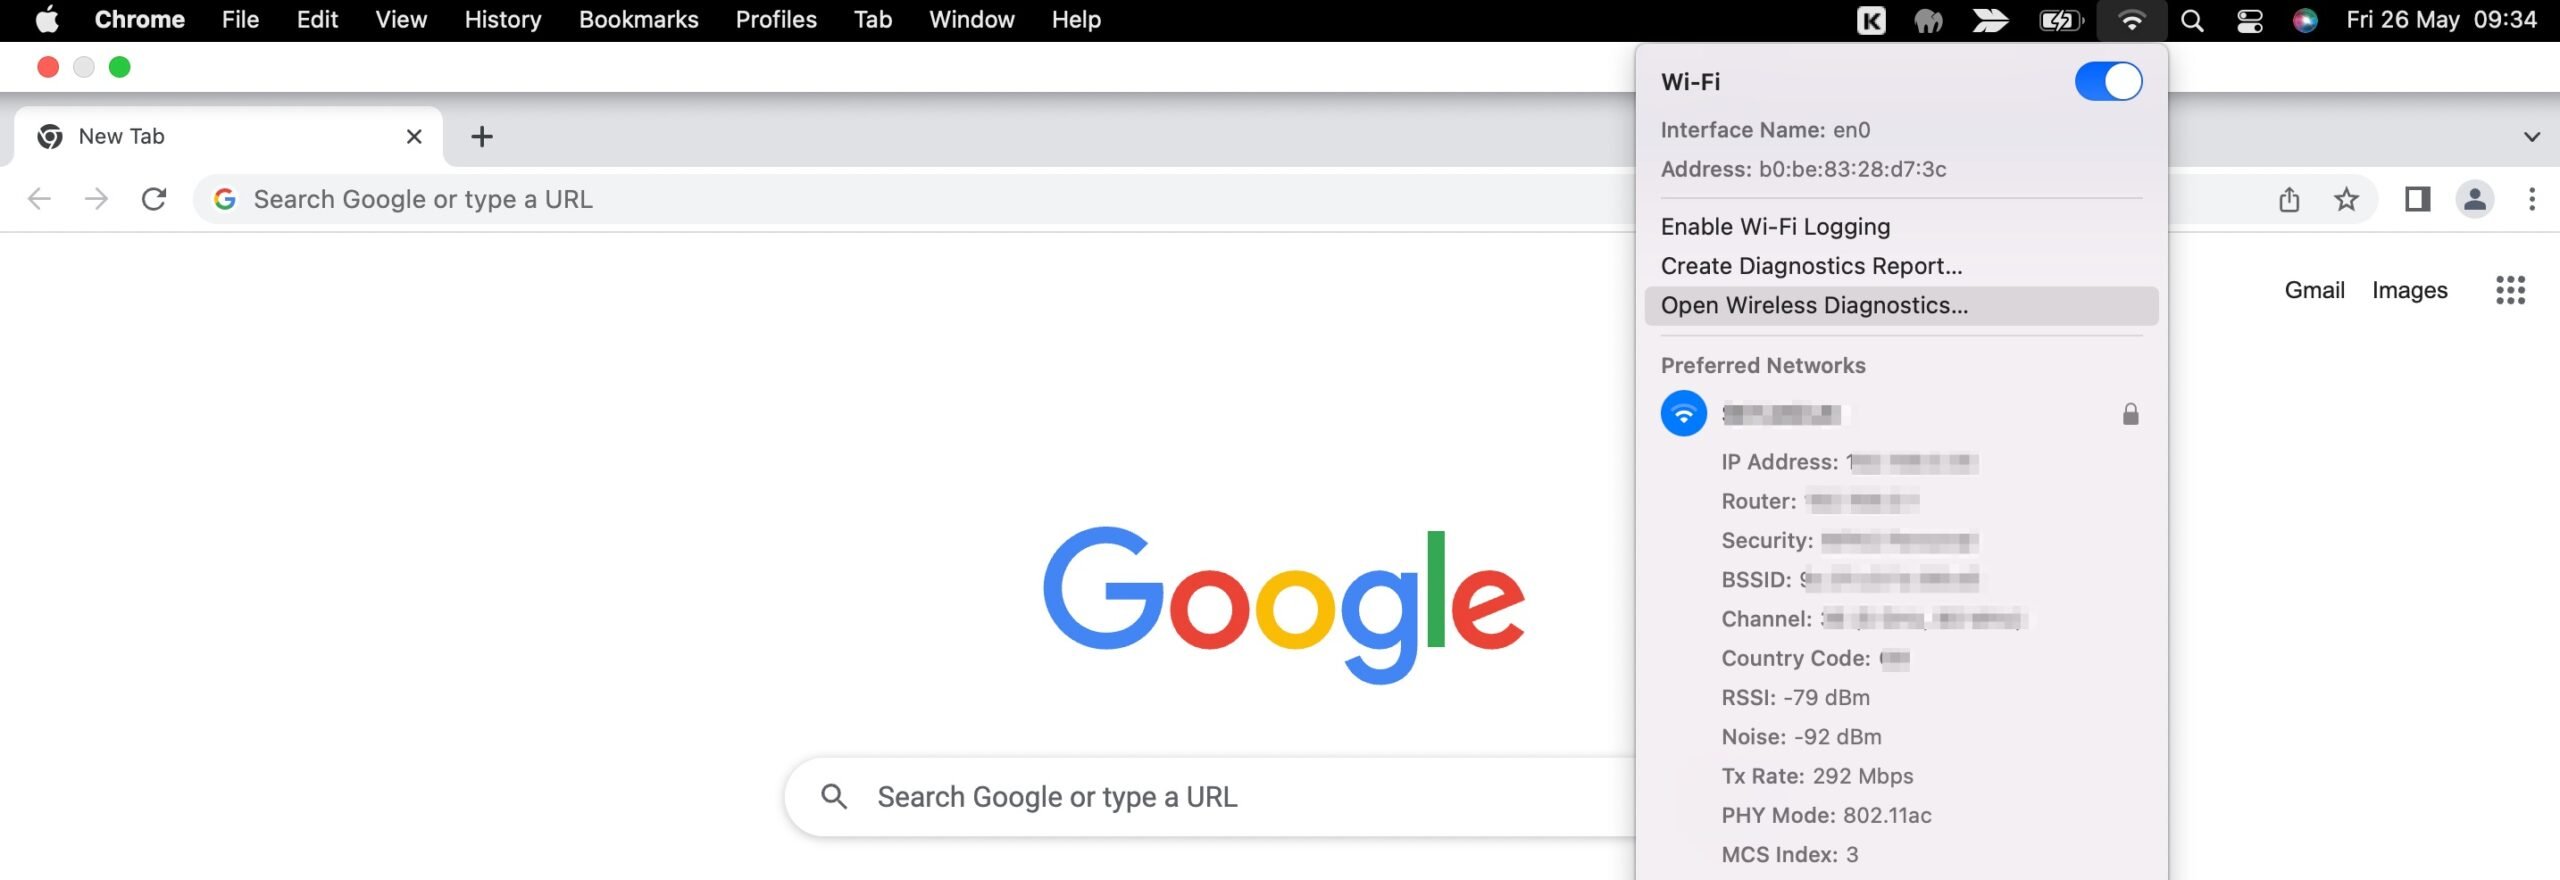
Now, simply follow the instructions in the pop-up that appears. Once the scan is complete, select the Info icon to find out more information about each entry.
For Windows users, you can right-click on the connectivity icon in the system tray of your desktop. Then, choose Troubleshoot problems.
If this doesn’t fix the DNS Server Not Responding error, you can restart your internet connection by turning your computer on and off. But, if you’re still receiving the error message, there may be a problem with your router.
In this instance, you can try to restart your router. Usually, you can do this by finding the power button and pressing it once. Then, wait a few seconds before you turn it back on.
Or, you might even want to reboot your router completely. To do this, unplug it entirely and wait at least 30 seconds before reconnecting it to power.
2. Visit your website in a different browser
One of the major causes of the DNS Server Not Responding error is that there’s a problem with your browser. As such, you might be able to fix the error by using a different browser to reach your site.
For example, if you’re currently using Google Chrome to connect to your site, try switching to Firefox or Microsoft Edge. If this works, then you know there’s an issue with your original browser.
One of these issues might be that you need to clear your browser cache. If you’re using Google Chrome, you can do this by clicking on the three dots to the right of your screen. Then, select More Tools > Clear Browsing Data:
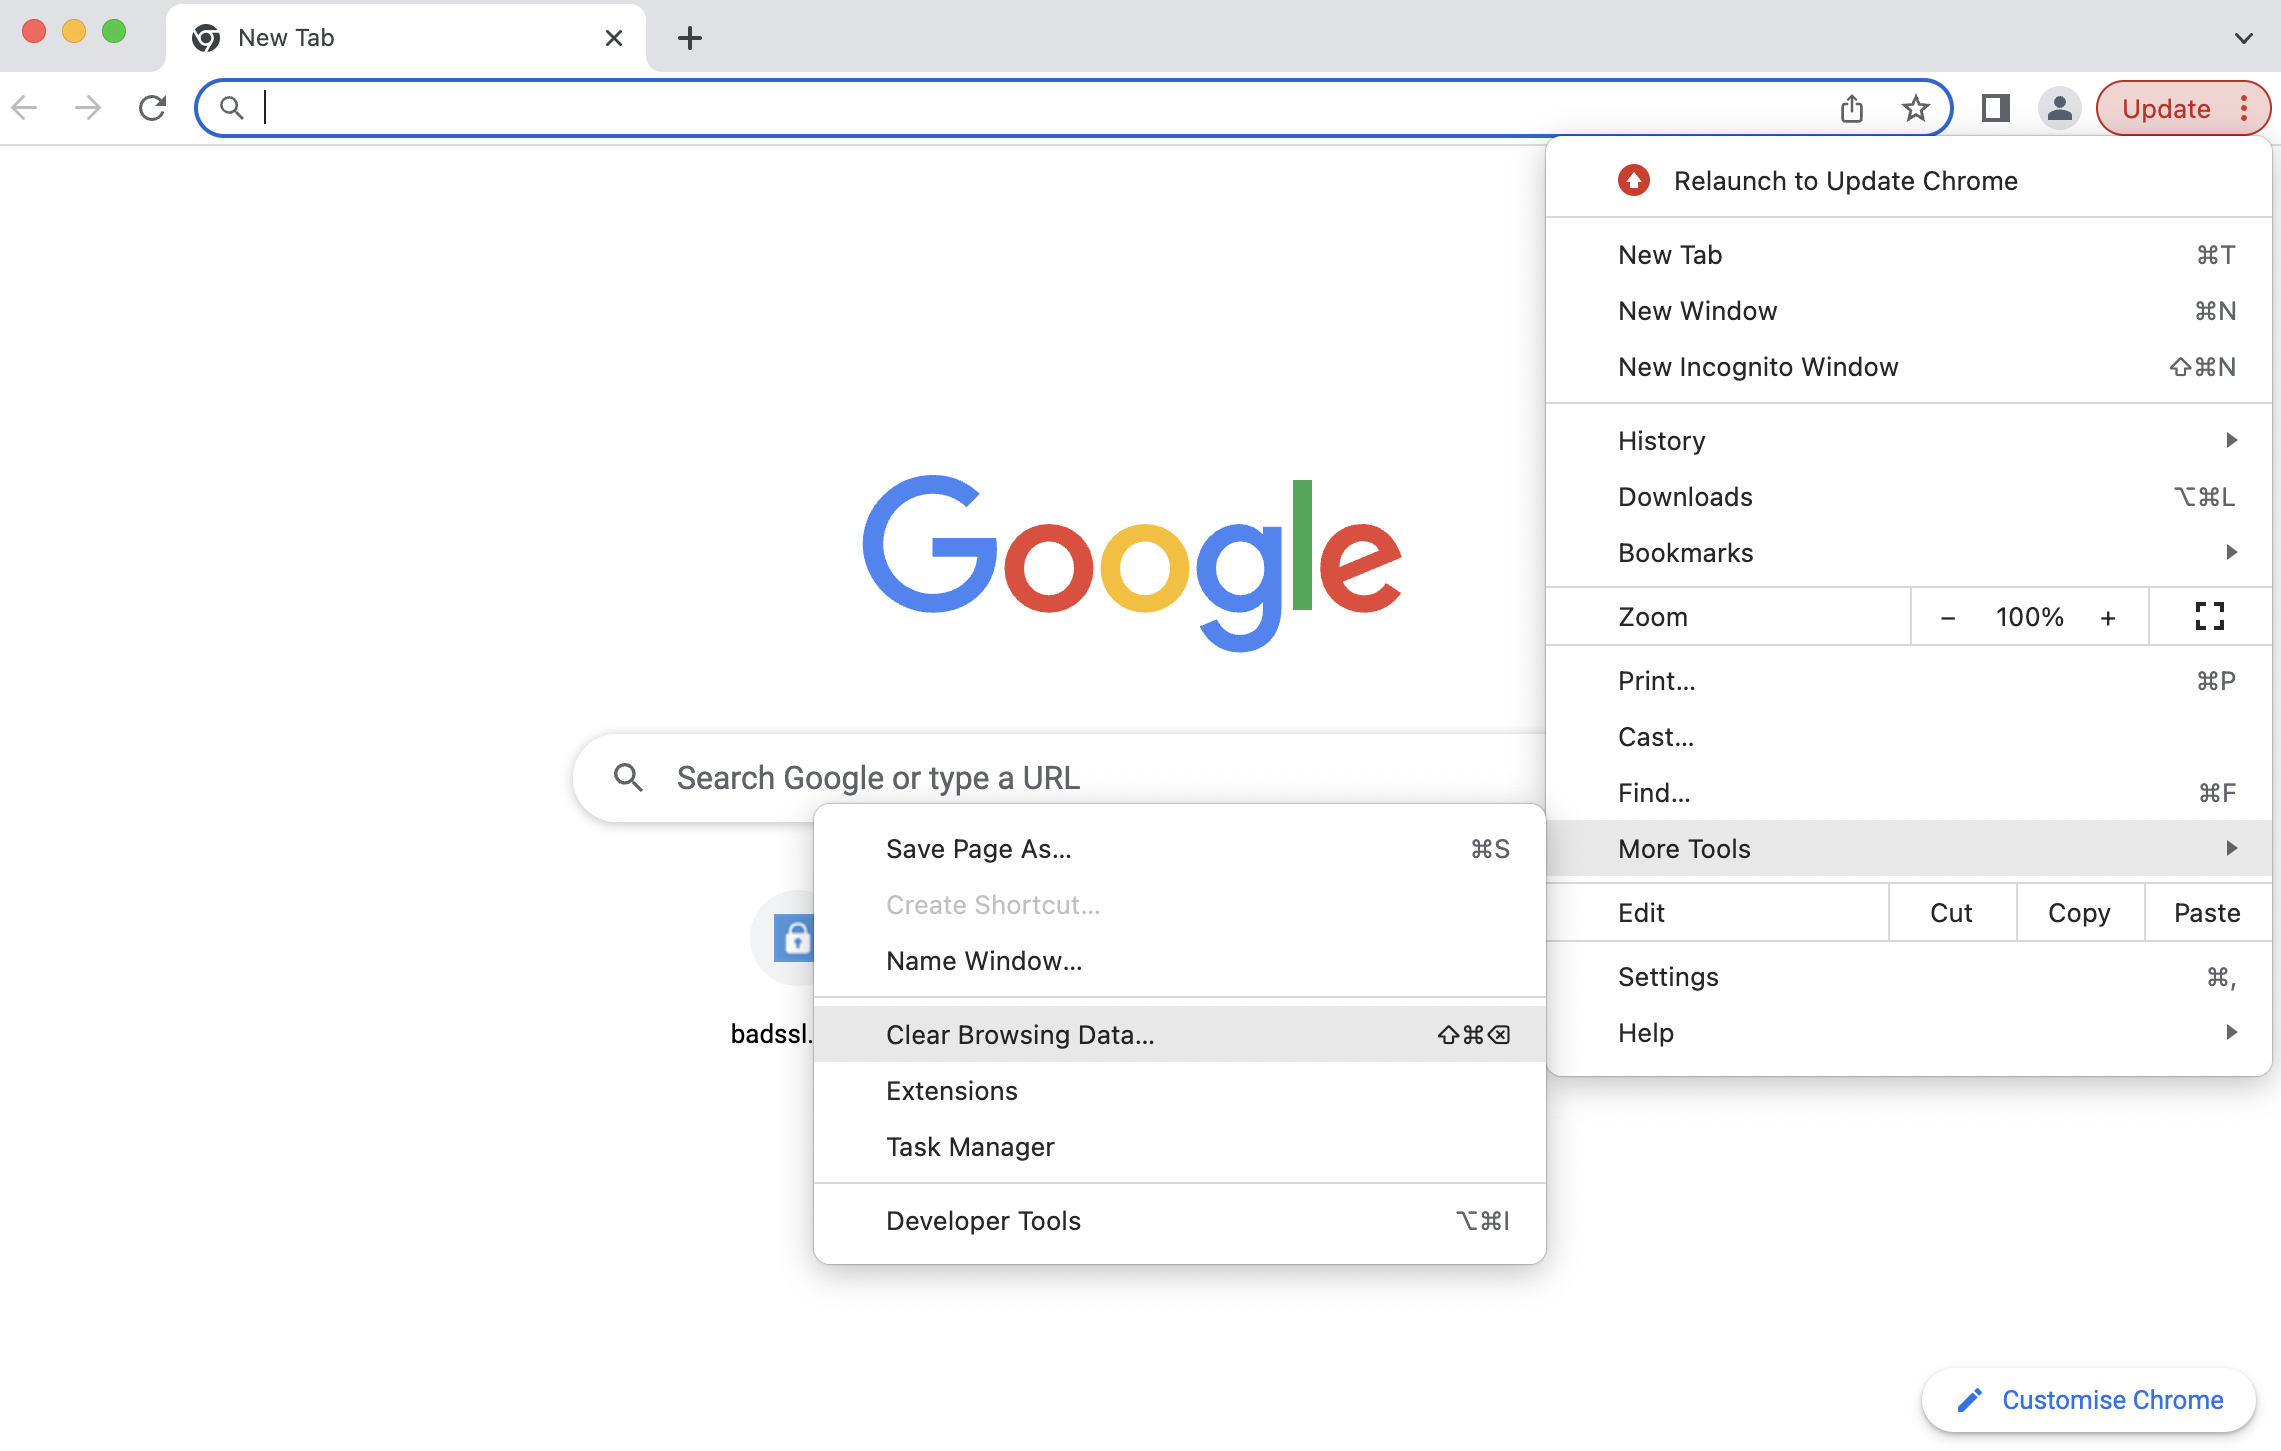
At the pop-up, you can clear your browser history, cookies, and cached images and files. Make sure that you at least select the latter option. Then, hit Clear Data.
If this still doesn’t fix the DNS Server Not Responding error, you might need to update your browser to the latest version. Or, you can reinstall the browser completely.
3. Disable your antivirus or firewall
Firewalls and antivirus programs are a great way to protect your computer against malicious software. However, sometimes, they can interfere with your network connections.
Generally, this occurs when there’s an issue with the software itself (for example, it might be out-of-date). Or, your antivirus/firewall settings may be too strict.
Fortunately, you can check whether your antivirus/firewall is causing the DNS issue by temporarily disabling it. If the error clears, then you’ll know that there’s a problem with your program.
You can do this on Mac by navigating to the Apple icon in the Apple toolbar. You’ll find this at the top left-hand side of your screen. Then, click on System Preferences:
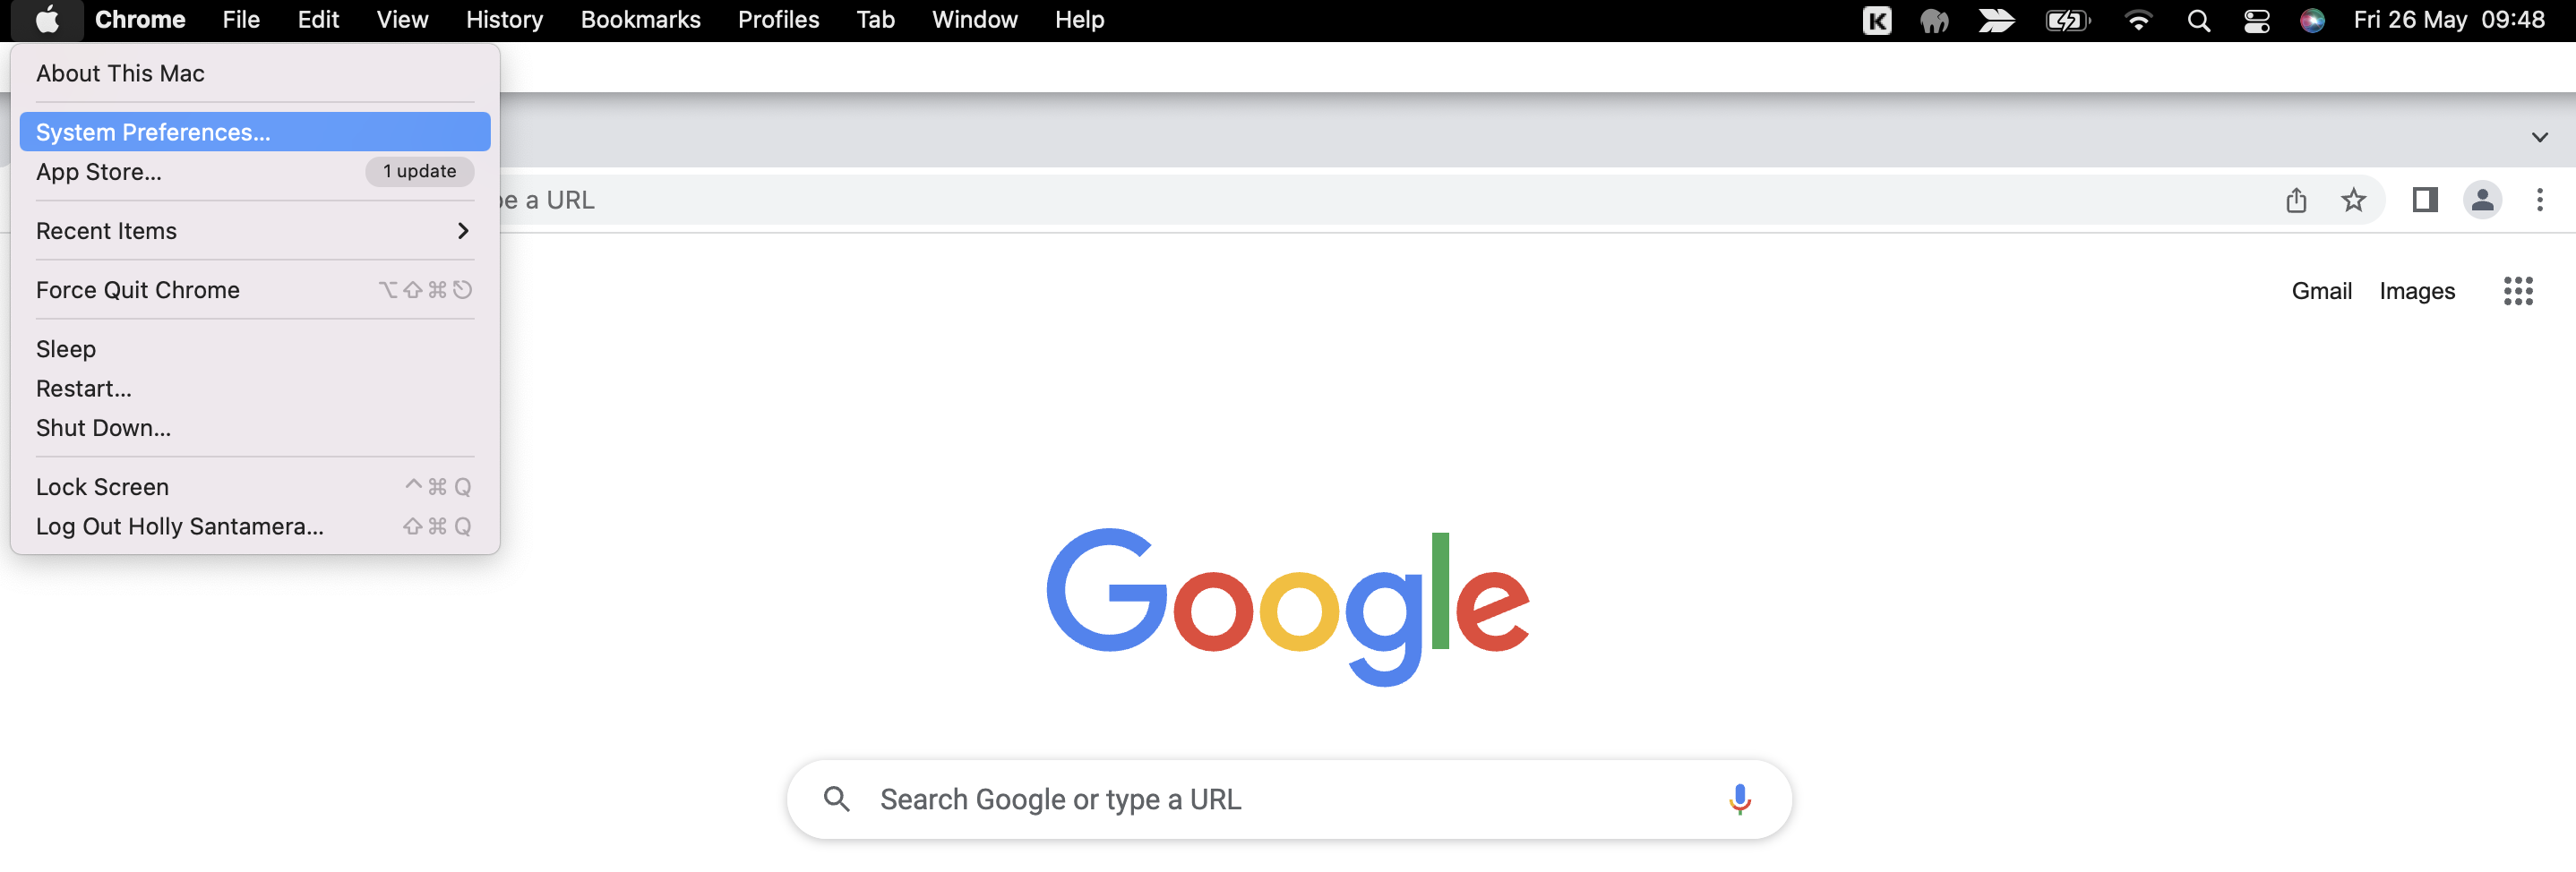
Here, select Security & Privacy and switch to the Firewall tab, where you can disable your firewall:
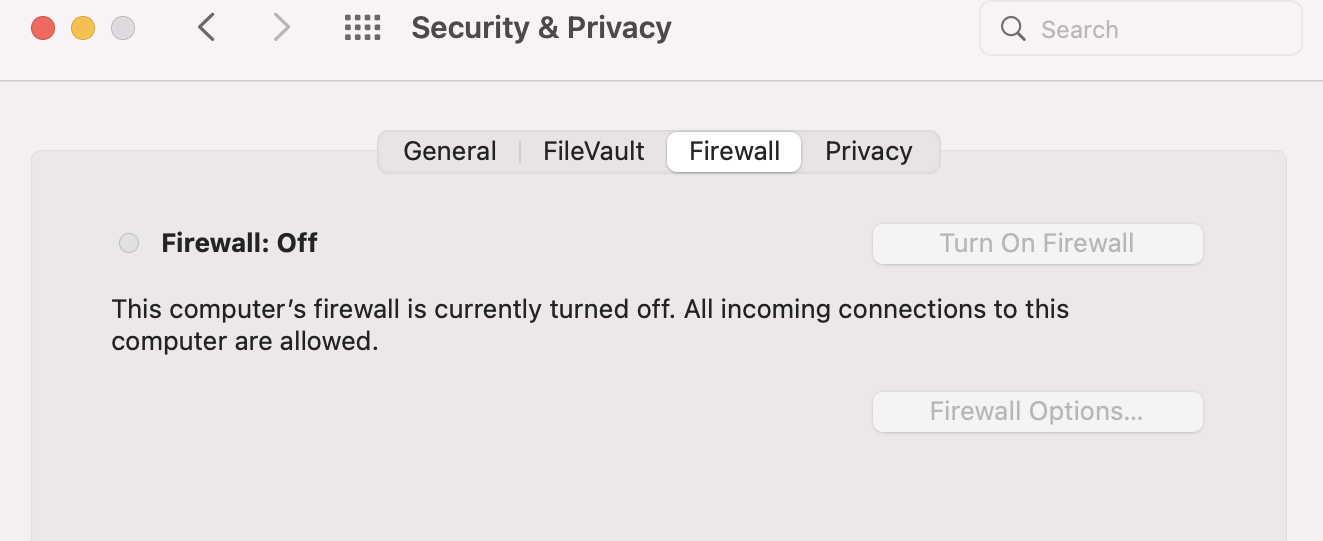
Now, visit your website to see if the error has cleared.
If it has, you might need to update your firewall software, switch to a different provider, or reconfigure your settings. Either way, it’s important that you remember to enable your firewall once you’re done troubleshooting.
4. Change the default DNS server address
You might be seeing the DNS Server Not Responding error because your DNS provider is unavailable. In this case, it’s a good idea to change the default DNS server address assigned to you by your Internet Service Provider (ISP).
Fortunately, there are plenty of free, public DNS servers like Google Public DNS [1] and Cloudflare 1.1.1.1 [2]. You can change your DNS settings on Mac by visiting System Preferences from your Apple toolbar.
At the pop-up, select Network. Then, click on the Advanced button:
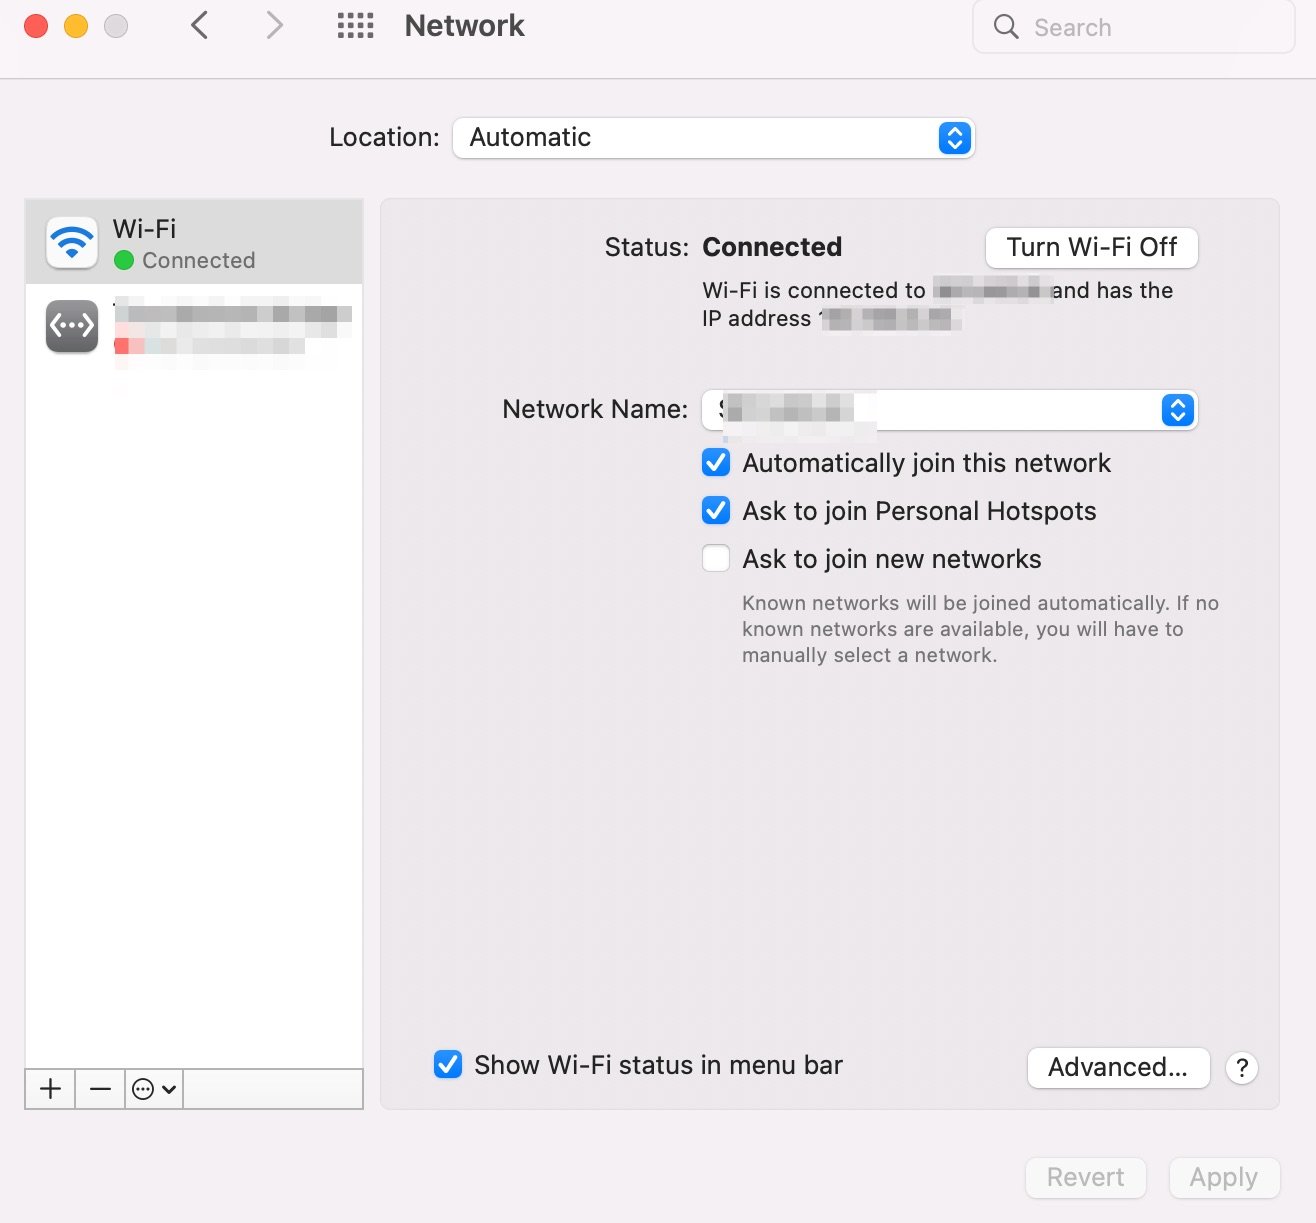
Now, switch to the DNS tab. Here, click on the + icon in the bottom left corner to add a new DNS server:
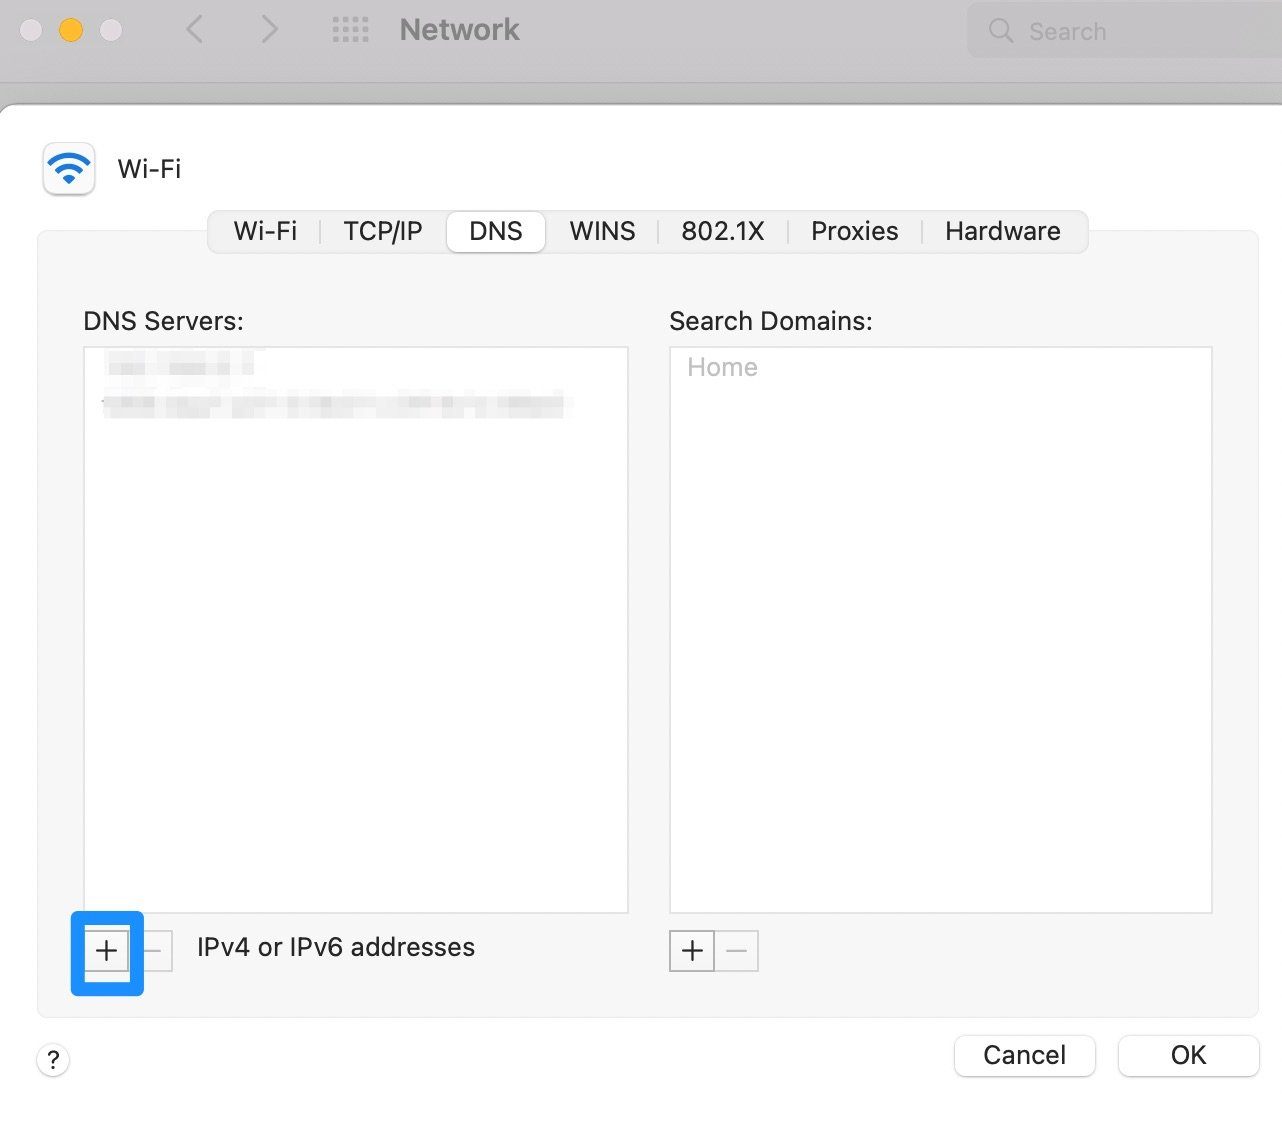
All you need to do is enter the numbers for the public DNS server that you want to use. For example, if you opt for Cloudflare, you’ll enter 1.1.1.1.
Click on OK to exit the pop-up, and then select Apply to save your new DNS settings. Now, you can visit your website in a browser and see if the DNS Server Not Responding error has cleared.
If you’re using Windows or another operating system, Cloudflare has detailed setup instructions for all operating systems. Here is a link to take you directly to the Windows setup instructions.
5. Flush your DNS cache
The final way to fix the DNS Server Not Responding error is to flush your DNS cache. Your DNS cache works similarly to a browser cache. But, it stores IP addresses rather than copies of web pages.
This is so that your computer doesn’t have to look up these addresses every time you revisit the same website. However, this means that the DNS cache data can become outdated, which can result in the DNS Server Not Responding error.
Typically, this occurs when you move your WordPress site to a new domain. But, it can also happen if you’ve switched web hosts.
👉 If you use Windows, you can clear your cache using Command Prompt:
- Launch Command Prompt – you can do so by typing cmd in the start bar.
- In Command Prompt, type in
ipconfig /flushdnsand hit enter.
On Mac, you’ll need to open the Terminal by pressing the F4 key. Then, enter terminal in the search box.
Once the Terminal is open, you’ll need to run the command prompt that’s right for your version of Mac OS. For example, Mac OS Big Sur requires the following command:
sudo dscacheutil -flushcache; sudo killall -HUP mDNSResponder
This will refresh your DNS connection. So, now, you can try to access your website and see if the error has cleared.
Fix the DNS Server Not Responding error for good 🎯
The DNS Server Not Responding error usually occurs when your browser is unable to establish a connection with the server hosting your site. It can be a tricky error to solve since you aren’t able to access your site. However, you can fix the error with some useful troubleshooting steps.
👉 To recap, here are five ways to fix the DNS Server Not Responding error in WordPress:
- Check your internet connection.
- Visit your website in a different browser.
- Disable your antivirus or firewall.
- Change the default DNS server address.
- Flush your DNS cache.
For some general tips for keeping your WordPress site in shape, 🌙 you can check out our full beginner’s guide to WordPress troubleshooting.
Do you have any questions about how to solve the DNS Server Not Responding error in WordPress? Let us know in the comments below!