Have you ever wondered how Gutenberg dynamic content works and how to implement it on your WordPress website? 🤔
We’ve got you covered.
In this article, you’ll learn what dynamic content is and how to add it to your ecommerce site, online magazine, or blog by using Otter Blocks – a free and easy-to-use WordPress plugin. 🔌
After reading this guide, you’ll be able to create, insert, and display dynamic values in the WordPress Gutenberg editor right away. 🥳 Let’s dive into it!
📚 Table of contents:
What is WordPress dynamic content?
WordPress dynamic content is content you can pull from your site’s database and populate on any page ‘dynamically.’
It could be pulling in information from a user’s profile (such as their name), core WordPress data (such as a post’s published date), information from custom fields, and more.
👉 Here are some specific examples of Gutenberg dynamic content:
- Dynamically inserting a user’s name. For example, when users register in your ecommerce store, they’ll see a personalized welcome message with their name. A user named Paul would see a text saying ‘Hello, Paul,’ while user ‘Anne’ would see the text ‘Hello, Anne.’
- Dynamically inserting information from custom fields. For example, you can use the Advanced Custom Fields (ACF) plugin to store custom information and then dynamically fetch and display this data on your WordPress site. If you change the custom field’s content, your posts will automatically reflect these changes without you needing to change anything in the post editor.
- Dynamically inserting images. For example, you can add a picture of a post’s author to every piece they write. This way, author images will automatically appear alongside their respective articles.
Now that you know what WordPress dynamic content is, it’s time to put it into practice. In the following section, we’ll show you how to use Gutenberg dynamic content step by step. 🤹🏼
How to add dynamic content in Gutenberg
One of the easiest ways to add dynamic content in Gutenberg is by using a WordPress plugin like Otter Blocks.
Otter Blocks is a free plugin that allows you to add dynamic content to the native WordPress block editor without any coding knowledge. Yes, you’ve heard it right: You don’t need to be a developer or a high-end techie to start adding dynamic content to your site!
To make this tutorial easily scannable, we’ve divided it into three subsections focusing on Otter Block’s dynamic content features:
- Dynamic Links and Values. Learn how to populate internal or external hyperlinks dynamically, as well as regular text content.
- Dynamic Values and ACF. Learn how to pull in information from custom fields that you’ve added with the Advanced Custom Fields plugin efficiently.
- Dynamic Images. Learn how to insert images dynamically, such as by pulling in a user’s profile picture.
To follow all of these tutorials, all you need is the free Otter Blocks plugin, which is available at WordPress.org.
Before getting started, make sure to install and activate the plugin. You can do so just like you’d install any other plugin – go to Plugins → Add New and search for “Otter.”
Dynamic links and values
In this first section, you’ll learn how to populate links or text content dynamically.
How to insert dynamic links in Gutenberg
Let’s start with an easy example of using Otter Blocks to add a dynamic link to the Gutenberg block editor.
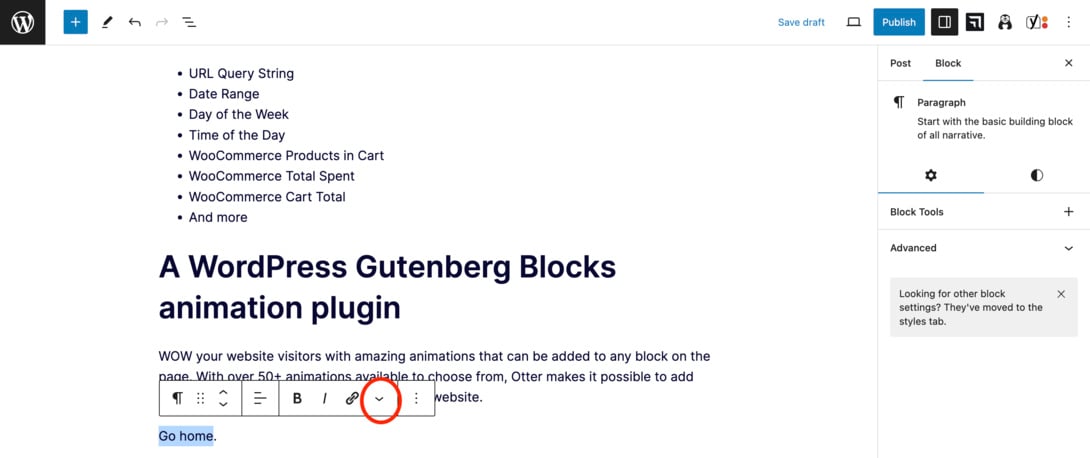
Once you’ve activated the Otter Blocks plugin, open a post and highlight the text to which you want to add a link.
For our example, we’ll create a ‘Go Home’ link to redirect users to the site’s homepage using dynamic links. After highlighting the text, click on the down arrow.
Now, click Dynamic Link.
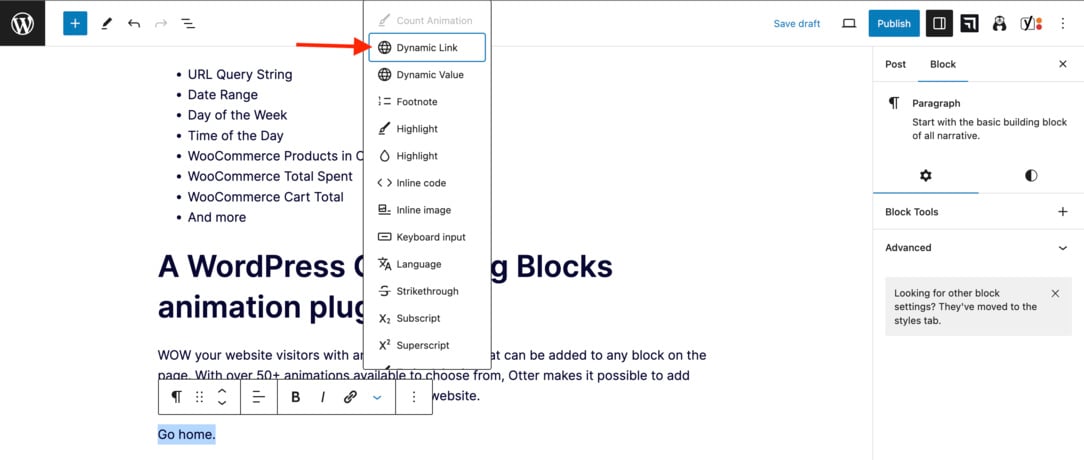
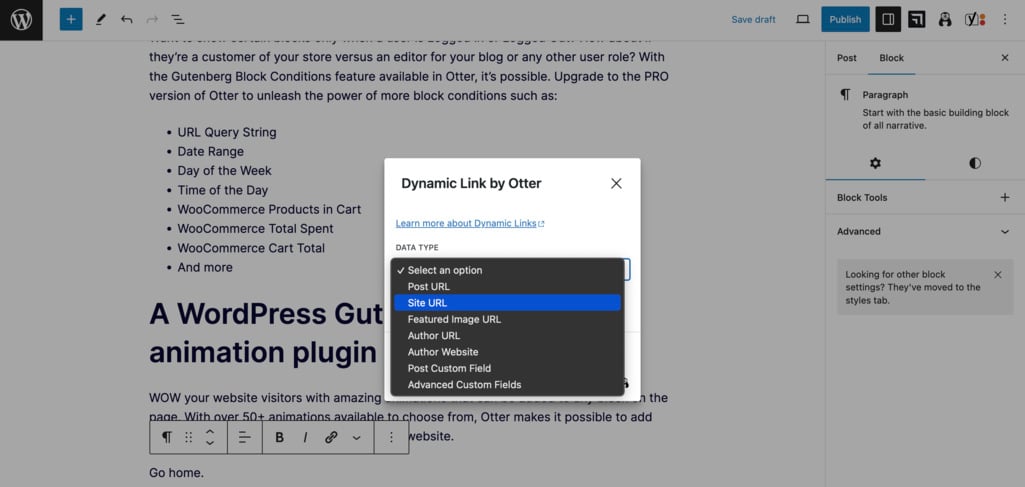
You’ll then see a data type list with options like Post URL, Site URL and Author Website.
If you want to use the Post Custom Field or Advanced Custom Fields features, you’ll need to purchase Otter Pro.
In our case, as we want to create a ‘Go Home’ link, we’ll select Site URL and click Apply.
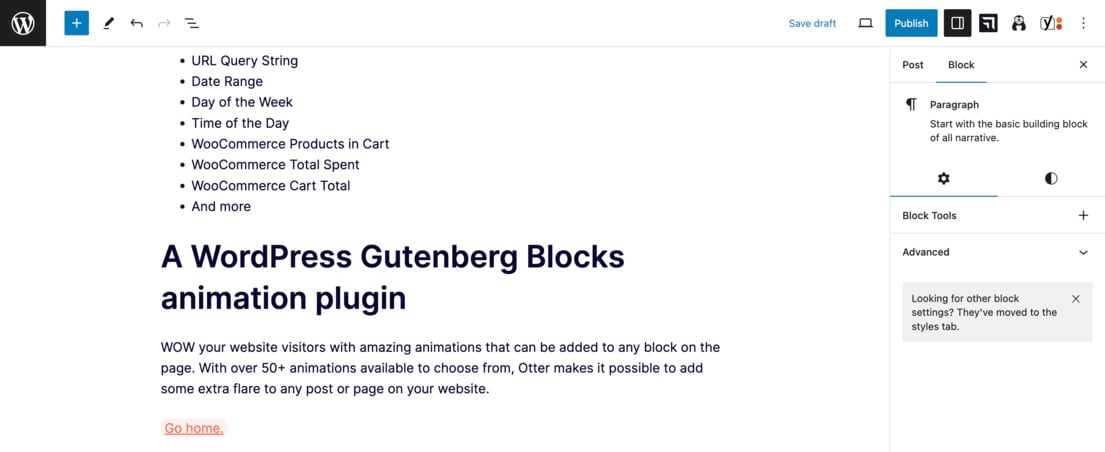
As you can see in the WordPress editor, we’ve added the link successfully.
To test it live, click Update and then View Post. Scroll down the page and click on the link.

Voilà. The ‘Go Home’ link redirects users from the post to the homepage.

How to insert dynamic values in Gutenberg
Let’s say you want to add information to a post using dynamic content.
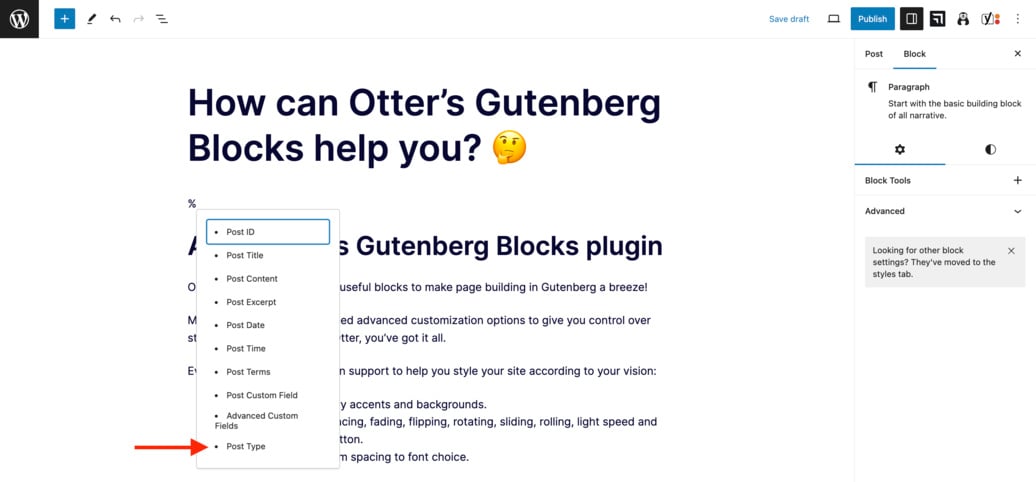
First, type the % symbol in the place you want to add it.
Once you type %, you should automatically see a menu appear with several options to choose from. For this example, we’ll select Post Type.
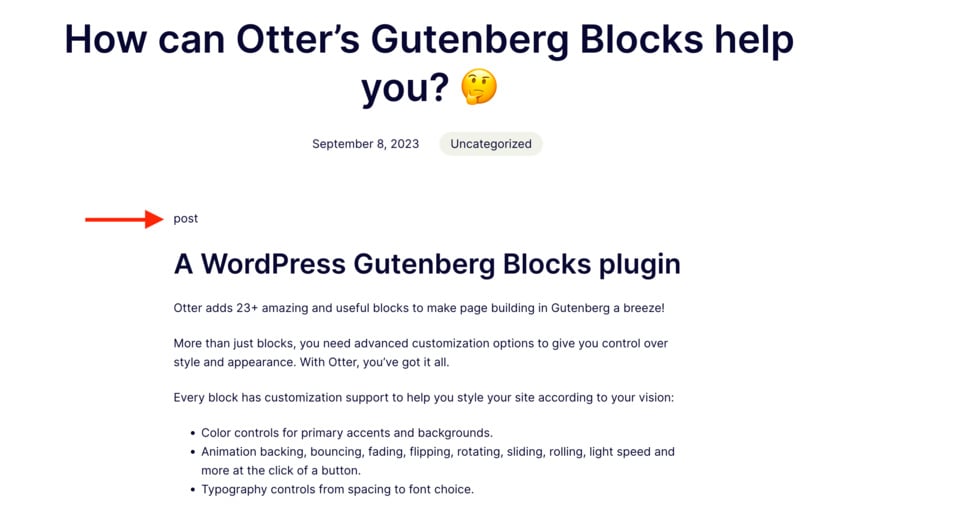
Once you click on it, you’ll see how the selection appears in the WordPress editor.

Save changes and see how the post looks on the preview or published page. The post type displays correctly.
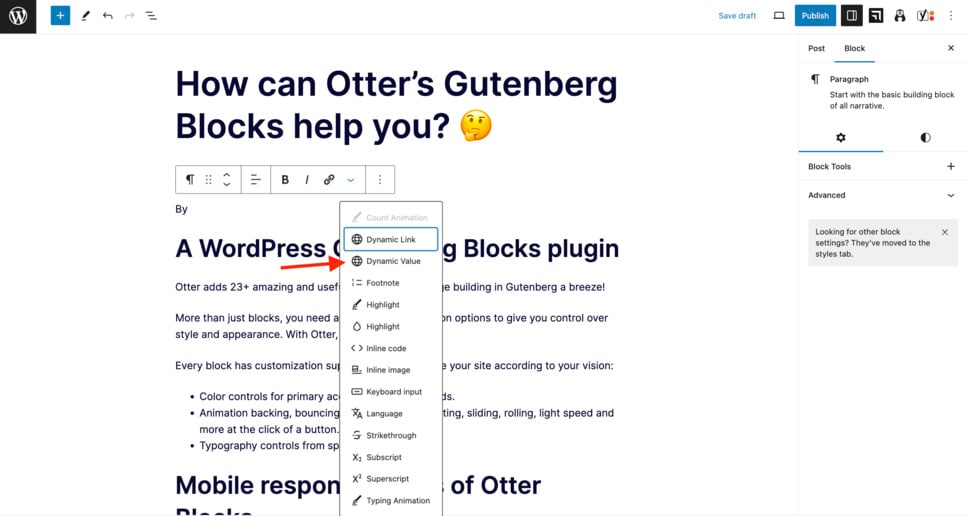
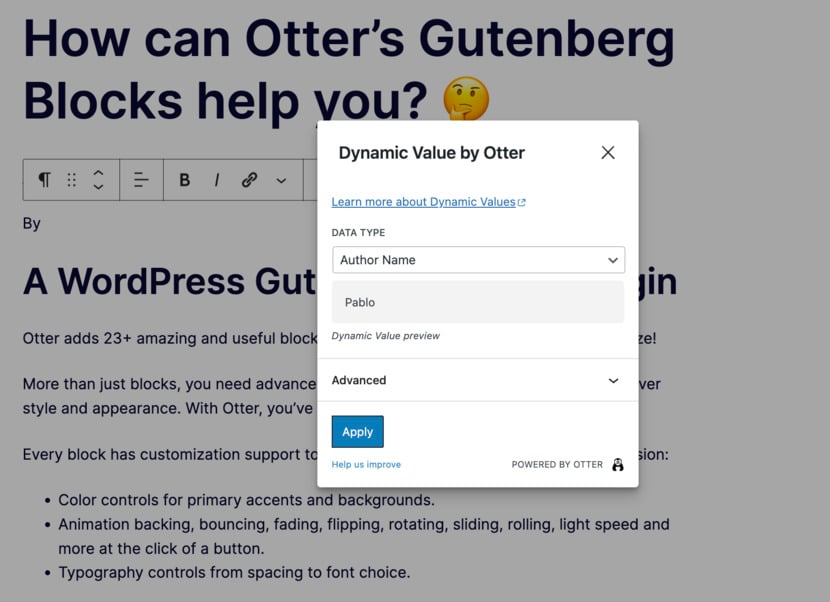
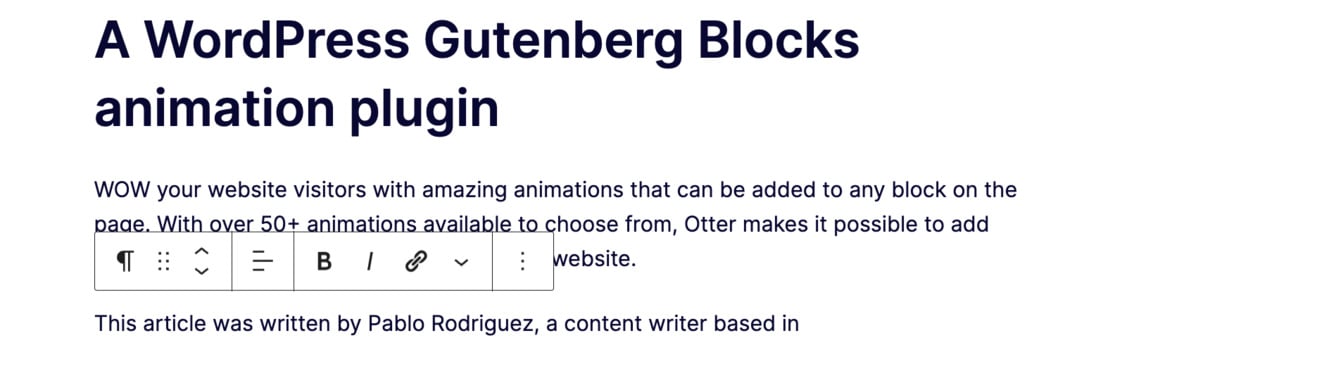
Now, let’s try to add an author’s name to the post. To do so, you just need to click on the section you want to add the content to (in our case, we’ll add it next to the word ‘By’), click on the down arrow, and then on Dynamic Value.
Now, select Author Name from the Data Type menu.
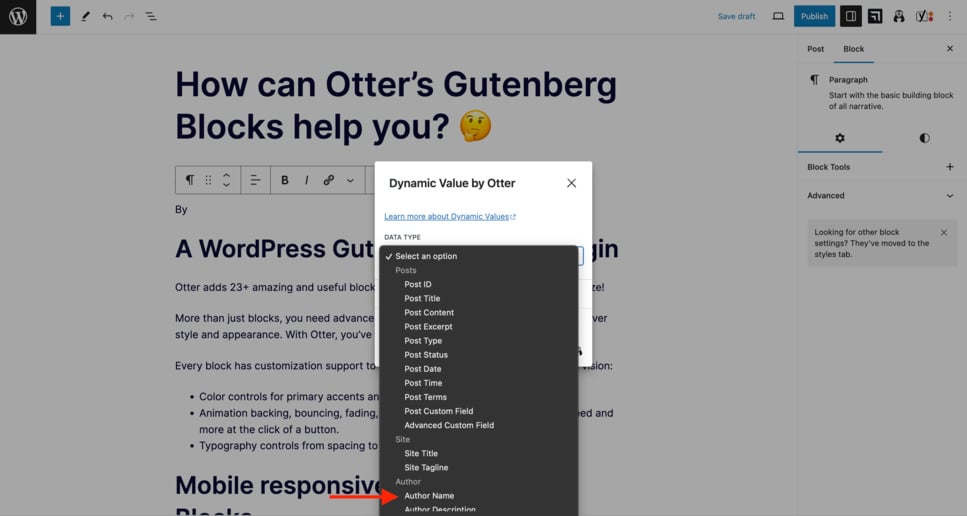
You’ll see that the Dynamic Value preview shows your name by default. Click Apply and save your changes.
Open the page to see the author’s name in the specified area.

How to insert custom field data in Gutenberg dynamically
So, you already know how to add dynamic links with Otter. The next step is to learn how to add other dynamic values using Advanced Custom Fields or ACF.
Please note that you’ll need to upgrade to Otter Pro to access the ability to insert custom field information.
Create your custom field group
Before getting started, you’ll first need to set up your custom fields if you haven’t already done so.
To begin, make sure you install the free Advanced Custom Fields plugin. You can find it in the WordPress plugin library.
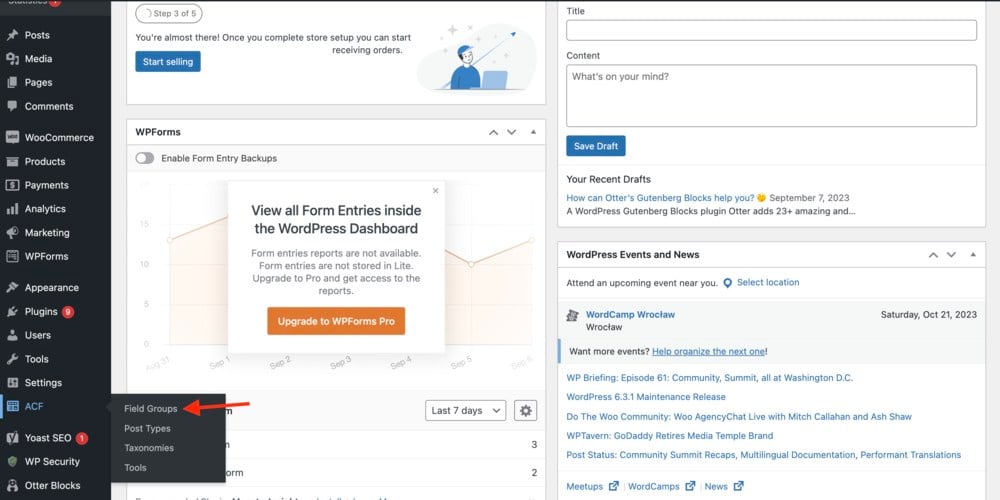
Once you activate the plugin, go to your WordPress dashboard, find the ACF field on your screen’s left side, and click Field Groups.
Click Add New at the top of your screen.

You’ll be redirected to Field Group, the tool you’ll be using to add new field groups. Add a name to the text box next to Add New Field Group. For our example, we’ll use the name ‘Example.’
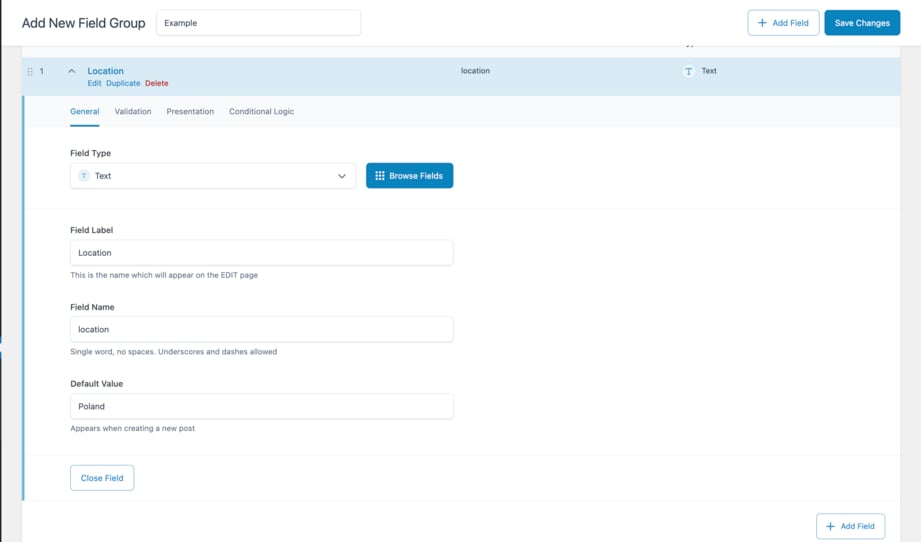
Next, choose ‘Text’ as the Field Type and write a Field Label (e.g., ‘Location’). The Field Name populates automatically, pulling the data from the previous label. Lastly, add a Default Value such as ‘Poland’ and click Close Field.
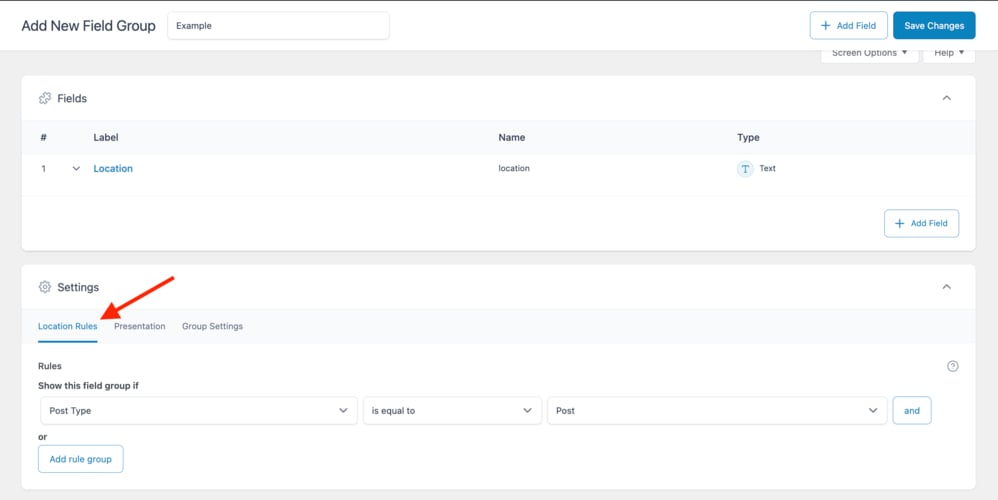
If you wish, you have the chance to add rules to your newly created custom field. You can set them in the settings tab. After doing so, click Save Changes.
Dynamically insert custom field information
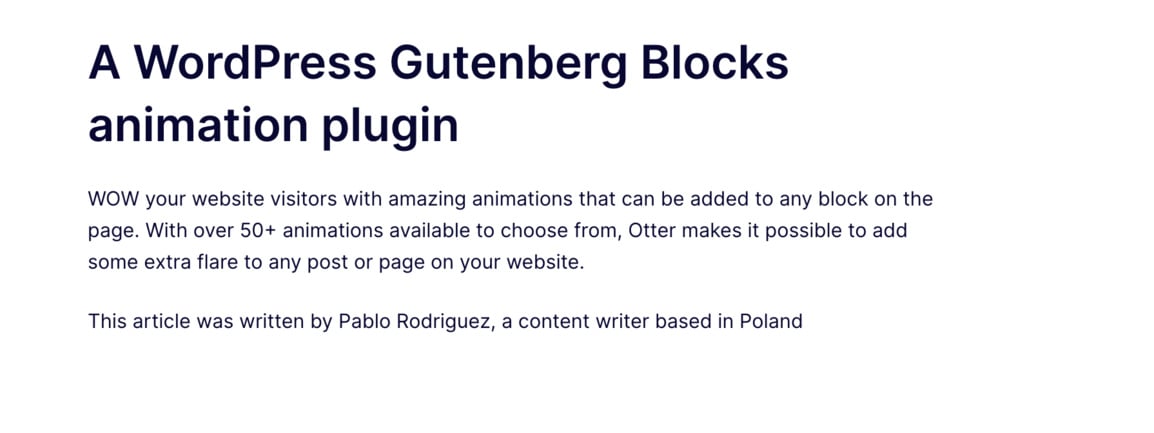
Now, go to the post to which you want to add the dynamic content and scroll down to the bottom of the page. You’ll find the new custom field with the default value you set earlier. In this case, ‘Poland.’

Scroll up and write the text to which you want to connect your custom field data.
Then, type % and click Advanced Custom Fields.
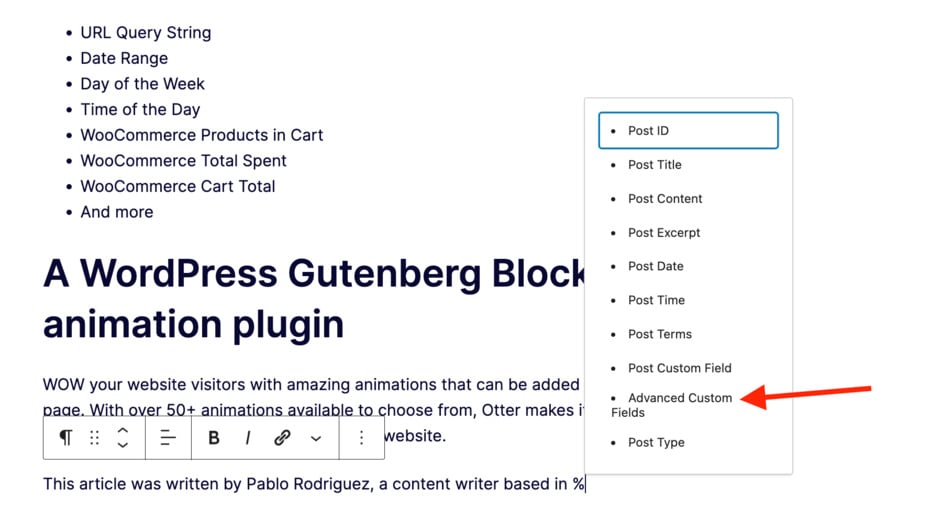
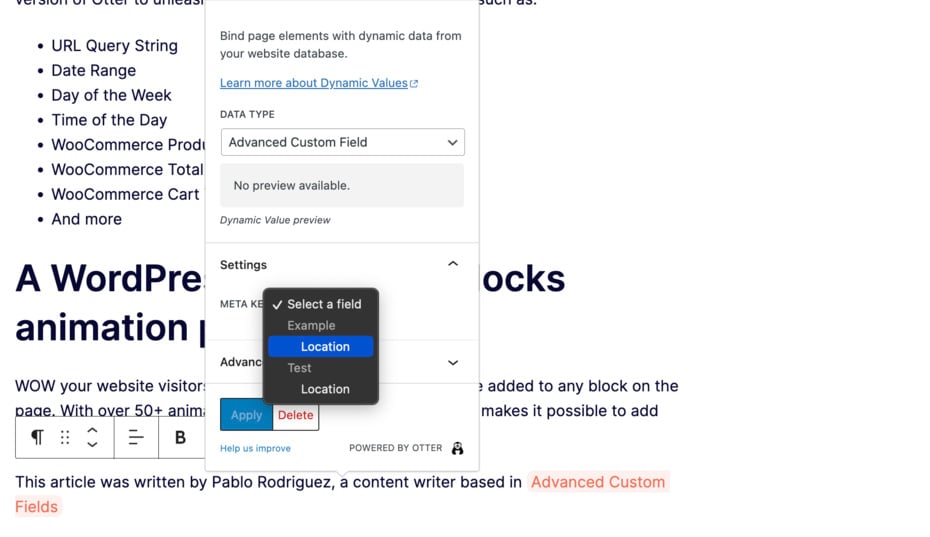
Go to the settings tab in the pop-up window and click Select a field.

Click Location. As you can see, we have two custom fields with that name, so we are choosing the one under Example, the name of the new Field Group we created. Next, click Apply and save changes.
Now, go to your site and check if the dynamic value was added correctly.
How to insert dynamic images in Gutenberg
Adding dynamic images to your WordPress site using Otter Blocks is straightforward.
You can use this Gutenberg dynamic content feature to add images to a testimonial section, a product review, or author images to blog posts.
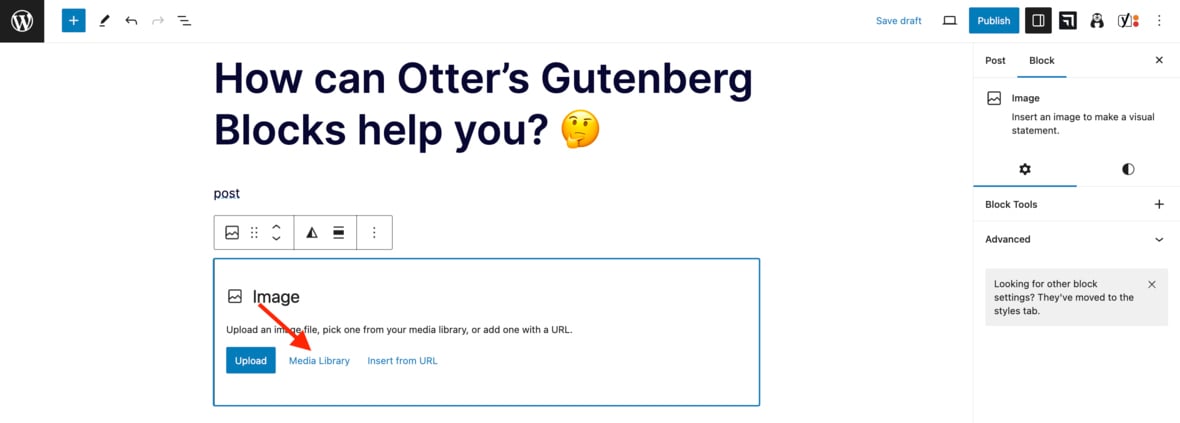
Start by opening an image block and clicking Media Library.
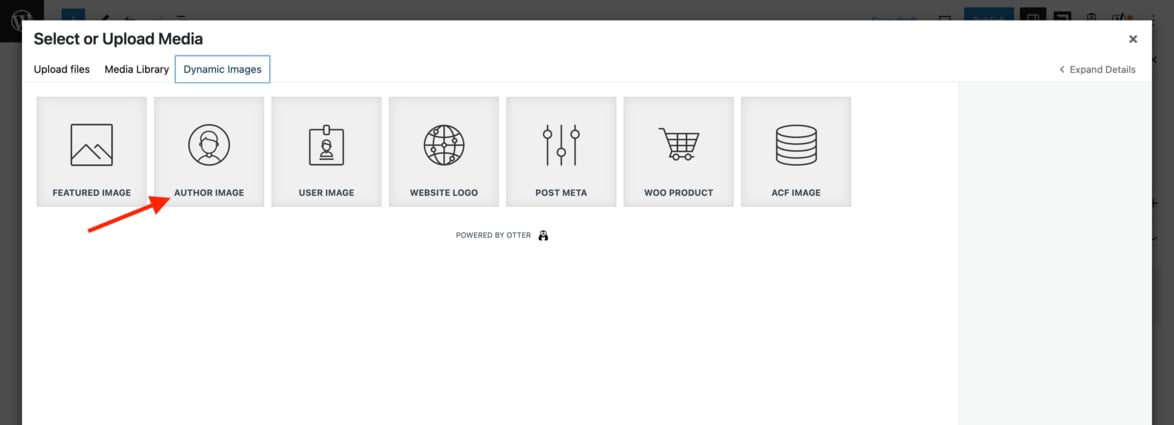
Go to the Dynamic Images tab, click Author Image and Select.
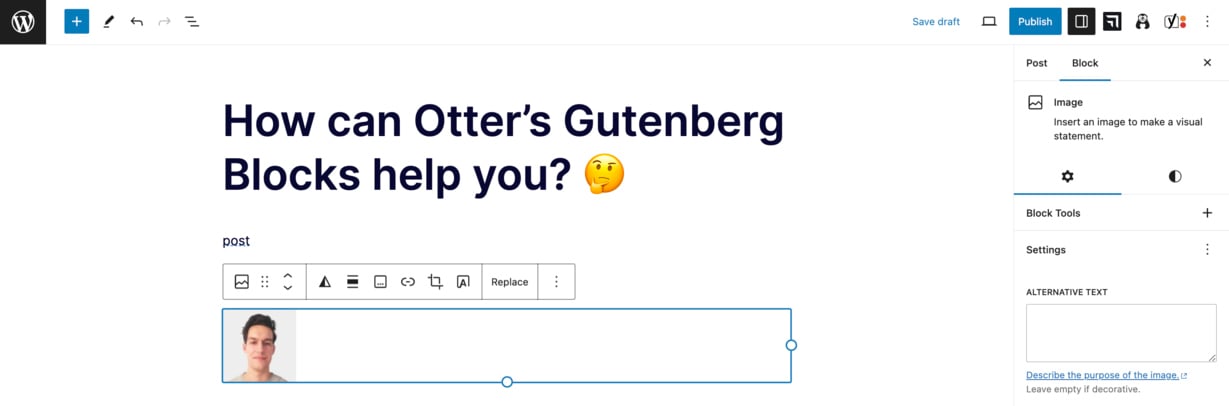
The image will then appear in the image block.
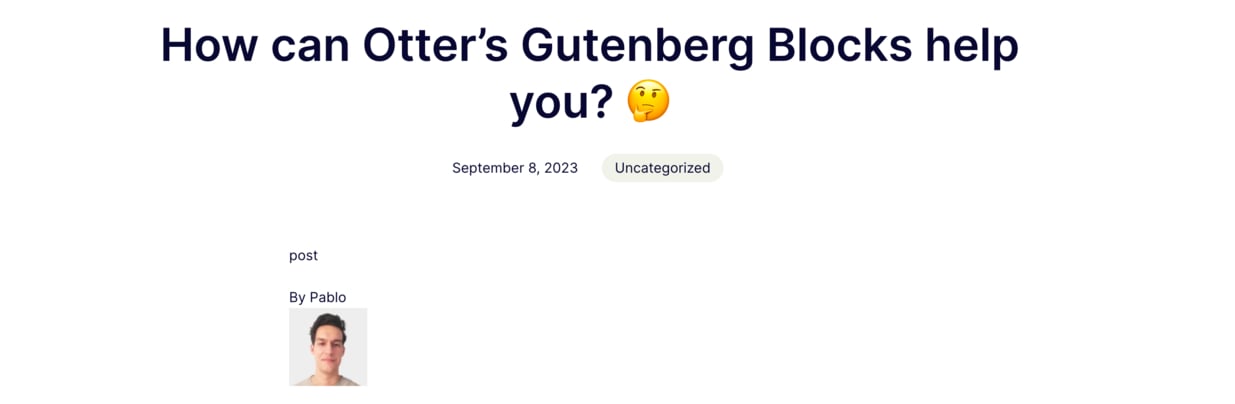
Save changes and verify the image shows up on your site.
Get started with Gutenberg dynamic content today ⏰
If you’ve read this far, you can consider yourself a Gutenberg dynamic content expert. Kudos to you!
Here’s a quick recap 🚀 of what we’ve covered:
- What Gutenberg dynamic content is. You’ve learned what Gutenberg dynamic content is, along with some real examples of how you might use it.
- How to add dynamic content in WordPress. You’ve learned how to use the Otter Blocks plugin to add dynamic links, values, and images to your WordPress site. With Otter’s user-friendly interface, you don’t need to be a coding expert to implement dynamic content in Gutenberg.
👉 If you want to learn more about the WordPress native block editor, check out our guide on Gutenberg blocks and how to use them.
Do you still have any questions about how to add dynamic content in Gutenberg? Let us know in the comments section below!