Want to implement WordPress leverage browser caching on your website?
Site speed test tools like Google PageSpeed Insights, GTmetrix, and Pingdom suggest leveraging browser cache because it’s an incredibly effective way of speeding up a WordPress website. 🚀
Browser caching is a process used to store data in the browser temporarily, so it can be accessed faster without having to load the page every time you want to view it.
There are a couple of ways to implement browser caching on a WordPress website. We have covered them all in the article below. Let’s dive in. 🤿
How does leveraging browser cache improve site speed?
To understand how leveraging browser cache improves site speed, you need to first learn how a web page loads on a browser.
A web page consists of numerous elements: text, media, widgets, header-footer, etc.
When you open a web page, your browser makes multiple requests to the site’s hosting server to load all the elements of the page.
The server returns those requests with appropriate data, which is then shown on the browser.
As you can imagine, the whole process takes a while, and depending on the number of elements on your web page, your website may require some time to fully load on the browser.
Since the attention spans of people these days are becoming increasingly shorter, slow-loading web pages are likely to result in high bounce rates and lost opportunities for engagement and conversions.
👉 This is why website owners should work towards increasing page loading speed.
One of the best ways to increase page loading speed is by using browser caching.
As we said earlier in the introduction, browser caching is the process of storing web pages in the browser, which helps reduce the overall server requests. It prevents your server from overexerting and the pages load faster.
Now that you have an idea of how leveraging browser cache improves website loading speed, let’s learn how to implement browser caching on a WordPress website.
How to leverage browser caching in WordPress?
There are two different ways to leverage the browser cache. You can do it using a plugin or by manually editing configuration files.
We recommend reading through all the methods listed below and carrying out the one that’s most convenient to you.
⚠️ IMPORTANT: You may start by removing plugins that you don’t need from your WordPress website. Plugins add extra code and functionality to your website. Such additional codes can slow down your site’s performance, especially if the plugins are poorly coded or conflict with one another.
Also, take a backup of your entire website. 💾
Some of the steps in this tutorial involve going to the backend of your website, accessing important configuration files, and inserting code snippets.
Other steps involve installing new plugins and letting it add code snippets into your configuration files. All this is risky business. One mistake can bring your site crashing down. The backup copy will be your safety net for when disaster hits. So take a backup before proceeding with the next step.
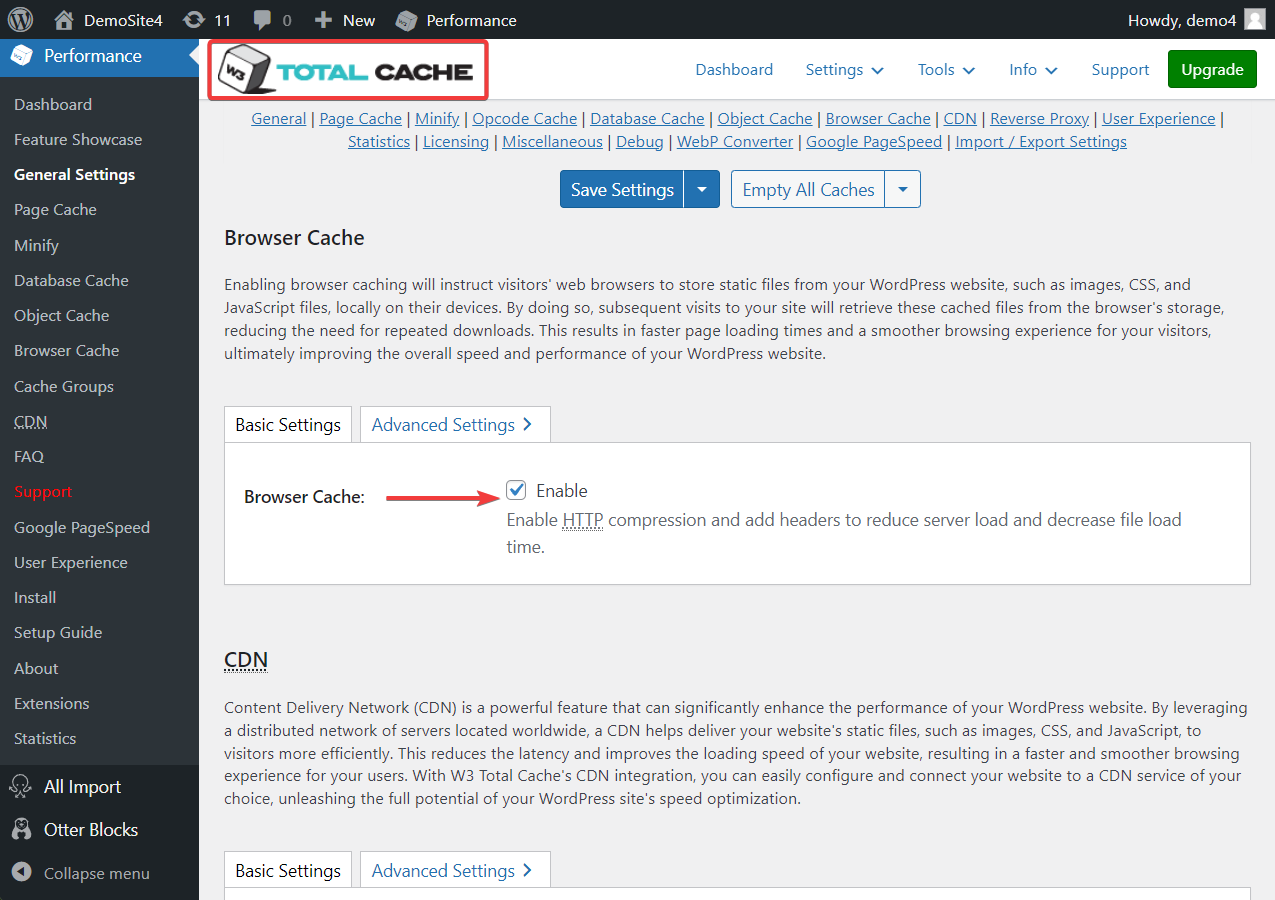
1. Install and activate a caching plugin 🔌
Using a caching plugin is the easiest way to leverage browser caching. All you need to do is install the plugin and set it up properly.
There are several caching plugins to choose from. Some of the most popular ones are WP Rocket, W3 Total Cache, WP Super Cache, WP Fastest Cache, and Comet Cache.
Most of these plugins have a free version that allows you to leverage browser caching.
We have guides on WP Super Cache and W3 Total Cache plugins. Be sure to check them out.
2. Use configuration files to add code snippets manually 🧑💻
To manually leverage browser caching, you need to carry out these two steps: determine your web server (Apache or Nginx), and add cache-control headers or expires headers.
Determine your web server
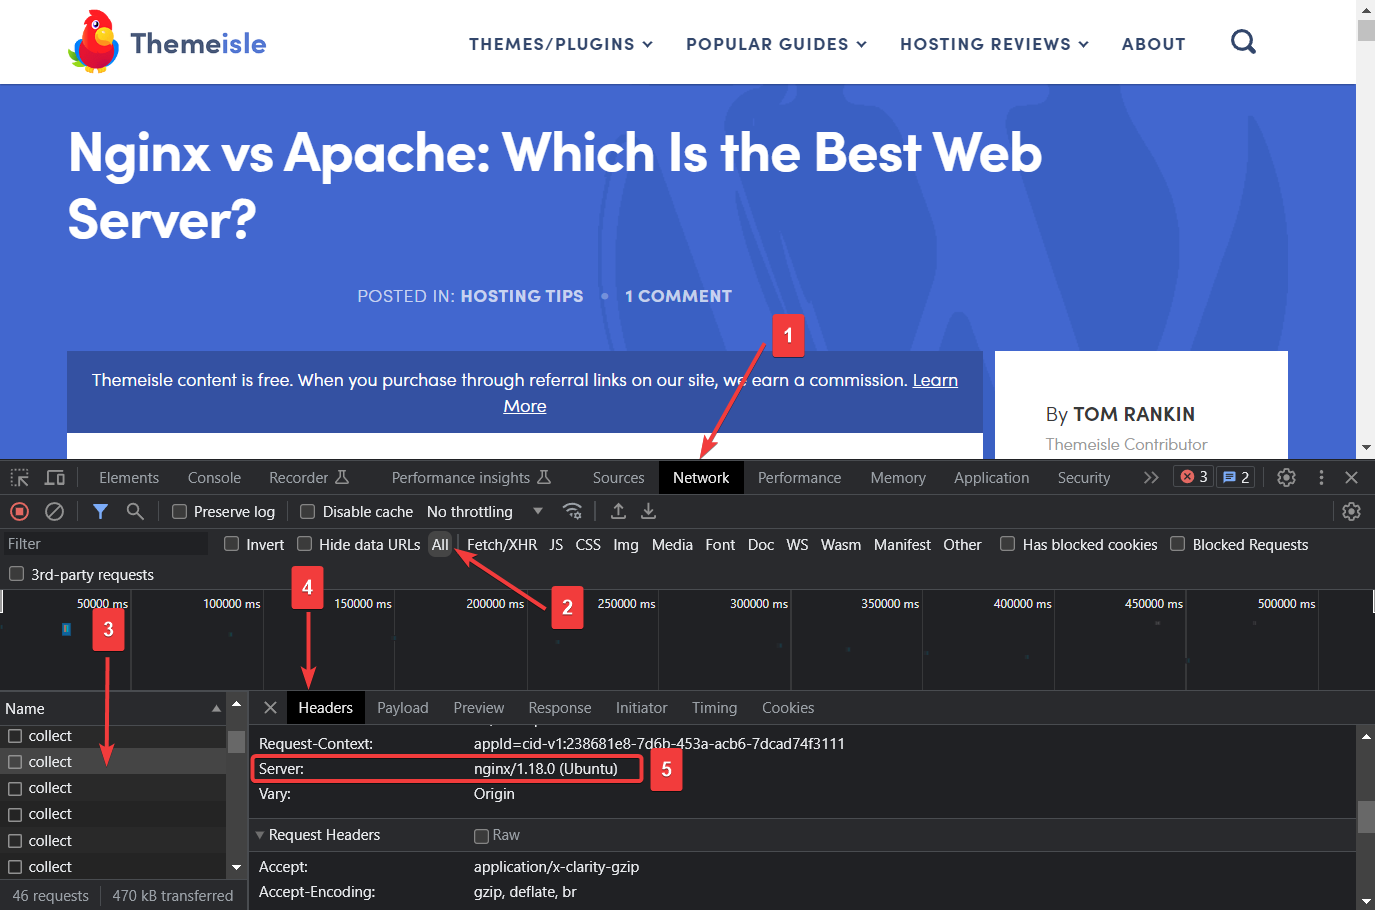
You can get on a quick chat with your hosting provider and ask them whether you are using Apache or Nginx, or figure it out yourself by taking the following steps.
- Open your website in a new tab, right-click anywhere on the page, and select the Inspect option
- On the Inspect panel, go to Network → All → Name
- Select any of the elements under Name and then go to the Header option
- Scroll down until you find the name of your server
Add cache-control headers or expires headers
“Cache-control headers” and “expires headers” are directives used to instruct browsers on how long to store and use cached content.
Both cache-control headers and expires headers serve the same purpose, so you don’t need to add both headers to your hosting server.
In this section, we have covered how to add both, but be sure to add just one on your server. Adding both headers is known to cause conflicts in a WordPress website.
Cache-control headers are more versatile and modern, offering fine-grained control over caching, while expires headers provide a basic way to specify cache expiration times. That said, you are free to add whichever header feels convenient to you.
Nginx server
Nginx users need to log into their hosting server, open their configuration file, and insert the following code snippet to add cache-control headers:
location ~* \.(js|css|png|jpg|jpeg|gif|svg|ico)$

 expires 7d;

 add_header Cache-Control "public, no-transform";
This sets the expiration period for the specified file types to seven days. You can change the number of days and add or remove file types from the code snippet.
In the same server block, copy-paste the following to add expires headers:
location ~* \.(jpg|jpeg|gif|png|svg)$

  expires 365d;


location ~* \.(pdf|css|html|js|swf)$

  expires 3d;
As you can see, this code snippet sets the expiry periods for different file types.
Feel free to customize the code to suit your needs.
💡 Note: If you don’t know how to access the Nginx configuration file, then look for a help doc from your hosting server or reach out to your hosting support team for assistance.
Apache server
Apache users have to log into their hosting account, access the .htaccess file, and add the following code snippet to add cache-control headers.
⌛ Important Be sure to add it before the “#BEGIN WordPress” or after the “#END WordPress” sentence.
<filesMatch ".(ico|pdf|flv|jpg|jpeg|png|gif|svg|js|css|swf)$">

        Header set Cache-Control "max-age=172800, public"

</filesMatch>
The code sets the cache expiry period to 172800 seconds or two days.
To add expires headers to your Apache server, insert the following code snippet into the .htaccess file:
## EXPIRES HEADER CACHING ##

<IfModule mod_expires.c>

ExpiresActive On

ExpiresByType image/jpg "access 1 year"

ExpiresByType image/jpeg "access 1 year"

ExpiresByType image/gif "access 1 year"

ExpiresByType image/png "access 1 year"

ExpiresByType image/svg "access 1 year"

ExpiresByType text/css "access 1 month"

ExpiresByType application/pdf "access 1 month"

ExpiresByType application/javascript "access 1 month"

ExpiresByType application/x-javascript "access 1 month"

ExpiresByType application/x-shockwave-flash "access 1 month"

ExpiresByType image/x-icon "access 1 year"

ExpiresDefault "access 2 days"

</IfModule>

## EXPIRES HEADER CACHING ##
You can probably tell that the code specifies caching periods based on file types.
Feel free to modify both codes to whatever suits you.
That’s it, folks. That’s how you leverage browser caching on WordPress.
Are you still seeing the leverage browser cache warning?
If the site speed tool still shows you the leverage browser cache warning, then that is likely because of Google Analytics (GA).
You can check whether GA is the real culprit by running your website on Google’s PageSpeed Insight. Expand all the audit results and look for the Google Analytics scripts. If GA is the culprit, then the Page Insight Tool will suggest that you “leverage browser caching for the following cacheable resource.”
To leverage browser caching for GA, you need to use a 3rd part plugin called Complete Analytics Optimization Suite (CAOS).
But before to starting install the plugin on your WordPress website, please know that this method is not supported by Google and that the CAOS plugin is not compatible with many Google Analytics plugins.
Conclusion 🧐
Leveraging browser caching could boost your WordPress speed to a great extent, but there is much more you can do to speed up your website.
For instance, you can take a look at our guides on how to improve WordPress performance and then how to increase WordPress speed on mobile specifically.
If you have any questions on WordPress leverage browser caching, let us know in the comment section below.