Learning how to make a price comparison website is not as difficult as you might imagine. You need a solid Content Management System (CMS) and knowledge on how to set up price comparison tables, reviews, and product ratings. If you have that, you have the basics of a successful website.
WordPress offers the easiest way to launch this kind of project. With the right plugins, you’ll be able to create engaging price comparison tables and help users determine what product is the best fit for them. If you play your cards right, this can translate to affiliate commissions.
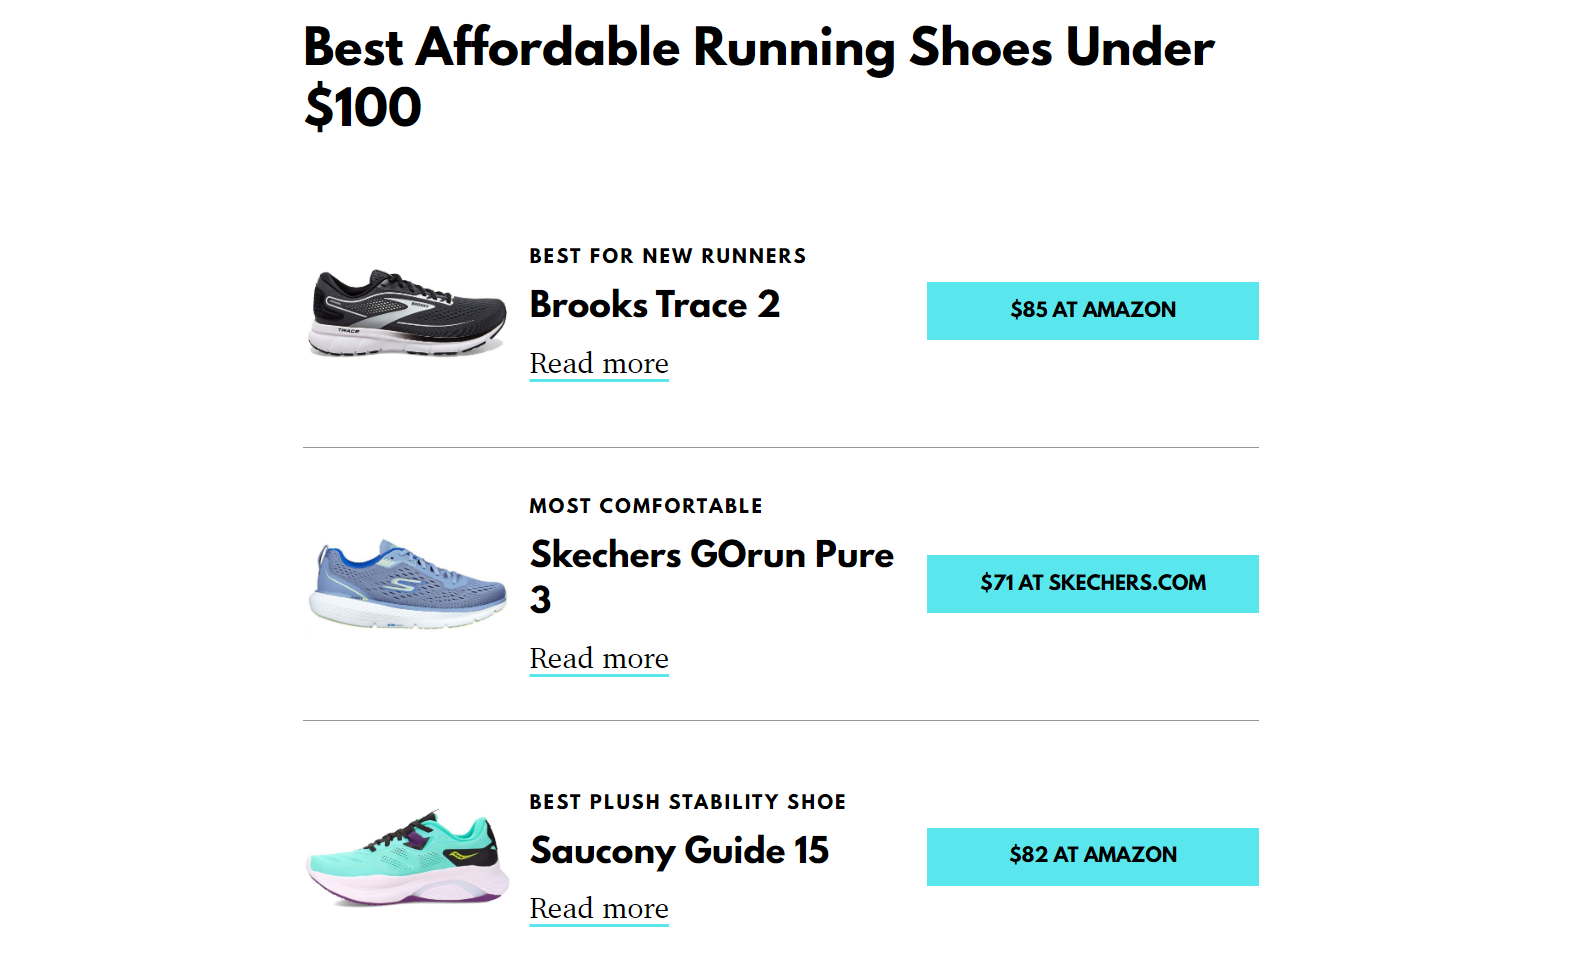
A price comparison site is somewhere where you can check how different products compare to each other. Typically, these sites focus on a specific product or niche and they link you to different stores selling them:
The advantages of comparison shopping are easy to see if you’re a customer. Comparing prices enables you to find the best deals for the products you’re looking for. If you dig deep, you might even find better product alternatives at a lower price.
If you’re running a price comparison site, all that work doesn’t come without a reward either. Being the go-to source for customers that are looking to compare prices for a specific product or niche gives you a lot of input over their decisions.
The information you share can determine what products customers buy. If that information is honest and it helps them save money or find the best products, you can turn a single purchase into a repeat customer.
Another advantage of learning how to make a price comparison website is that you can “capture” users that are set on making a purchase. When you’re comparing prices, you’re typically ready to pull the trigger on a product, but you want to make sure that you’re getting the best deal possible.
To recap, here are the benefits of running a price comparison site:
- You can help users make purchases
- You get to lead customers toward the best products for their needs
- This kind of site can capture customers that are ready to make a purchase
- You can monetize the site using ads or affiliate deals
If you can monetize those visitors using affiliate marketing or ads, a price comparison website can be a fantastic money-making venture. That is, of course, if you know how to make one.
How to make a price comparison website (5 steps)
This tutorial will guide you through the basics of learning how to make a price comparison website. During the steps that require further setup, we’ll link you to guides that will show you what you need to do. For now, let’s focus on niches.
Step 1: Determine a product niche (with affiliate potential) 🙋♂️
A “niche” is the category of products that you want to focus on. Most of the best price comparison sites focus on a specific area because it allows them to dig deeper and show more expertise.
If you only compare products of a specific type, you’ll end up knowing everything there is to know about them. This is a critical skill as customers need guidance to make the best buying decisions:
When it comes to picking a niche, you need to consider two factors. The first is how much you know about it and the second is how you can monetize it.
Affiliate marketing is the best method to monetize a price comparison website by far. If you’re part of an affiliate, you can collect a set fee or a cut of every sale that comes from your website.
Amazon Affiliates is the most popular affiliate program in the world because they sell pretty much every product you can imagine. However, you can also find affiliate programs from specific sellers that tend to pay better than Amazon does. Ultimately, it all comes down to what product niche you choose.
Step 2: Register a domain and get hosting 💻️
This is perhaps the most fun part of building a new site. Registering a domain requires you to come up with name ideas and to check if they’re available:

A lot of people spend too much time coming up with the perfect domain name. Since we’re dealing with a price comparison site, your best bet is to choose a name that’s related to the product niche you want to focus on. If you need help coming up with ideas, we recommend using a domain name generator.
Once you register the domain you want, it’s time to get to work on hosting. For a price comparison website, we recommend using managed WordPress hosting. That way, you’ll be able to focus on growing your website and not on micromanaging maintenance tasks.
Step 3: Set up WordPress and a theme ⚙️
Installing WordPress is simple. Depending on which web host you use, chances are that WordPress may come pre-installed on your website.
If that’s the case, all you have to worry about is learning the ins and outs of how to use the Content Management System (CMS). That means creating pages and posts, installing plugins, and choosing a theme.
Choosing a theme is perhaps the most important decision you will make for a new website. The theme you use needs to reflect the niche you want to focus on. Luckily, there is no shortage of WordPress themes to choose from, both free and premium. The WordPress repository offers so many options that it would take you a lifetime to sort through them all:
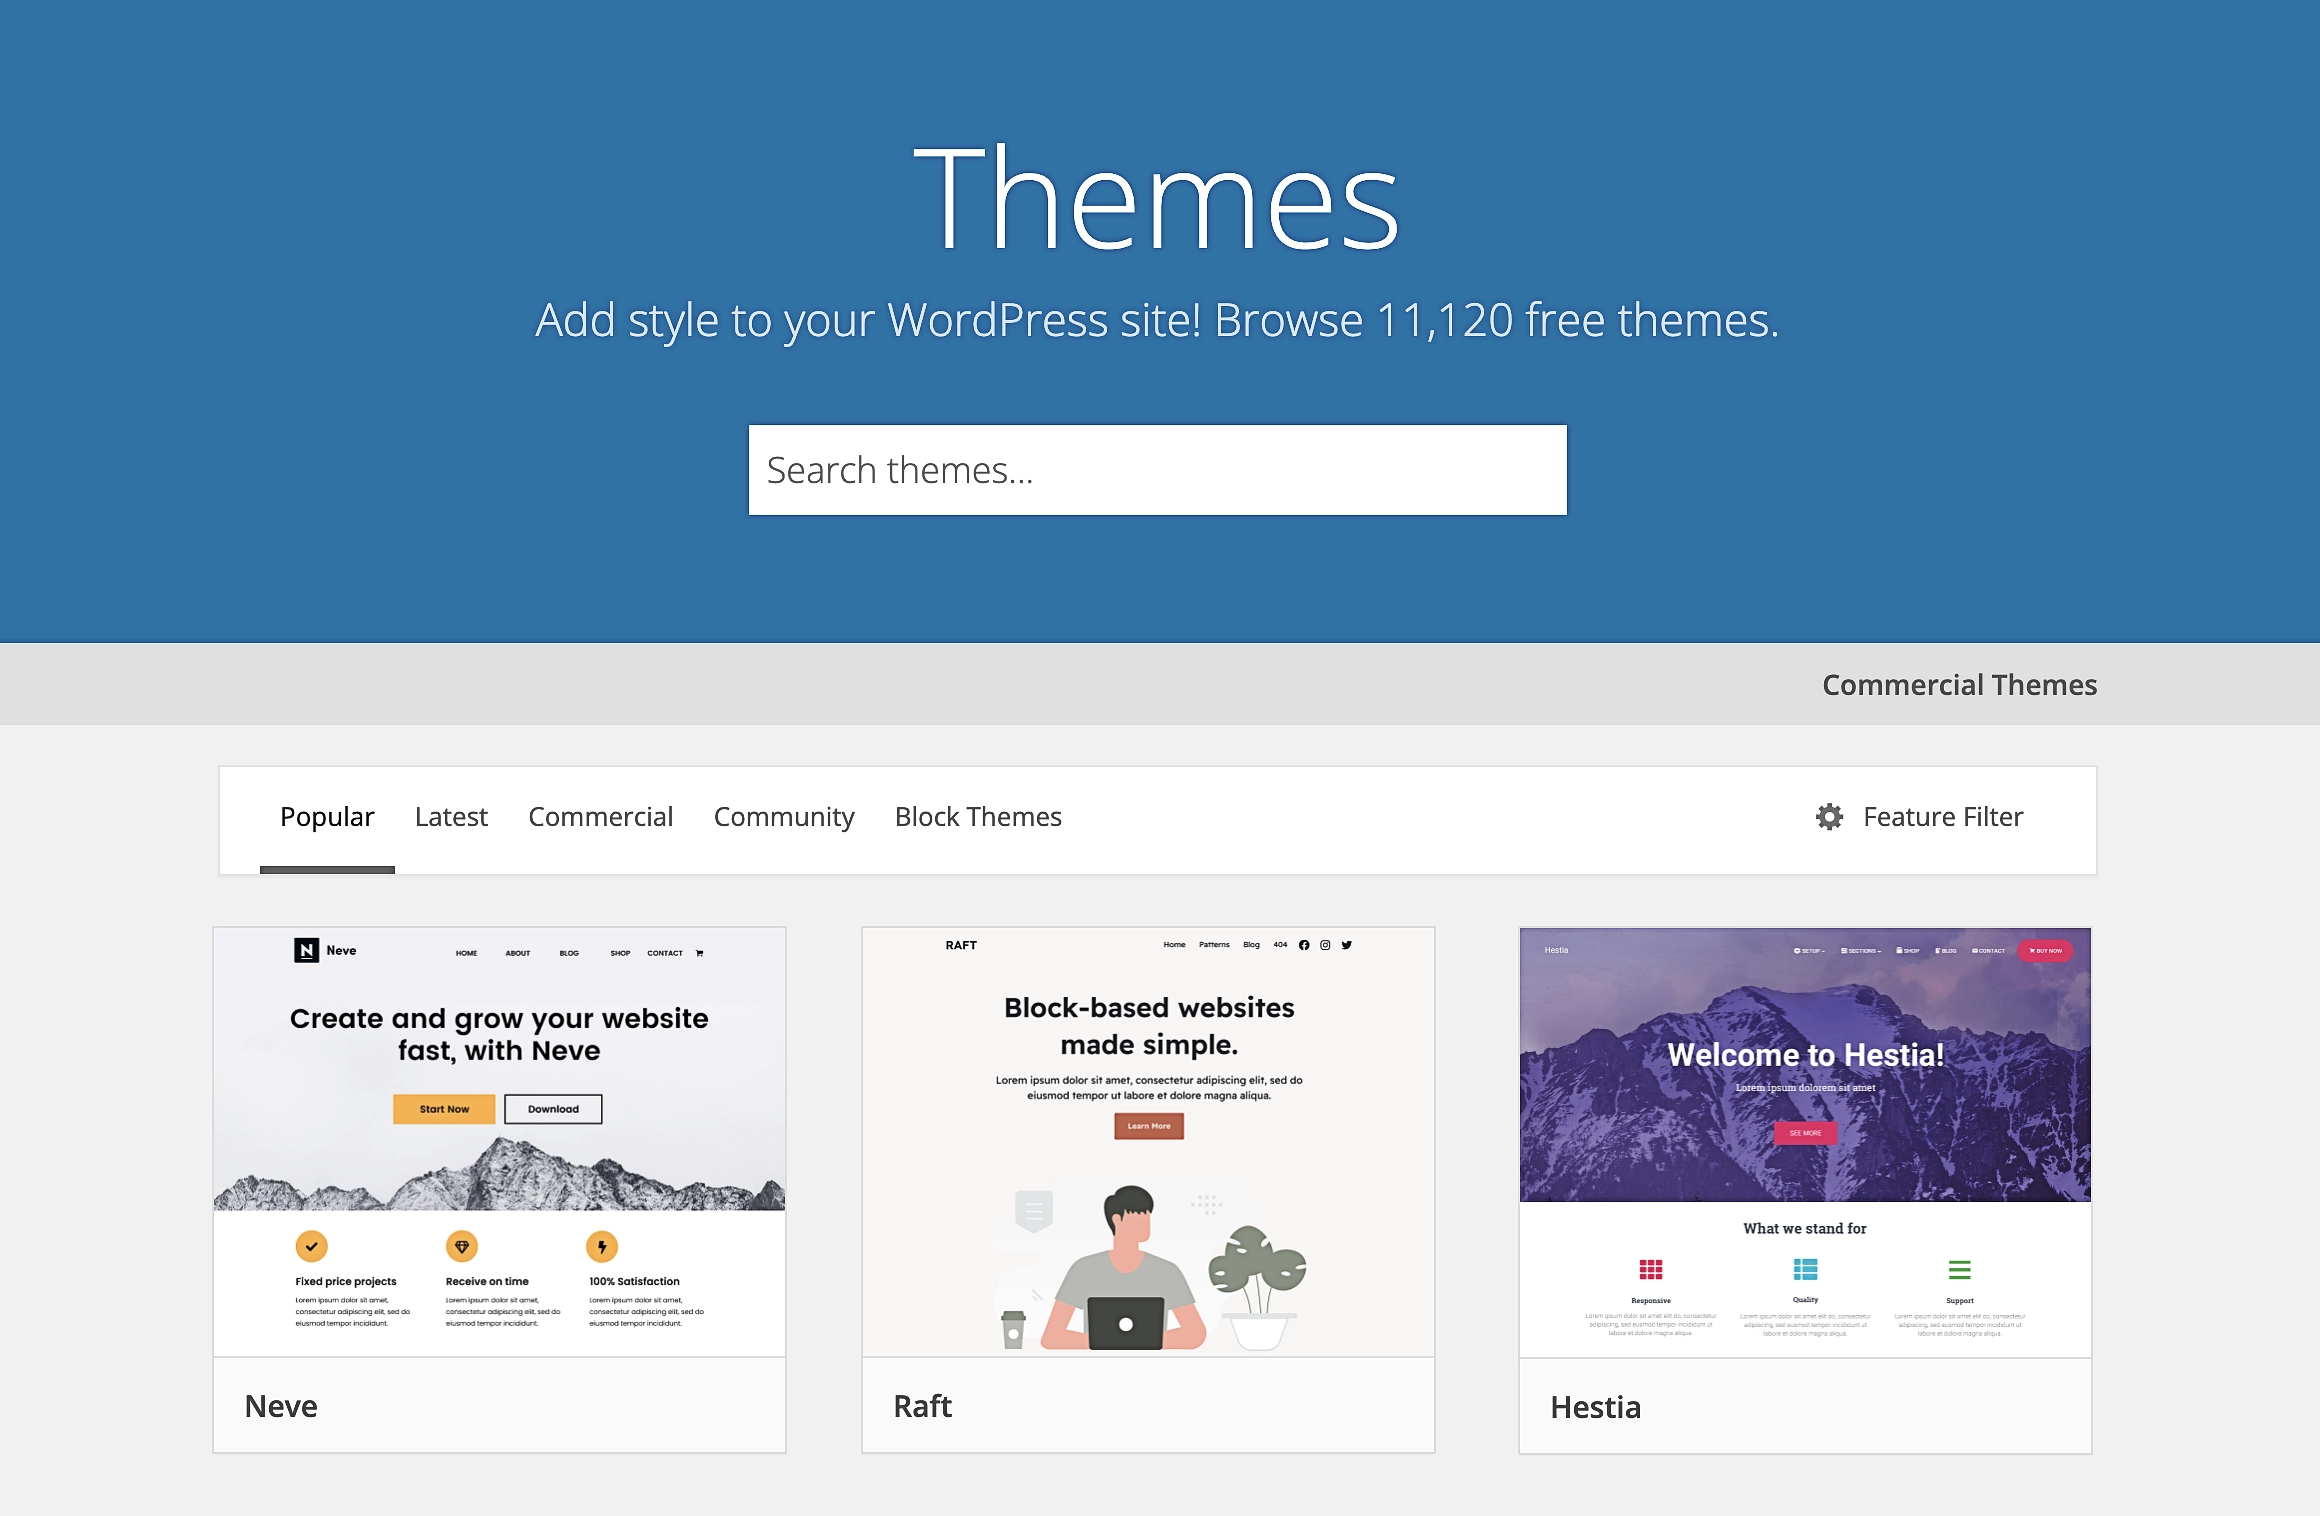
Since you’re launching a new website, we recommend that you start with a free theme. Once your price comparison site starts making money, you can consider switching to a premium theme if you think it’s necessary.
Step 4: Add price comparison tables 💳
The key step in learning how to make a price comparison website is knowing how to set up tables. If you look at some of your favorite websites that offer plans or multiple products, you’ll notice price comparison tables can be incredibly detailed:
These are not regular tables. Price comparisons need to be designed in a way that you can visually measure multiple products between each other and for guiding customers toward the option you want them to buy.
There are a lot of plugins you can use to create price comparison tables in WordPress. However, we recommend Otter Blocks because it enables you to do so while using the Block Editor.
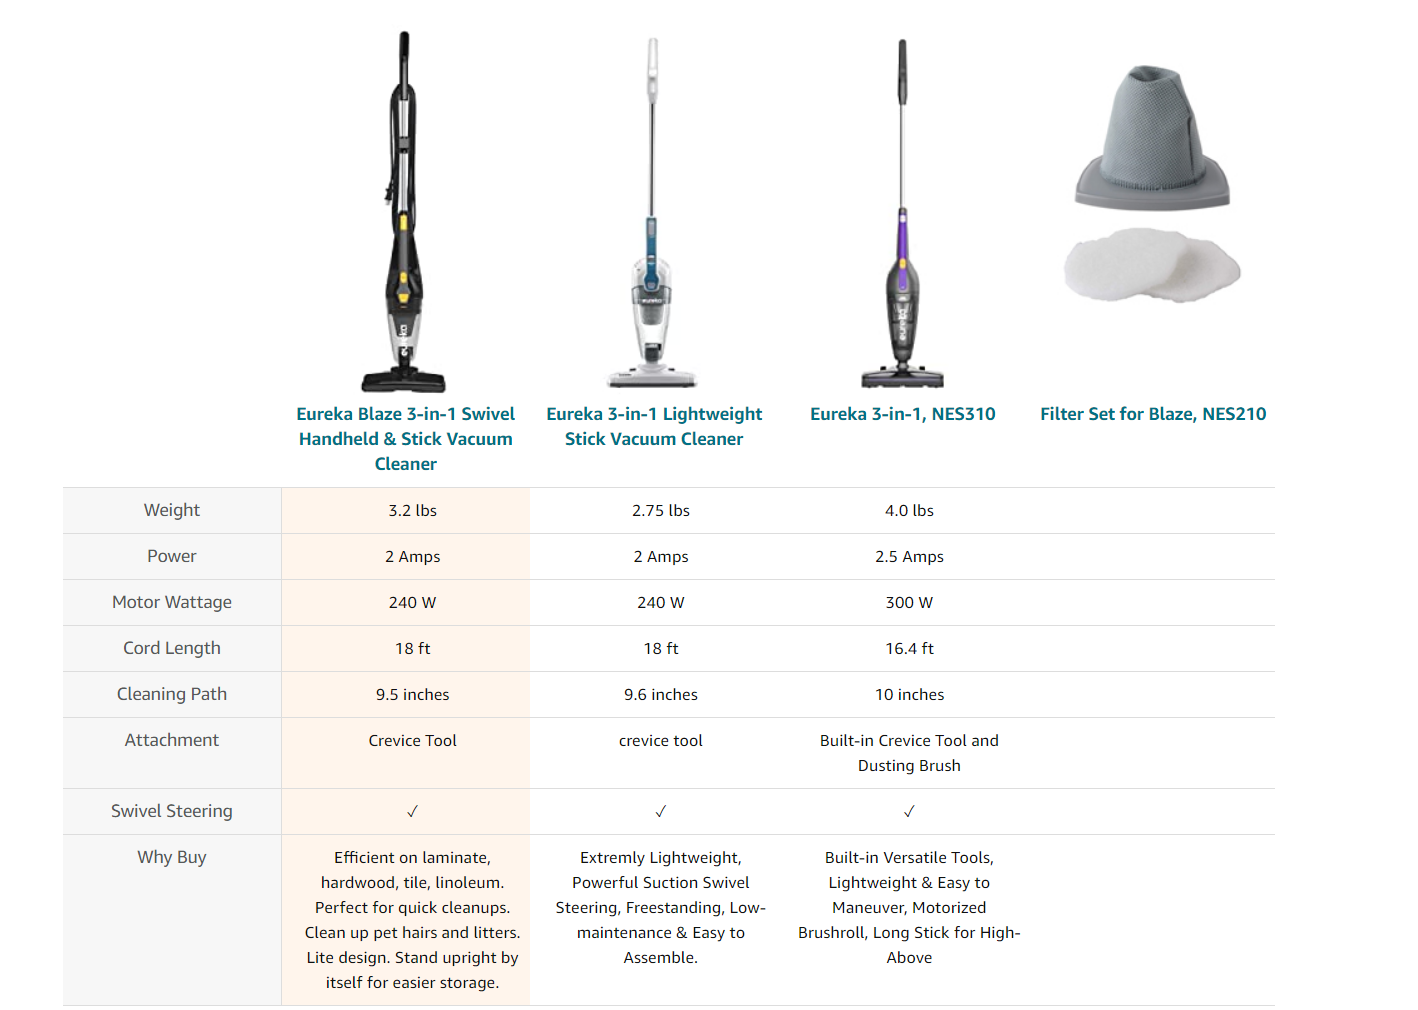
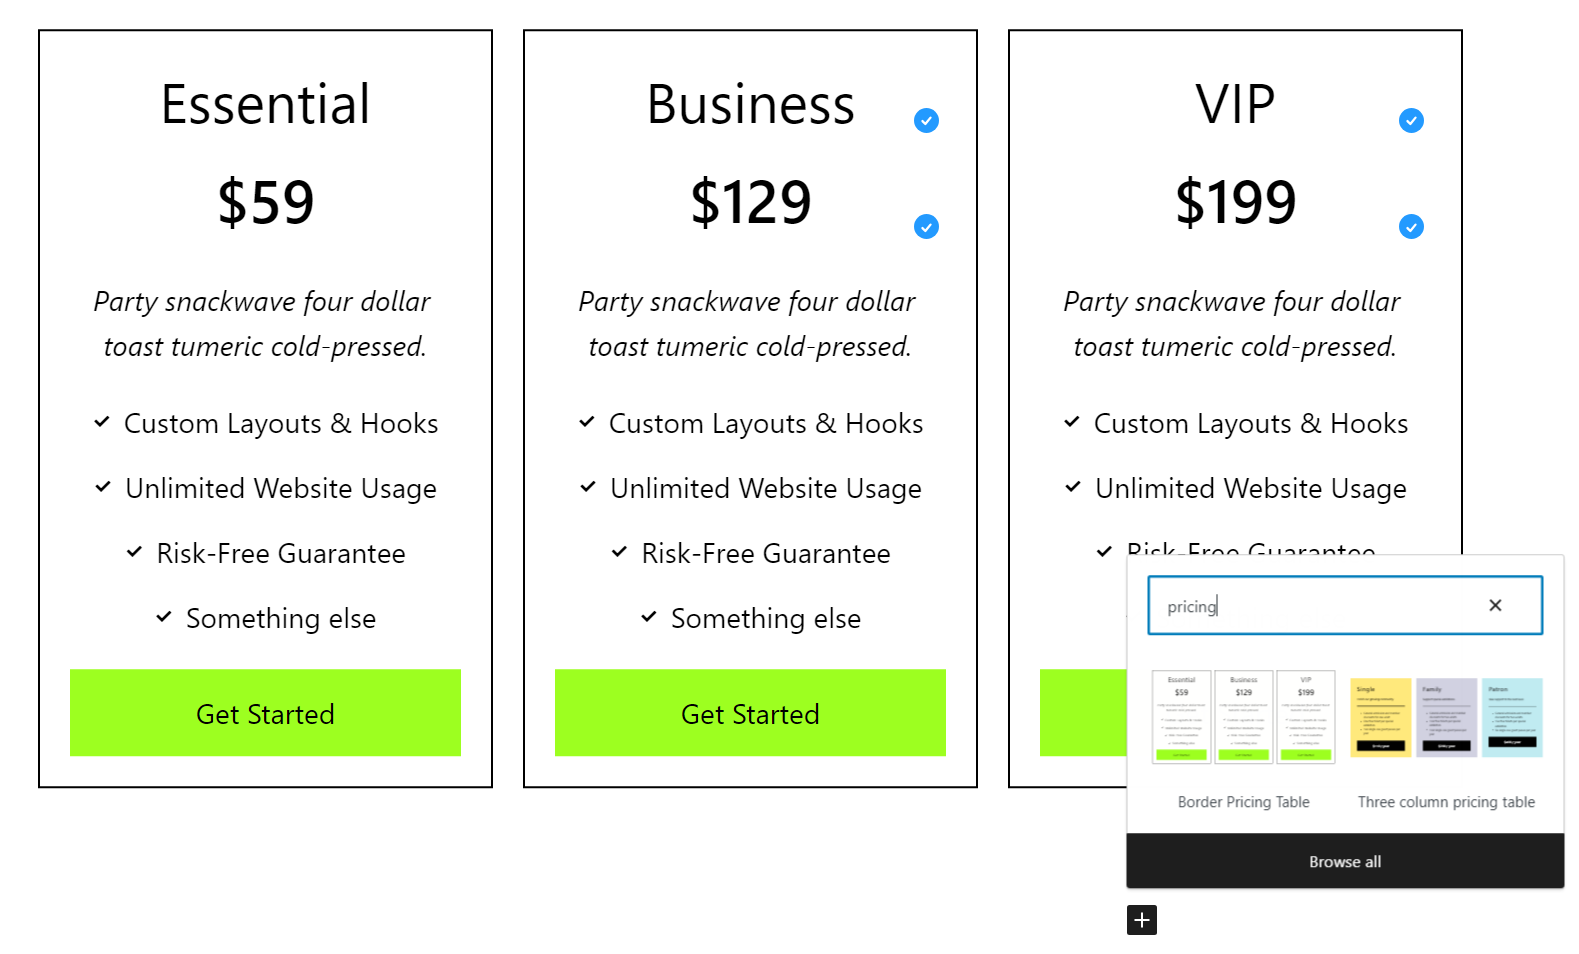
Otter Blocks includes multiple pricing table designs that you can customize for product comparisons. Here’s a quick look at the Border Pricing Table block:
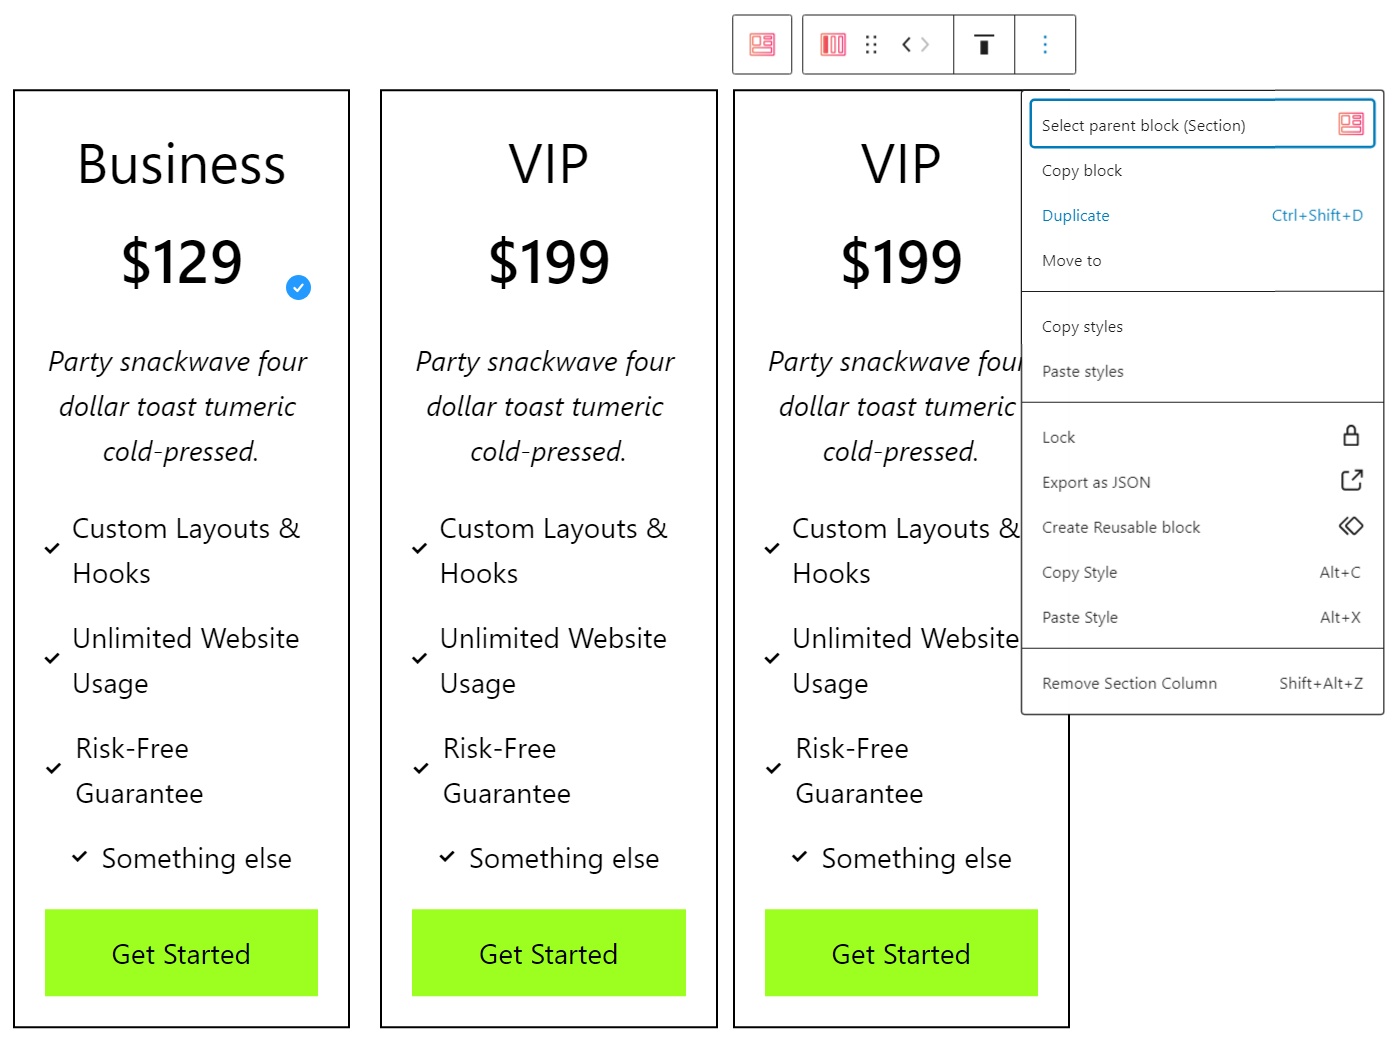
Every element in that block is fully customizable and you can add new products by duplicating any of the existing columns:
You can customize these tables to include product images and any other essential piece of information. The main thing to keep in mind is that customers should be able to compare features between products to help them make a quick purchase decision.
Step 5: Include reviews and ratings ⭐⭐⭐
Tables are at the heart of price comparison websites. However, they’re not the only elements you want to rely on to convince users to make a purchase. You’ll also want to showcase reviews and ratings to help users decide which product best suits their needs.
A lot of customers love long-form reviews that include all the information they might possibly want to know about products. Others will likely just blog review posts and jump right into the ratings for each product.
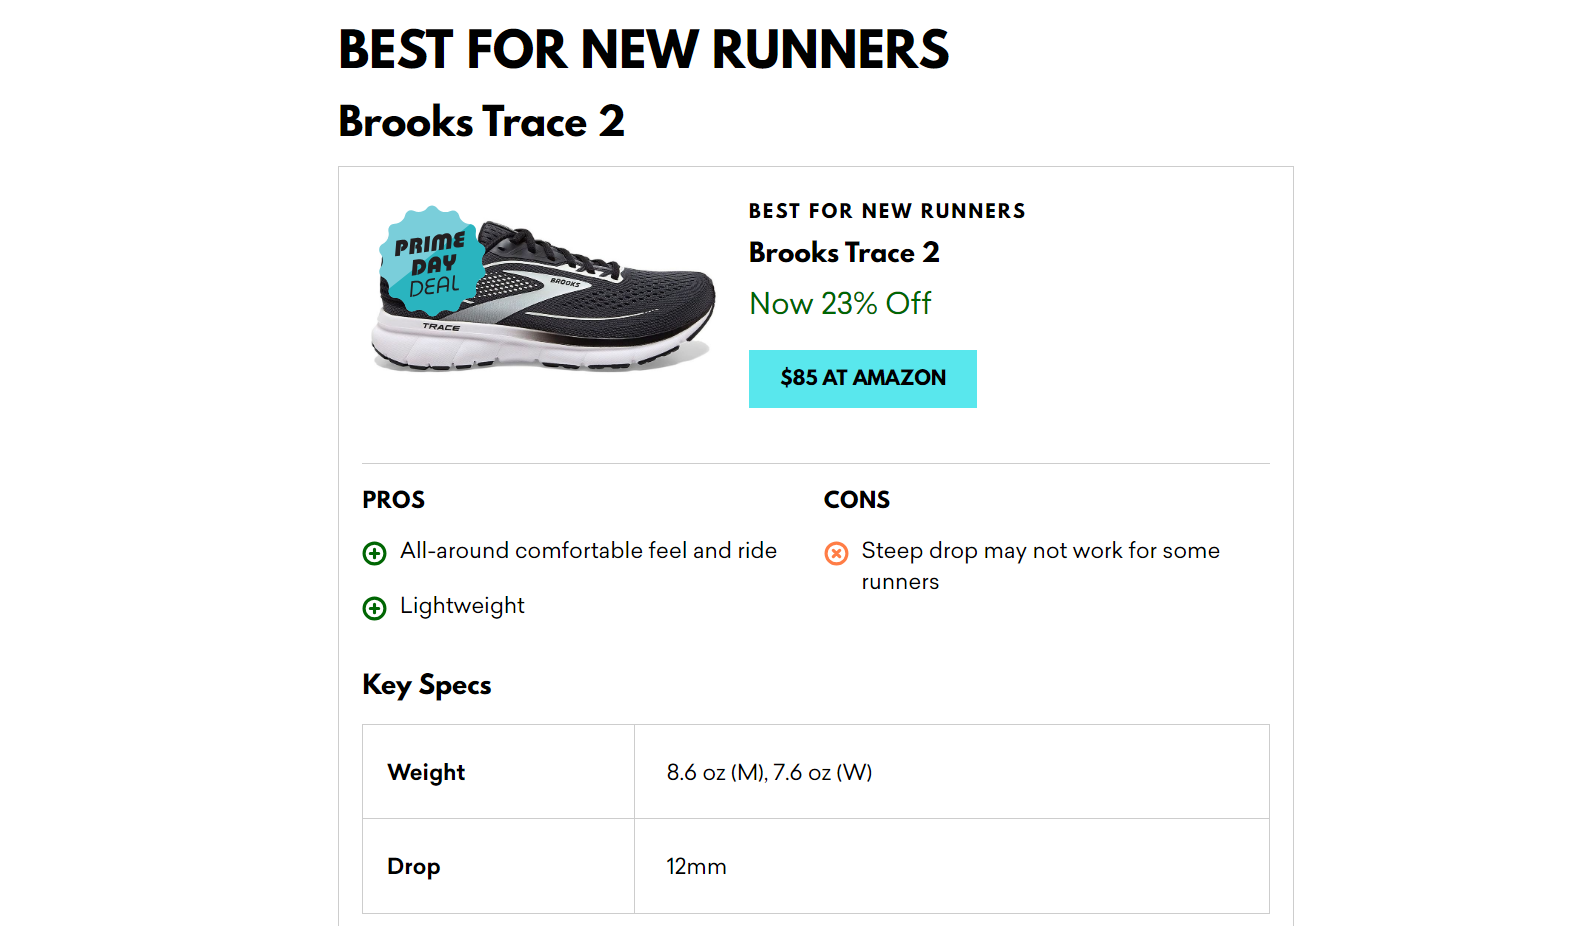
If you use Otter Blocks, you have access to the Product Review block. You can use that block to include ratings sections in pages or posts that look like this:
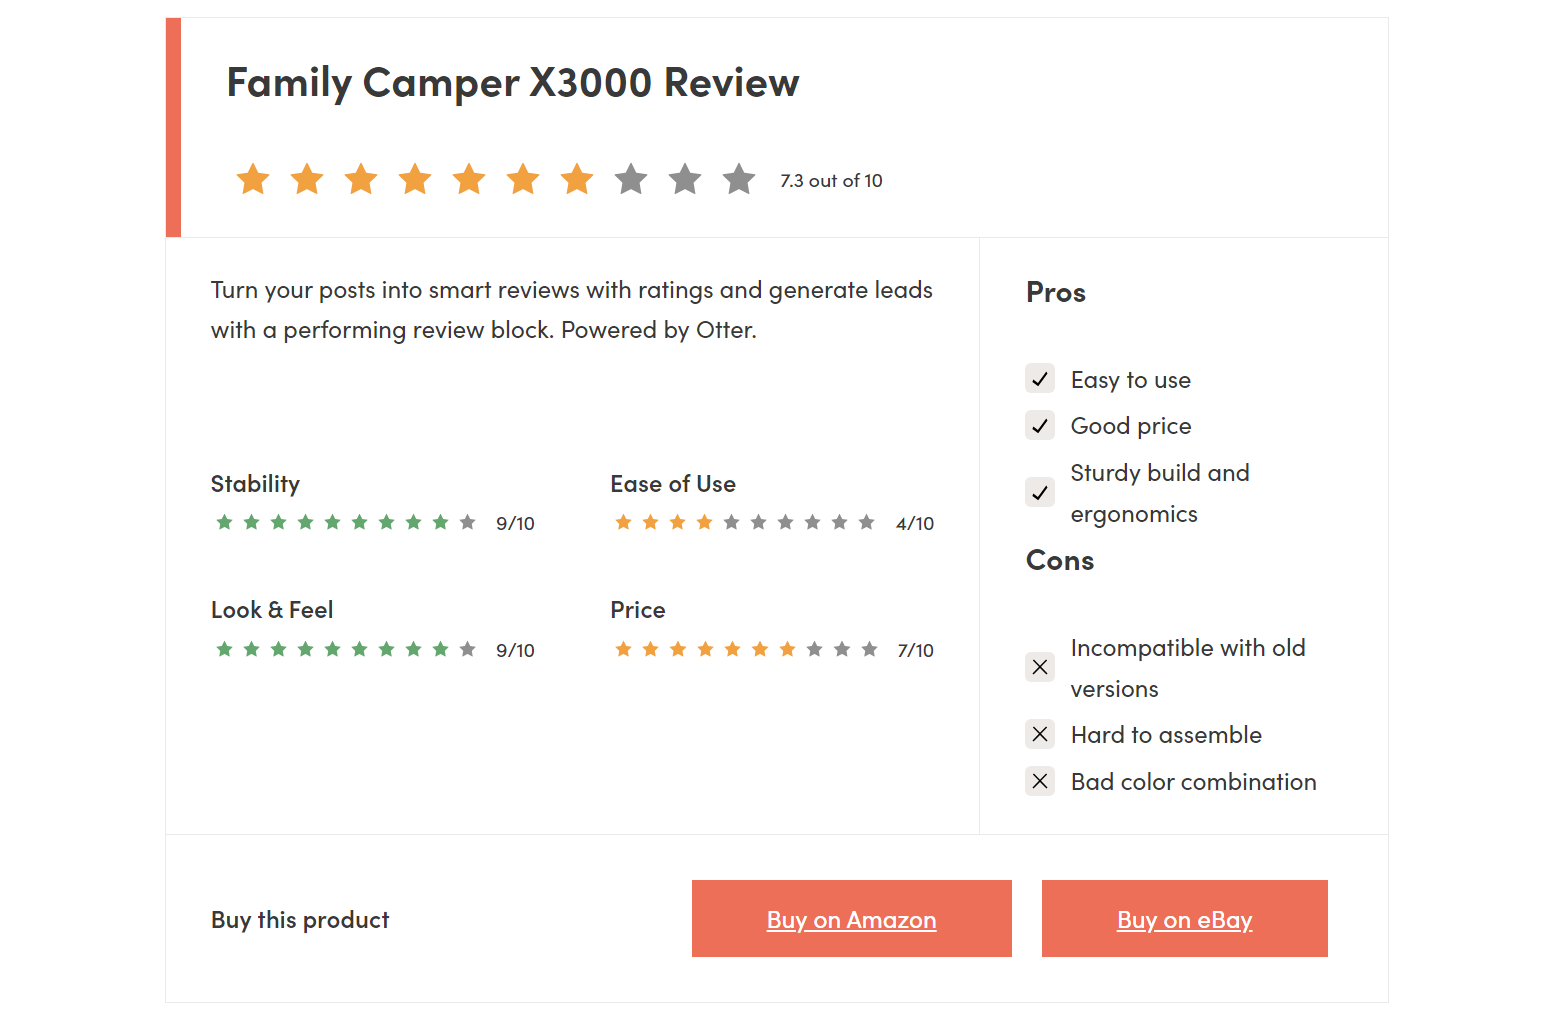
This block is fully customizable and you can adapt it to include the pros and cons that you want, as well as what aspects of a product to rate. Moreover, you can add multiple purchase buttons to each block, which means you can use them to promote multiple stores with which you have affiliate agreements.
💡 Keep in mind that this review block is meant for reviews that you – the website owner – write yourself. It’s not meant to help you gather reviews from customers or users. If that’s what you’re looking for, check out our other post that lists some of the best review plugins available.
Conclusion 🧐
Creating a website whose sole purpose is to drive sales to third-party stores requires a lot of work. You’ll need to do massive amounts of research to find the best deals and to understand what products you should recommend to users.
Ultimately, the success of your site will come down to how trustworthy it is and how easy you make it for users to find the best option for them.
If you’re thinking about building a price comparison site, using WordPress will make the process a lot easier. Here’s what you’ll need to do:
- Determine a product niche (with affiliate potential). 🙋♂️
- Register a domain and get hosting. 💻️
- Set up WordPress and a theme. ⚙️
- Add price comparison tables. 💳
- Include reviews and ratings. ⭐⭐⭐
Do you have any questions about how to start a price comparison website in WordPress? Let’s talk about them in the comments section below!