Are you confused about how to make a website multilingual in WordPress? Then, we’ve got you covered.
While WordPress offers a lot of options for creating and maintaining a website, it doesn’t provide multilingual functionality out of the box.
That said, it doesn’t mean you’ve got to stick to the default language.
Despite not being a built-in feature, you can have a WordPress website in multiple languages. For this, there are many multilingual and translation-ready themes and plugins.
This article will give you a comprehensive step-by-step guide on creating a multilingual WordPress site using WPML, GTranslate, Polylang, and TranslatePress.
Before we begin, let’s quickly look at a few reasons you’d want a multi language website.
Why Do You Need to Make Your Site Multilingual?
Let’s start with the most obvious one. You would want a multilingual site for the very same reason you’d go with a website in the first place — to reach out to a broader audience.
You can connect to your audience on a personal level by addressing them in their native language. This is more beneficial if you are an international business looking to expand.
English might be the global language, but it’s not the first language for more than half the population.
Add the fact that most websites only cater to the English audience; you can have an upper edge just by adding a language switcher.
Having said that, let’s learn how to choose the ideal multilingual WordPress plugin for your site.
How to Choose a WordPress Multilingual Plugin for Your Site?
There are a lot of translation plugins on the market today with varying sets of features. So, you must ensure the one you plan to use aligns with your needs.
To make it even simpler, here are a few features that you’d need to look for in a WordPress multilingual plugin.
- Language Coverage: You need to make sure the multilingual plugin supports the language you want to translate to.
- Translation Completeness: Besides pages, a good multilingual plugin will allow the translation of categories, tags, plugins, and other WordPress elements.
- Language Switcher: It’s a widget that helps readers to choose their preferred language. A good rule of thumb is it needs to be clear and easily accessible.
- Automatic Translations: Translation plugins can save your time and effort through automatic translation. The accuracy varies depending on the translation service in use.
- Manual Correction: It’s not given that the auto-translate service will always give accurate results. So, it’s better to have a manual correction option.
How to Make a Site Multilingual? (4 Easy Methods)
There are a lot of plugins that you can use to make your WordPress site multilingual.
However, in this article, we’ll be looking at four of the most popular WordPress multilingual plugins.
- WPML (WordPress Multilingual)
- GTranslate
- Polylang
- TranslatePress
WPML is the most popular of the four but requires a paid license.
The other three are freemium alternatives to WPML that you can get started for free.
Method 1: How to Make a Website Multilingual with WPML?
WPML is by far the most popular WordPress translation plugin. This is because it supports 65 languages out of the box. Not to mention, the custom language that you can add on top.
The automatic translation does a very good job of translating your content. It’s capable of machine translations of WordPress admin, menu items, posts, and pages.
Before you start to worry — that ultimate control is still in your hand, and you decide the content, the language you want to translate, and the overall workflow.
Here’s a step-by-step guide on installing and using WPML to make a site multilingual in WordPress:
Step 1: Purchase and Install the WPML WordPress Plugin
WPML is a premium plugin. Thus, to install the plugin on your site you must first complete the purchase. For this, visit the WPML’s official site.
WPML currently offers three premium plans with the most basic one starting at EUR 39 per year.
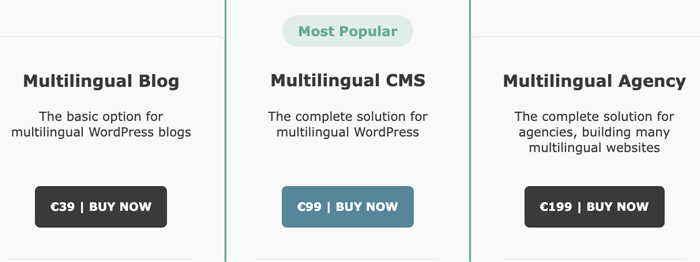
However, we’ll be using the more popular Multilingual CMS plan which costs EUR 99 per year.
You can get a plan that suits your needs the best.
Once you have signed up for one of those plans, you can log into your WPML account using your username and password.
From your WPML account dashboard, click on the drop-down menu next to your account name on the top right and click on Downloads.
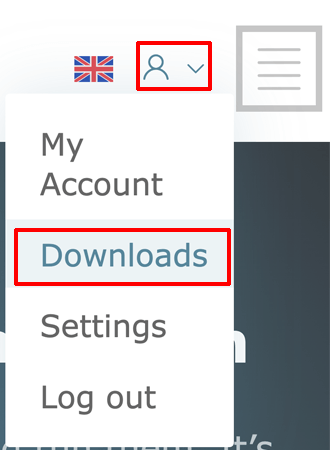
There you’ll find the OTGS Installer file. Save this file on your computer by clicking the download button.
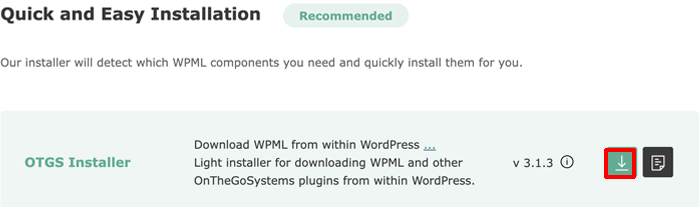
Alternatively, you can also directly download WPML and its required components from your account dashboard.
However, we prefer uploading the OTGS file as it displays a list of all the available WPML plugins for you to download and activate right on the dashboard once we register with WPML.
Nevertheless, you can follow one of the above methods at your convenience.
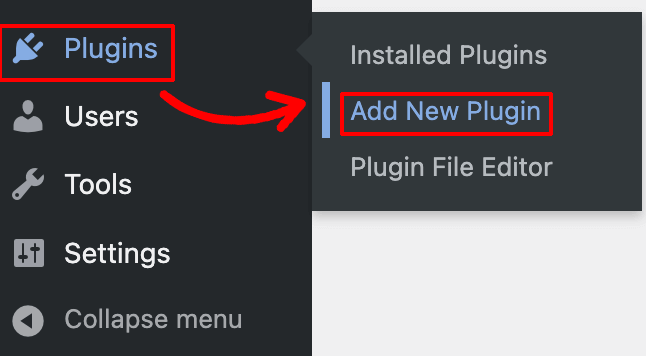
So, once you have the OTGS file, log in to your WordPress admin dashboard. Then head to Plugins >> Add New Plugin.
After that, click on the Upload button at the top and select the file you saved earlier. Then, click on Install Now.
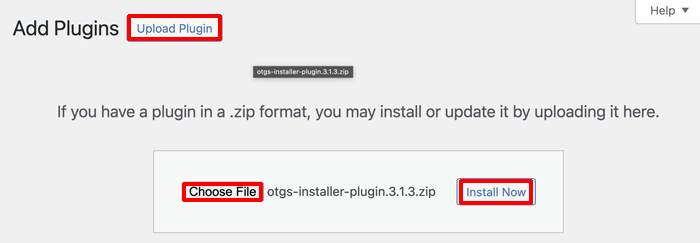
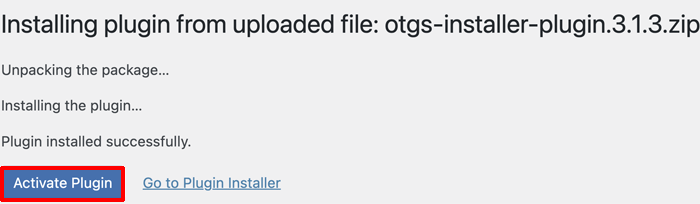
Once the installation is complete, hit the Activate Plugin button.
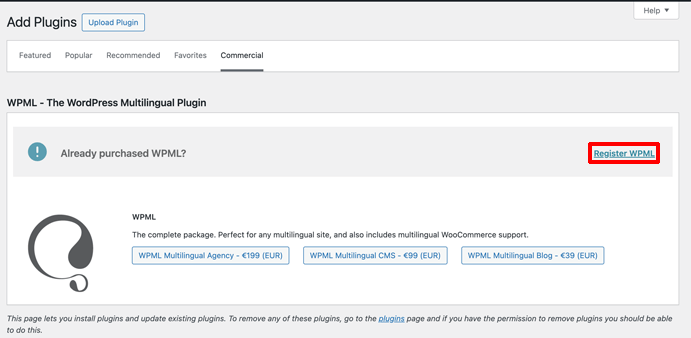
Step 2: Activate WPML
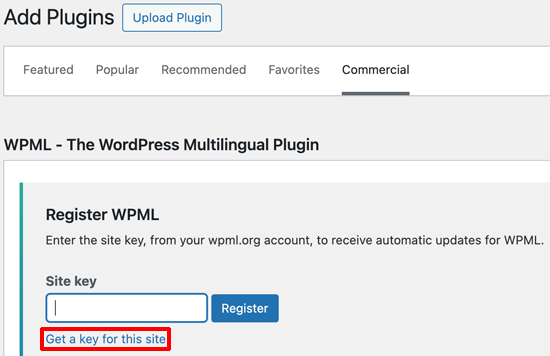
Next, you’ll be taken to the WPML registration page. Click on Register WPML.
This will take you to the Add a Site Key section on your WPML account.
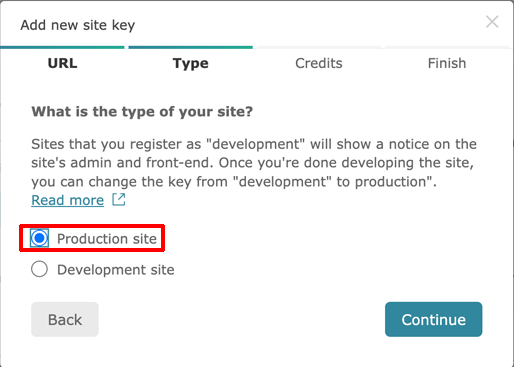
If your site is already online, select Production Site. Otherwise, choose Development Site and hit Continue.
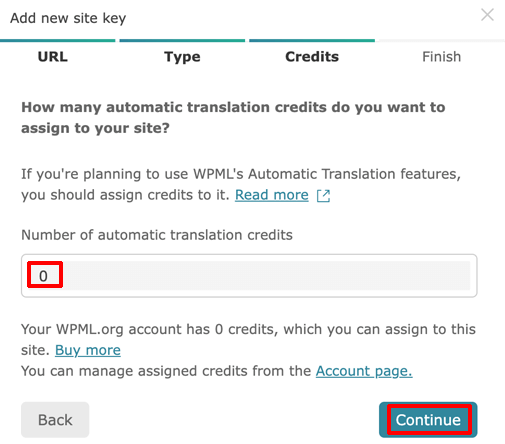
Then, assign credit for Automatic Translation. Leave it to zero and continue if you plan to use manual translation.
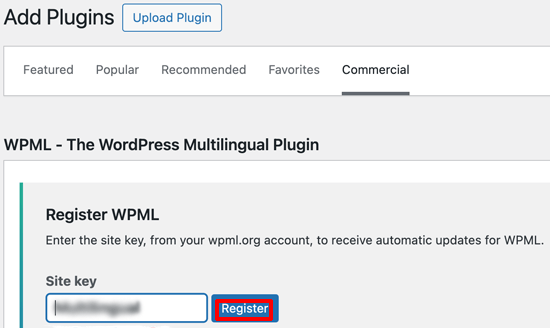
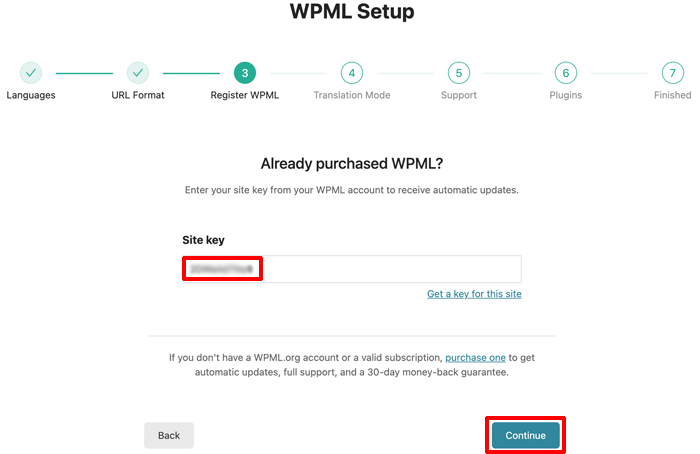
Finally, WPML will create a Site Key for you. Copy and paste it into the Site Key box on the registration page and hit Register.
Registering the WPML plugin will unlock the WPML Package Installer. Here, we’ll checkmark the WPML Multilingual CMS. You can also add other additional packages based on your needs.

You’ll see an Activate after download button towards the bottom of the page. Select it and hit Download.
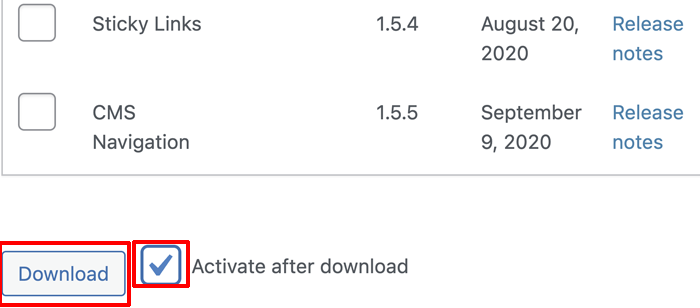
With that, WPML is successfully installed and activated on your site.
Step 3: Setup WPML On Your Site
The Setup Wizard will open after all the downloads are completed.
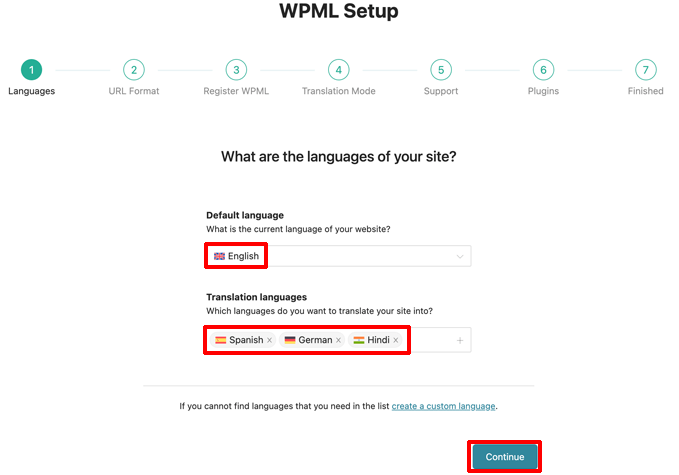
In the language section, pick the language that your site is currently in. This will be the default language.
Then, select the languages that you want to add to your site. You can pick multiple translation languages here.
Then, select the URL pattern for each translation language of your site.

Since we’ve already entered our Site Key, you can skip the Purchase WPML section.
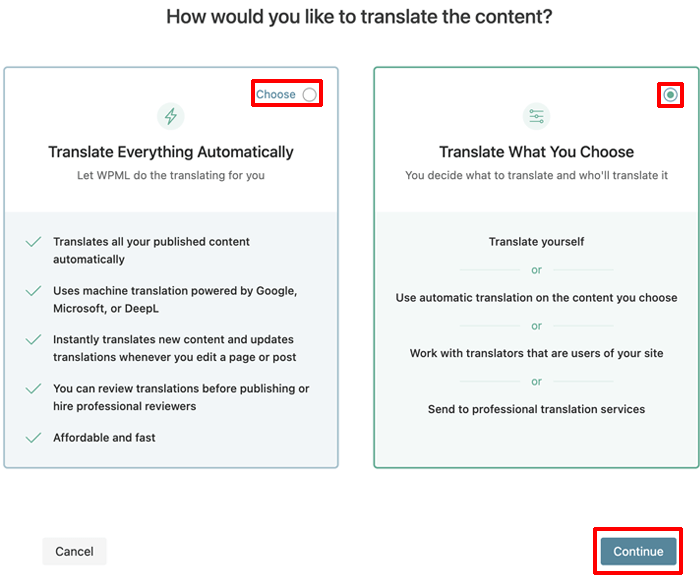
Next, choose whether you want automatic machine translation or manual translation from the translation mode. Choose “Translate What You Choose” if you’re going to do it manually.
WPML will then ask for your theme and plugin information to check for compatibility issues. Select Yes or No based on your personal preferences and continue.
Here, we’ve selected Yes.
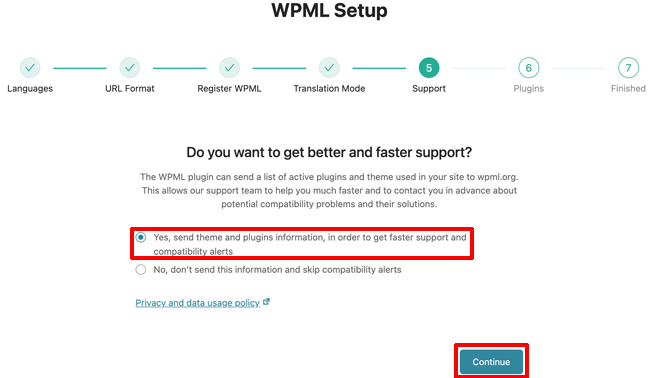
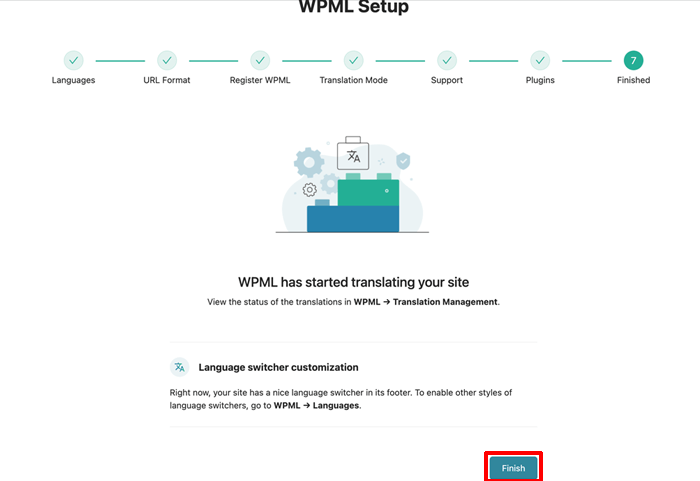
Finally, click on Finish to complete the setup.
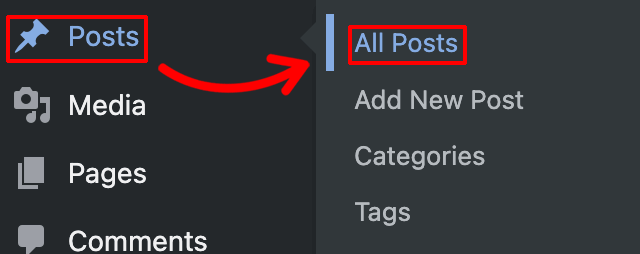
Step 4: Translate Posts and Pages
To translate a page, go to your WordPress Dashboard>> Posts >> All Posts.
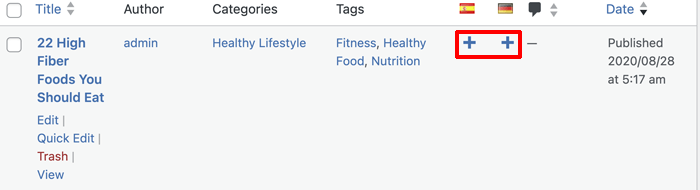
You’ll notice a new column with flags of all the languages you selected during the process.
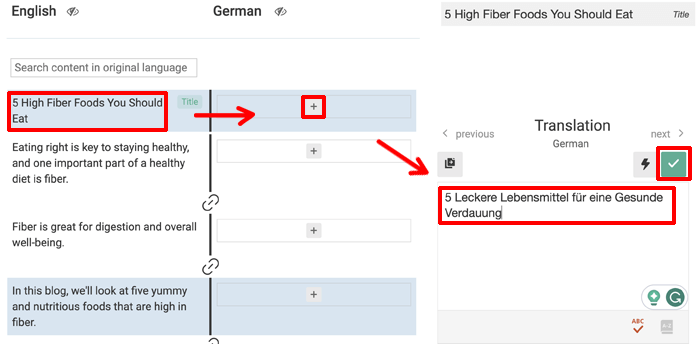
The “+” sign means there is no translation for that language. To add one, click on it.
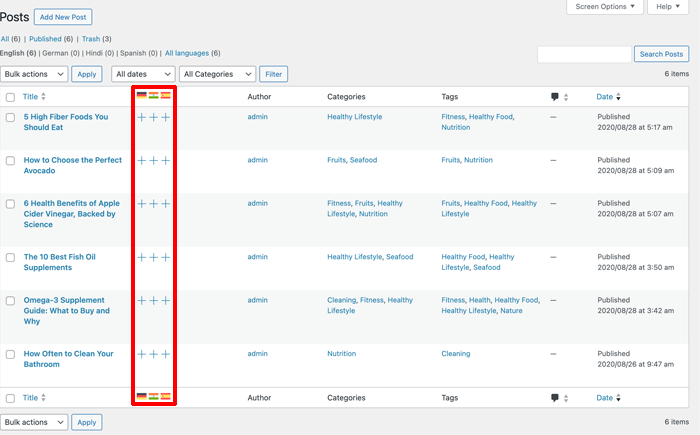
This will open the translation window with the original content arranged into different segments. Select each segment and add the translation to the text box next to the right.
Alternatively, you can use automatic translation by hitting the thunder icon if you have enough credit.
Once you’re satisfied, select the tick icon above the text box.
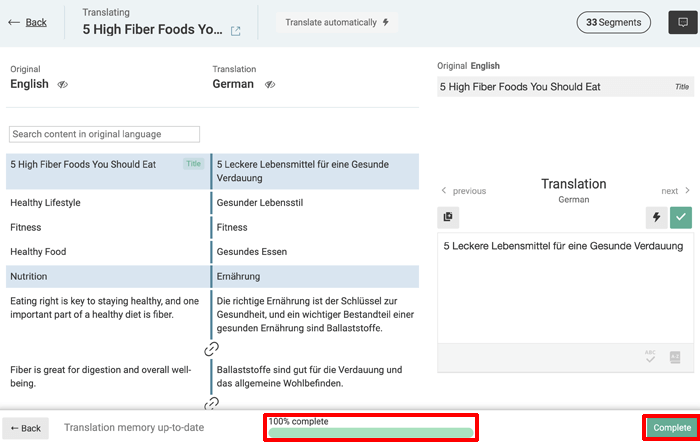
Finally, after you’ve added translations for all segments, save the translation post by clicking on the complete button at the bottom.
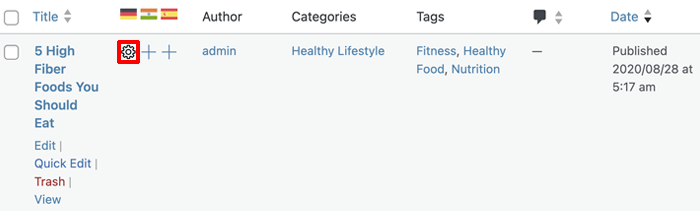
To edit a translation afterward, click on the corresponding gear icon. This will open the translation window again.
You can translate pages by heading to Dashboard >> Page >> All Pages and repeating the process above.
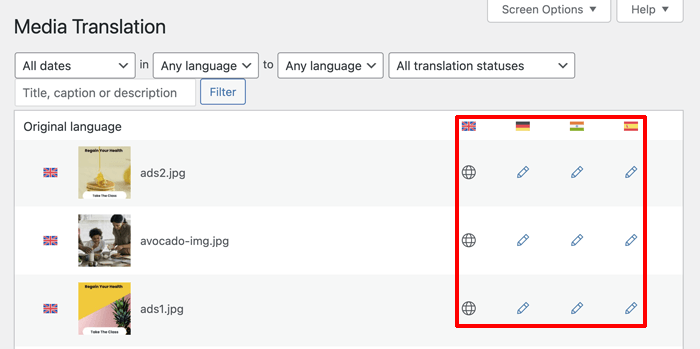
Step 5: Translate Media
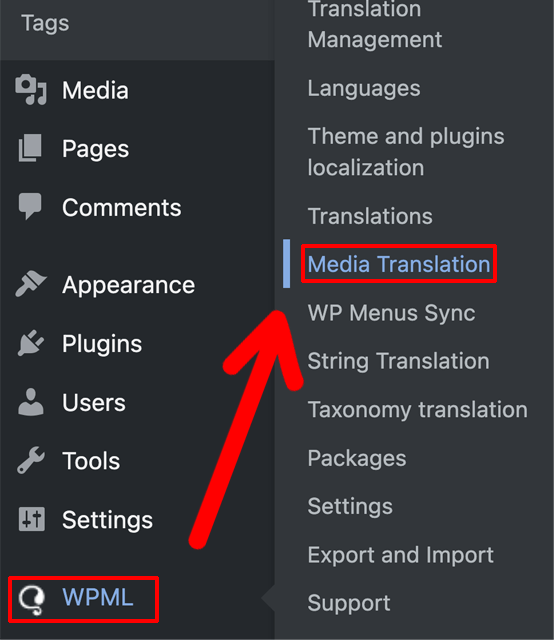
You can access the image translation options by going to Dashboard >> WPML >> Media Translation.
Pick the image and select the pen icon below the language you want to translate it into.
Add the translated title and alternative text in the translation section.
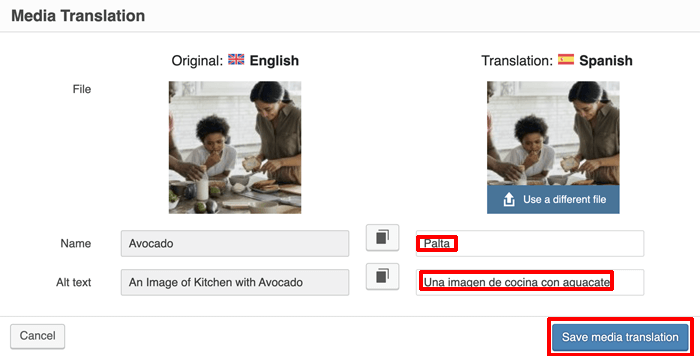
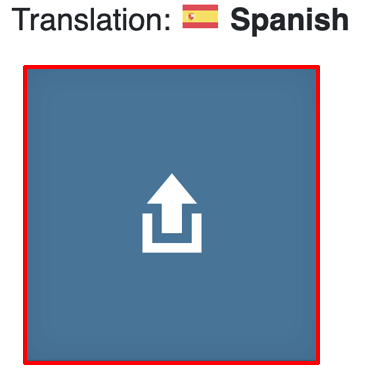
Hovering on the images in the translation section shows an upload icon. If you want to use a different image to display on the translated page, you can upload the image by clicking on it.
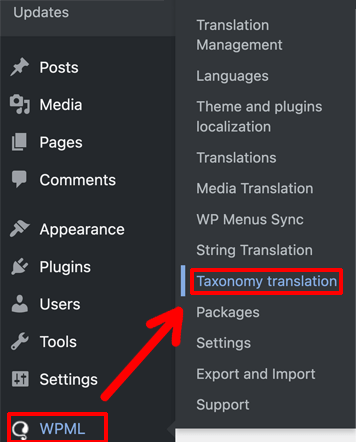
Step 6: Translation Categories and Tags
WPML also allows the translation of categories and tags.
For that, go to WPML >> Taxonomy Translation.
Then, select the taxonomy you’d like to translate from the drop-down menu.
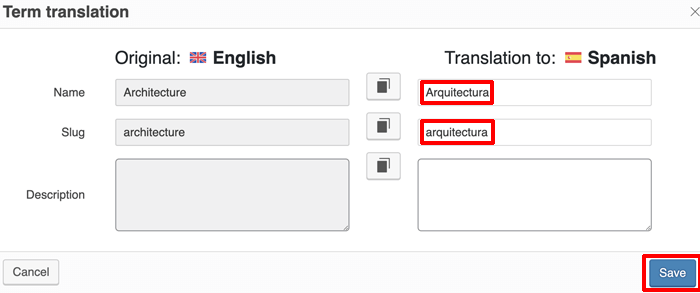
Click the “+” sign next to the term to open the Term Translation dialog box.
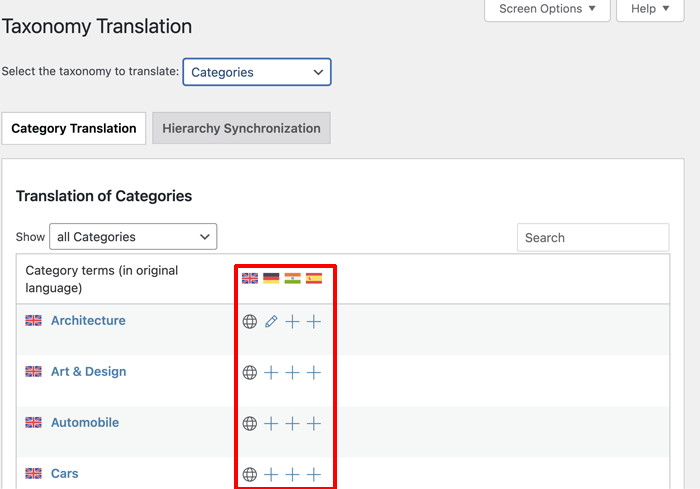
Add the translated term and slug and hit Save.
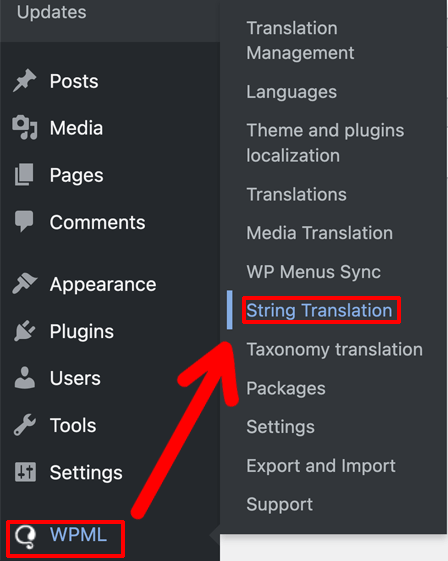
Step 7: Translate Strings
With WPML, you can also translate texts outside of posts, pages, categories, and tags. This includes texts on the admin screen, widgets, and menu.
Go to Dashboard >> String Translation.
Click on the “+” corresponding to the term and language.
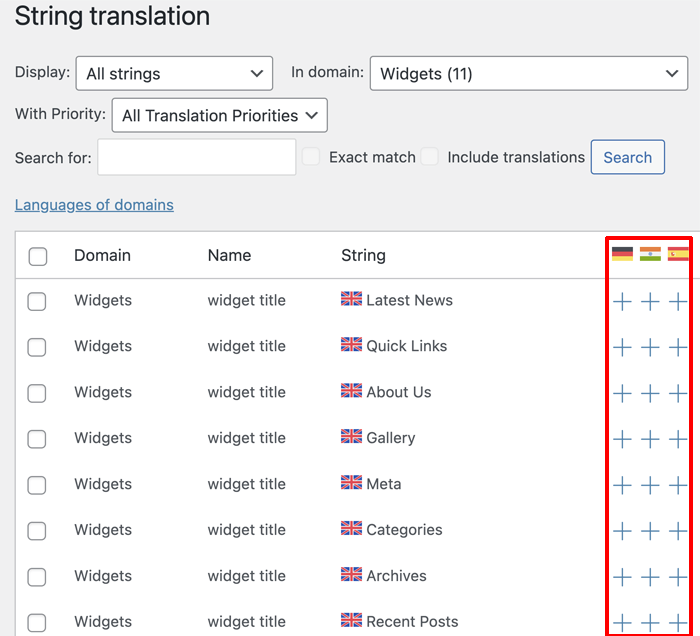
Add the translation on the menu that pops up and hit save.
Step 8: Translate the Navigation Menu
Translating the navigation menu is as simple as adding translations for categories, tags, and strings.
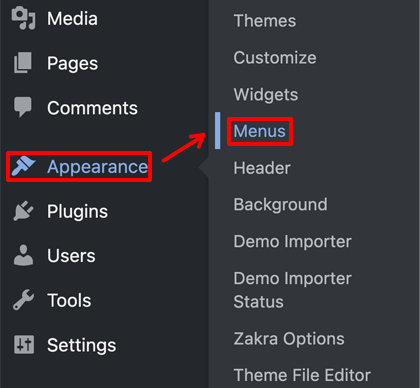
First, go to Appearance>> Menus. Then, select the menu you want to translate.
Then, on the right, you’ll see the options to translate the menu into other languages.
Clicking on a language will create a menu for that language.
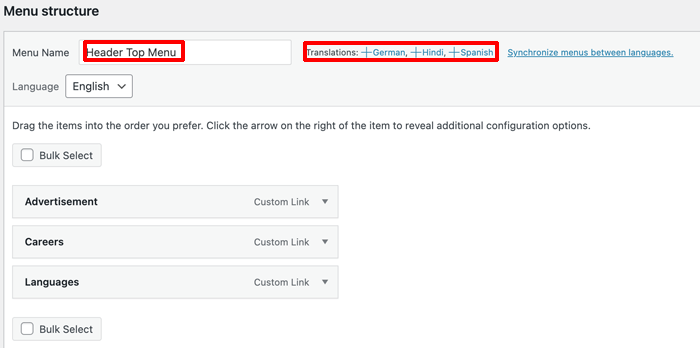
Add all the items you need to the new menu and save the changes.

Hence, this is how you make your website multilingual using WPML – one of the leading multilingual plugins for WordPress.
Though WPML is one of the finest plugins for making a multilingual website, we also have other alternatives in case you don’t want to go premium in the first place.
Method 2: How to Make a Website Multilingual with GTranslate?
GTranslate is an easy-to-use WordPress multilingual plugin supporting machine translations for over 100+ languages. It’s available for free as well as paid options.

The free tier places a language selector on your site. It uses JavaScript to translate the pages locally.
On the other hand, the paid version uses neural networks for more accurate translation. It also hosts the translated version on the cloud, allowing it to index and even rank on Google.
Here’s a step-by-step guide on installing and using GTranslate to make a site multilingual in WordPress:
Step 1: Install and Activate GTranslate WordPress Plugin
GTranslate has a plugin you can install for free on your WordPress website.
Install it by navigating to Plugins >> Add New Plugin from the dashboard.
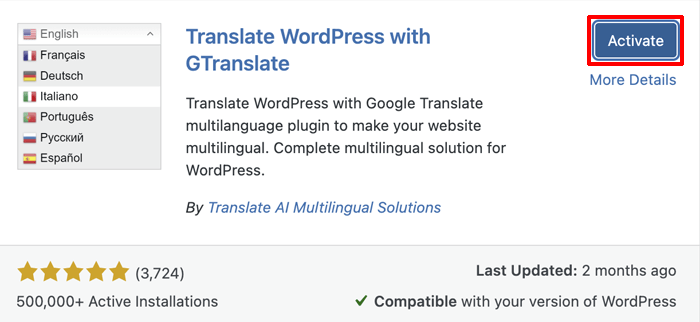
Then, type Translate WordPress with GTranslate on the search bar.
Hit Install Now to add the plugin to your site.
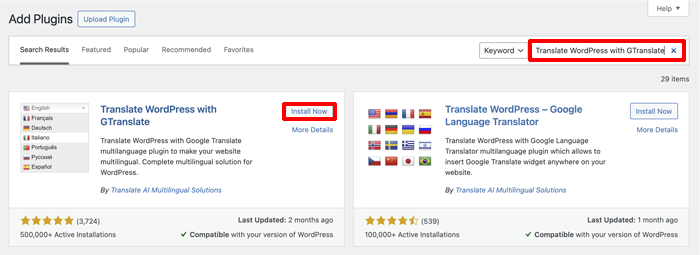
Wait for the installation process to finish, and then hit the Activate button.
Step 2: Customize the Settings
This will add a WordPress language switcher on the front end of your website, allowing users to select their preferred language.
GTranslate will automatically translate your site’s content depending on the users’ language.
You can control the widget and language settings from the GTranslate dashboard.
Go to Settings >> GTranslate from your WordPress dashboard to access it.
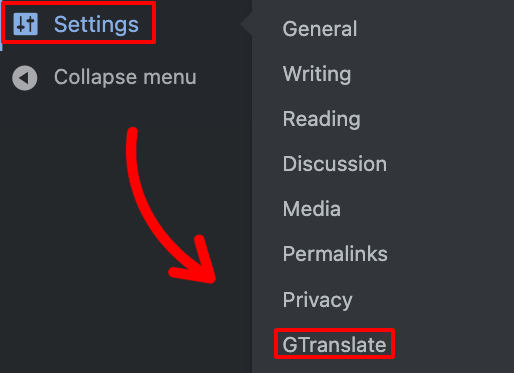
This will open the GTranslate dashboard with the following options:
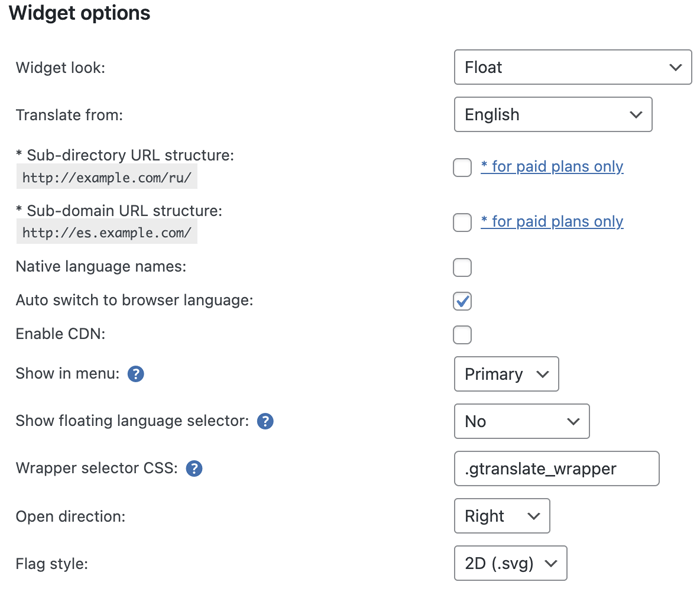
- Widget Look: Adjust the look and feel of the WordPress language switcher widget as per your preference.
- Translate From: Choose the default language that the website is currently using.
- Show in Menu: Use this option to add the language selector to the menus.
- Show Floating Language Selector: Add a floating language switcher on the website.
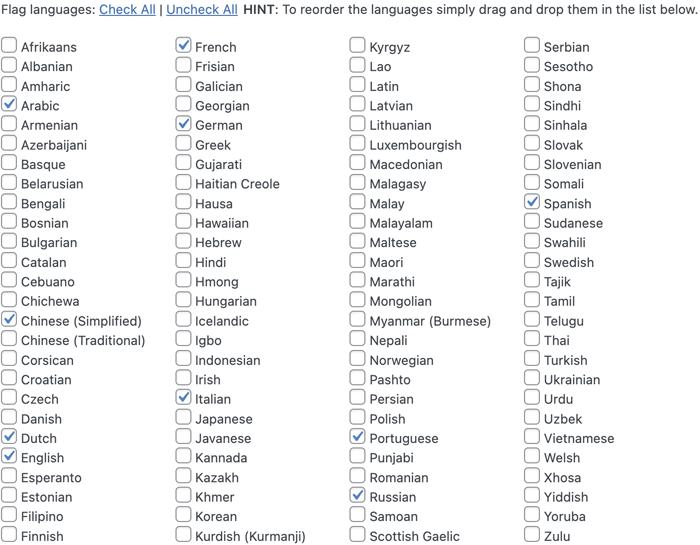
- Flag Languages: Choose the languages that you want to translate into.
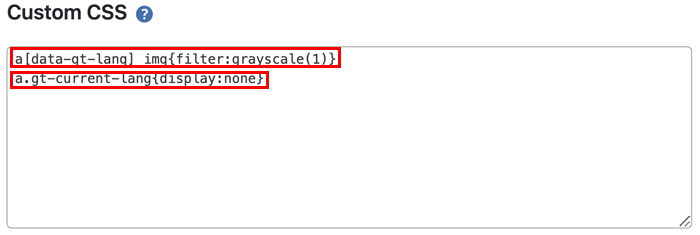
You can use the Custom CSS section to customize the widget further. For instance, you can make the flags monochrome in the drop-down list.
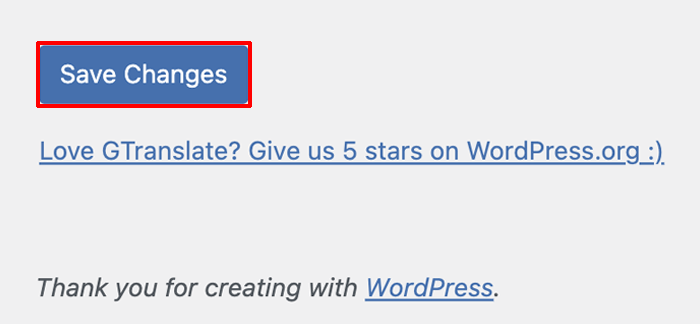
Step 3: Confirm the Changes
Click on the Save Changes button to confirm your settings. And that’s how you make your WordPress site multilingual with GTranslate.
Method 3: How to Make a Website Multilingual with Polylang?
With over 700,000+ active installations and a 4.5-star user rating, Polylang is one of the leading WordPress multilingual plugins.

It allows you to manually translate your content, including posts, categories, menus, and custom posts. Machine translation is not built-in, but you can access it using third-party add-ons.
Polylang also has an in-house add-on for WooCommerce, but it’s only available with the Pro plan. The premium plan works better with WordPress blocks and templates.
It also offers more support for url structures, content synchronization, and third-party plugins.
Here’s a step-by-step guide on making a WordPress site multilingual with Polylang.
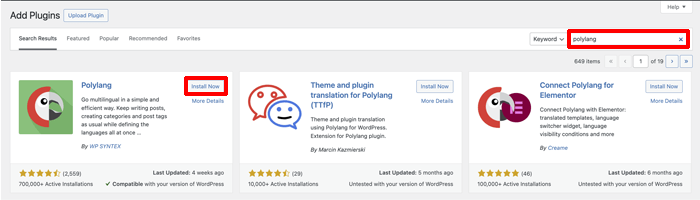
Step 1: Install and Activate Polylang
You can install the free version of Polylang by heading to the Plugins >> Add New Plugin from your WordPress admin dashboard.
Use the search bar on the top left to look for Polylang. Once it appears, hit install and then activate.
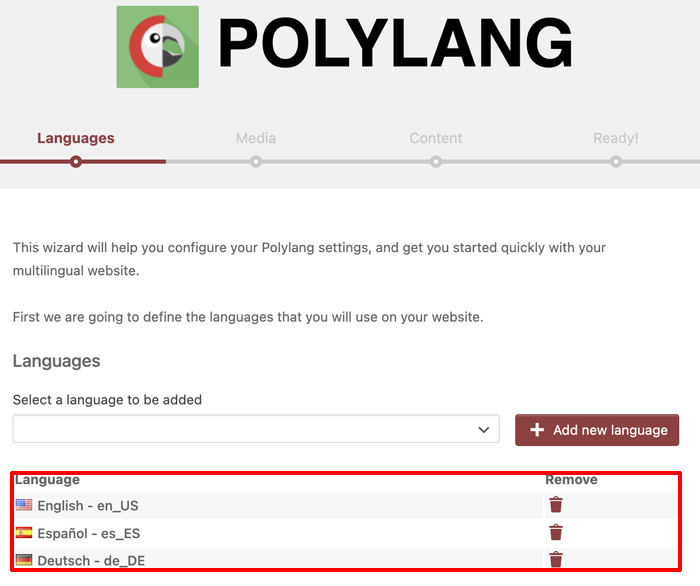
Step 2: Configure the Setup Wizard
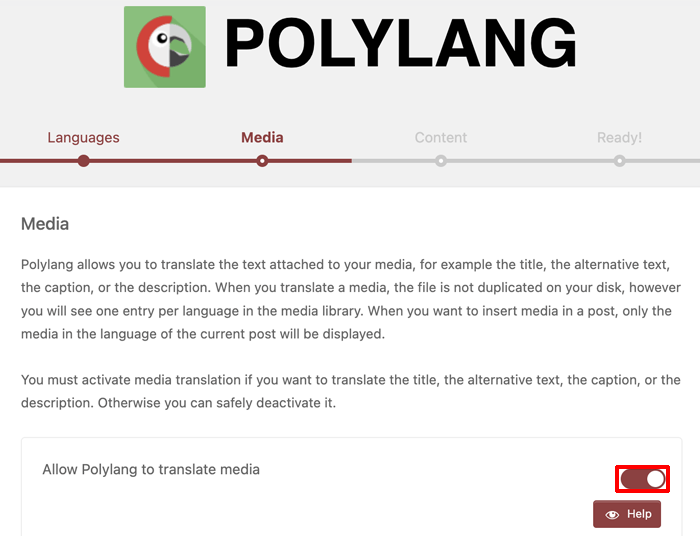
This will launch the setup wizard with the following tabs for the initial configuration:
- Languages: Select all the preferred languages along with the default language.
- Media: Select this option if you want to translate the title, alternative text, caption, and description of images on your site.
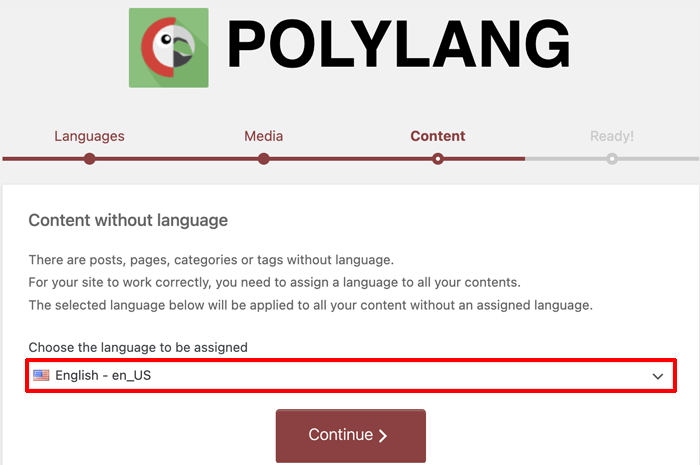
- Content: Use this to assign a language to all the existing pages and posts on your website.
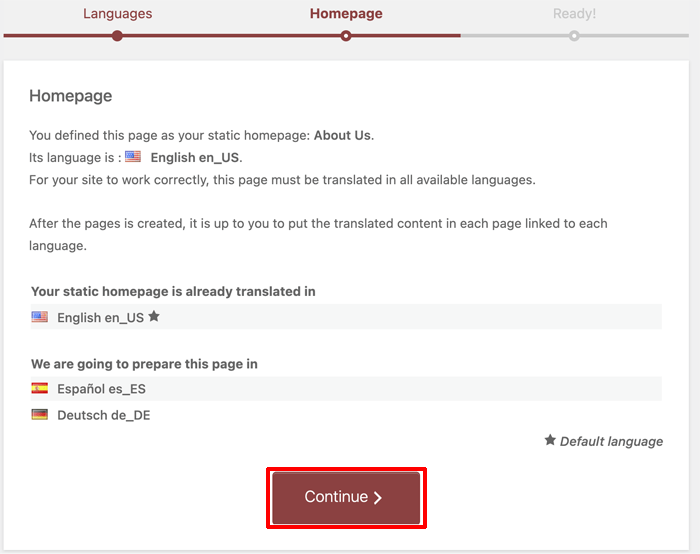
- HomePage: If you have a static webpage, this will create separate homepages for each of the languages selected.
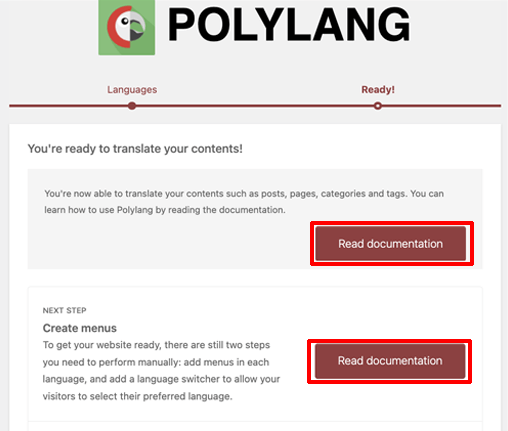
- Ready: This section houses all the documentation if you want to go through it. Else, you can start translating your content right away.
Step 3: Translate Posts, Pages, Categories, and Tags
To translate a post, locate it by going to the Posts >> All Posts from the WordPress dashboard.
You’ll notice flags of languages you selected in the previous step in the header.
Add a new translation by clicking the “+” sign corresponding to the language.
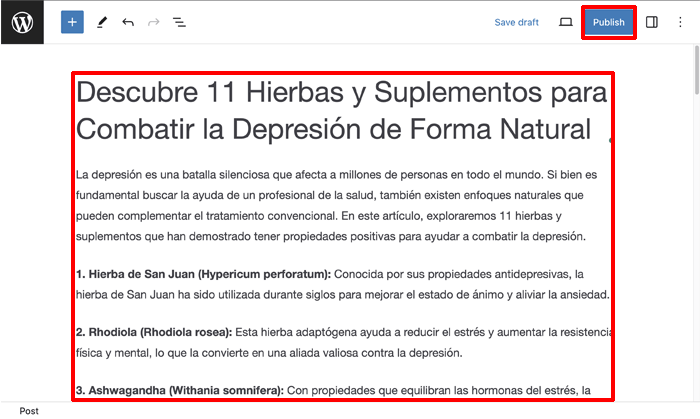
This will open a new post block editor where you can add the translated content.
Hit the Publish button to publish the translation.
You can also edit the translation after it’s been published. Just click on the pen sign corresponding to the translation you wish to change.
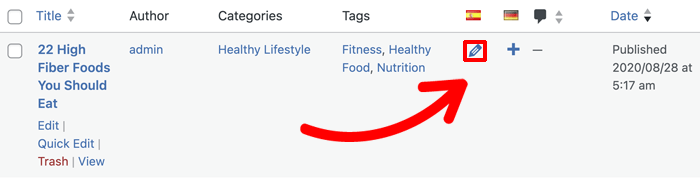
Similarly, you can translate pages, categories, and tags following the same process.
Step 4: Translate the Site Title and User-defined Terms
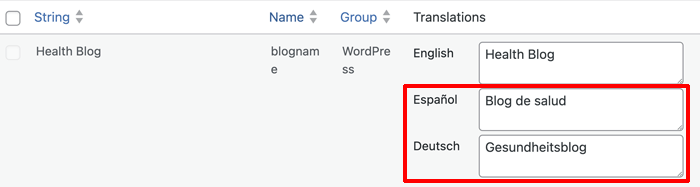
Polylang also allows you to translate the site title, tagline, and other user-defined terms.
To do this, you must access Polylang translation settings by going to Languages >> Translations from the dashboard.

Then, add translations of the user-defined terms to the appropriate text box.
Step 5: Add a WordPress Language Switcher to the Menu
Finally, you need to add a language switcher to your site menu.
Go to Appearance > Menus. Select a menu and tick the Language from the Add menu item.
Then head to Menu Structure and select the Language menu item you just created.
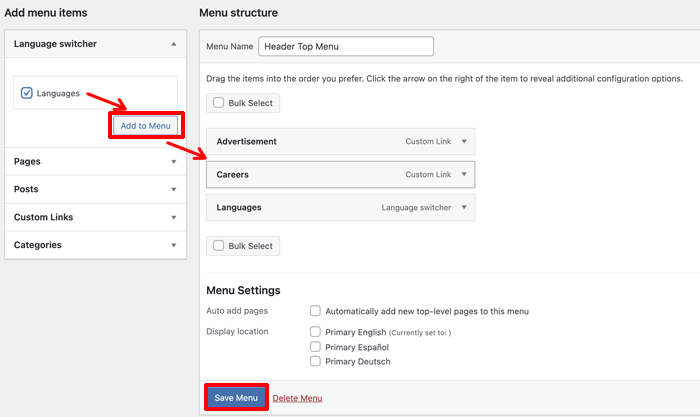
Customize how you want languages to appear in the language switcher from the drop-down list.
Once done, click on the save menu to save your changes.
Method 4: How to Make a Website Multilingual with TranslatePress?
TranslatePress is another widely used WordPress multilingual plugin. You can use it to manually translate a website in multilingual languages.
TranslatePress also allows machine translation using Google Translate if you have an API Key. It also has a premium plan that uses DeepL for automatic translation.
Here’s a step-by-step guide on making a WordPress site multilingual with TranslatePress.
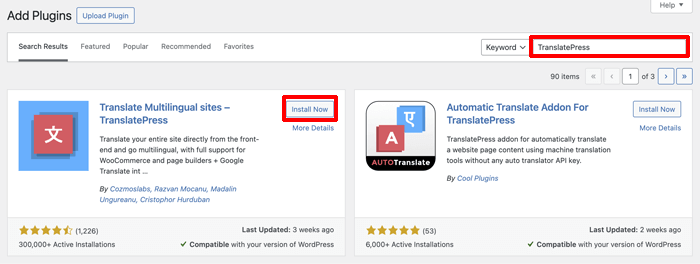
Step 1: Install and Activate TranslatePress
You can add TranslatePress to your WordPress site by going to Plugins >> Add New Plugin.
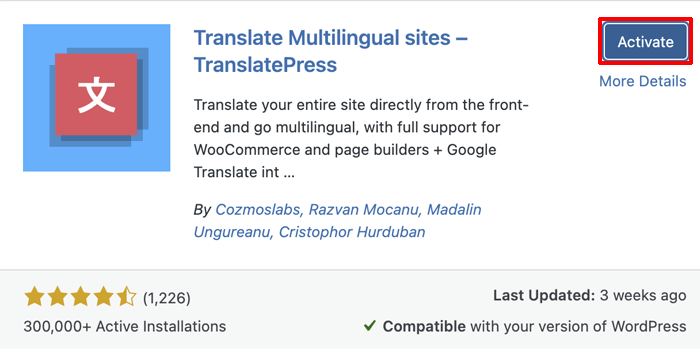
Search for TranslatePress and hit the Install Now button.
Once it’s installed, hit the Activate button.
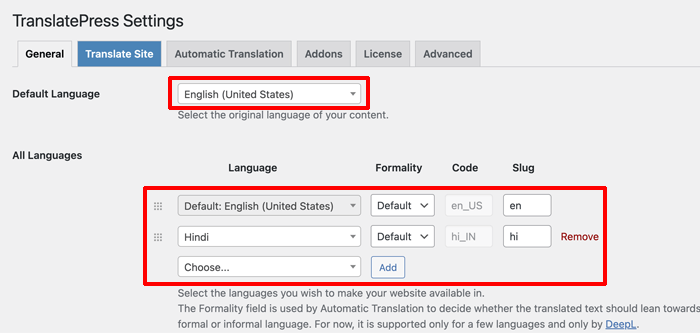
Step 2: Add Language to Translate To
This will open up the TranslatePress Settings.
In the Default Language section, select the language your website is currently in.
Use the All Language section to add the language you want to translate to. Pick the preferred language, select the formality (optional), and select a slug.
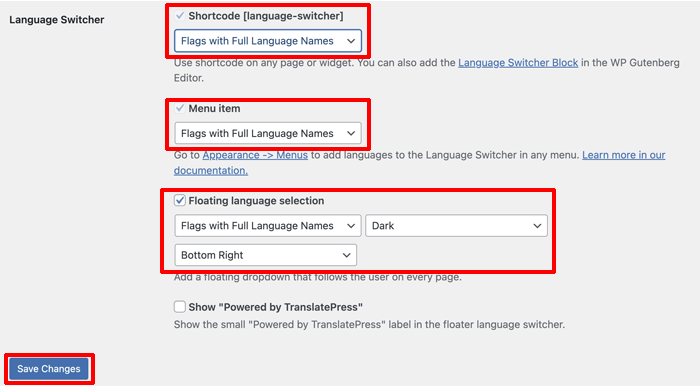
Step 3: Add Language Switcher
TranslatePress automatically adds a floating WordPress language switcher to your site. You can change its look by tweaking the Floating Language Selection option under the Language Switcher.
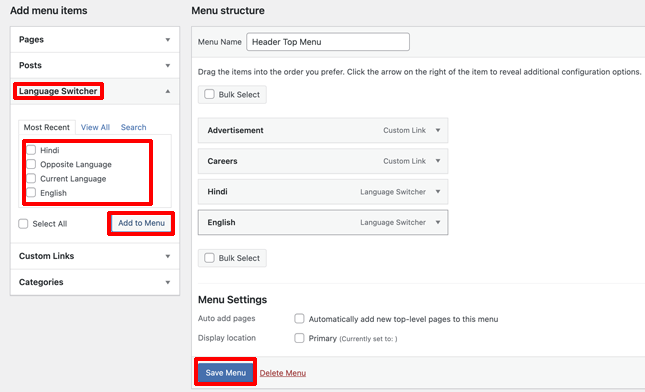
You can even add languages to the menu. Head to Appearance >> Menus from the dashboard and select the languages you want to display on the menu from the Language Switcher.
You can then change the positioning of the language on the Menu from the Menu Structure.
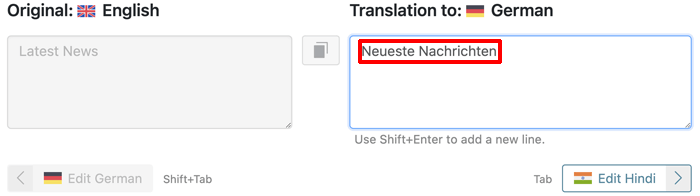
Step 4: Translating Your Content
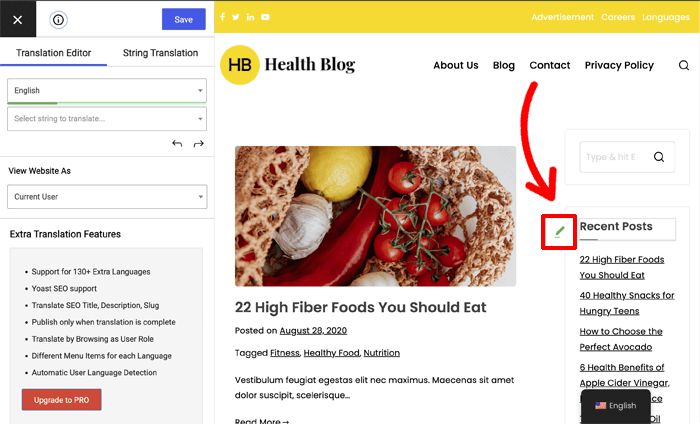
To translate a page, go to the page and select the Translate Page option from the WordPress toolbar.
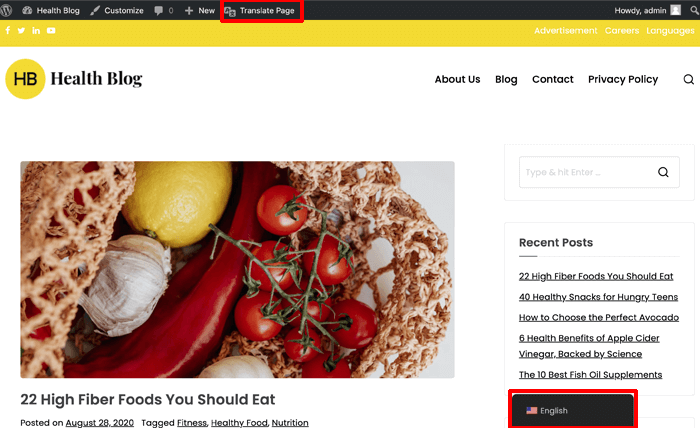
This will open the Translation Editor. You can hover over the section you want to translate and select it by clicking the pencil icon.
This will select the section on the Translate Editor. Add the translated version of the text in the ‘To section below
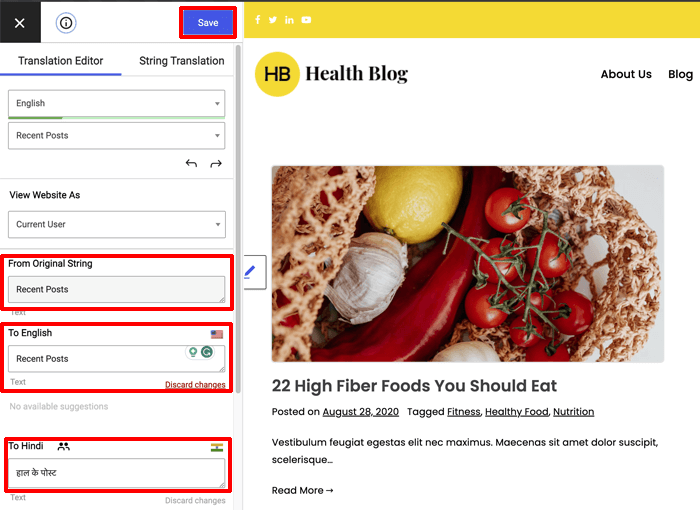
Once you are satisfied, save the changes.
Repeat this step for all other content on the page.
Concluding How to Make a WordPress Website Multilingual!
Despite being the international language, English is not the first language of most of the global population.
Thus, having a multilingual site is always better if you want your business to expand to a broader audience.
Furthermore, making your WordPress multi language website is no longer a headache.
With plugins like WPML, GTranslate, TranslatePress, and Polylang, you can now make your web pages available in multiple languages just like that.
Hopefully, this article was beneficial to you.
If you are interested, check out our guides on migrating a WordPress site with zero downtime and installing WordPress locally using XAMPP. You may also like our article on the best WordPress lightbox plugins.
Also, if you have any say on this article, write to us in the comment section below.
Disclaimer: Some of the links in the post may be affiliate links. So if you purchase anything using the link, we will earn affiliate commission.