The WooCommerce thank you page seems like a small part of your online operation. Customers look at it for a second or two, then move to other parts of the internet.
Yet, that doesn’t have to be the case.
In fact, wouldn’t you rather customers take time examining your WooCommerce thank you page, due to its creativeness and potential for more savings or product information?
By default, WooCommerce technically offers a thank you page, but there’s not much to it. That’s why we’ll show you how to customize the basic WooCommerce thank you page to add custom text and colors, while also including crucial elements, like buttons to get customers to shop more or coupons to drive more sales.
📚 Table of contents:
What’s a WooCommerce “thank you” page?
The thank you page appears right after a customer clicks on the Place Order button.
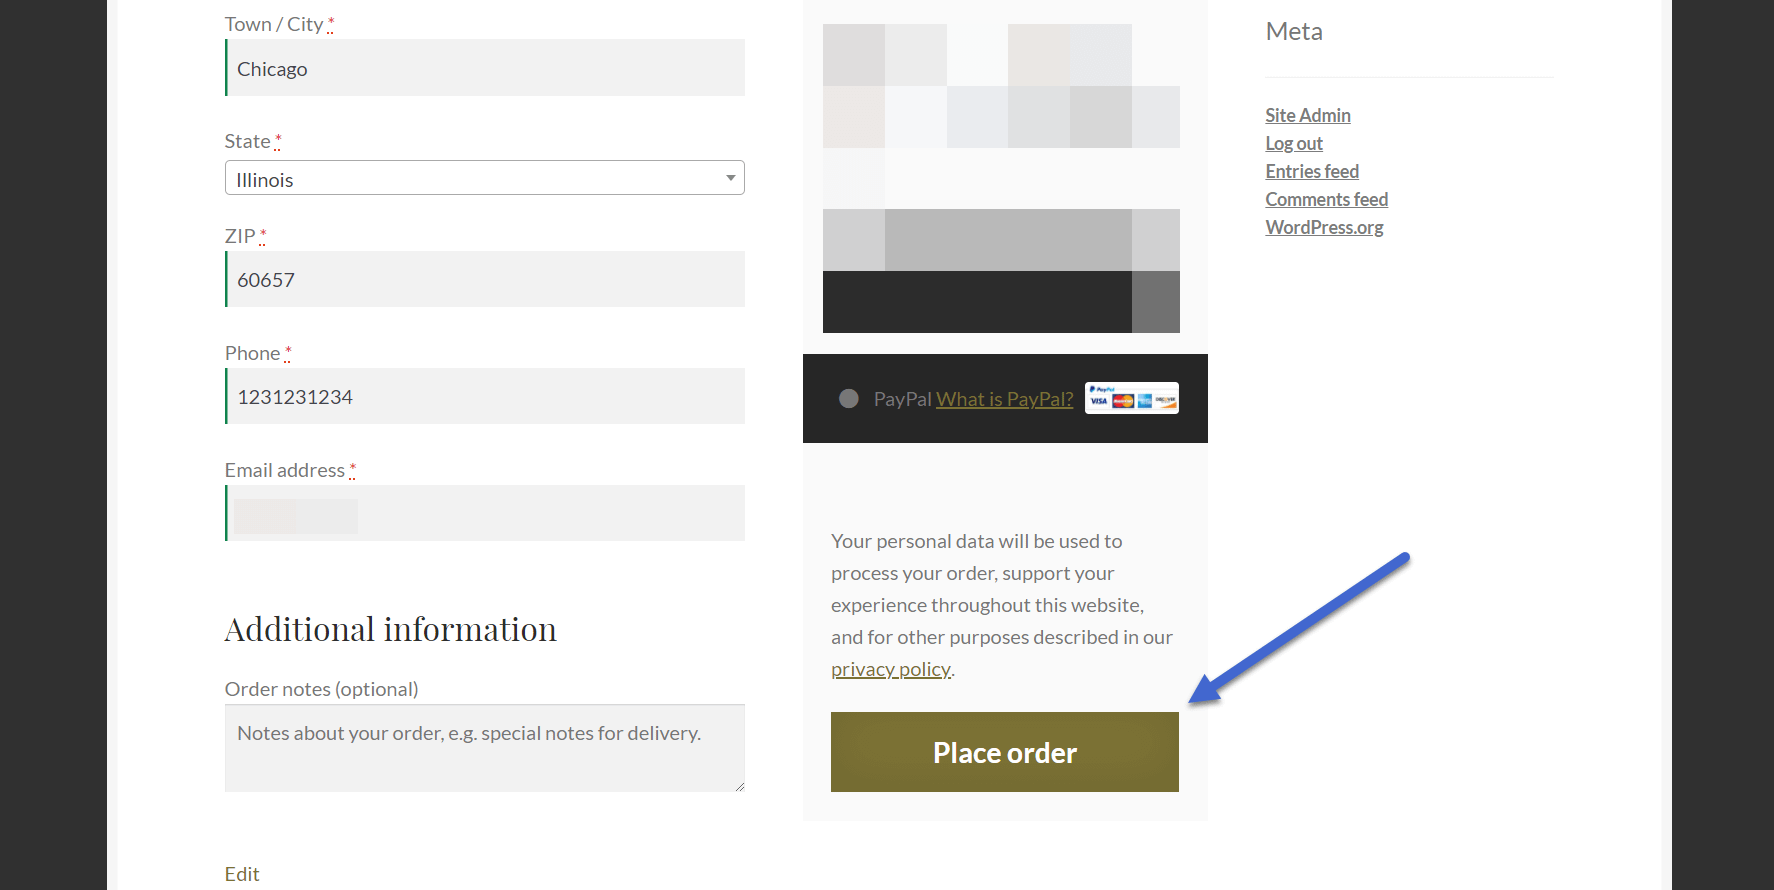
It’s different from the thank you/receipt email in that it’s a redirect to a new webpage your customers see on your website.
However, the default thank you WooCommerce page lacks creativity, and WooCommerce doesn’t let you customize any of the elements.

Our goal is to make a thank you page with more color, customized text, and useful modules to drive more sales.

How to make a custom WooCommerce “thank you” page
The best way to make a custom WooCommerce “thank you” page is with the Sparks for WooCommerce plugin.

This plugin provides a number of extra features for WooCommerce, including comparison tables, wishlists, and advanced product reviews.
It also allows you to build custom “thank you” pages, where customers get redirected to particular thank you pages based on the products they purchased.

Once you set it up, the Sparks for WooCommerce plugin overrides the standard thank you page in WooCommerce and automatically makes that confirmation section more appealing. Not to mention, you’re able to edit most elements on the page, leading to a well-branded WooCommerce thank you page.
To get started, purchase, install, and activate the Sparks plugin. Click here if you need guidance installing a plugin.

Create a new “thank you” page
With Sparks for WooCommerce installed and active, you’ll now see a new Marketing tab in the WordPress dashboard. Click on that, then select the Thank You Pages option to make a thank you page for your WooCommerce site.
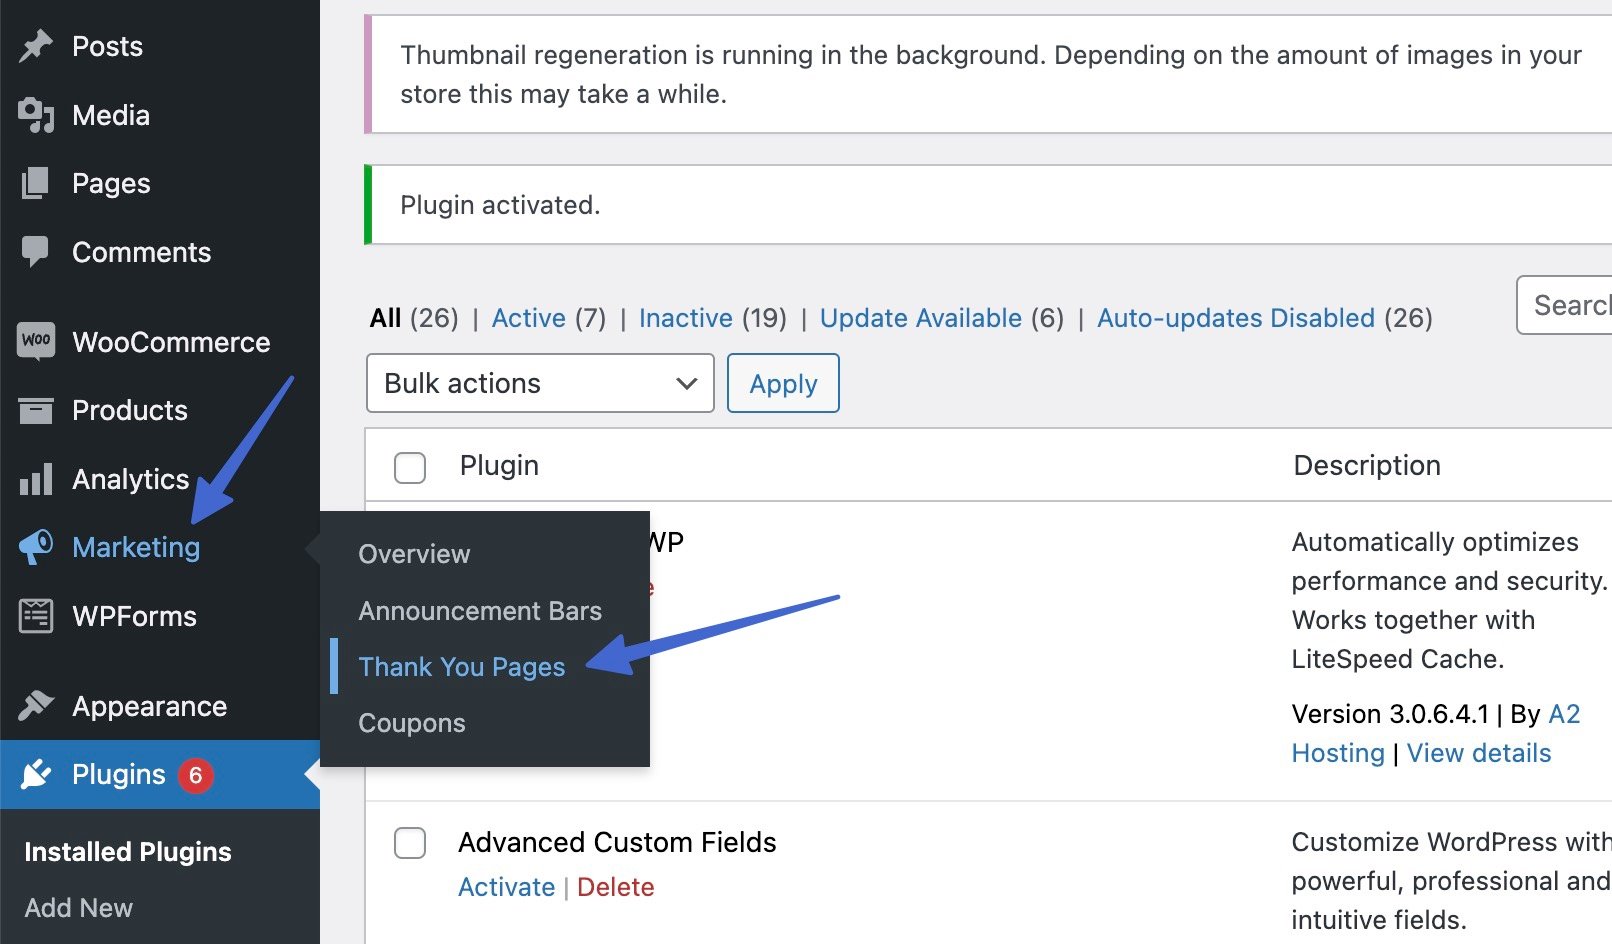
The Thank You Pages section displays all of your thank you pages. When you first install the Sparks plugin, you should see “No posts found.”
Click the Add New button to get started.

Design and stylize the “thank you” page
Designing and styling your thank you page is no different than generating a post or page in WordPress. You can utilize the built-in WordPress block editor (Gutenberg) or a custom page builder plugin.
We suggest Otter Blocks for the most advanced WooCommerce blocks for thank you pages, as it extends the native editor with a bunch of useful new blocks and features.
Simply click on the Add Block button to get creative and incorporate a wide range of elements on the page.
🤓 Suggestions:
- A title for the thank you page
- A hero image or cover with a relevant image and text (or buttons)
- Information about the order, or a button for them to view the order status
- A way for customers to contact you
- Buttons for sharing the purchase on social media
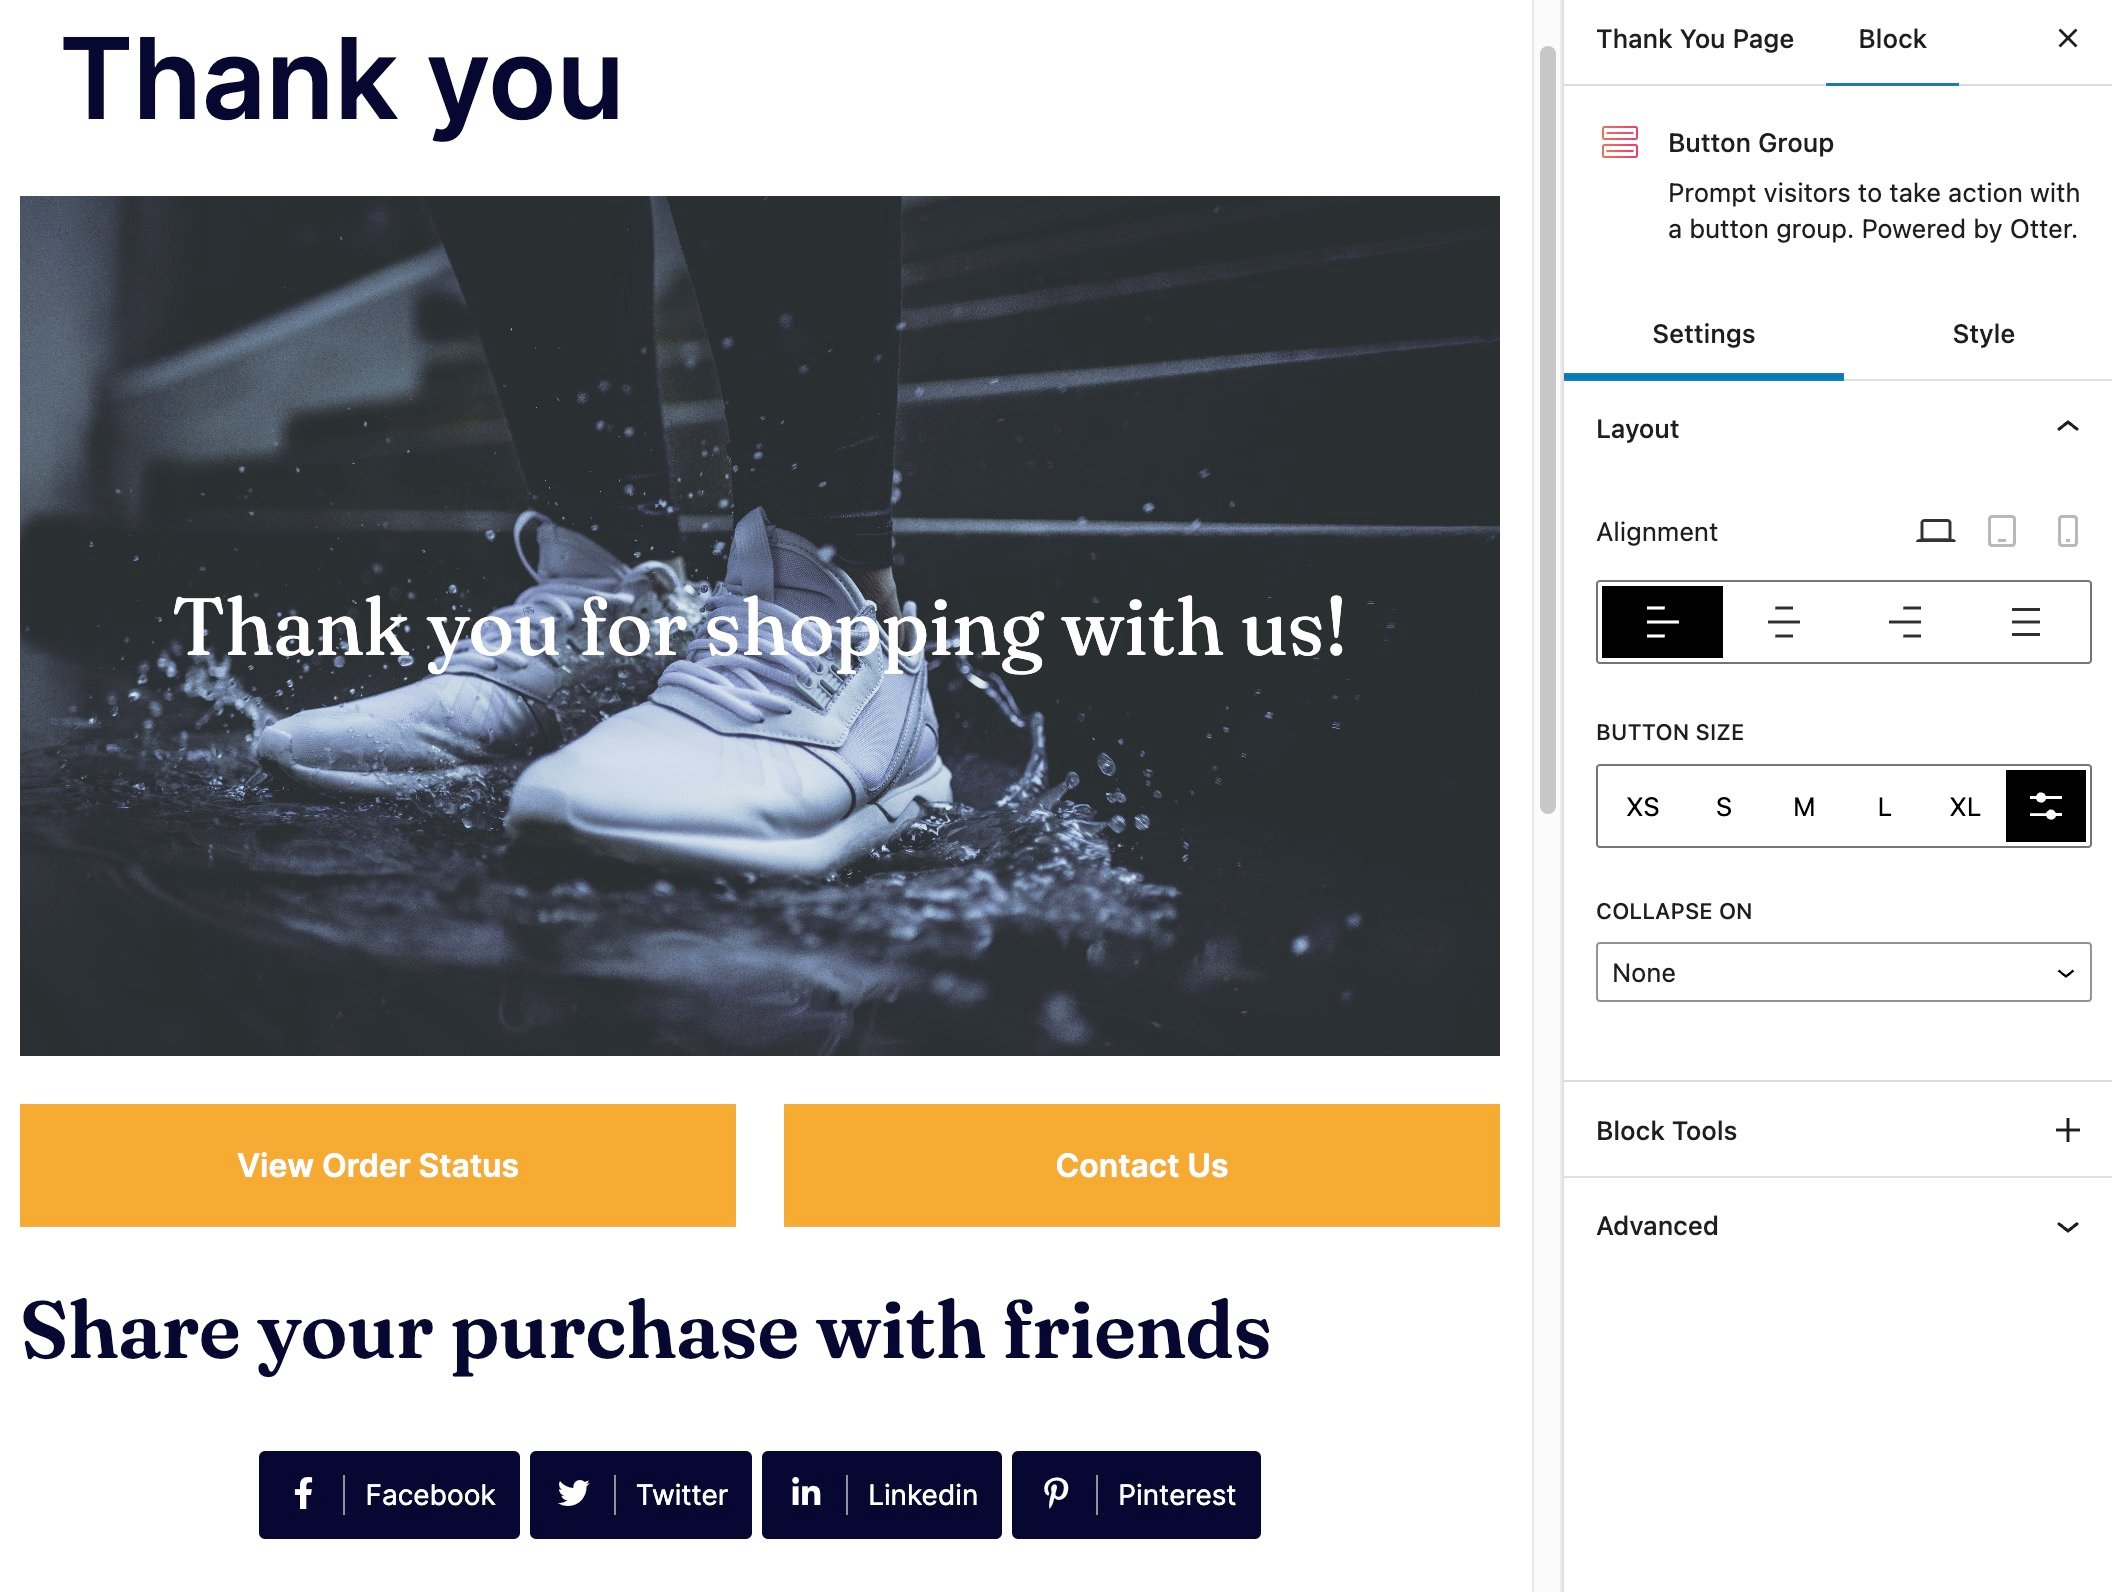
In our example, we also included:
- A section that recommends other products the customer might enjoy
- A button to go back to the shop
- Several columns and links that lead to pages for customer support, blog posts, and tutorials
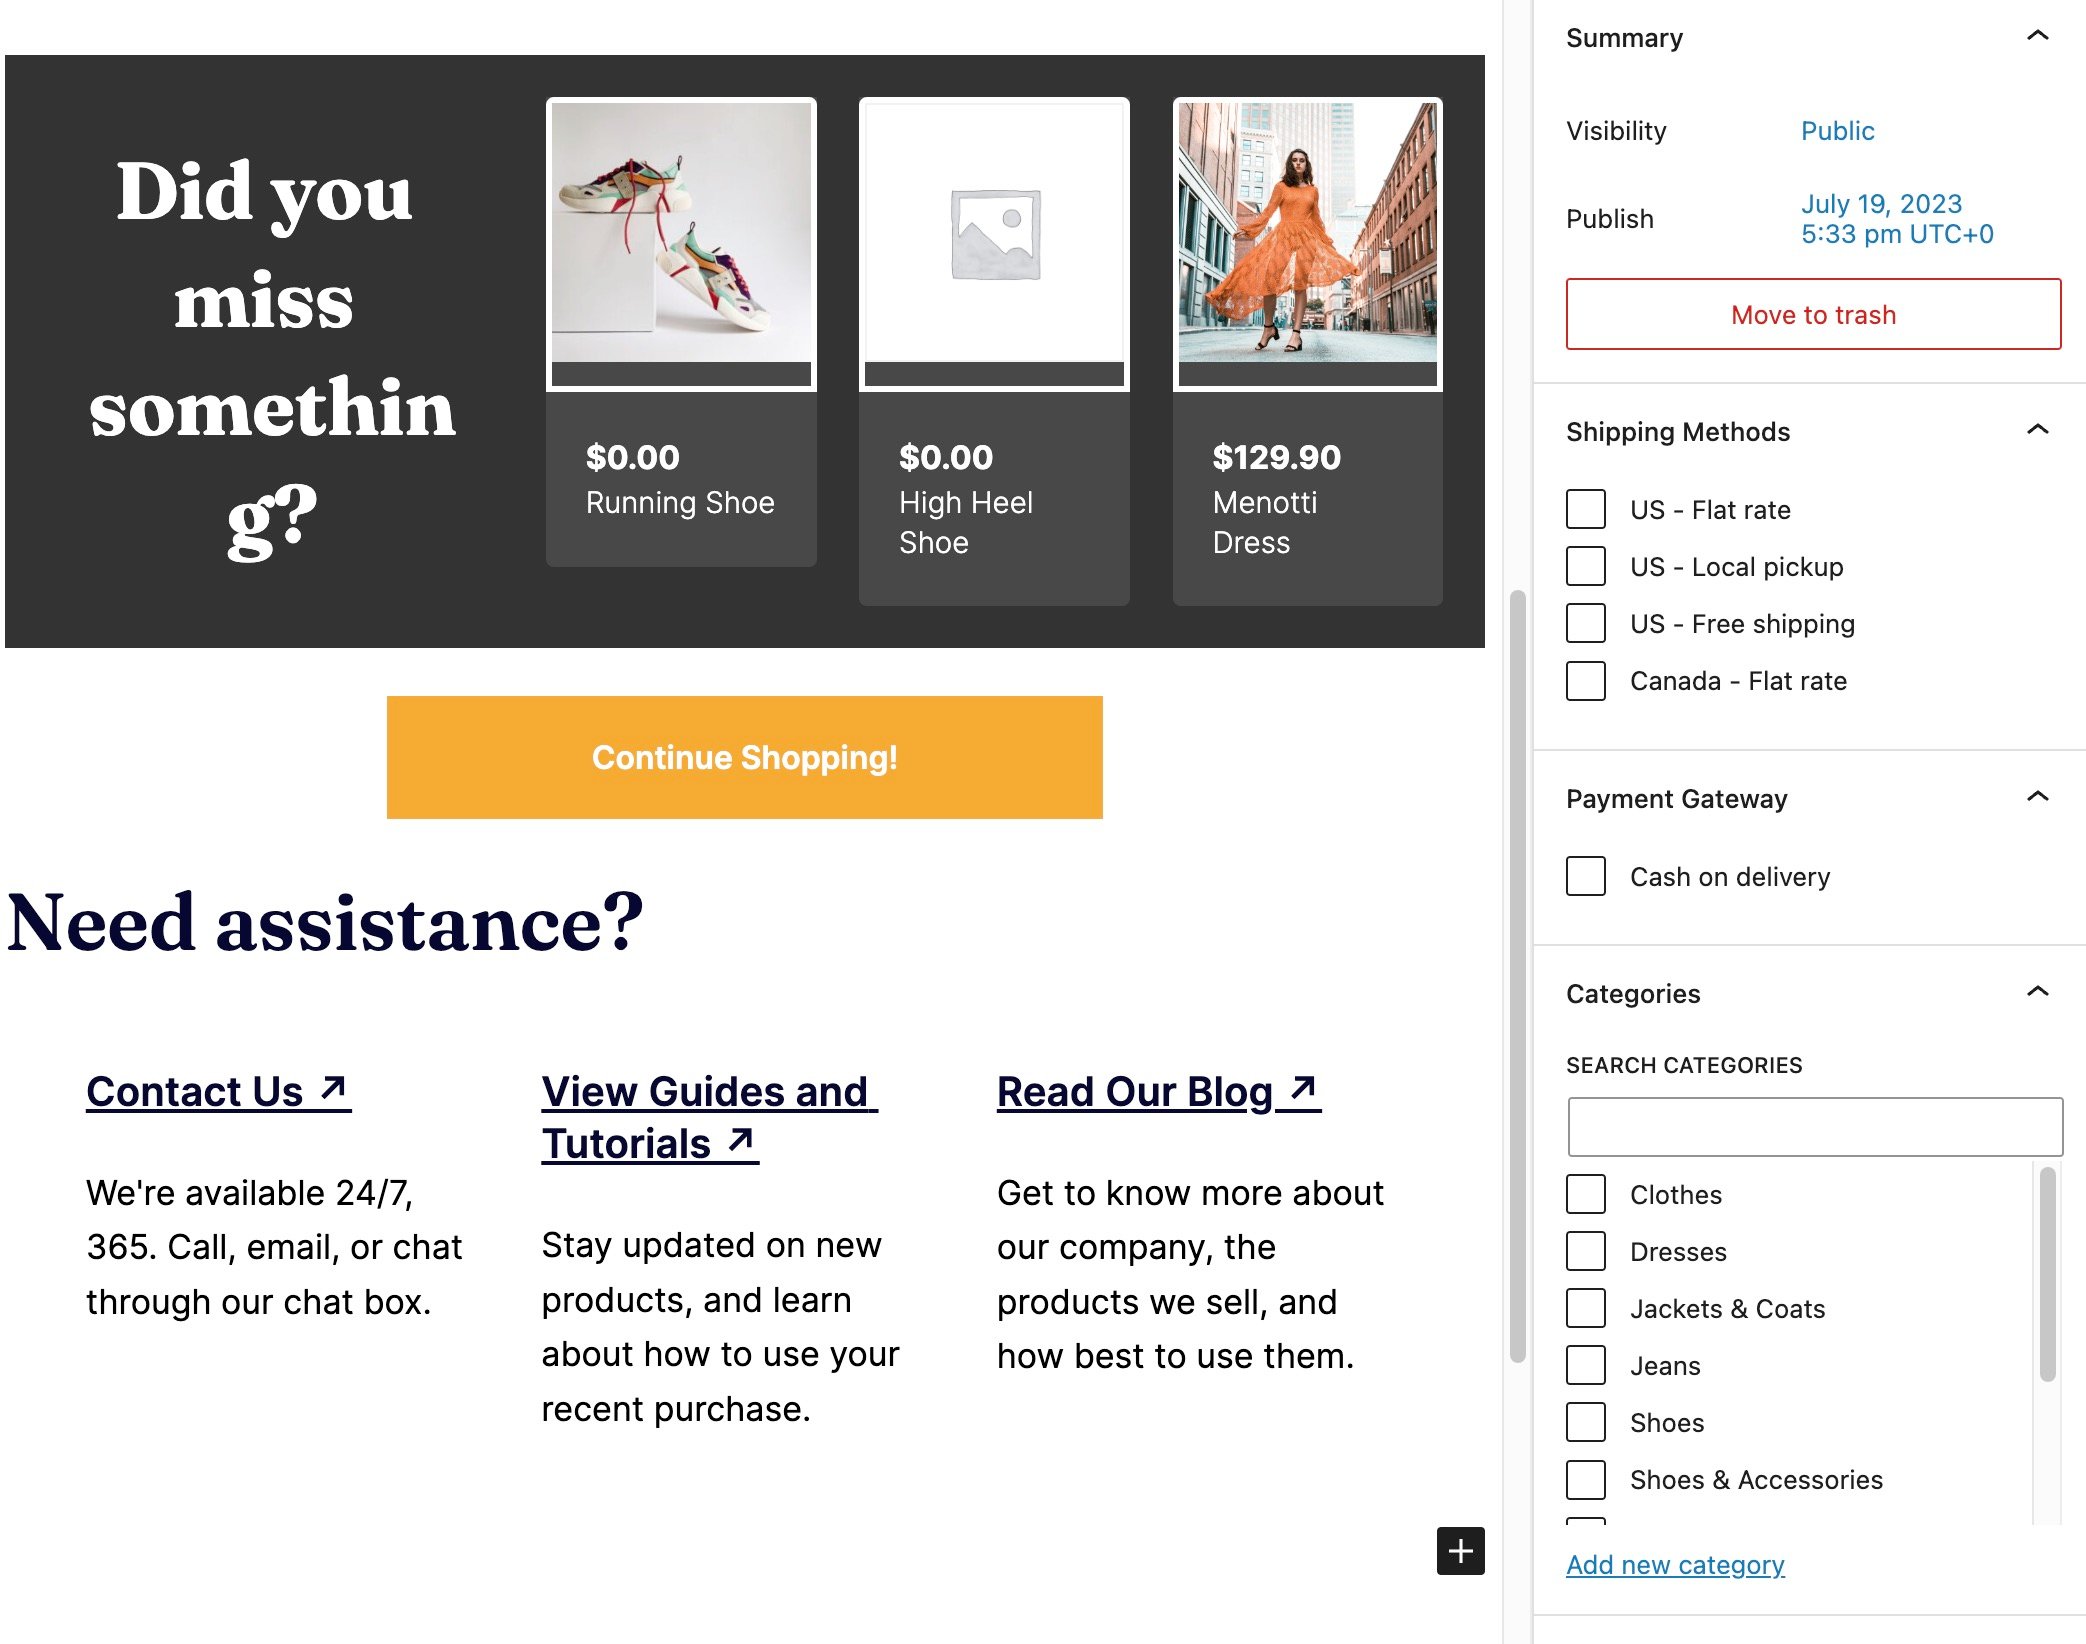
In addition to all that, you might consider adding testimonials, shipping details, helpful media/documentation, or coupons to get customers to return.
When you’re done designing the thank you page, click the Publish button.
Only show the “thank you” page based on certain conditions
On the right side of the Settings panel, you’ll see a Thank You Page tab. This helps you set conditions for when this particular thank you page will appear on your website. A person who purchases a dress, for instance, may see a different thank you page when compared to someone who buys shoes.
This is one of the unique features of the Sparks for WooCommerce plugin, since you can set thank you page conditions based on the following options: shipping methods, payment gateways, product categories, post attributes.
Shipping methods 📦
The first option is to decide when the thank you page shows up based on shipping methods.
Under the Thank You Page tab, open the Shipping Methods dropdown. Select the shipping methods associated with your currently open thank you page. For this example, we’ll set up a standard thank you page for all US sales.
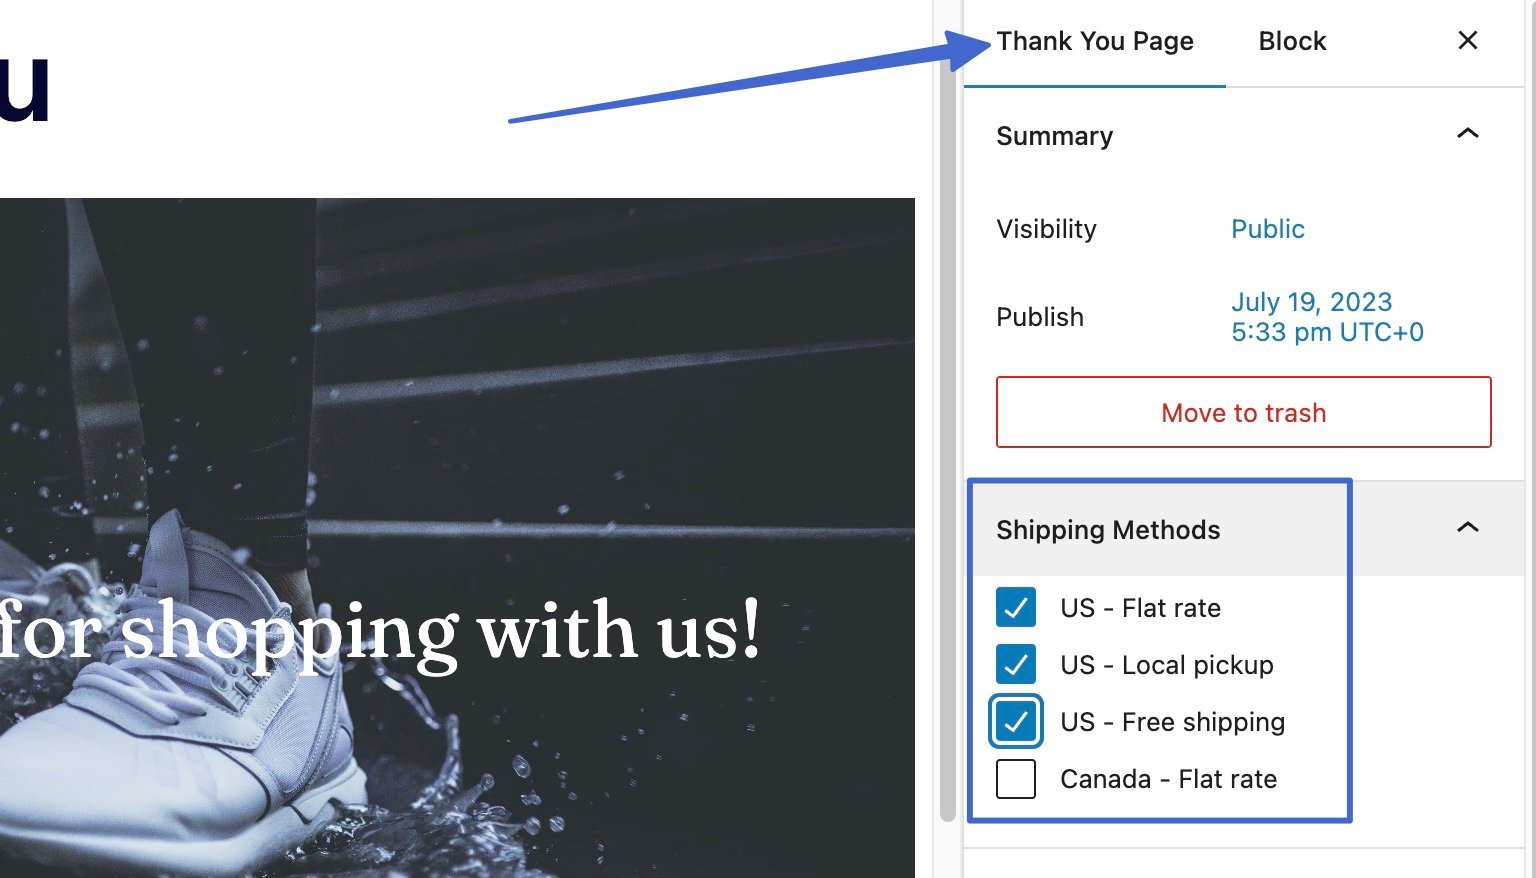
After clicking the Update button, this thank you page will only appear for US customers, not those in Canada. Then, you can make a second thank you page in Sparks that’s more relevant to other regions.
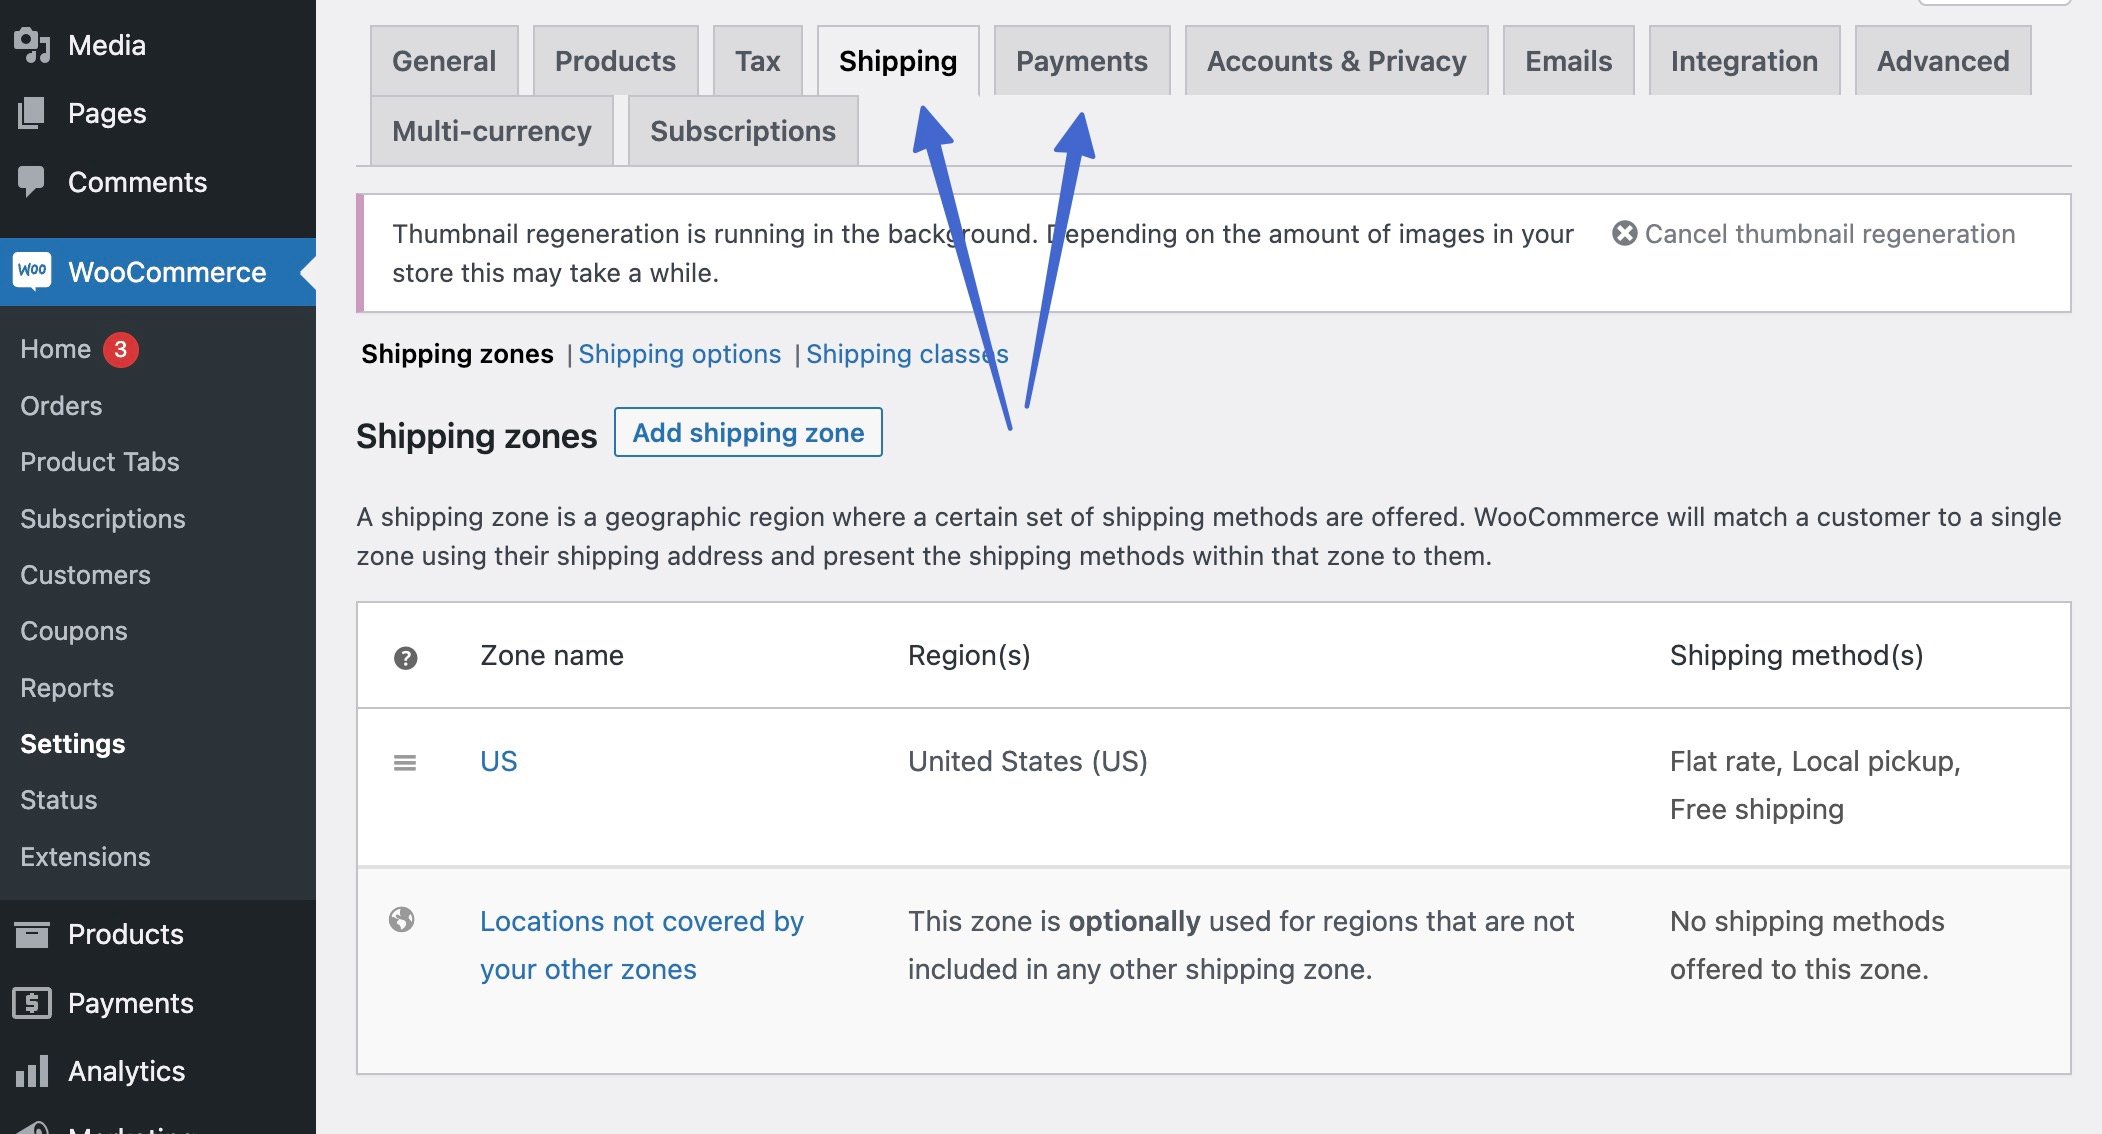
⚠️ Note: To see shipping methods and payment options for thank you pages, you must first add shipping methods and payments to WooCommerce. Go to WooCommerce → Settings → Shipping to include zones, and WooCommerce → Settings → Payments to activate payment methods.
Payment gateway 💳
Another available condition is to only display a thank you page whenever a customer uses a specific payment method. This may come in handy since someone paying in person might need information like the pickup address, as opposed to someone buying with a credit card who mainly wants to see a receipt and order status.
To attach a thank you page to certain payment methods, go to the Thank You Page tab. Open the Payment Gateways dropdown and select the gateway or method that makes the most sense for the current thank you page.
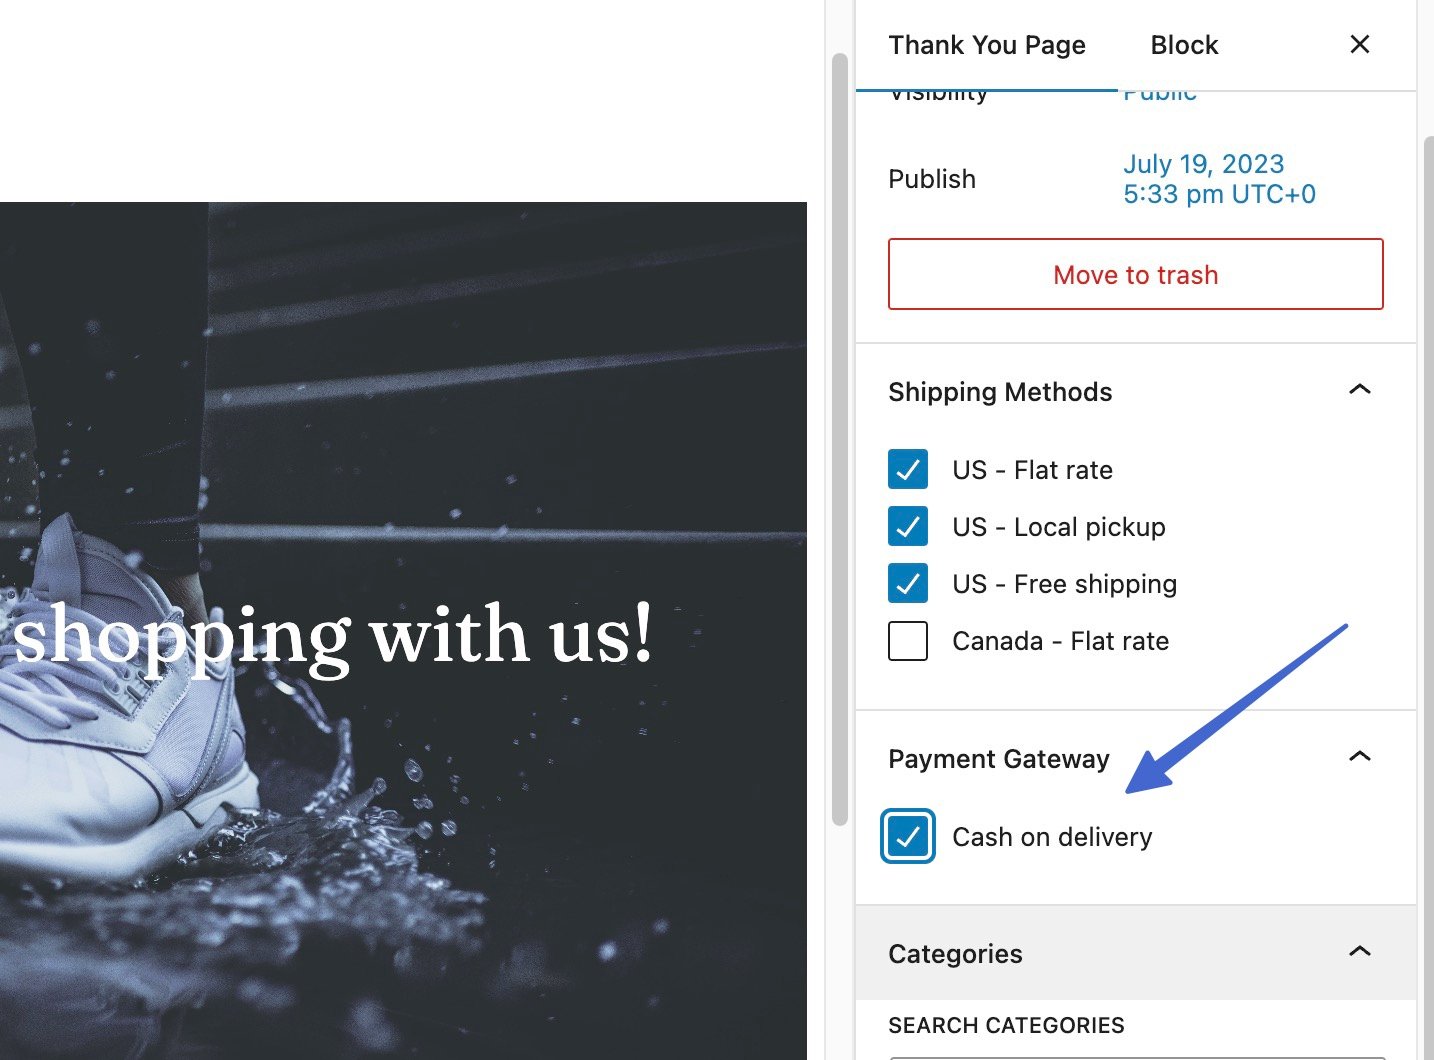
After you decide on the proper payment gateway for the thank you page, click the Publish or Update button to save your changes. You can go back to Marketing → Thank You Pages to create additional thank you pages for other forms of payment.
Product categories 🛍️
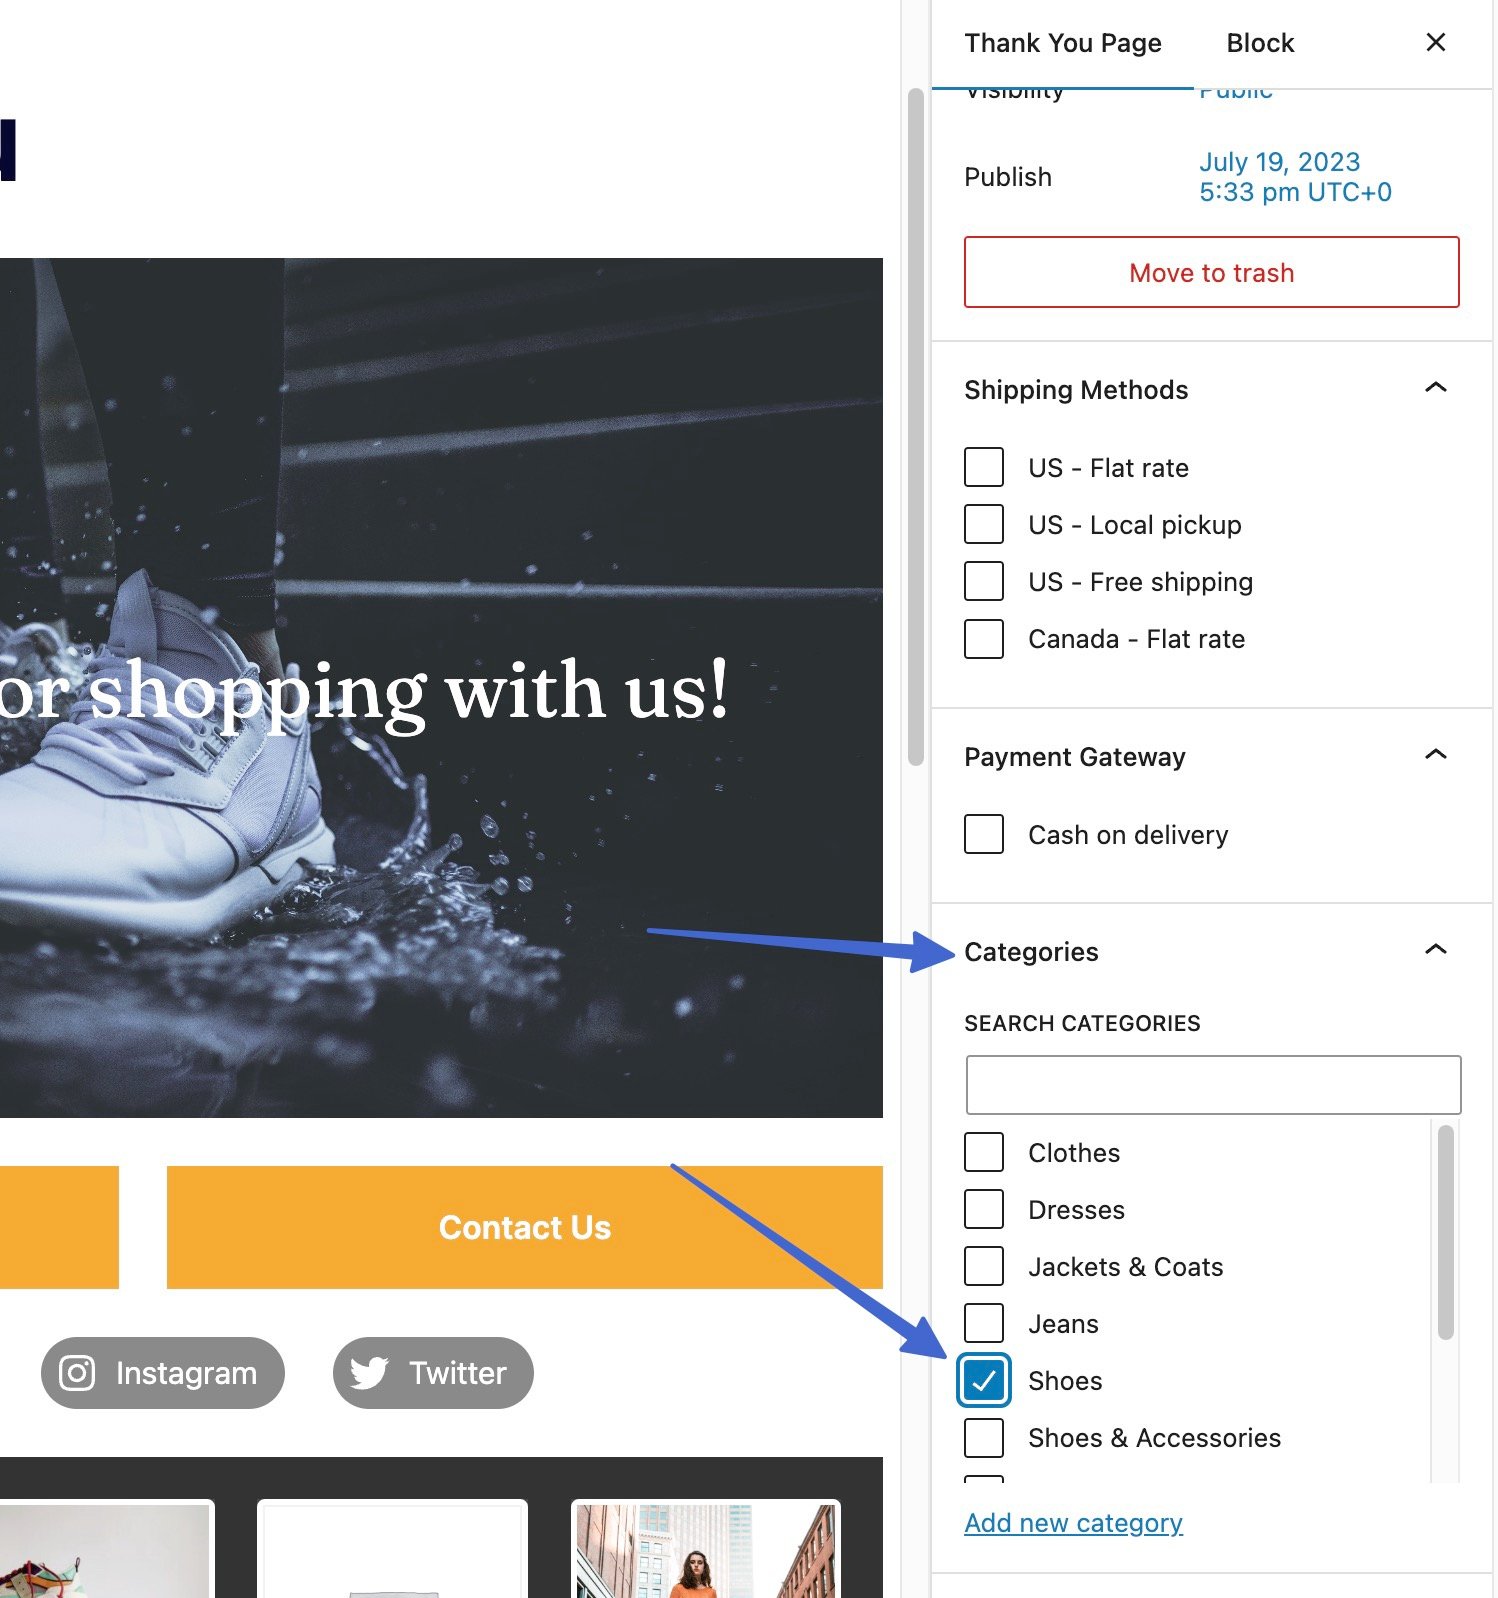
You might want a thank you page to only appear whenever a customer buys from a particular category. This is useful for showing certain related products on thank you pages, or even to modify the thank you message, media, and links to support documentation.
For example, if a customer purchases a pair of shoes, you can include a relevant banner image (with shoes in the picture), links to customer support links regarding shoes, related products in the same category, and a message that talks about how to get the most out of the shoes.
To select a category for a thank you page, open that thank you page, and click on the Thank You Page tab. Scroll to the Categories section and open up its options. Check the box that’s relevant to the currently open thank you page.
Add thank you pages to individual products
Instead of attaching a thank you page to general categories, payment gateways, or shipping methods, Sparks provides more granular control for assigning a thank you page to individual products.
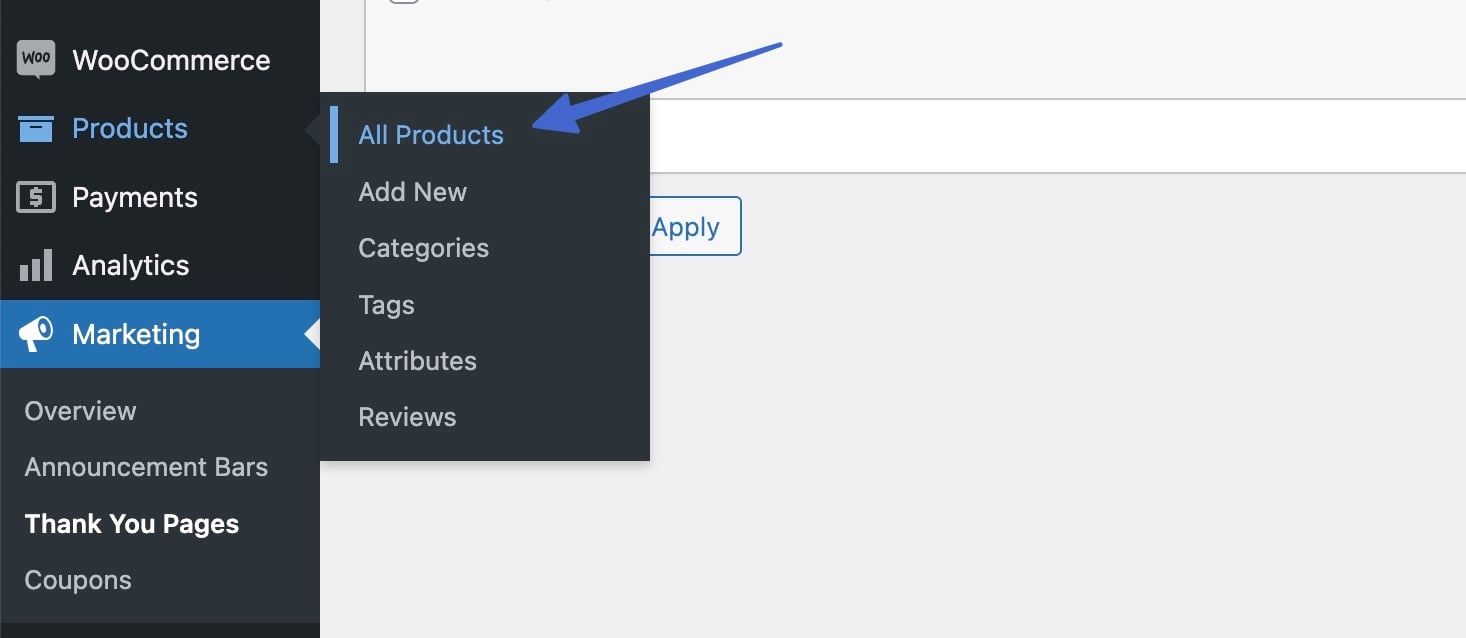
To make this happen, go to Products → All Products in the WordPress dashboard.
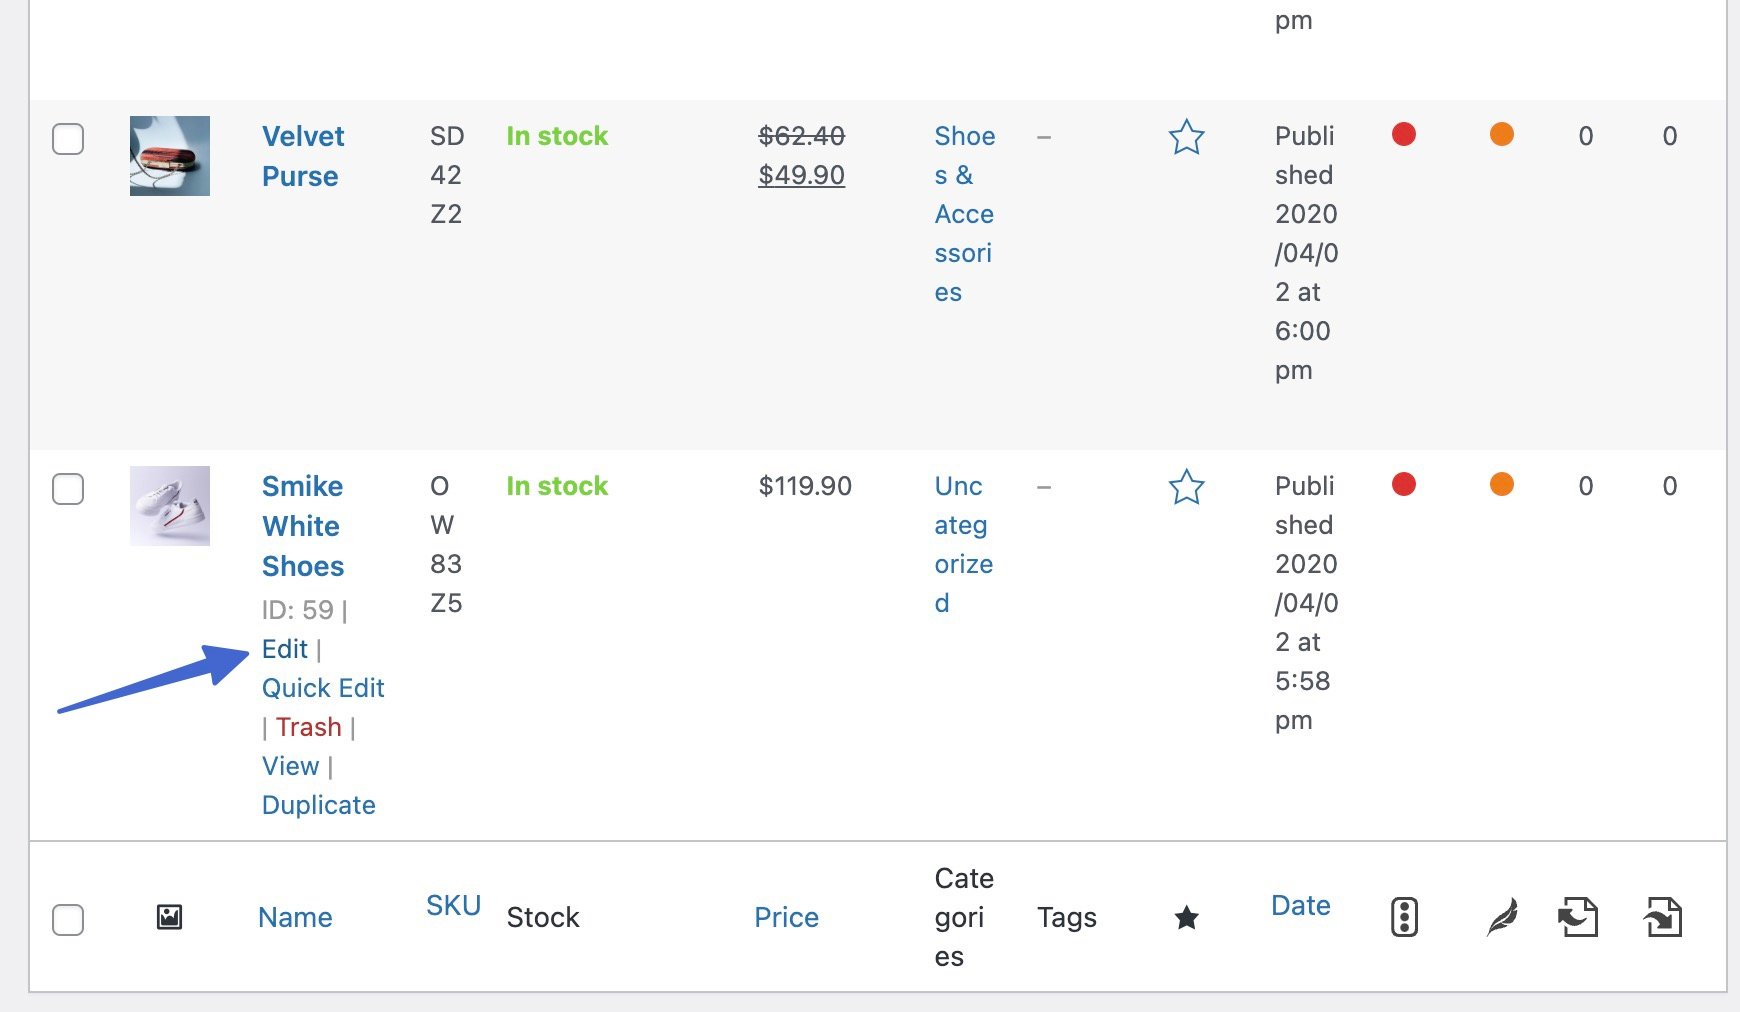
Find the product for which you want to add the thank you page. Click the Edit link.
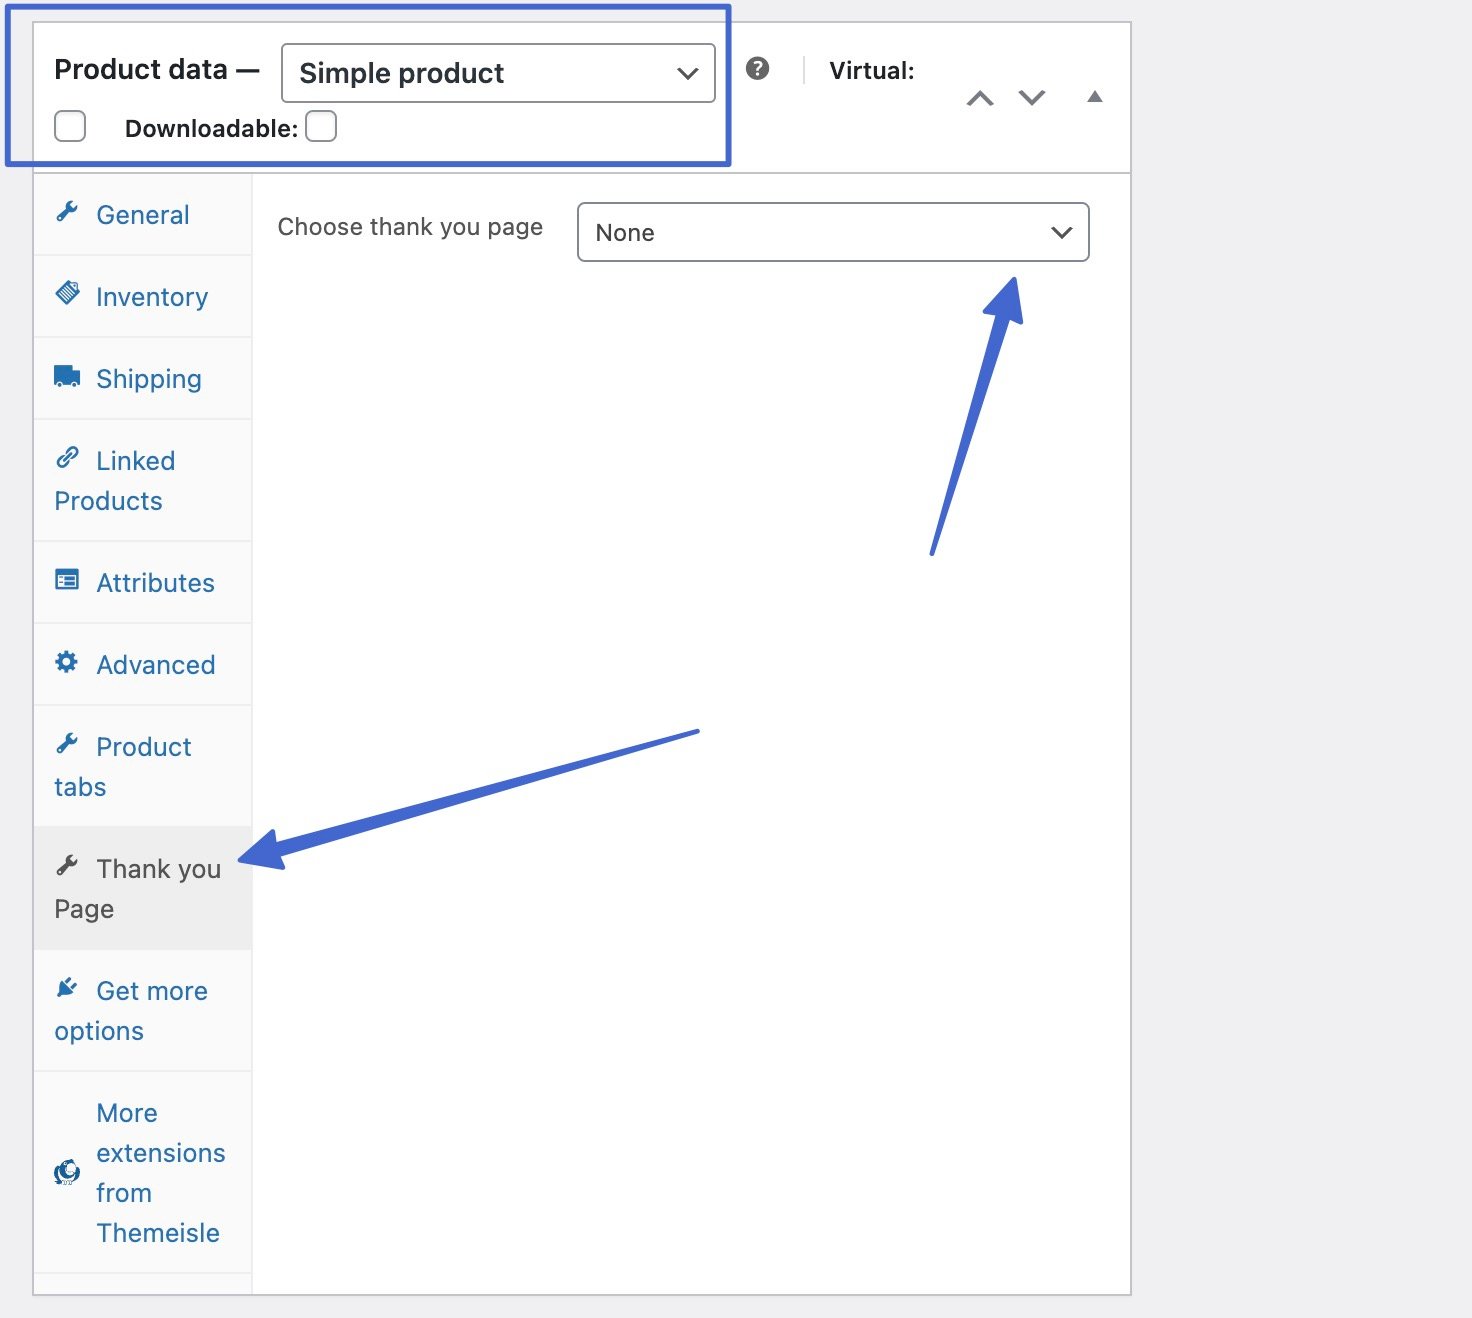
Scroll to the Product Data section and click on the Thank You Page tab. Here, you’ll see a field to “Choose thank you page.” Click on the dropdown menu to locate the thank you page that makes the most sense for this product.
As you can see, we have added the general thank you page created earlier in this article as the right thank you page for this product.
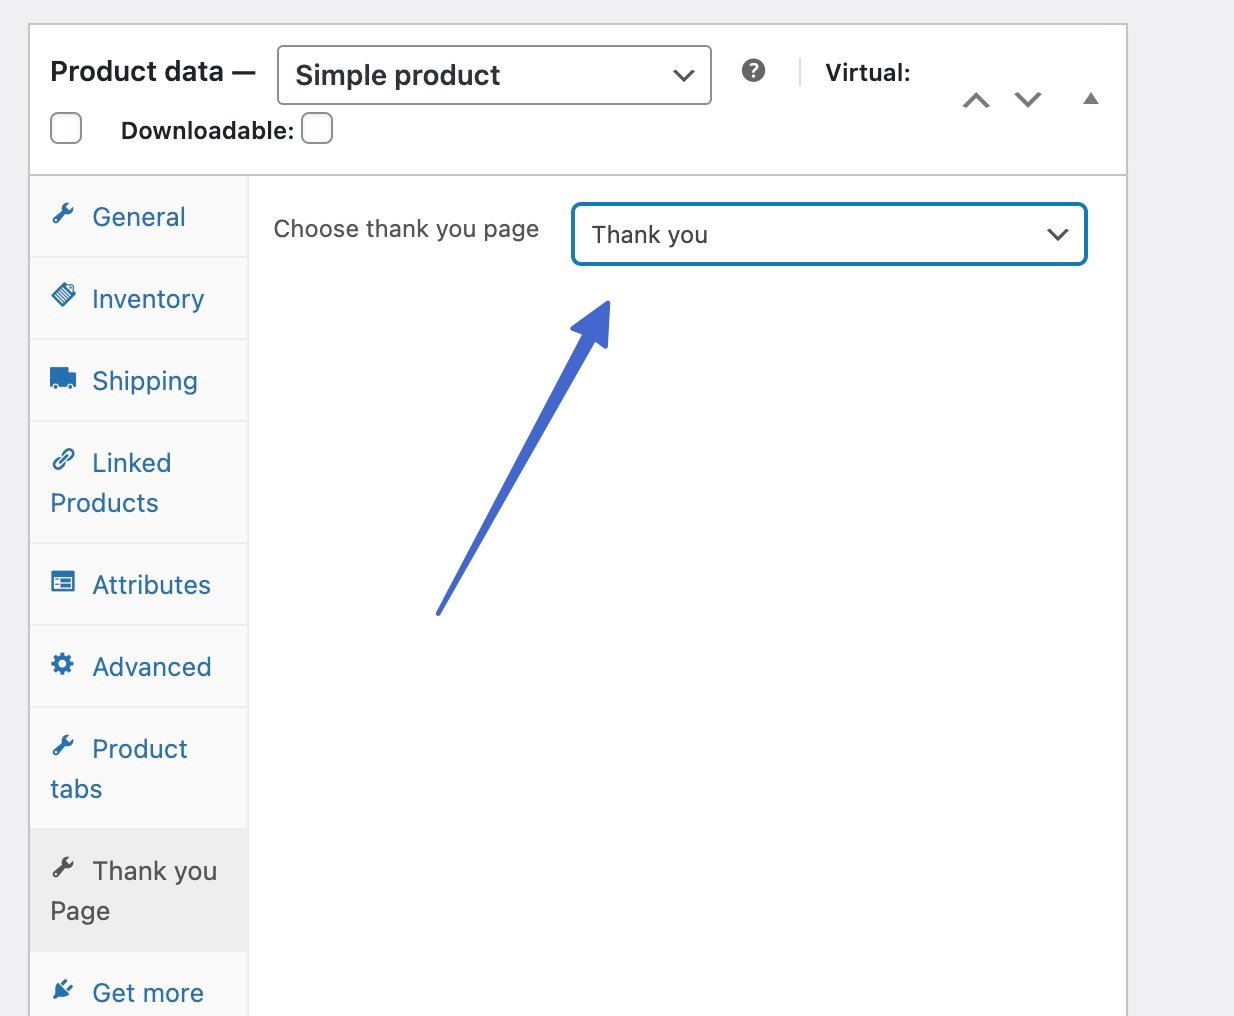
Once you’re done, click the Publish or Update button to ensure the thank you page appears when a customer purchases this product and only this product.
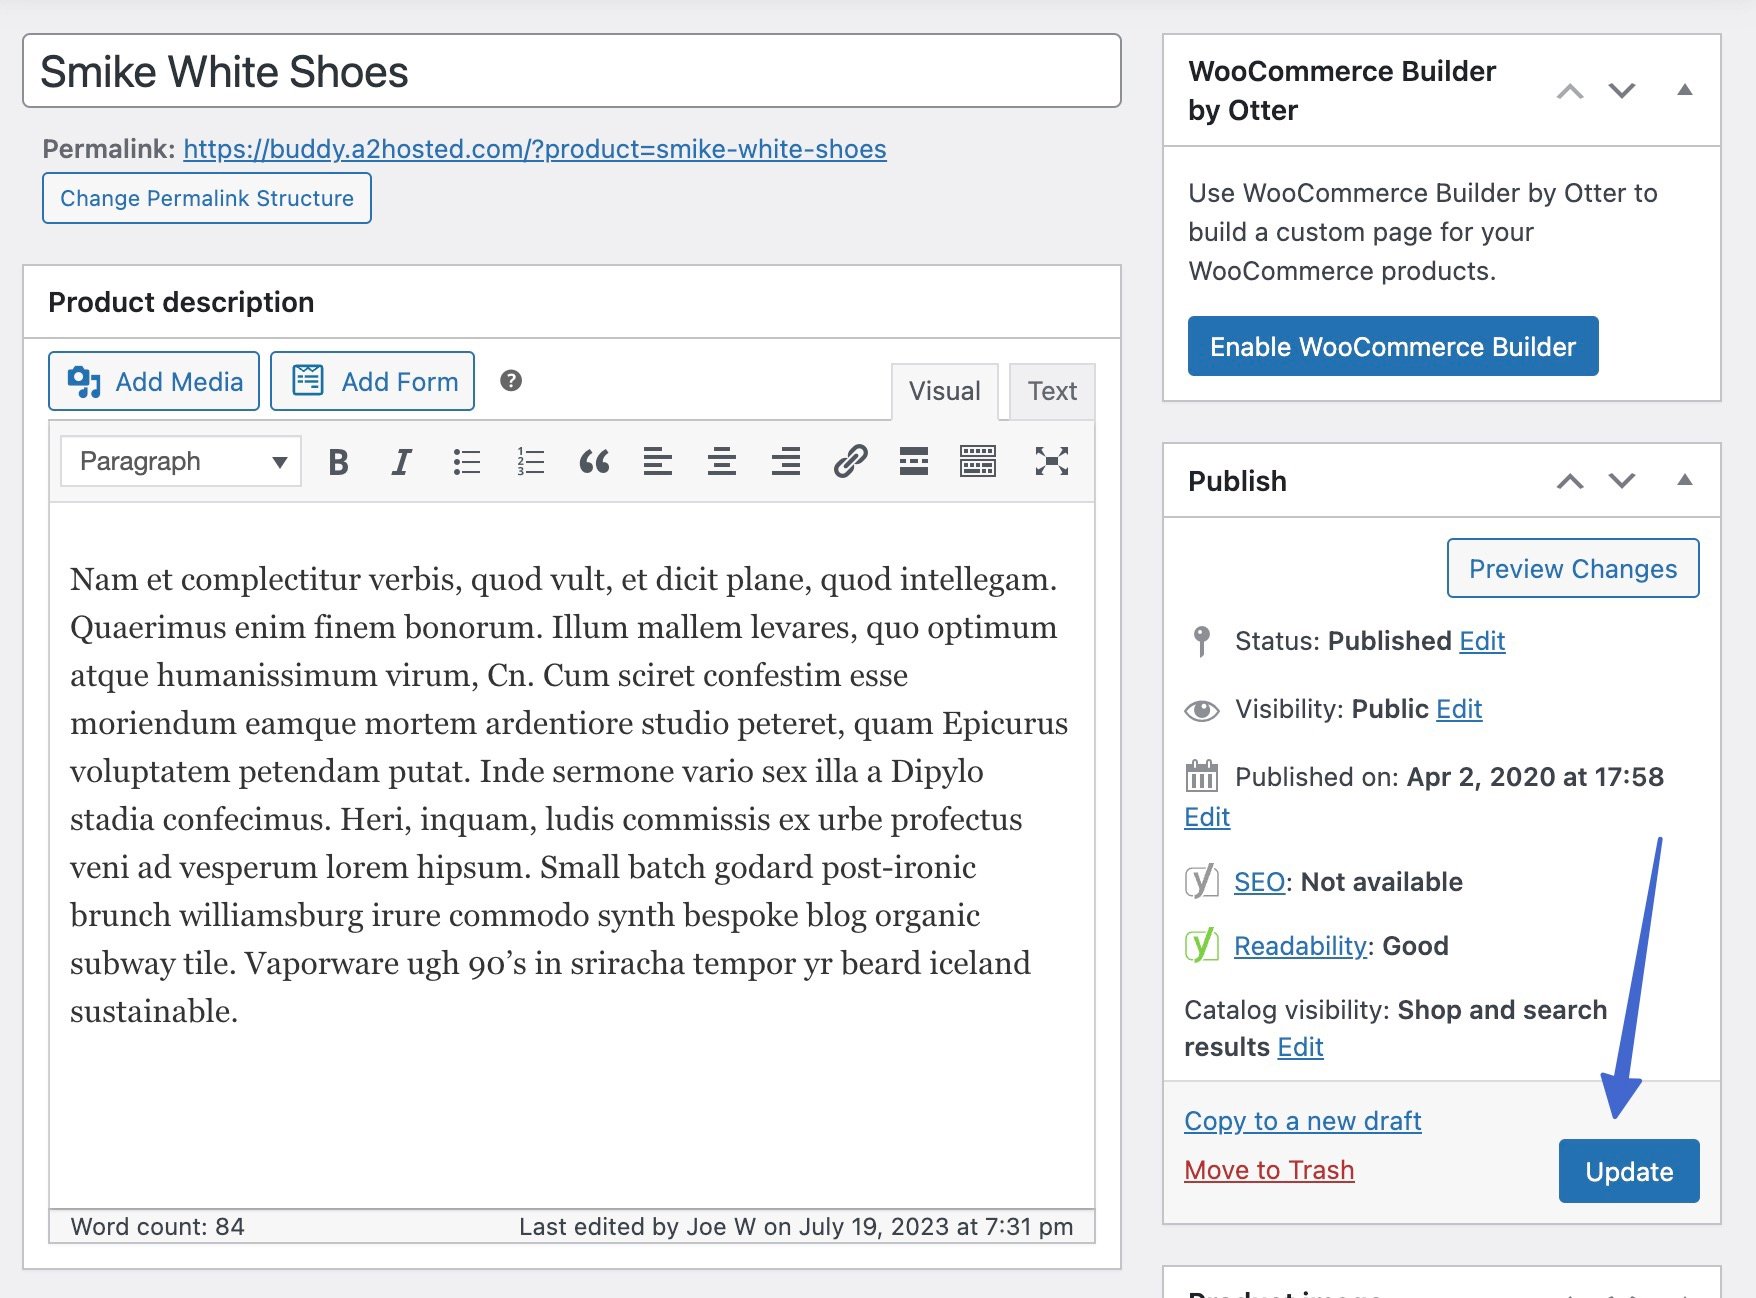
You’re more than welcome to activate the thank you page for multiple products by repeating this process on other product pages.
Thoughts on what to add to your WooCommerce thank you page
A thank you page on WooCommerce presents several ways to communicate with users and convert them into repeat customers.
💡 Here are some ideas on how to use your WooCommerce thank you page and what to include:
- Have a button on the thank you page for them to go back to your shop.
- Link to another page to collect feedback or provide an instructional video.
- Embed images, videos, or custom code to liven up the thank you page.
- Include a map and information about their shipping times.
- Show related products (cross-sells or upsells) to prompt people to consider buying more.
- Add social sharing buttons, so customers can send their purchases to friends and family.
- Suggest they sign up for a newsletter, and include a form for them to do that.
- Display a discount coupon usable for a future purchase.
- List customer reviews or testimonials.
- Include instructions on how to use the product via text, video, or image.
Our conclusion on how to make a WooCommerce thank you page
Quite a few other methods allow you to generate a WooCommerce thank you page with the help of custom CSS or other plugins.
Although we feel the Sparks for WooCommerce plugin offers the best features and the most reasonable price, consider looking into these other WooCommerce thank you page plugins for further designs and features:
With best practices in place, you’re bound to improve sales with every thank you page that shows up after a purchase.
⚙️ For some other options to improve your store, check out our full roundups of the best WooCommerce plugins and the best plugins for eCommerce stores.
Still have any questions about how to create a custom WooCommerce thank you page? Let us know in the comments.