Do you want to learn how to use Grammarly in WordPress? If yes, this article is for you.
In online content creation, precision, clarity, and engagement are paramount.
Good grammar is not just a show of literacy, but it significantly impacts the readability and comprehension of a piece. And that’s where Grammarly comes into play.
So, if you want to enhance your content’s quality, incorporating Grammarly into your WordPress process might be the solution you need.
That’s why we’ll guide you on how to set up Grammarly for WordPress and demonstrate how to use it properly.
What is Grammarly? In What Ways Can Grammarly Assist with WordPress?
Grammarly is a widely used application designed to monitor your writing for grammatical errors, making it an excellent tool for writers.
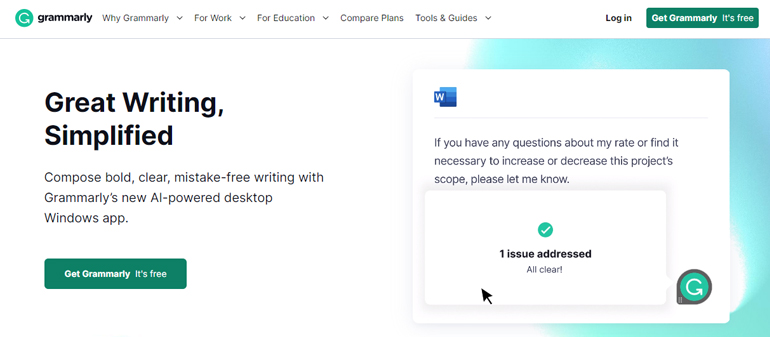
It’s an AI-powered writing enhancement tool that assists writers in creating error-free, concise, and effective content.
This tool is incredibly beneficial for users of WordPress, one of the most popular content management systems (CMS) worldwide.
But why should you use Grammarly with WordPress? Let’s dive into the myriad ways Grammarly can elevate your WordPress experience.
- Grammar and Spelling Checks: Grammarly is an in-depth proofreader catching spelling, punctuation, and grammatical errors, essential for maintaining professional content on WordPress.
- Sentence Structure and Clarity Improvements: Grammarly suggests sentence structure and clarity improvements, helping WordPress users create straightforward, concise, and easily understandable content.
- Vocabulary and Word Choice Improvements: Leveraging its extensive lexical database, Grammarly helps enrich the vocabulary and improve word choice, essential for creating engaging and memorable content on WordPress.
- Tone and Style Adjustments: Grammarly provides feedback on tone and style, allowing WordPress bloggers to adjust their language to match their target audience, ensuring consistency throughout their posts.
- Plagiarism Detection: Grammarly’s plagiarism detection tool cross-references content against millions of web pages, ensuring content originality and maintaining the credibility and reputation of a WordPress website.
How to Sign Up for Grammarly?
If you want to enhance your writing with Grammarly’s advanced grammar, spelling, and plagiarism checks, signing up for an account is straightforward.
So, let’s walk you through this easy method.
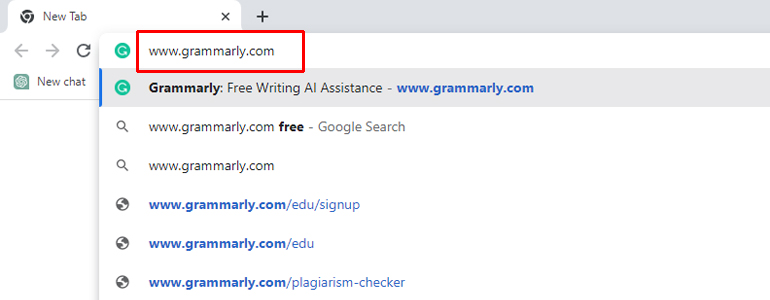
Step 1: Visit the Grammarly Website
Start by going to the Grammarly website. You can do this by typing “www.grammarly.com” into your browser’s address bar and hitting enter. This action will take you to the homepage of Grammarly.
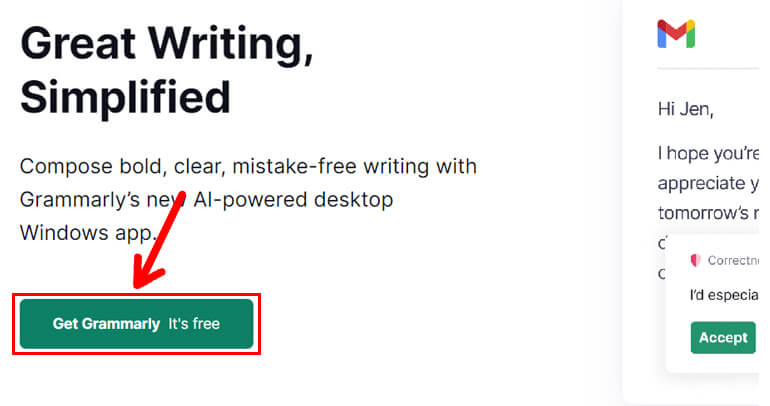
Step 2: Click on ‘Get Grammarly’
On the Grammarly homepage, you’ll notice a green button labeled “Get Grammarly.” Click on this button to initiate the sign-up process.
Step 3: Choose Your Plan
Grammarly will now present you with different plan options. These include a free version and several premium options that offer more advanced features. Select the plan that suits your needs the best.

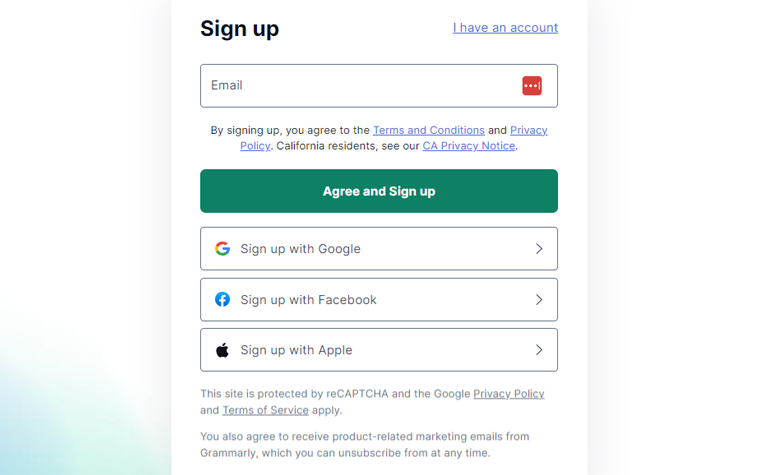
Step 4: Create an Account
After choosing a plan, you’ll be prompted to create an account. You can sign up using your Google account, Facebook account, or email address. Choose the method that works best for you and follow the instructions.
Step 5: Set Up Your Profile
After signing up, you’ll be asked to set up your Grammarly profile. This includes choosing your language preference and defining your writing goals.
Step 6: Install Grammarly Extensions
Install the Grammarly extensions on your browser and word processor for easier access and real-time suggestions. Follow the on-screen prompts to complete the installation.
That’s it! You can now start using Grammarly to enhance your writing.
Simply input your text into Grammarly’s editor or write directly on your browser or word processor if you’ve installed the extension.
By following these steps, you can quickly sign up for Grammarly and use its powerful writing tools.
Now that you’ve signed up with Grammarly. We’ll show you different ways to use it in WordPress.
Ways to Use Grammarly in WordPress (4 Easy Methods)
If you’re wondering how to use Grammarly in WordPress, here are the four easy methods to get going.
1. Copy-Paste Manually
This method requires no installation. Simply write your content in WordPress, then copy and paste it into the Grammarly editor on the website.
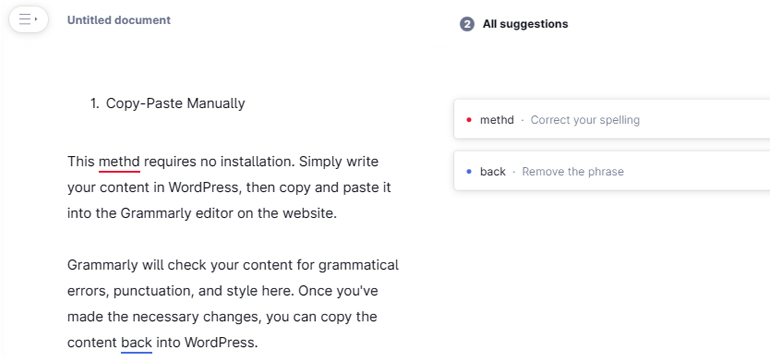
Grammarly will check your content for grammatical errors, punctuation, and style and provides relevant suggestions.
Once you’ve made the necessary changes, you can copy the content back into WordPress.
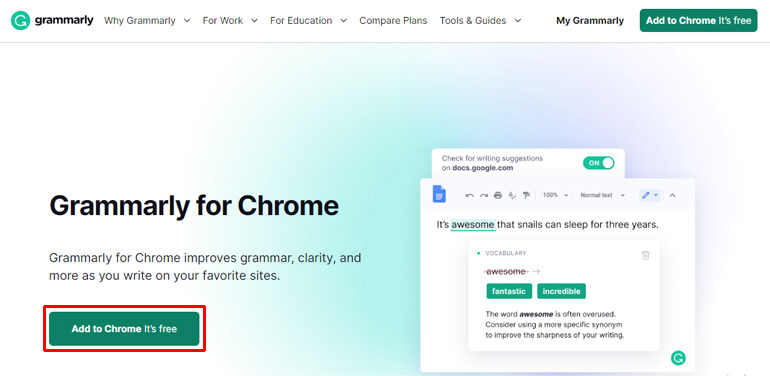
2. Grammarly’s Chrome Extension
You can install the Grammarly extension for Chrome from the Chrome Web Store.
Once installed, it’ll promptly start working on your WordPress text fields, underlining any grammar or spelling issues it finds.
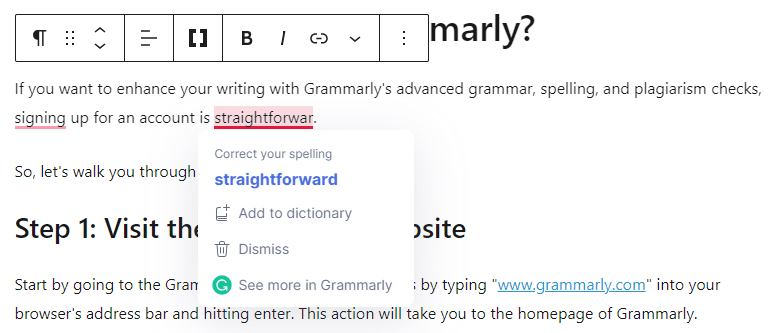
You can click on the underlined words to see Grammarly’s suggested changes and apply them if you agree.
3. Install Grammarly Apps on Windows/Mac
Grammarly offers standalone desktop apps for both Windows and Mac.
After successfully installing, you can use this application to write your content, correct errors, and copy and paste the final product into WordPress.
This app works similarly to the Grammarly web editor.
4. Grammarly Keyboard
Grammarly also provides a mobile keyboard for both iOS and Android devices. This means you can check and correct your WordPress content while on the go.
After installing the Grammarly keyboard, make sure it’s enabled and set it as your default.
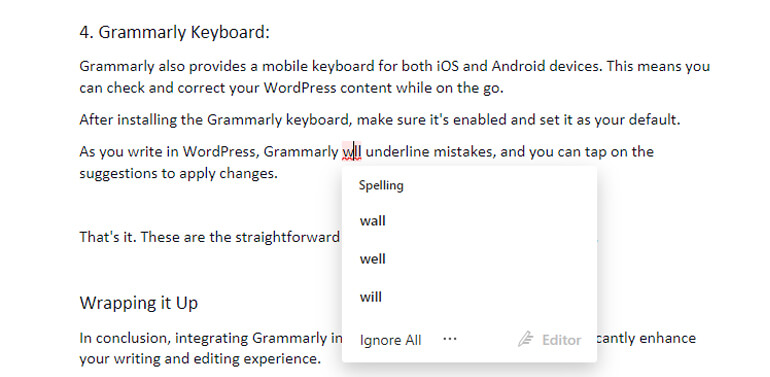
As you write in WordPress, Grammarly will underline mistakes, and you can tap on the suggestions to apply changes.
That’s it. These are the straightforward ways to use Grammarly in WordPress.
Wrapping it Up!
In conclusion, integrating Grammarly into your WordPress website can significantly enhance your writing and editing experience.
This guide has walked you through the step-by-step process of using Grammarly effectively in WordPress, ensuring error-free and polished content.
First, we explored the various benefits of using Grammarly, such as its ability to catch typos, correct grammar mistakes, and offer suggestions for improving writing style.
Next, we provided a step-by-step guide on how to set up and install Grammarly on your WordPress site.
This included signing up for a Grammarly account, installing the Grammarly browser extension, and configuring the settings to match your writing needs.
Furthermore, we highlighted how you can use Grammarly within the WordPress editor.
So that’s it. If you’re interested, check out our articles on how to learn WordPress and how to add meta descriptions and keywords in WordPress.
If you wish to see more WordPress-related content, visit our blog.
And if you have any queries, don’t hesitate to contact us via Facebook and Twitter.
