Elementor is one of the most popular WordPress page builders on the market. It can enable complete beginners to design an entire website from scratch. However, if you’re new to the tool, you still might find an Elementor tutorial useful. 🏗️
In order to make the most out of Elementor, you’ll need to have a good understanding of a few key characteristics. First of all, you’ll want to take advantage of its template library. You’ll also want to know a bit about its drag and drop interface, responsive design features, and AI potential. 🤖🤖
In this post, we’ll start by introducing you to Elementor. Then, we’ll provide you with an in-depth Elementor tutorial, walking you through some key features as we create a web page. Let’s begin!
An introduction to Elementor
Before we dive into our Elementor tutorial, let’s go over some basics. Elementor is a WordPress page builder plugin.
In the past, page builders were the best way to design an entire WordPress site without having to deal with any coding. Today, this is possible using built-in WordPress features like the Site Editor and the Block Editor.
👉 However, page builders like Elementor still give you more flexibility and customization options:
Elementor enables you to create your website using drag and drop “elements” called widgets.
Additionally, it offers useful features for mobile web design. And, it gives you some cutting-edge functionality with Elementor AI. In a nutshell, Elementor enables total beginners to build stunning, professional-looking websites without ever having to touch a line of code.
Elementor tutorial for WordPress: a beginner’s guide
Now that you know a little more about Elementor, we’re going to highlight some key features and characteristics as we walk you through the process of building a web page.
The template library 🎨
One of the great things about Elementor is that it comes with a robust template library. These pre-made designs can help fast-track your website creation process.
After you’ve installed and activated Elementor, you should see a Templates tab in your menu:
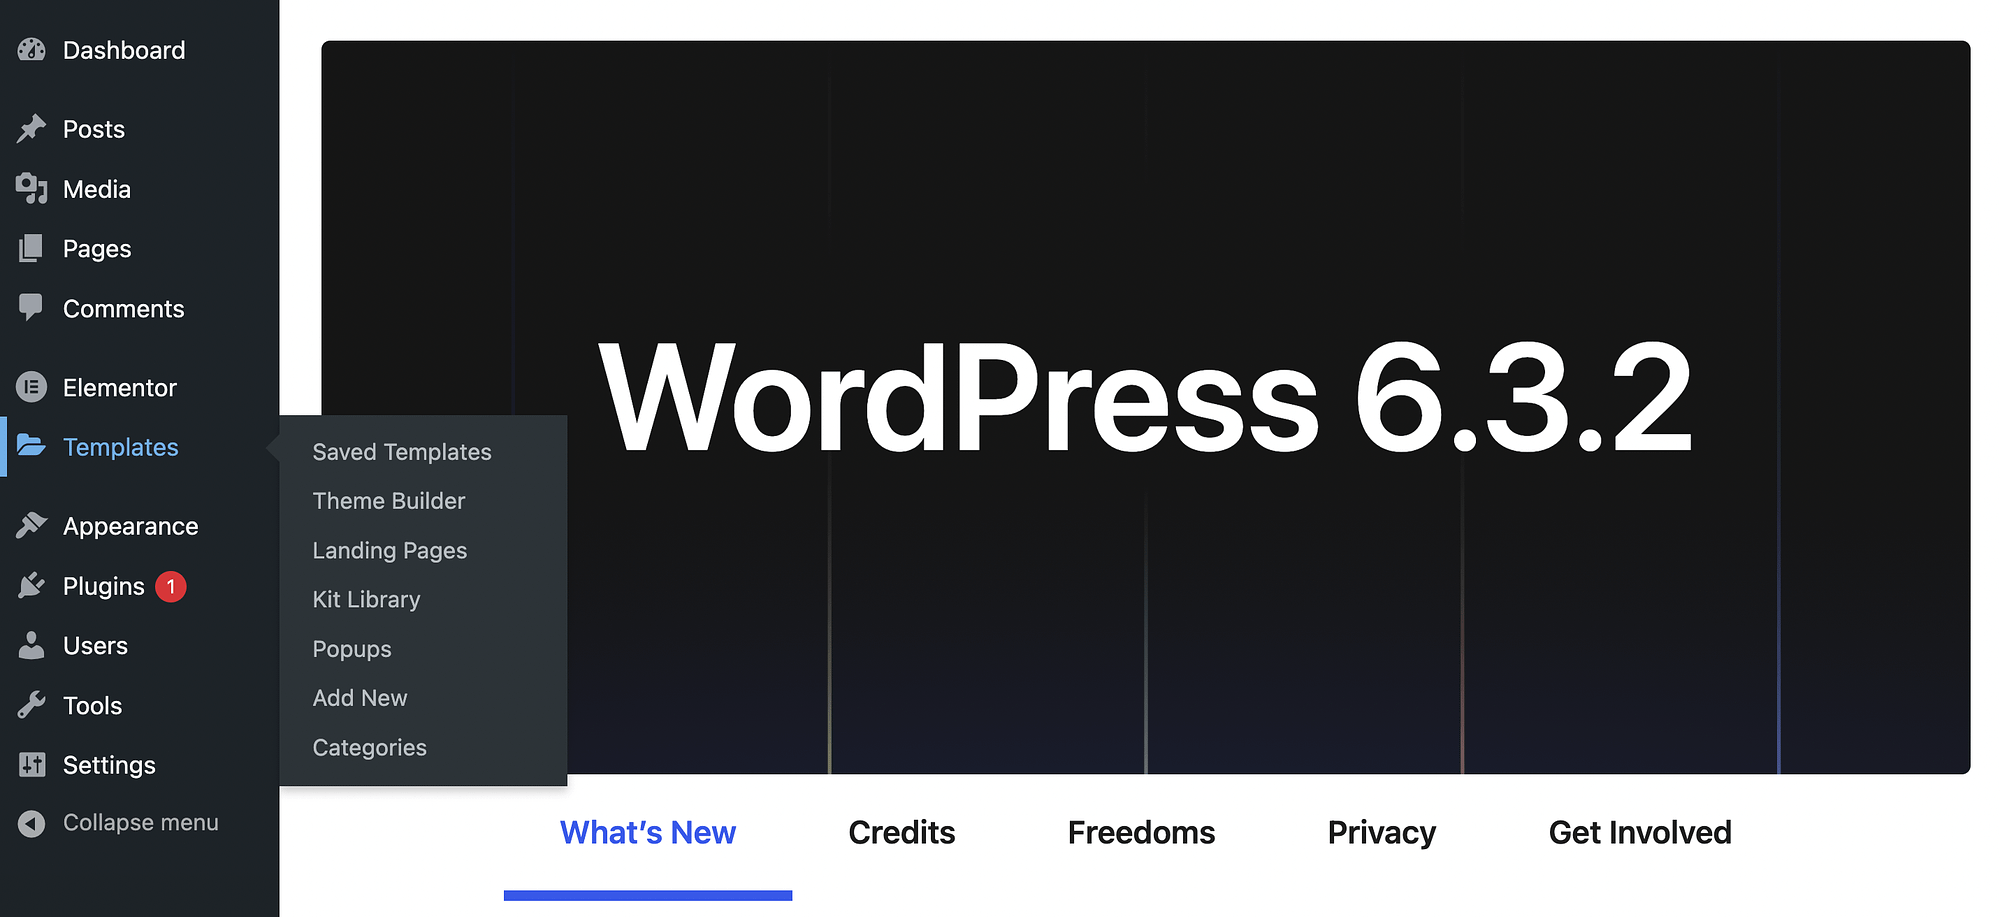
When you’re brand new to the plugin, your Saved Templates will be empty.
However, if you’re using a premium version of Elementor, you’ll have access to pre-made templates in the Theme Builder section:
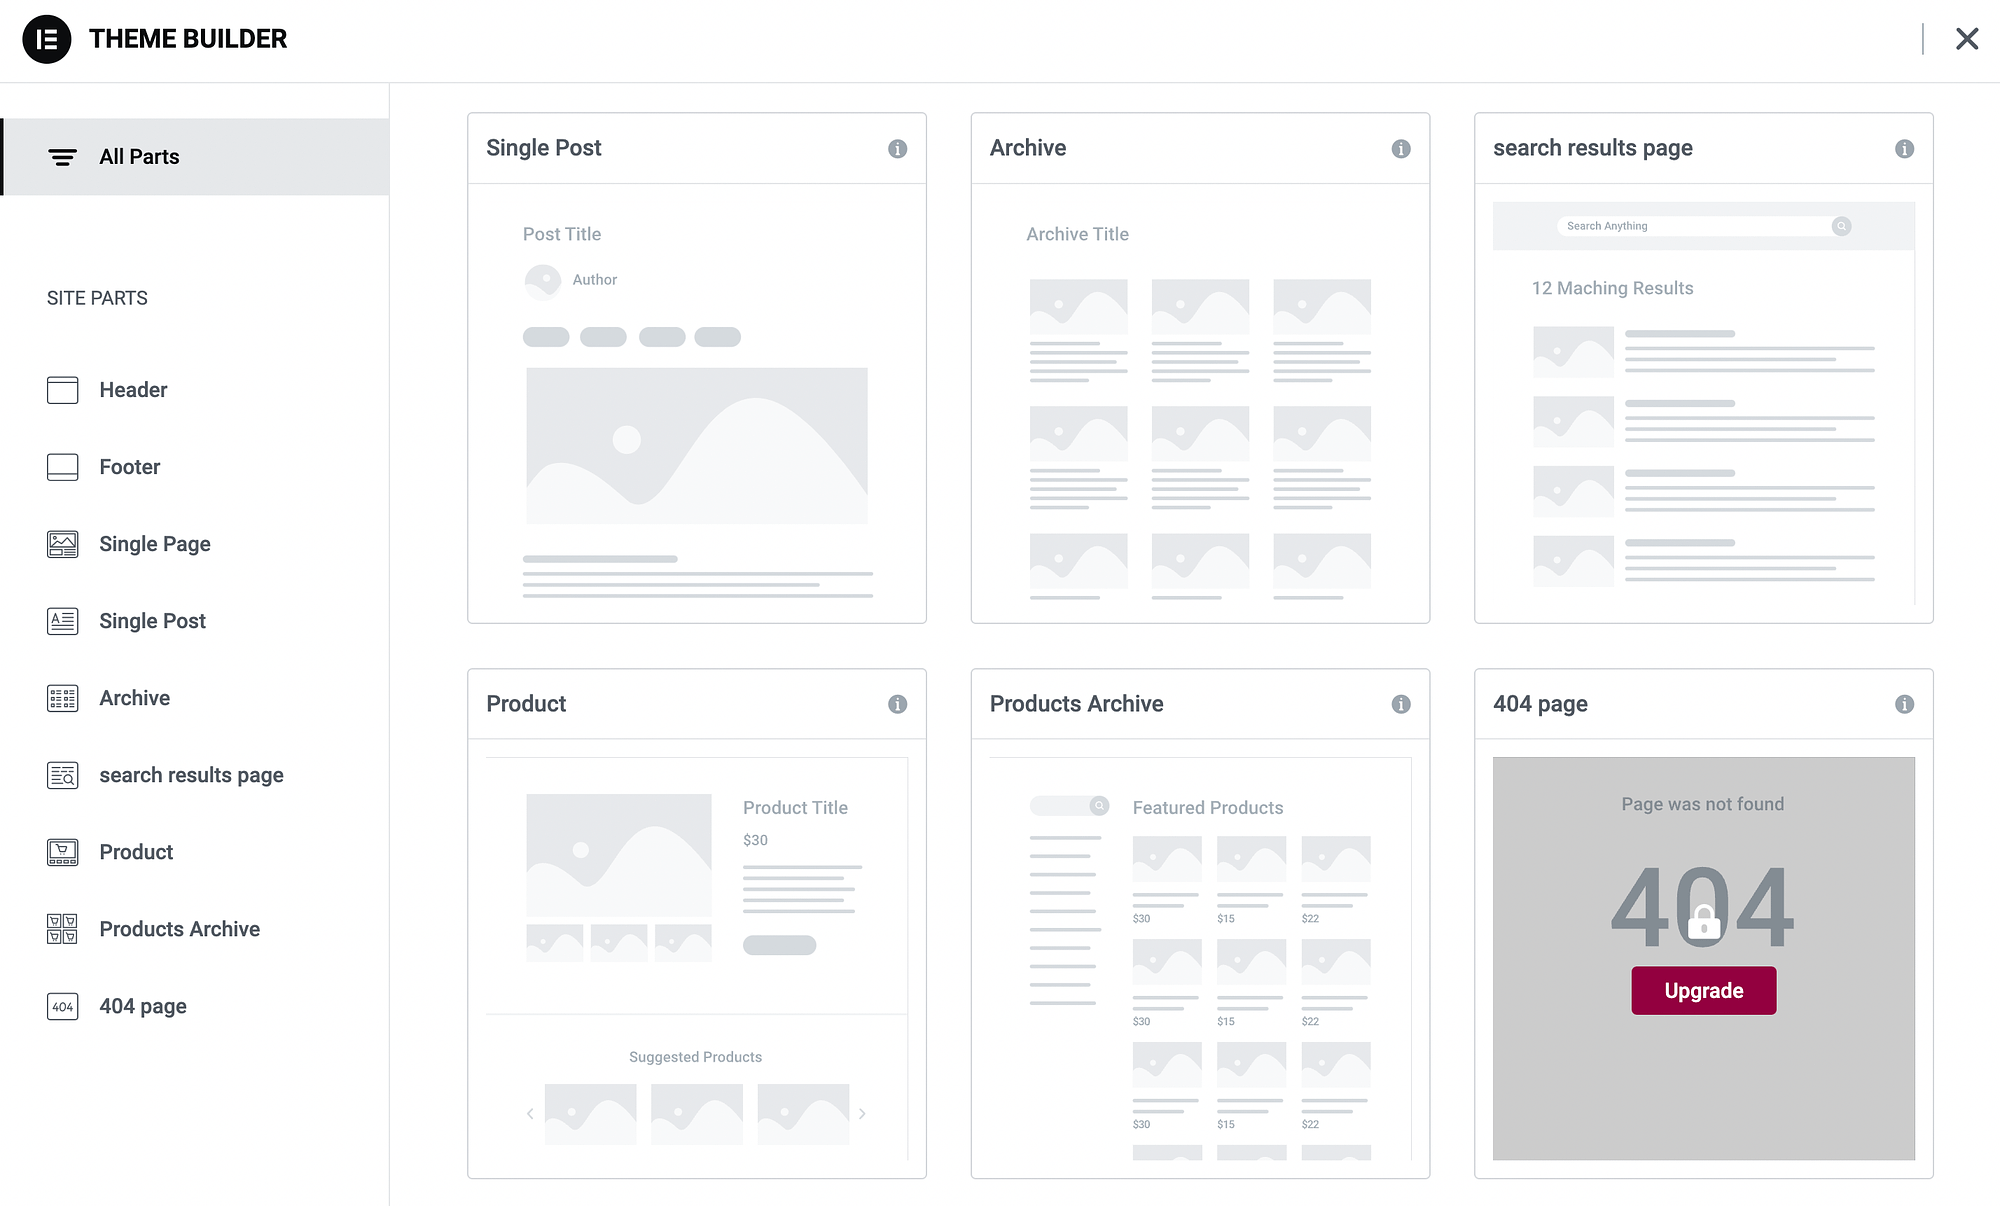
When you upgrade to a paid plan, you’ll get complete page templates for things like product pages, blog posts, and more. You’ll also get template parts for sections like headers and footers.
If you’re a premium user and you want to create a landing page, you can go to Templates → Landing Pages → Add New:
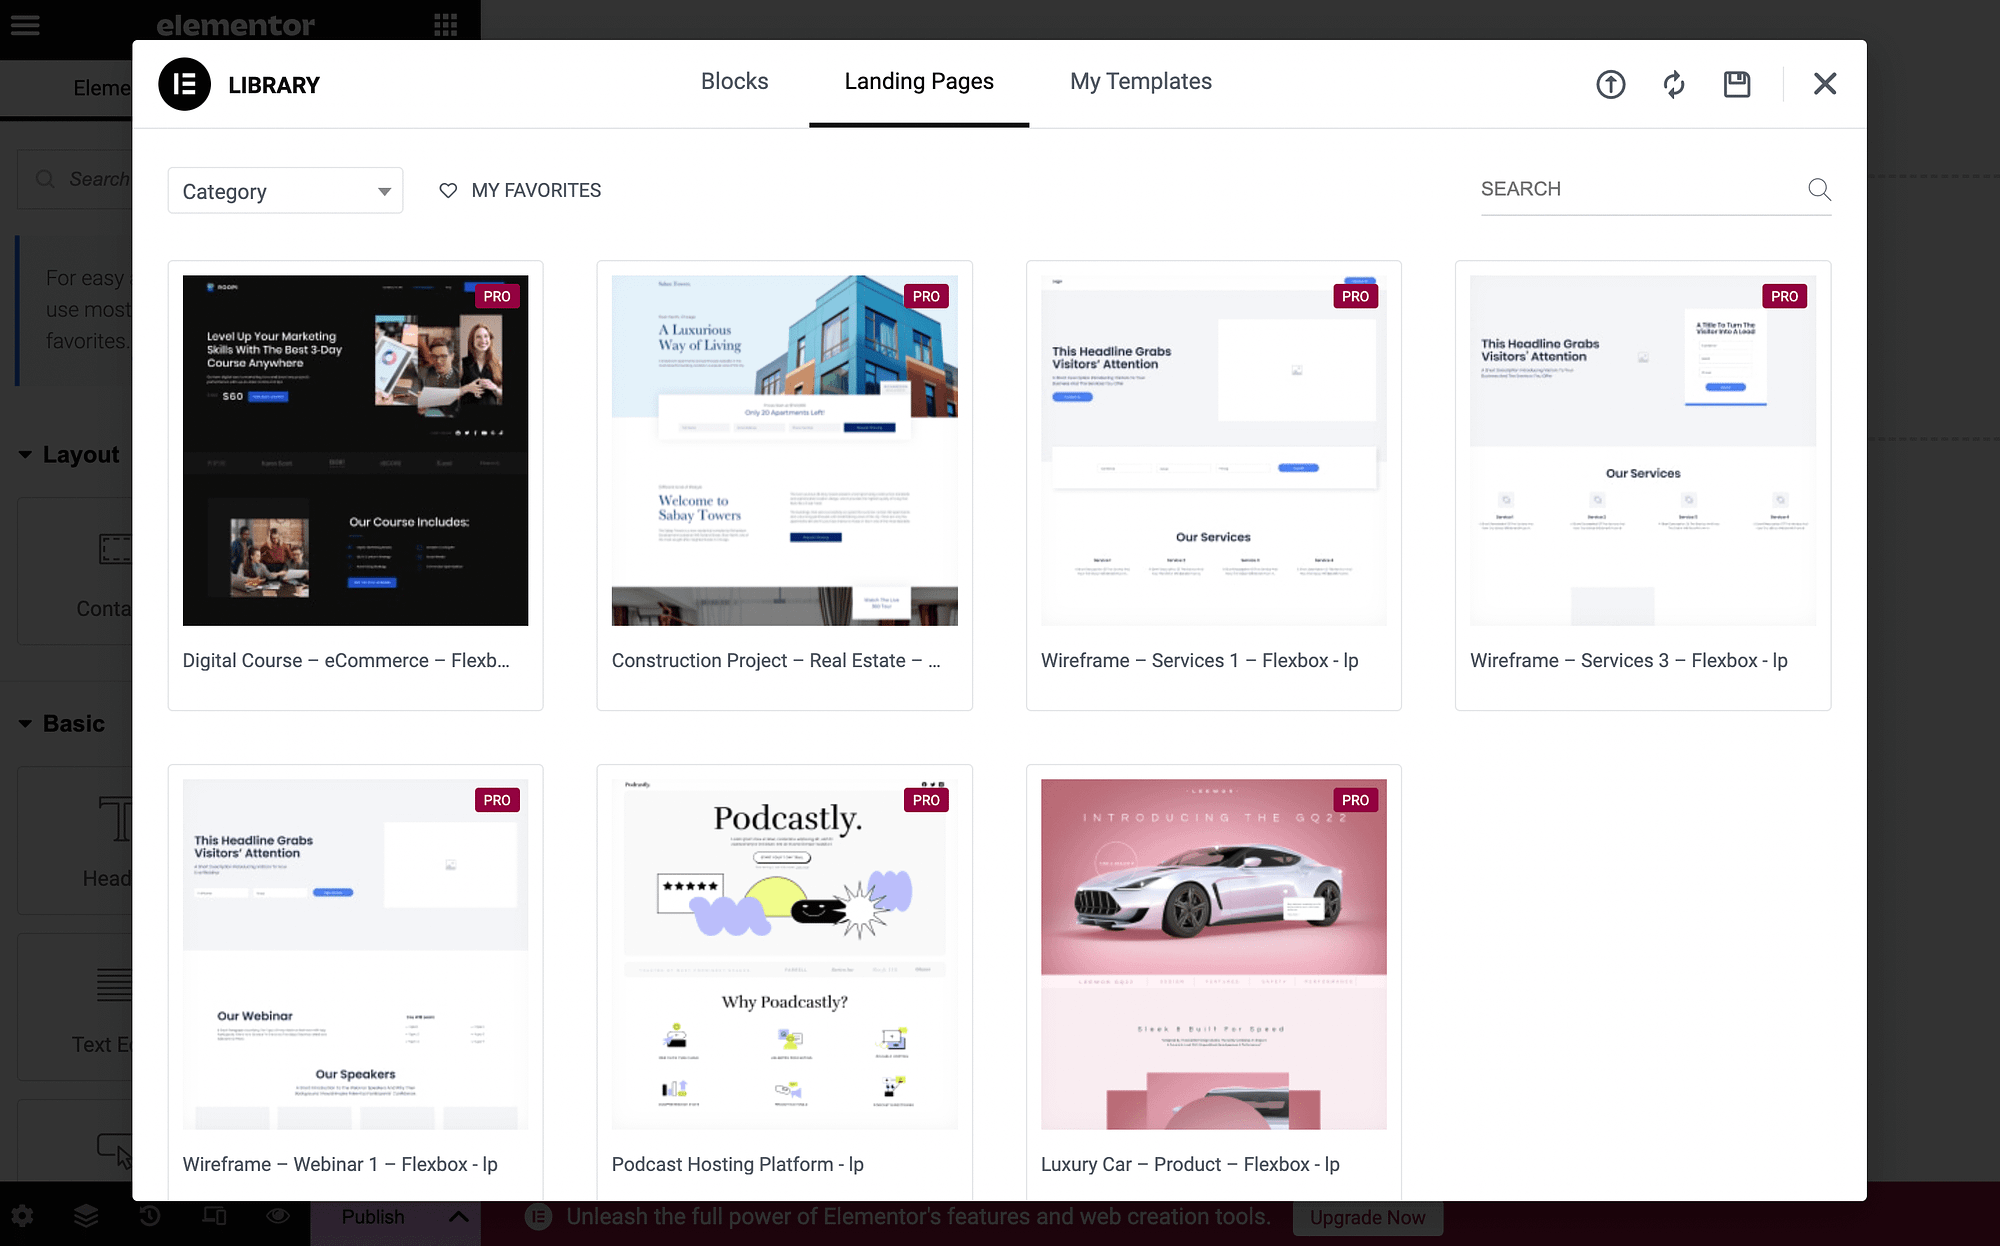
There’s also a Blocks tab which contains more template parts. You can open the dropdown menu to see a new Category:
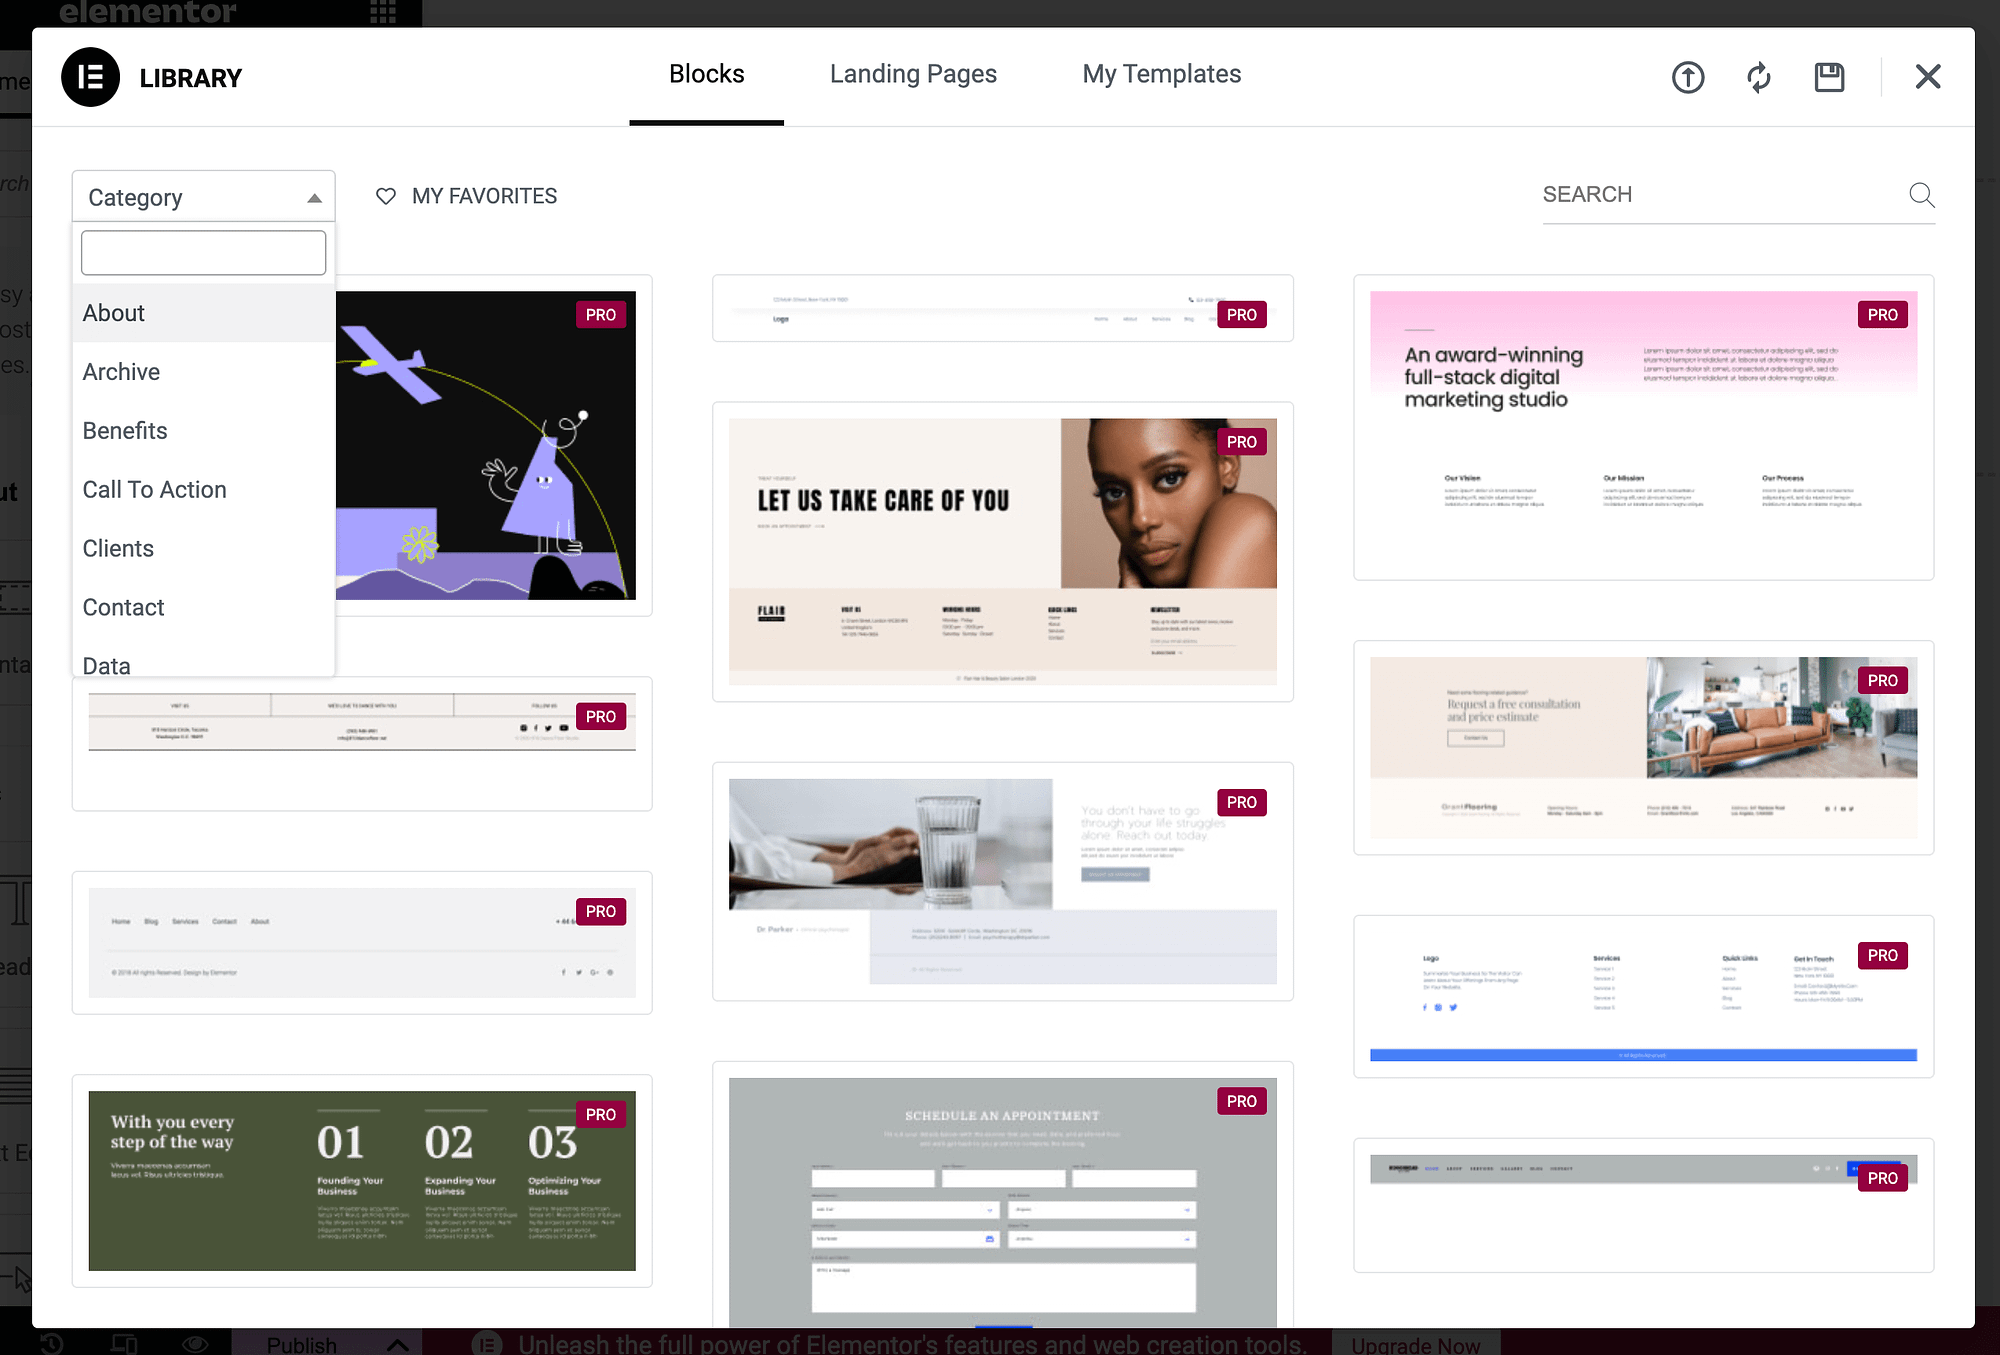
Keep in mind though, if you’re using the free version of the plugin, you won’t be able to use these templates. In that case, simply continue on to the next section.
The drag and drop interface and widgets 🖱️
Now, the true Elementor tutorial begins! Let’s see how you can make a web page using the plugin’s drag and drop interface.
Go to your WordPress dashboard and navigate to Pages → Add New:
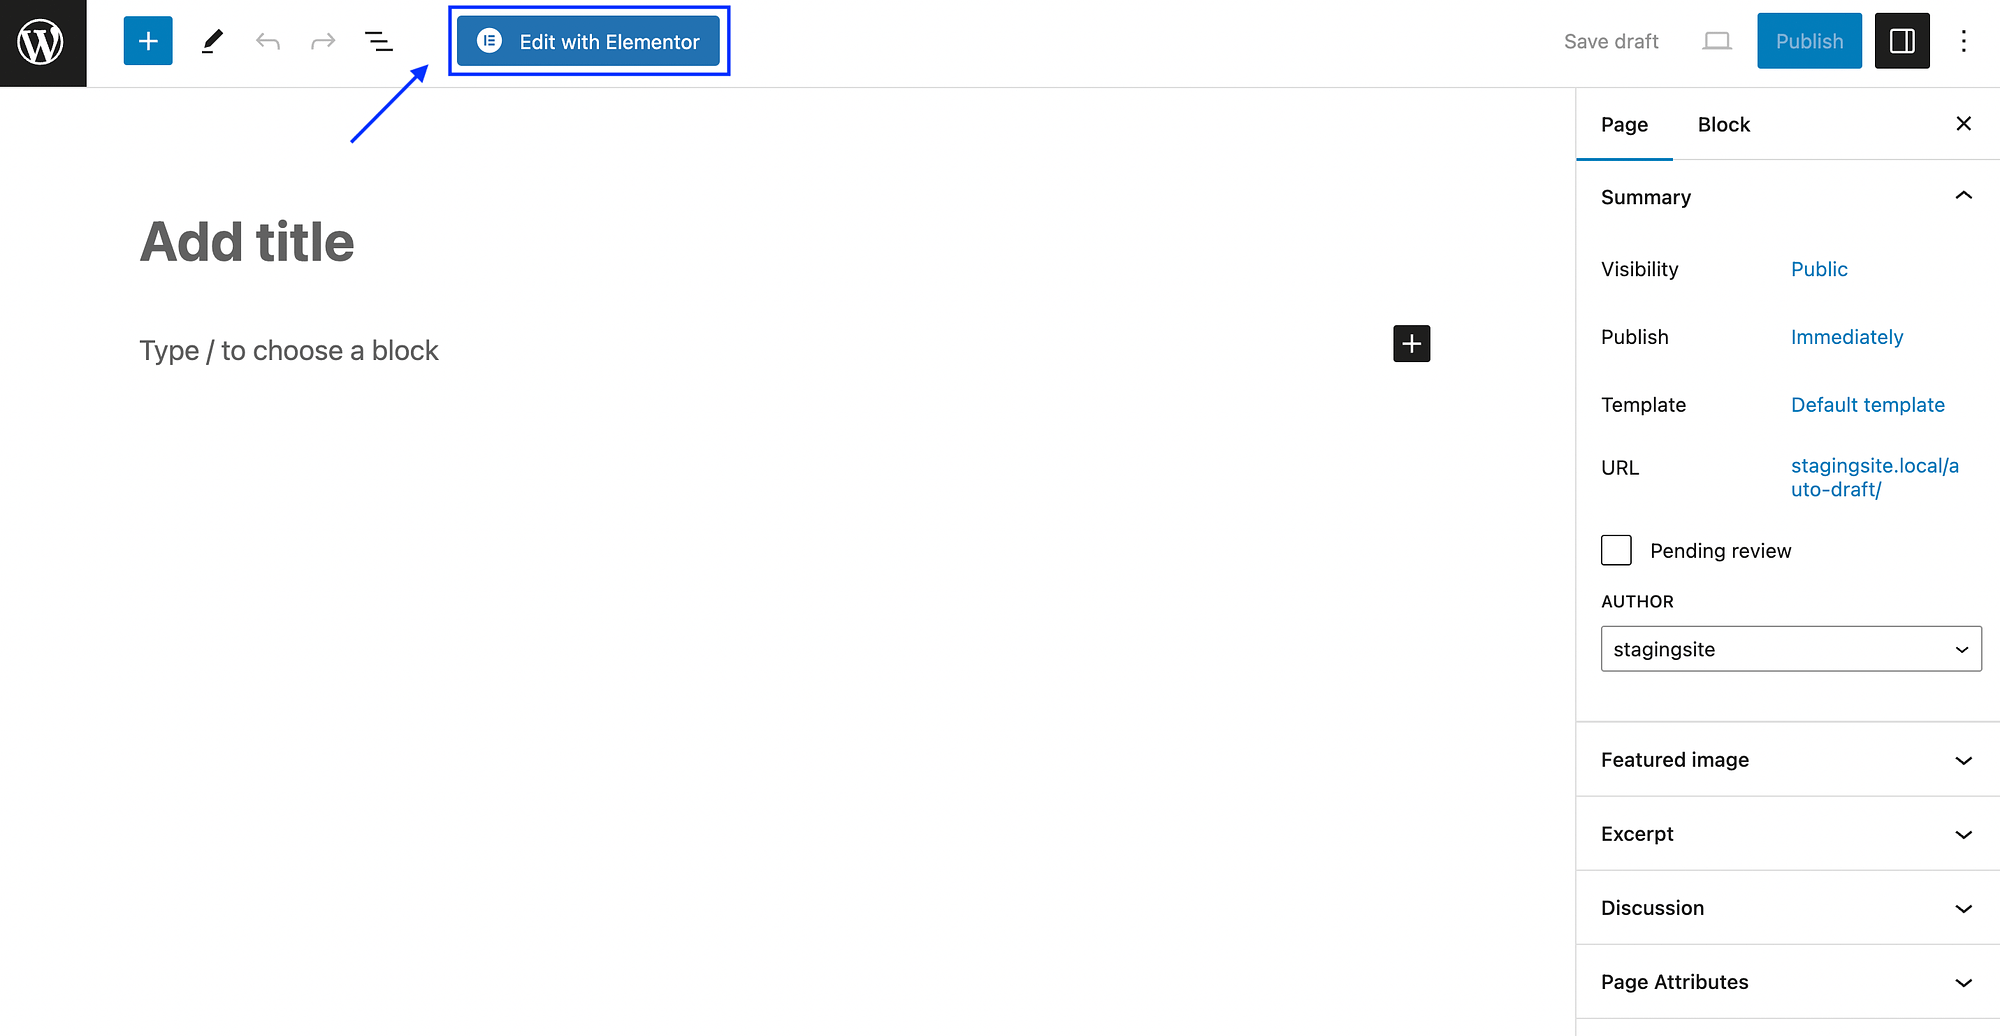
Hit the Edit with Elementor button to launch Elementor:
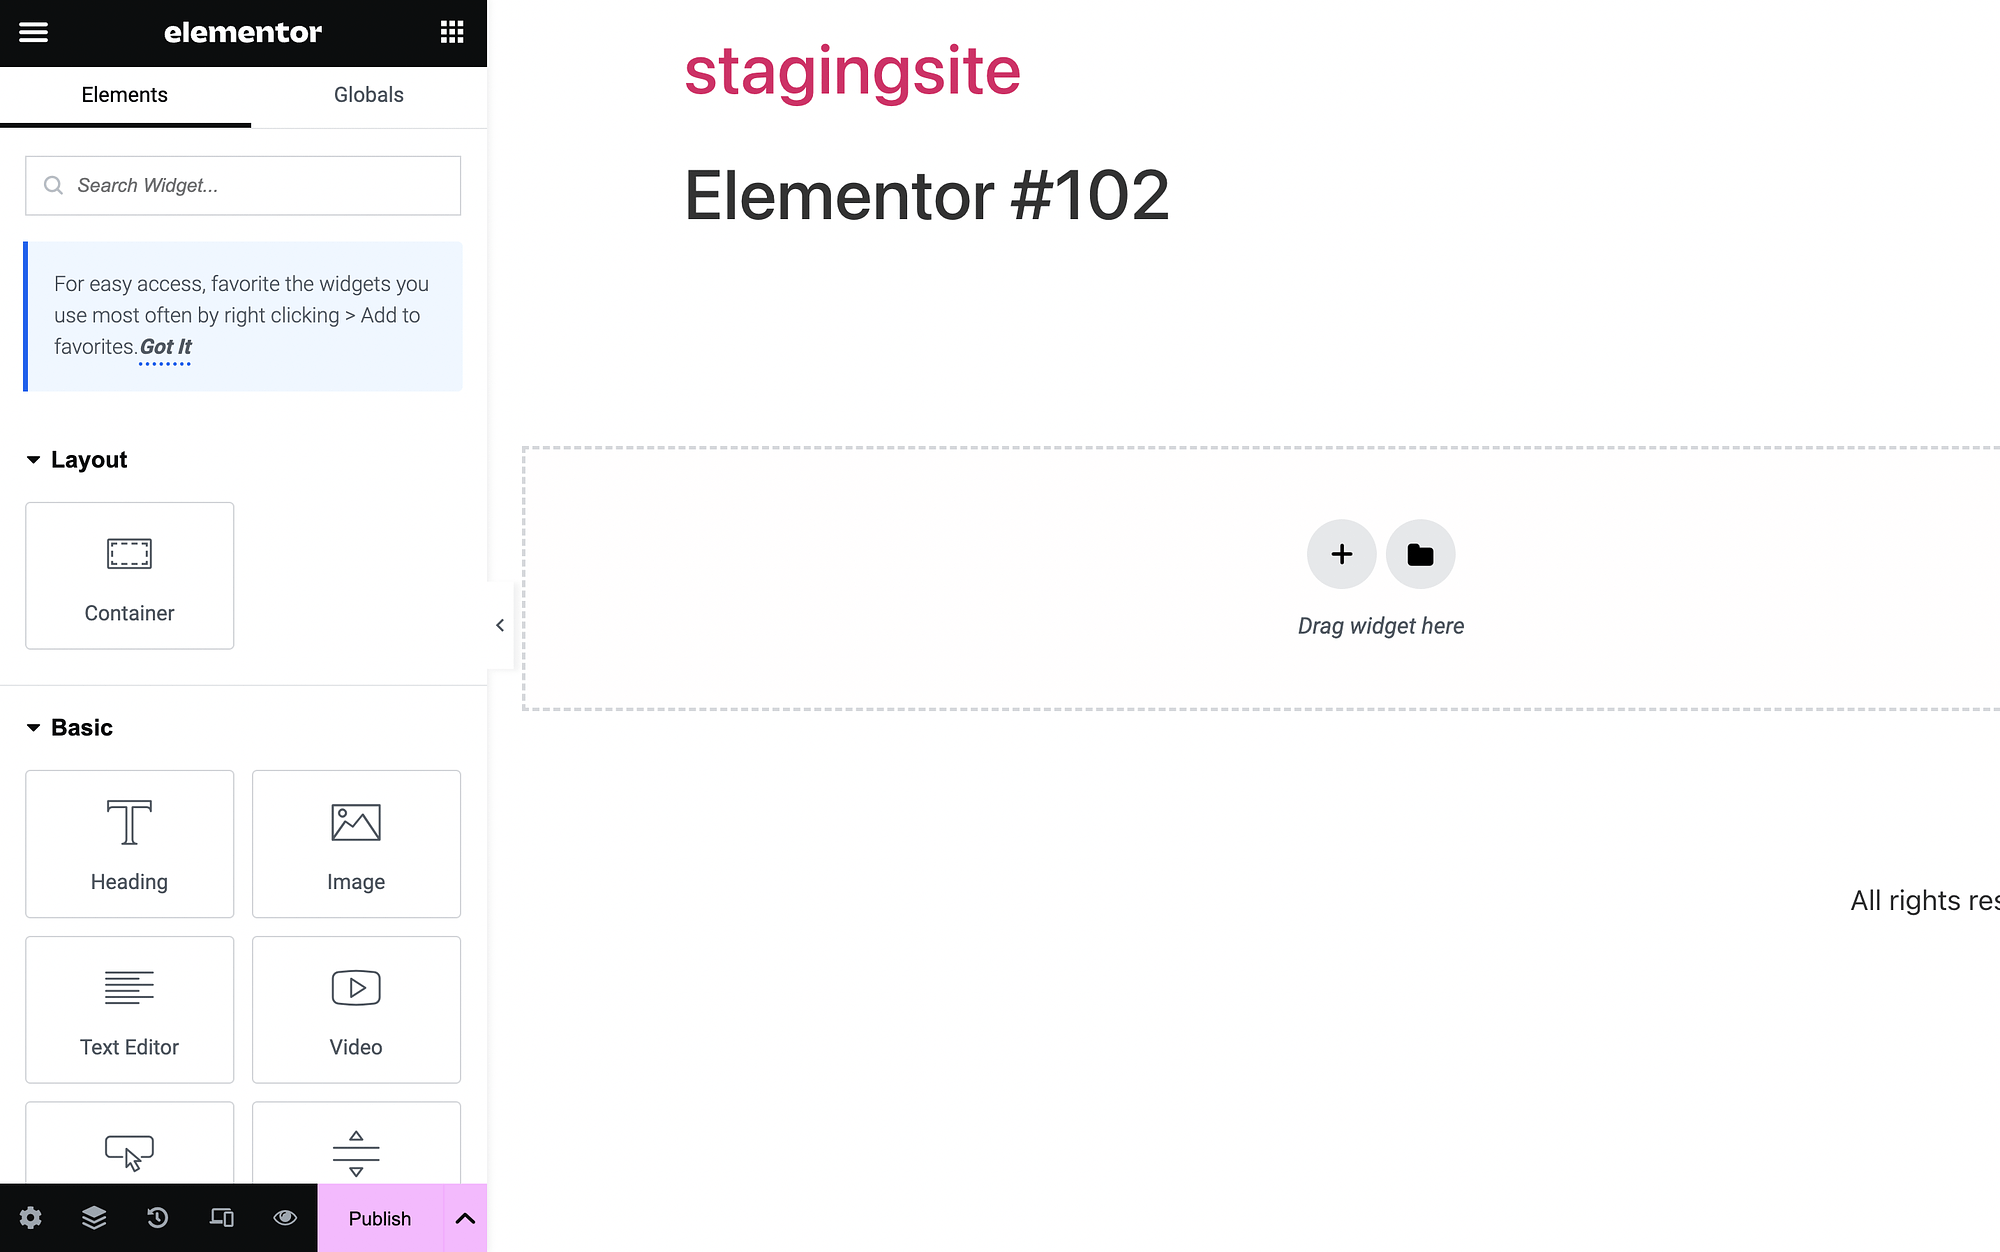
As you can see, you have your Elementor menu on the left and your content area on the right. Within your Elementor menu/panel, you’ll see all the “elements” or widgets you can drag and drop onto the page.
These widgets have straightforward names like Heading, Image, and Text Editor. They’re also divided into categories like Layout, Basic, Pro, General, etc.
To use a widget, simply click on it to hold it, and then drag it on to the right:
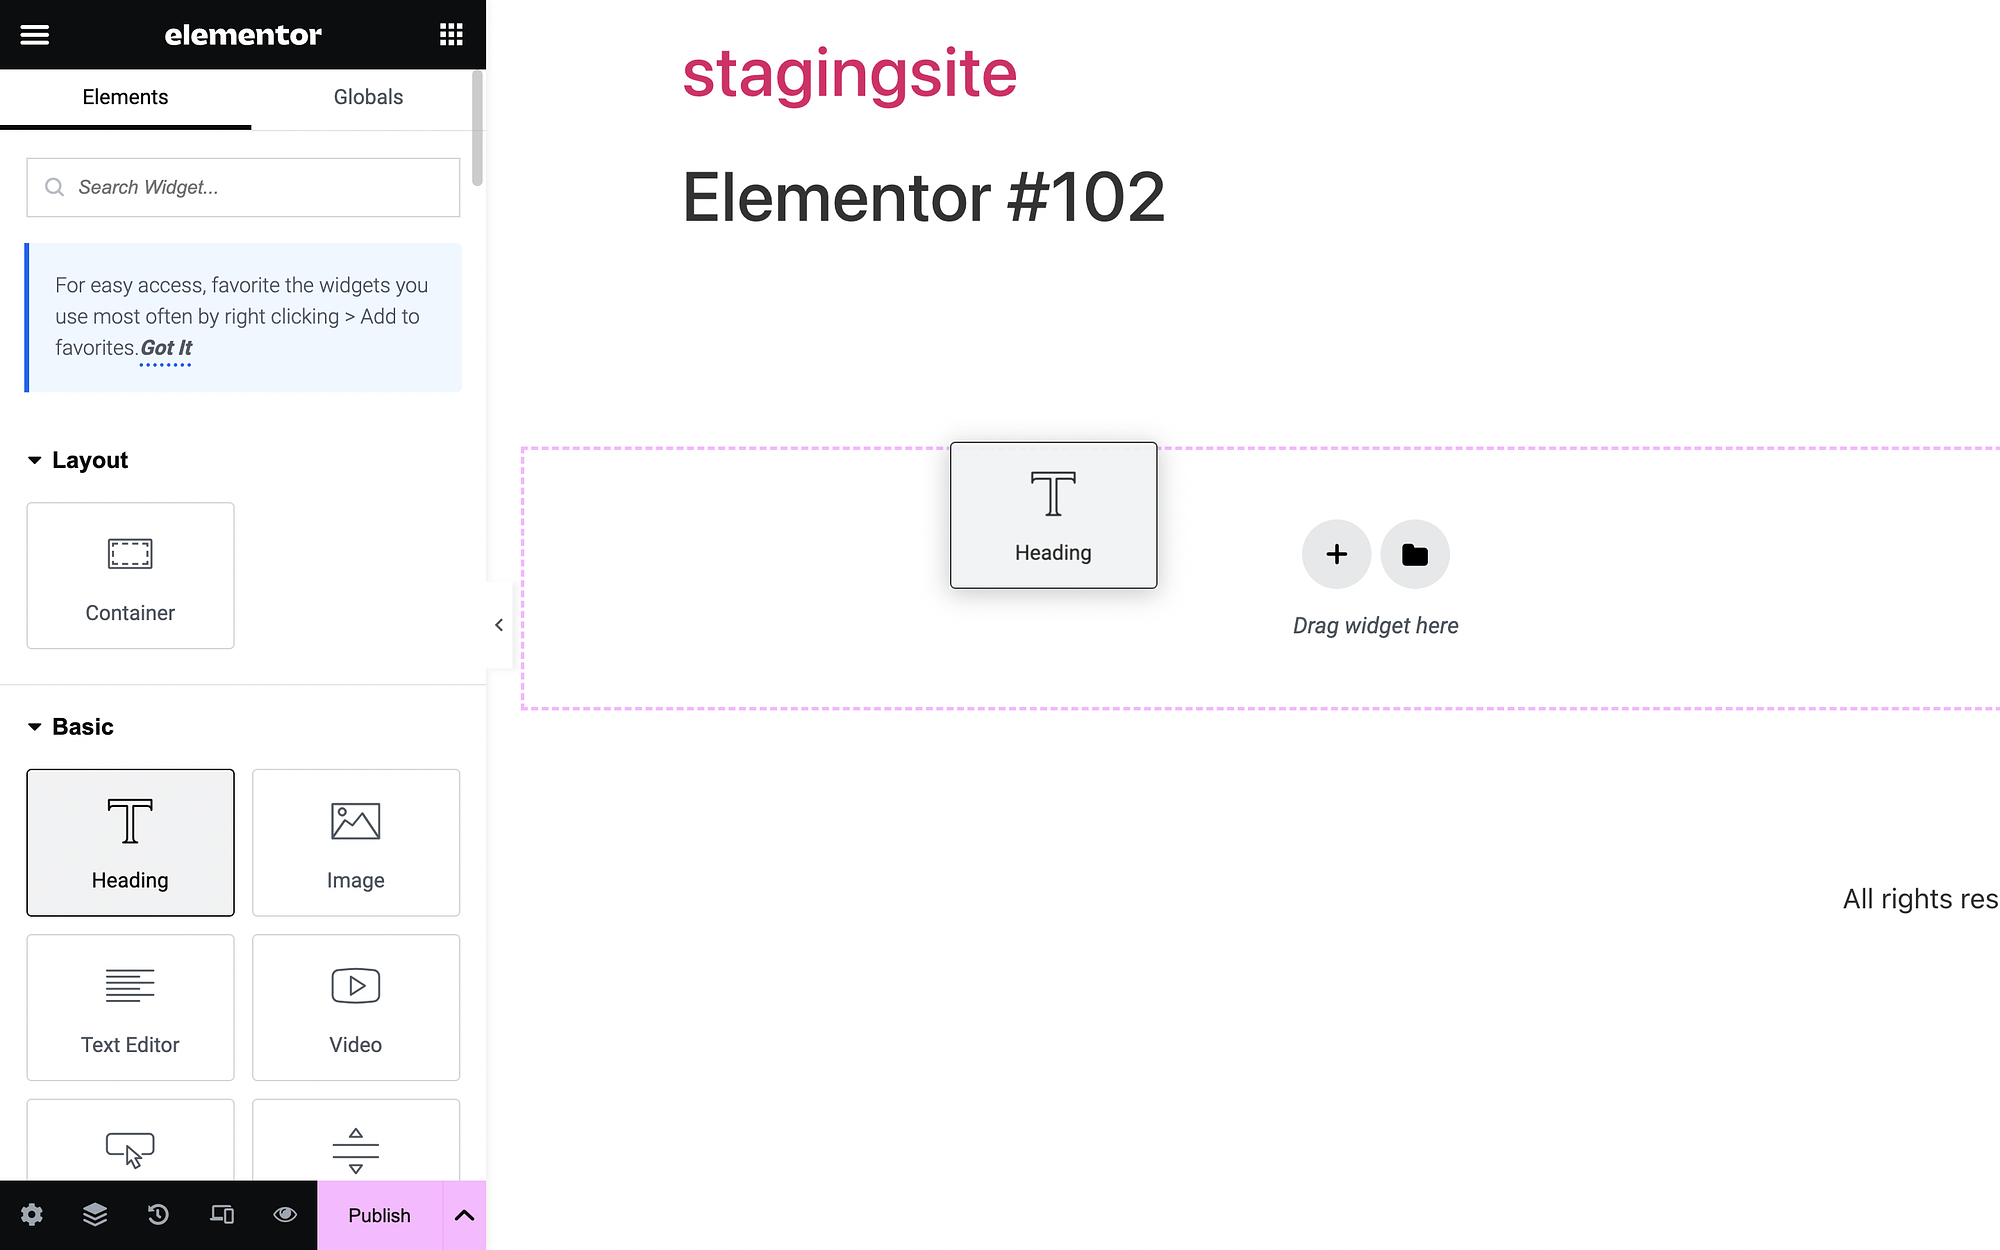
We’re going to add a heading widget to our page:
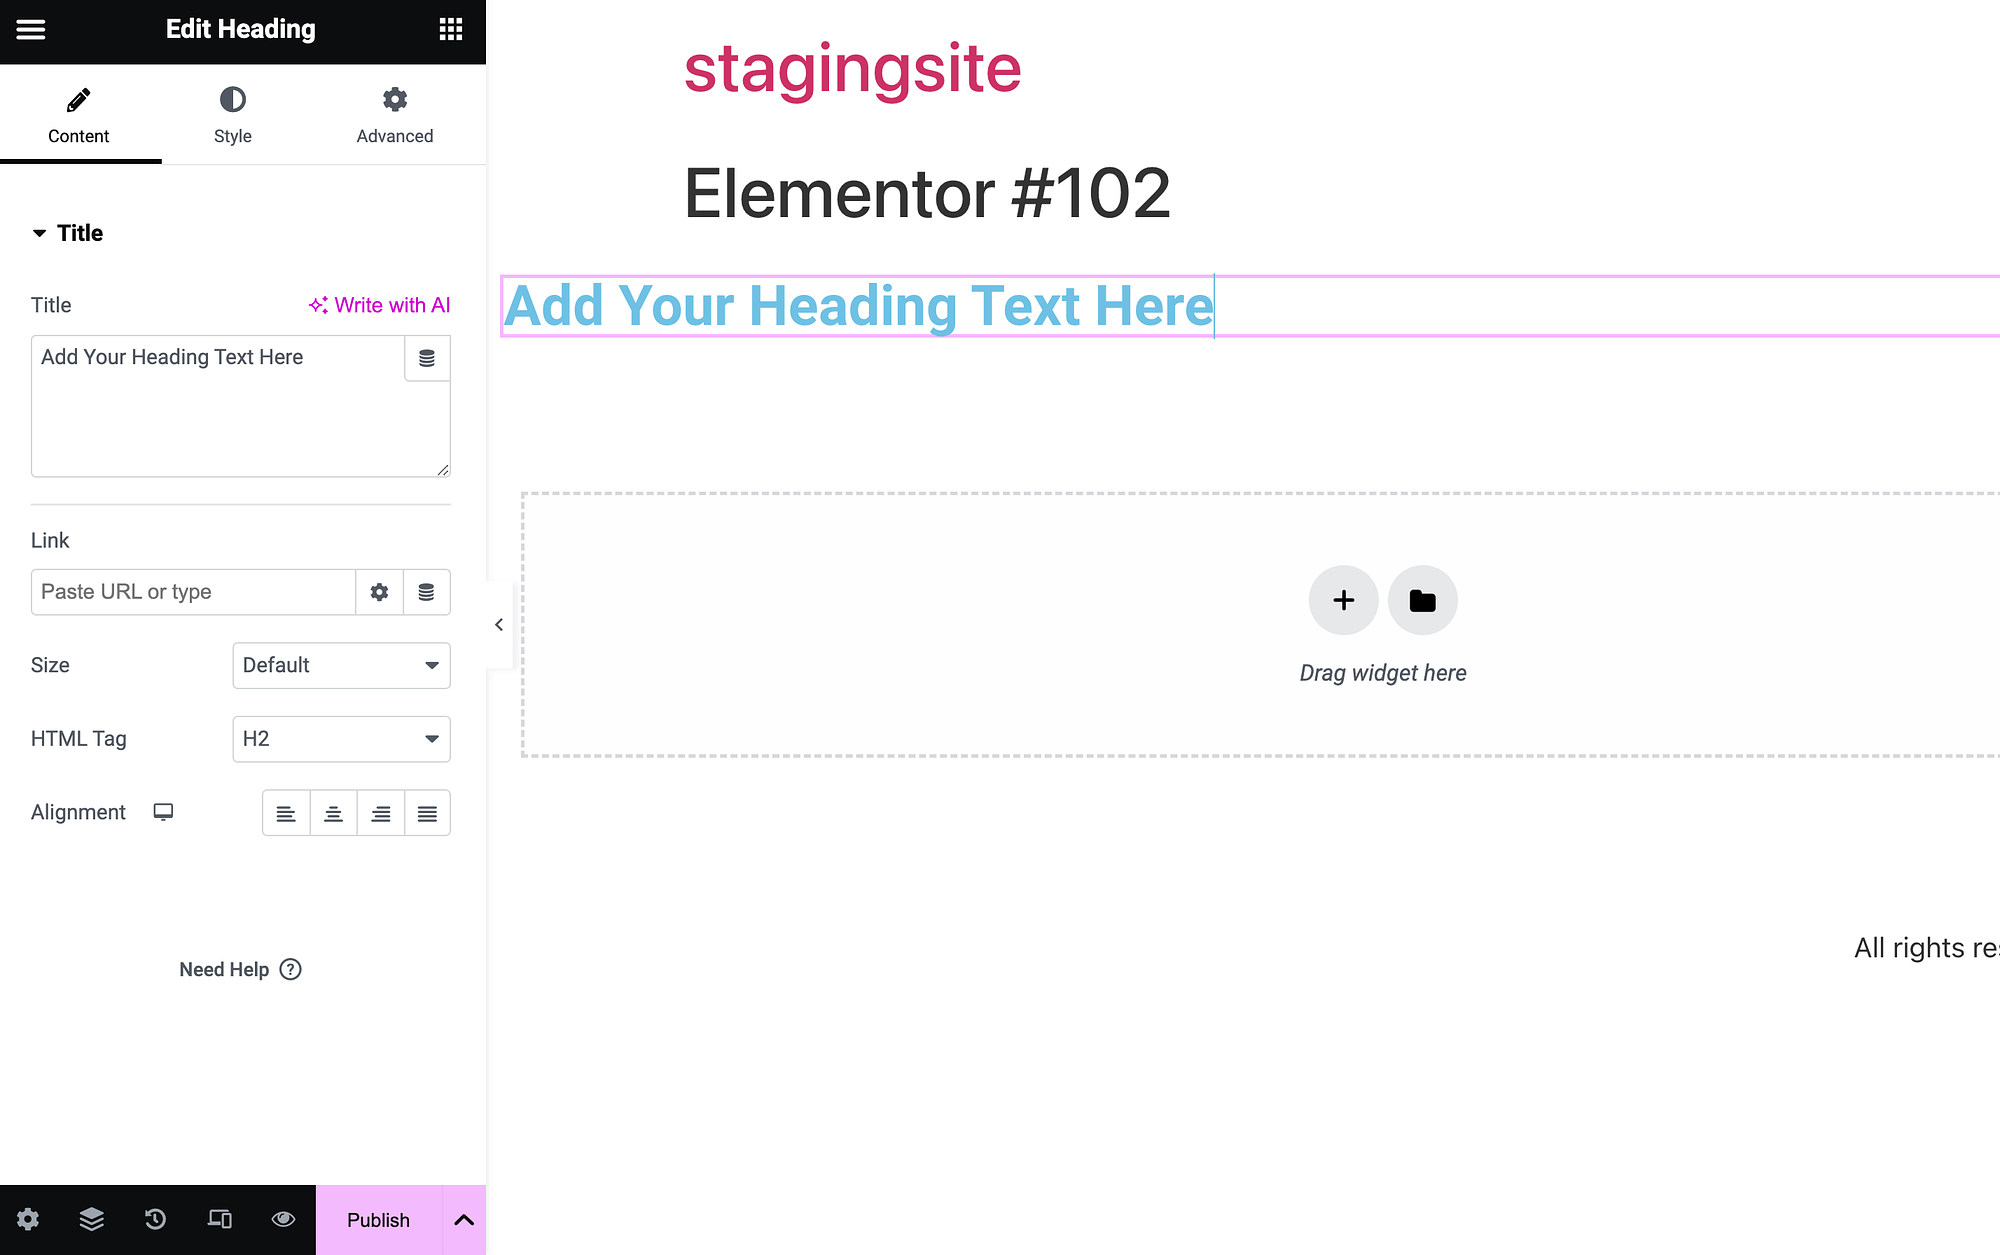
Once we add the module to the content area, our widget settings open on the left. To change our heading text, we can simply write in the text box under Title:
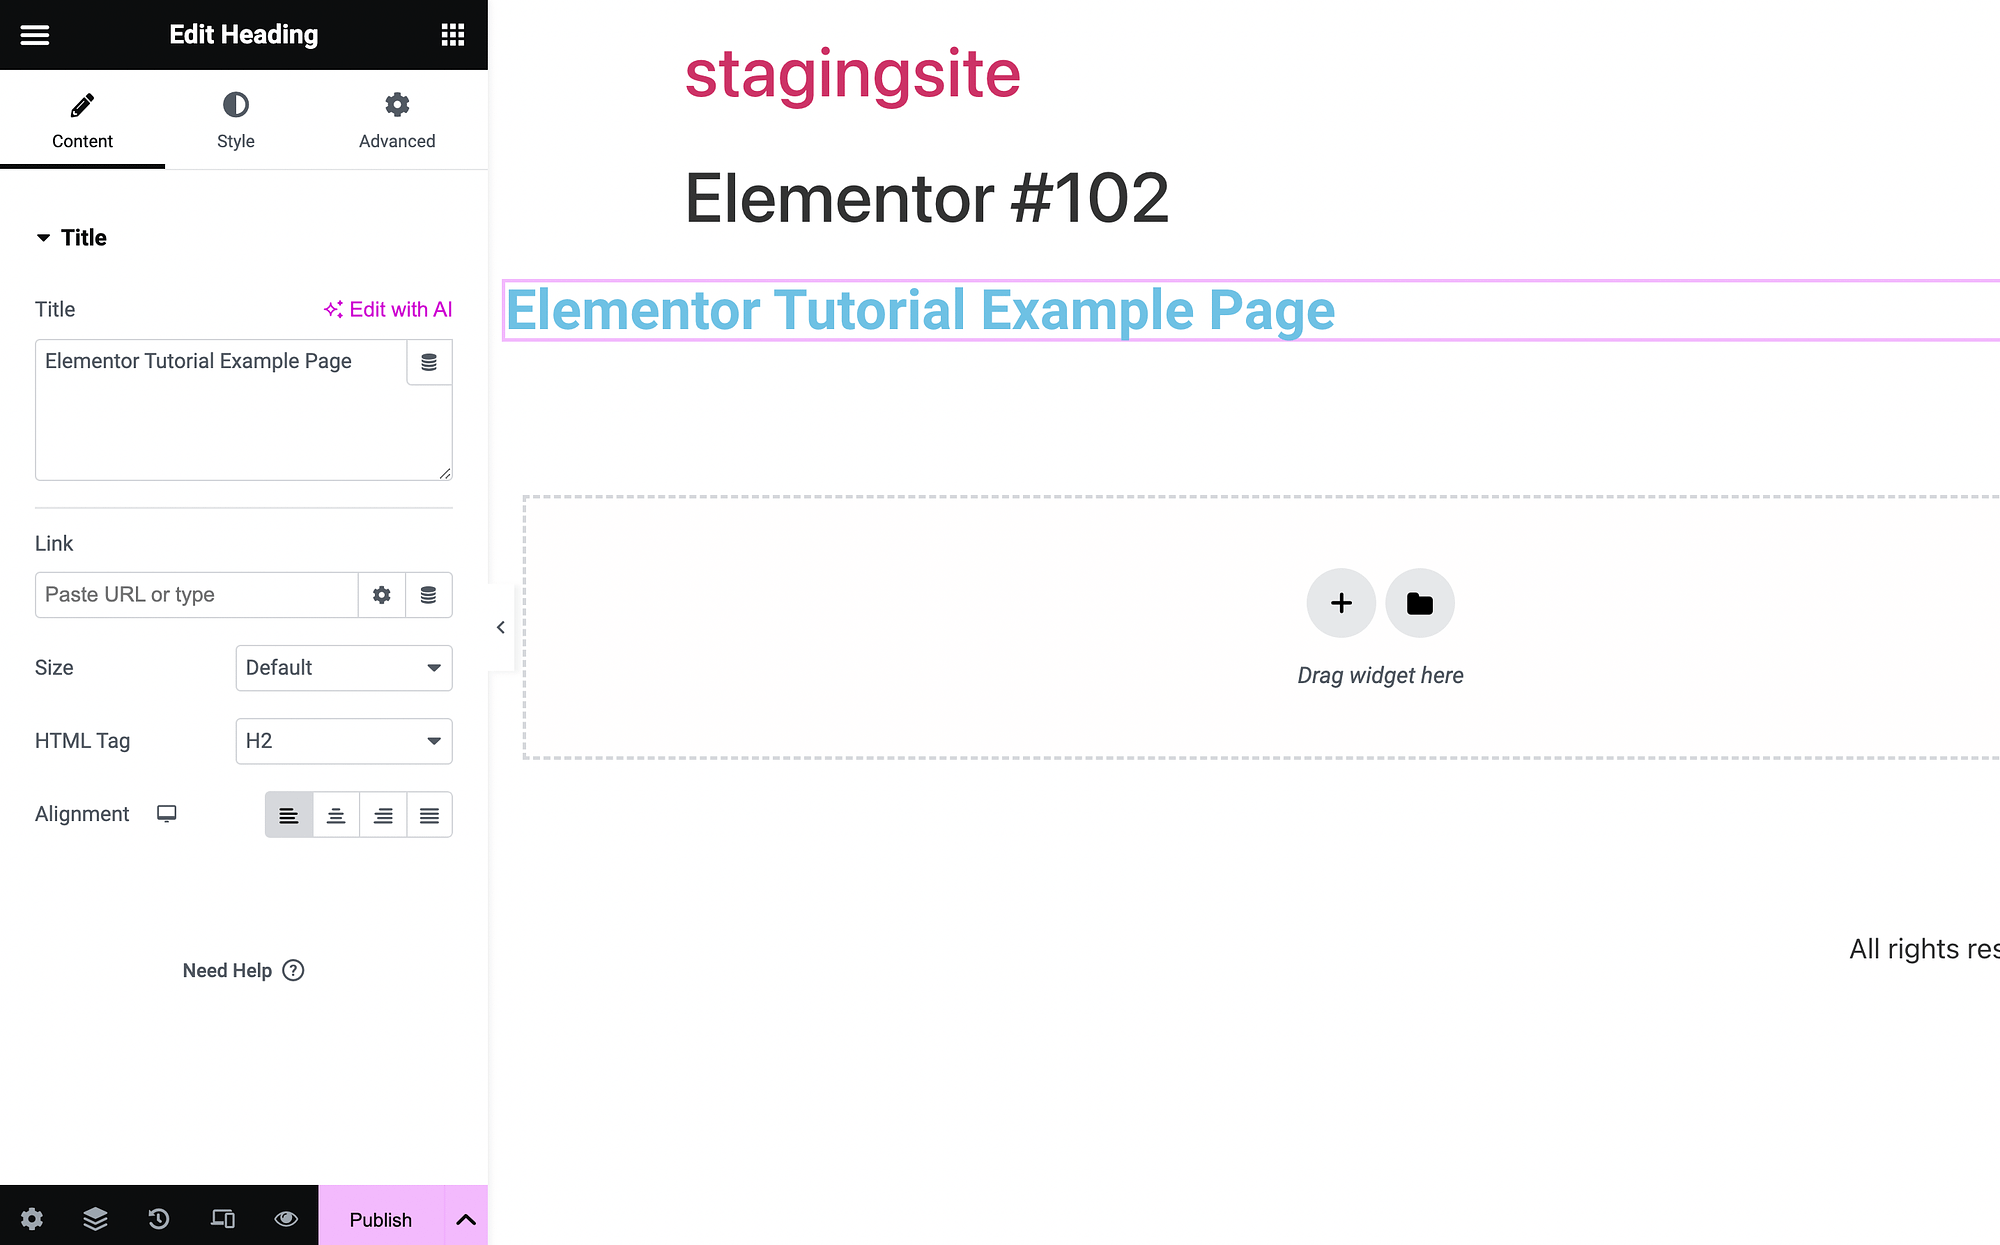
We’ve written “Elementor Tutorial Example Page” in ours.
Widget customization and management ⚙️
Now, let’s experiment more with widget customization in this Elementor tutorial. Starting off, we’ll use the Image widget:
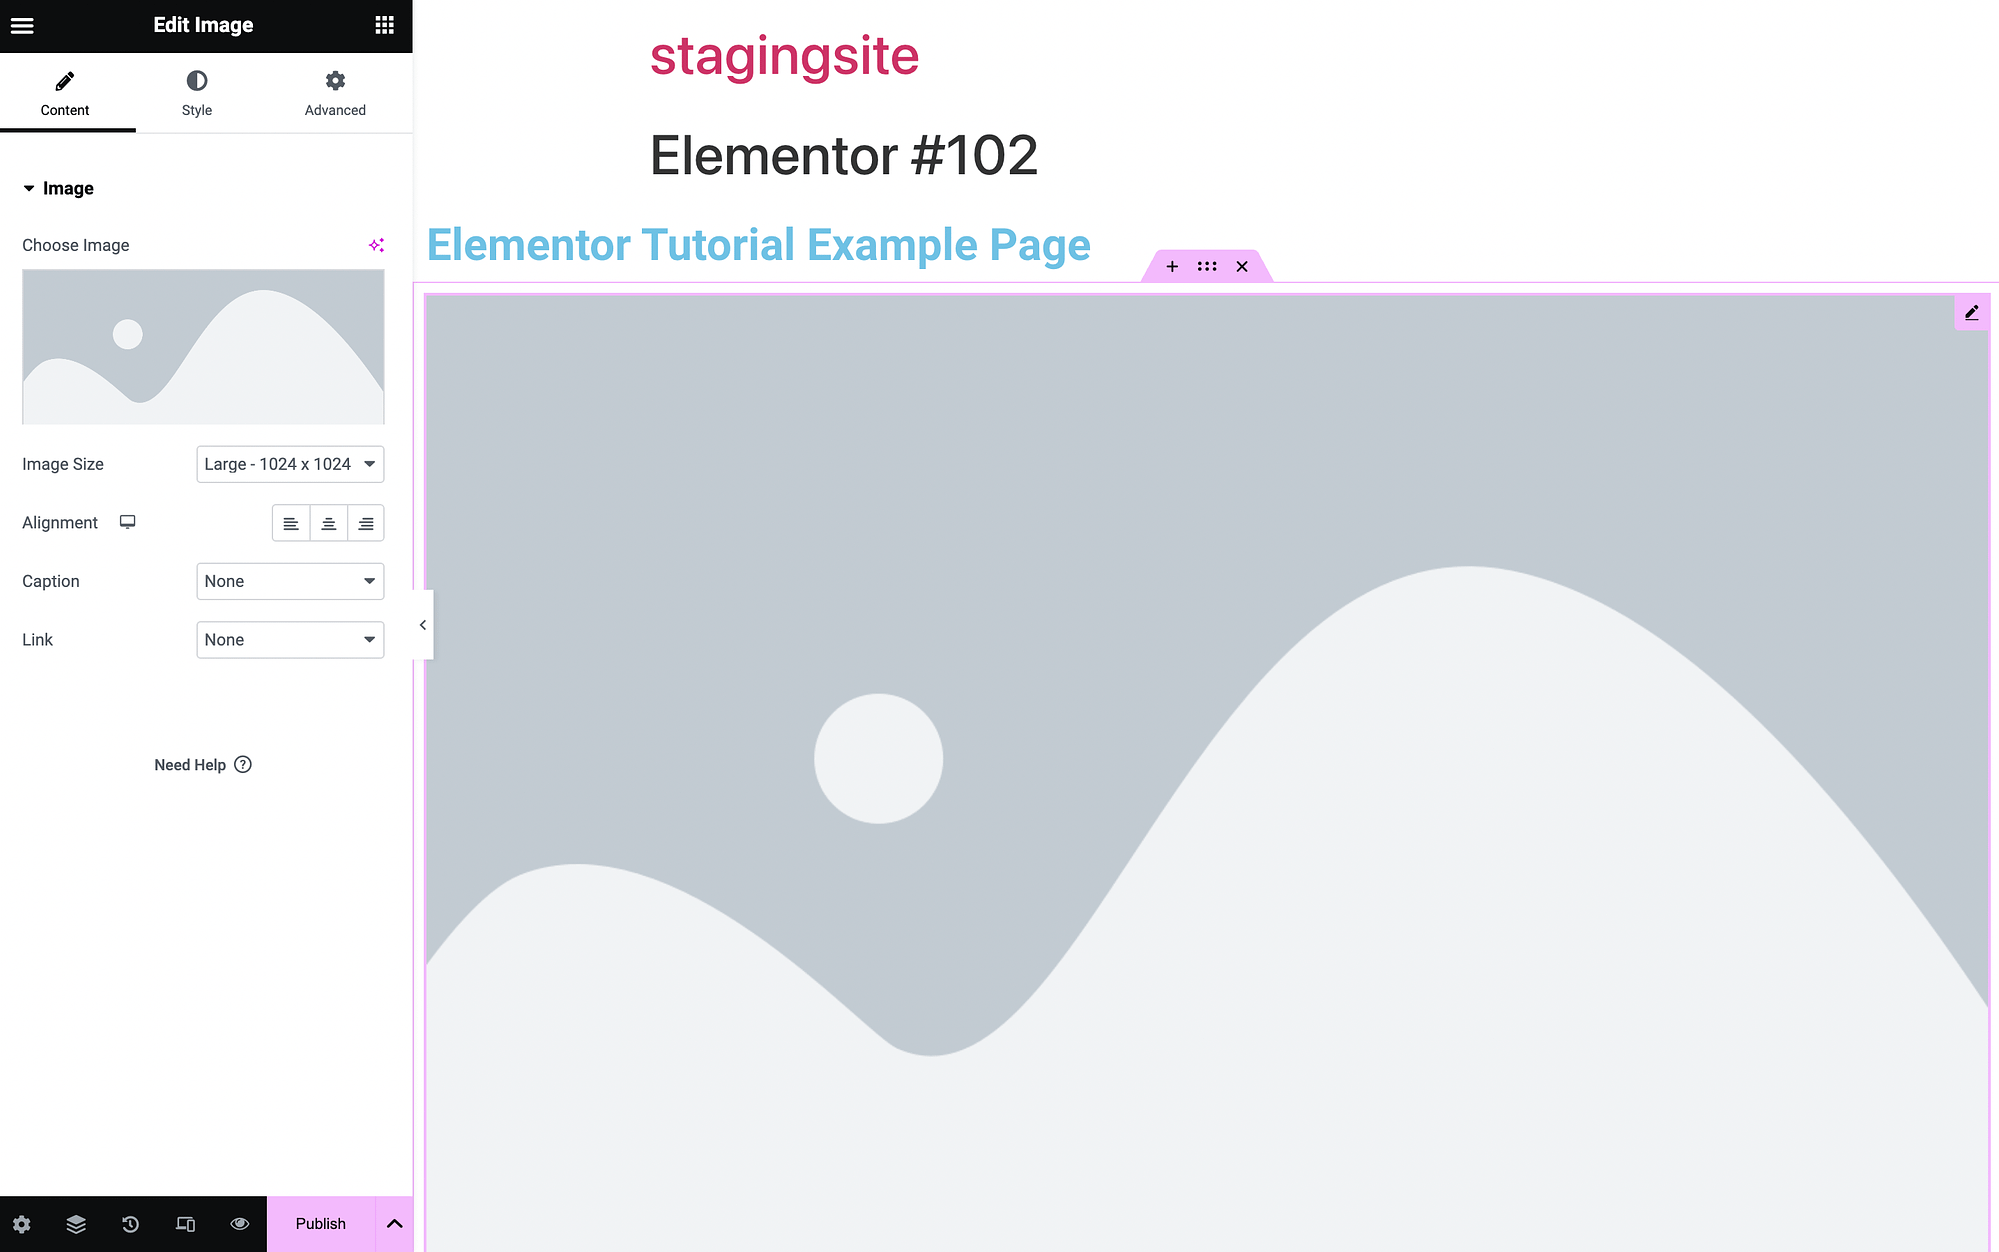
Click on the box below Choose Image to upload one:
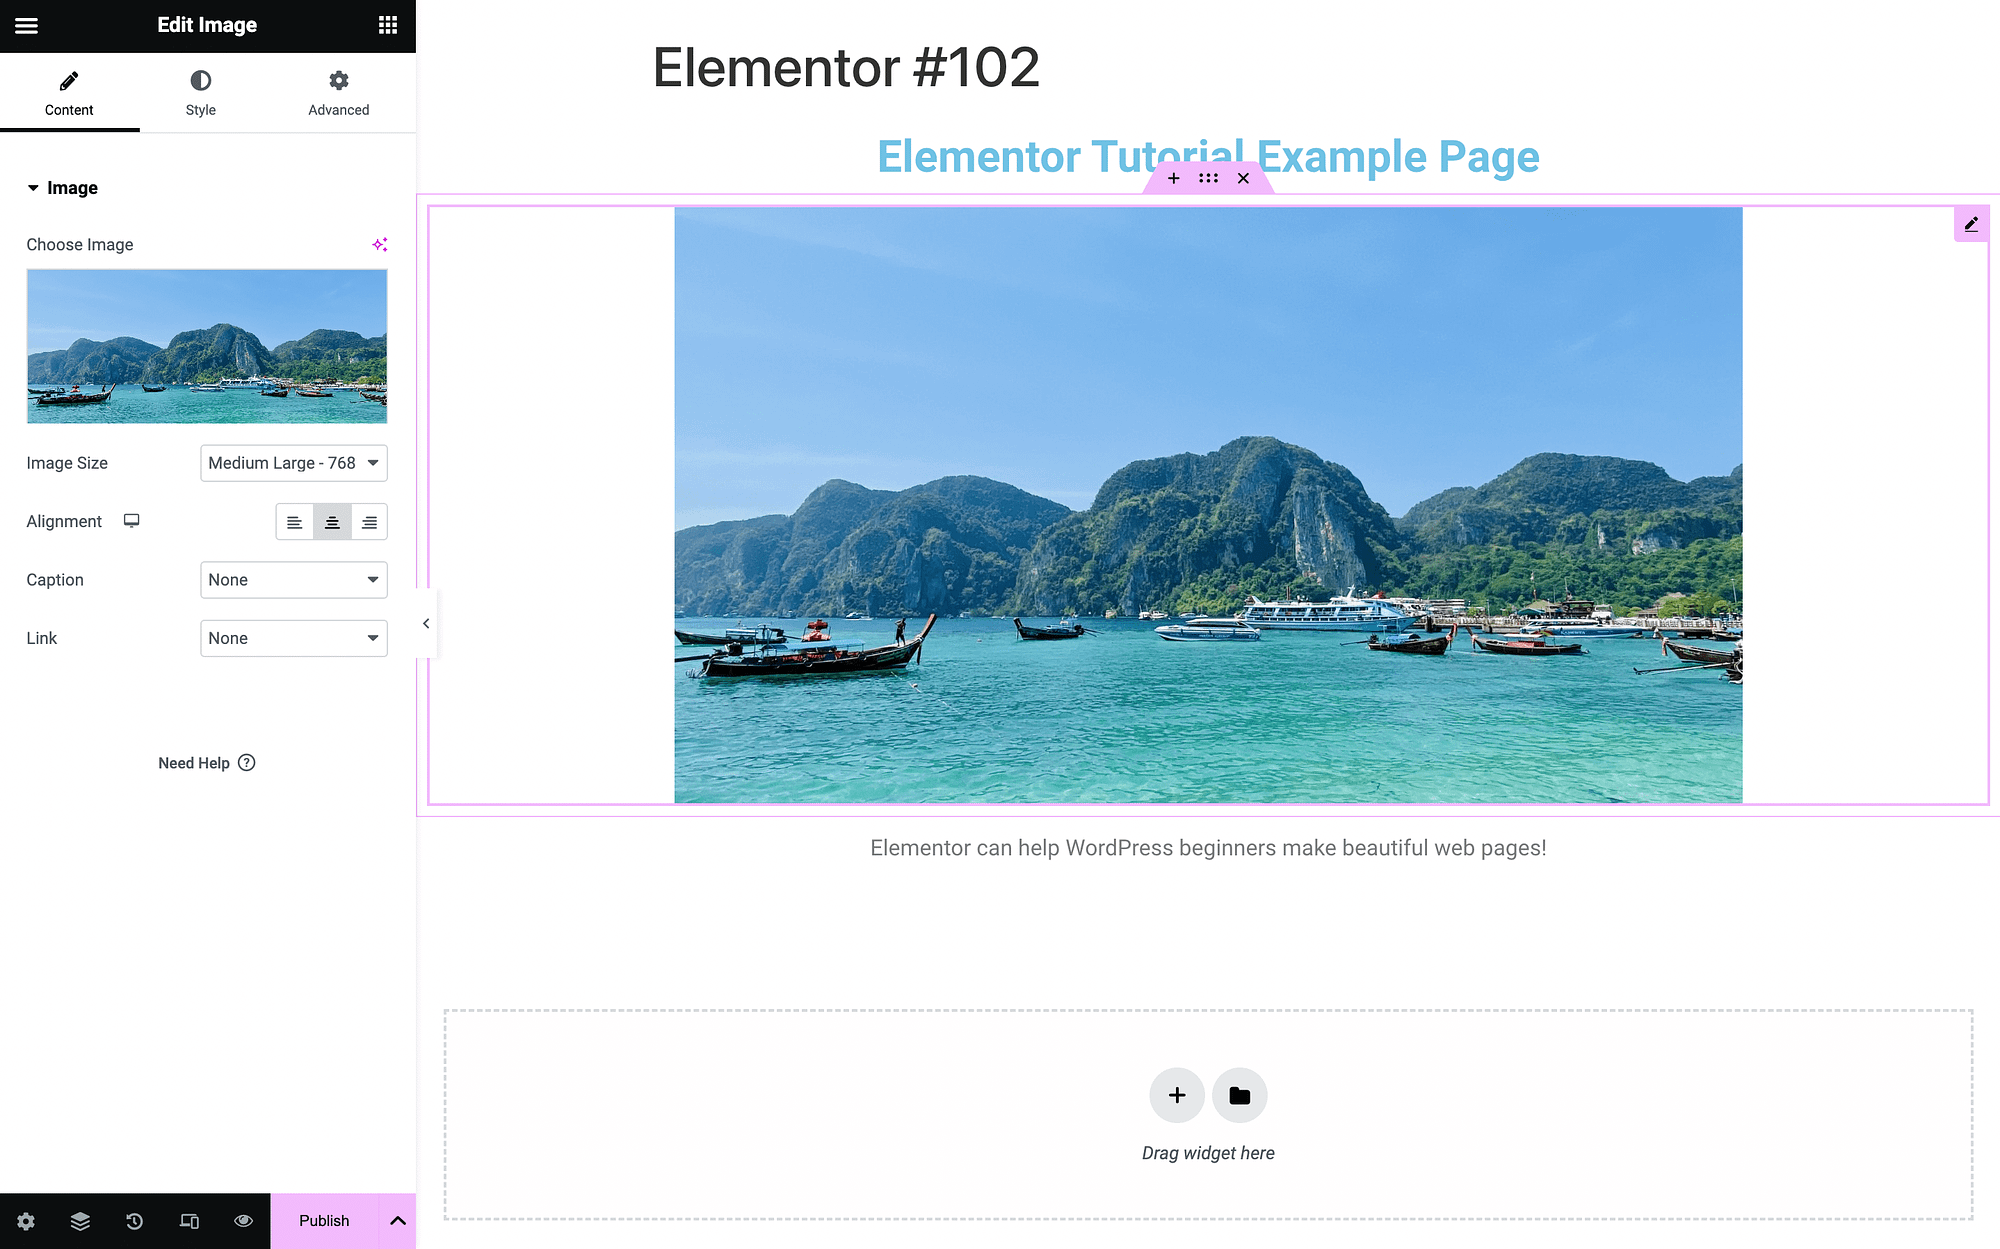
Use the Alignment features to center both widgets.
At this point, you might want to further explore your customization settings in each widget. They have tabs for Content, Style, and Advanced.
If we return to our Heading module, we can use the Style tab to change the color:
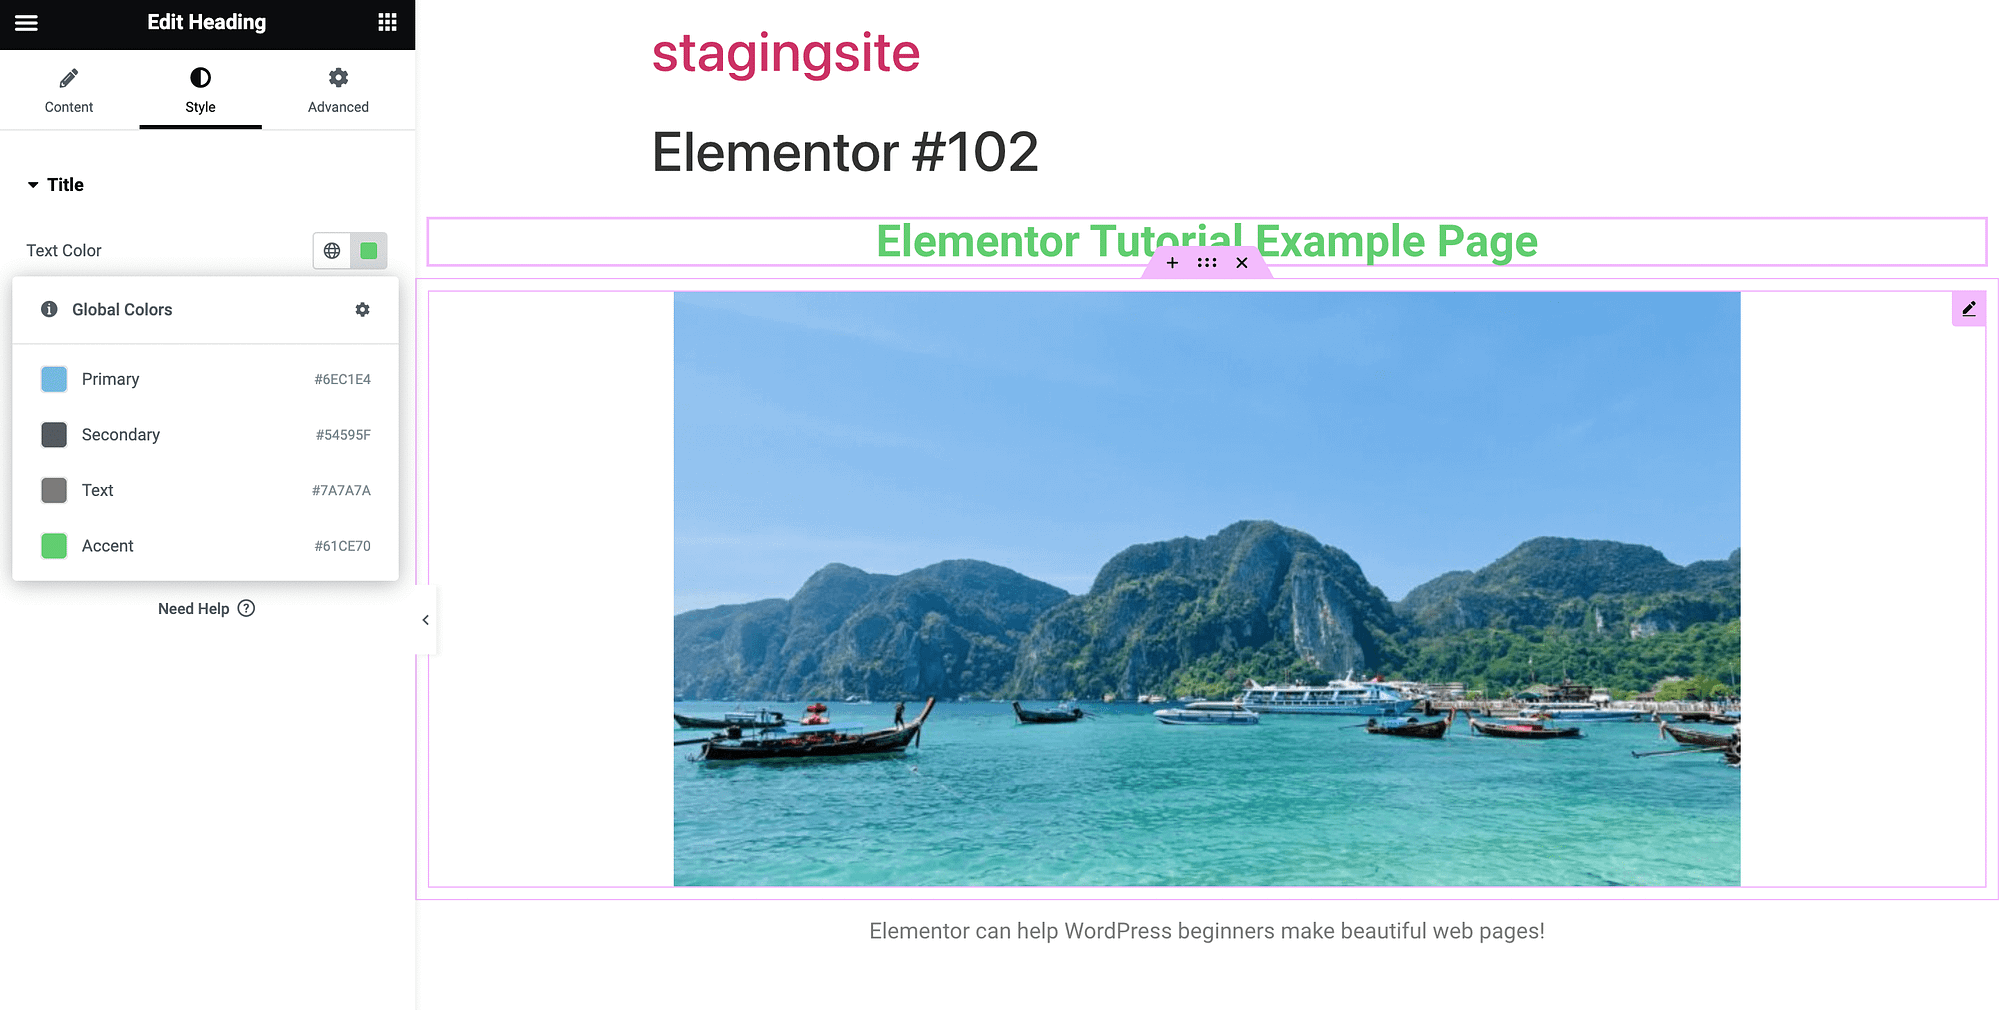
You can choose from your global theme colors, or use a color picker. In your Advanced widget settings tab, you can modify layout, background, borders, and more:
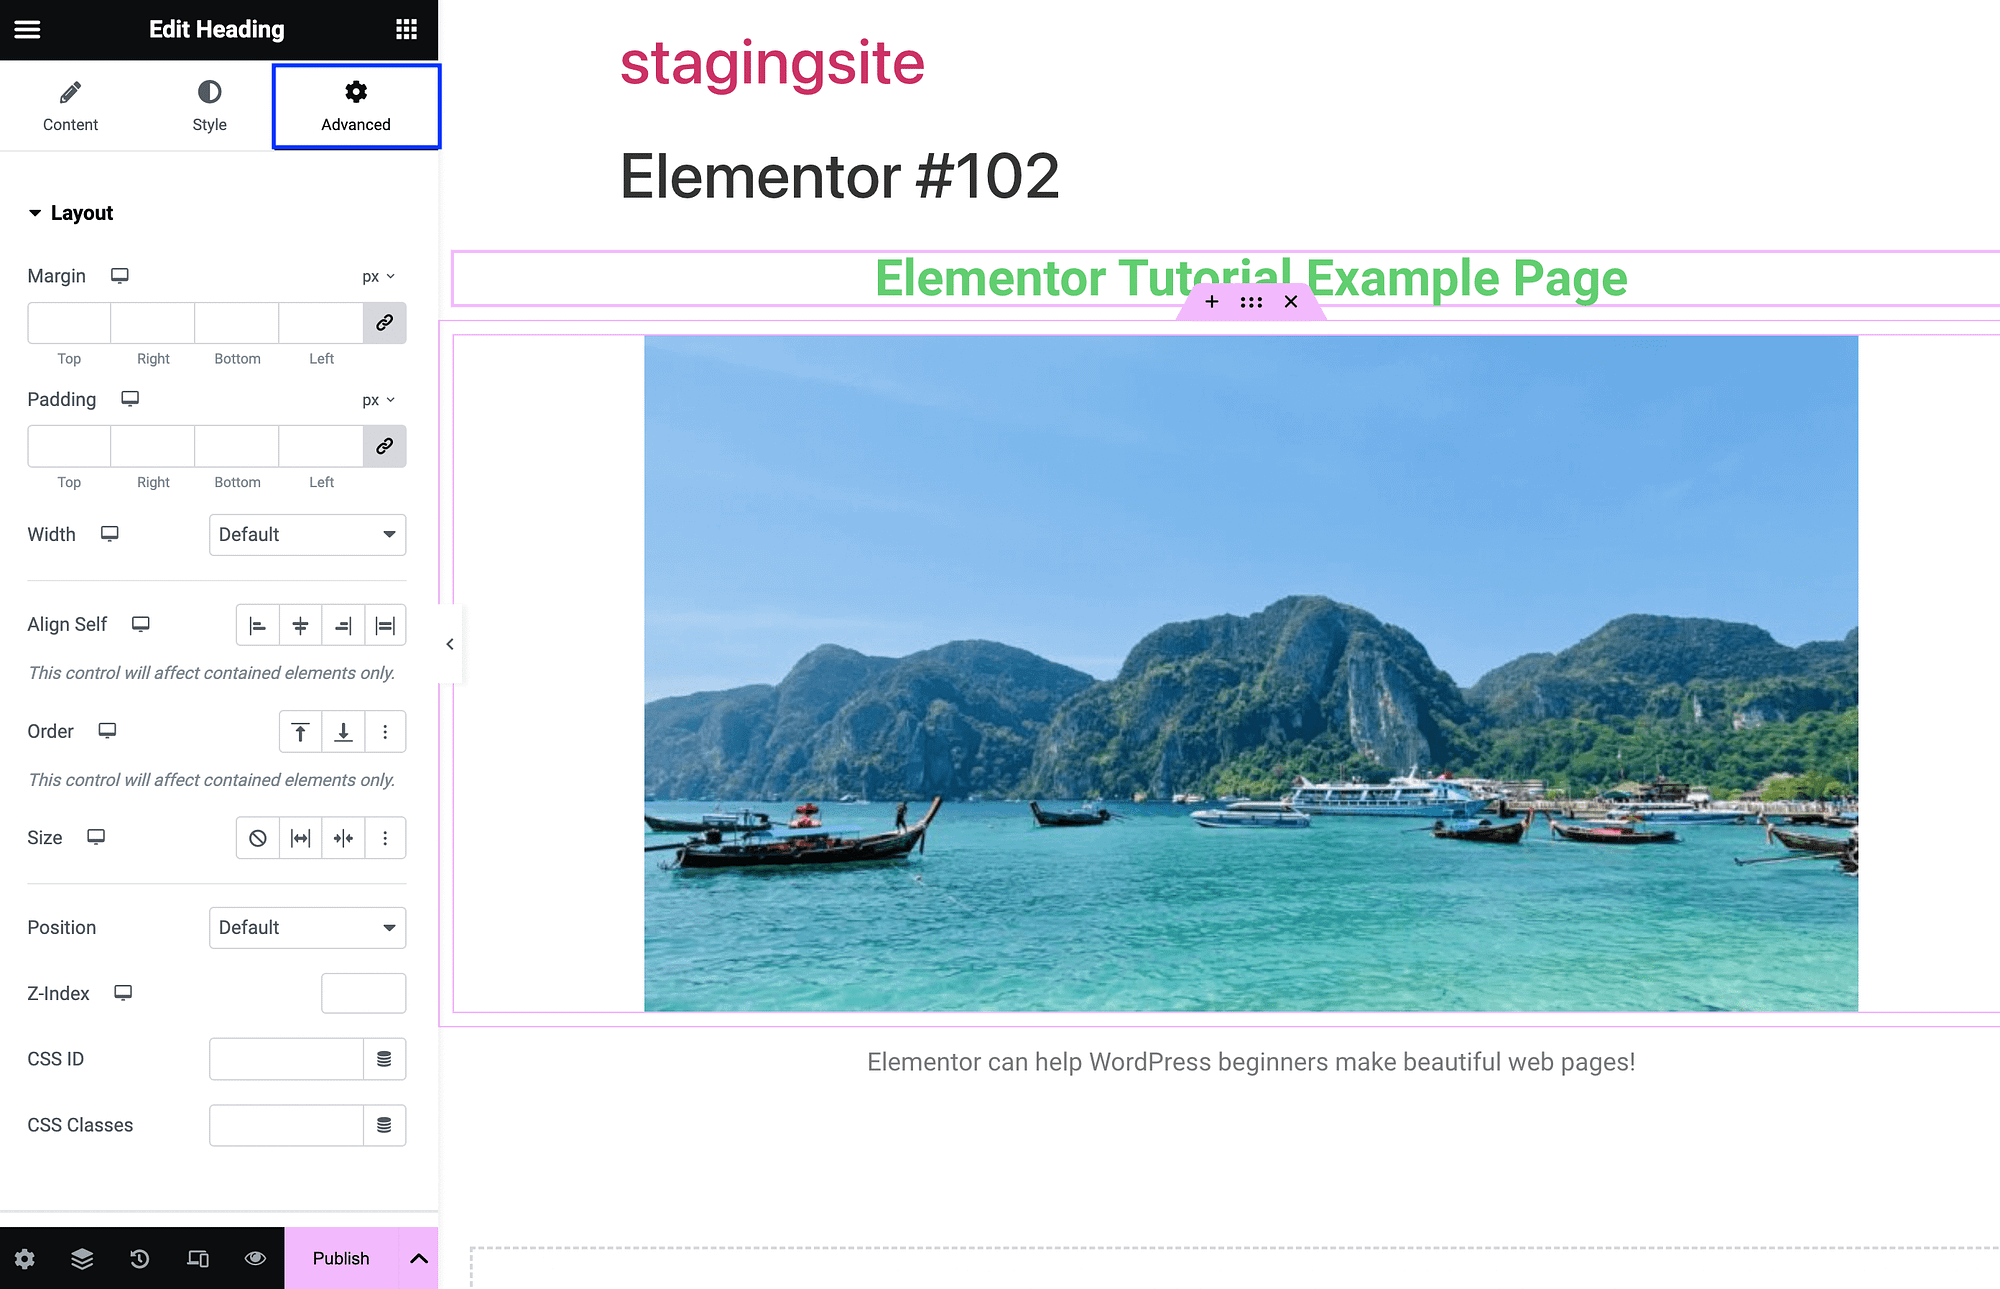
Collapse and expand these sections by clicking on the arrows. It’s also important to understand how the larger structure of your Elementor page works. When you hover over any widget, you’ll see some options:

Hitting the x will delete that widget. Meanwhile, when you click on the dots between the x and the +, you’ll open your container settings for that widget:
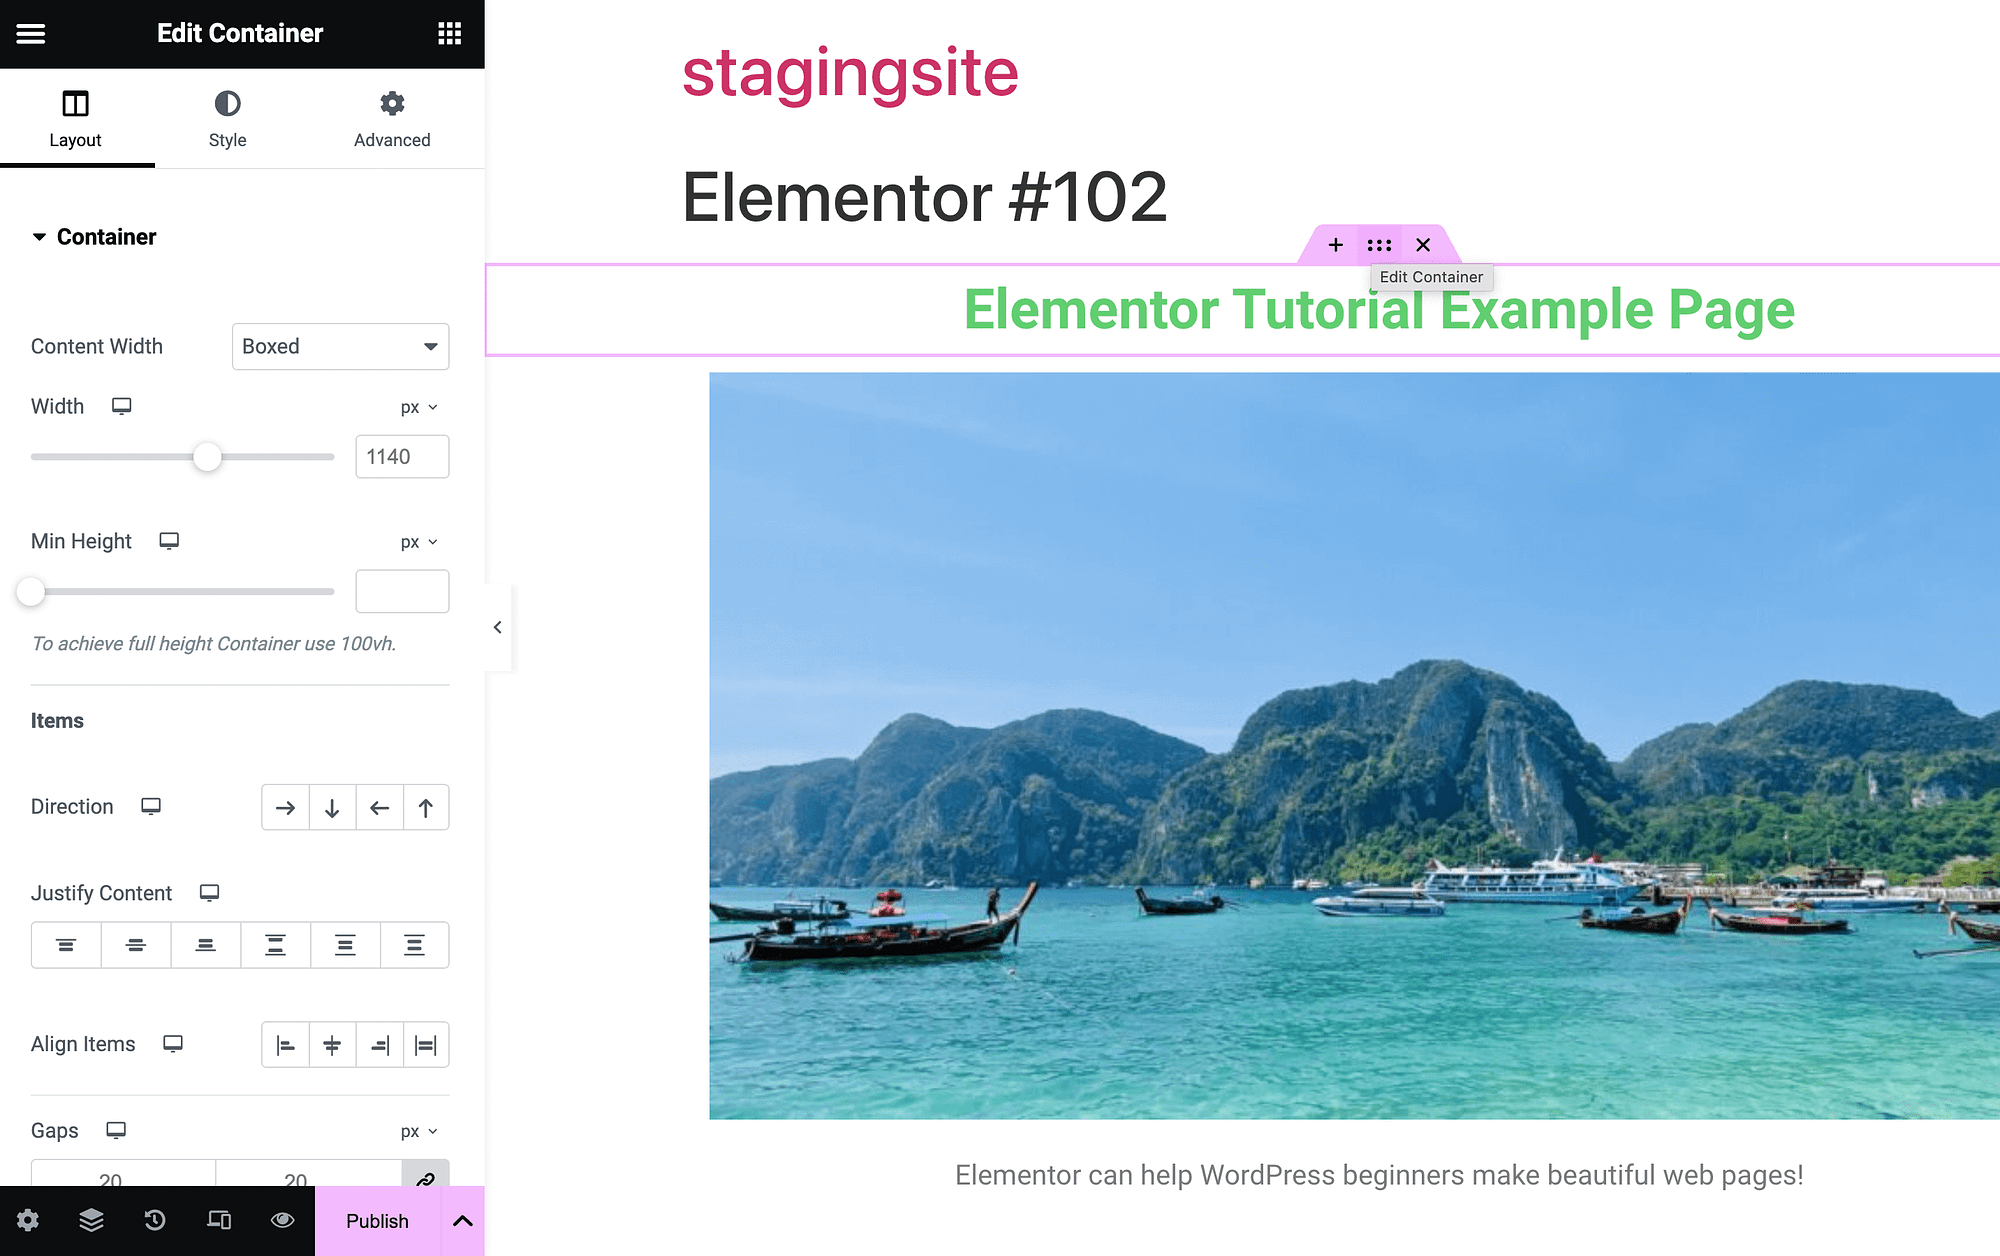
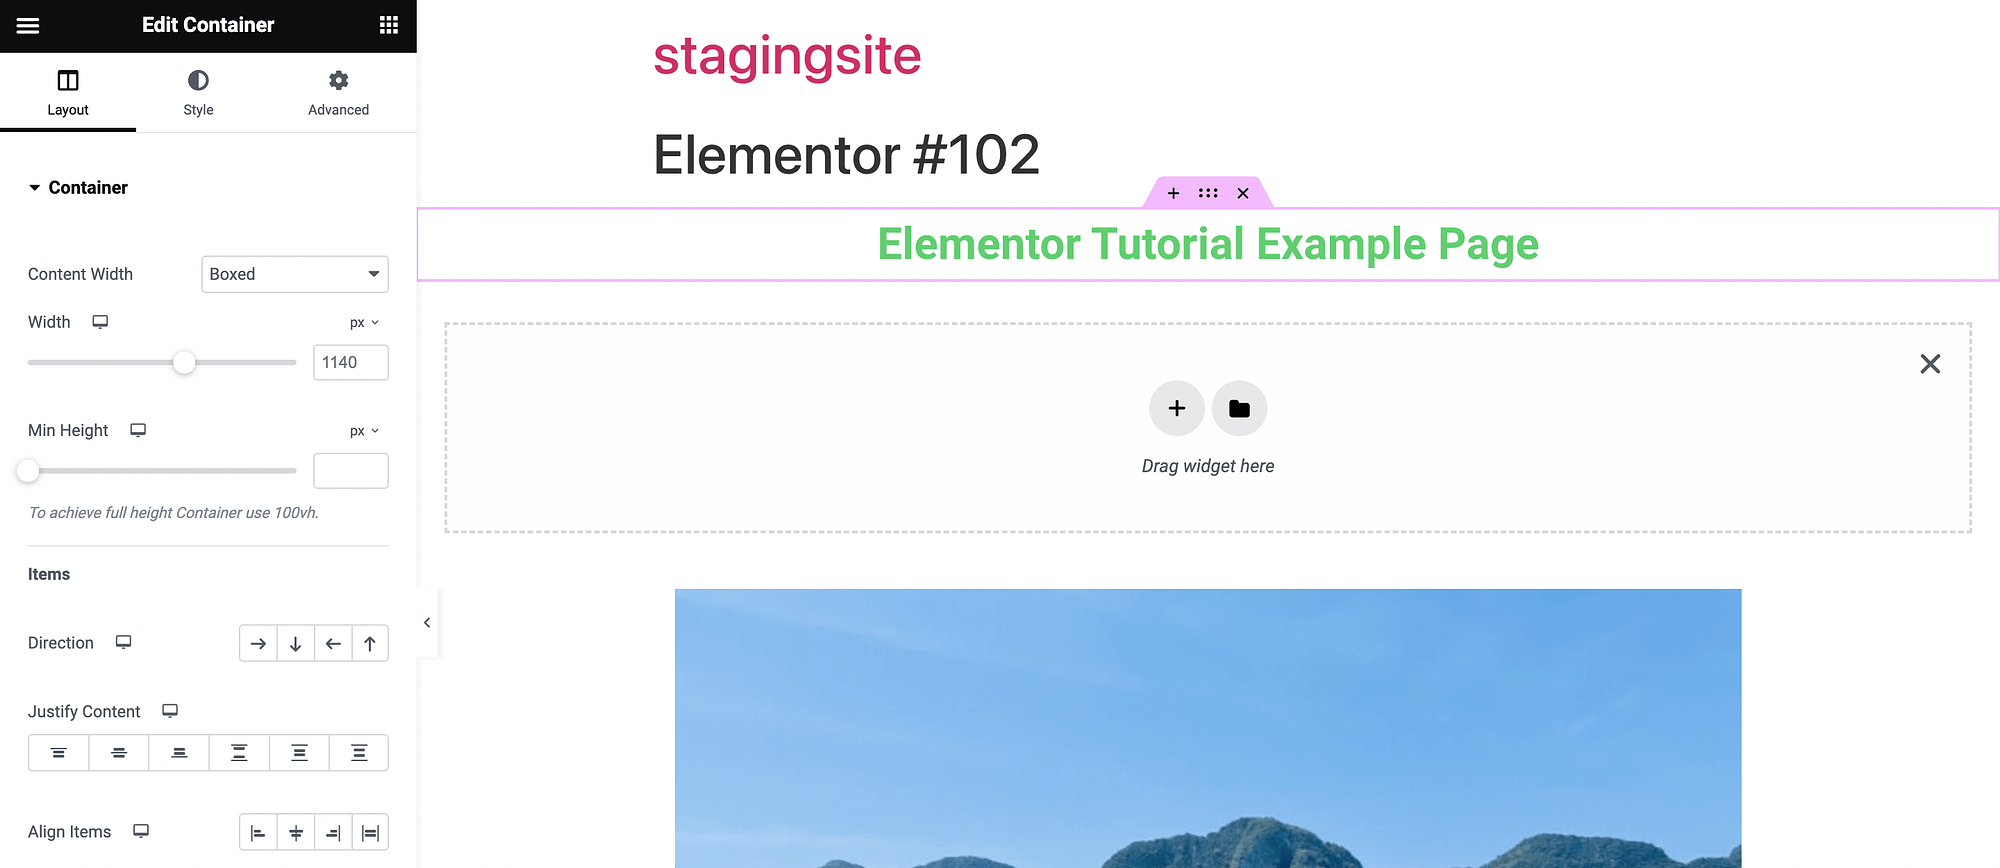
The container is the box that holds each page element. When you click on the + symbol, you can add a new container:
Now that you have a basic grasp of widgets and the drag and drop interface, we’re going to dive into some more advanced features. But first, now would be a good time to save your work.
To do this, expand your menu options using the arrow next to Publish. Save your work as a draft or template:
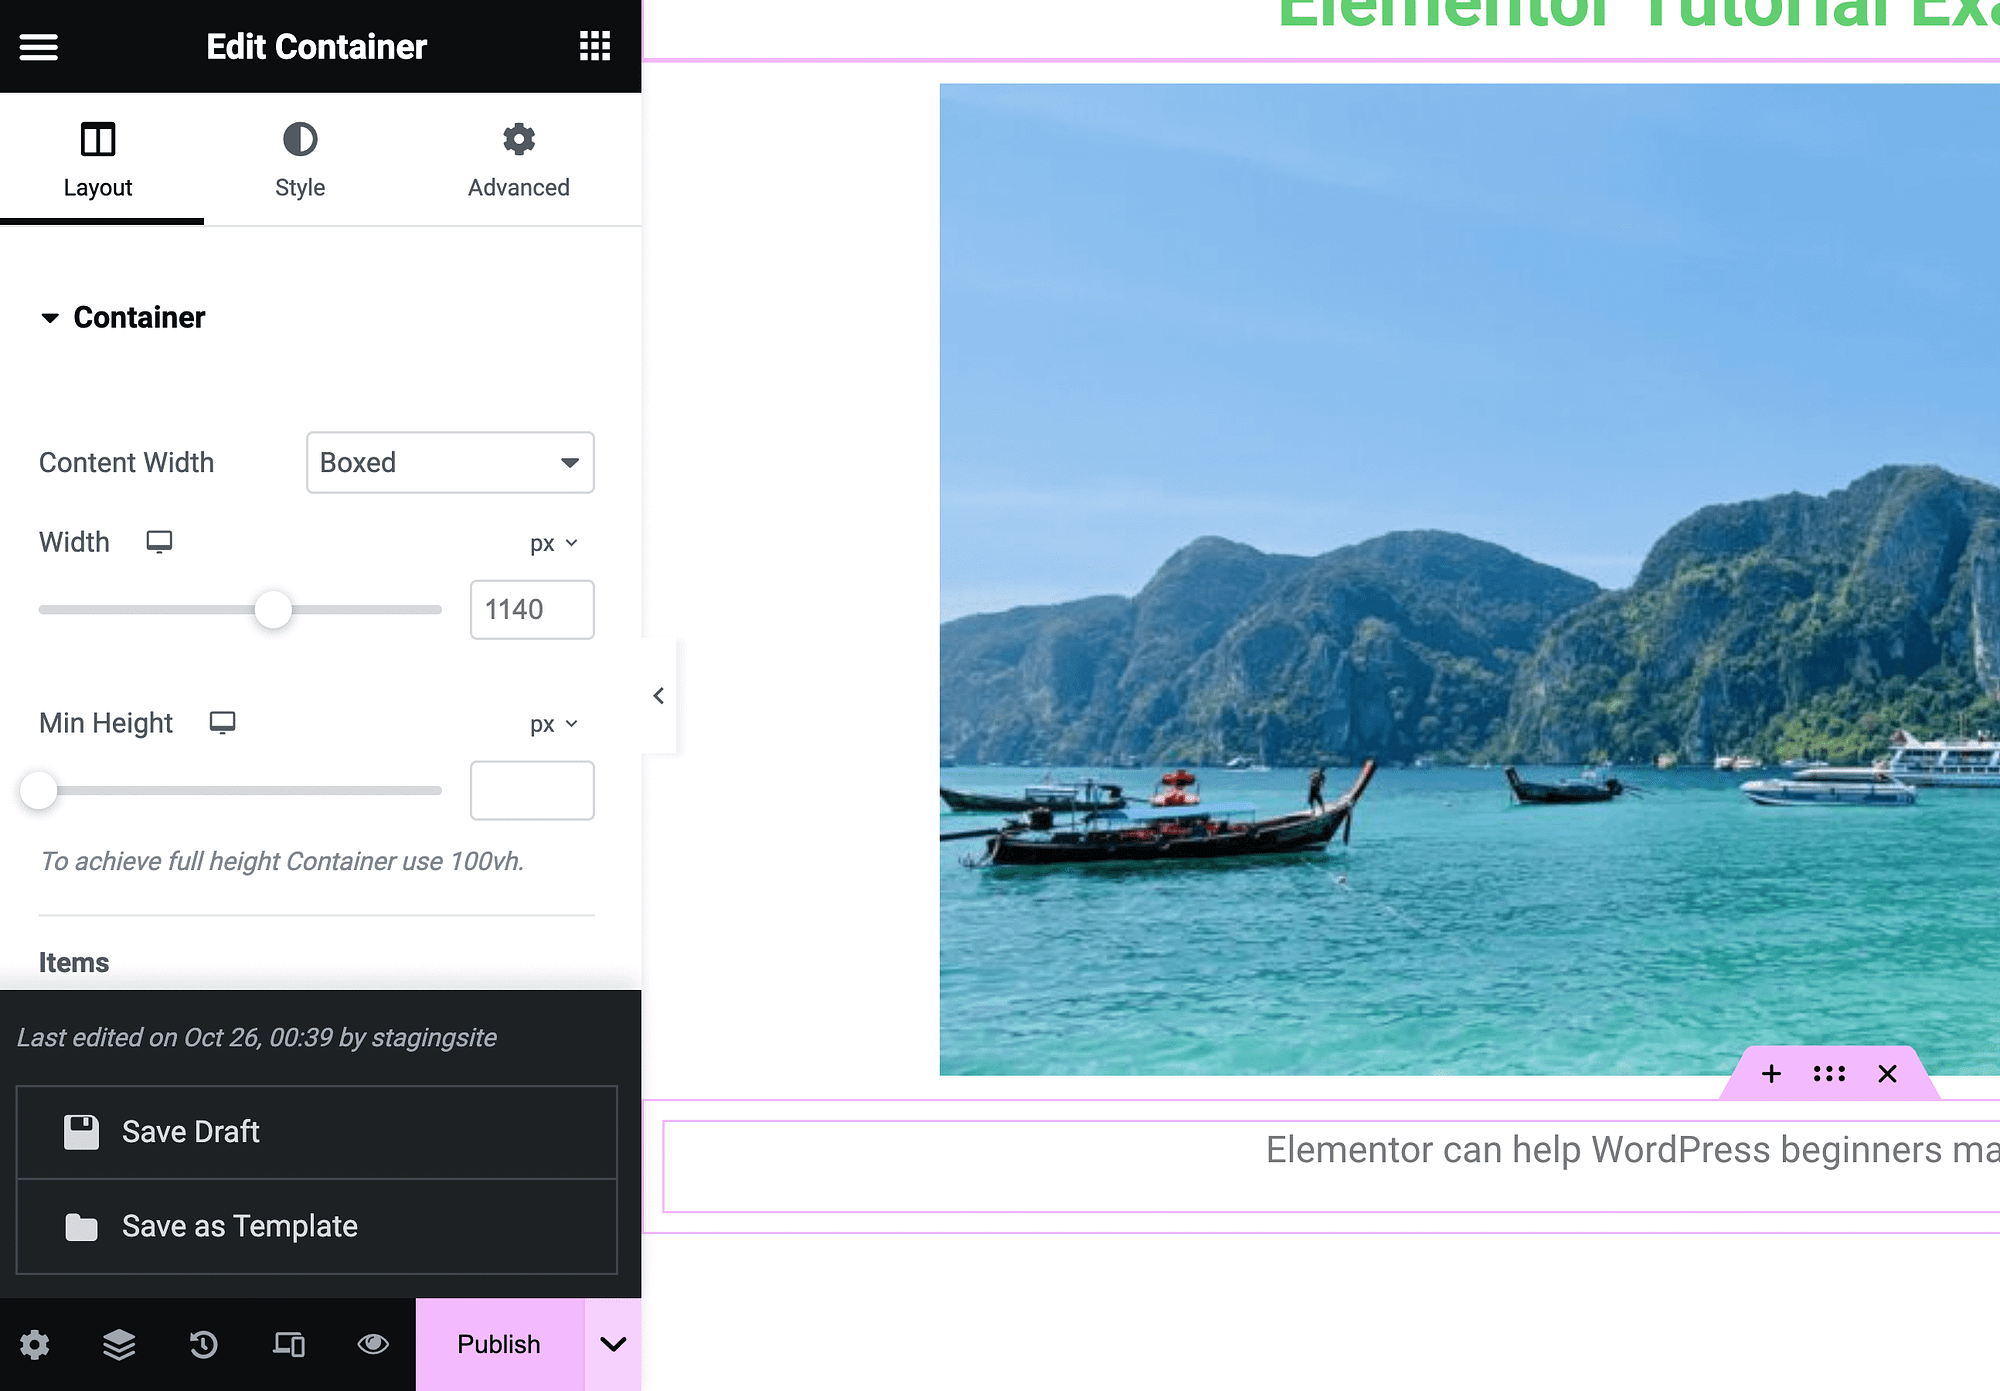
Then, when you’re ready for the page to be made public, hit Publish.
Also, note that every page you make with the page builder will have a heading at the top that says “Elementor” followed by a number. This is generated upon creation. You can simply open the page in your Block Editor to delete it.
Mobile and responsive design controls 📱
95 percent of users worldwide access the internet using a mobile phone [1]. Therefore, it’s crucial that every website look good and function properly on every device.
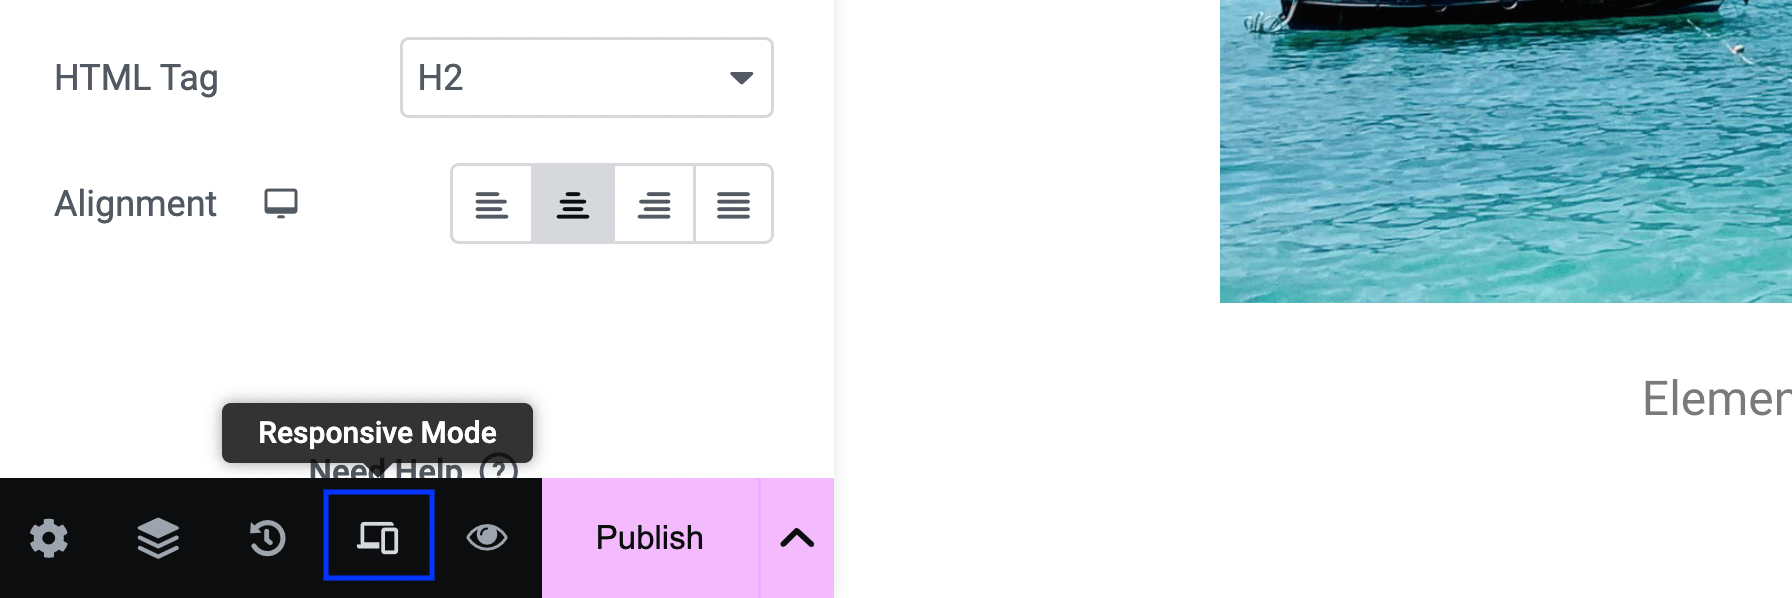
To tap into your responsive design controls in Elementor, you can start by launching Responsive Mode in the bottom left-hand corner of your screen:
This will launch some new settings at the top of your editor:
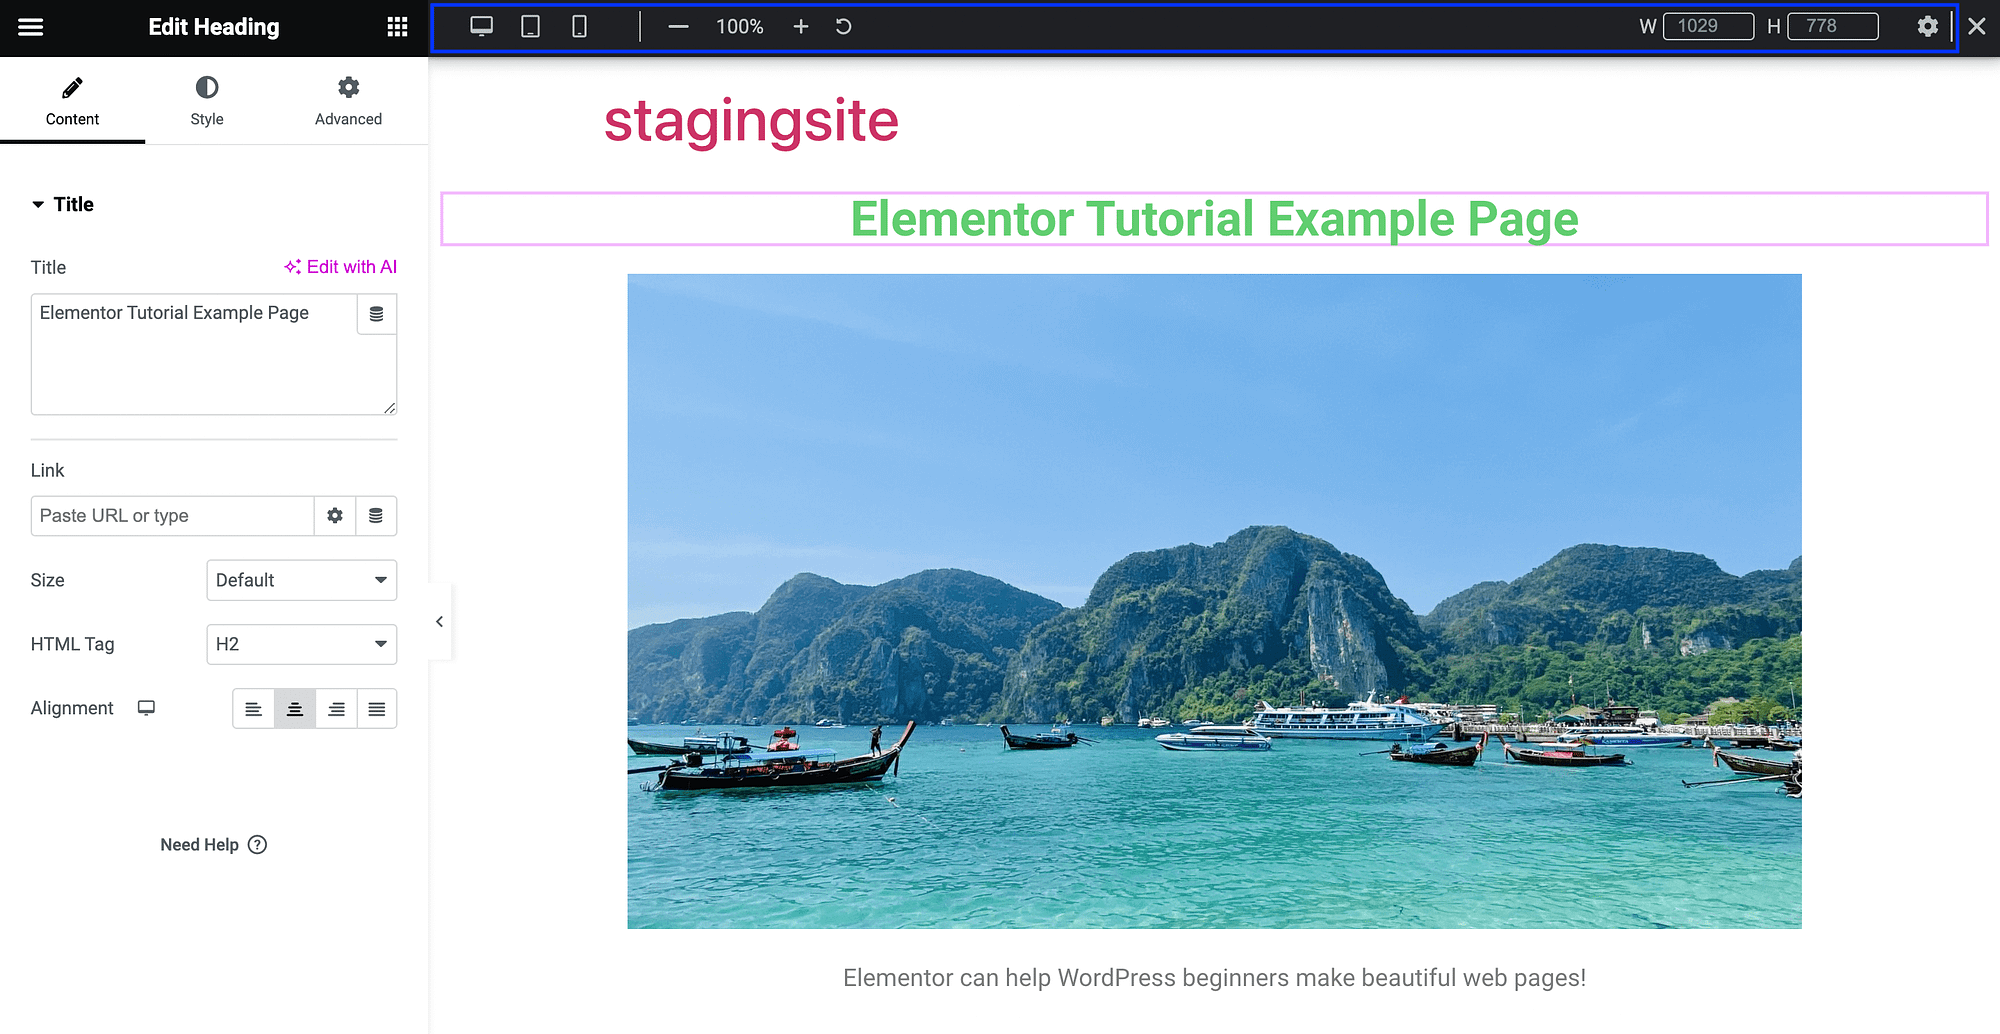
Perhaps the most useful feature here is the ability to view your current page as if it were on another device. By default, you’ll see how your page appears on desktop, but you can also check out a tablet or a mobile device view:
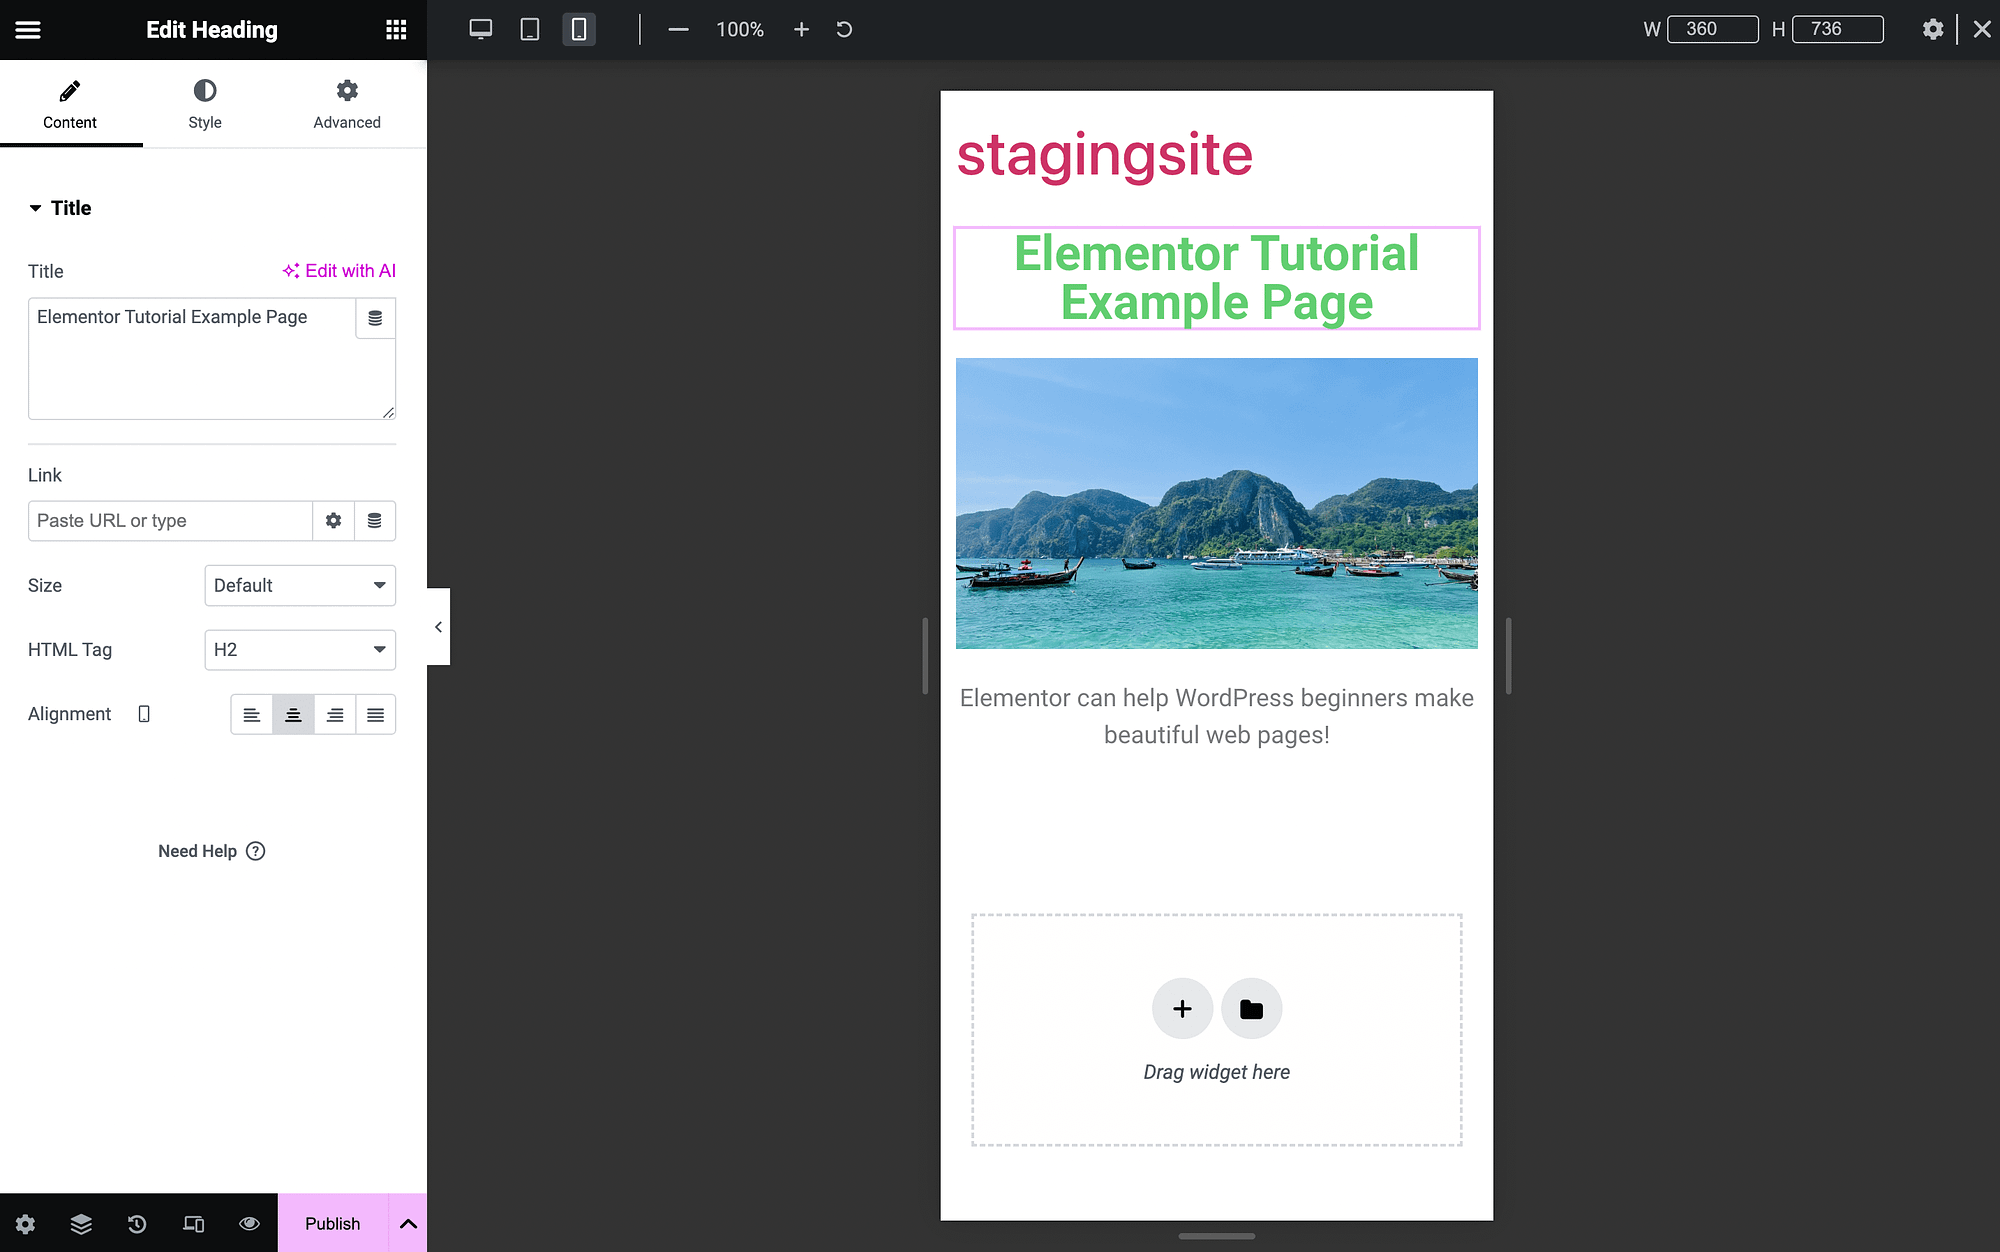
Using a responsive WordPress theme is the best way to ensure your site is mobile-friendly, but these features are extremely valuable.
Additionally, you can access more responsive features in your Advanced widget settings:
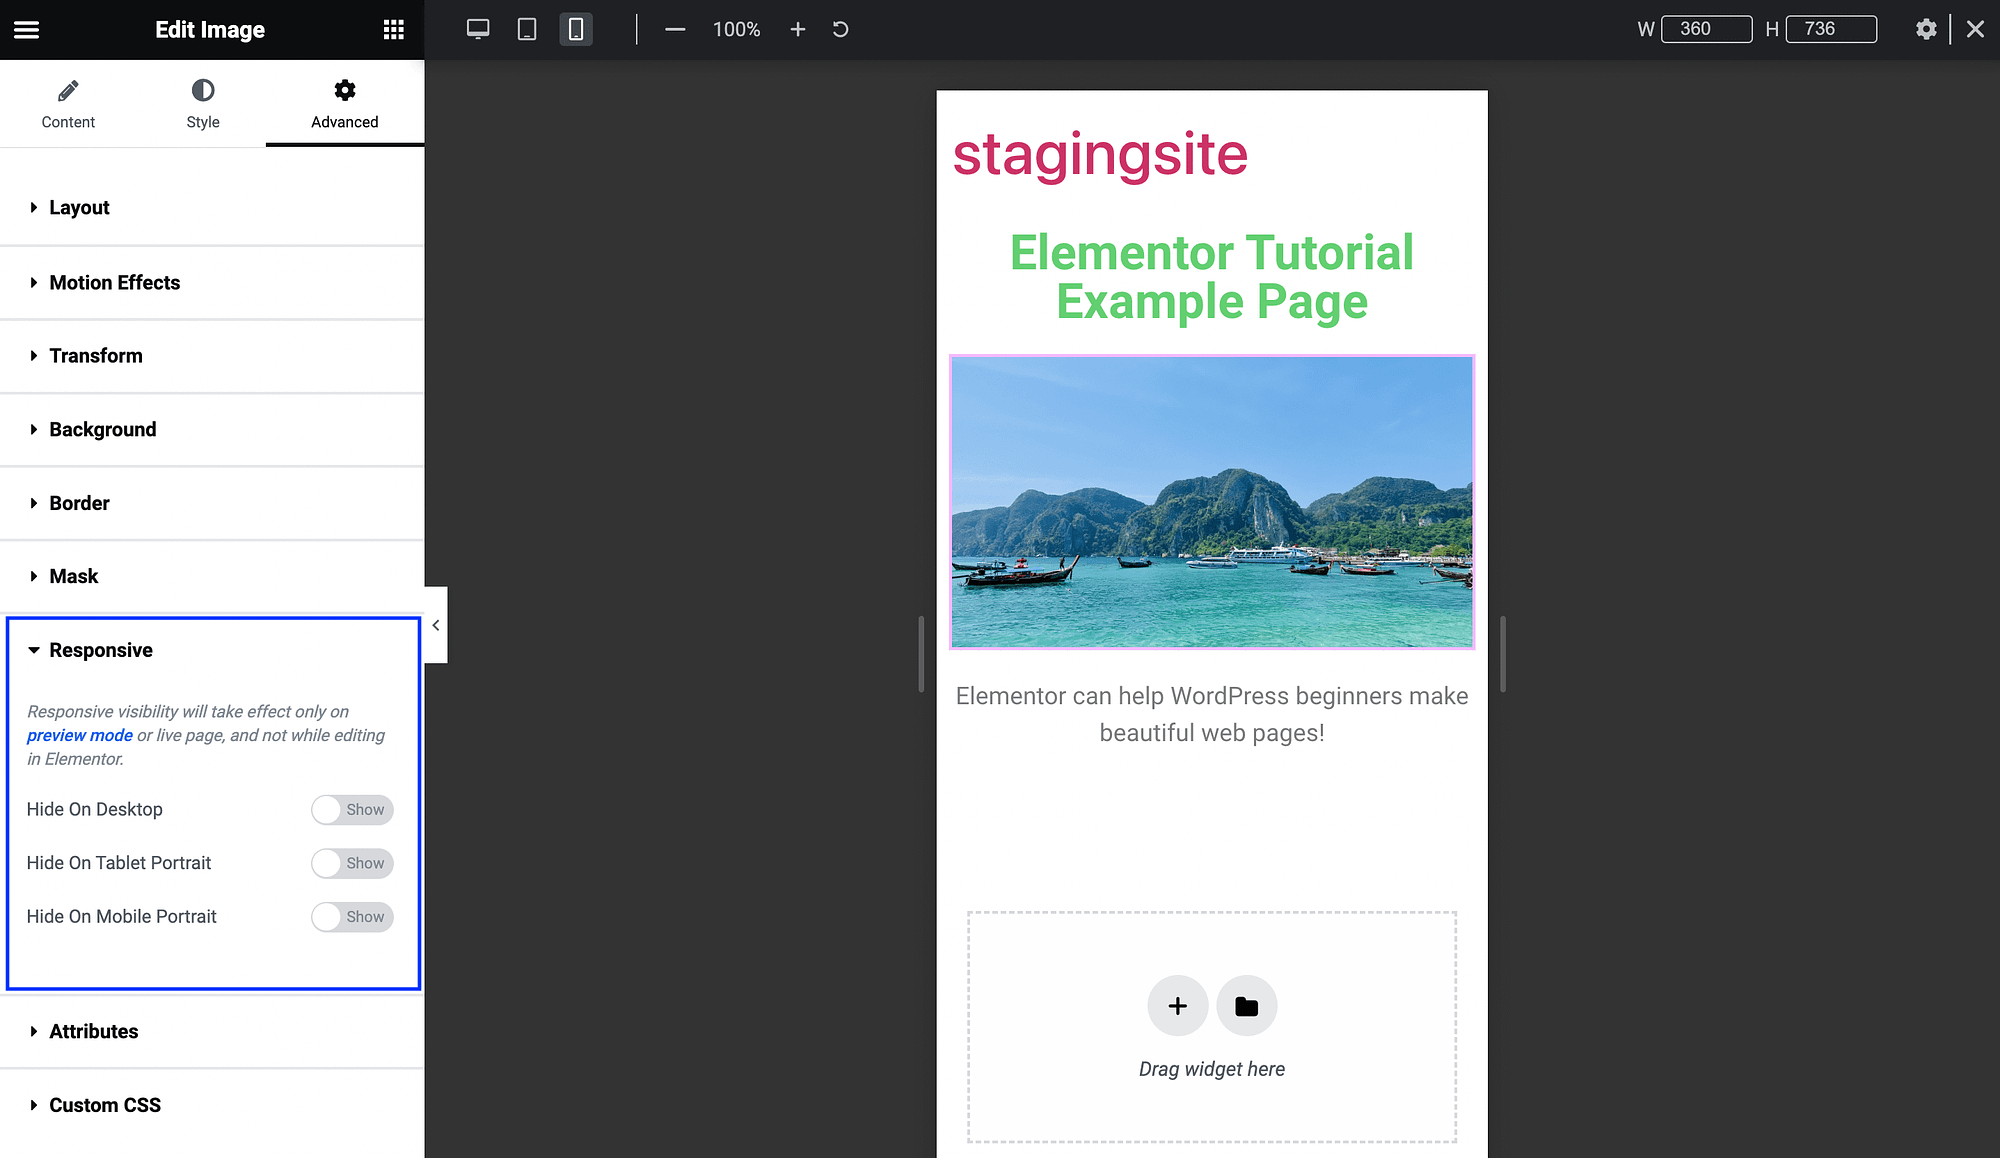
Here, you can toggle buttons to remove certain page elements on certain devices. For instance, you might do this for a larger video on a homepage.
Elementor AI 🤖
Finally, one of the newest and most cutting-edge features covered in this Elementor tutorial is Elementor AI. With the free version of Elementor, you can use it to generate text, images, and even code, using built-in artificial intelligence (AI).
These features are super easy to use, you just need to know where to find them. To generate text, simply locate the Edit with AI button:
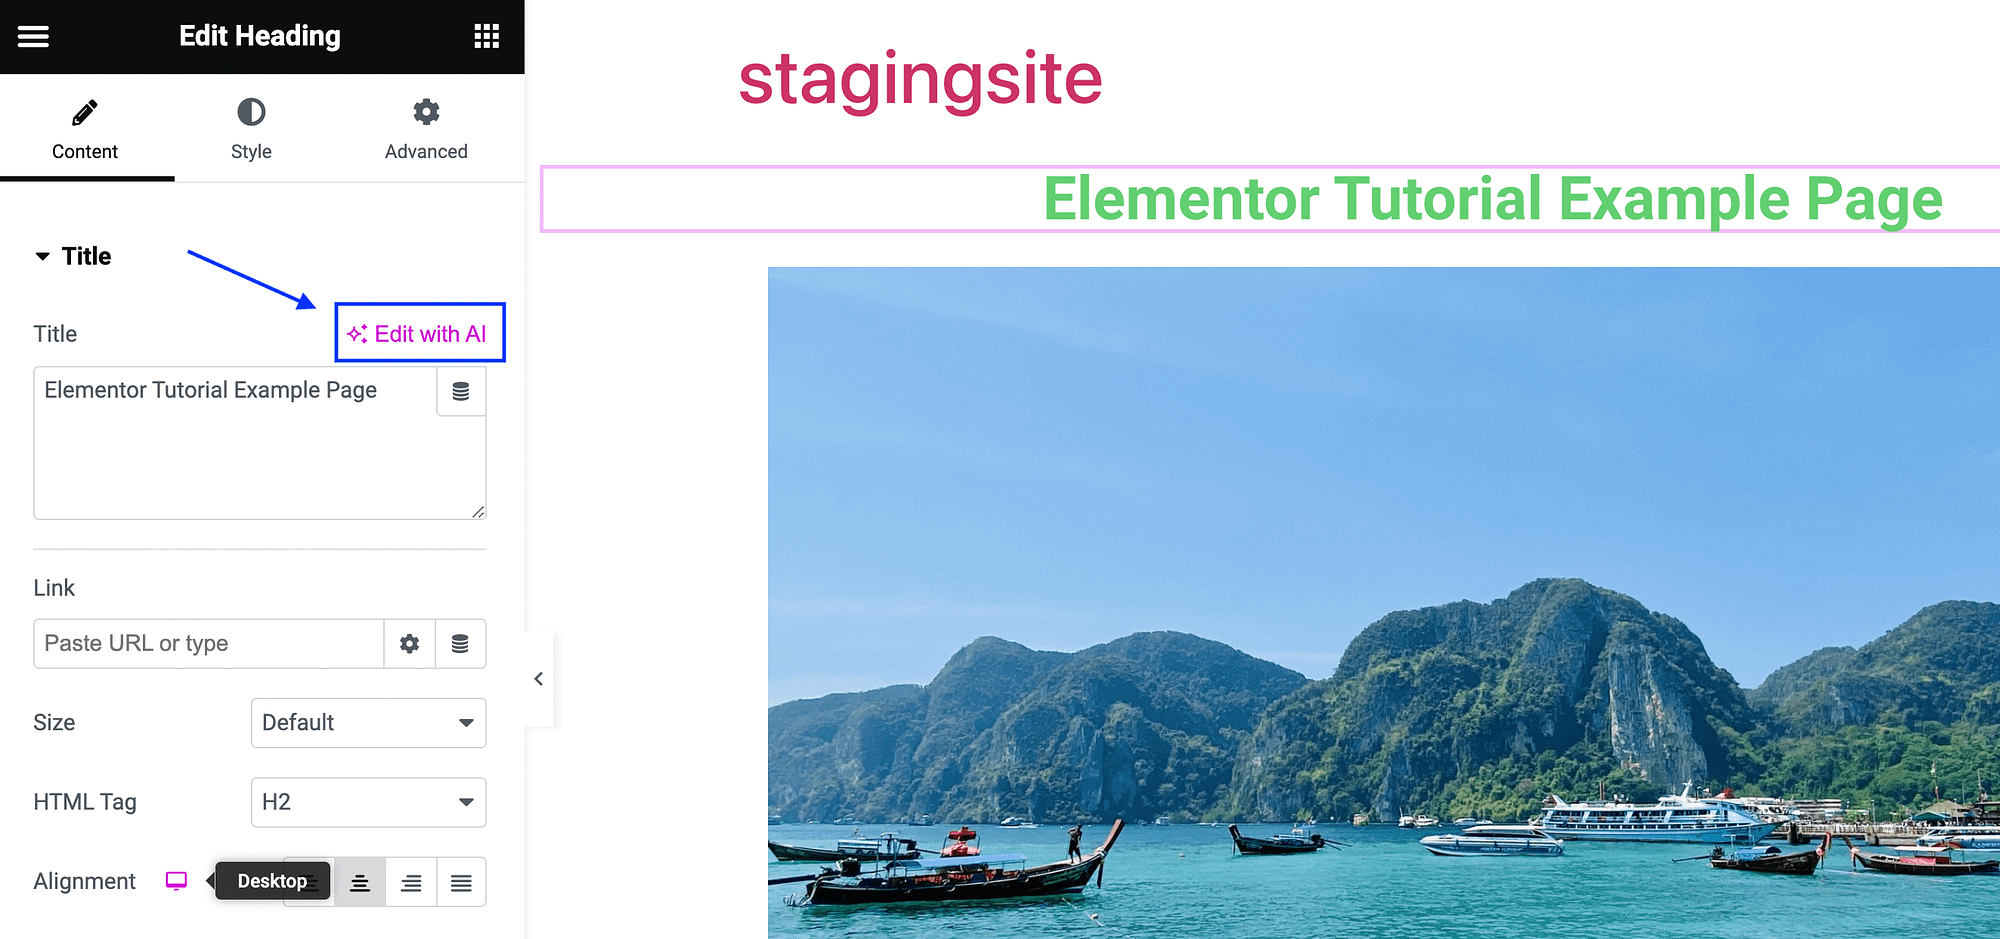
When you click on it, you’ll see a page that prompts you to connect to the tool:
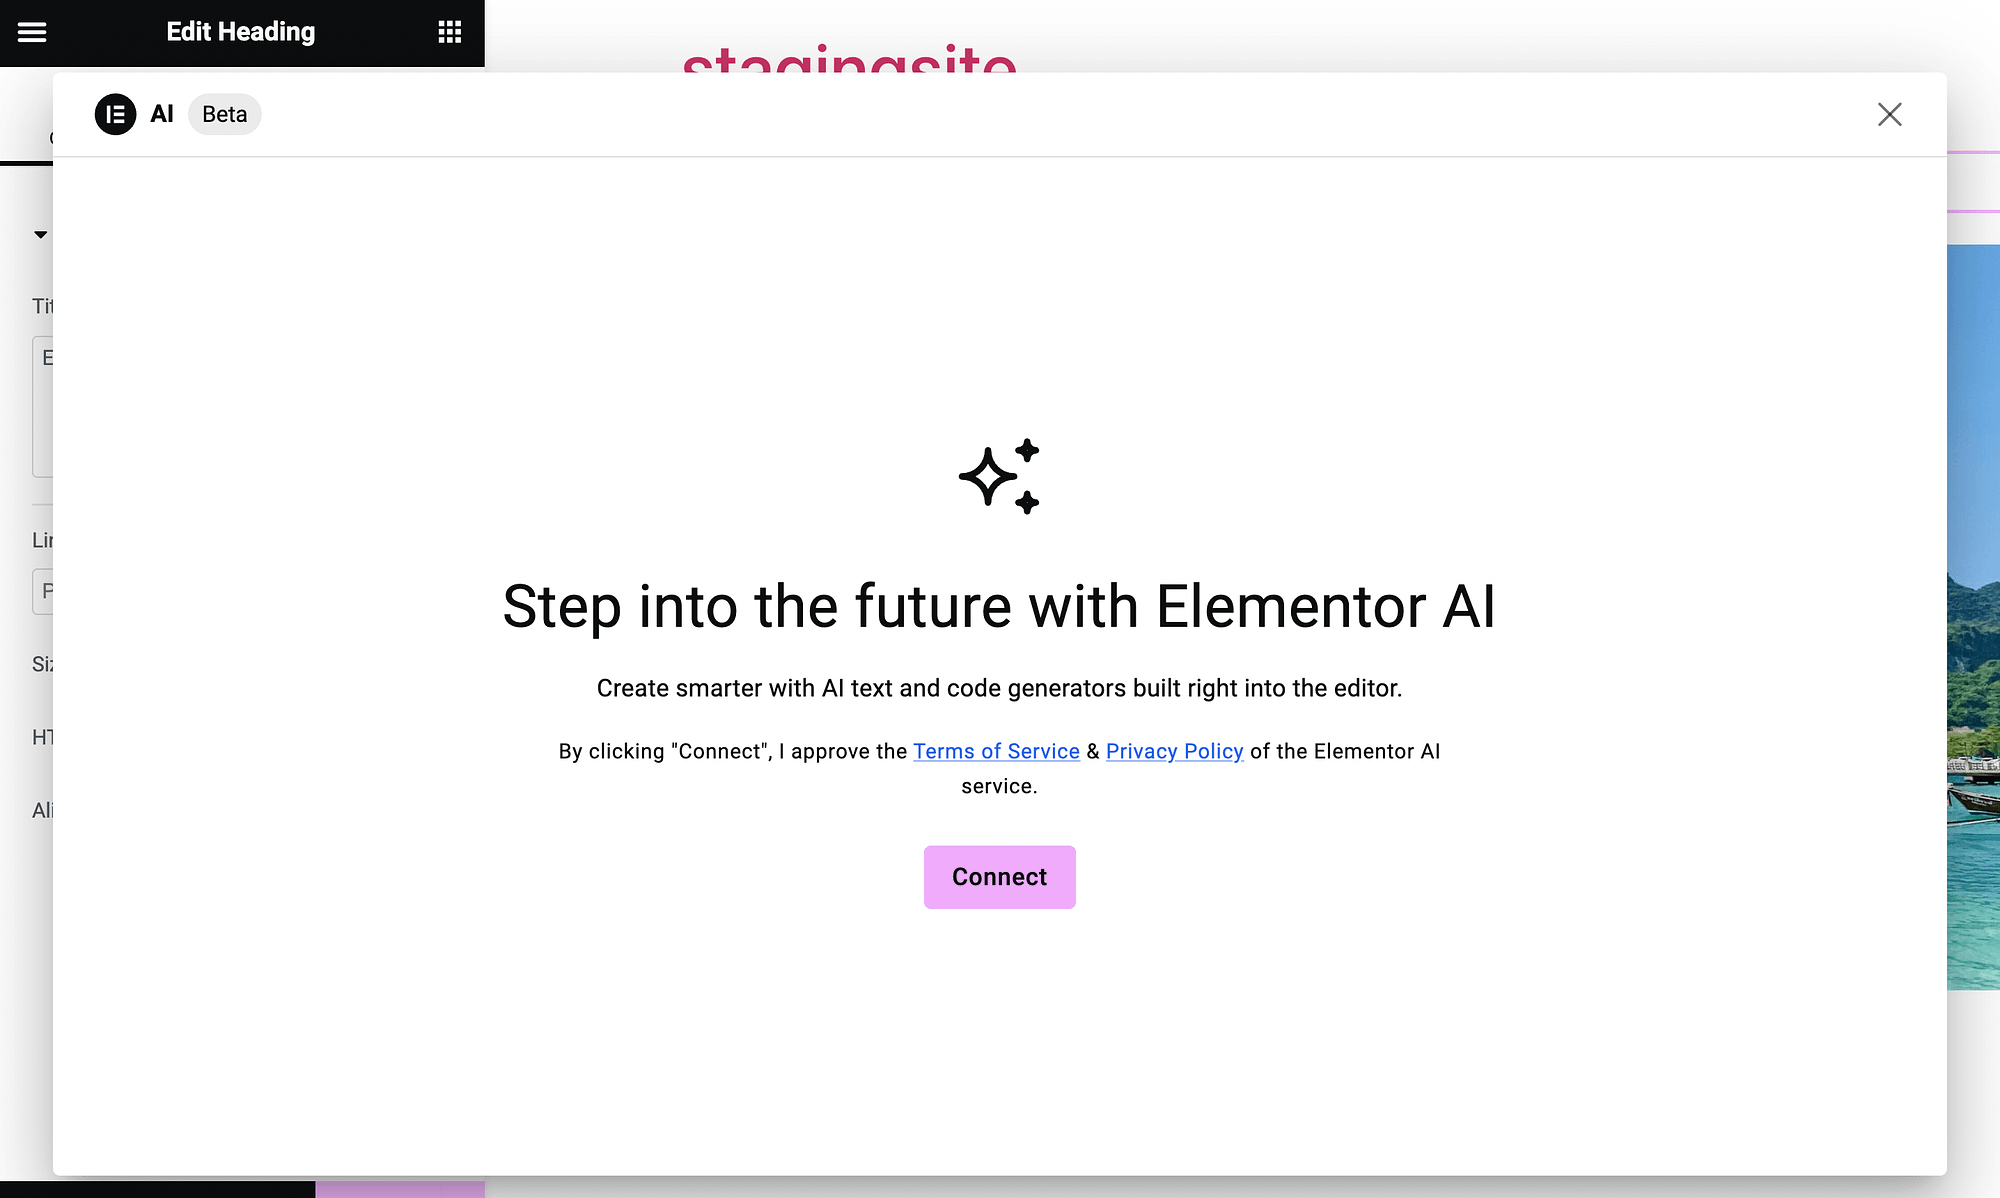
After you complete the process, you’ll see the AI text generator box:
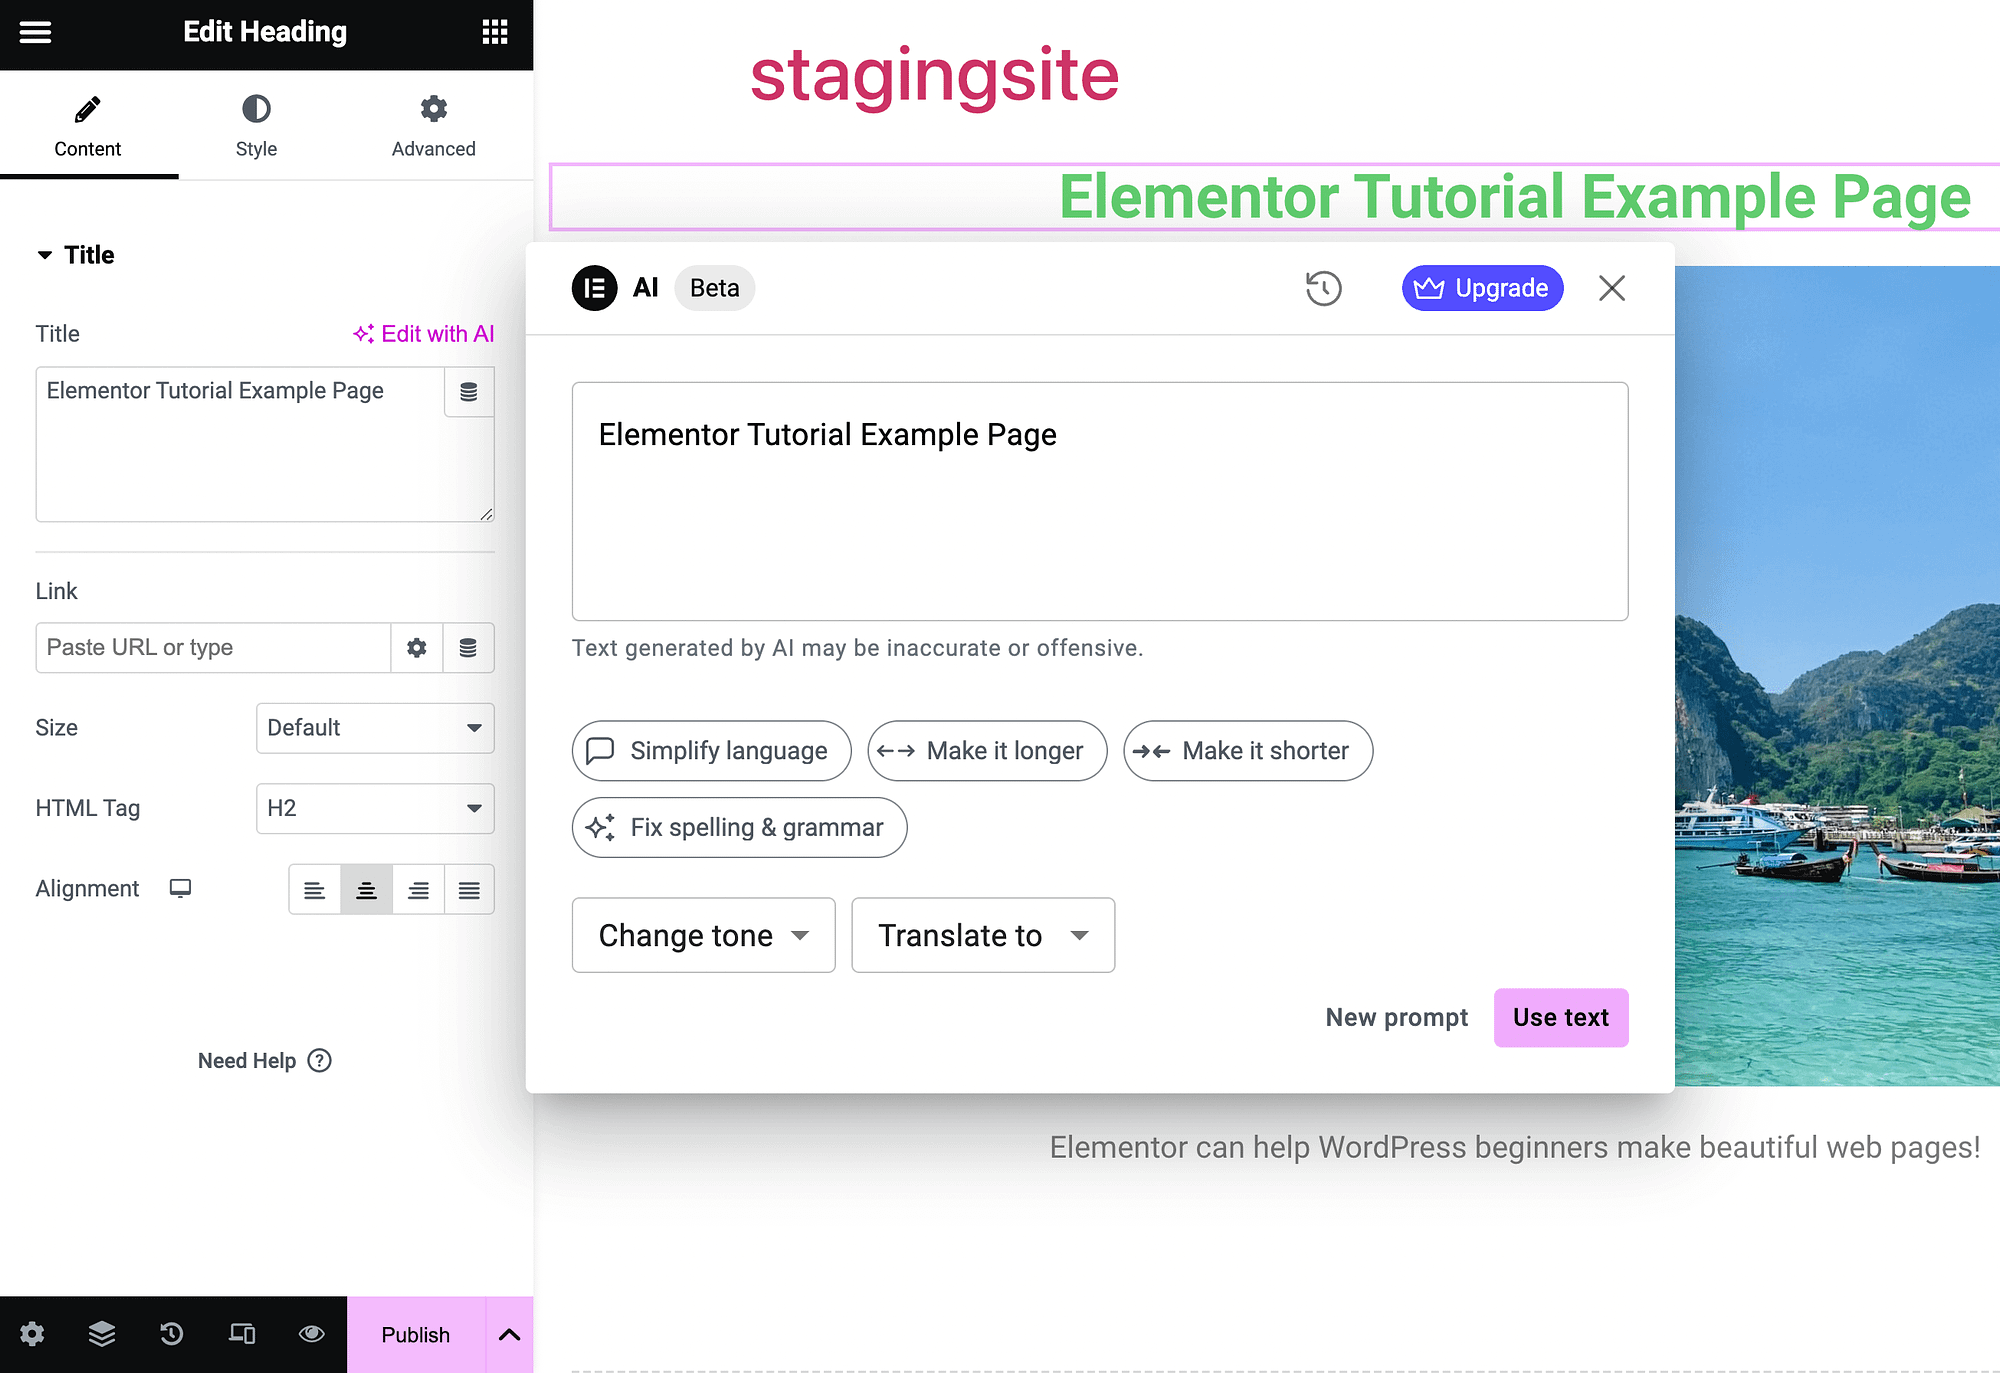
Use it just as you would any other AI text generator. It even includes sophisticated options that let you change tone and translate text. You can use it to generate taglines, product descriptions, or any type of content you need.
If you want to use AI to generate images in Elementor, simply find the Create with AI button next to any image field:
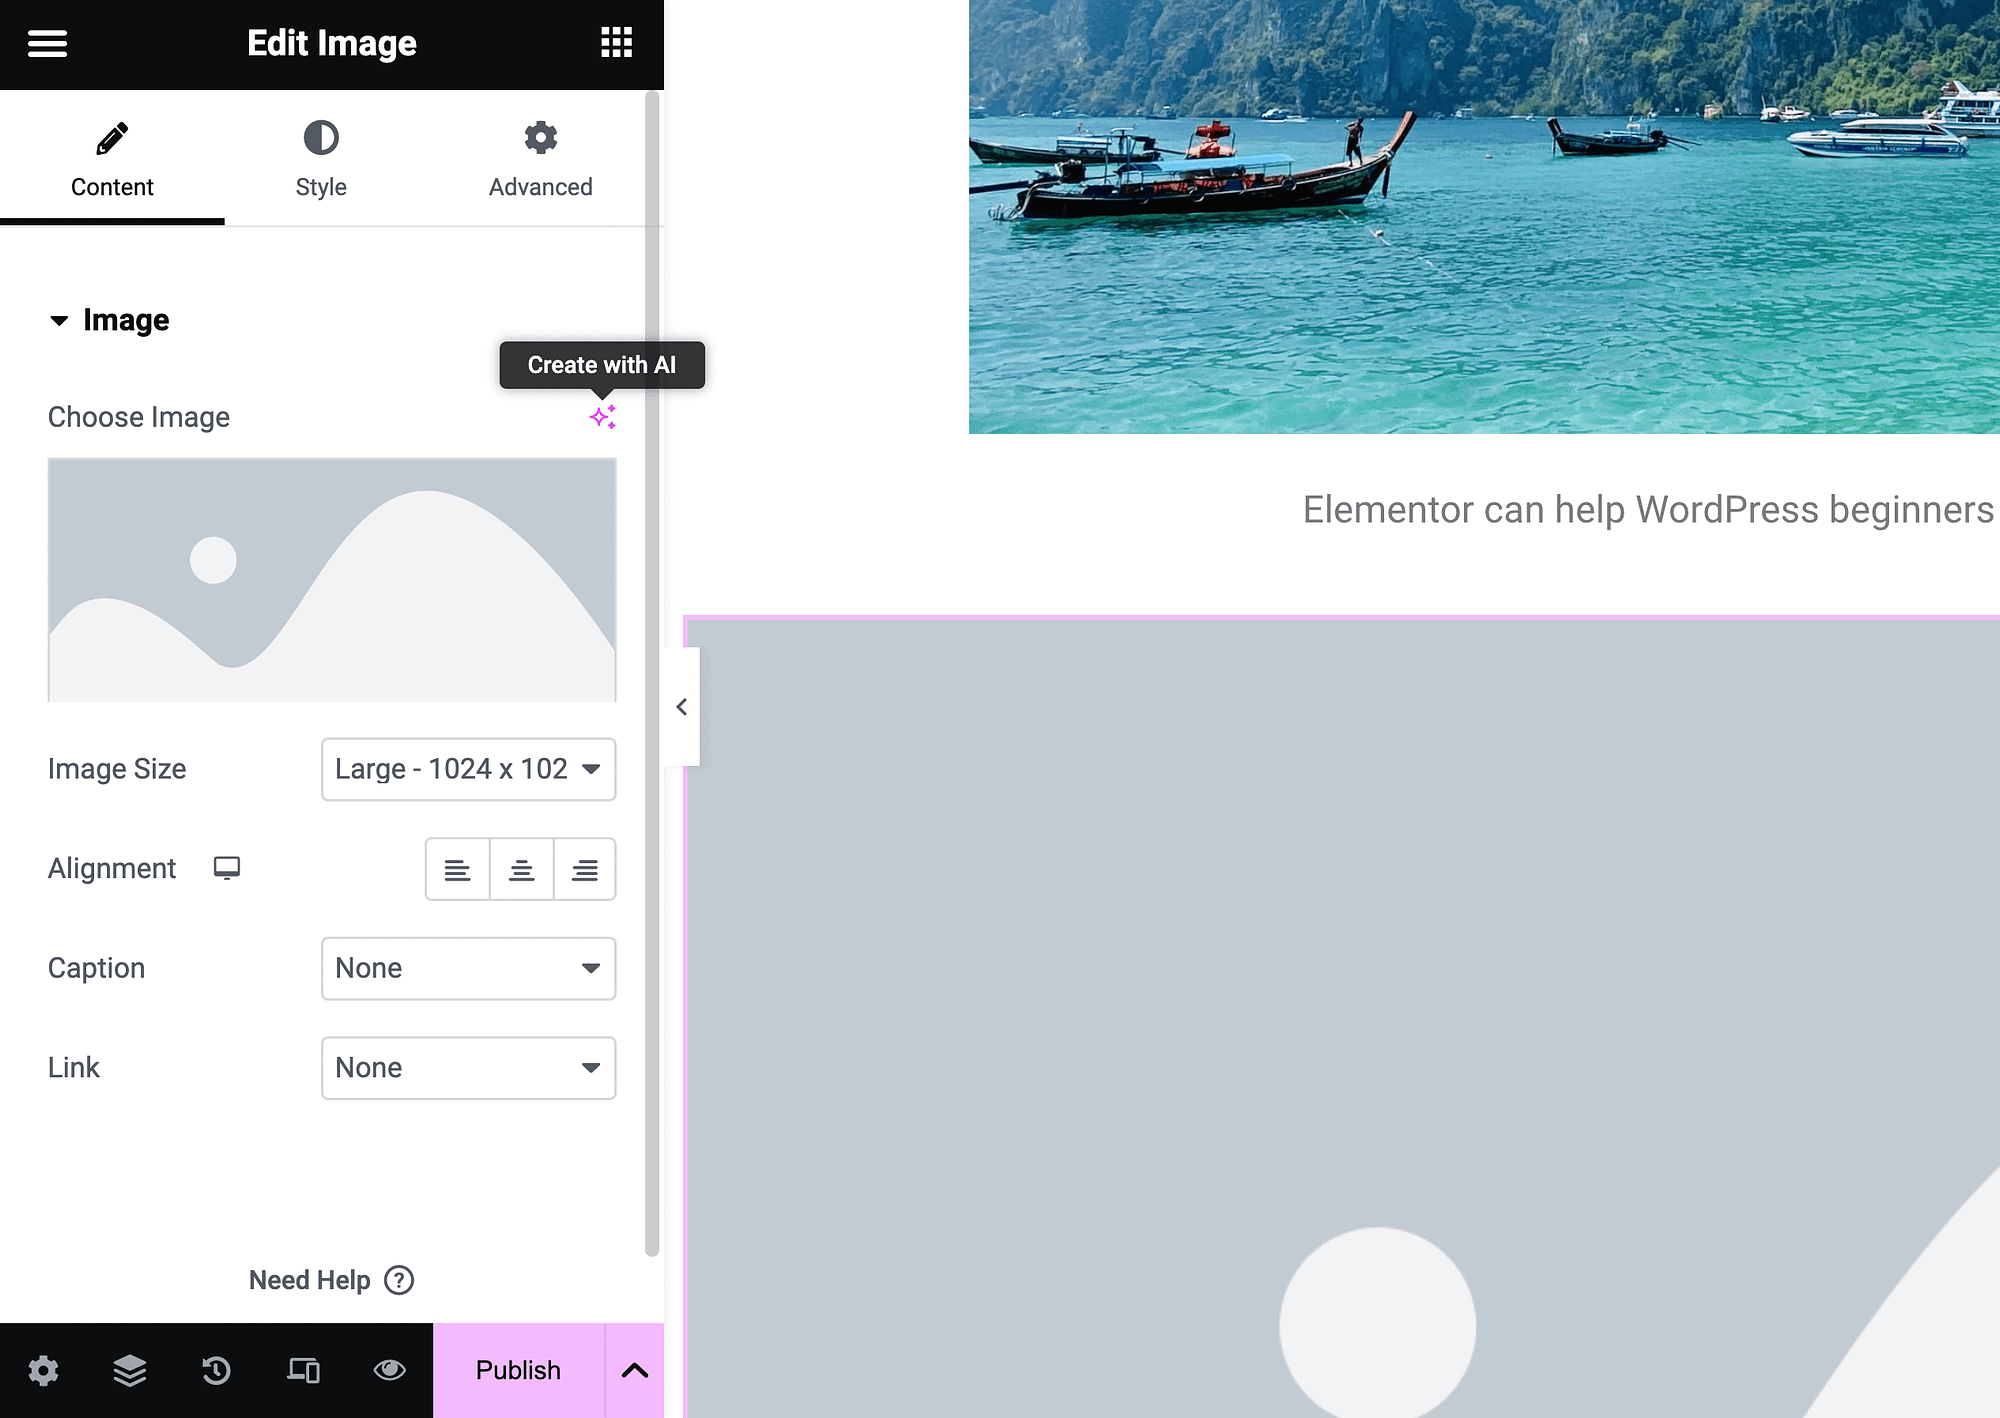
Click on it to launch the AI image generator:
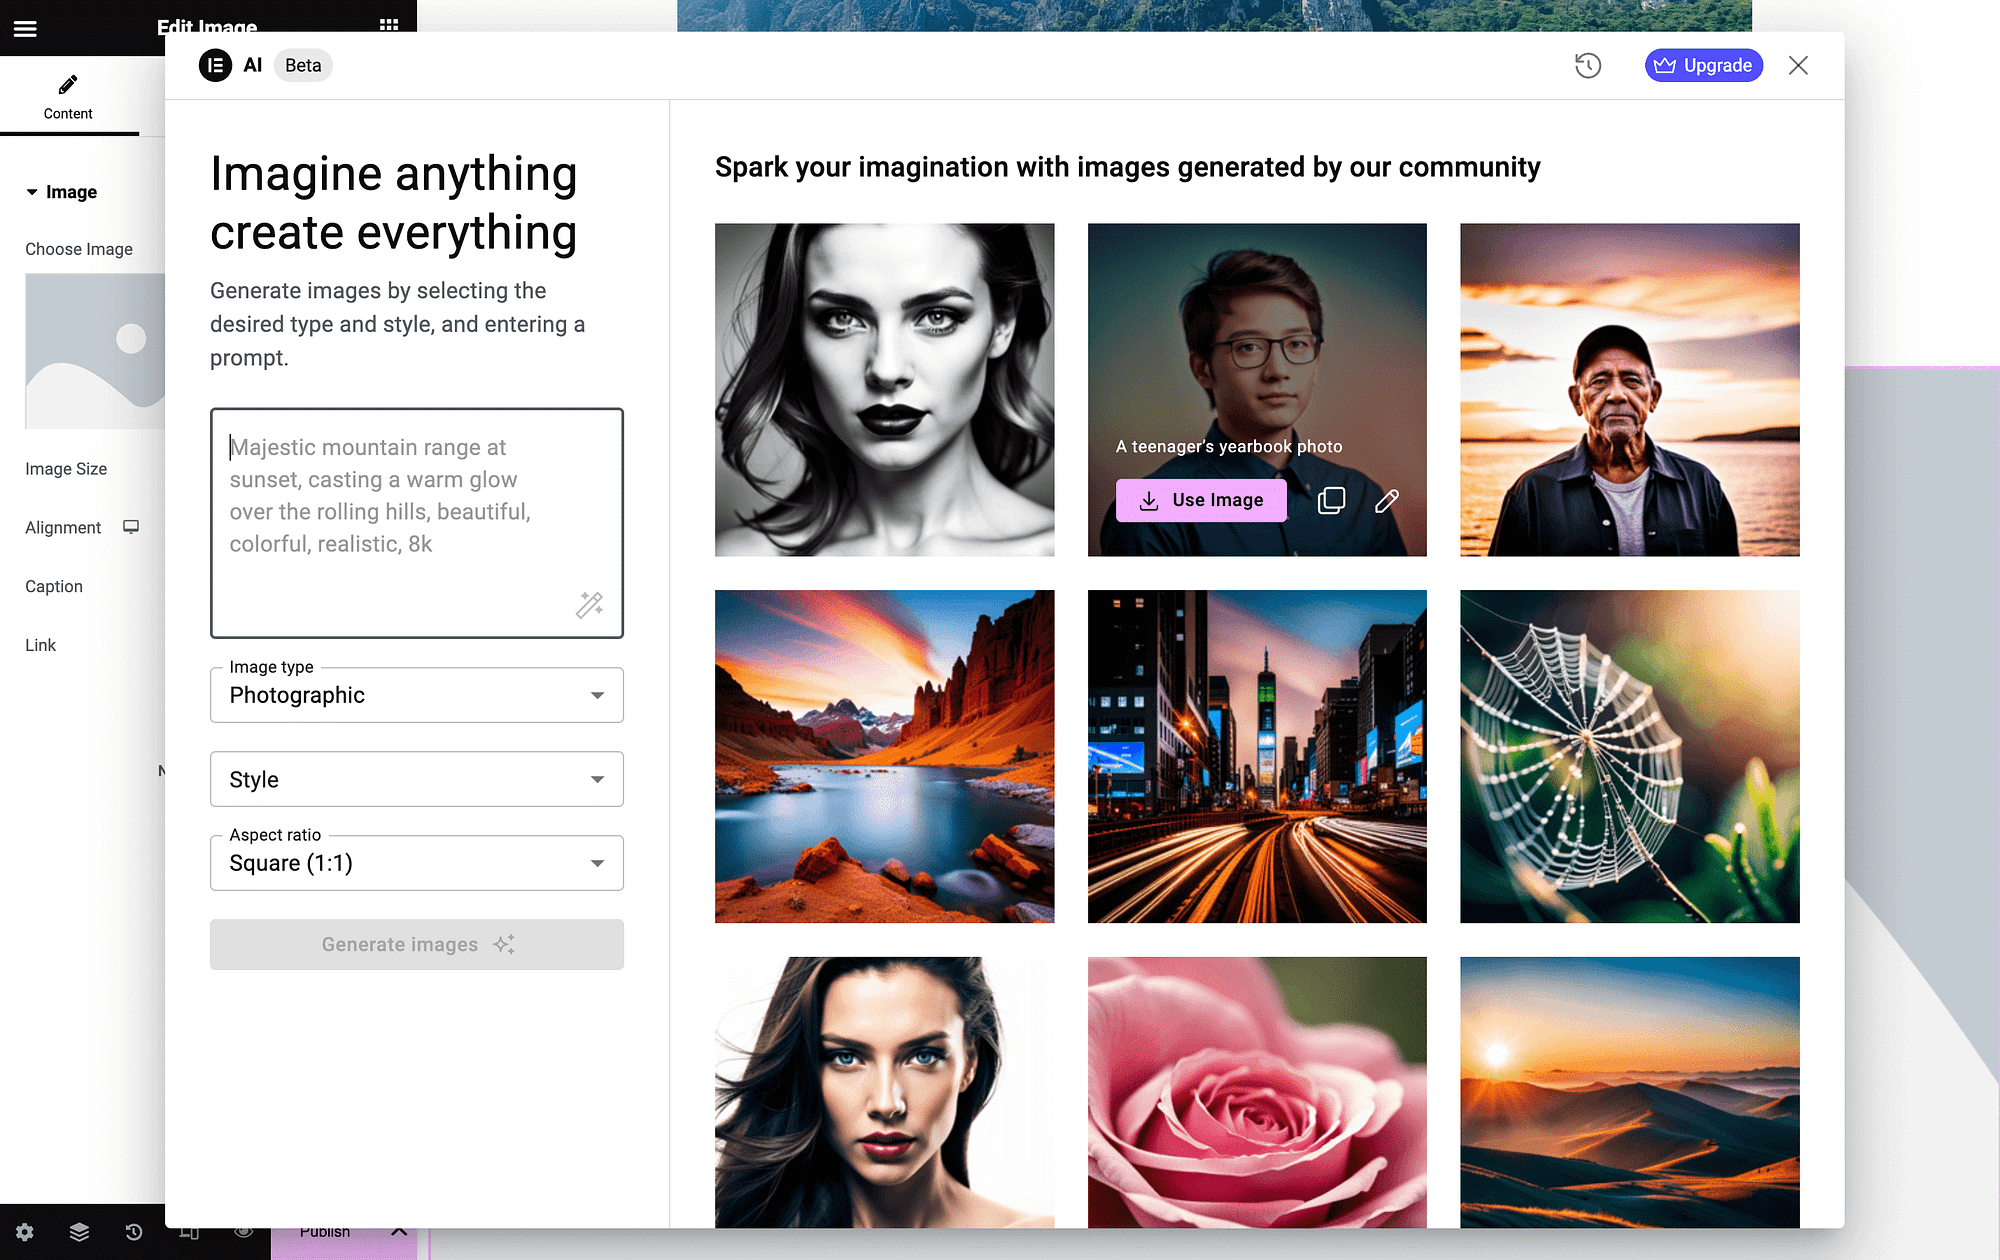
On the left you can enter your promote and customize some image settings.
Lastly, you can add an HTML widget and generate custom code with AI. Just hit Edit with AI:
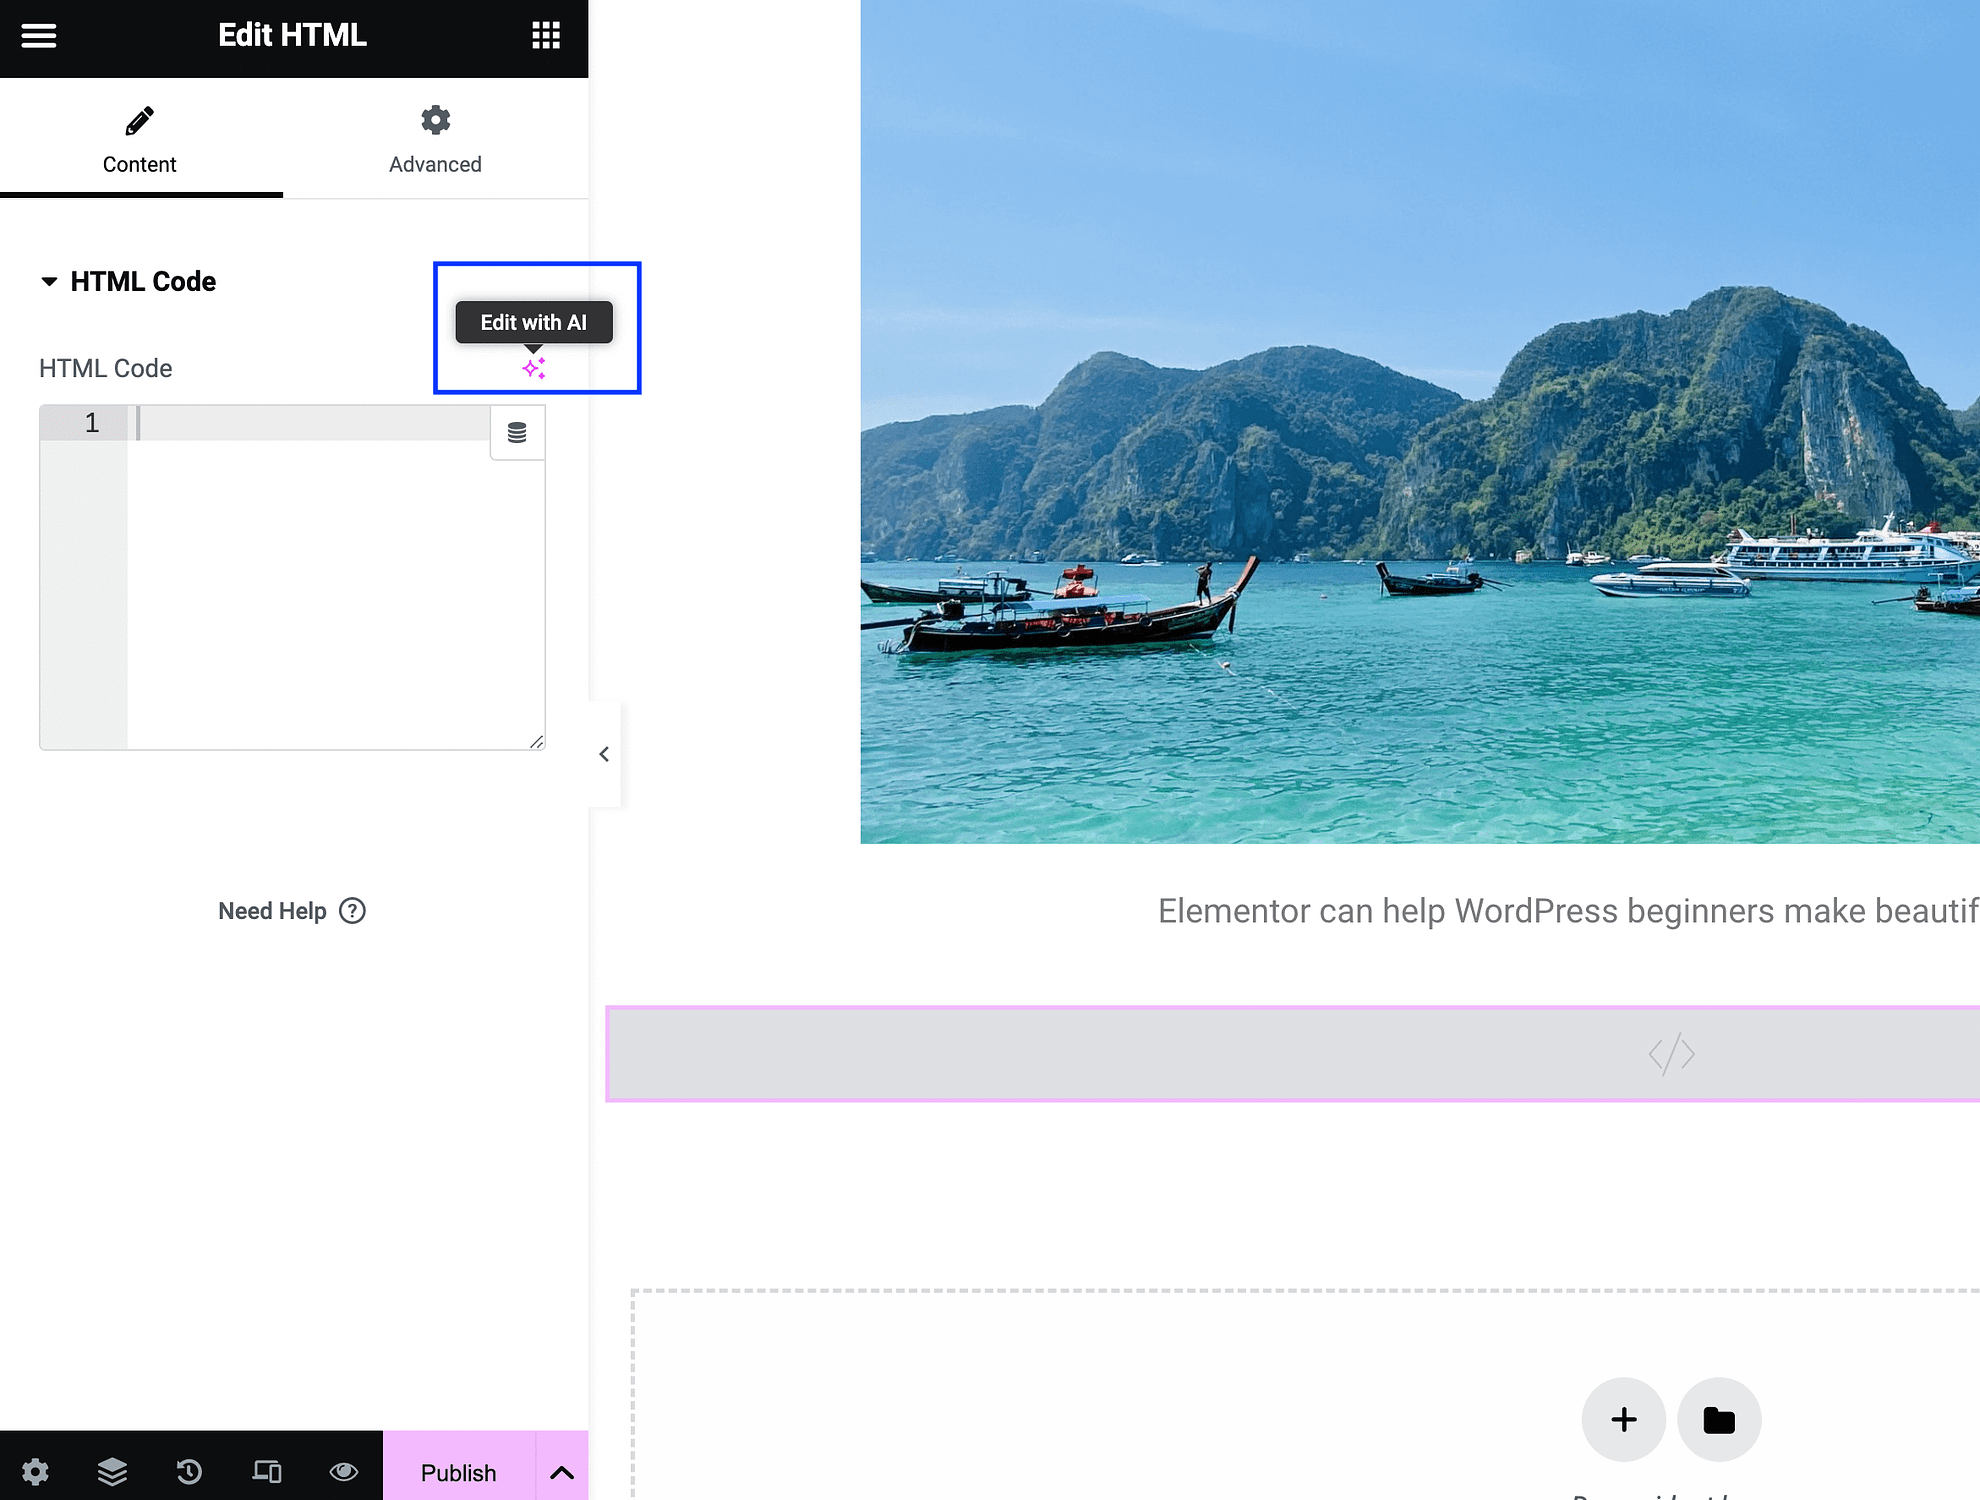
This will launch your prompt screen:
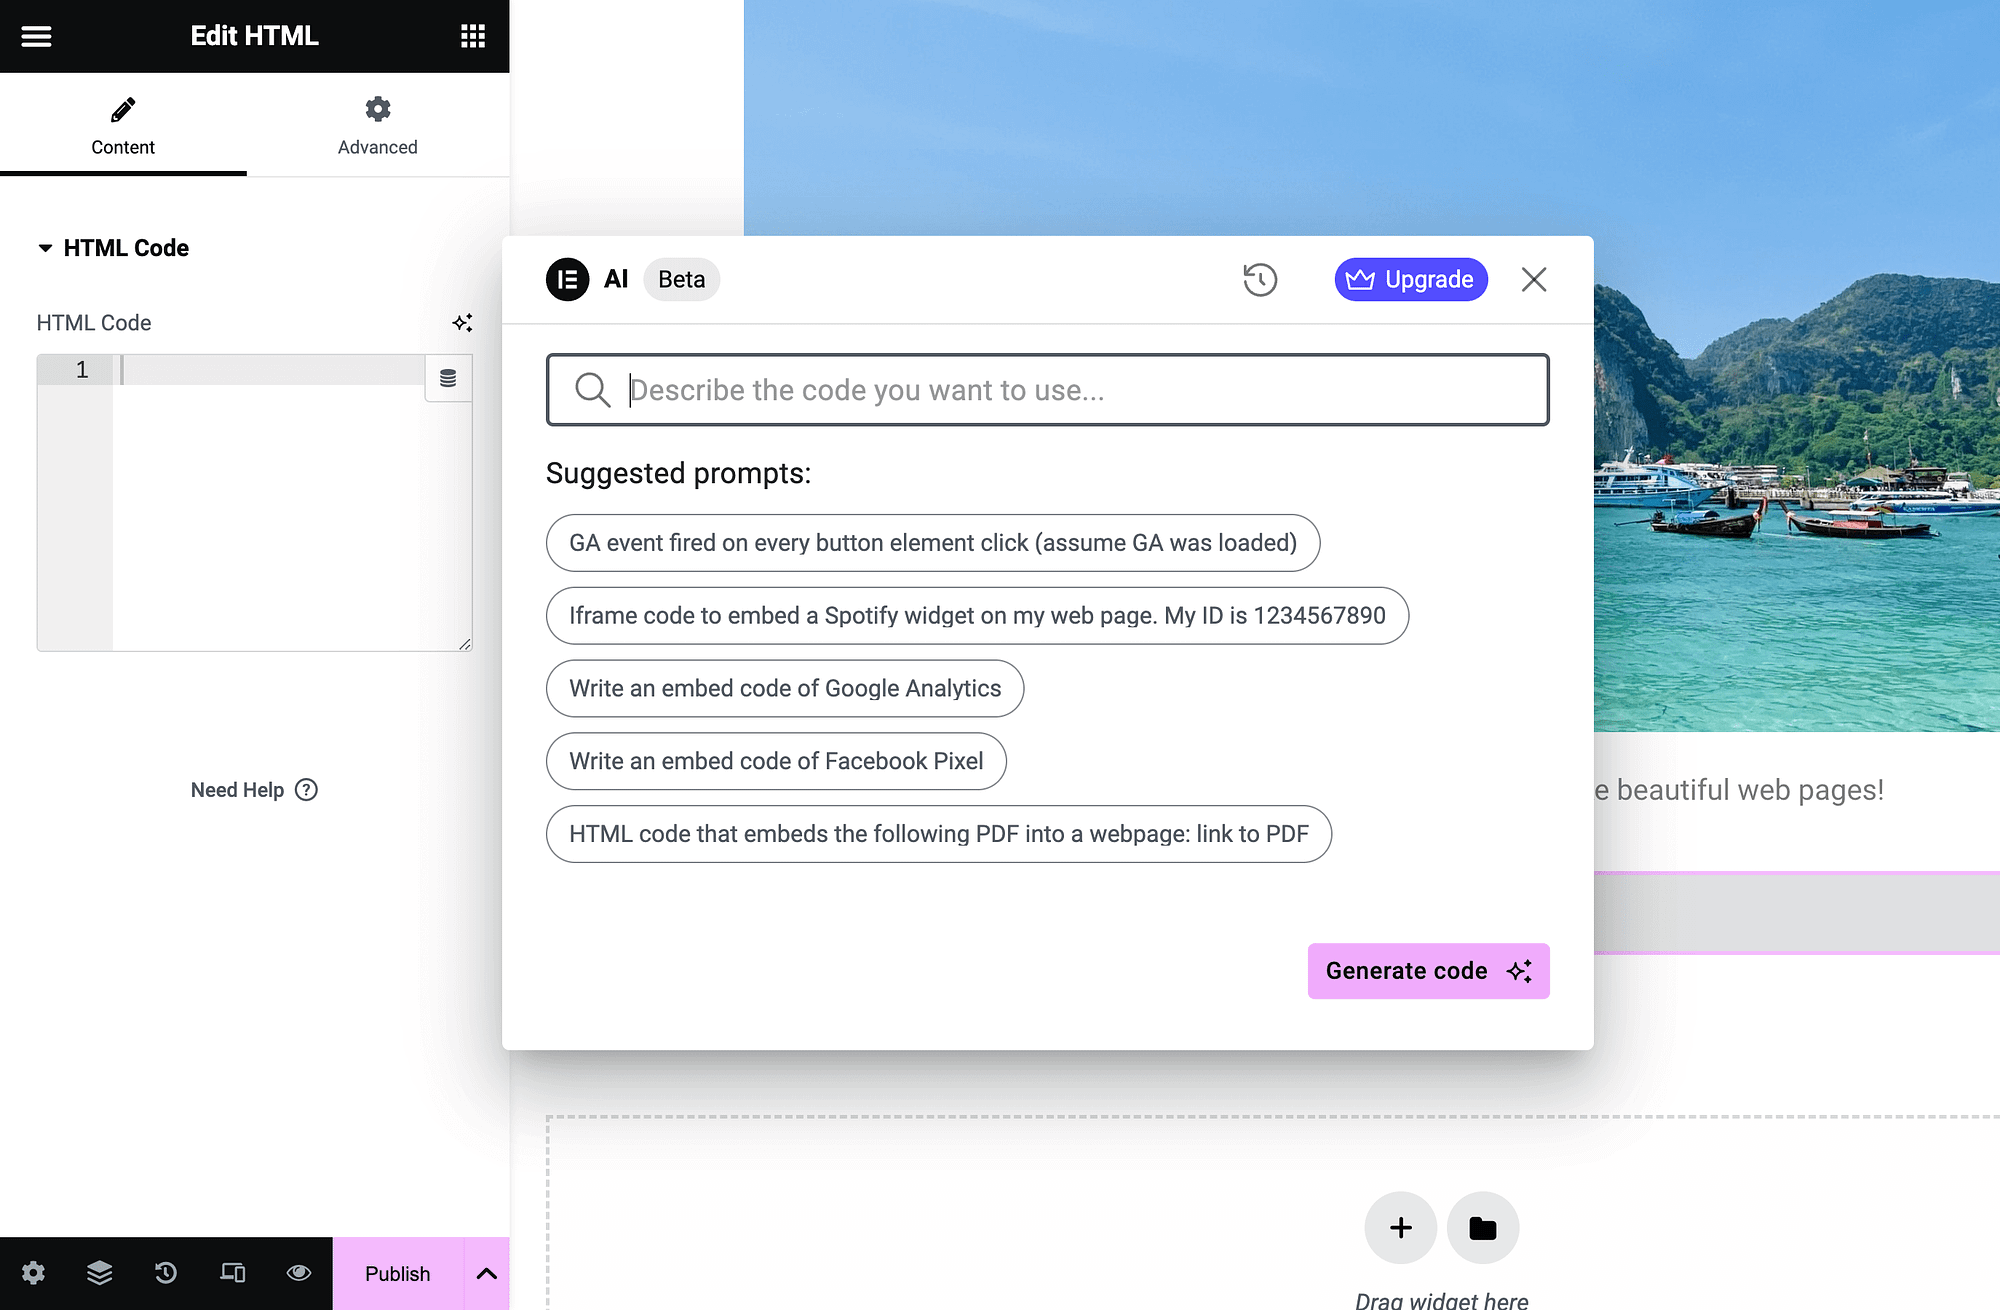
Just enter a description and hit Generate code. These are just a few ways you can use Elementor’s AI features for web design.
Conclusion 🧐
If you want to build custom web pages without the hassle of coding, Elementor may be just the solution for you. Still, there’s a bit of a learning curve, so an Elementor tutorial can be super useful.
To start off, you’ll want to get familiar with the drag and drop interface and basic widgets. Then, you’ll be able to customize widgets and manage containers. When you’re ready, tap into more advanced options for mobile-optimization. You can even use built-in AI features to fast-track the process. 🏗️
Do you have any questions about this Elementor tutorial? Ask us in the comments section below!
