If you’re looking to improve Search engine optimization (SEO) on your site, Yoast SEO is one of the most popular plugins. However, without following a thorough Yoast SEO tutorial, the settings and features can be overwhelming for beginners.
That’s why we’re taking you through each step of the Yoast SEO setup procedure. You’ll use the configuration wizard for the initial setup. Then, you’ll need to understand the meta box and the dashboard and configure the most useful settings. ⚙️
An introduction to Yoast SEO
Yoast SEO provides one of the easiest ways to optimize content on your WordPress site. This way, you can gain visibility in the search engine results and drive more traffic to your pages.
For example, Yoast handles all the technical SEO aspects like canonical URLs, meta tags, XML sitemaps, and structured data integration so that search engines can understand your content:
One of the standout features of Yoast SEO is that you’ll get access to a meta box, which sits beneath the content editor. Here, you’ll gain actionable recommendations to enhance your content’s SEO and readability.
What’s more, Yoast SEO often releases new features. For instance, it recently added an AI generator to help you create engaging SEO titles and meta descriptions quickly.
The good news is that Yoast SEO comes as a free WordPress plugin. However, you can also upgrade to Yoast SEO premium for $99 a year to unlock extra tools and features.
With the Pro plugin, you’ll get content quality and link suggestions as you write. And you can preview posts to share across Facebook and Twitter. 🔌
Yoast SEO tutorial for beginners
Now that you know a bit more about Yoast SEO, let’s get this Yoast SEO tutorial underway.
- Set up Yoast SEO using the configuration wizard
- Navigate the Yoast SEO dashboard
- Understand the Yoast SEO meta box
- Yoast SEO extra settings
1. Set up Yoast SEO using the configuration wizard ⚙️
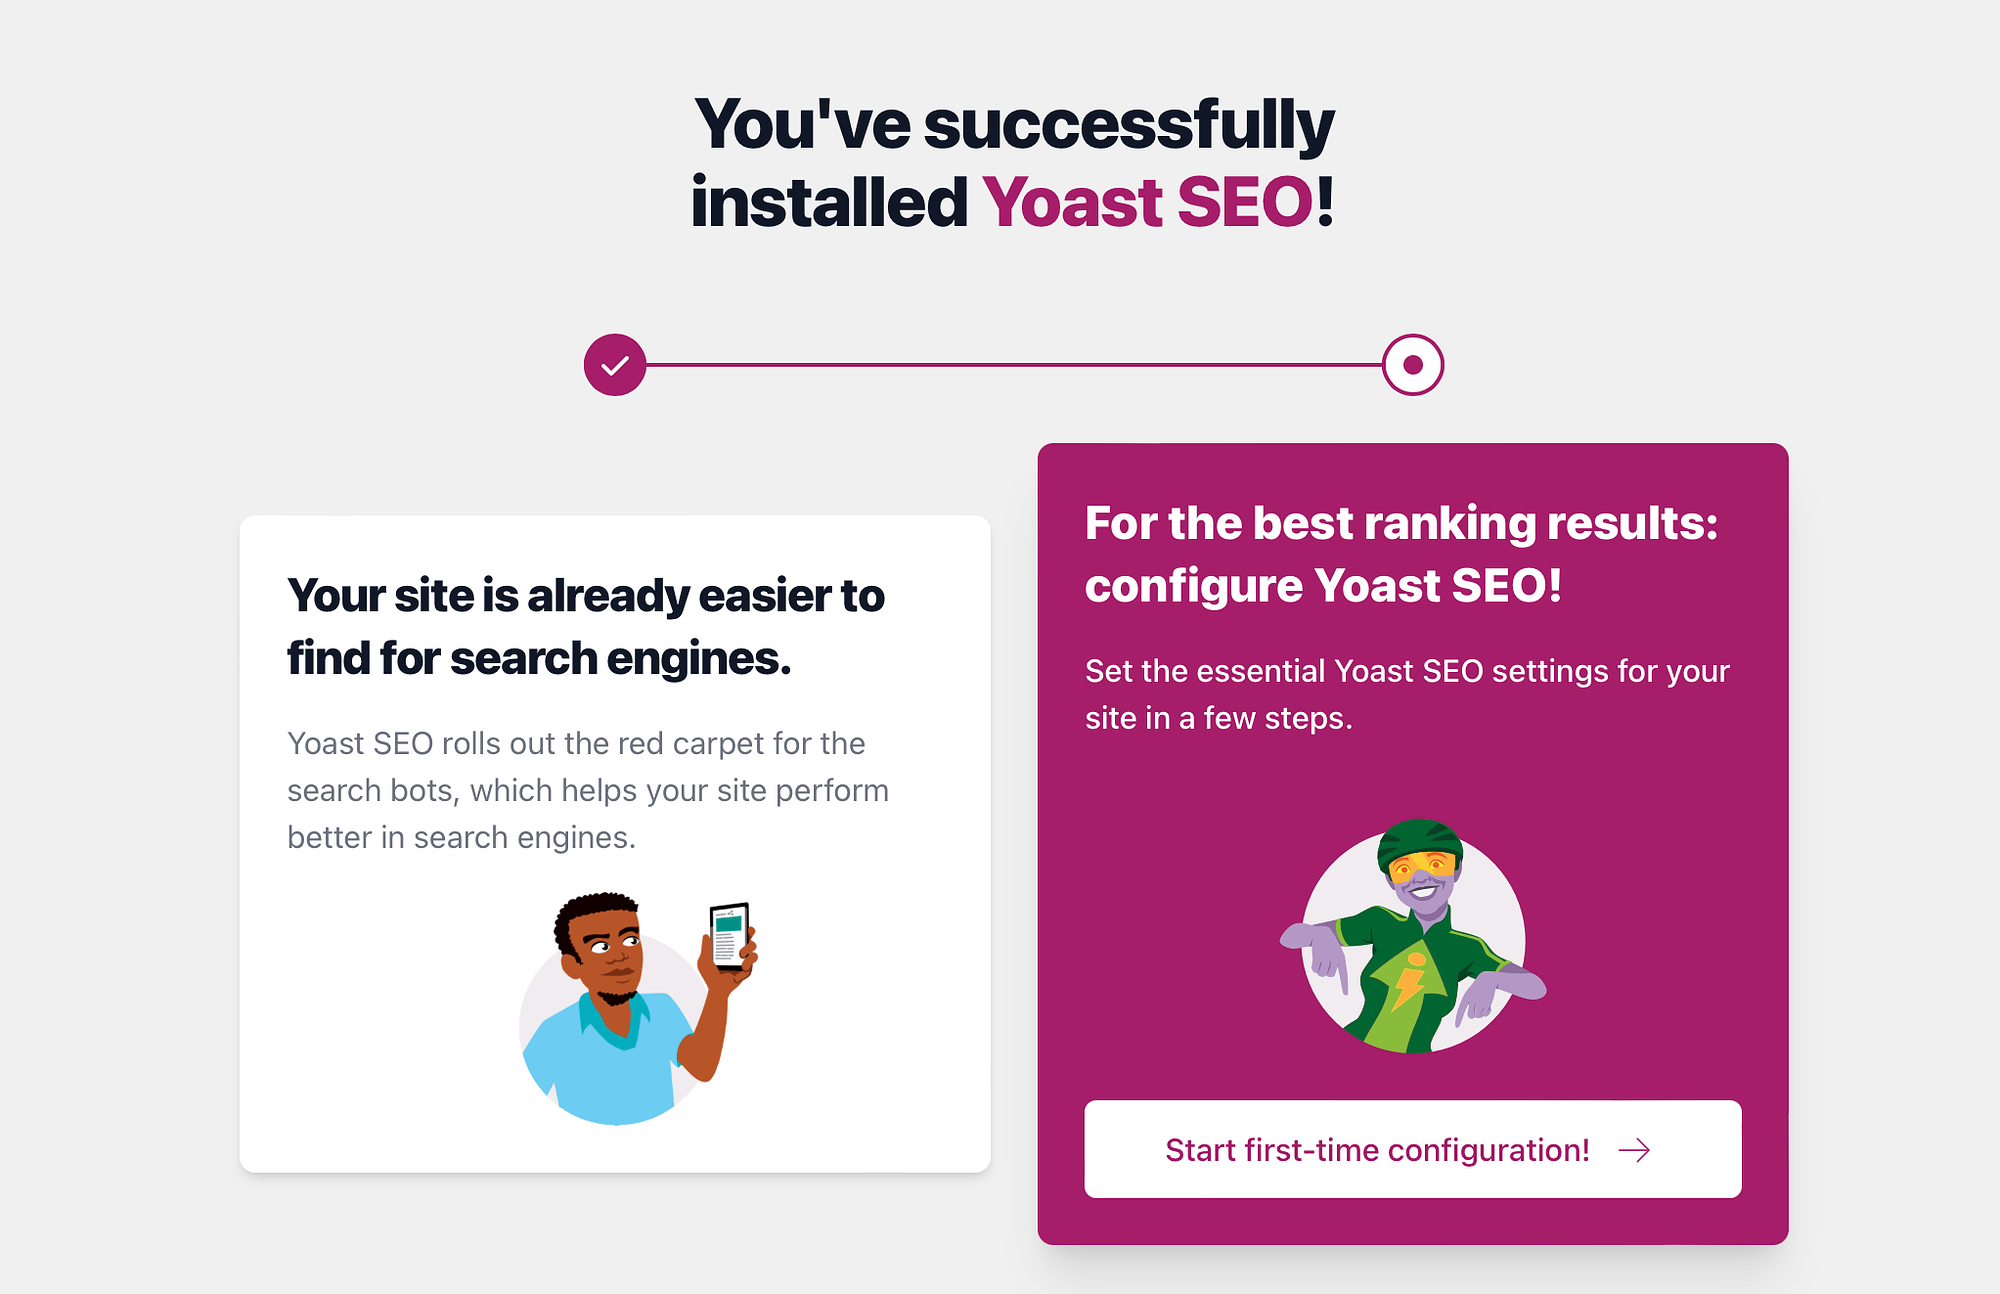
If you’re wondering how to use Yoast SEO, the first step is to install and activate the plugin in WordPress. With the free plugin, simply head to Plugins > Add New within your dashboard. Then, type “Yoast SEO” and click on Install Now > Activate.
Upon successful activation, select Start first-time configuration:
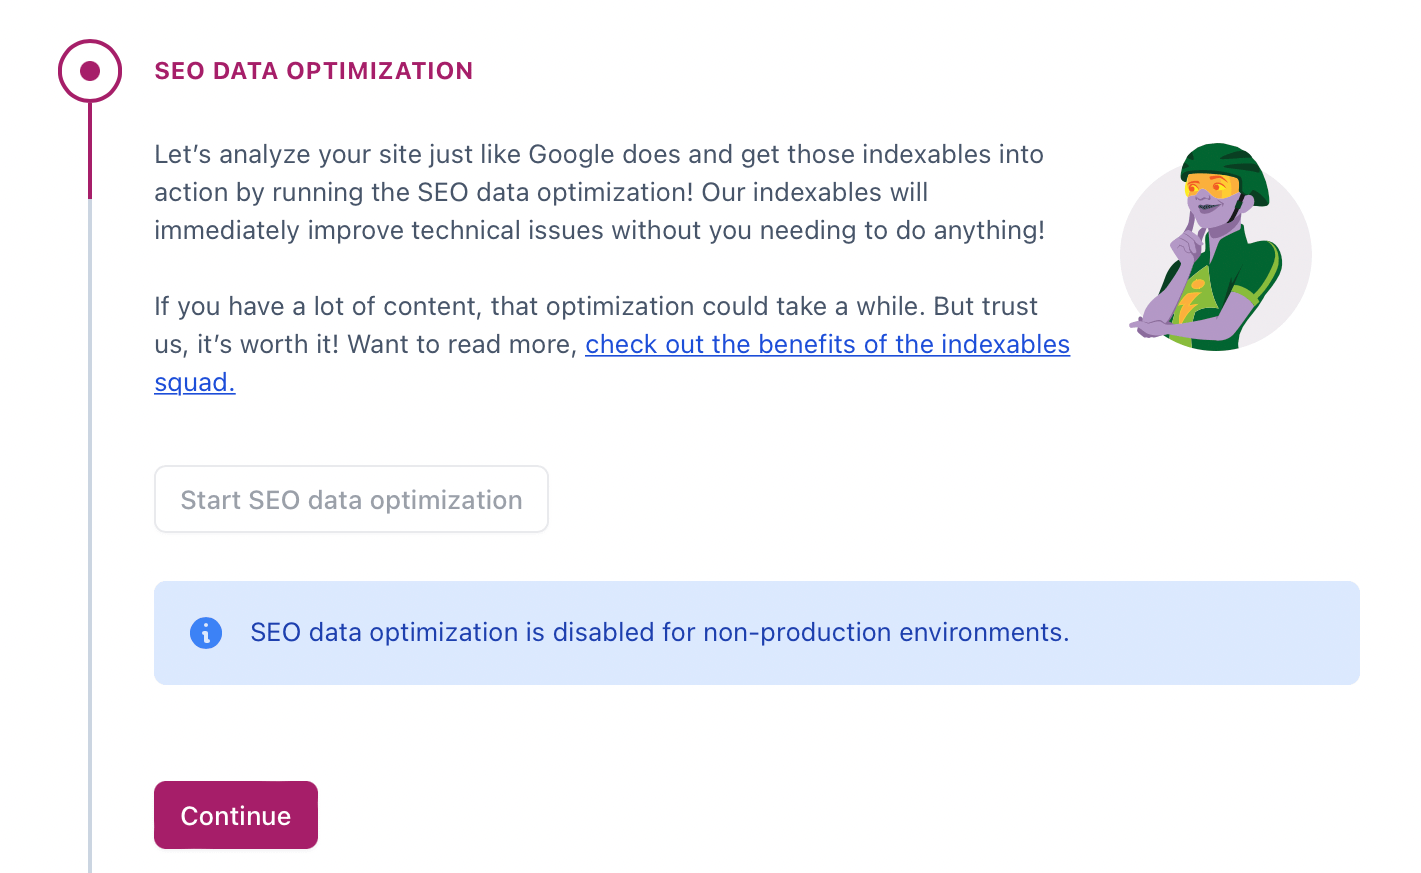
Now, you’ll be guided through several sections that help Google better understand your content. First off, in the SEO Data Optimization section, you can use Yoast’s indexables (a suite of tools to help search engines find your content) to improve any technical issues on your site. This can take a while if you’ve lots of content.
Plus, this feature is only available to production environments. So, if your site is a non-production environment, simply click on Continue:
At this point, you can access the Site Representation tab. Here, you can enter some details about your website and/or organization. Meanwhile, you’re able to upload a logo from your Media Library. Then, click on Save and continue.
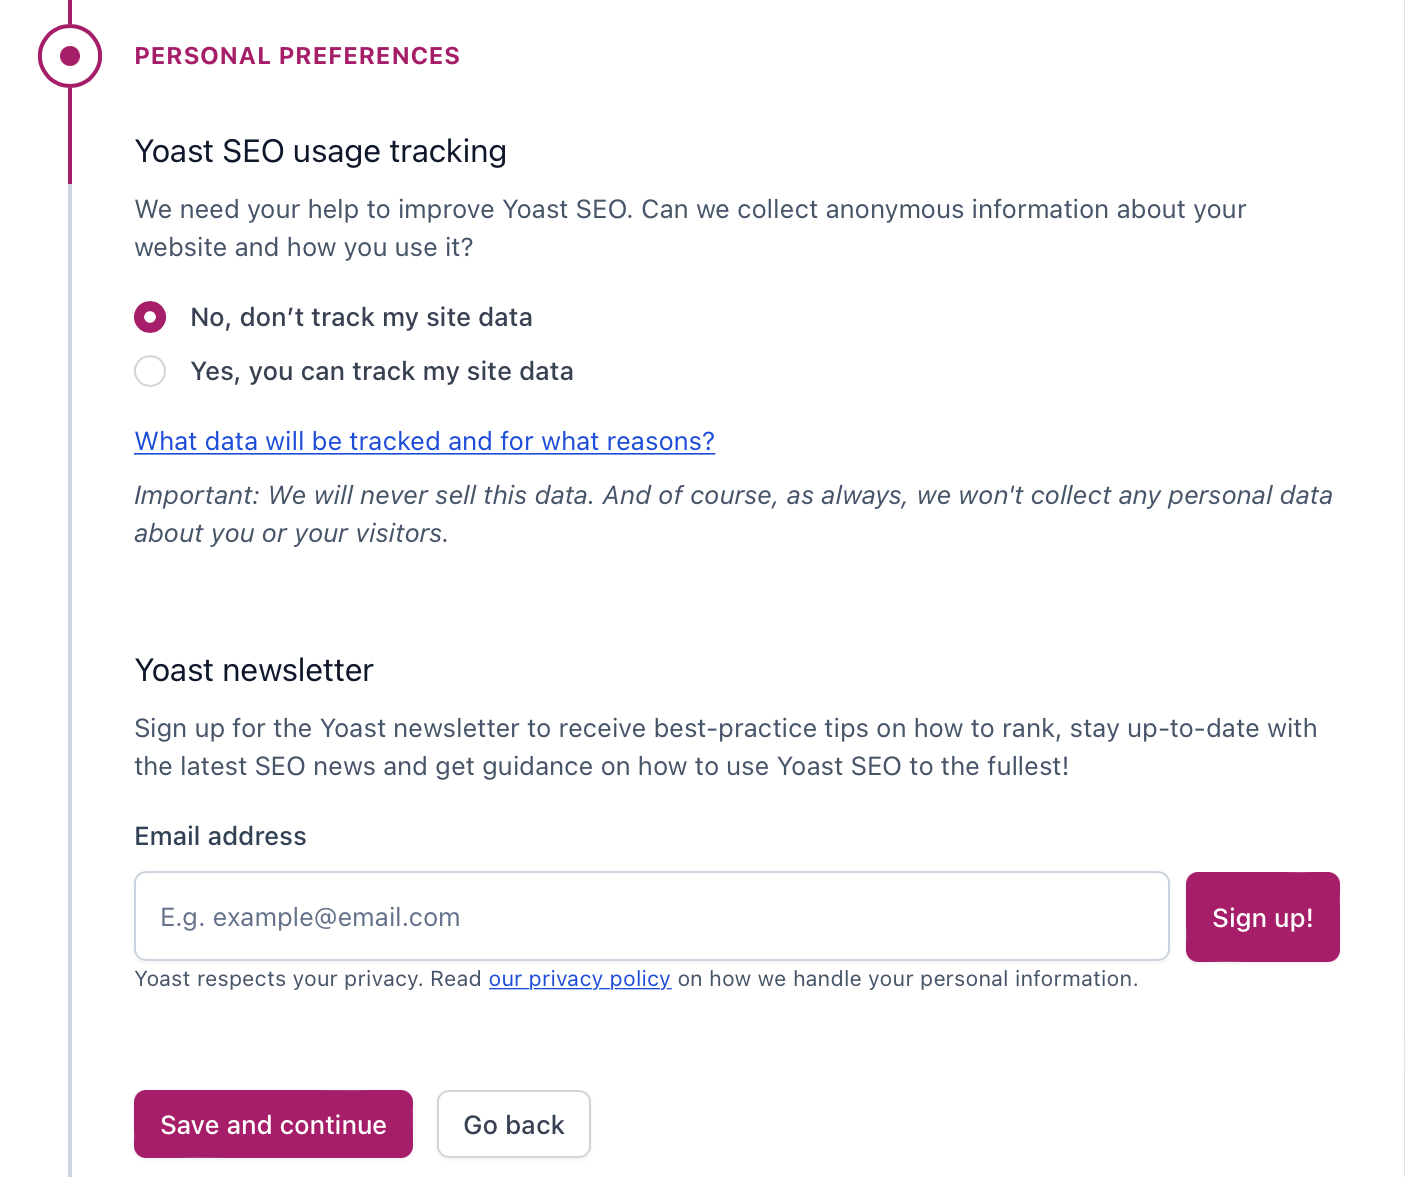
In the Social Profiles section, you can add your organization’s social profiles, or if you’re setting up a personal blog, simply link your personal accounts. The next tab enables you to configure some personal preferences.
For example, you can determine whether you want Yoast SEO to track your site’s data. Then, click on Save and continue:
And that’s all there is to the initial Yoast SEO configuration. So now, click on the link to lead you to the Yoast SEO dashboard.
2. Navigate the Yoast SEO dashboard 🧑💻
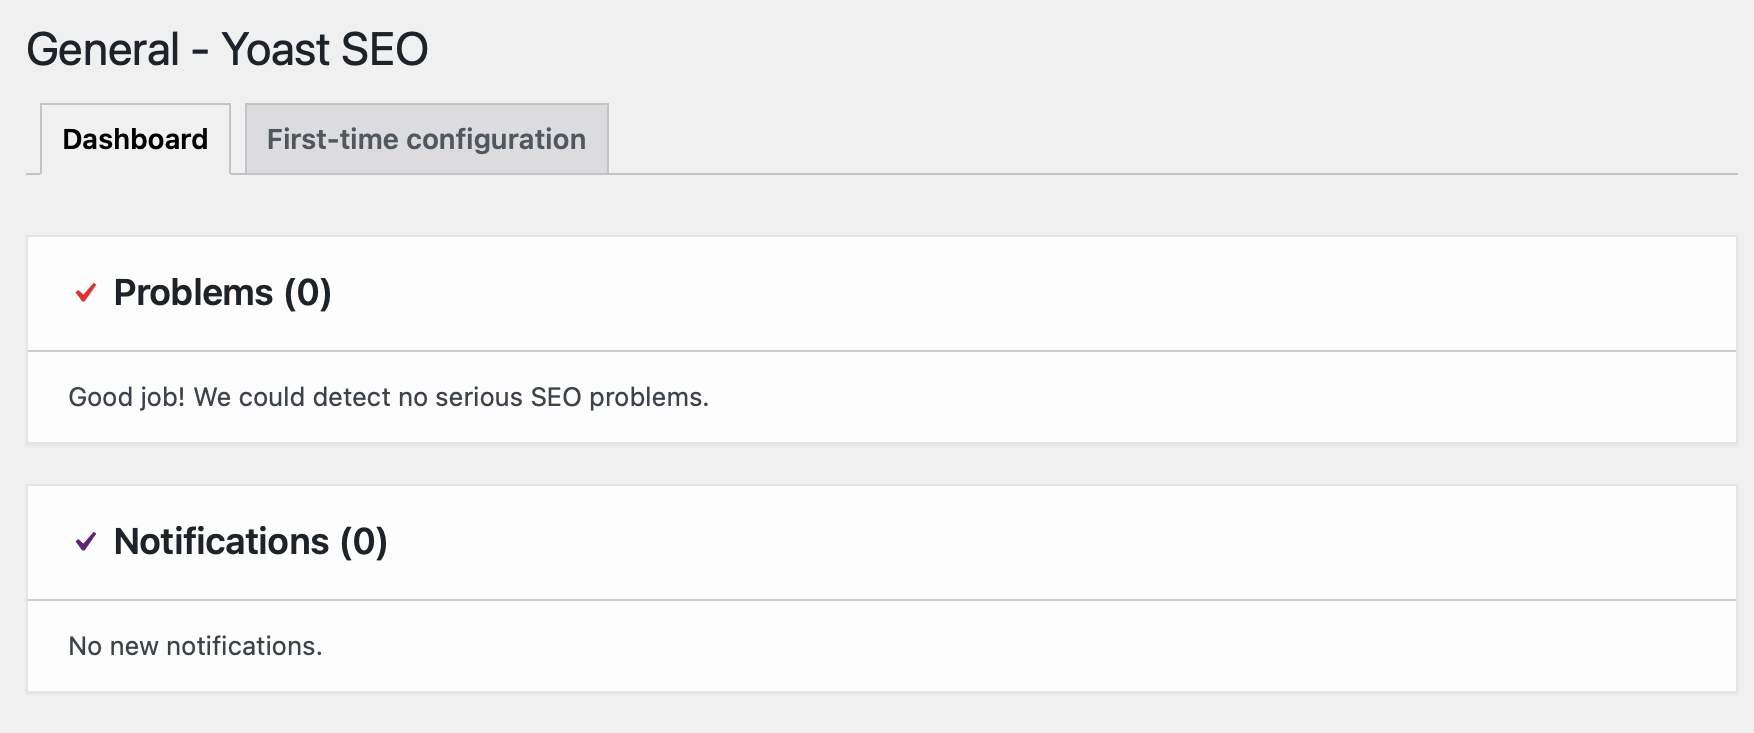
With Yoast SEO installed on your site, you’ll have access to a dedicated Yoast dashboard. Here, you’ll be notified about any serious SEO issues that have been detected on your site:
Plus, you can switch to the First-time configuration tab to edit any of the details that you saved in the previous section.
Now, go to Yoast SEO → Settings to enable/disable Yoast features:
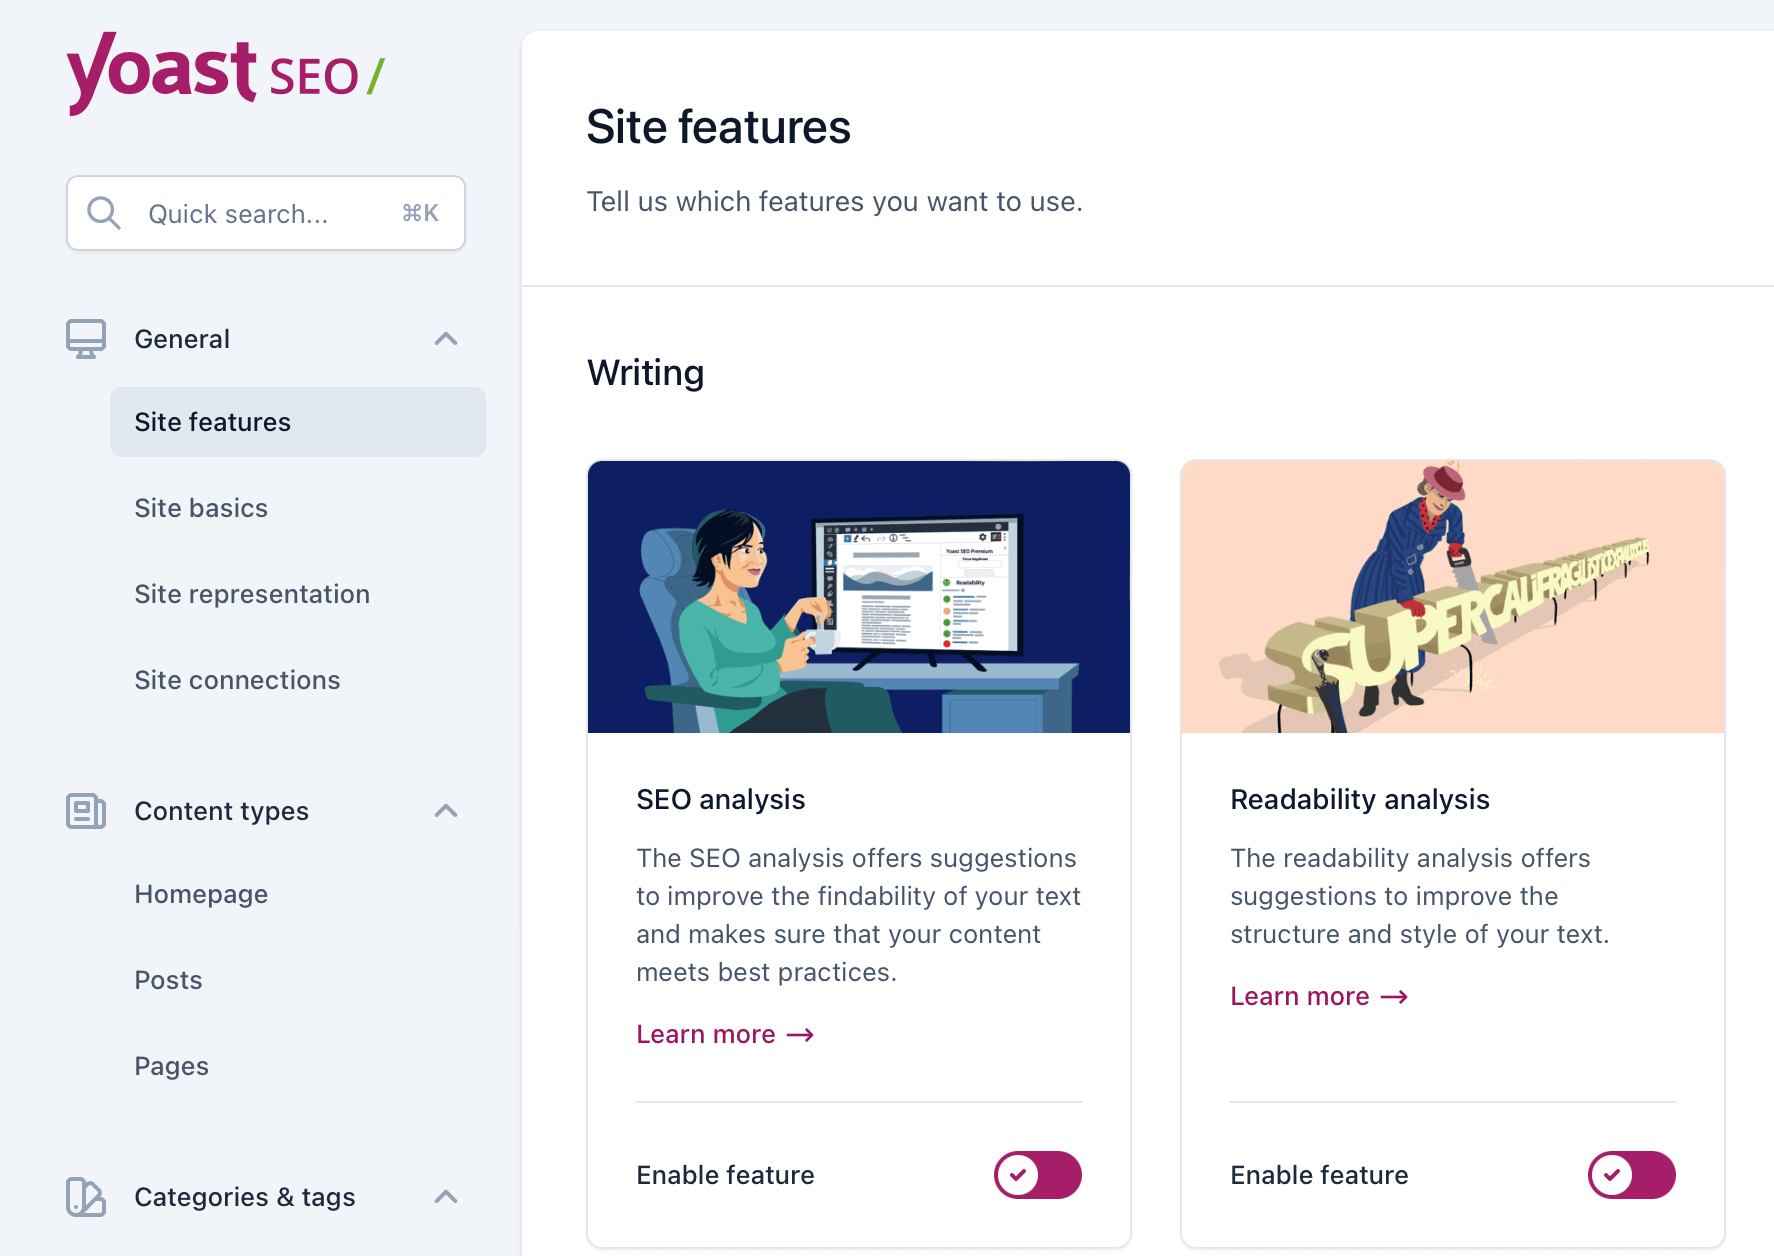
For example, you can disable the Readability analysis if you don’t want to receive suggestions in the meta box.
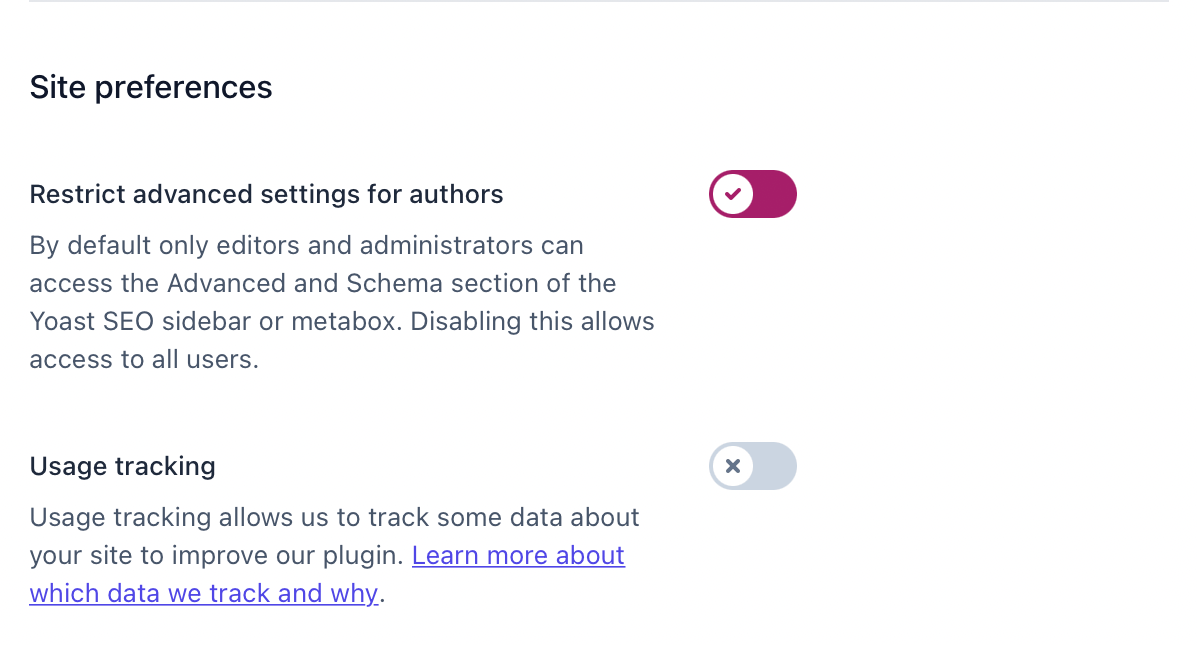
Then, switch to the Site basics section to add extra site information and save your site preferences. Here, you can restrict advanced settings for authors. This means that only authors will be able to remove posts from the search results or change the canonical:
Under Site connections, you can verify your site with a range of tools like Google Search Console, Pinterest, and Bing Webmaster tools. This is a good thing to do since it will speed up the rate at which those search engines will discover your content.
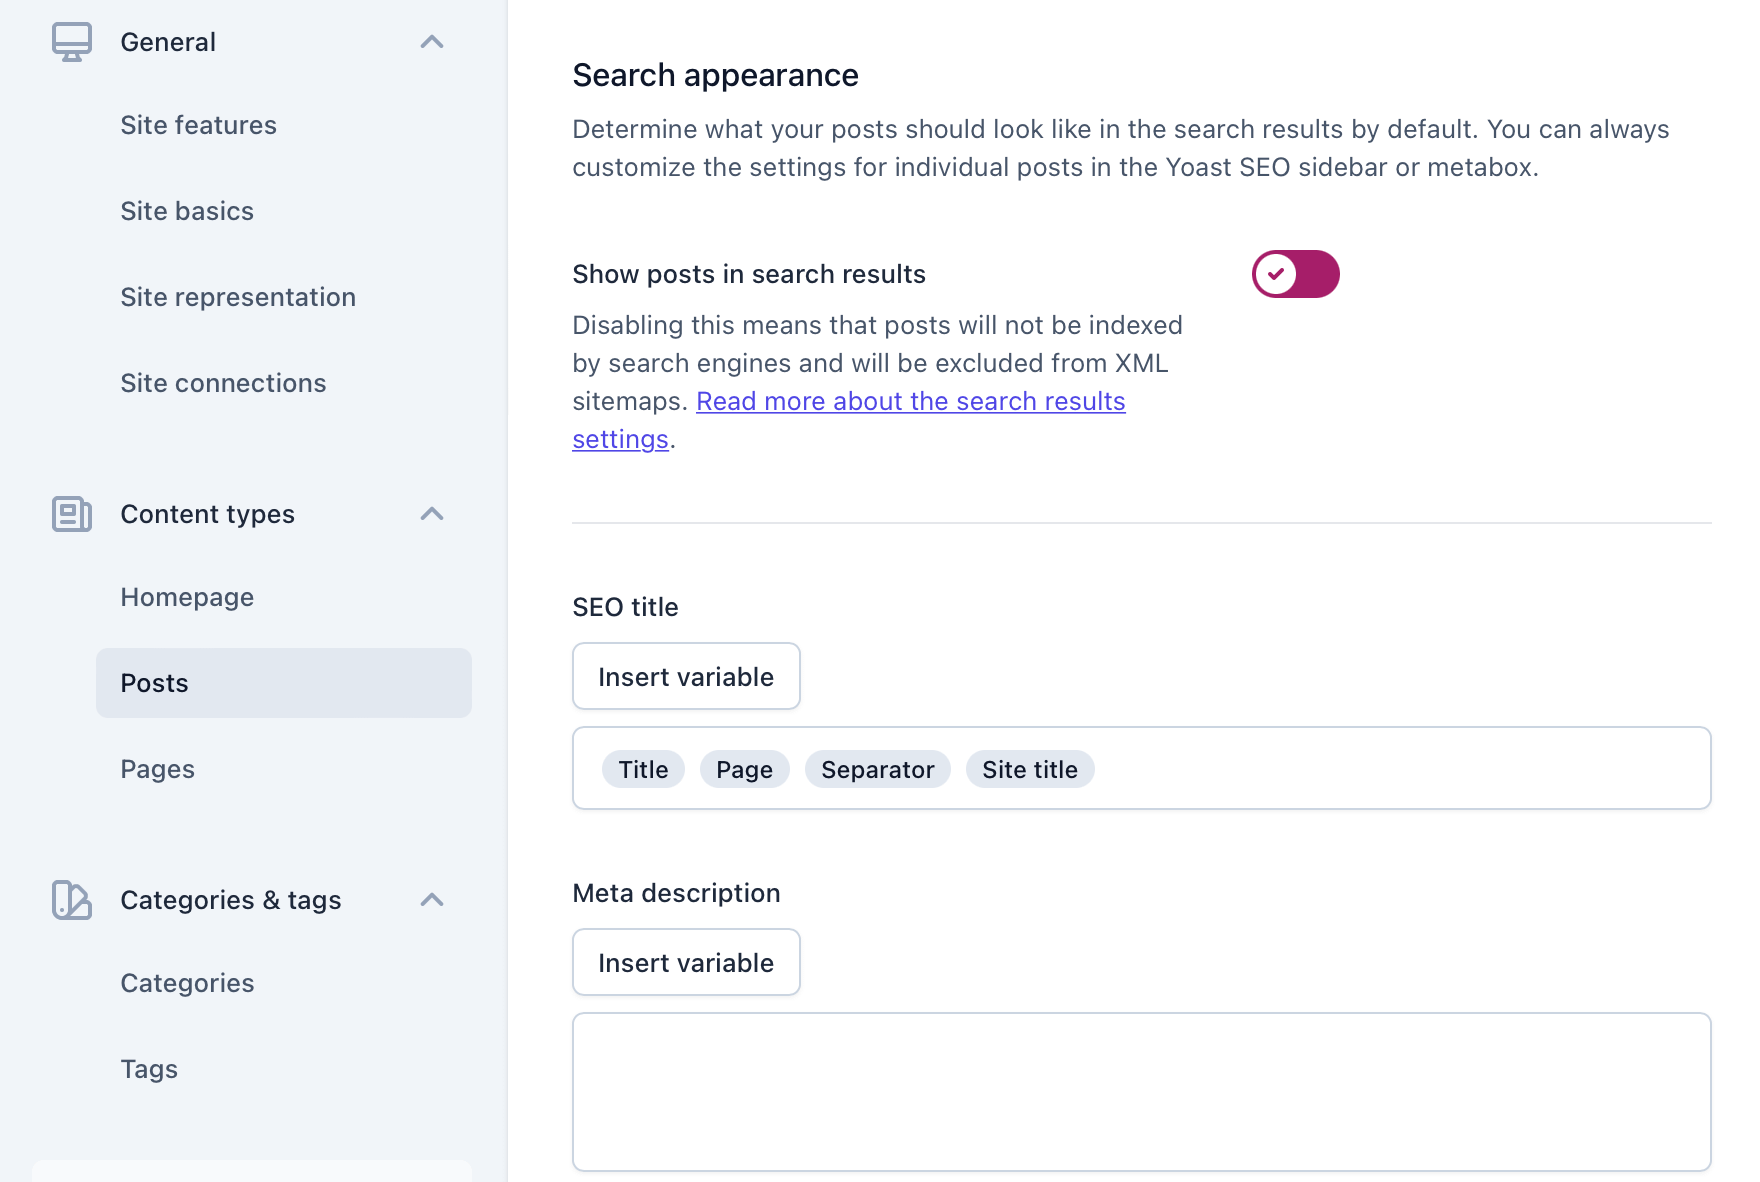
Next up is the Content types section. Here, you can determine how your homepage, posts, and pages display in search engines. This feature enables you to set templates for SEO titles and meta descriptions:
Additionally, you can do this for your categories and tags. You can also make sure categories and tags are visible in the search results, and insert/remove variables from the SEO title.
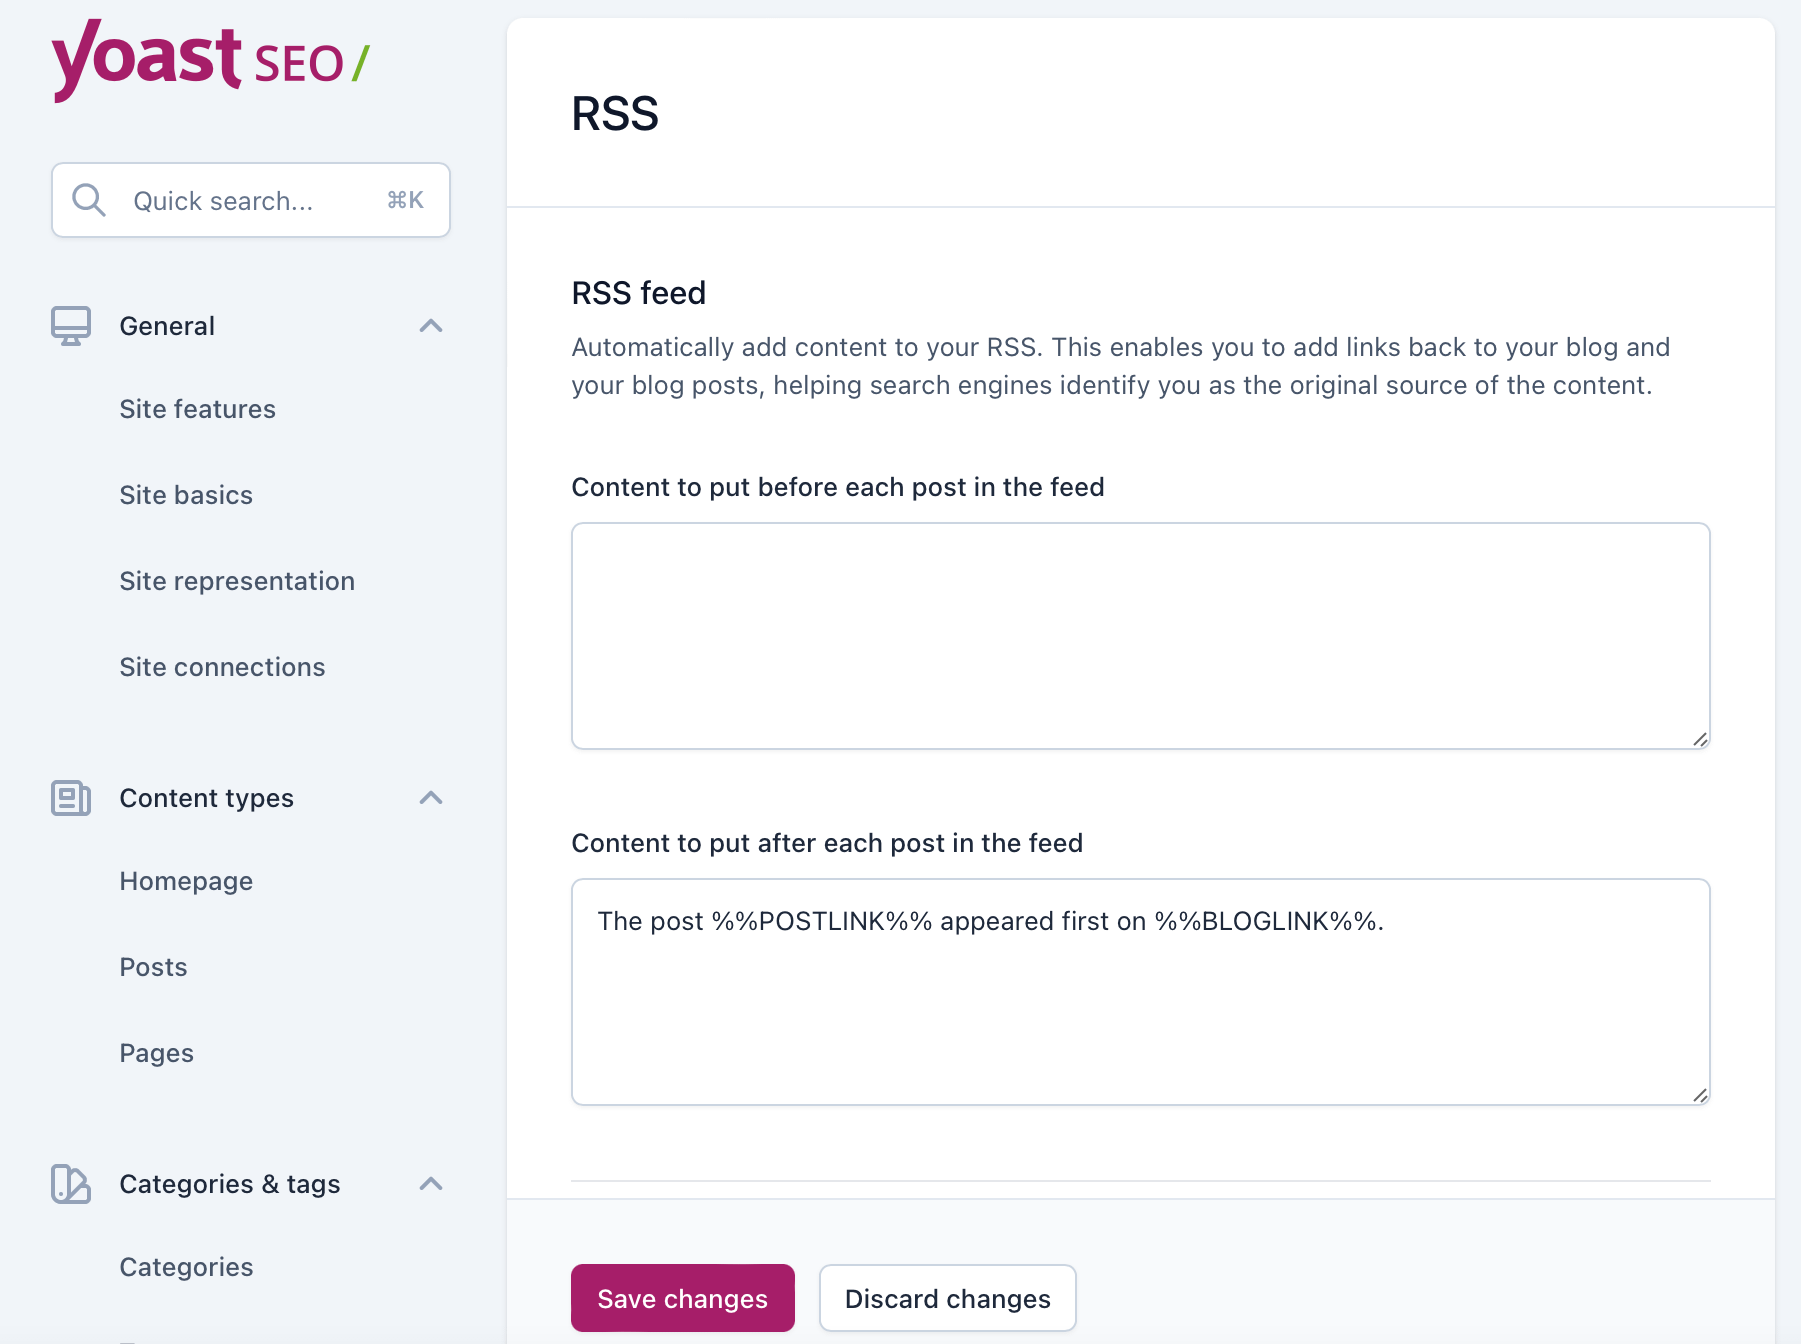
Lastly, the Advanced settings allow you to determine how formats, author archives, and date archives appear in search engines. Meanwhile, in the RSS section, you can make sure search engines identify you as the original source of the content:
Lastly, in the Breadcrumbs tab, you can add separators and prefixes to your breadcrumbs. Meanwhile, you can alter the anchor text for your homepage and enter a custom breadcrumb for your 404 page.
3. Understand the Yoast SEO meta box 👨🎓
The next part of our Yoast SEO tutorial is understanding the meta box. You’ll find the meta box beneath the WordPress editor, where you write your posts and pages.
If you use the Block editor, you can also access it from the sidebar:
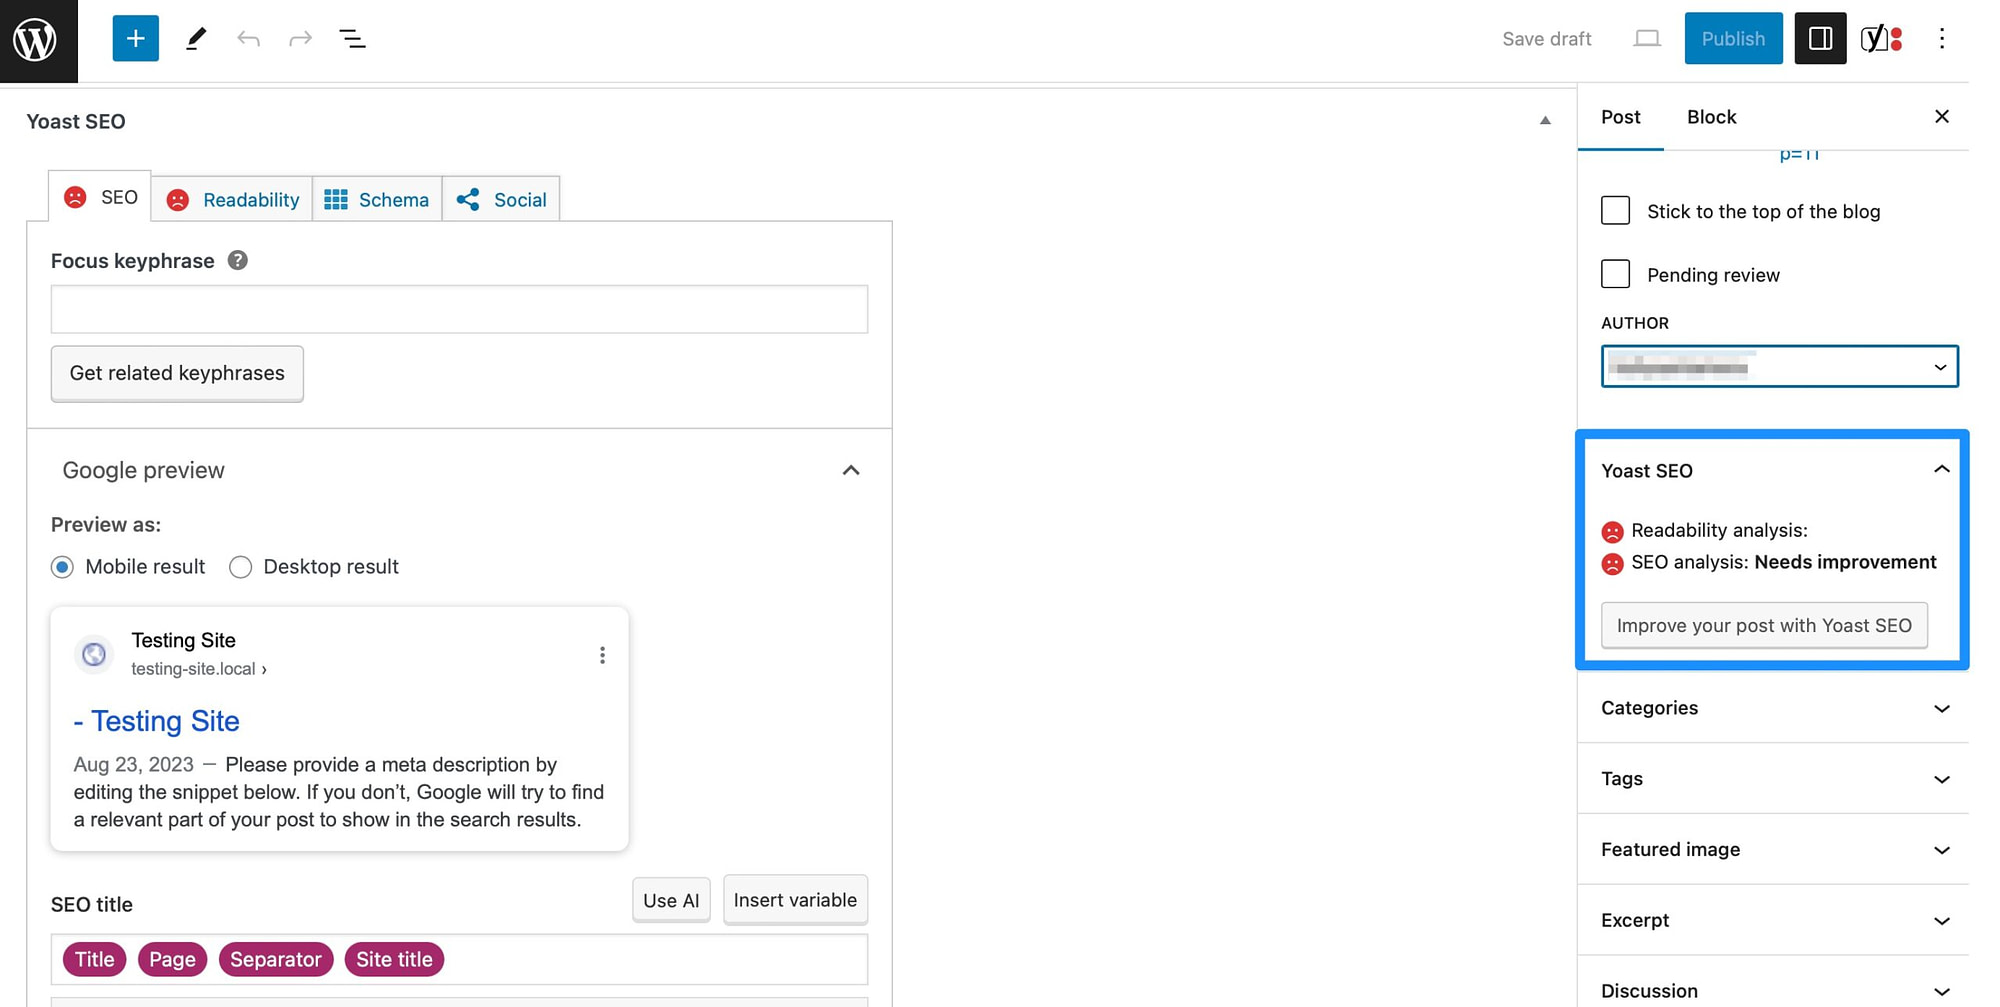
The first tab is the SEO section, where you’ll receive actionable recommendations to optimize your content for search engines. For example, you can enter a relevant keyword so that Yoast SEO can optimize the post for that specific keyword.
Additionally, you’re able to preview (and change) the snippet that Google will display in the search results. This contains your SEO title, slug, and meta description:
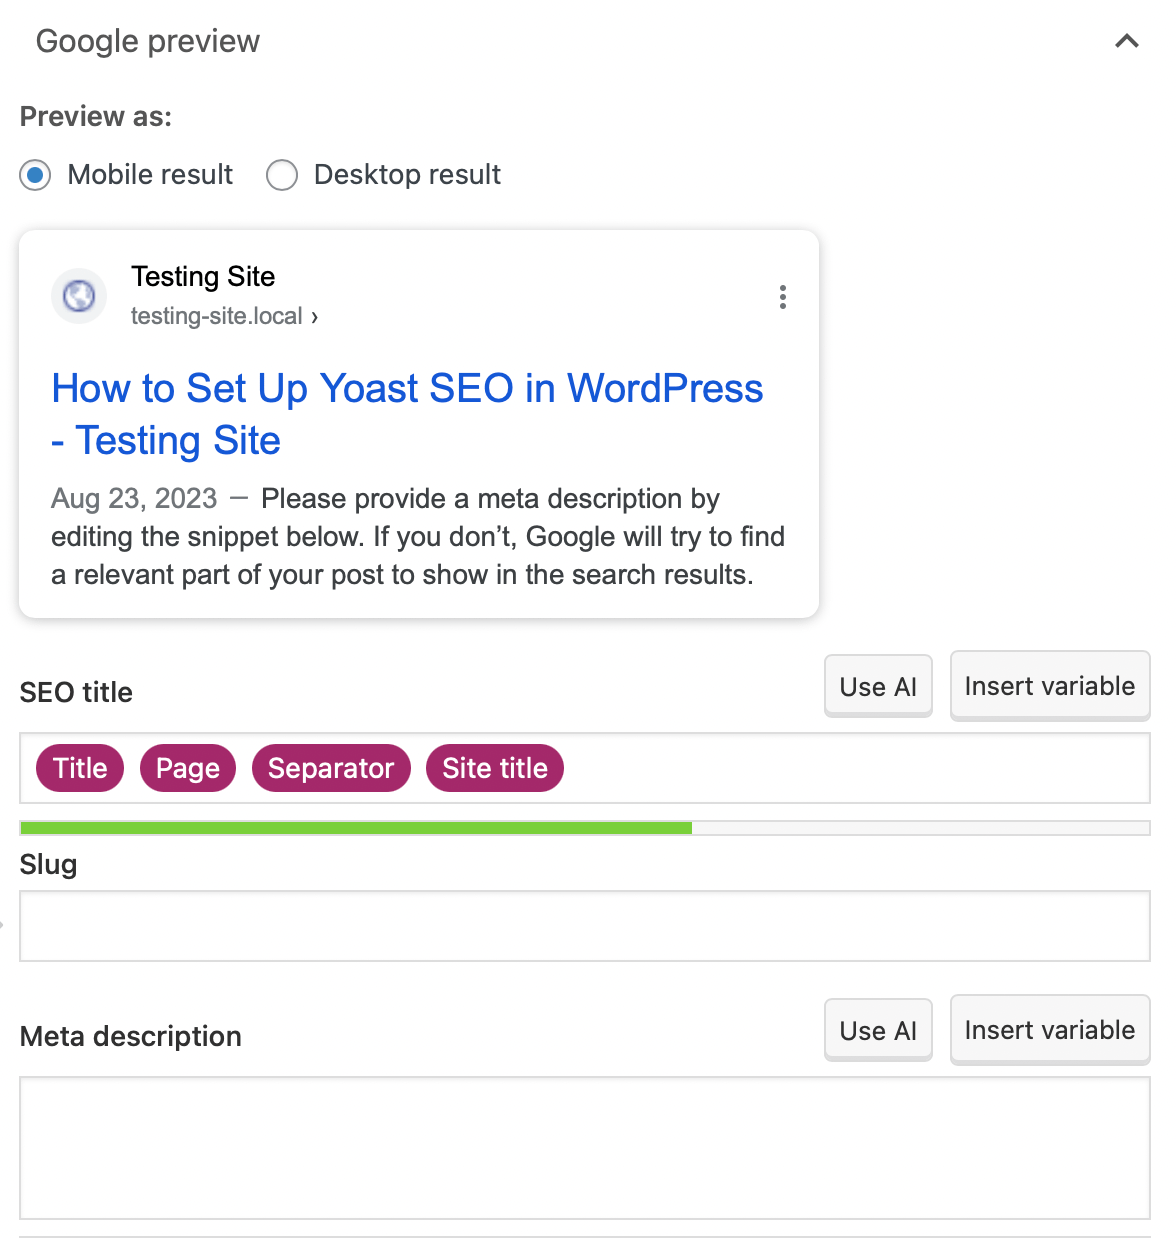
You’ll also notice a green light that indicates that the length of your title and description are optimal.
Next, you can expand the SEO analysis tab to find ways to improve your overall SEO score. For instance, Yoast SEO will analyze the key phrase density, image alt attributes, outbound links, text length, and more:
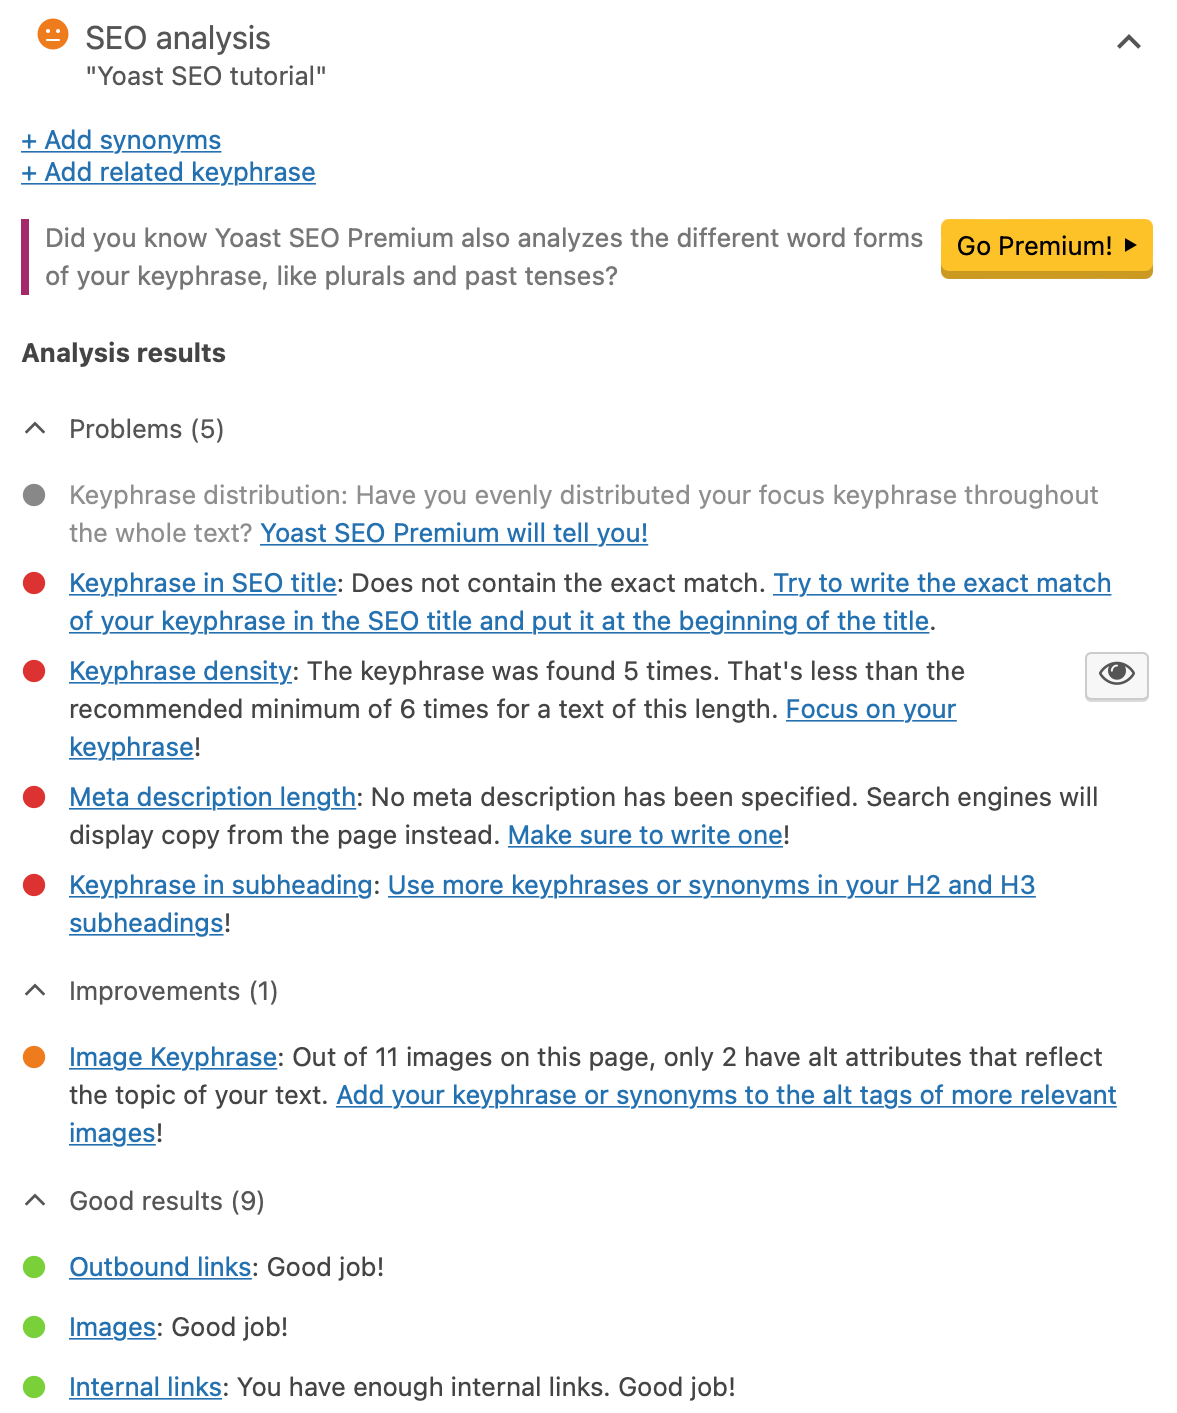
Here, you can see what you’re doing well and identify areas to improve on-page SEO.
The Readability tab is also a very important Yoast setting, since it enables you to make your content more appealing to your visitors:
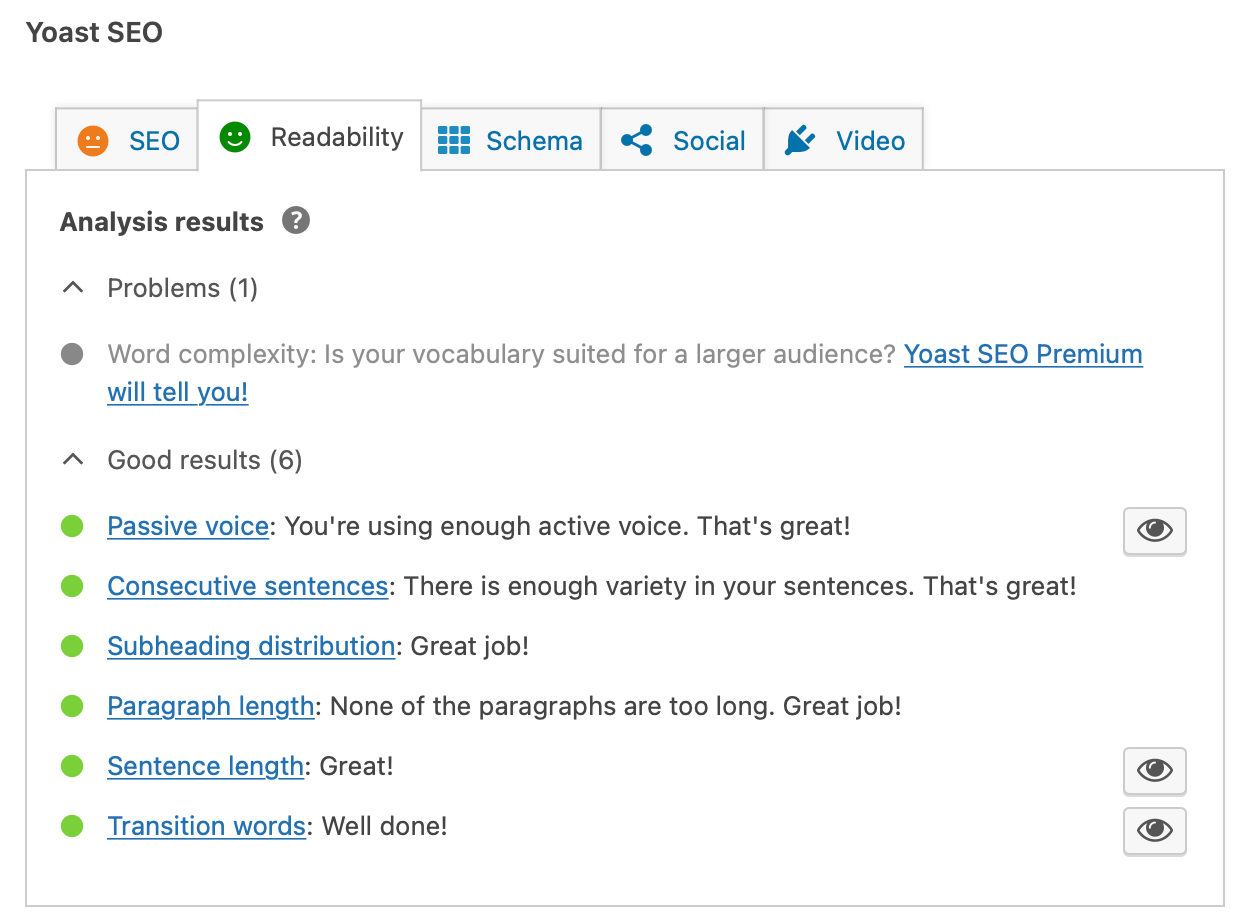
Yoast encourages short sentences and paragraphs, transition words, and active voice.
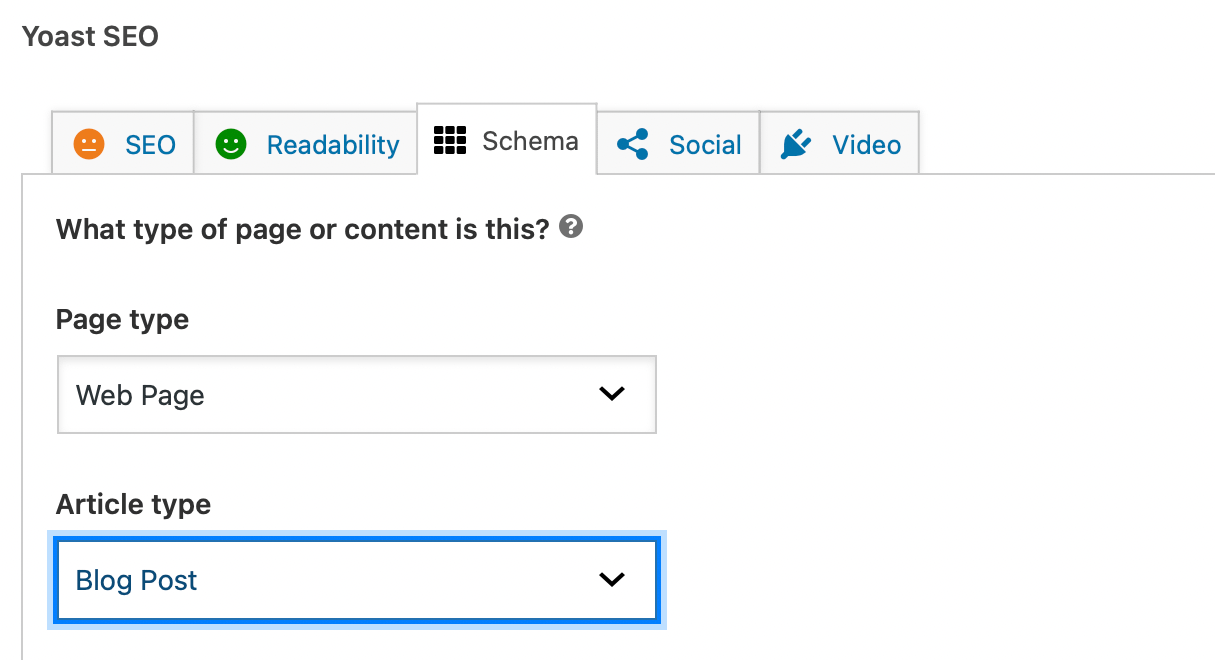
Then, in the Schema tab, you can tell search engines what type of page you’ve created, like an FAQ page or a checkout page. This can help you get some rich snippets on the results pages. Meanwhile, you can define your content as a blog post, article, or report:
With Yoast SEO Premium, you can also adjust the appearance of your content on Facebook and Twitter. And, if you add a video to your page, you can visit the Video tab to optimize it.
Although we covered the dashboard earlier in this Yoast SEO tutorial, there are some other key settings that you can tweak here. First off, navigate to Yoast SEO > Integrations:

By default, Semrush and Wincher are enabled to conduct keyword research and monitor your post rankings. But, further down, you’ll find possible schema integrations.
Here, you can gain rich results in Google search by using plugins (like The Events Calendar) that connect with the Yoast Schema API. Meanwhile, you can integrate Yoast with popular plugins like Elementor and Jetpack.
Now, switch over to the Tools section of Yoast SEO. Here, you can import or export SEO data to use on another website. You can also edit important SEO files like robots.txt and .htaccess:
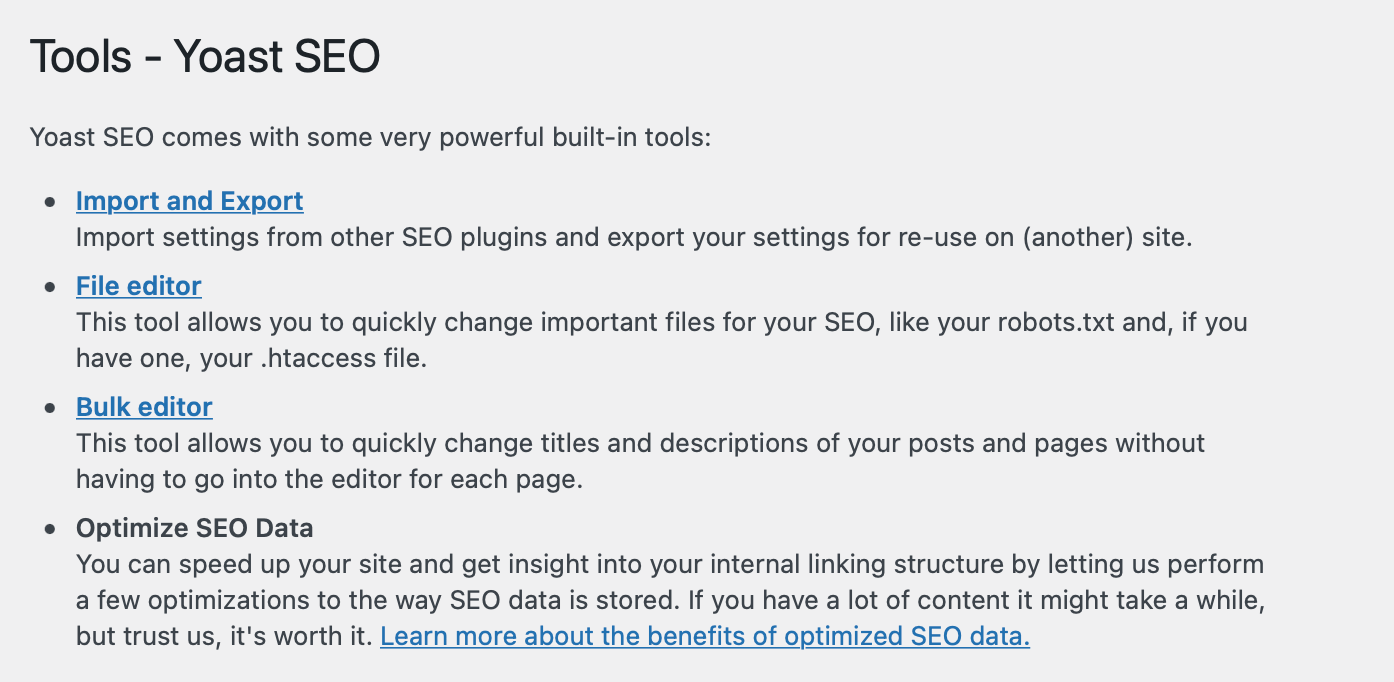
Meanwhile, click on Bulk editor to quickly change the titles and descriptions of your content pages without visiting the individual pages.
Lastly, in the Academy tab, you can start courses on topics like copywriting, structured data, and keyword research. With Yoast SEO Premium, you’ll get unlimited access to Yoast Academy.
What’s more, with Yoast Premium, you’ll gain two additional sections. The Workouts section can bring more traffic to your most important articles. Then, in the Redirects tab, you can define the redirect type and link to the new URL.
Conclusion 🧐
While Yoast SEO is one of the most popular SEO plugins for WordPress, there are lots of settings and features that can be confusing for beginners. That’s why it’s a good idea to follow this full Yoast SEO tutorial so that you get the plugin set up correctly and understand how to use it.
For instance, you’ll use the configuration wizard to set up Yoast SEO. Then, you can optimize your content within the WordPress editor using the meta box. Meanwhile, in the Yoast SEO dashboard, you can activate settings, enable integrations, and access built-in tools.
Do you have any questions about our Yoast SEO tutorial? Let us know in the comments below!