With two billion monthly users [1], Instagram gives you access to a huge audience to promote your business or products. It can also be a great way to engage with your customers and establish trust. Therefore, you might want to create a WordPress Instagram feed to add to your web pages.
While this may sound complex, you can find plugins that make this task much easier. This way, you can also customize the height, picture size, and background color of the feed so that it slots in nicely on your website. 🎮
Why create a WordPress Instagram feed?
Since January this year, Instagram has been the third most popular social media network behind Facebook and YouTube [1]. With two billion active monthly users, an Instagram feed provides an easy way to grow your audience, engage with customers, and promote products.
Better yet, by displaying your best Instagram images on your website, you can drive organic traffic to your social account and gain more followers. Plus, with comments and likes visible, your Instagram feed provides powerful social proof to help you build trust with your audience.
What’s more, since your feed is constantly updating, it will always offer new content. This is an easy way to keep your site looking fresh for visitors without manually editing your existing web pages.
How to add an Instagram feed in WordPress (in 4 steps)
Now that you know why it’s a good idea to create a WordPress Instagram feed, let’s take a look at four simple steps to get started.
Step 1: Install the Smash Balloon Social Photo Feed plugin 🔌
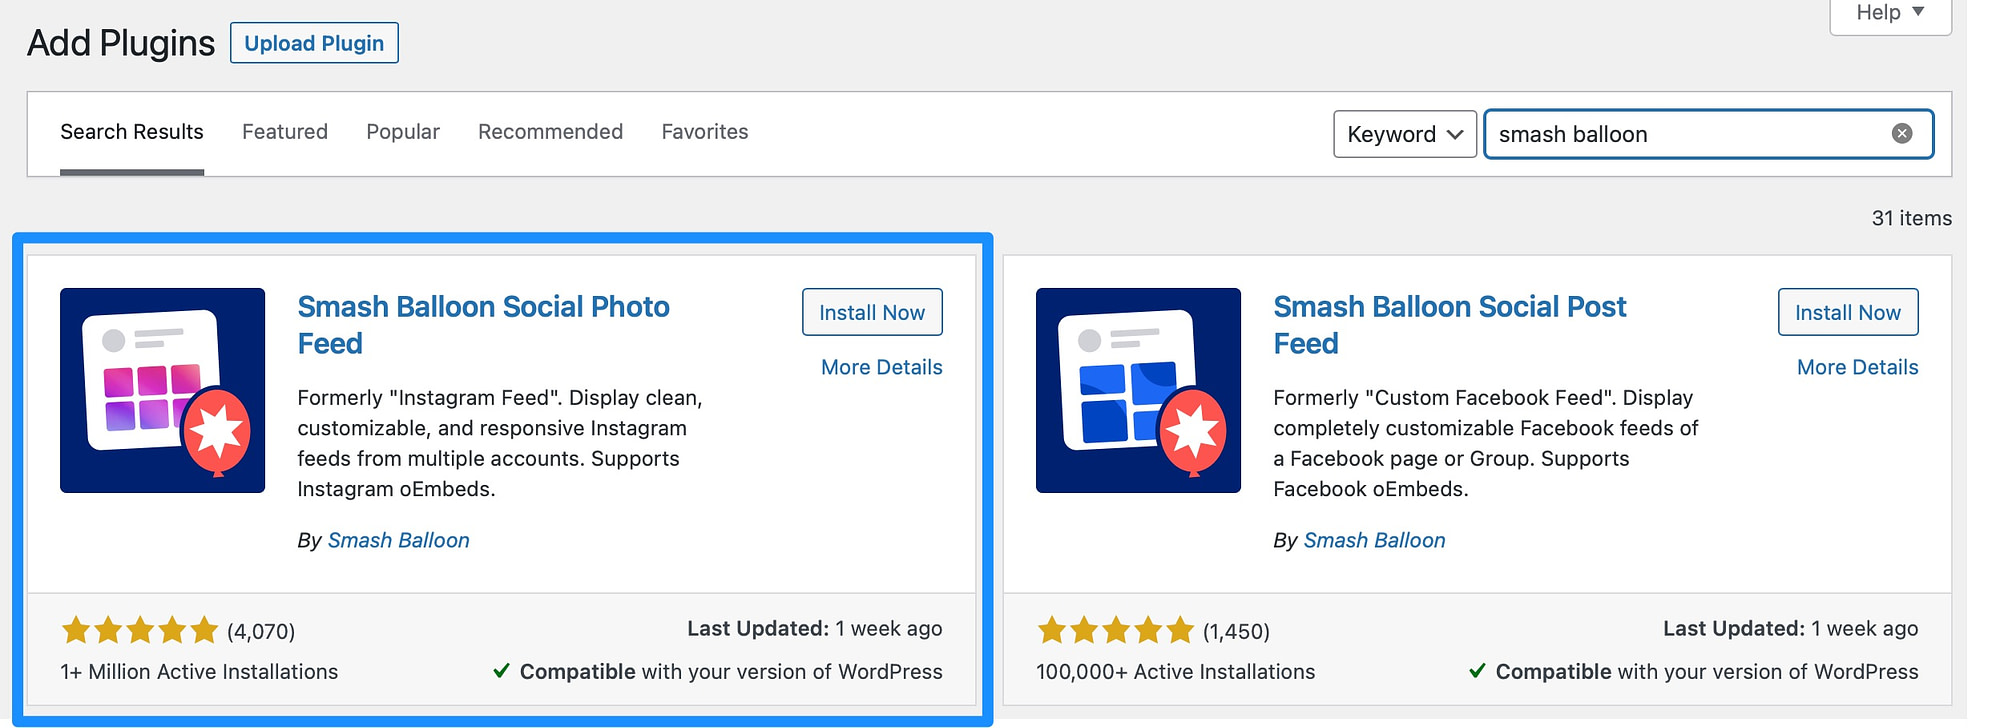
The easiest way to embed an Instagram feed is to use a plugin. There are plenty of excellent options, but we’re going to use Smash Balloon Social Photo Feed.
This way, you can display photos from multiple Instagram accounts. Plus, you can completely customize the appearance of your feed by changing the size, picture order, colors, buttons, and more.
To get started, go to Plugins > Add New from your WordPress dashboard. Search for the plugin using the search bar. Then, click on Install Now:
This may take a few seconds. Then, select Activate.
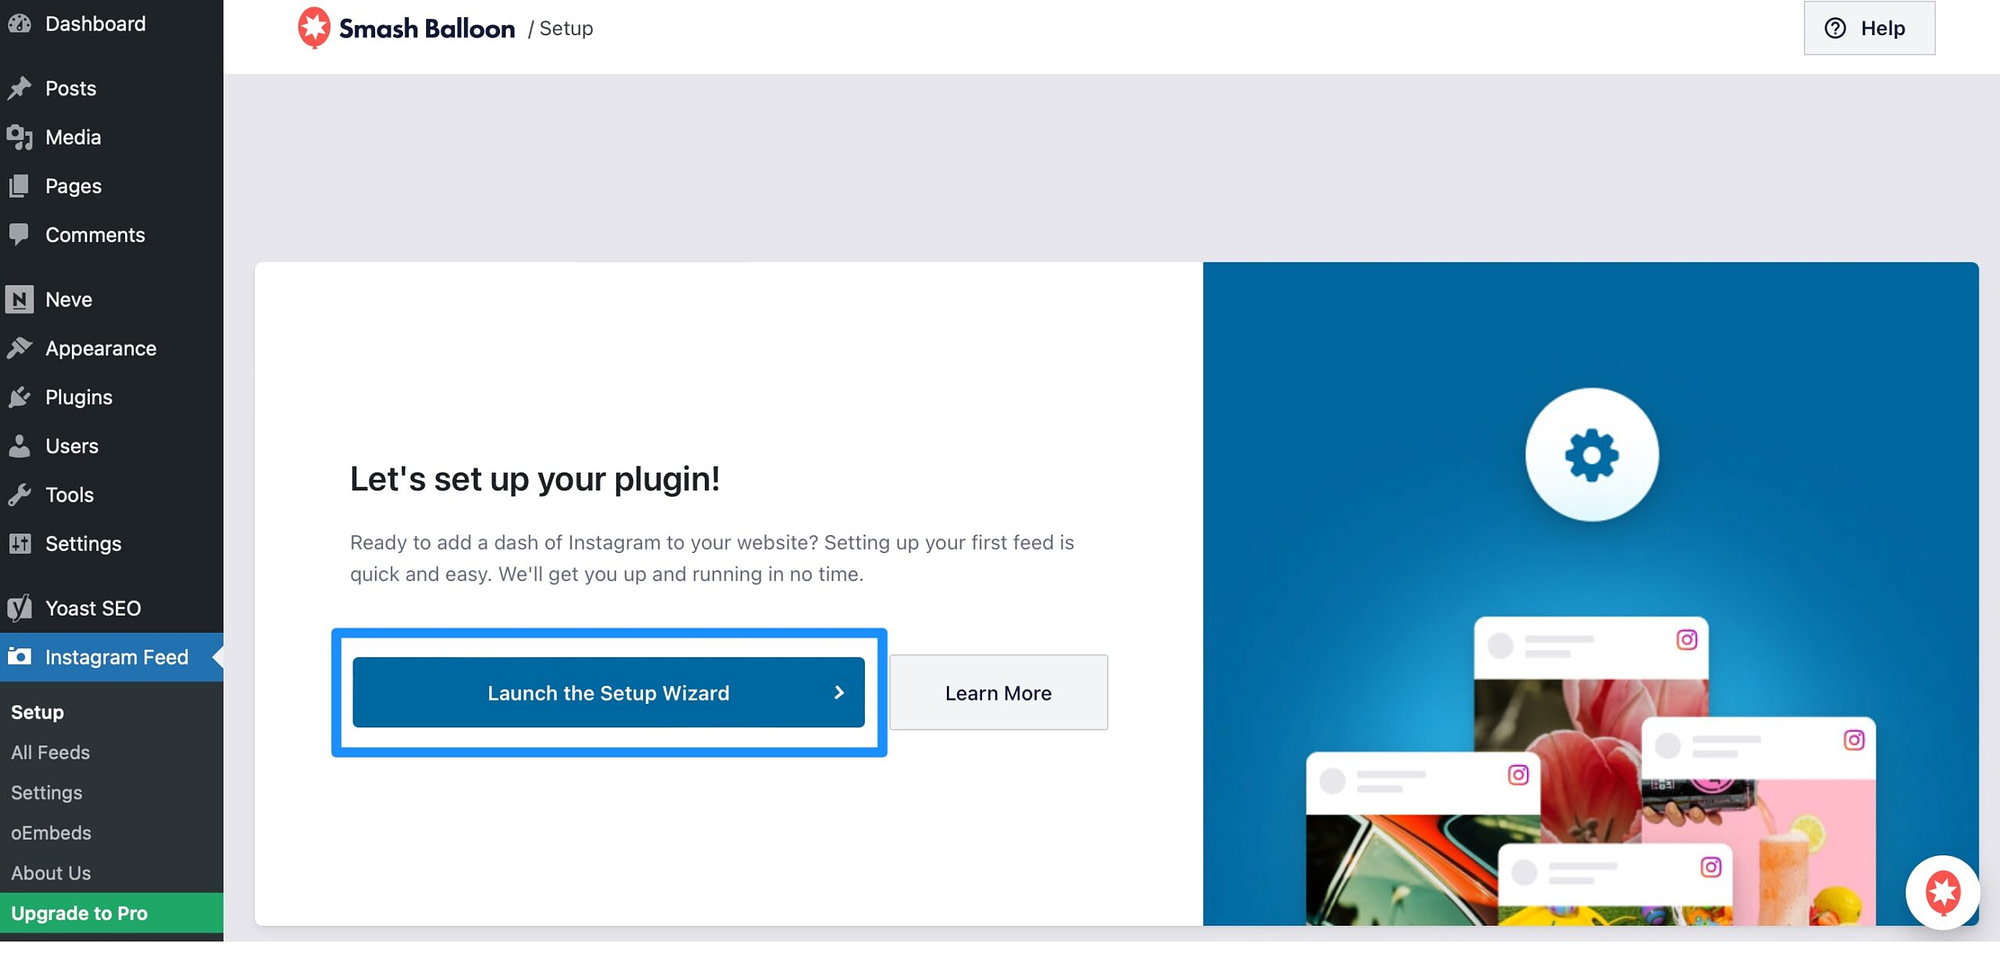
At this point, you should see a new Instagram Feed tab listed in the WordPress sidebar. Click on the tab and select Launch the Setup Wizard:
The first thing you’ll be asked to do is connect to your Instagram account. This will redirect you to the Smash Balloon app.
Step 2: Connect to your Instagram account 🤝
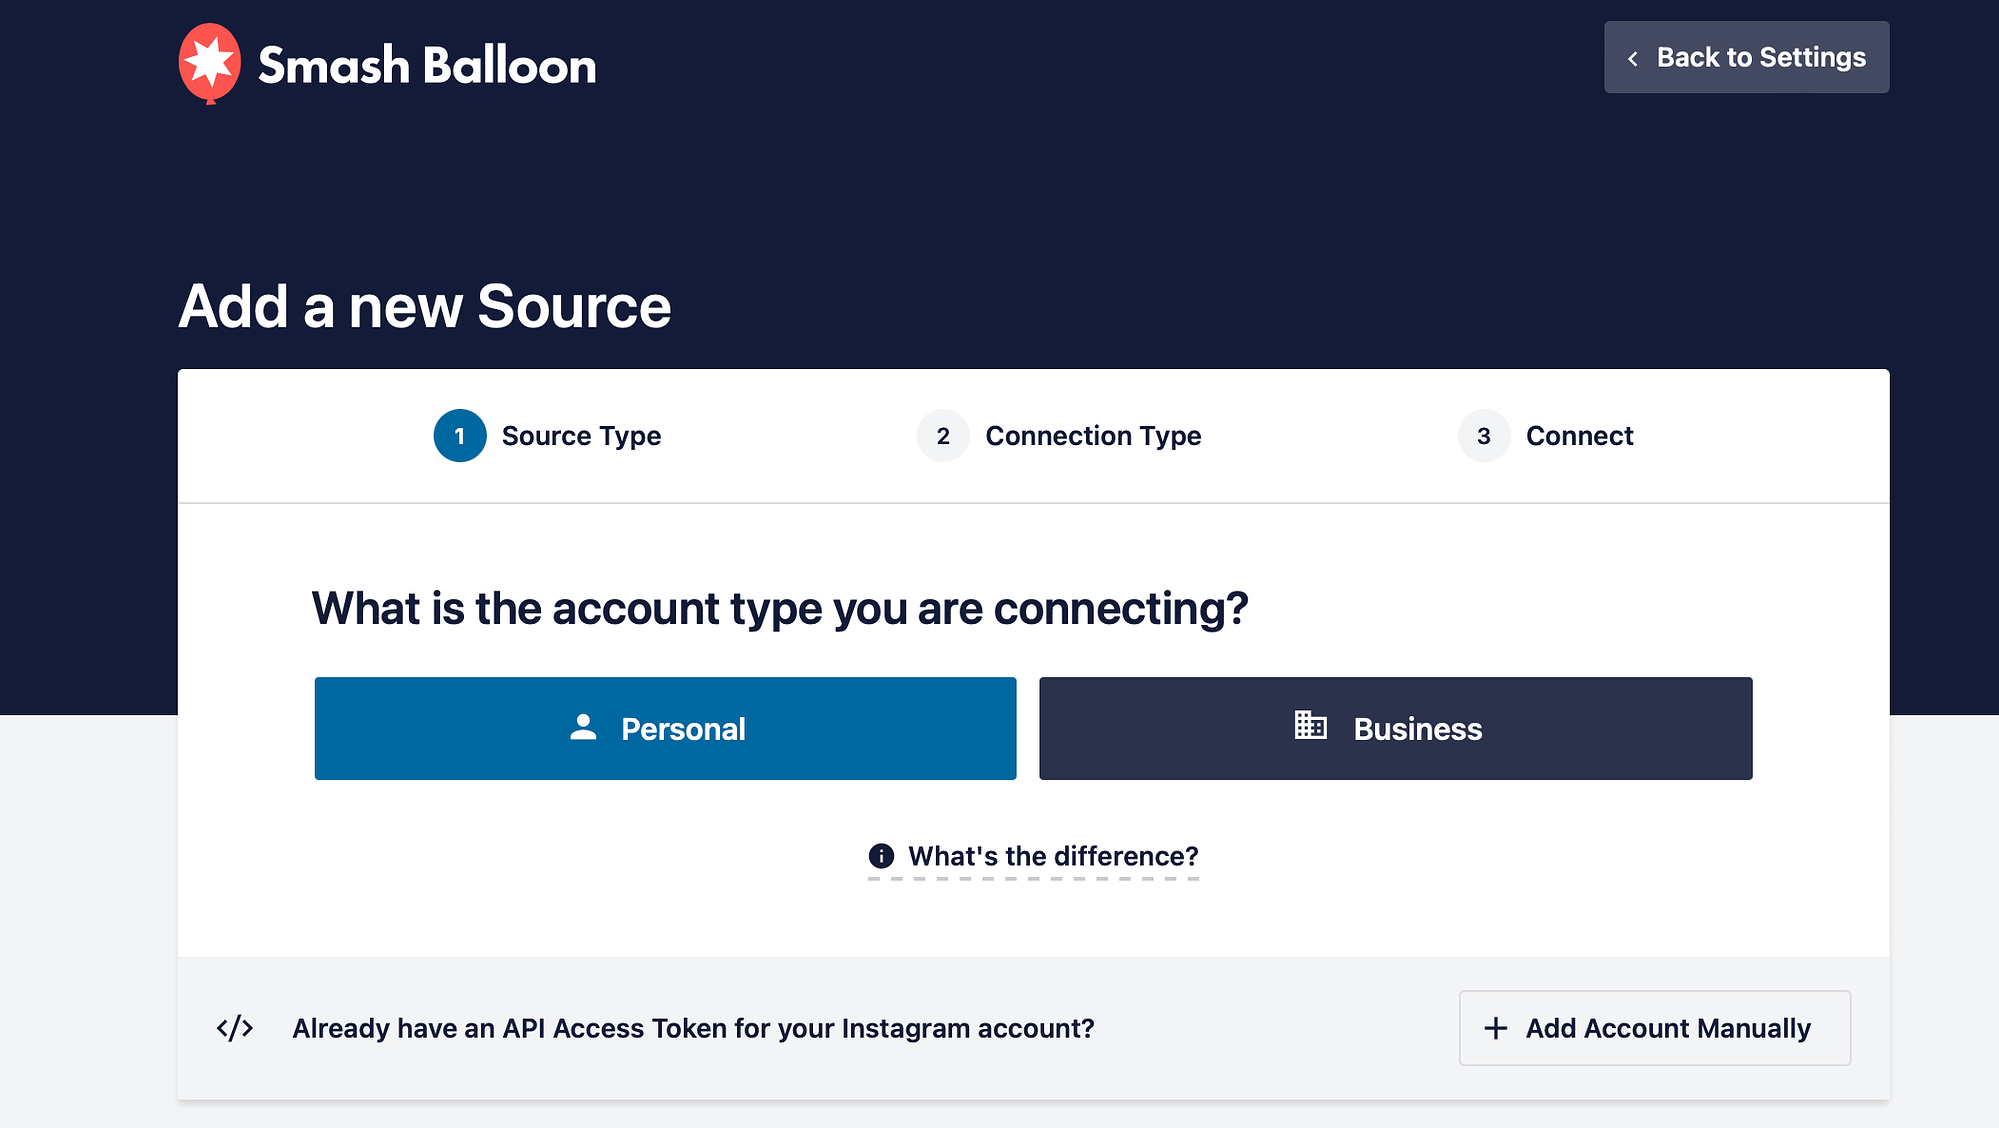
To connect to your Instagram account in the Smash Balloon app, you’ll need to add a new source. You’ll also need to tell Smash Balloon whether you’re connecting to a Personal or Business account:
It’s best to open a fresh tab and connect to your Instagram account before taking the next step. Now, return to the Smash Balloon app and click on Connect with Instagram.
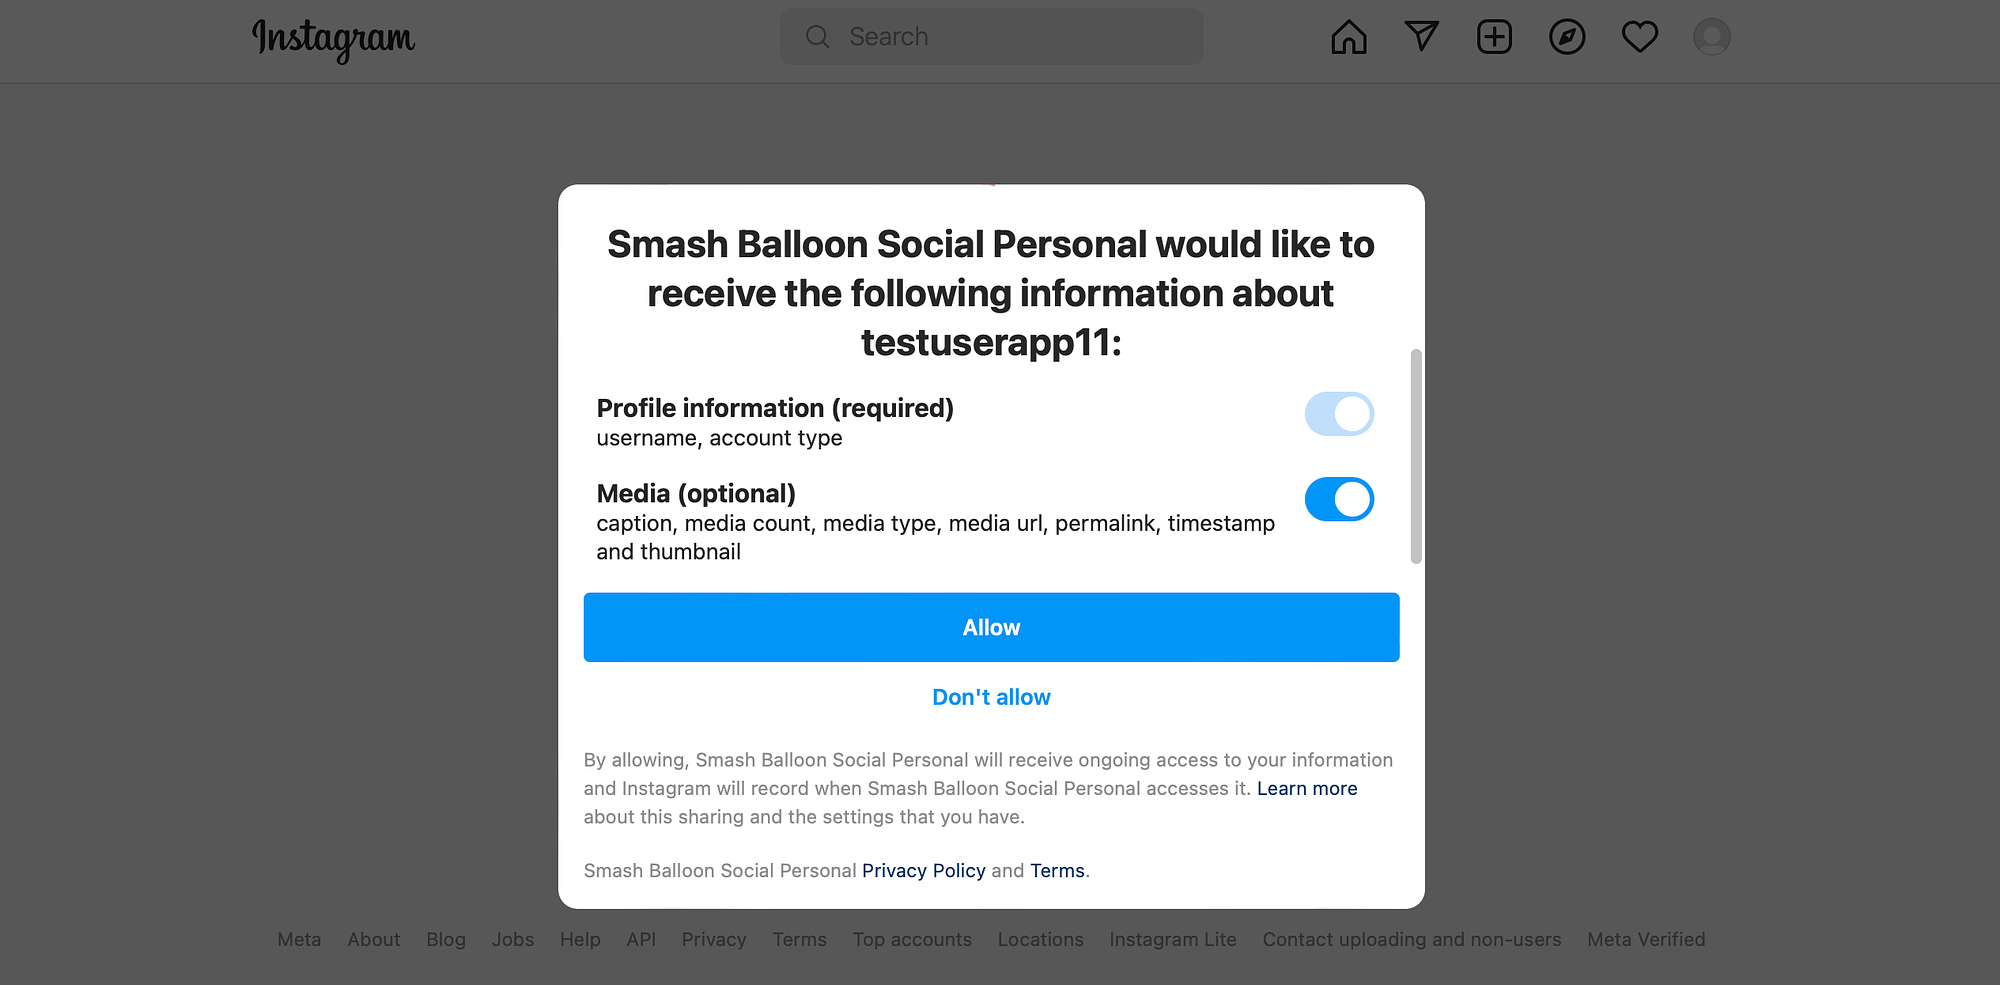
You can use the sliders to define the information that Smash Balloon receives from your account. Then, click on Allow:
Next, you’ll be asked to verify your Instagram domain. Then, you’ll be taken back to the Smash Balloon Setup Wizard. Here, you’ll see that your Instagram account has been added successfully:

You can continue to add more Instagram accounts, or click on Next.
Now, you’re able to configure various other settings and features as you move through the installation process. For instance, you can optimize images, display Instagram posts that have a specific hashtag, and enable posts that you’ve been tagged in.
You’ll be notified once the process is complete:
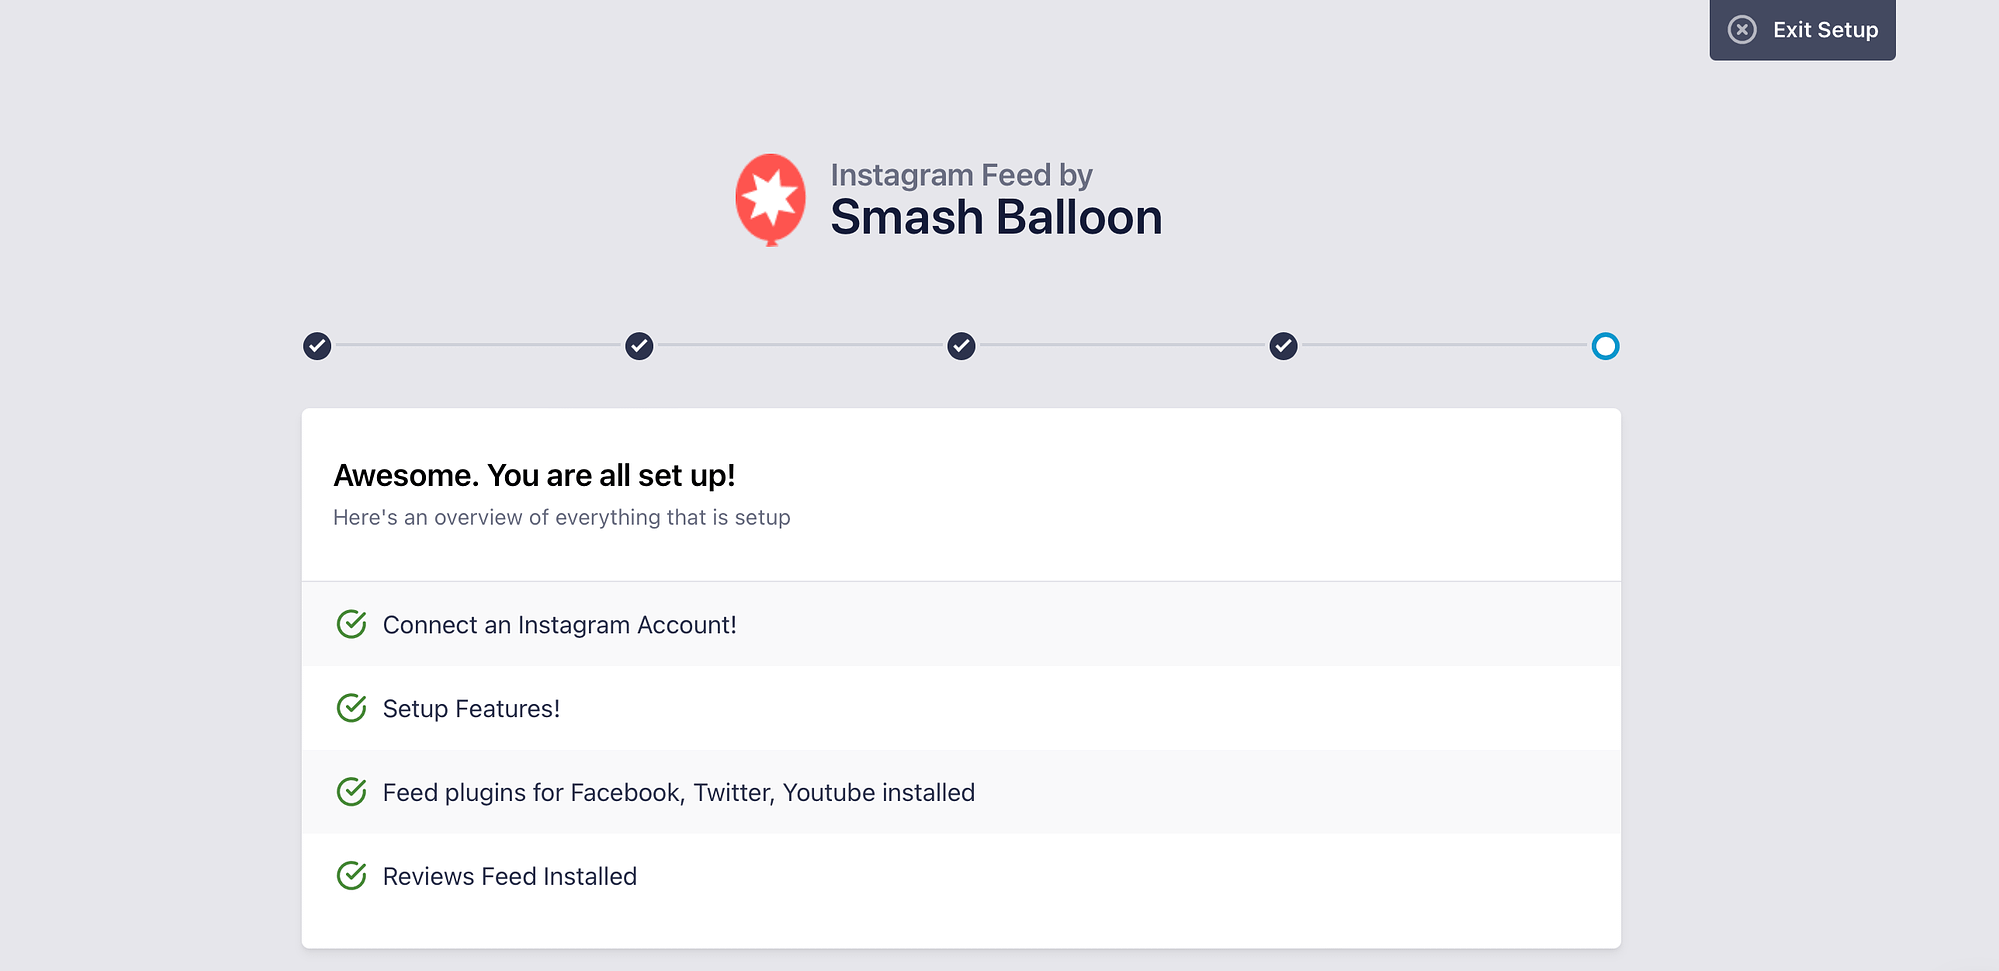
Then, scroll down to the bottom of the page. Here, you can enter a license key to upgrade to a premium plan. Or, click on Complete Setup Without Upgrading.
Step 3: Add and customize your Instagram feed ⚙️
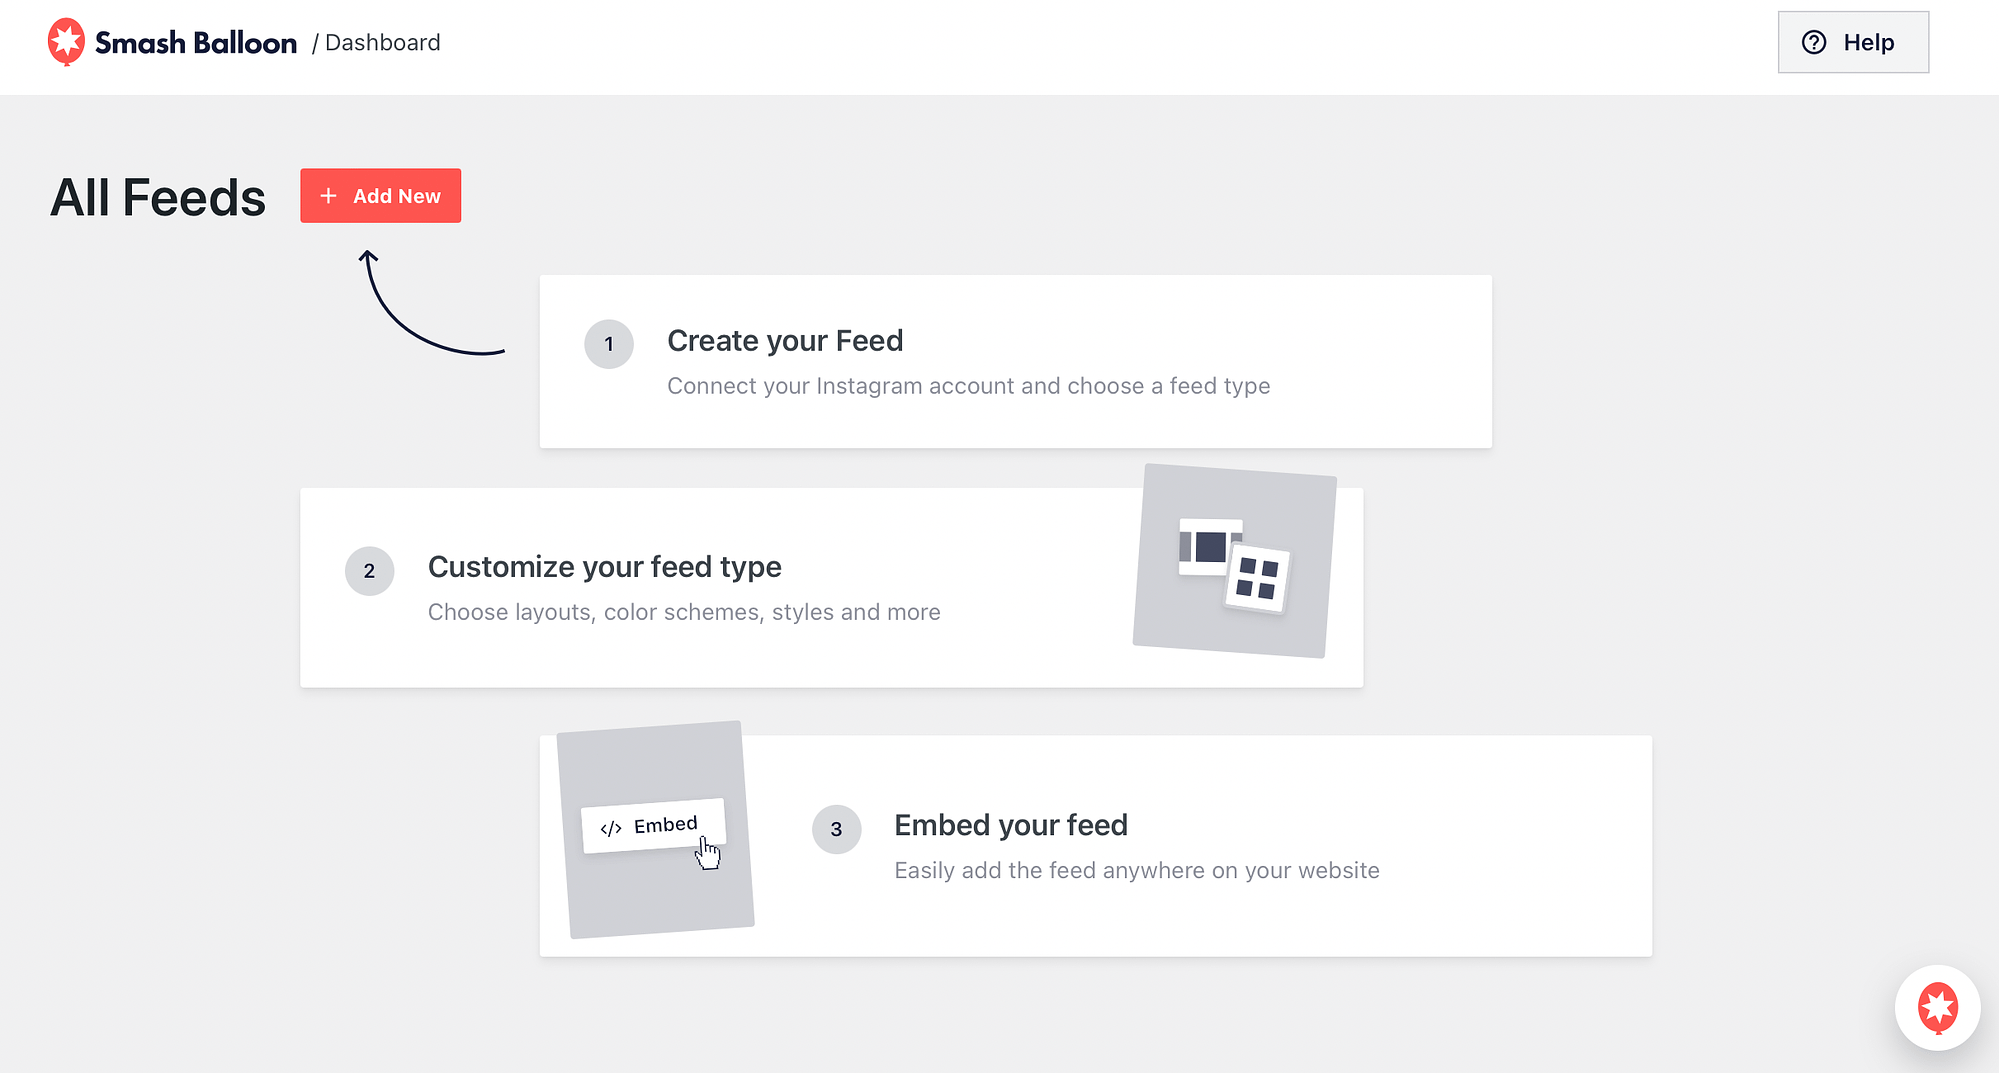
Now that you’ve connected Smash Balloon to your Instagram account, you’re ready to add your first feed. To do this, go to Instagram Feed > All Feeds. Then, click on Add New:
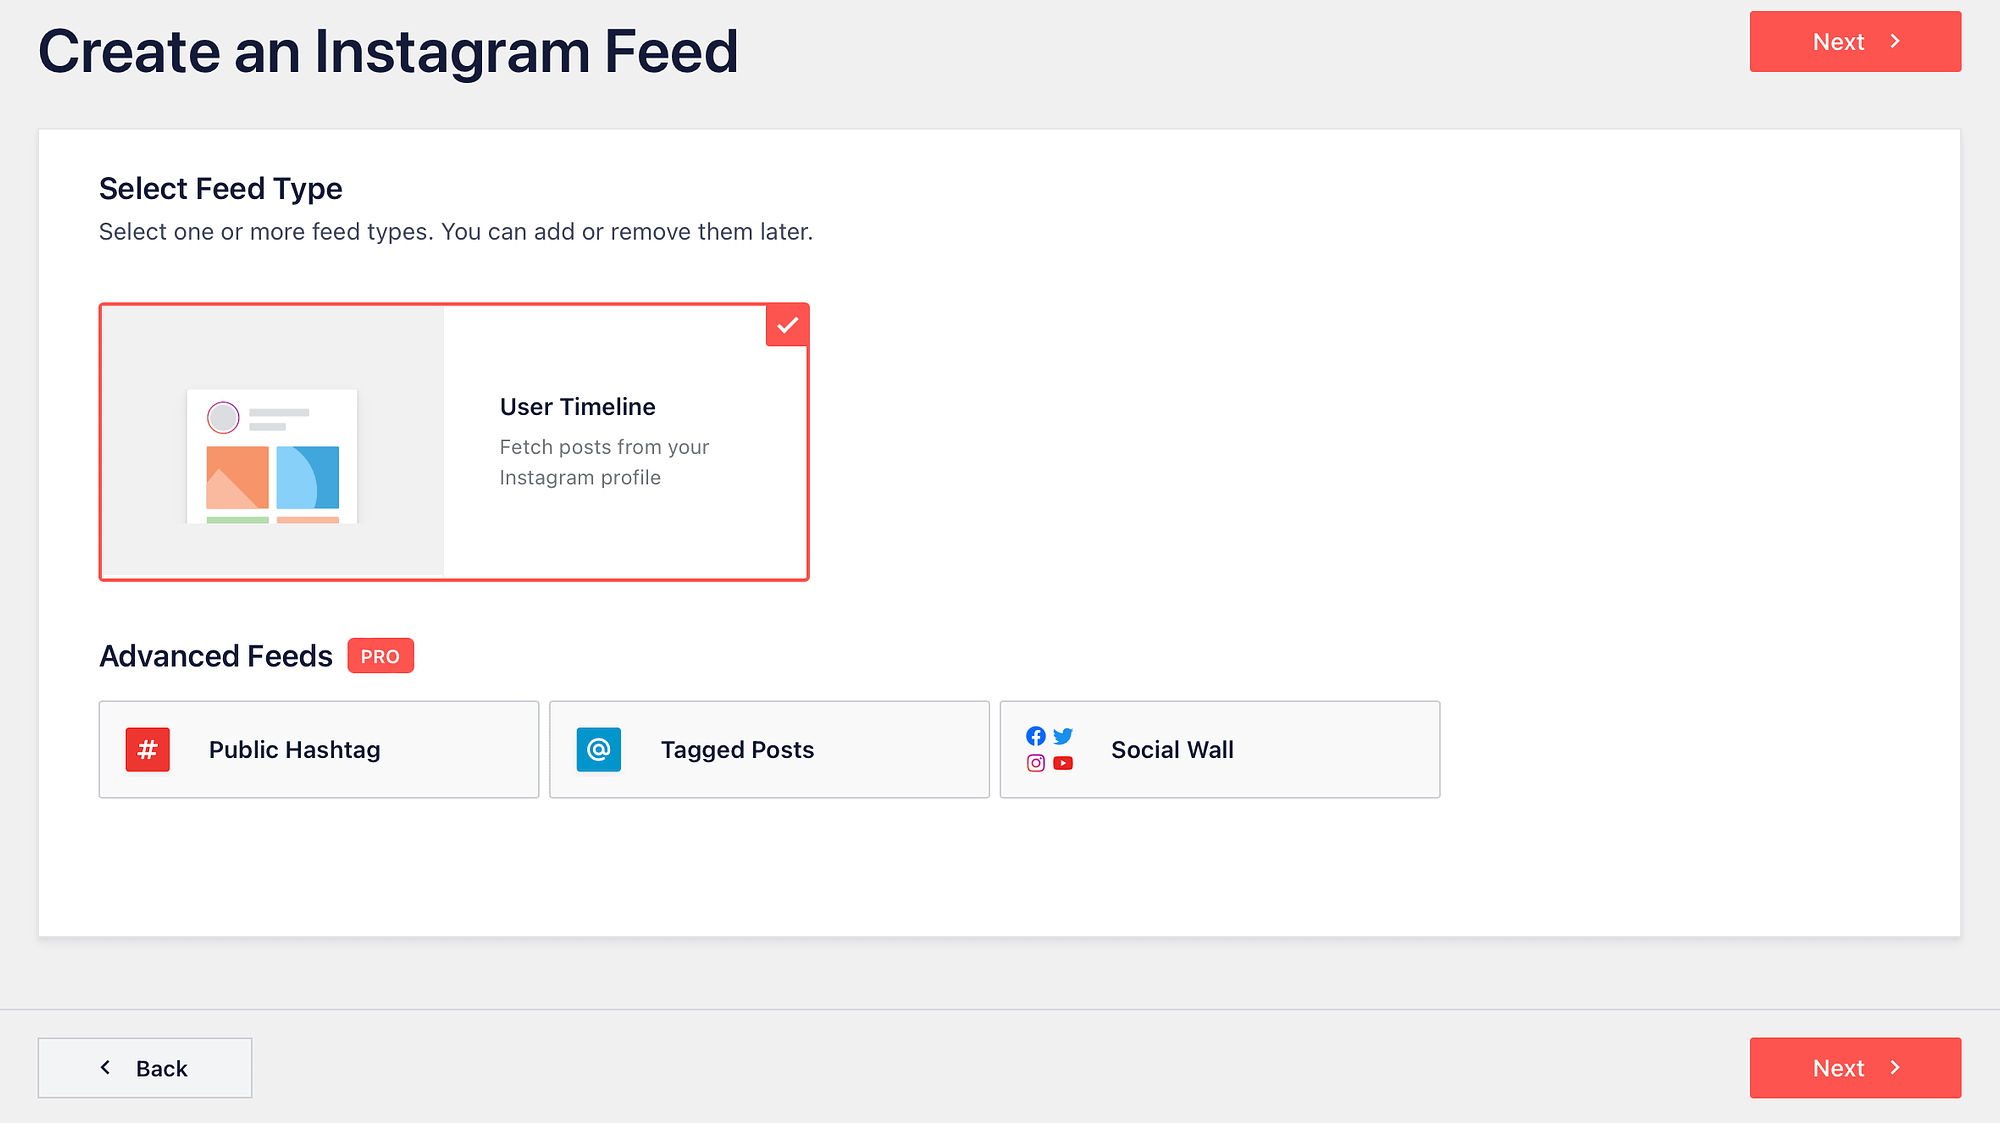
With the free version of the plugin, you’ll only be able to create User Timeline feeds. But, if you’re using Smash Balloon Pro, you can create feeds from tagged posts and hashtags, too.
Now, click on Next:
Here, you can choose the source that will generate your Instagram feed. You should see the Instagram account that you connected to in the previous section:
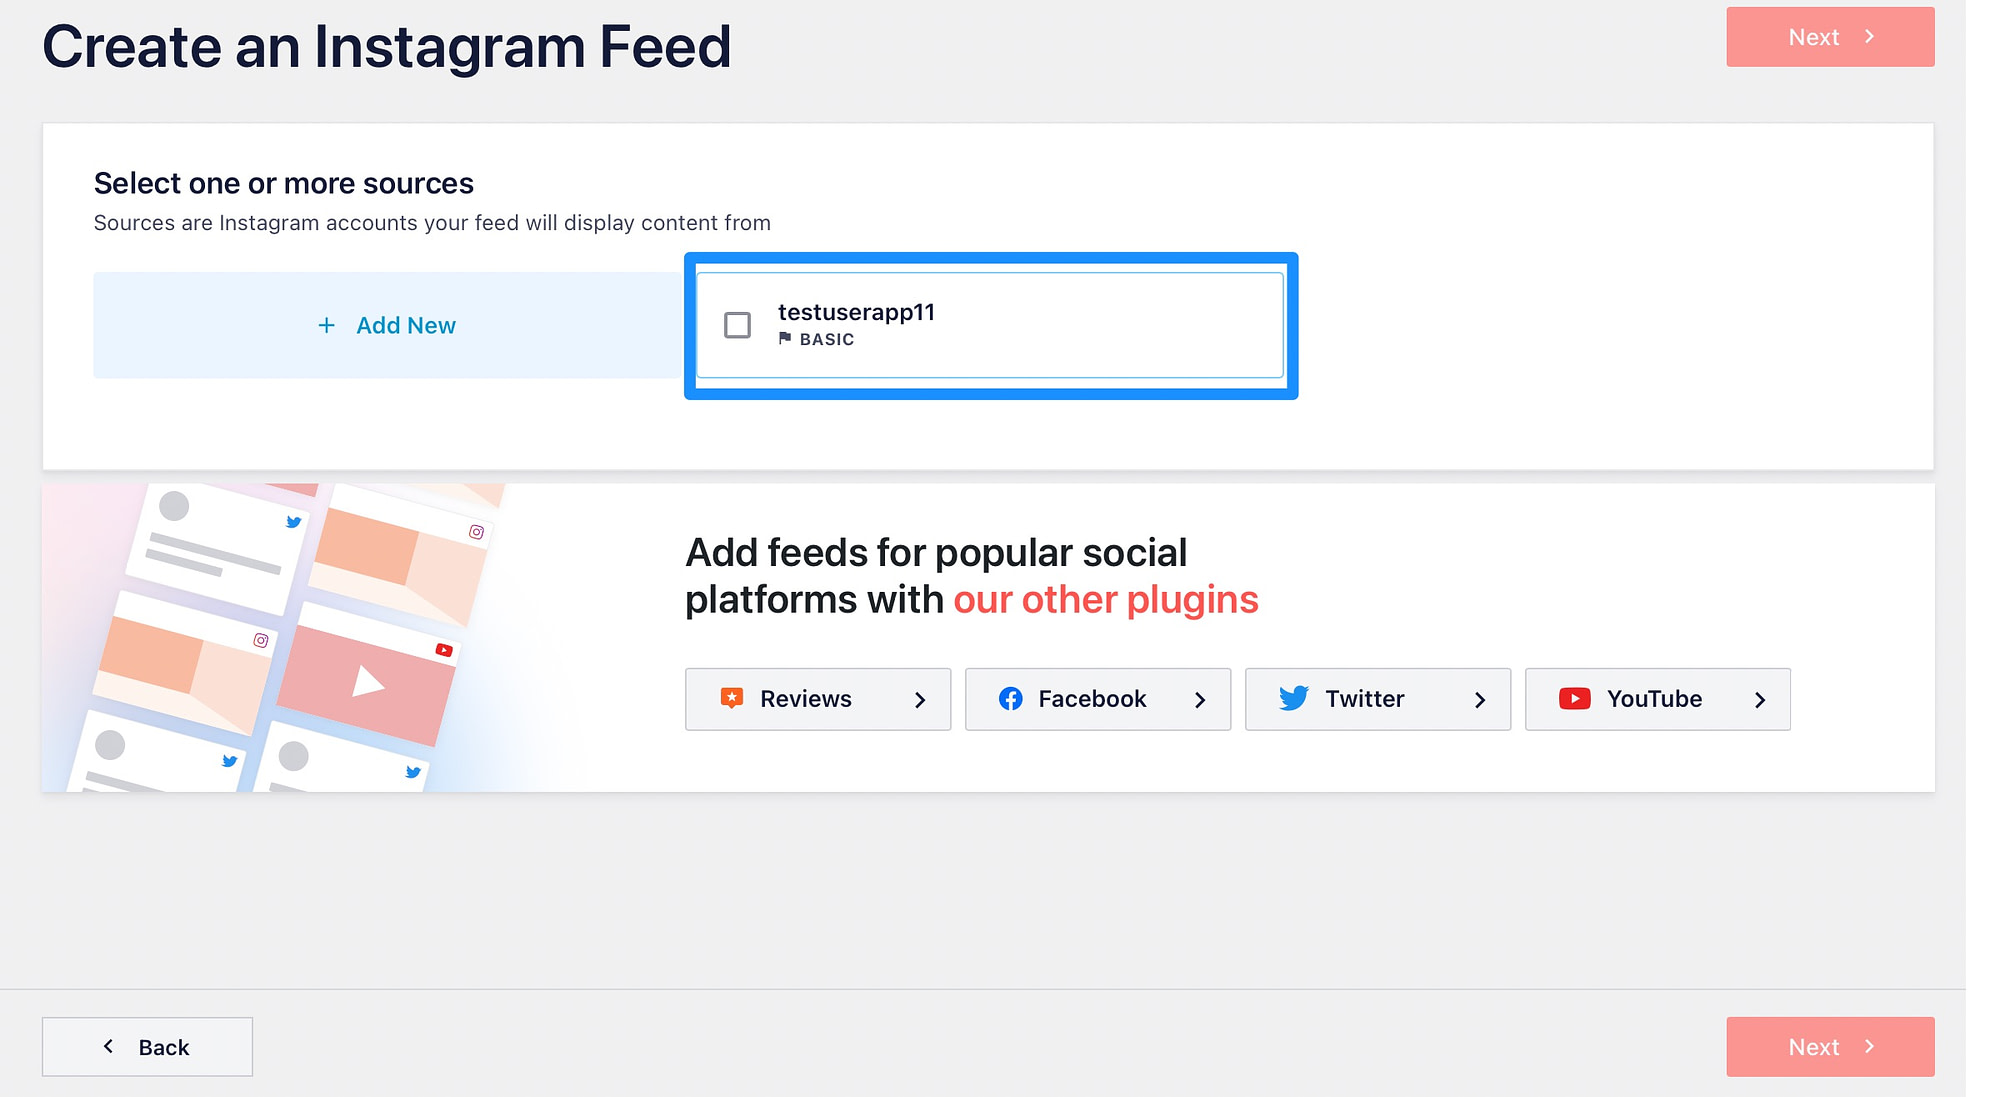
Select the relevant Instagram account and click on Next.
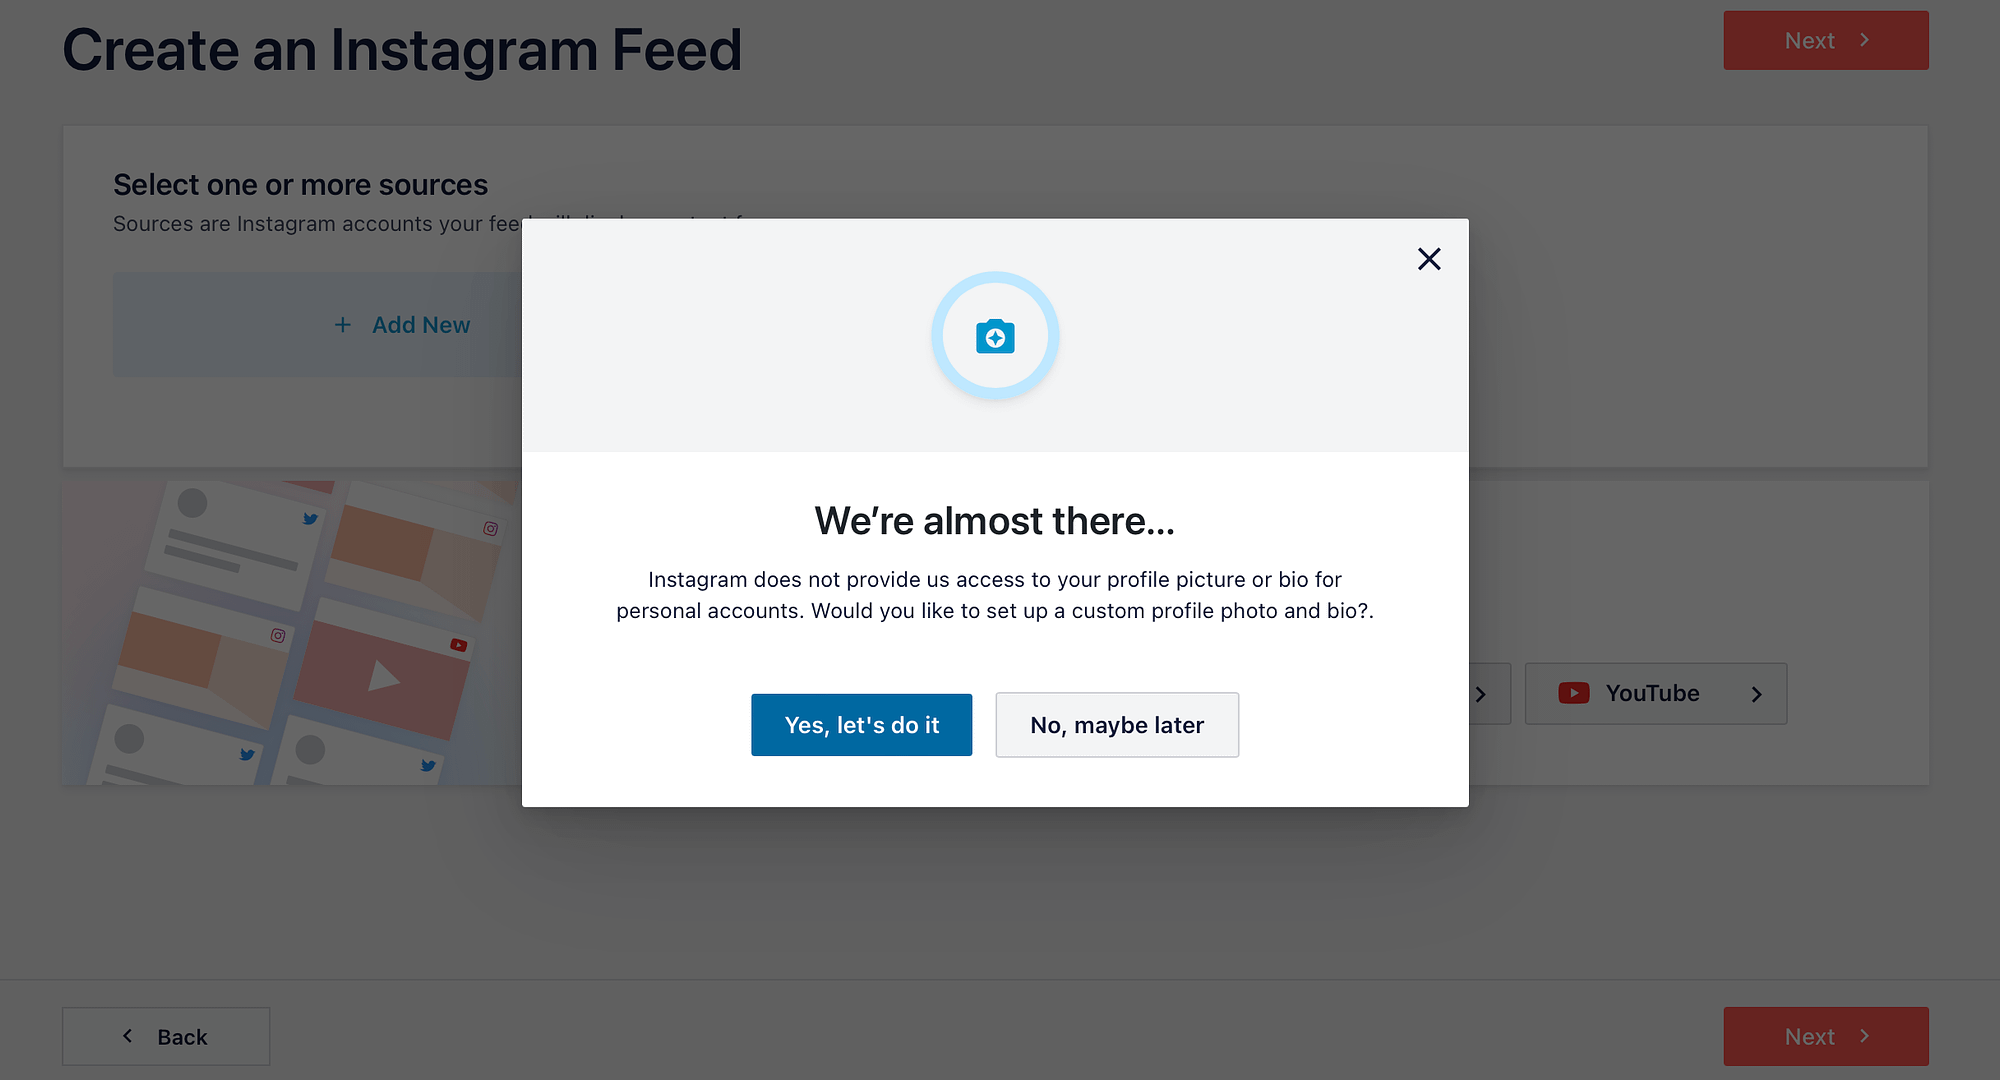
By default, Smash Balloon doesn’t gain access to your profile picture or bio. So, you can choose to set up a custom profile picture and bio, or continue without doing that:
Now, your feed will open in the Smash Balloon editor, where you can customize its appearance:
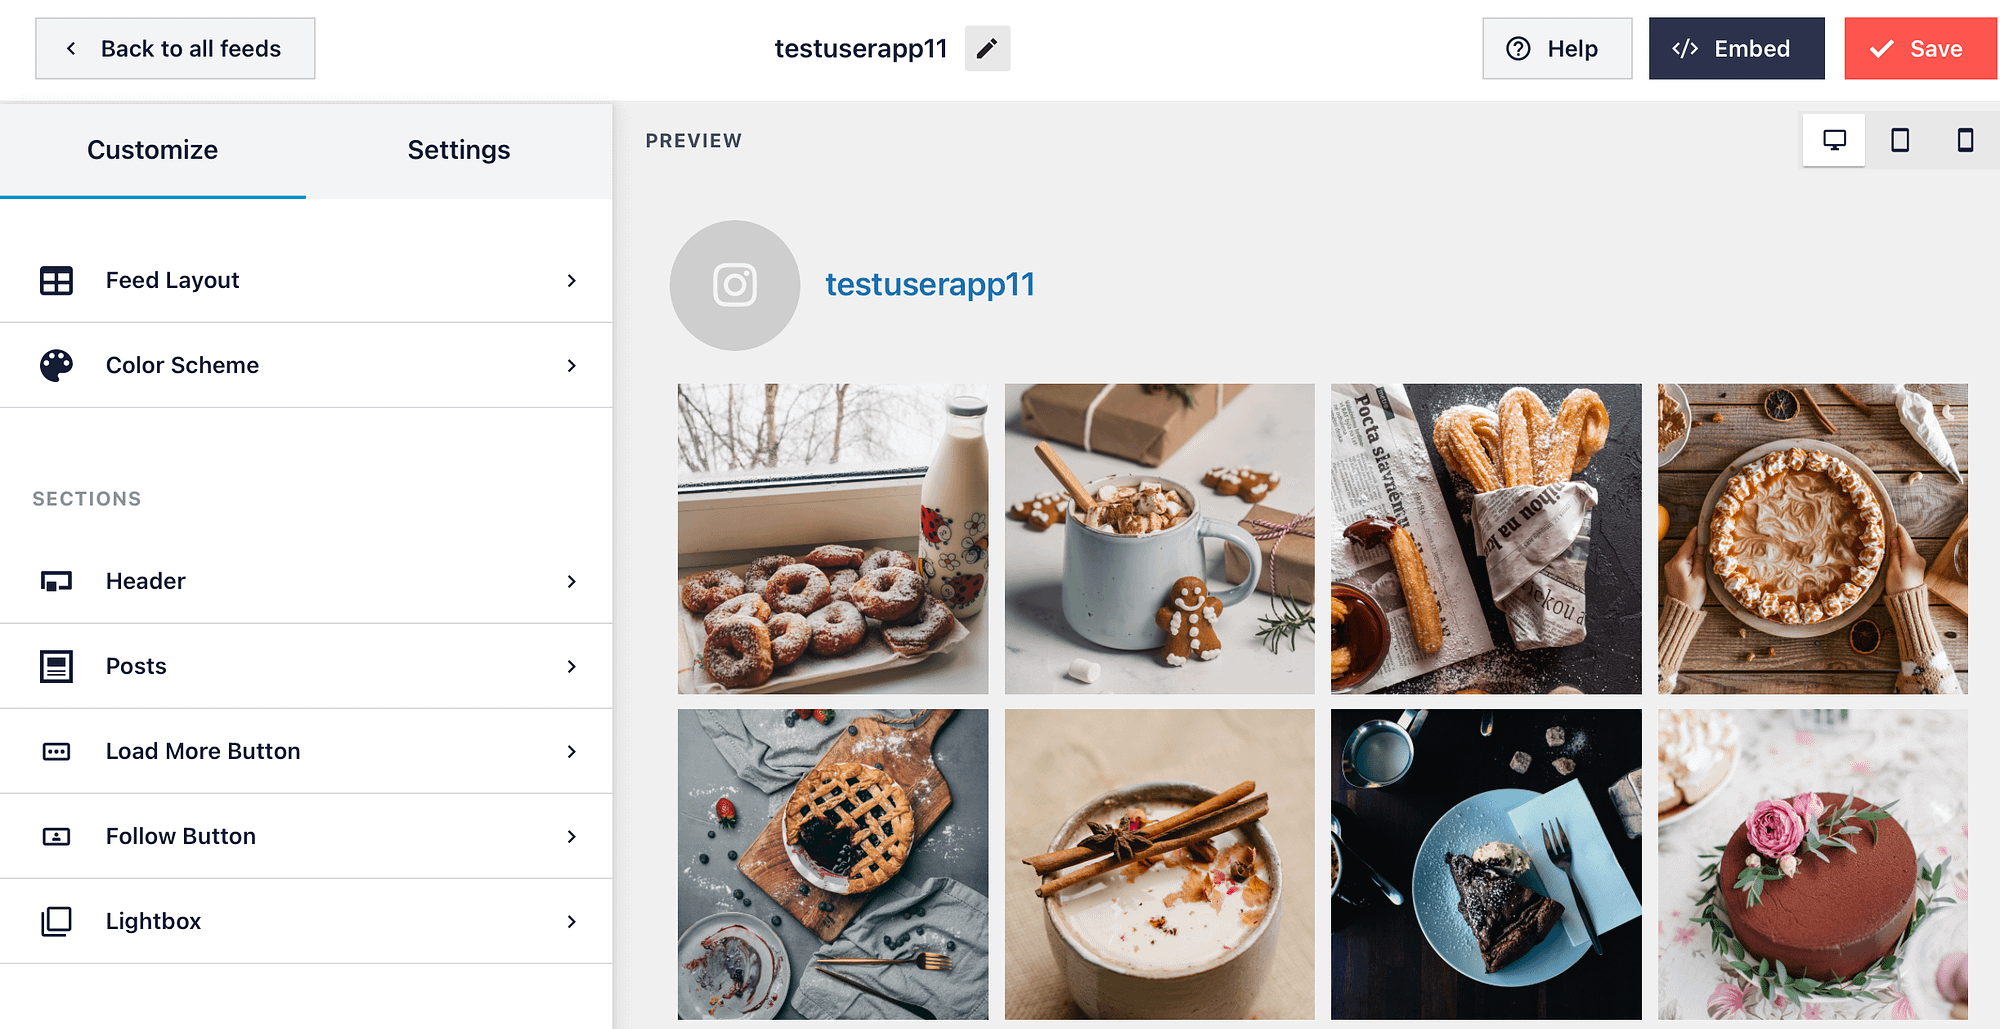
For example, under Feed Layout, you can adjust the height, and change the number of columns and posts. Meanwhile, you can visit the Color Scheme tab to create a custom color scheme for your feed:
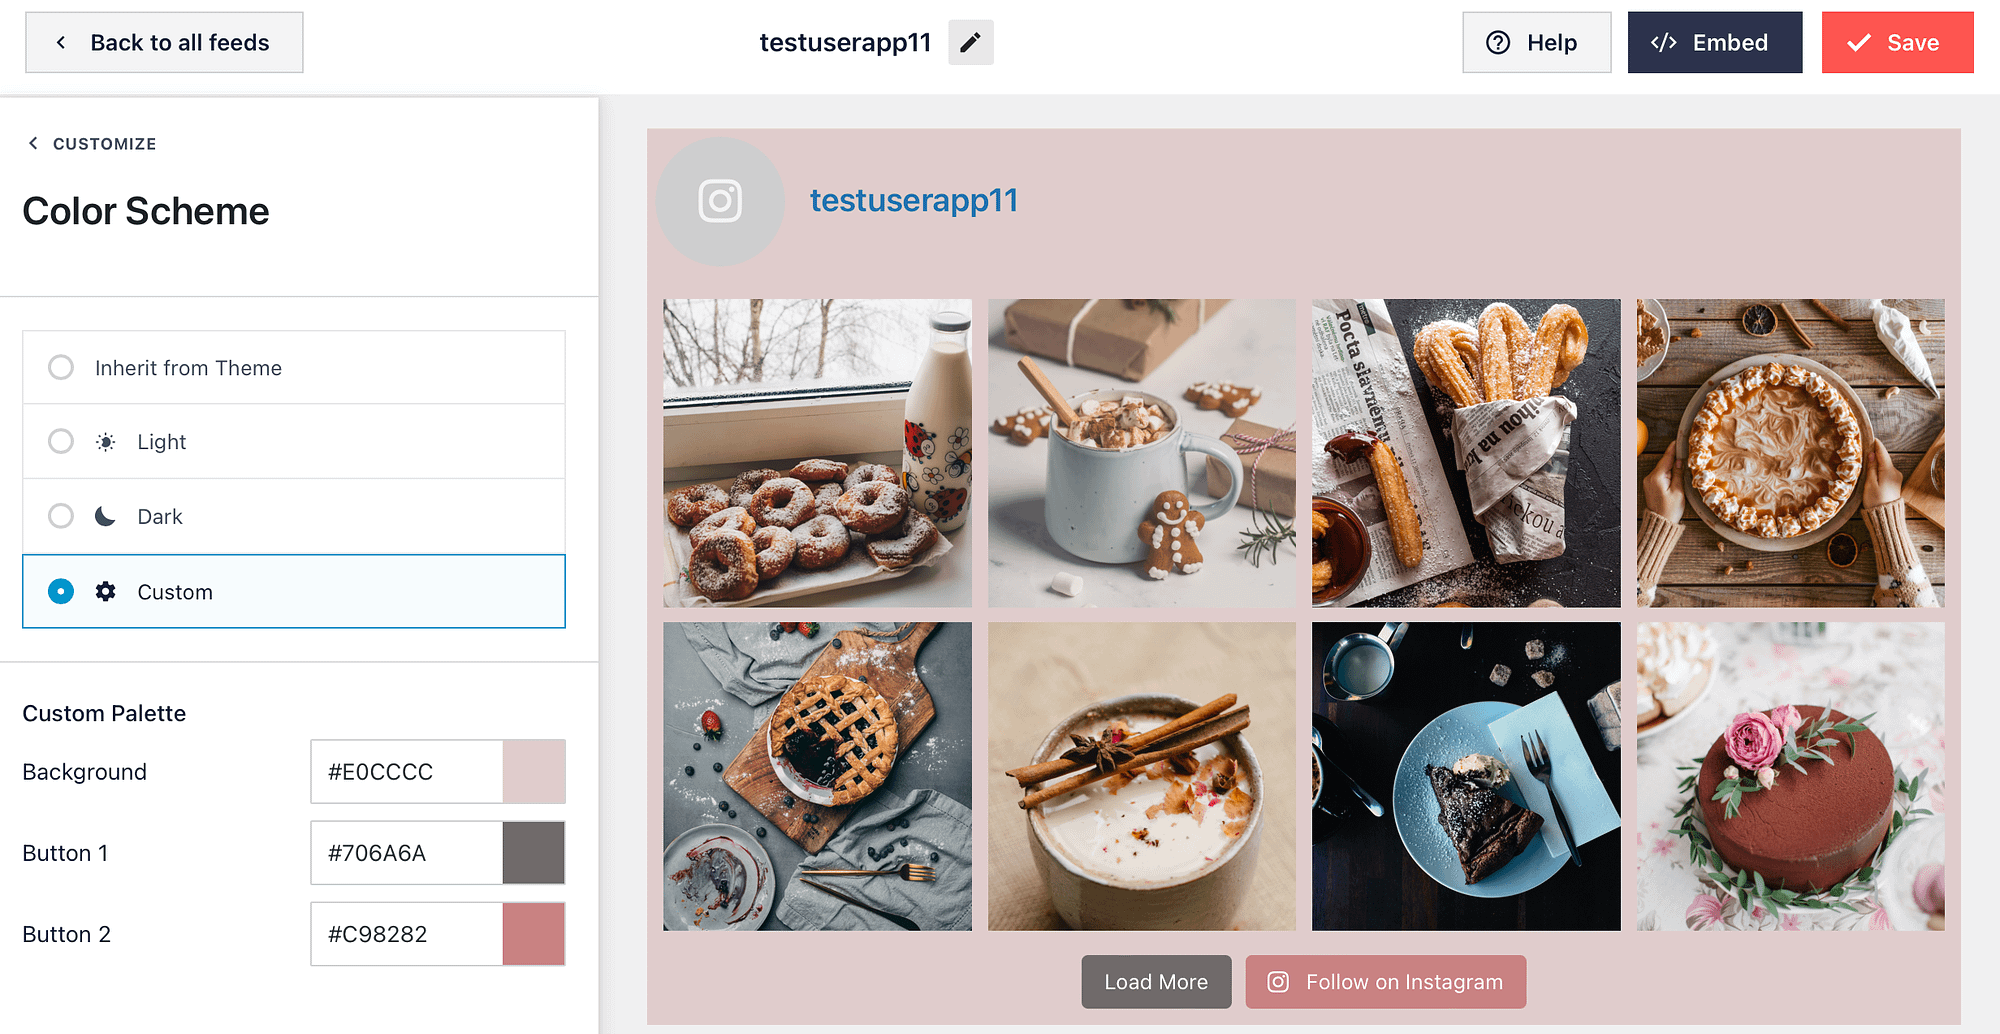
What’s more, you can disable the Instagram header under the Header section. You can also change the text on the “Load More” and “Follow on Instagram” buttons.
Plus, with the Pro version, you’re able to display likes and comments on your posts, and change the layout to masonry or carousel. Make sure to click on the Save button to update your WordPress Instagram feed.
Step 4: Embed the Instagram feed in WordPress 🖱️
At this point, you’re ready to embed your WordPress Instagram feed using a block, widget, or shortcode. If you’re using shortcode, simply click on the Embed button within the editor and copy the code that displays there:
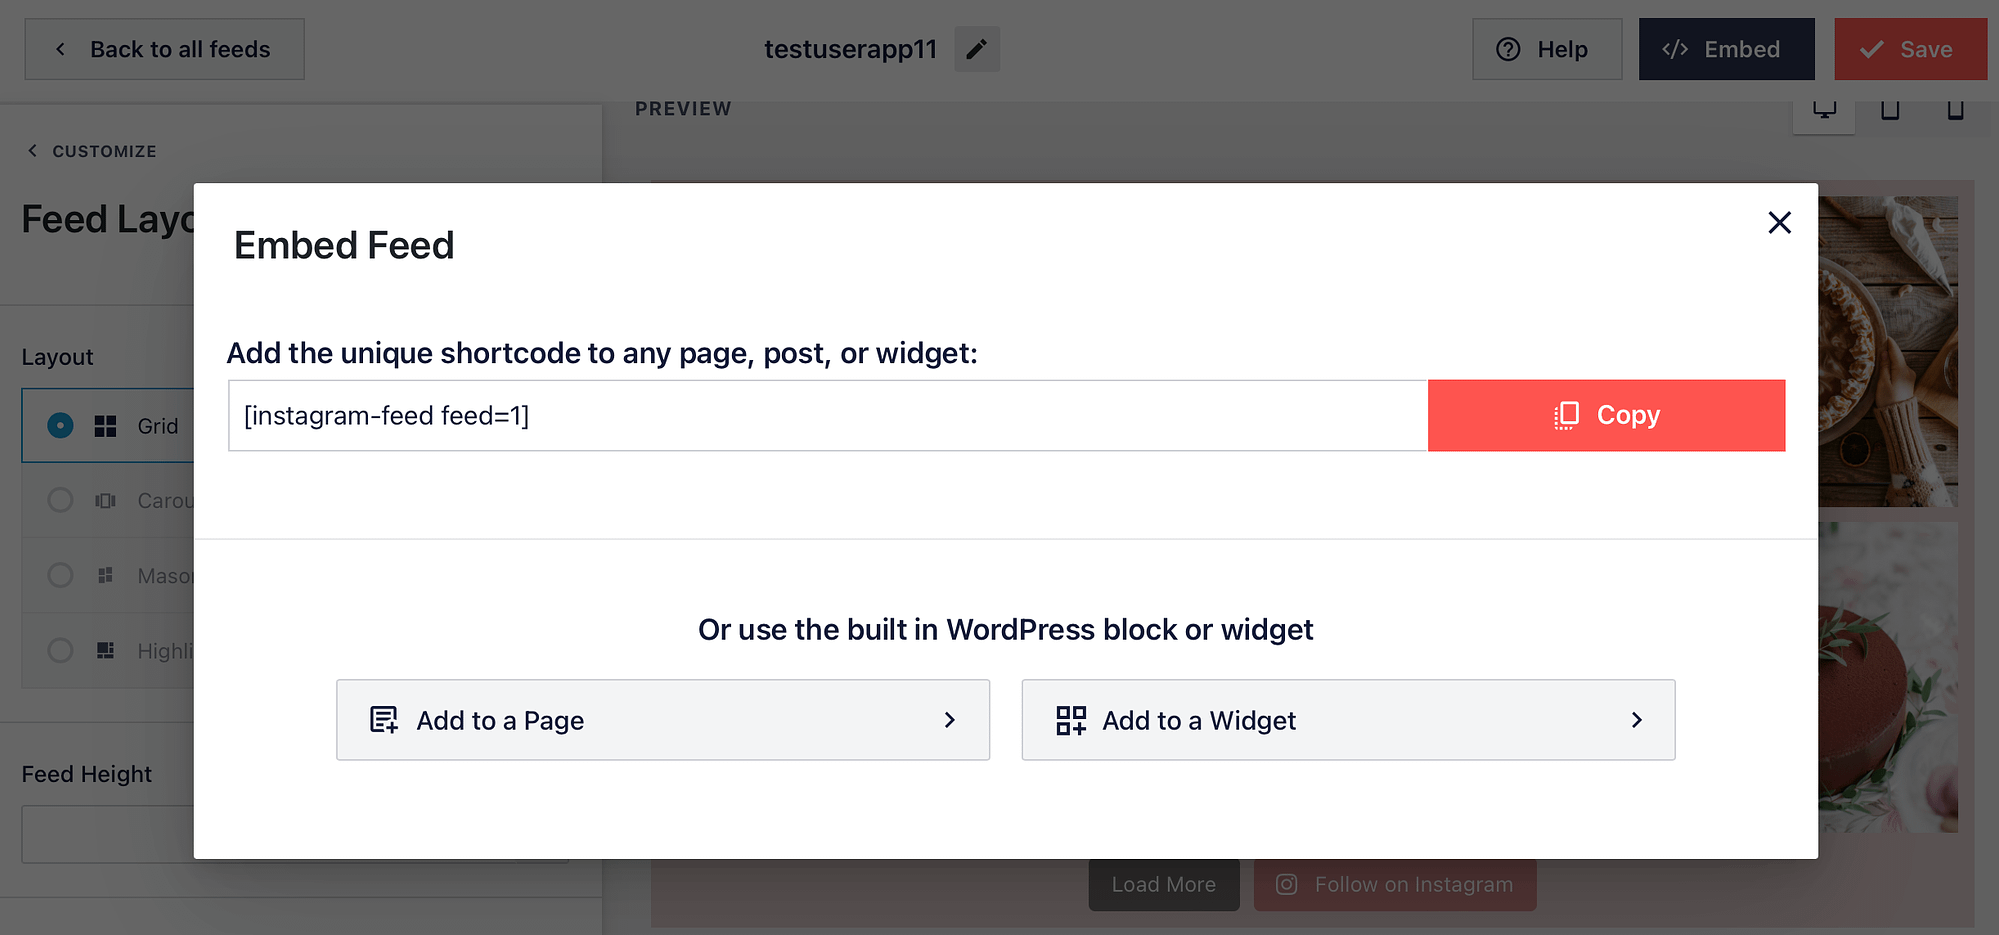
Here, you’ll also see that you can embed your feed using the built-in WordPress block or widget. To proceed with the block, select Add to Page. Or, to use the widget, choose Add to a Widget.
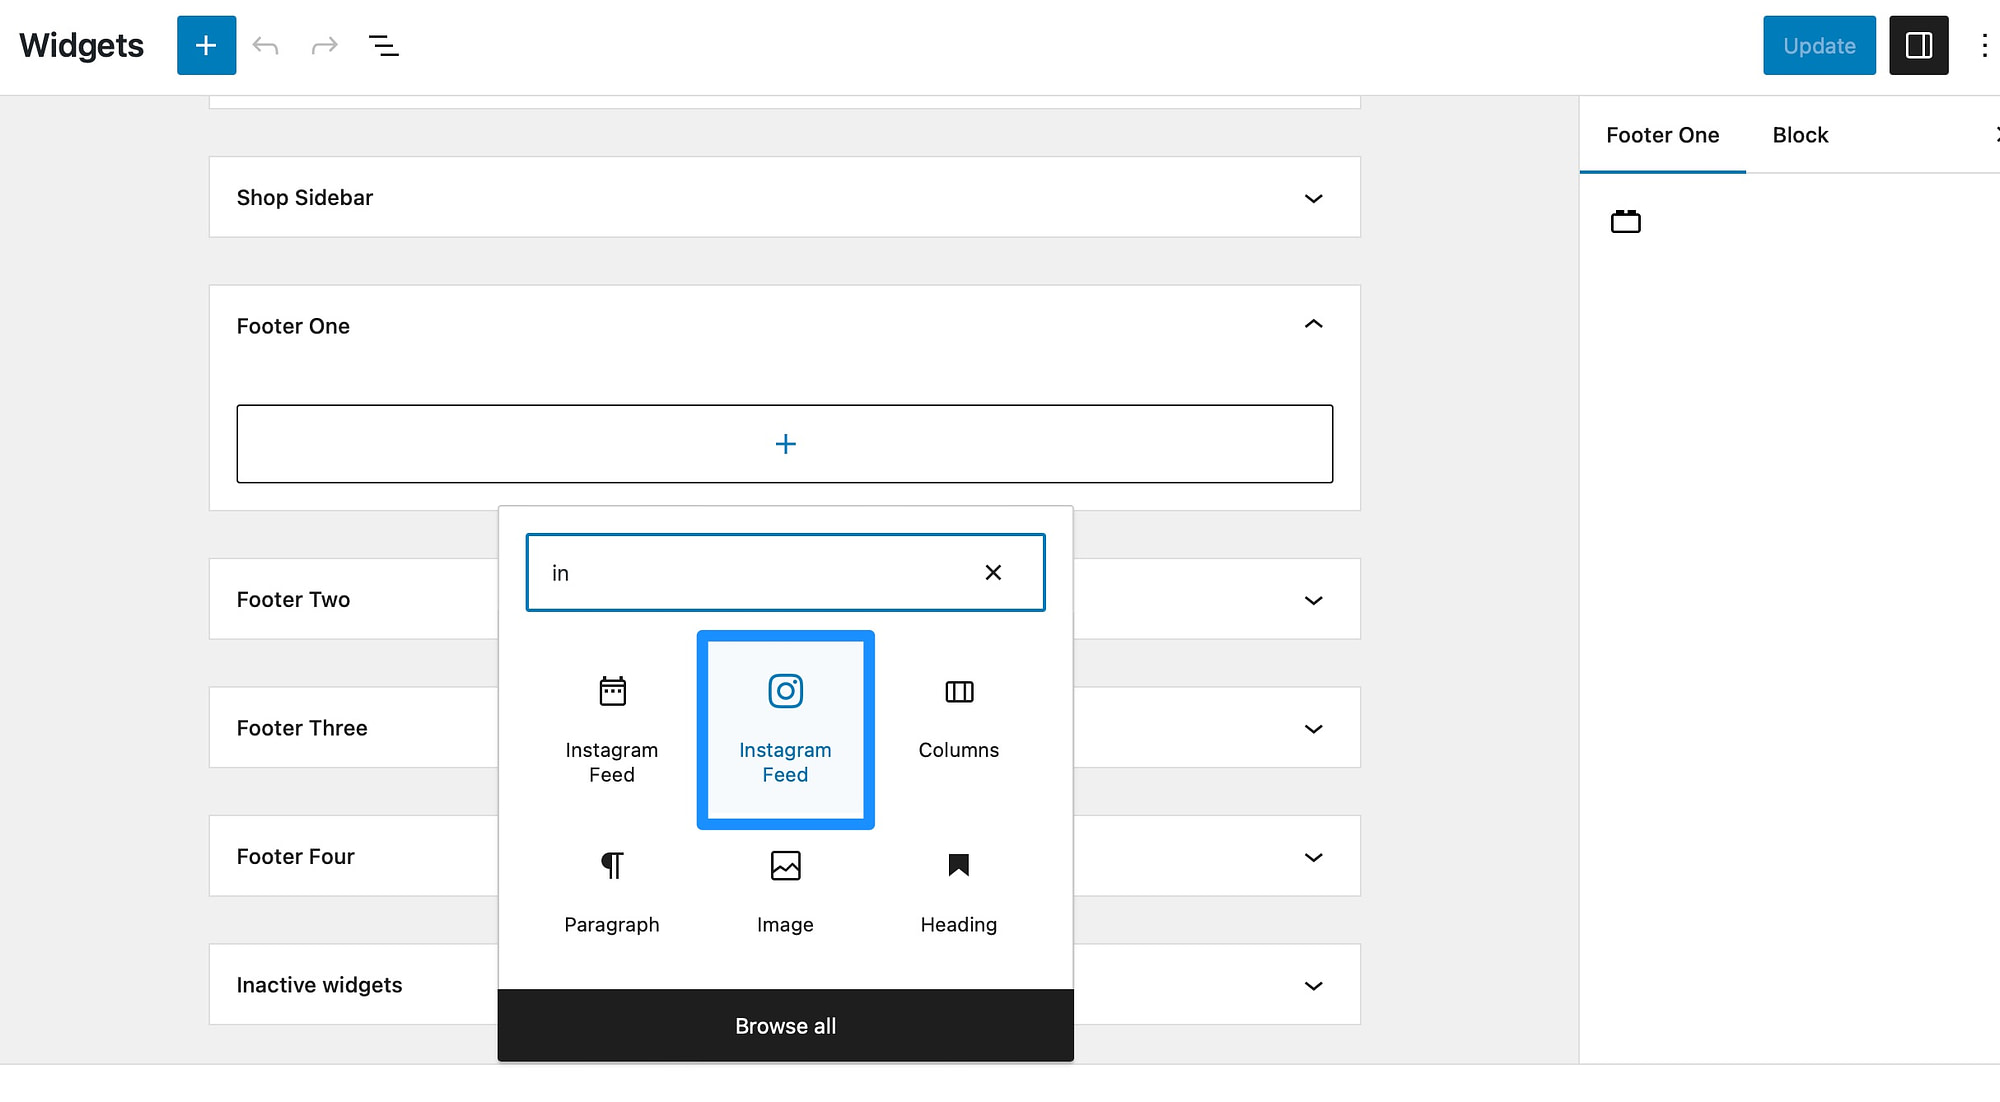
A widget can be a good option if you want to display your WordPress Instagram feed in your header or footer. With this method, you’ll need to locate the Instagram Feed option in the Widgets screen:
Instantly, your feed should appear in the widget area:
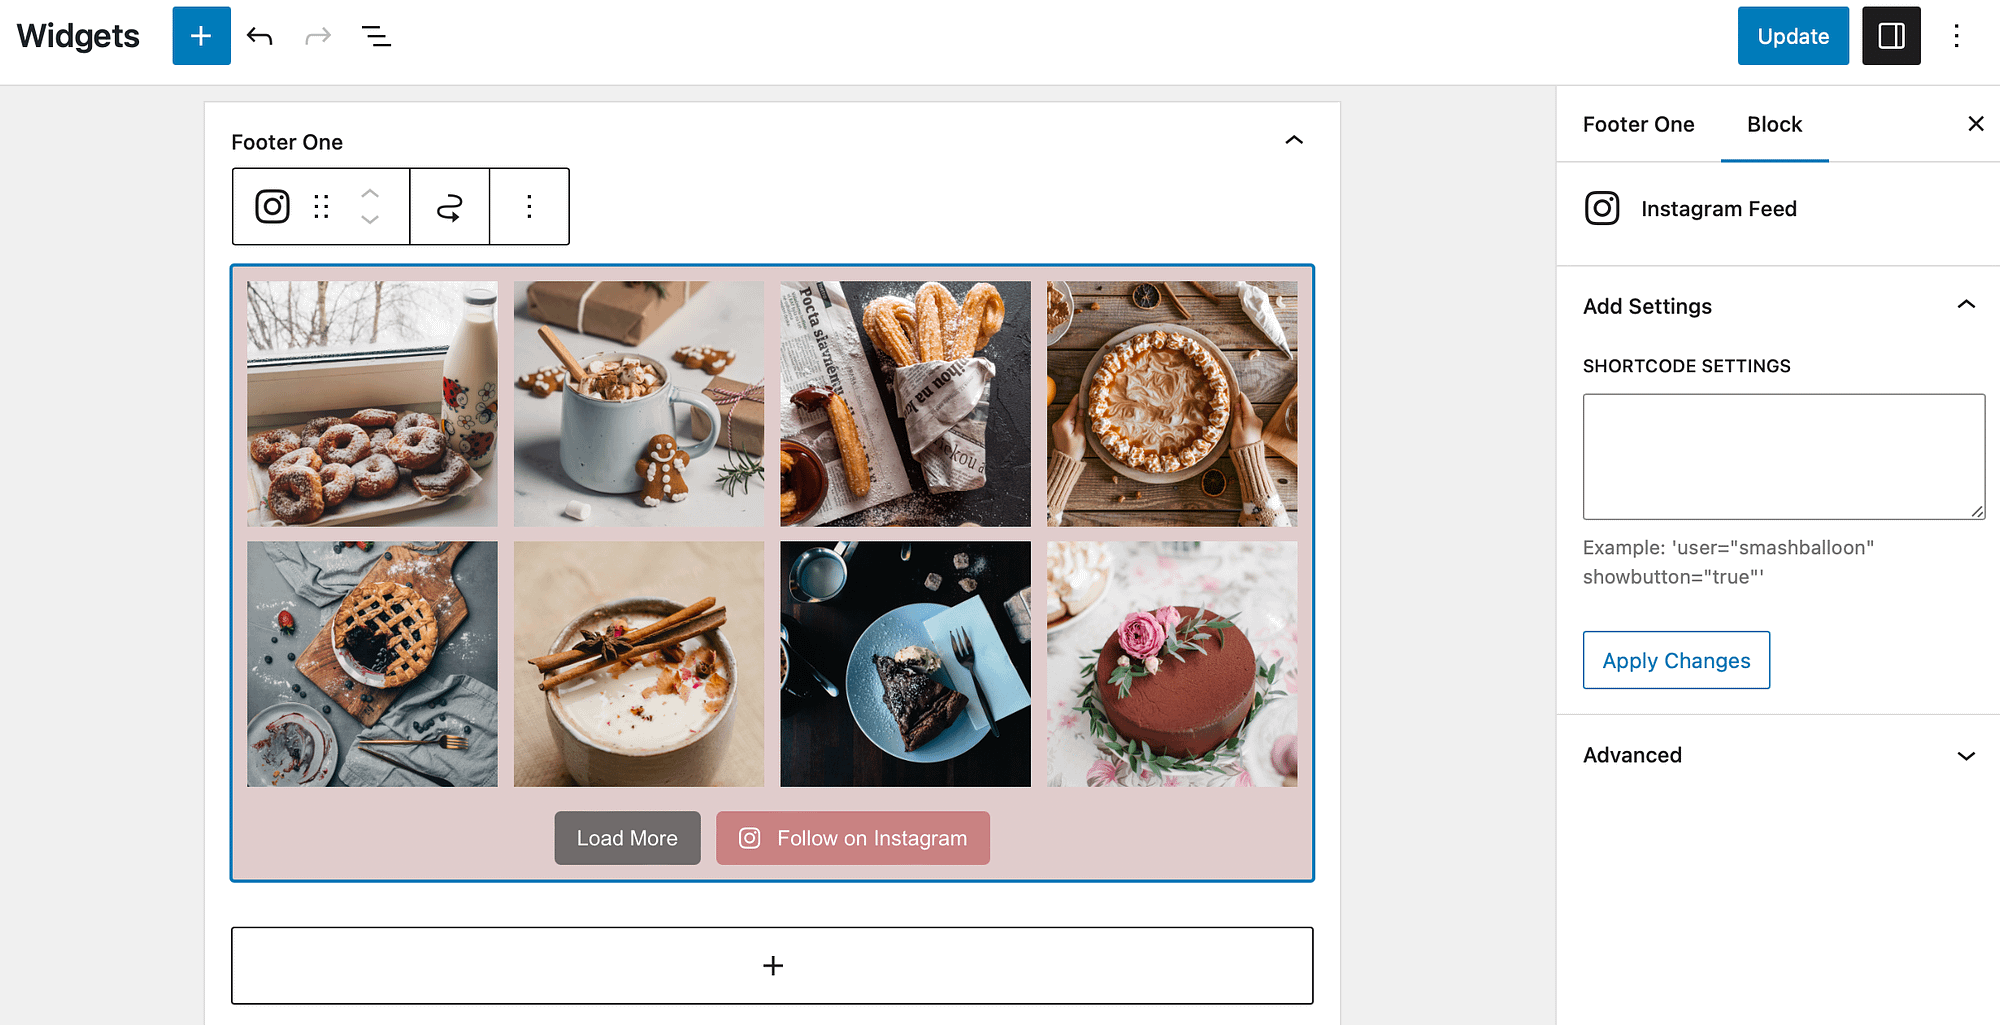
If you’ve created multiple feeds and the widget is displaying the wrong one, enter the shortcode for the relevant feed in the Shortcode Settings to the right. Then, click on Update and view your site on the front end to make sure your feed appears correctly.
Conclusion 🧐
An Instagram feed is a great way to exchange traffic between your Instagram account and your website. Plus, it enables you to constantly update your site with fresh content and promote your products. Better yet, it’s super simple to create a WordPress Instagram feed using a plugin.
👉 To recap, here’s how to add an Instagram feed in WordPress:
Do you have any questions about how to create a WordPress Instagram feed? Let us know in the comments below!