Imagine your website as a comprehensive database where each page or post is a separate element, and each category or tag is data that defines relationships and classifications. Without a well-organized search and classification system, visitors may encounter difficulties in finding the information they need because the content is unstructured and lacks clear navigational markers.
By combining the convenience of Elementor with the custom post organization capabilities of JetEngine, you unlock new possibilities in web development, allowing you to create websites with thoughtful structure and convenient navigation.
Let’s consider five examples of using JetEngine’s custom taxonomy with Elementor to optimize your website’s structure.
Table of Contents
JetEngine‘s taxonomy tool for Elementor is a feature that extends the capabilities of the Elementor plugin for creating posts and pages in WordPress. It helps you conveniently manage and display classifications of your content.
For example, if you run a blog about different countries, you can add custom taxonomies using JetEngine to create a taxonomy called “Continents” and then add terms such as “Europe,” “Asia,” and “South America.” Then, you can categorize your blog posts under these terms.
JetEngine integrates with the drag-and-drop Elementor editor. This allows you to easily add widgets to your web pages that visually display these classifications in an attractive way. There are widgets for archive lists, single term templates, and many more. Overall, JetEngine taxonomy provides complete control over how your content is organized and presented, leading to more structured, user-friendly websites with enhanced navigation capabilities.
Tools that JetEngine offers for creation custom taxonomies provide users with a convenient interface within the WordPress dashboard, allowing them to create, edit, and manage taxonomies effortlessly. Users can define hierarchical relationships, set customizable labels, and configure other parameters according to their site’s requirements.
One of the key advantages of JetEngine’s custom taxonomy tool is its seamless integration with the Elementor page builder, enabling users to incorporate taxonomy elements directly into the design of their web pages. This integration dynamically filters, sorts, and displays content based on taxonomy terms, offering users a more interactive and visually appealing browsing experience.
WordPress Taxonomy Types
There are two main types for effective post organization: categories and tags. Let’s take a closer look at both.
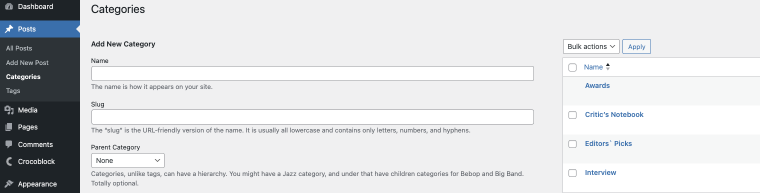
Categories
These are hierarchical WordPress taxonomies, where you can create subcategories, similar to a big box containing several smaller boxes, each of which can contain even smaller ones. Each category is referred to as a term. You can assign one or multiple categories to a single post or page.
Pro tip
However, for the ease of site navigation, it’s better to stick to the minimum necessary categories.
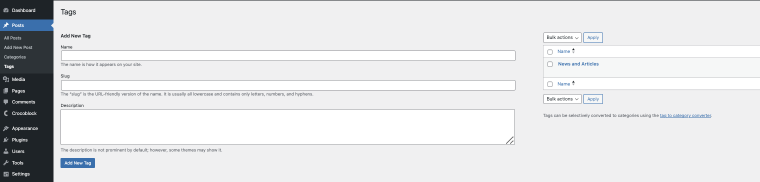
Tags
Tags serve a similar function to categories but without hierarchical structures. They group posts with similar details, focusing on finer aspects of content than general topics. For example, if you want to create genres and subgenres for your movie website, you can use categories for hierarchical structures and tags for more specific groupings. Creating tags is similar to creating categories; you can configure them in the Posts > Tags section or the panel next to the visual editor. Here, you can define slugs and descriptions.
If you want detailed instructions on creating a custom taxonomy, please follow our guide.
We’ve touched on the key advantages of JetEngine taxonomy for Elementor, but now, let’s explore them in greater detail.
Enhanced сontent organization
JetEngine custom taxonomy tool simplifies content structuring by allowing the creation of custom classification systems. This not only streamlines content organization but also enhances the overall user experience, enabling visitors to find the information they need quickly.
Powerful taxonomy listings
Using the Listing Grid widget in Elementor powered by JetEngine, you can create dynamic lists showcasing your taxonomy terms. This feature enables visually appealing displays of taxonomies with customizable layouts and presented information, offering an engaging way to navigate through your content.
Flexibility and control
JetEngine provides extensive control over your taxonomies. You can define custom labels, configure additional parameters like term hierarchy (e.g., categories and subcategories), and even link custom meta fields with terms for richer data representation. Such flexibility ensures that your taxonomy system aligns seamlessly with your content structure and presentation preferences.
Optimized integration with Elementor
JetEngine seamlessly integrates with Elementor, allowing you to utilize the familiar interface for developing and creating taxonomy listings. This eliminates the need for complex coding, making the entire process more convenient for users accustomed to Elementor’s intuitive design capabilities.
We’ve reached the most interesting part – the use cases, thanks to which you’ll see how simple and effective content categorization can be. Below are several examples of how JetEngine taxonomy can be used to categorize content on different website types.
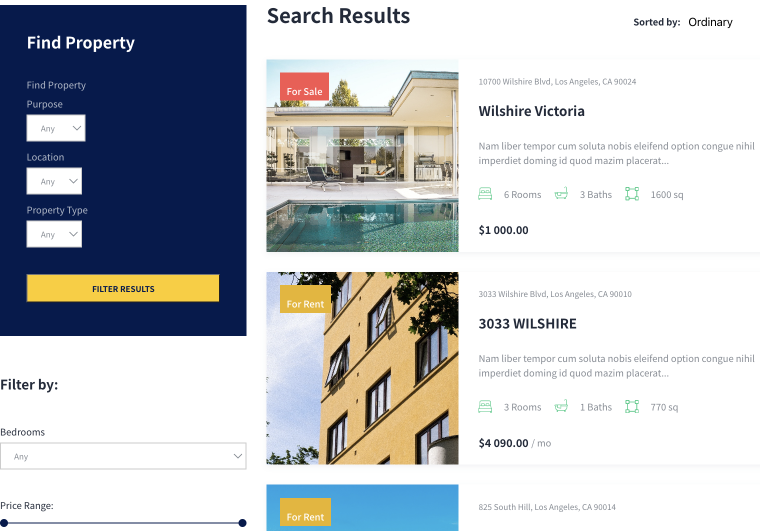
Use case 1. Real estate portfolio
If you want to categorize real estate properties on your website, we can create custom taxonomies such as “Location,” “Property Type,” or “Purpose.” Each property posted on the site is linked to the corresponding taxonomy based on its characteristics.
Let’s take a look at a step-by-step taxonomy setup using Case 1 as an example.
Step 1. Installing and configuring the JetEngine plugin
Install and activate the JetEngine plugin on your website. Navigate to JetEngine > Taxonomies > Add New.
Enter the category name (e.g., “Location”). Choose “Properties” as the Post Type from the list. Optionally, enable the Edit taxonomy/meta box link for quicker access to taxonomy settings.
In the end, click the “Add Taxonomy” button to create the taxonomy.
Step 2. Creating tags for the category
Go to the Properties > Locations page. Enter the tag name (e.g., “Los Angeles”) and a corresponding slug. Click on the “Add New Tag” button to add the tag. The newly added tag will appear on the right side.
Step 3. Assigning tags to properties
Navigate to the Properties page and select the desired property. On the right panel, find the created category and choose the appropriate tag. Utilize the JetEngine’s Dynamic Terms widget to create a label showing where your property is located. In the General section, select the taxonomy you created. You can customize the tag’s appearance as desired (size, color, style, etc.)
Click “Update” to save the changes.
Now, the property is categorized and ready to be displayed on your website.
Use case 2. Product catalog
For enhanced product browsing, it’s essential to organize the product catalog into categories for easier searching for desired items. If you’re running a bookstore, optimizing the search using hierarchical taxonomies like type of book or genres to classify books in your catalog is advisable. Arrange books into categories such as author, publication year, and others to ensure convenience and ease for website users.
To build taxonomies for a product catalog, use the same process as before, but this time, to create hierarchical categories, go to Taxonomies > Advanced Settings. Within the advanced settings, locate the Hierarchical toggle and enable it.
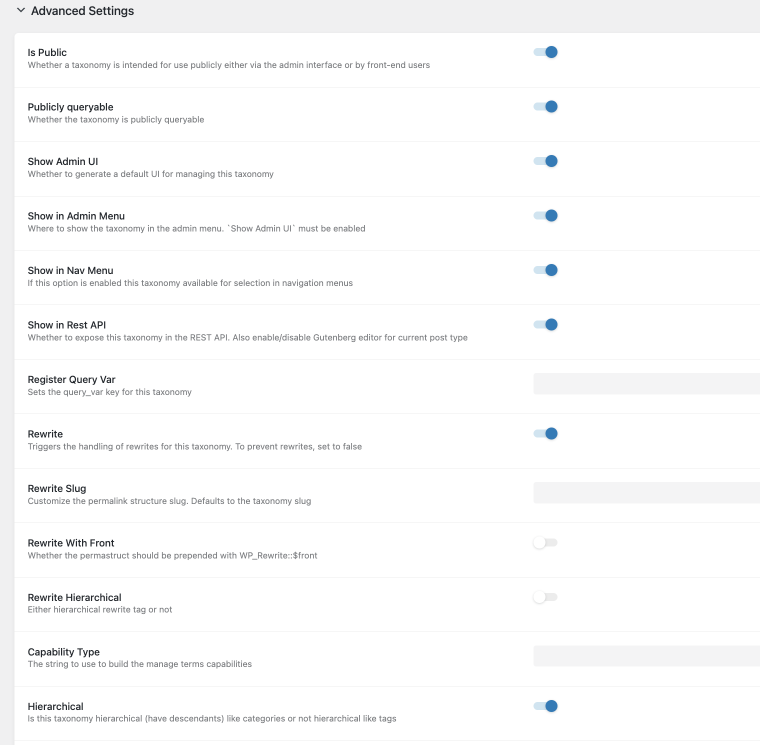
Now, you will see that in the admin panel, within the section of your post, a button for adding a new term will appear. Simply type the category name (for example, Paper Book or E-Book). Underneath the slug field, you’ll find a new option labeled Parent Category. Here, you’ll select the appropriate subcategory (e.g., for E-Book, add Text Book or Audio Book). Click on the “Add New Tag” button to include the tag.
Now, assign this category to the posts or products for which you’ve created this taxonomy.
Use case 3. Travel website
Diversify your travel website by categorizing the tours into custom taxonomies like countries such as France, Germany, and Iceland. This method simplifies tour discovery for users, making it easier to find relevant ones. Additionally, it enhances promotional efforts, ensuring effective targeting of specific event categories.
In JetEngine, create a new “Country” taxonomy for the Tour page. Define categories like France, Germany, etc. Then, when selecting a tour, choose the appropriate country category/tag.
Use case 4: Service provision website
It’s time to organize your service provision website to ensure users can easily find what they need. If your website offers medical services, categorize them into specific fields such as dermatology, cosmetology, surgery, and more.
Just like in previous examples, start by going to JetEngine > Taxonomies > Add New. Create a category (e.g., Service Type) and choose “Doctors” as the taxonomy type from the list.
Within the Doctors field, add the necessary category terms.
Assign categories to your posts, and the ultimate outcome will resemble this:
Use case 5: Job board website
Ditch the one-size-fits-all approach and organize your team by vacancy type (full-time, intern, volunteer) using custom categories. This lets you showcase your diverse workforce efficiently and build user-friendly dynamic employee lists – a win for both you and website visitors.
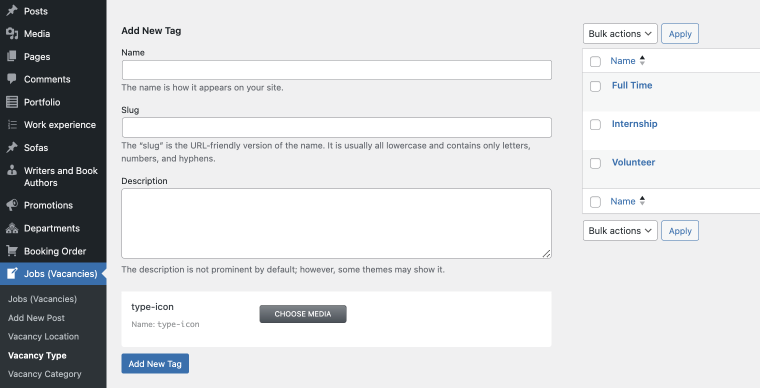
The steps remain the same as in previous cases. Navigate to JetEngine > Taxonomies > Add New. Add the needed category (for example, Vacancy Type) and choose “Jobs” as the taxonomy type from the list.
Let’s diversify by opting for a non-hierarchical taxonomy here. In the Jobs (Vacancies) field, click on the newly created tag and add the labels you require for classification. We decided to choose Full-time, Intern, and Volunteer.
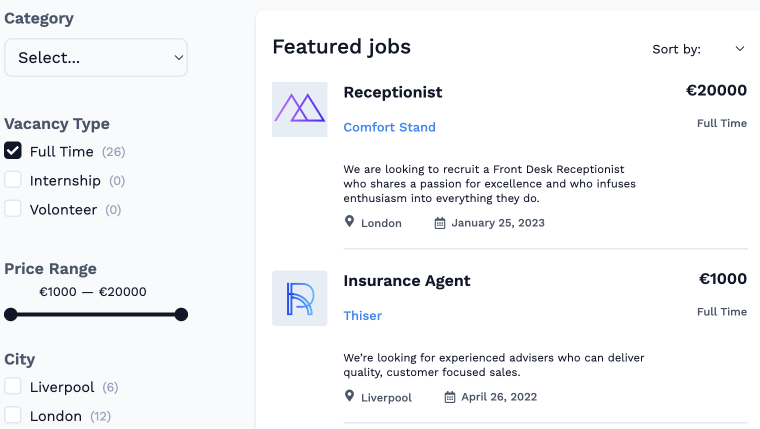
Navigate to the Jobs (Vacancies) page, choose a desired employee, and select the relevant tag.
Here’s the final result after we categorized the workers:
Pro tip
Plan your taxonomy structure. Before creating taxonomies, think about how you want to categorize your content. For complex category structures, use hierarchical taxonomies.
FAQ
Taxonomies in WordPress are a way of organizing and categorizing content. The default taxonomies include categories and tags.
To use JetEngine taxonomy tool, you need to have a WordPress website with Elementor installed. Then, install and activate the JetEngine plugin, go to the taxonomies tab, and choose your settings.
Yes, JetEngine is designed to work seamlessly with any well-coded WordPress theme. Whether you’re using a pre-built theme or developing your own, you can use the plugin’s functionality to enhance your website’s taxonomy management.
No, JetEngine taxonomy is designed to be user-friendly and intuitive; no coding skills are required. The plugin offers a visual interface within WordPress, making it easy for users to create and manage custom taxonomies using a familiar interface.
Takeaway
Taxonomies are definitely heroes of website organization. They make it easier for visitors to find what they need quickly. A well-organized website with a clear hierarchy is not just user-friendly; it can also lead to better SEO and a more engaging experience.
While WordPress offers built-in categories and tags, plugins like JetEngine take content organization to the next level. With JetEngine taxonomy, you can create custom classification systems tailored to your specific needs. This empowers you to categorize your content in highly relevant and meaningful ways, enhancing your website’s functionality tremendously.
Utilizing the JetEngine taxonomy and Elementor duo, you can transform your website from a content jungle into a simplified informational hub. Remember, small efforts in the organization will help create a user-friendly and successful website.