Automation is one of those words everyone seems to love. If you can automate something on your WordPress website, the smart move is often to do it. However, WordPress barely includes any automation options out of the box. That’s where automation plugins come in, which is why we wanted to share our AutomatorWP review.
AutomatorWP enables you to connect almost any element in WordPress together. This includes the WordPress core processes, plugins, and third-party tools. The result is the automation of the processes between them. It can include almost any combination you can imagine, depending on which version of the plugin you use. The automations work on a trigger-action basis. So something taking place in one app triggers a corresponding action to take place in another app.
AutomatorWP Review: An introduction to the plugin
AutomatorWP is a plugin that enables you to automate processes in WordPress by using “triggers” and “actions.” A trigger can be almost anything that happens on your website (and it can involve plugins), leading to the actions you can set.
The plugin doesn’t ship with any pre-set automations. Instead, it lets you build them using a simple editor. You get to pick triggers and actions from the options AutomatorWP provides and use them to create the automations you want.
AutomatorWP is incredibly flexible in that it offers several automation options for each of its integrations. For example, you can use the plugin to automate sending a personalized email when a user registers (using Mailchimp or Brevo). You can configure notifications for when someone publishes or updates a post, and much more.
Your experience with AutomatorWP may vary depending on what plugins you use, as well as the add-ons you have access to. It is compatible with numerous plugins and third-party platforms. If you’re the kind of person who uses a lot of tools while running your site, chances are there are several menial tasks you can automate.
⚙️ Key Features
- Create automations with configurable triggers and actions
- Integrates with dozens of plugins and third-party platforms
- Use a drag-and-drop builder to create automations
- Keep a log of automations for troubleshooting purposes
- Add-ons available for more integrations, actions, and triggers
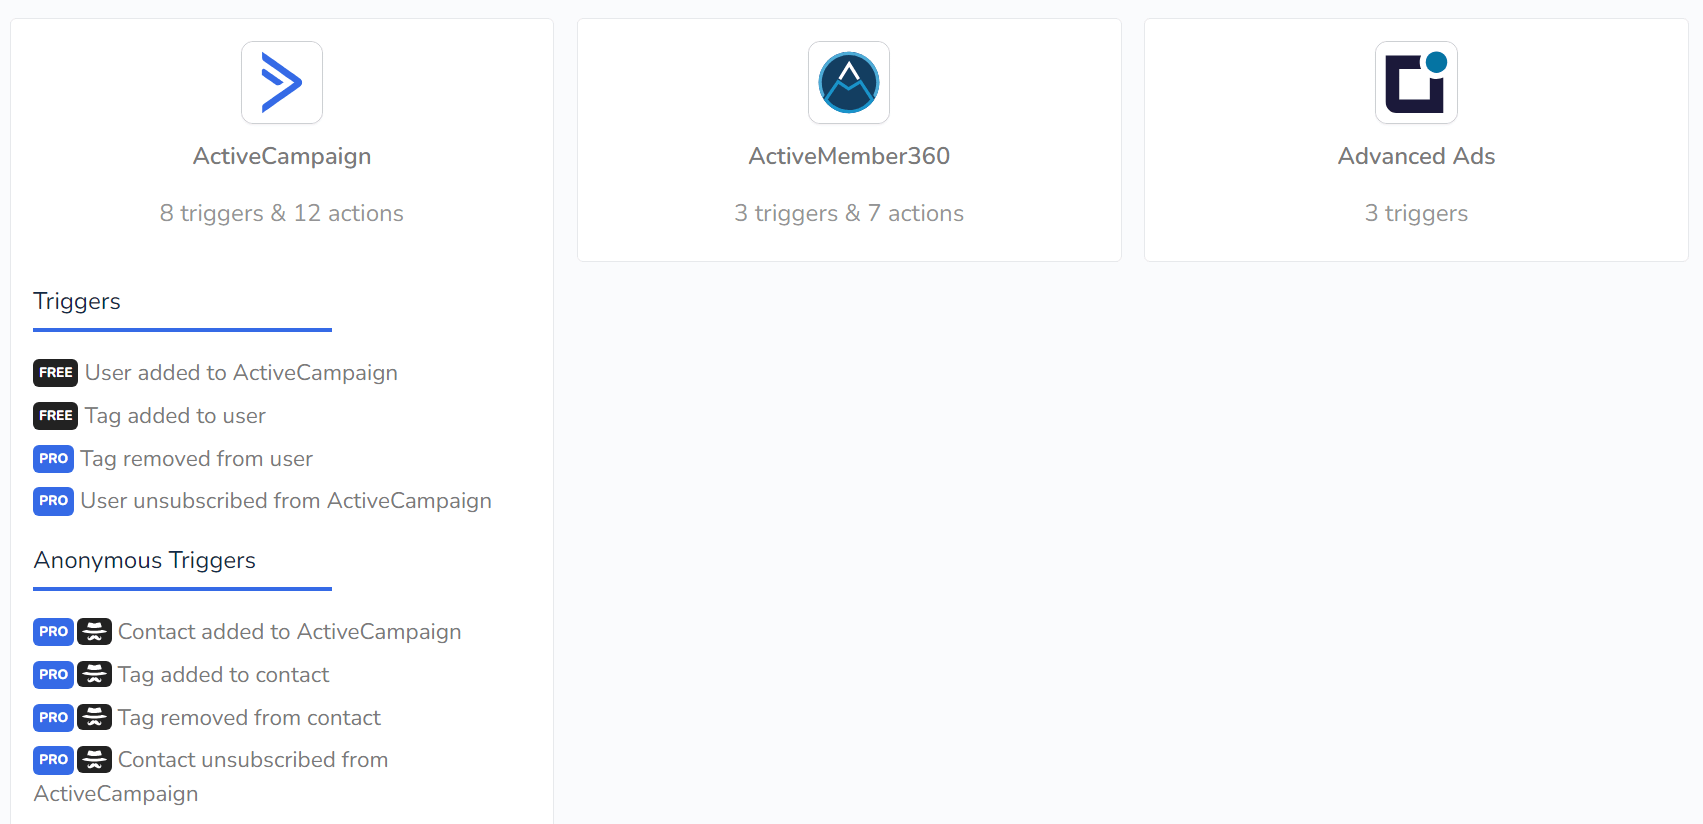
🤝 Key Integrations
- ActiveCampaign
- ActiveMember360
- Advanced Ads
- Advanced Custom Fields
- Blockli
- AffiliateWP
- Airtable
- Amelia
- Awesome Support
- bbPress
- BuddyPress
- Caldera Forms
- Contact Form 7
- Divi
- Download Manager
- Easy Affiliate
- Easy Digital Downloads
- Elementor
- Events Manager
- Formidable Forms
- Forminator
- GamiPress
- Give
- Google Calendar
- Google Sheets
- Gravity Forms
- HappyForms
- HubSpot
- IFTTT
- JetEngine
- Jetpack CRM
- LearnDash
- LearnPress
- LifterLMS
- Mailchimp
- MailerLite
- MailPoet
- Make
- MemberPress
- Ninja Forms
- Notion
- Paid Memberships Pro
- Presto Player
- Simple Giveaways
- SliceWP
- The Events Calendar
- Thrive Apprentice
- Thrive Quiz Builder
- Twilio
- Ultimate Member
- Vimeo
- WishList Member
- WooCommerce
- WPLMS
- WP User Manager
- WP Simple Pay
- WPForms
- YouTube
- Zapier
- Zoom
How automations work in AutomatorWP
Automating tasks that involve multiple plugins and/or third-party tools can sound intimidating. That’s why we wanted to focus part of our AutomatorWP review on going over how this process works and whether it’s user-friendly or not.
Overall, setting up automations in AutomatorWP is relatively simple. When you create a new automation, the plugin will ask what users it should affect.
You can only pick one user group for each automation, and this setting can’t be changed later. These groups include logged-in users, non logged-in visitors (or “anonymous”), and user categories (such as all accounts with a specific role). Alternatively, you can set up automations that run on all posts or a specific subset:
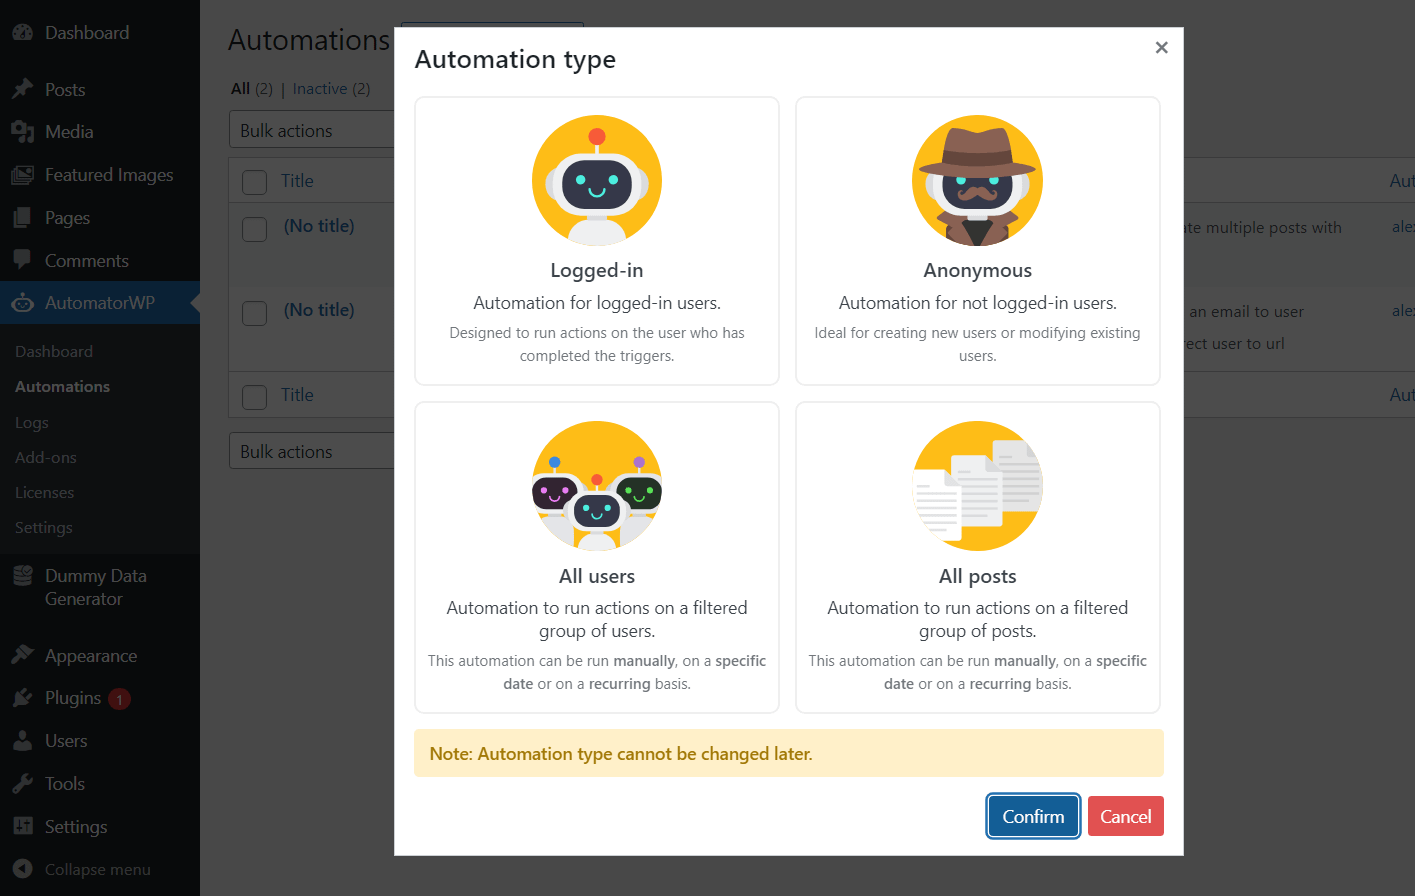
What type of automation you choose will depend on what you want to do. For example, if you want to create an automation that gives out coupons to users that make a purchase, you’ll probably want it to work only for registered users (we’ll show you how to do this in a bit).
After choosing a type of automation, you get to configure the triggers and actions for it. Each automation can have one or more triggers and actions. However, if you add multiple triggers, keep in mind that they all need to happen for actions to occur:
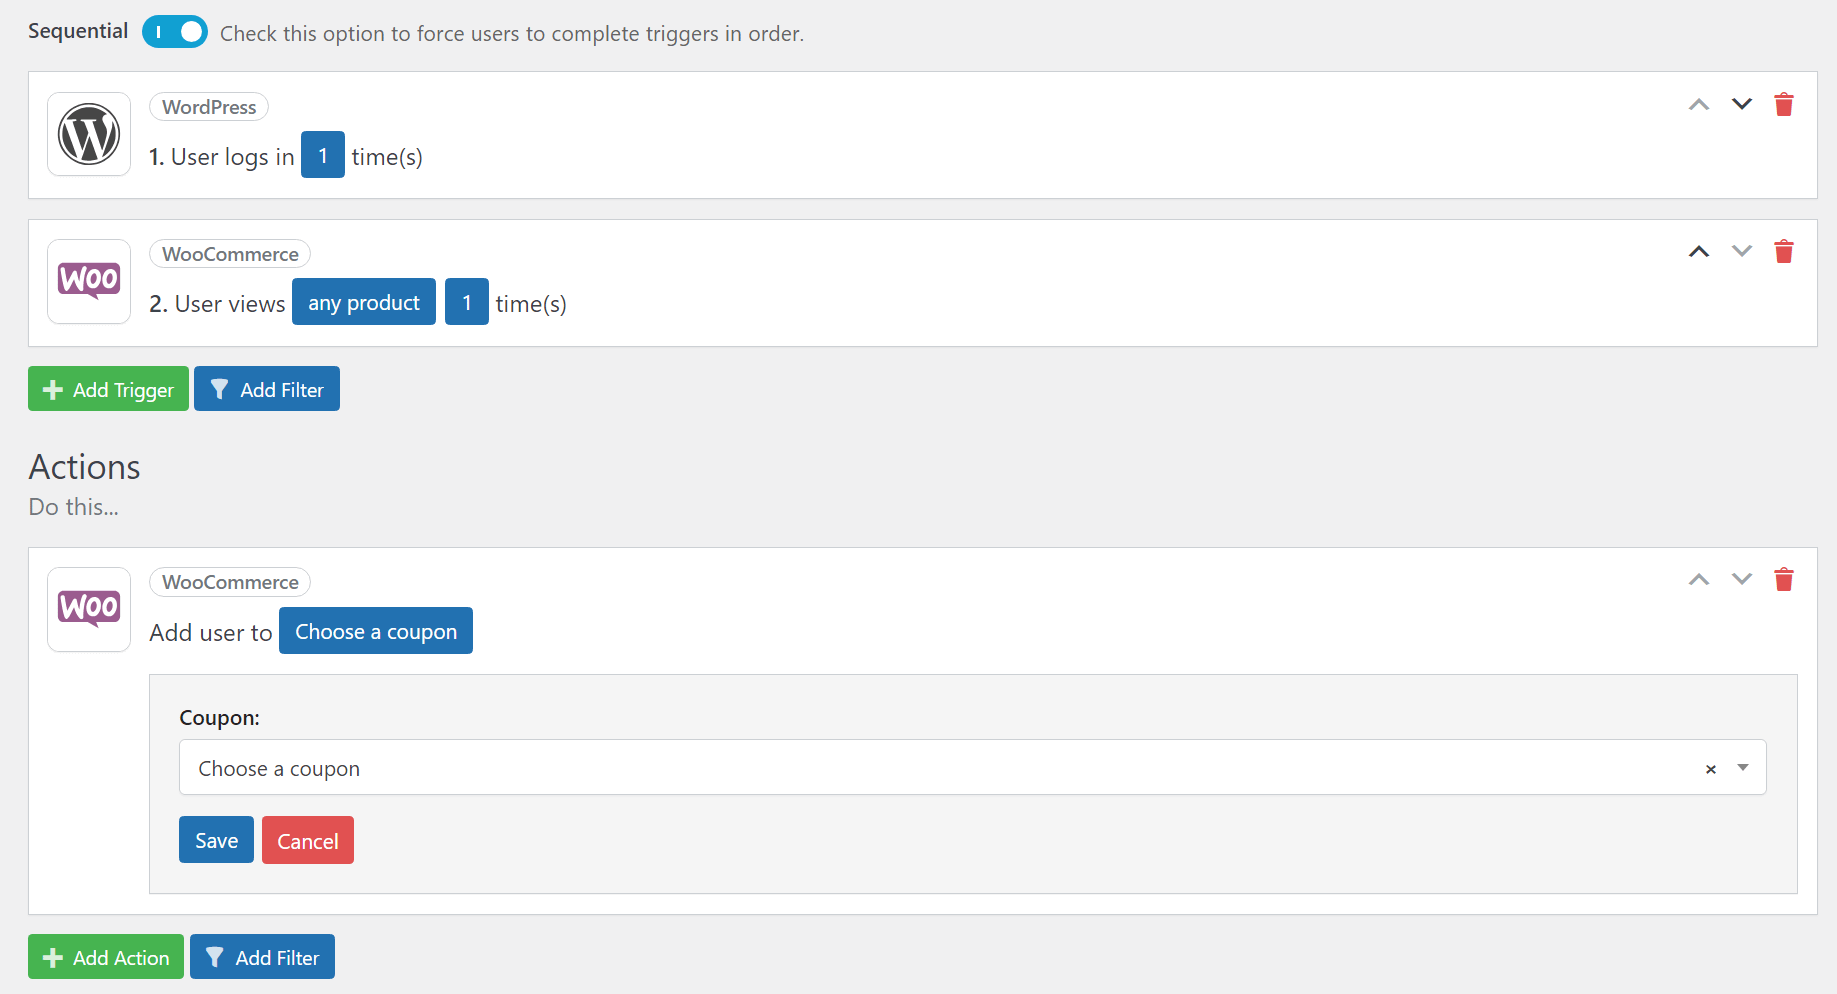
If you toggle the Sequential option, triggers will need to happen in a specific order for actions to work. This enables you to create some automations that can only run under very specific circumstances.
Once you’re happy with the way the automation is set up, you can hit the Save & Activate button. However, if you pay attention to the Save Changes widget, you’ll notice it includes more configuration settings. Here, you can set how many times the automation should run per user and if it should only run a set number of times in total:

After saving a new automation, you can check out its status under the AutomatorWP → Automations tab. There you’ll see a list of all automations you’ve set up and a brief overview of how they work.
What can you automate using AutomatorWP? Examples
Now that you know how automations for this plugin work, it’s time to look at some examples in action. For this part of our AutomatorWP review, we wanted to show a couple of use cases and talk about our experience setting them up.
1. Send emails and redirect users 📧
For starters, let’s see how AutomatorWP fares with basic automations that don’t involve plugins or third-party tools. The free version of the plugin enables you to use WordPress “events” (things that happen on your site) as triggers or actions.
The trigger here is a WordPress event, so we choose the WordPress option when adding it. You can change the trigger setup at any time and experiment with different options, so we encourage you to do that to get used to the plugin:
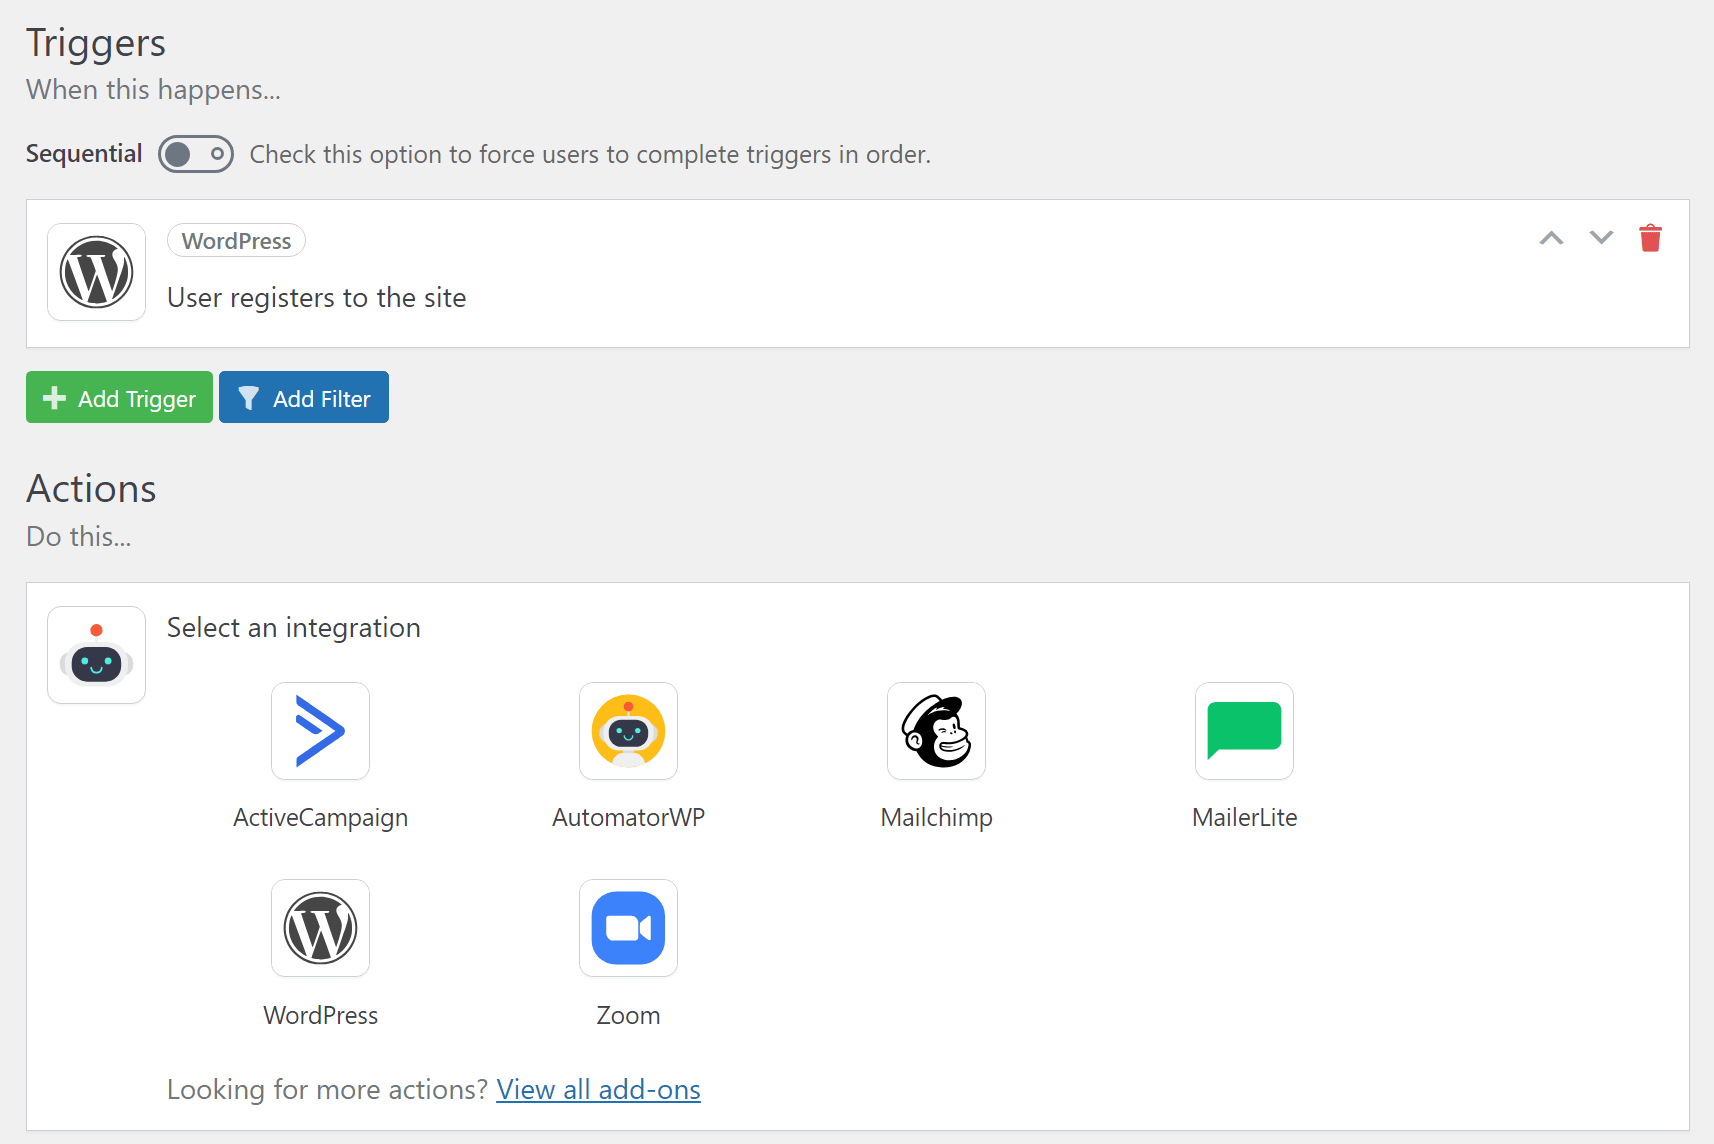
The triggers and actions that you see will vary depending on the plugins and add-ons you have installed. For example, if you run a WooCommerce site, the WooCommerce integration will appear in the Select an integration menu.
One caveat, is that it can be jarring to see an integration appear in the menu only to see that it requires an add-on to work. Add-ons and licenses for AutomatorWP are relatively expensive, which is something we’ll discuss in a minute.
For our first test automation, we wanted to use software to send an email and redirect users after they registered. This can be incredibly useful as a way to send users to a welcome page or to any information that might be relevant to them:
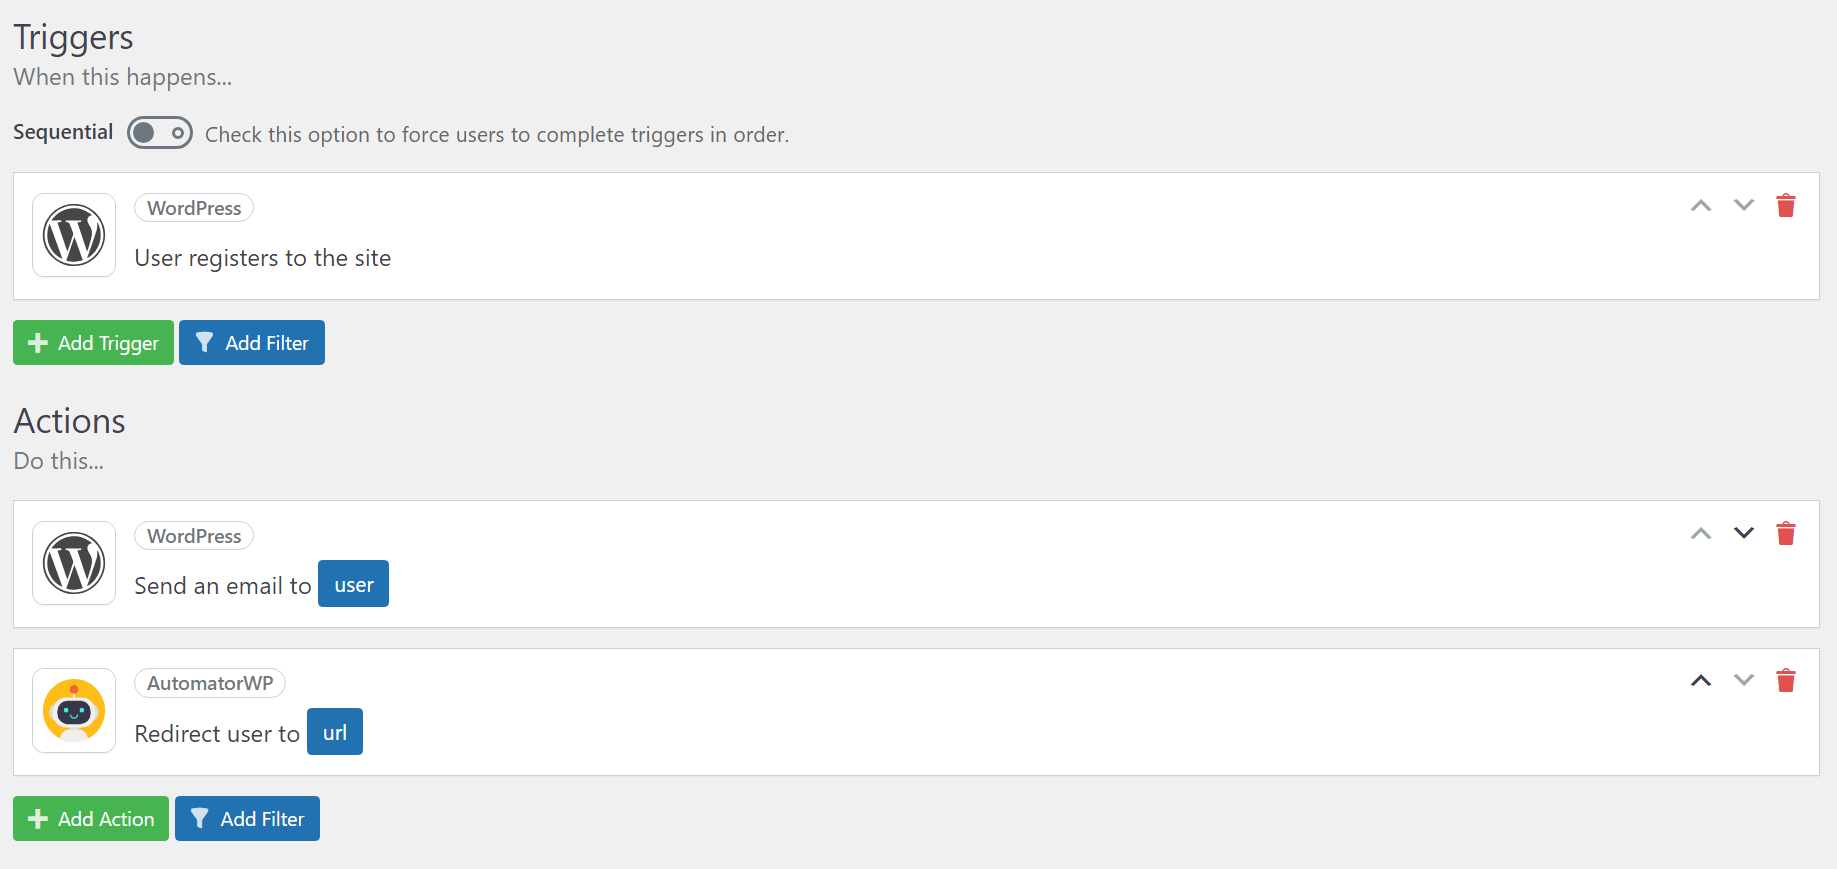
All actions in AutomatorWP are fully configurable. Clicking on the blue buttons you see within each action will enable you to change their settings. In the case of the Send an email to user action, you get to write the contents of the email itself, all without leaving the automation creation page.
2. Send buyers a coupon code 🏷️
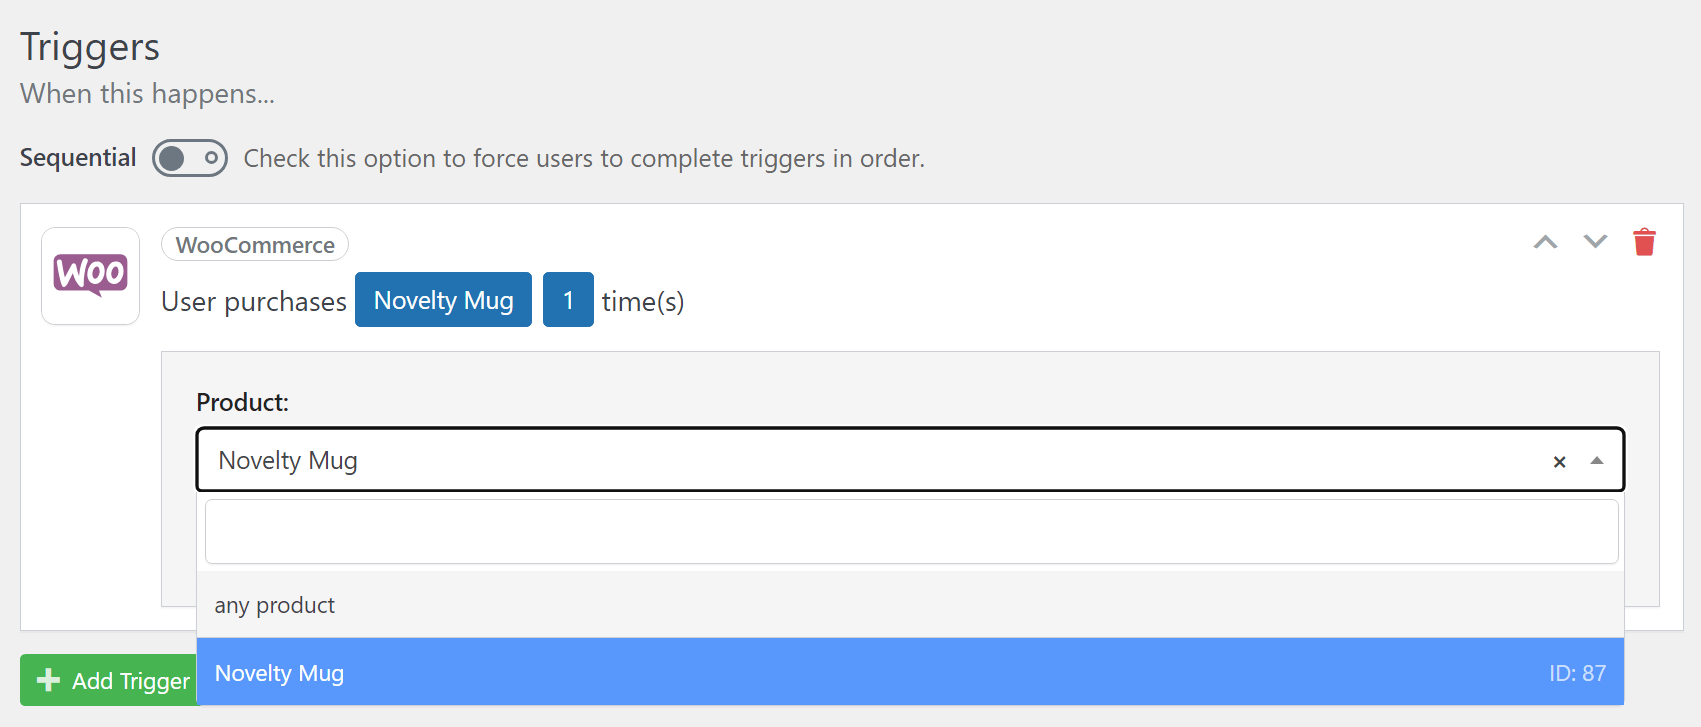
One of the most useful integrations that AutomatorWP offers has to do with WooCommerce. The free version of the plugin enables you to choose from a variety of WooCommerce triggers and actions. For example, you can use AutomatorWP to give users a discount on their next purchase if they buy a specific product.
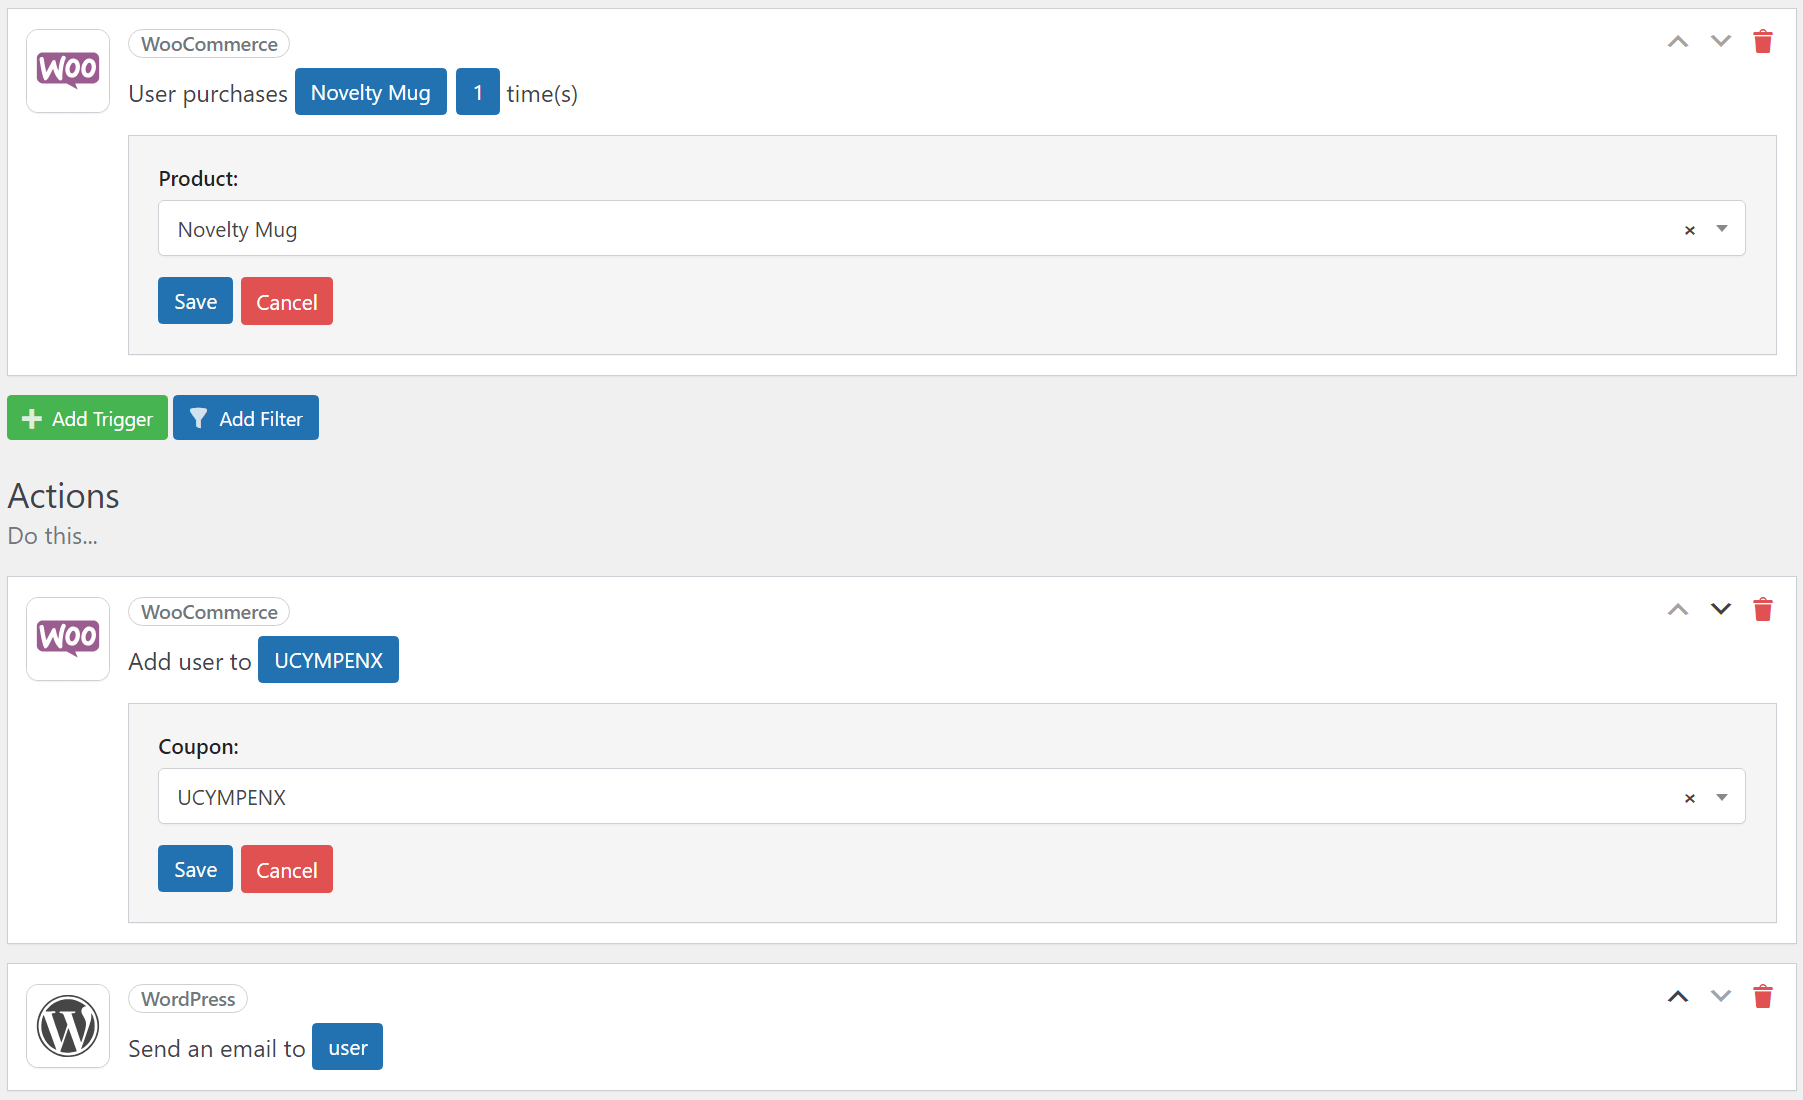
Setting up that automation was simpler than it sounds. All we had to do was pick a WooCommerce trigger and use the User purchases a product trigger, then choose which product it applies to:
For the action, we selected the WooCommerce Add user to a coupon option and picked one of our coupons. The way this automation works is that the discount will apply automatically:
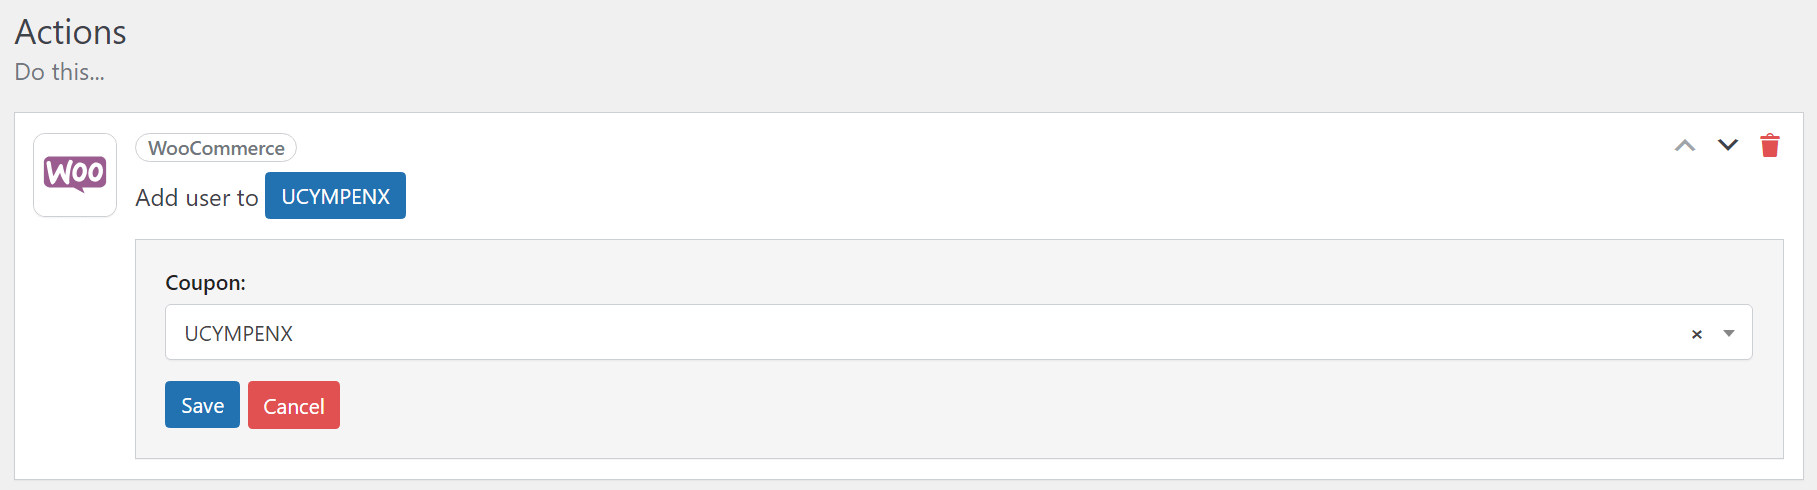
To avoid confusion, we added a second action that sends an email to the user explaining they’re receiving a discount on their next purchase and why. Here’s how the final automation looks:
Overall, the process was remarkably simple. The only issue, in our experience, lies in figuring out what automations are available to you depending on what version of the plugin you use.
AutomatorWP Review: free vs premium
AutomatorWP comes in both free and premium versions. The free version of the plugin gives you access to a limited range of triggers and actions. You can see them when creating a new automation or if you check the plugin’s list of available triggers and actions.
The free version of the plugin works great if the automations you need are available in that version. However, a lot of useful triggers and actions are restricted to the premium version of the plugin as well as its add-ons.
The plugin offers a library of hundreds of add-ons, each of which can be purchased separately. Add-ons have a starting price of $29 for a yearly license. Alternatively, you can pay for an “access pass,” which is what AutomatorWP calls its licenses. Yearly licenses that give access to all add-ons, triggers, and actions start at $149 per year.
As far as plugin licenses go, that’s relatively expensive. Due to its price, we can only recommend AutomatorWP’s premium version if you need to create multiple automations that are not available in the plugin’s free version.
Alternatively, you can try out Zapier or some of its alternatives. At their core, those tools work very similarly to AutomatorWP, but they’re not as integrated with your WordPress website and might therefore not offer some of the more WordPress-specific automations or triggers.
AutomatorWP review: conclusion 🧐
As it turns out, you can automate pretty much anything in WordPress with the right plugin. AutomatorWP makes it easy to create simple or complex automations within your website and it integrates with a massive roster of plugins and third-party tools.
While working on our AutomatorWP review, we found the plugin to be remarkably user-friendly. It lets you set up complex automations rather easily. However, the main downside of tools like this is their price. It seems that the whole segment of WordPress automation tools has very similar price tags, but those prices aren’t exactly low.
You can still use the free version of AutomatorWP, but some tools, triggers, actions, and automations are not available in it, which will force you to upgrade. Still, for the right kind of user, AutomatorWP can be an awesome improvement to your daily workflows with your WordPress blog.
Do you have any questions about our AutomatorWP review? Let’s talk about them in the comments section below!
Free guide
4 Essential Steps to Speed Up
Your WordPress Website
Follow the simple steps in our 4-part mini series
and reduce your loading times by 50-80%. 🚀
Pros
Automations are easy to set up and customize
Use a drag-and-drop builder to configure automations
Offers a lot of integrations with plugins and third-party platforms
Cons
It’s relatively expensive compared as a WordPress plugin overall
Some integrations are hard to set up, depending on the third-party platform you want to use