Would you like to know how to take a screenshot on Windows? A screenshot is an image taken of the content on the screen. It can be a part of the screen or the entire screen. If necessary, additional tools can be used to enhance the quality and result of a screenshot.
Several methods are available to you if you wish to capture a screenshot of something on your computer.
This article will show you all the best ways to take a screenshot in Windows, whether you wish to save the entire screen or just a portion.
How to Take a Screenshot on Windows?
In recent years, screenshots have become extremely popular since they provide a means of capturing images that can be referred to at a later date.
Here are the best methods to take a screenshot on Windows by using the Windows screenshot shortcuts and functionalities:
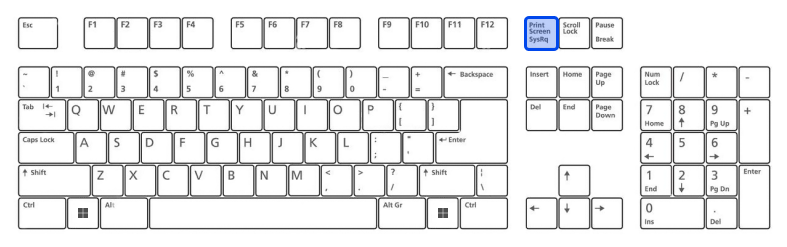
Method 1: Use The Print Screen Button
The easiest way to take screenshots on windows 11 and 10 is to use the Print Screen key.
To capture your entire screen, simply press the PrtScn key on the upper-right-hand side of your keyboard.
The screenshot will be copied to the clipboard in Windows 10. The screenshot should be pasted into a program that offers the ability to insert images, such as Microsoft Word or Paint.
By clicking the PrtScn button in Windows 11, the screenshot will be saved to the computer’s Screenshots folder; you can find it by opening File Explorer and selecting Pictures on the left. In addition, if you have OneDrive enabled, it will also be saved to your account.
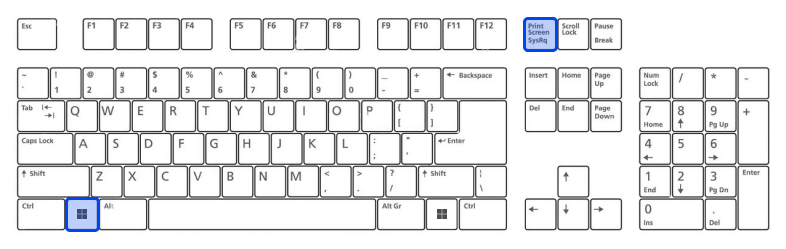
Method 2: Use The Windows Key + Print Screen
Press the Windows key and PrtScn on Windows 10 to take a screenshot and save the file automatically. You will be provided with a screenshot of your entire screen stored in the Screenshots folder.
A screenshot of your entire screen also will be saved to the Screenshots folder in Windows 11 when you press the Windows Key + PrtScn.
Using this method, you can paste the image directly into an art app for social media and other apps.
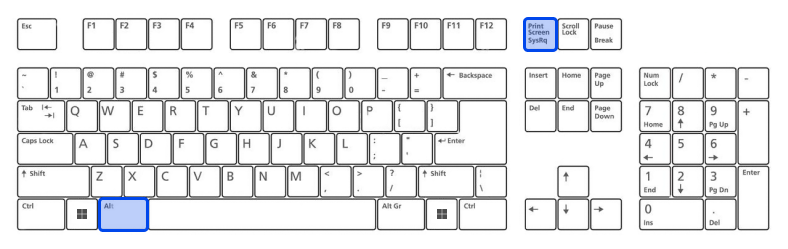
Method 3: Use Alt Key+ Print Screen
Press Alt + PrtScn if you want only the window you are currently working in to be captured.
This will copy the information to your clipboard in Windows 10, so you will need to paste it into another program to save it.
The screenshot will be copied and saved to the Screenshots folder immediately in Windows 11.
Method 5: Use The Snip & Sketch tool in Windows 10
Snip & Sketch on Windows 10 is the best tool for capturing screenshots if you wish to customize, annotate, or share your screen captures.
Snip & Sketch can be activated by simultaneously pressing the Windows Key and Shift + S.

There will be a lighting effect on your screen, and a mini menu will appear at the top, giving you the option of taking a rectangular free-form window or capturing the entire screen. Using the Snip & Skitch options, you can select how to take a screenshot.
You will see a preview notification in the lower-right corner of your screen once you have captured the screenshot and saved it to your clipboard.
Open the Snip & Sketch app by clicking the preview notification to save, share, and edit the screenshot with the available drawing tools.
Method 6: The Snipping Tool in Windows 11
Snipping Tool is available in Windows 10, but it is not always the tool you should use when taking screenshots.
As a result of Windows 11’s significant upgrades, the Snipping Tool now offers the best support for taking customized screenshots.
Windows 11 users can start the Snipping Tool by searching for it or pressing the Windows Key + Shift + S combination.

Snip & Sketch dims your screen, and at the top of your screen, you will see a toolbar with screenshot options. Using this toolbar, you can take a rectangular, free-form, full-screen, or full-window capture.
After taking a screenshot, the image will be copied to your clipboard so you can share it immediately. When you click on the preview in the bottom right corner of your screen, you can save and edit it.
Method 7: Use The Game Bar
Game Bar is an overlay that you can use within most Windows applications and games to take screenshots and record videos. Press the Windows and G keys simultaneously to open the Game Bar.
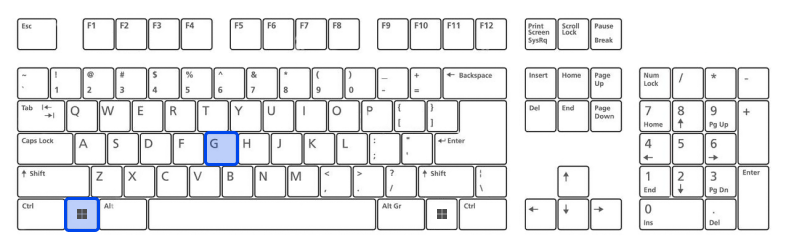
You may capture a screenshot of the full-screen interface by clicking on the camera icon in the overlay menu.
Additionally, you can record a video clip by pressing the record button and selecting the microphone icon to add audio to the recording.
In the Game Bar, screenshots and video clips are stored as PNG files in the Videos → Captures folder.
Alternatively, you can view all captured screenshots and videos in the Game Bar by clicking on the “Show all Captures” button underneath the screenshot and recording buttons.
Method 8: Take a Screenshot on a Microsoft Surface Device
You can take a screenshot on Windows 10 with a Microsoft Surface device by pressing the Power Button + Volume Up Button.
Your screenshot will be saved to the Pictures → Screenshots folder once the screen dims.
Best Apps to Take Screenshots on Windows
If you are unsatisfied with the built-in screenshot functionalities in Windows, several third-party applications are worth considering, each with its features. These are the best of them:
- Lightshot is a free tool that lets you capture screenshots and share them quickly on social networks. You can replace the Print Screen function on Windows 10 with Lightshot, which offers more editing options than it.
- Greenshot is another free tool that allows the editing and customization of screenshots and the ability to capture an entire scrolling web page.
- The Snagit screenshot tool allows the creation of animated GIFs, screenshots of full web pages, and many other features.
It is possible to purchase the premium version for $50. You can also try the trial version for 30 days, but any pictures captured during the trial can be watermarked.
Conclusion
This article discussed the best methods and apps to take a screenshot on Windows. Thank you for taking the time to read this article. We hope you found it interesting.
Please let us know your thoughts about the article in the comments section. We encourage you to share this article on Twitter and Facebook if you enjoy the article.