WordPress’ content management system (CMS) starts as a robust blogging tool. But thanks to its continuous development over the years, it has now become a competent website builder. Bugs and errors are inevitable, but its developers provide plenty of solutions to simplify debugging WordPress.
For over a decade of running my business website in WordPress, I have experienced a fair share of errors. It can sometimes be intimidating and frustrating, but everything can go smoothly with the right solution to implement. In this post, I’ll share the most common WordPress issues to help you identify them.
I also include practical strategies and techniques on how to fix them. Try these debugging solutions yourself to maintain the website’s good performance. Let’s begin.
9 Tips & Techniques For Debugging WordPress
There’s no need to panic whenever you encounter critical errors. Here are some effective debugging techniques to solve different WordPress issues.
Enable WordPress Debug mode
Identifying the problem is the first step in debugging your website. If you’re a pro, you can use the WP_Debug to monitor and review the site’s existing errors. It’s a PHP constant (starts with a letter or underscore) that initiates WordPress’ debug mode.
To start, go to the root folder of your website’s file directory and find the wp-config.php file. Open the file and set the WP_Debug to TRUE (set FALSE by default). Look at the screenshot below to see the code you need to add to the file.
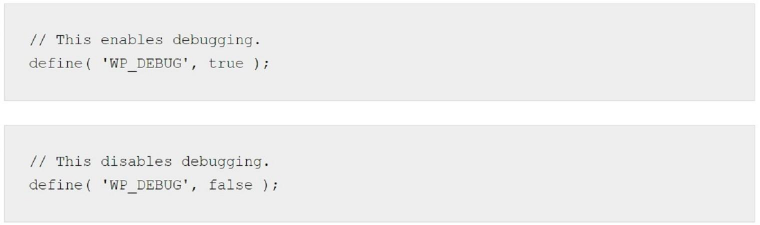
Ensure to create a backup before you edit the wp-config file. It’s always safe to have a backup when data loss strikes or your code fails. If you find this method intimidating, you can use a plugin to enable the WordPress debug mode.
Pro tip
If you find the previous method intimidating, you can use a plugin to allow WordPress debug mode. One powerful tool that most users trust is WP Debugging by Andy Fragen. It uses the wp-cli/wp-config-transformer command to write the wp-config.php constants.
Also, its default settings are set as True.
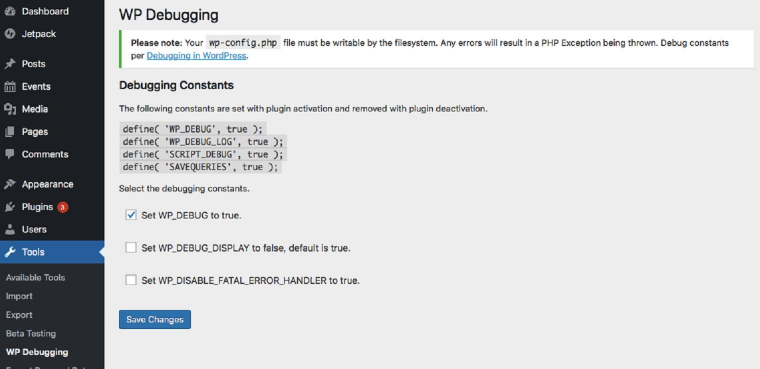
It includes 3 other features to ensure efficiency, and here they are:
- Debug Bar;
- Query Monitor;
- Debug Quick Look.
PHP errors, notices, and warnings are some of the information you can access when successfully enabling WP_Debug.
Review the WordPress site’s errors through Debug logs
Now that the WP_Debug is set, all your website’s error messages will be saved to the debug log file (WP_Debug_Log). You also need to set it to True to work.
By default, the debug logging file is saved within your content directory (/wp-content/ directory). But you can also save it to a specific location path if you want to. Look at the screenshot to know what code to add for each option.

You can start reviewing your sites’ error log files by going to your File Manager or FTP client. The next step is to locate the debug.log file under the /wp-content/ folder. Open it, and you will see the error’s details, which include the PHP file and exact code line.
Pro Tip: File manager & FTP client options
Checking all the errors on your website can be time-consuming. Save time by using the right tool. WordPress is compatible with many File Managers, but the fan favorites are the following:
- Plesk;
- cPanel;
- DirectAdmin.
On the other hand, FileZilla is the popular choice for FTP clients. It’s an open-source file transfer protocol software with an intuitive user interface. However, Cyberduck poses a better option because of its comprehensive security features.
Read this article if you want to explore more FTP client options. All options are compatible with Windows, Mac, and Linux operating systems.
Understand the different types of PHP errors
Identifying the problem is essential, but one has to fully understand it to find the root cause and appropriate solution. Understanding the types of PHP errors is great to start with:
#1. Notice error
PHP notice error contains minor mistakes in the core code. It usually ranges from a typographical error in PHP variable names or calling a variable first before declaring it. Even if the site encounters the problem, it won’t impact the code execution.
Solution options for notice errors:
- You can use a PHP code checker to check common minor errors. It features a simple code editor where you can paste your custom code. Select the PHP version you’re using, then press the Analyze button.
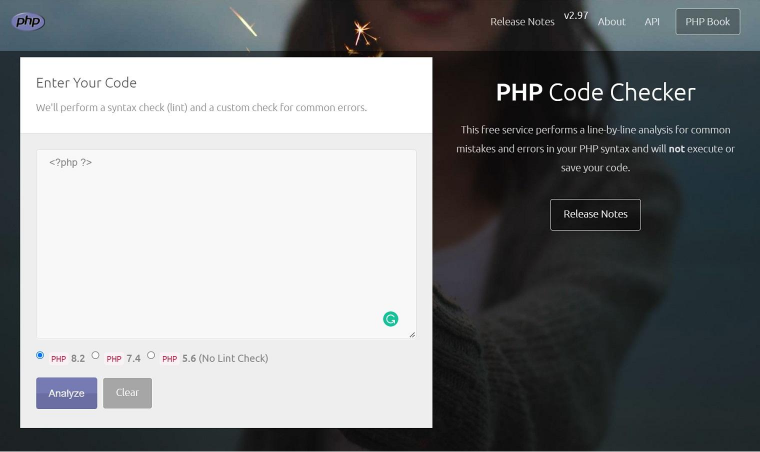
- If you only want to check typo errors, you can use the PHP pspell_check() function. It will constantly check the spelling of every word in the code.
#2. Warning error
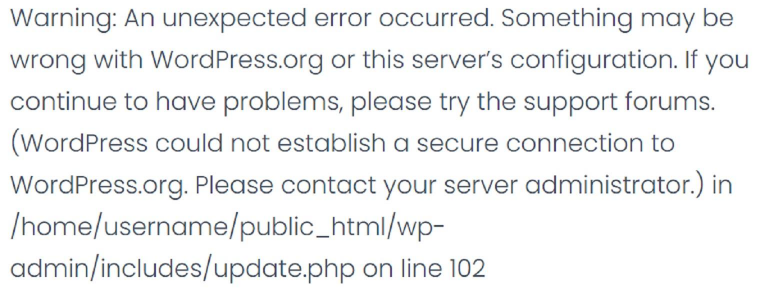
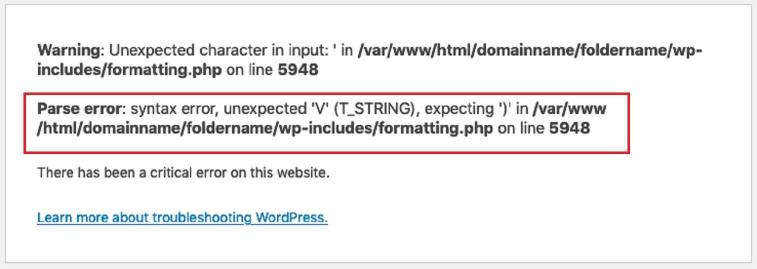
From the name itself, warning error is the error type that notifies the developer when a problem arises. The usual problem that many encounters is that the file path doesn’t exist. You can solve it by checking the affected web page’s file name on the script and root directory and correcting them as necessary.
Like the notice error, warning errors don’t stop the code execution. The display message of this error usually goes like this:
#3. Parse error
A parse or syntax error is the comprehensive version of the notice error message. Aside from the misspelling, it also detects the following problems in the PHP code:
- wrong symbol;
- invalid variables;
- unclosed quotation;
- missing punctuation;
- faulty coding structure.
The simple solution is to delete the code’s problematic part and correct the syntax. Overwriting will do the trick if the problem is a faulty coding structure. It usually occurs for corrupted file content, like the screenshot below.
Debugging WordPress’s fatal error
The fatal error is the most serious PHP error type. As the name describes, a fatal error indicates that the website fails to load correctly or crashes because of its script:
- Access invalid data.
- Max out the PHP memory limit.
- Calls an undefined or non-existing function.
And the list goes on.
It may sound dangerous, but you can still resolve it. How can you determine the cause of the fatal error?
One way to identify it is by reading the exact error code.
Part of the error code message shows the details of what went wrong and instructions on how to fix it. It also includes the code line number so you can quickly find and solve the error. Look at the screenshot below to give an idea.
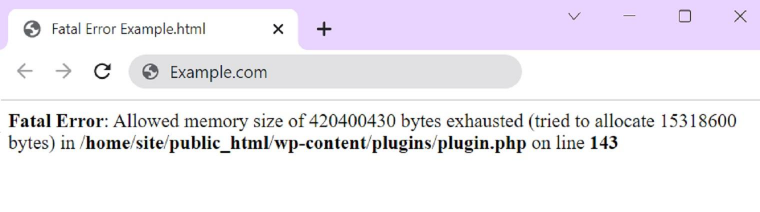
The error on the screenshot attempts to exhaust the allowable PHP memory limit. You can solve it by editing your site’s wp-config.php file and setting a new memory. Here’s the code you need to add:
define(‘WP_MEMORY_LIMIT’,‘256M’);Remember to save and upload the new configuration file to your server.
Pro Tip: track the time the error occurs
Another method to identify the error’s cause is by determining the time of occurrence.
- Startup: Installation-related errors.
Solution: Run the installation process and provide the correct details.
- Compile-time: Attempt to call an undefined function or non-existent data.
Solution: Check any misspelled command or call the correct function
- Runtime: Similar error with compile-time, but the error occurs during execution.
If the error on runtime is caused by exceeding the maximum execution time, you need to edit the .htaccess file. Configure the settings on your CPanel. If you have none, you can install a plugin in WordPress.
Debugging WordPress database
A WordPress website won’t work without a connection to a reliable database. It helps websites to collect, save, store and retrieve all their data. A few of the data it can store is listed as follows:
- website settings;
- tags and categories;
- organizational information;
- plugin and theme-related data;
- user profile data and comments;
- web pages, posts, and other forms of content.
Does it cover data changes?
Yes, it can also capture and store data changes, such as new updates and content removal, because WordPress uses MySQL. It’s a relational database management system compatible with various open-source applications.
The most common database-related error lies in establishing its connection to the WordPress platform.
- Cause: Some web hosting control panel requires users to encode the database information during the installation process manually. Therefore, some encode the information incorrectly.
- Solution: Edit your wp-config.php file and add the correct information. Look at the screenshot below to know what line of codes you need to look at.
Pro Tip: Get the support you need
More errors may occur related to the WordPress database, and each has its solutions. But if all your troubleshooting knowledge fails, it’s best to ask for help.
Your first option is to contact your web host provider. If your provider is WordPress, you can rely on their community and free developer resources. The community is supportive and helpful.
Hiring a competent assistant (freelance or full-time) is also an efficient option. Ensure they have the skills and training to work with WordPress, PHP, and MySQL databases to guarantee success.
Debugging WordPress White Screen of Death (WSoD)
Some people find the White Screen of Death as one of the alarming problems that may occur in your WordPress website. It will never display an error message, just a plain white background. Before anxiety and panic take over, there are simple techniques available to identify the problem.
- Deactivate plugins
One cause of WSoD is compatibility issues between plugins. To find out if this is the real cause, go to the Administration Screen (or phpMyAdmin) and select Plugins in the main navigating menu. Once there, you can start deactivating all your working plugins.
When everything is disabled, reactivate the plugins one at a time. Refresh your website to see if that resolves the problem. Continue the reactivation process until you identify the problem.
- Deactivate theme
WSoD often occurs when creating a new website or launching a new theme. All you need to do is replace the existing theme with one of WordPress’ default themes (e.g. Twenty Twenty-One).
You can check WordPress’s debug mode to gather more information on the cause of the problem.
- Clear your browser cache
Clearing your cache allows you to eliminate all previous problems, outdated files, and malware. Try to remove it and see if it fixes the problem.
Debugging WordPress 404 error
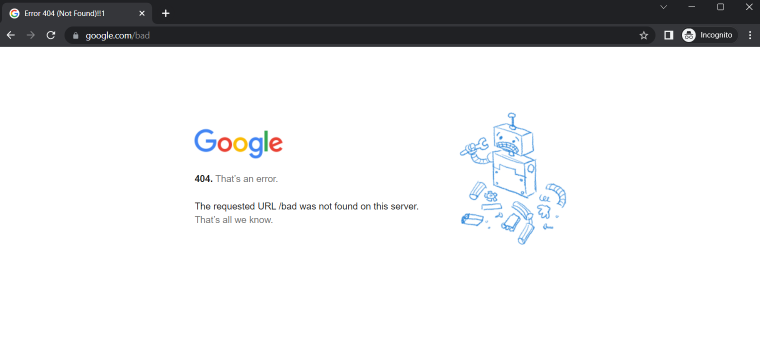
The 404 error is one of internet users’ most common issues while browsing. How can you fix this error? Here are the 3 quick fixes you can apply:
- Refresh the page and wait. The 404 error message may occur even at times, even without a real issue. So, it’s best to press F5 multiple times and wait for it to work.
- Check the web page’s URL. Typographical errors and web pages with the same are other causes of 404 errors. You can avoid it by choosing a unique name per web page and typing the URL right.
- Check your website pages for broken links. If the original web page is already deleted, it’s best to redirect the affected page to other relevant and newer content.
Debugging WordPress maintenance mode issue
If you’re new to WordPress, one important thing you should know is its system features a built-in maintenance mode. It means that whenever they release a new update, they will install a .maintenance file into your site’s base folder. The file contains a message that says:
Briefly unavailable for scheduled maintenance. Please check back in a minute.
It’s their way of giving you a heads-up that they will disable your website until they finish the updating process. The only downside of that feature is it requires owners to manually remove the error message. You can do so by connecting your server via FTP and deleting the .maintenance file.
The next step is clearing your cache. It’s intended to ensure all residual files from the previous version have been removed. Your website should function well after that.
Pro Tip: Install compatible plugins & themes
There are times when a WordPress website gets stuck in maintenance mode. One common cause is the plugin and themes installed are incompatible. To prevent this from happening, you need to check their compatibility before proceeding to the installation.
You can check the compatibility from your WordPress dashboard.
Activate Yoast SEO debug mode
Search engine optimization (SEO) is an integral part of websites. Implement it right on every aspect of your website and ease your mind that it will create a user-friendly site experience, which will attract more organic traffic.
You can apply SEO to your website in 2 ways. The first method is to inject SEO attributes into your website manually. It’s effective, but it’s a bit time-consuming and prone to errors.
Another promising method is using an SEO plugin. For instance, Yoast is currently the most trusted WordPress plugin because it offers many excellent features (keyword optimization, content look-ups, etc.). You can activate its debug mode using the below code.

Open your child theme’s functions.php file and paste the code at the bottom part, before ?>.
FAQ
If you download WordPress for the first time, you won’t find the wp-config.php file. The WordPress setup process will only create the file when you complete the installation process. For existing users who can’t find the file, you can create a new one by loading wp-admin/setup-config.php in your web browser.
PHP error log comes with four parts: error type, core error, stack trace, and code line number. To determine the main cause, read the stack race as it states the details of what your site/app’s system did and where it failed.
Yes, you can disable them through the php.ini file setting. Look for these lines of code: error_reporting and Default Value: E_ALL. Change it with Default Value: E_ALL & ~E_NOTICE, then refresh the server.
The location of your database depends on the hosting provider you use. But if you use cPanel, you can access it through phpMyAdmin.
Go to your phpMyAdmin database and select the database you want to optimize. Select all the tables available, then click the “With Selected” dropdown and choose Optimize Table. It will defragment all the tables you have selected and boost its performance and reduce the database size.
Conclusion
WordPress has a hassle-free way to build a website fast. But sometimes, things don’t work as planned. Fortunately, there are various methods available for debugging WordPress issues.
When solving a problem, always start by identifying the problem. It would help to ask yourself questions like: What is the problem? How did you discover it? And how long has this been going on?
It’s an effective method to understand the real issue and cause. You can also set clear goals and develop an action plan to ensure it won’t happen again in the future.