Would you like to learn how to add fonts in Photoshop? There are a lot of designers who find it very important to know how to add fonts to Photoshop.
In truth, adding fonts to Photoshop is a straightforward process that can be accomplished with just a few easy steps.
This article will describe how to install fonts in various versions of Photoshop such as Photoshop CC, Photoshop portable, Photoshop iPad, activate them in different operating systems, and remove them.
How to Add New Fonts to Photoshop
A constant flow of custom fonts is critical to any artist’s workflow. As a result of social media, even traditional artists will need a basic understanding of typography. If you do not wish to be restricted to the default fonts, you can change them.
This section will cover how to add custom and Adobe Fonts to Photoshop on Mac and Windows. Adobe Fonts is the premium font site that comes included with Photoshop.
How to Add Fonts to Photoshop in Windows
Many custom fonts are available on the internet; some are free, while others require payment.
Before using these fonts for commercial purposes, check the licensing conditions because many free fonts are intended only for personal use.
Before adding your custom fonts to Photoshop, you must download a font from a site such as dafont.com or BetterStudio Fonts. Follow the below steps to do this:
- Choose a Font Site and Download the Font

- Extract the Downloaded Font File
- Install the Font on Windows
As soon as the font has been installed on your computer, it is immediately available for use without a reboot.
After downloading and installing the font on your PC, you can add it to Photoshop on Windows. Follow these steps to do this:
- Create a new image in Photoshop or open an existing image
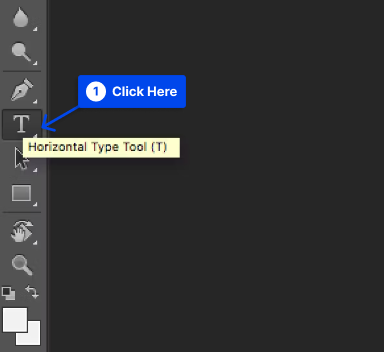
- Click the T icon on the left to open the text tool.
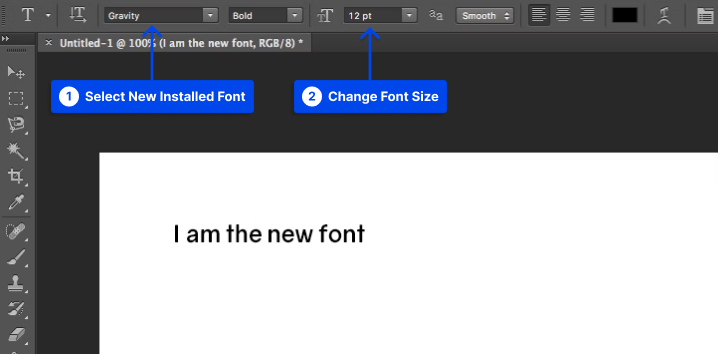
- Click the fonts dropdown menu at the top to see all your installed fonts.
- Select the font that you just installed
- Use the dropdown menu next to your fonts to stylize your text
How to Add Custom Fonts to Photoshop in Mac
There are very few differences in how Adobe Photoshop works on Mac and Windows. Therefore, you can use a font with Photoshop after installing it.
Before adding a custom font to Photoshop on Mac, you must install it on your Mac. Follow the below steps to do this:
- Once you have downloaded your font, extract its contents to a folder.
- Your font file will be opened in the Font Book after you double-click it.
- Click on Install Font to install your font on your Mac after previewing it.
You will now be able to use your font in Photoshop once it has been installed. The following steps will assist you in doing it:
- Click on the T icon on the left side of Photoshop to begin.
- Select your downloaded font from the drop-down menu at the top of the page
- Select a font variation from the menu located next to the font name if you wish
- Type your text using the font of your choice.
How to Add Adobe Fonts to Photoshop on Mac & Windows
The Adobe Font, formerly known as Adobe Typekit, is a collection of licensed fonts included in the Adobe Creative Cloud service.
Thousands of fonts are available in the Adobe Font collection, which can be used for personal and commercial purposes.
However, keep in mind that fonts are subject to periodic change, with old ones leaving and new ones replacing them.
The following steps will demonstrate how to add custom fonts to Photoshop on Mac & Windows using Adobe Fonts:
- Open Adobe Fonts
After logging into Creative Cloud, open Photoshop and select More From Adobe Fonts from the Font drop-down menu.
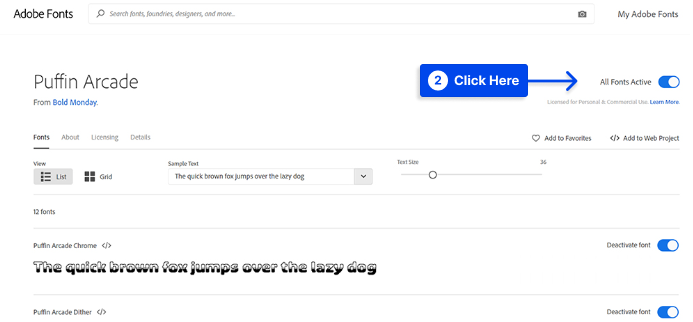
- Activate Font and Font Styles
Click on the font you wish to download, then toggle on Activate Fonts to activate the various types and weights of the font.
It is also possible to select only some of the font’s styles for activation while leaving others inactive. This will help add to the overall organization and shorten the Fonts dropdown menu.
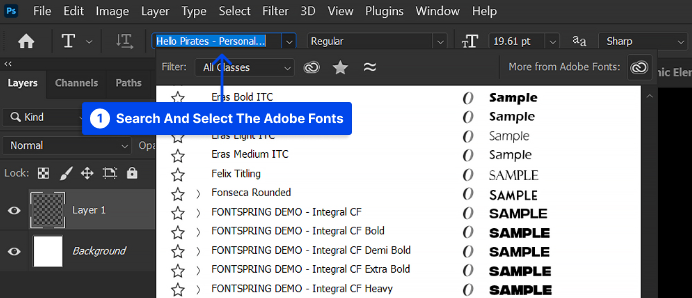
- Search for and use the Font in Photoshop
Once the font has been activated, you should return to Photoshop and search for the font by name. When logged into Creative Cloud and connected to the Internet, Adobe fonts are automatically downloaded and synchronized across all Adobe programs.

How to Remove Fonts From Adobe Photoshop
If you have installed too many fonts and are having trouble selecting a font from Photoshop’s font menu, you may wish to remove some of them.
To accomplish this, you will need to uninstall fonts from your system since Photoshop utilizes fonts from your system.
If you do not wish to permanently remove a font, you can temporarily disable it on your system.
A third-party app can be used to accomplish this on Windows; however, Mac’s operating system already contains this feature.
Remove Fonts From Adobe Photoshop on Windows PC
It is possible to remove installed fonts from the Settings app in Windows 10. Here is how to do so:
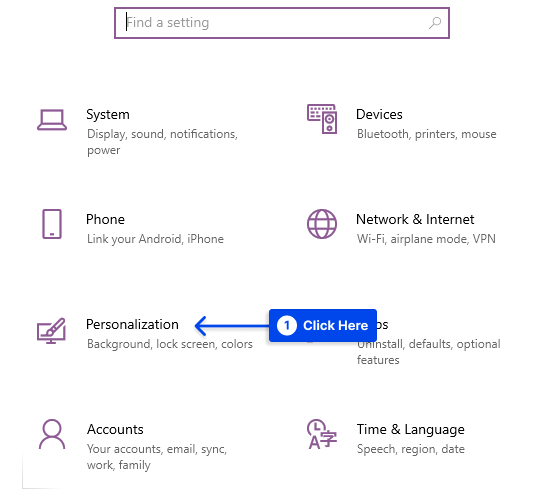
- Open the Settings app and click Personalization.
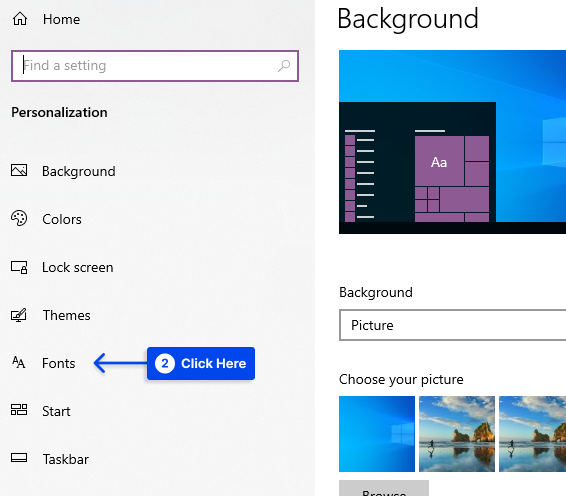
- Select Fonts on the left sidebar.
- Click the font you want to remove on the right, and select Uninstall.
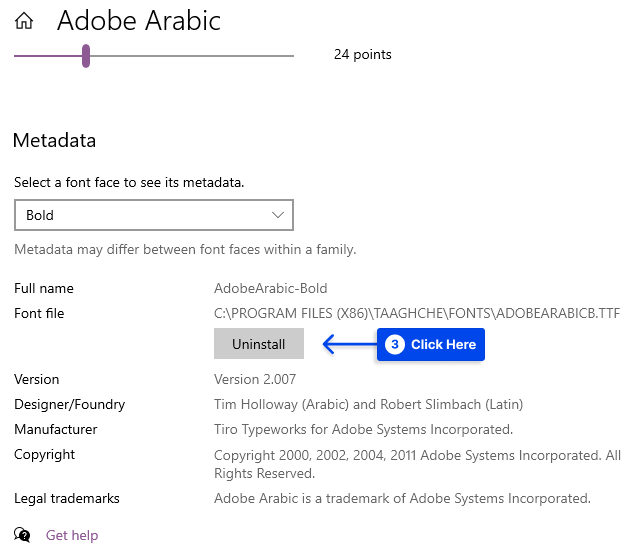
- Select Uninstall again in the next prompt.
The free FontBase PC application will allow you to disable a font if that is all you require.
The application serves as a font manager, allowing you to disable the fonts that you do not wish to use. As soon as you are ready again, you can enable your fonts and they will appear in Photoshop.
Remove Fonts From Adobe Photoshop on Mac
Using your Mac, you can remove and disable fonts without having to use any third-party font managers.
Follow the following steps to remove a font from your Mac:
- Open the Font Book utility using your preferred method.
- Click the font you want to remove.
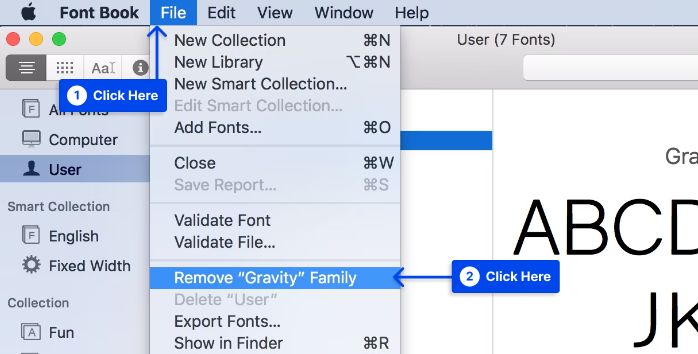
- Click the File menu at the top and select Remove.
Also, follow the bellow steps to disable a font on your Mac temporarily:
- Find your font in the Font Book utility.
- Right-click the font and choose Disable.
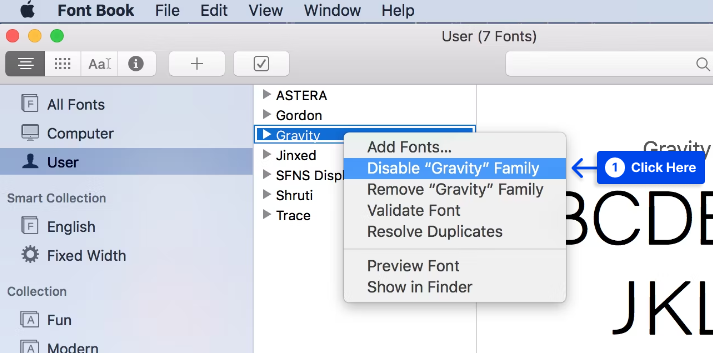
- Click Disable in the prompt.
- To enable your disabled font, right-click the font, and select Enable.
How to Set the New Font as the Default Font in Adobe Photoshop
When setting your newly added font as the default font in Photoshop, there isn’t much you need to do.
You can change the default font by simply opening the text tool and selecting your new font, which will become the tool’s primary font.
If you reaccess the tool, your font choice will be pre-selected, allowing you to type without selecting it again.
Conclusion
Whether using a Mac or a PC, adding or removing fonts to Photoshop is quick and straightforward. Simply download and install the font.
We hope you found this article helpful.
Please leave any other questions concerning this article in the comments section. If you like this article, please share it on Facebook and Twitter.