Own a business that requires you to serve customers in person and want to make a booking website? If yes, then you’ve come to the right place.
In today’s fast-paced world, booking websites have become a crucial part of our everyday lives. Whether you’re an individual looking for a quick online booking or a business owner trying to streamline your reservation process.
A booking website can make all the difference!
So, where do you begin? How do you build a booking website that fulfills your needs and goes above and beyond for your users? Don’t worry anymore!
In this beginner’s guide article, we’ll show you how to make a booking website that stands out in this congested internet space. So, let’s start!
What is a Booking Website? Why Do You Need One?
Before we move ahead, let’s explore a bit about the booking website and why you need one.
Simply, you can understand the booking website as an online platform that enables customers to book a variety of services. That includes hotels, flights, salons, clinics, and so forth.
It offers a simple and effective approach to making reservations and maintaining them. All without requiring phone calls or face-to-face meetings.
Here are some key reasons that outline why you need a booking website. They are:
- Reach more people and draw in more clients. All by giving them a simple and quick way to book your services online.
- Simplifies the reservation process and lightens the pressure on your team. Consequently, this saves time and increases client satisfaction.
- Serves as a one-stop shop for all of their travel needs. So, they can compare costs, check availability, and book reservations with the utmost convenience.
- Makes the booking process easier and more enjoyable for passengers by saving time and effort.
- It’s a must-have for any business that wants to remain competitive in today’s digital world.
Now that you know its importance, let’s proceed forward to choosing the ideal website-building platform for your booking website.
Pick the Right Website Building Platform
Each website-building platform has its unique characteristics and expertise. Thus, it’s fair to ponder which platform would be best for making your booking website.
As a result, we’ve reviewed the top 3 website platforms here to help you make the right pick.
1. WordPress
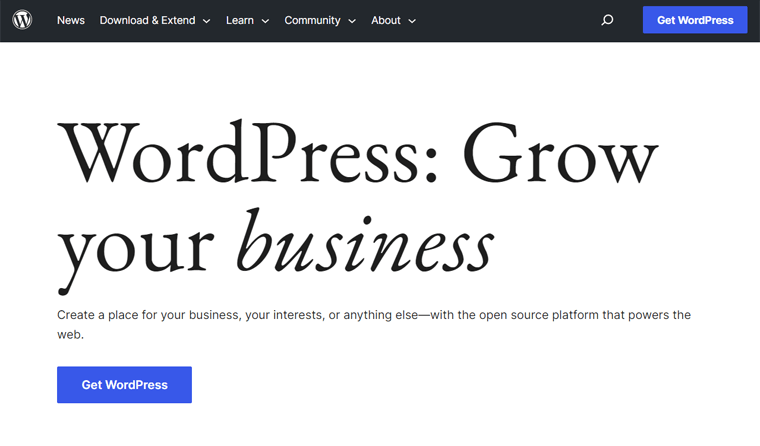
WordPress is a powerful open-source website-building platform to create and manage booking websites without coding skills. Precisely, it’s a Content Management System (CMS) that offers you a handful of configurable themes and plugins.
Pros:
- Doesn’t require much technical know-how to create your booking website.
- Offers a user-friendly interface along with excellent SEO (Search Engine Optimization) capabilities.
- Choose from a vast library of WordPress themes and WordPress plugins.
- A vast community of developers and users contribute to its development and maintenance.
Cons:
- It can also be slow if not optimized properly.
- Due to its popularity and the availability of several third-party plugins, security risks exist.
- You’ve to manage your domain and hosting independently.
Did you know, WordPress is available to you in 2 different flavors? That is WordPress.org and WordPress.com. You can check out our comparison article on WordPress.org vs WordPress.com to know its differences.
2. Wix
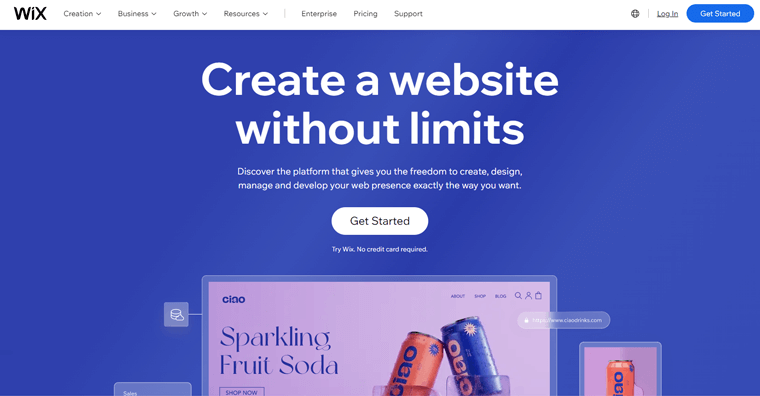
Wix is another cloud-based self-hosted website builder that you can use to make a booking website. This means you don’t have to worry about managing the domain or hosting. On top of that, it comes with a drag-and-drop interface with the option to add an easy booking system. So, you can create a booking site hassle-free.
Pros:
- Pick from tons of templates perfect for making your booking site effortlessly.
- You get a free plan with a subdomain of its name. For instance, yourbookingwebsite.wix.com
- Offers a range of handy features to make your booking site stand out. Such as SEO tools, third-party app connectors, and more.
Cons:
- Price policies may be limited.
- Given the size and nature of your booking website, you might not get the advanced features required.
Do you want to compare WordPress and Wix side by side? Then, read our in-depth comparison of WordPress vs. Wix for more detailed insight.
3. Shopify
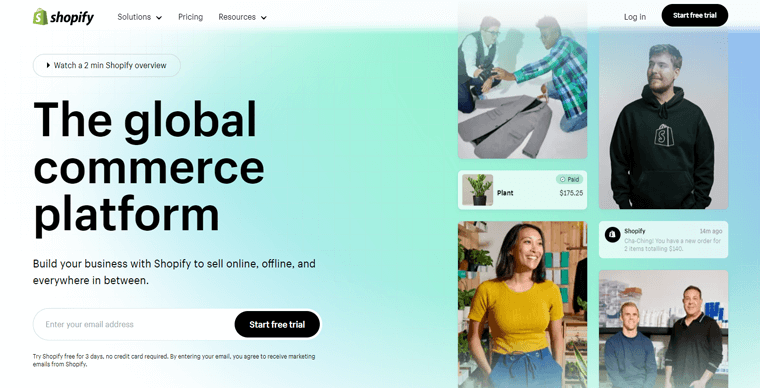
Shopify is an eCommerce website builder that offers a comprehensive platform for setting up and managing an online store. Although Shopify is mainly designed for selling physical and digital goods, you can use it for a booking website. As it offers a range of tools tailored to manage bookings like scheduling, appointment confirmations, etc.
Pros:
- Simple to use and hassle-free to set up your booking website.
- Enables integration with a wide range of third-party applications to improve the performance of your booking website.
- Secure processing of payments with popular payment gateways. Such as PayPal, Stripe, and Apple Pay.
- Provides SSL (Security Socket Layer) encryption to guarantee the security of all client information.
Cons:
- You’ve to pay an additional charge for third-party apps.
- Provides limited functionality for advanced booking features.
- Limited control over backend customization and hosting.
Do you want to know more about the Shopify website-building platform? Then, definitely check out the article on what Shopify is to get rigorous insight.
Our Recommendation – WordPress
Are you confused about which one is the best website builder platform to make your booking website? Well, all the above-mentioned builders have their own set of perks and drawbacks.

Yet, if you want us to say, then we recommend WordPress.org as the best platform of all. Wondering why so?
The strongest aspect of WordPress is its ability to incorporate all necessary functionality to build an extensive booking website. Like specialized plugins for booking, adaptable booking forms, availability schedules, etc.
All of this enables you to quickly design a booking website that is both expert and user-friendly.
Having said that, now let’s explore how you can create a booking website using WordPress.org in the next section.
How to Create a Booking Website Using WordPress?
Here, we’ll walk you through each step of making a WordPress booking website. Stick with us as we lead you through.
Step 1: Purchase a Hosting Plan, Domain, and Install WordPress
The starting point of creating a booking website involves purchasing a suitable hosting plan, domain name, and WordPress installation.
Purchase a Hosting Plan & Domain
To begin with the hosting plan, you should select the appropriate WordPress hosting provider. And then purchase a suitable hosting package for your booking website.
Simply you can understand the hosting provider as the one who provides you with hosting services. Web hosting is a must to store your booking website’s files and makes it accessible on the internet.

Do check our article on what web hosting is to know more about it.
There are tons of hosting options and providers on the internet. So, you should always choose the one with the best uptime, fast load times, and satisfactory customer service.
For more guidance, you can refer to our article on what to look for in a web hosting company.
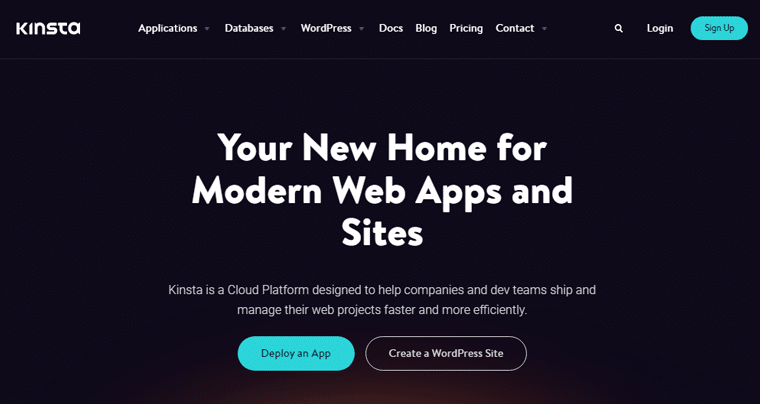
However, if we had to recommend, then we’d suggest going for reputable providers. Such as Kinsta, Bluehost, Cloudways, etc.
Likewise, a domain name is an online address that your visitors use to access your booking website. For instance, your domain name looks like www.yourbookingwebsitename.com.
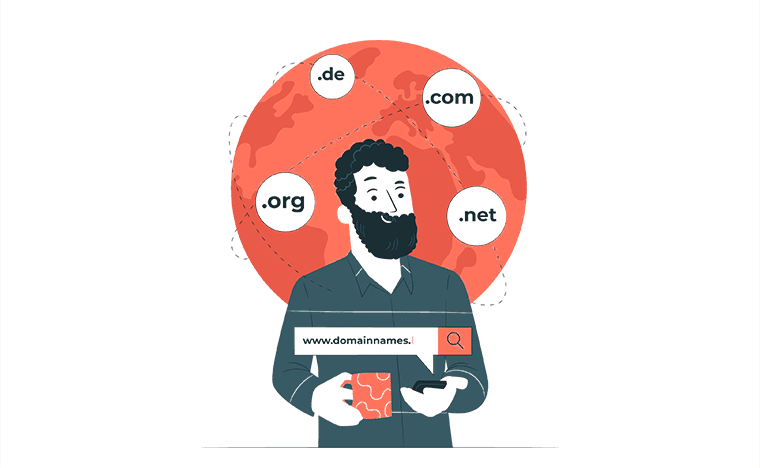
It’s crucial to ensure that your chosen domain name is relevant to your business or brand and easy to recall. Most importantly, it should be available for purchase.
You can refer to our article on how to choose a domain name for your business for more guidance.
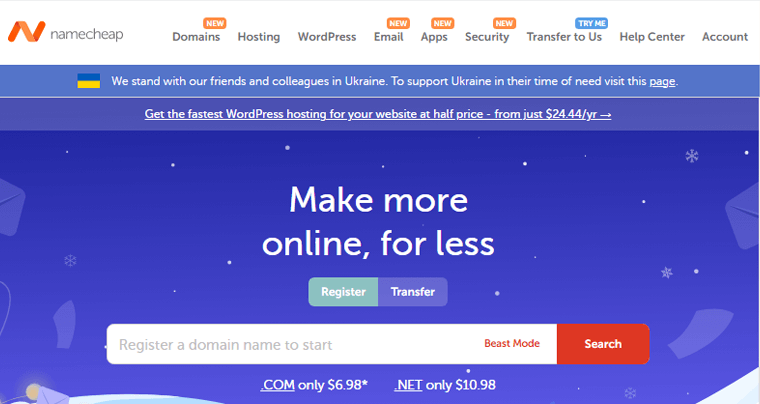
Moreover, some hosting companies do assist you in acquiring a domain name without having to go elsewhere. Alternatively, you can purchase one from various popular domain registrars like Namecheap, GoDaddy, etc.
Install WordPress
The next step is to install WordPress after you’ve bought a hosting plan and a domain name.
To inform you, several hosting companies provide one-click installs to make the process simpler. Plus, you can find various managed WordPress hosting plans. That automatically takes care of security, backups, upgrades, and more.
Regardless of the hosting plan you pick, you can install WordPress by following these 3 simple steps.
- Open your hosting account and log in.
- Look for a WordPress installation option in the Control Panel.
- As directed, carry out the instructions. With that, you can set up WordPress instantly.
You’ll receive the login information from the hosting company through email shortly after installation. Following that, you can quickly log in to your WordPress dashboard.
Step 2: Choose an Elegant Booking WordPress Theme
Now, your next job is to choose an elegant booking WordPress theme suitable for your booking website. Are you wondering what the theme exactly is?
Simply, you can think of the theme as a pre-made template that reflects the entire architecture, aesthetic, and usefulness of your site.
Therefore, you should pick a theme that precisely matches your concerned business that involves online booking. So that your customer gets an amazing user experience on your site.
How to Choose the Ideal Booking WordPress Theme?
Here, have a glance at a few key things to consider when choosing the booking WordPress theme for your booking website. They are:
- Booking Functionality: Choose a WordPress theme that’s designed with booking features in mind. It should support booking forms, calendars, scheduling, and other functions.
- Customizability: Ensure it’s flexible enough to modify colors, layouts, and other design elements. So, you can reflect the essence of your booking website at a glance.
- Integrations: Look for a theme that can integrate with popular booking plugins. Along with payment gateways, CRM (Customer Relationship Management) systems, and social media platforms.
- Performance: Verify if it’s optimized for speed and performance. Your chosen theme should have clean code and fast loading time for a seamless user experience.
- Responsiveness: Last but not least, ensure that the theme is fully responsive and optimized for viewing on all devices.
Besides the above-mentioned points, it’s better to check its ratings and reviews, pricing, support, and other factors. You can read our article on how to choose a WordPress theme for more guidance.
Here, we’ll use the Astra theme during this tutorial. As it offers various booking website templates perfect for building a booking website. Plus, you cannot ignore the fact that it’s a multipurpose theme with 1+ million active installs.
You can also check our article on the Astra theme review to get more detailed insight into this theme.
Using Astra WordPress theme
Let’s quickly go over how to use the Astra WordPress theme for your booking website now.
Installing & Activating Astra WordPress Theme
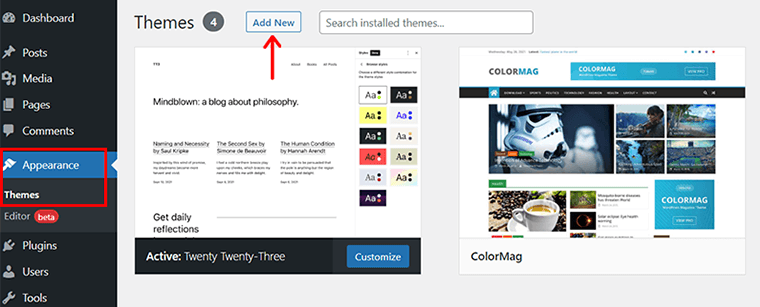
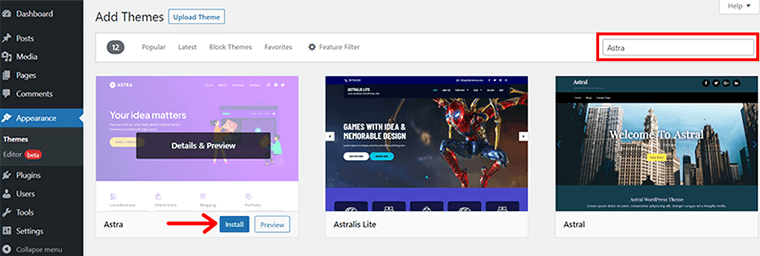
On your WordPress dashboard, go to the ‘Appearance’ > ‘Themes’ page. Following that, click the ‘Add New’ button and type ‘Astra’ in the search bar.
After you find the Astra theme, you need to click on the ‘Install’ button. Then, wait for the installation to finish.
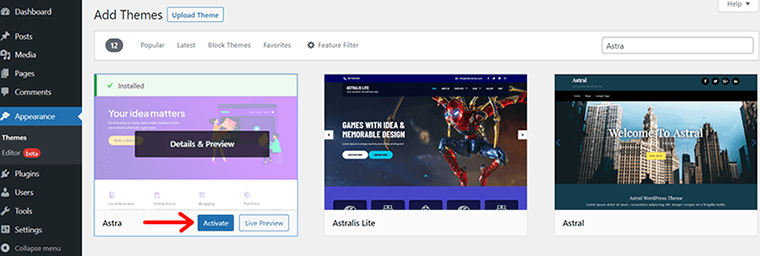
Shortly, you’ll find the ‘Activate’ button. Simply, click on it.
After your theme is successfully activated, Astra sends you the Thank You notification. You can see the ‘Get Started’ button on the same popup. Click on it.
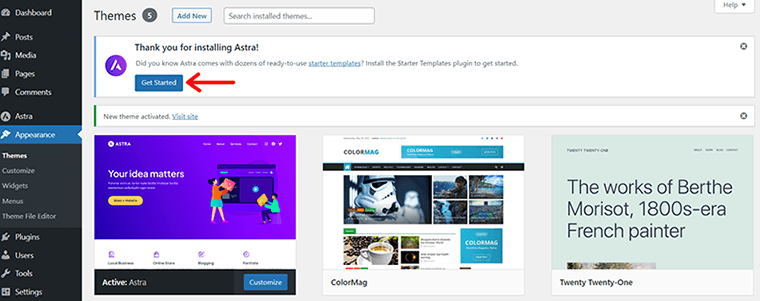
With that, you’ll notice that your dashboard now has the ‘Starter Templates’ installed and activated automatically.
Next, you’ll see a dashboard page as shown in the screenshot below.
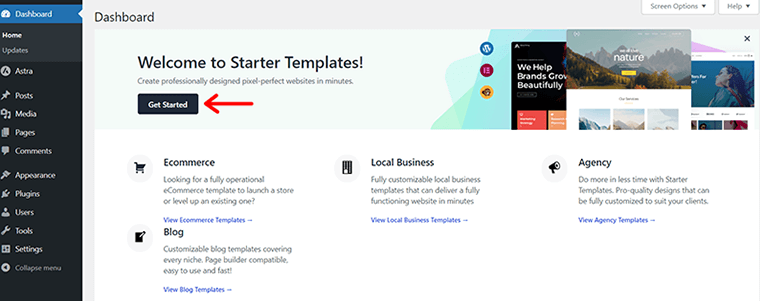
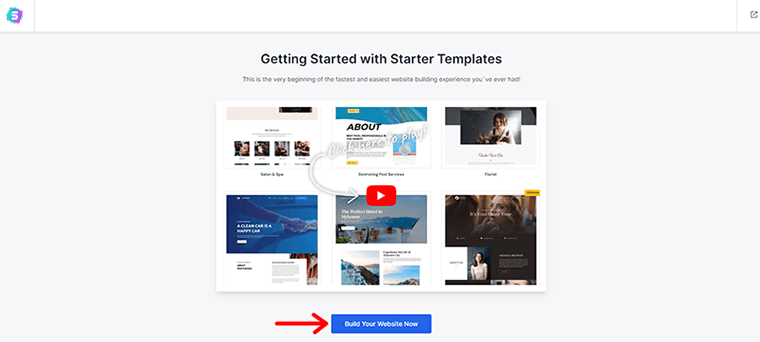
Once more, click on the ‘Get Started’ option. Here, you can explore the various beautiful starter templates that suit your booking website. Then, a different page is opened for you. Here, all you have to do is click the ‘Build Your Website Now’ option.
Import Your Chosen ‘Booking’ Template
Then, you need to type the keyword of your business in the search bar.
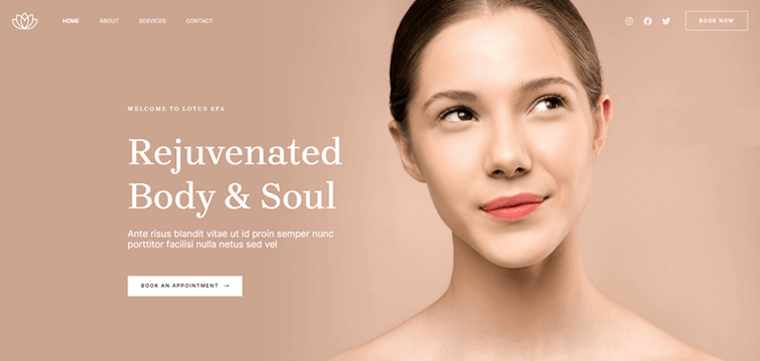
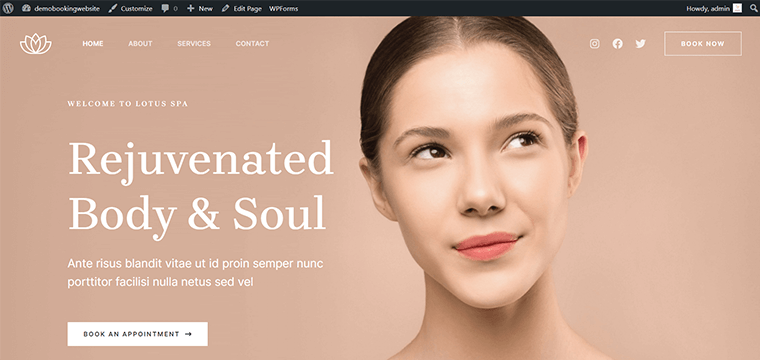
For example, let’s consider you’ve got a spa center. And you’re planning to open a spa booking website where your clients can make booking right from your site.
So, type ‘Spa’. With that, you’ll find several beautiful templates to create your spa booking website.
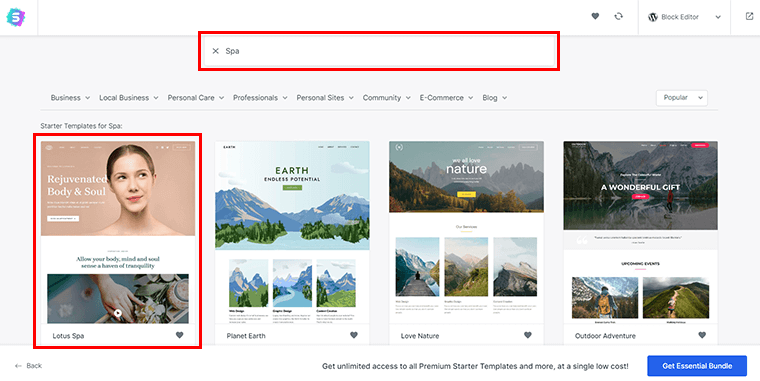
All you’ve to do is double-click on your chosen spa template. Here, we chose the first template i.e. ‘Lotus Spa’. Now, you’ll see the following page.
Here, if you already have a logo for your spa website, then you can upload it right away. If not, then still not a big deal! You can always change it later via the Customize option. For now, simply hit on the ‘Skip & Continue’ option.
Likewise, you can modify the colors and fonts before importing your template. However, if you’re unsure, then you can always do it later.
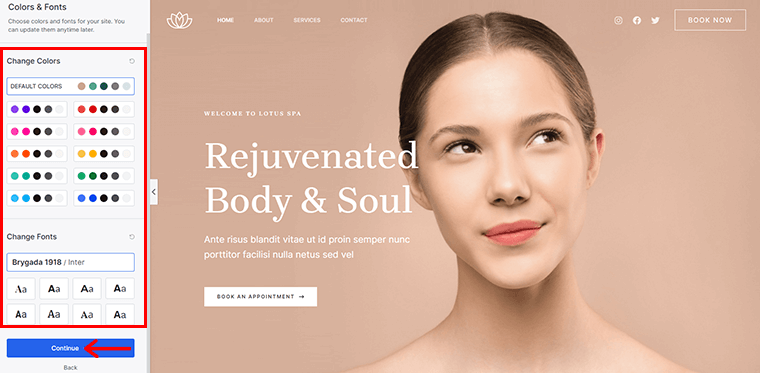
Once finished, click on the ‘Continue’ option.
Last but not least, Astra requests certain details. You can quickly finish them out and hit on the ‘Submit & Build My Website’ option.

Afterward, you’ll notice a popup saying ‘Congratulations’ for successfully importing a booking template for your spa website.
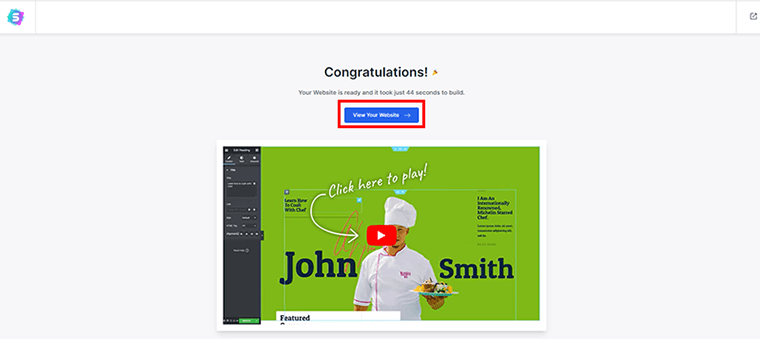
Next, click on the ‘View Your Website’ option to preview how your spa booking website looks.
Step 3: Set Up a WordPress Booking Plugin (Amelia)
The next step involves installing a WordPress booking plugin to integrate a booking system into your website. Some of the popular booking plugins are Amelia, Simply Schedule Appointments, etc.
Here, we’ll be using the Amelia plugin to create a booking website. This freemium WordPress appointment and event booking plugin enables you to set up a comprehensive booking system on your website.
I) Installing & Activating Amelia Plugin
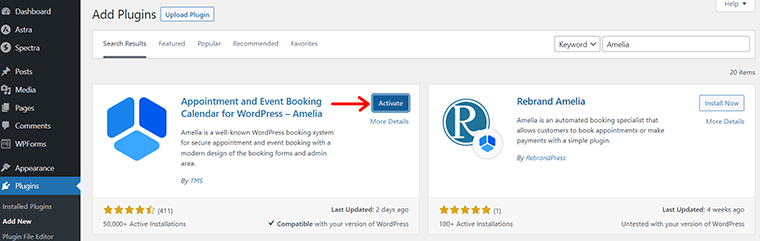
From your WordPress dashboard, you can quickly install the Amelia WordPress plugin. For that, go to ‘Plugins’ > ‘Add New’. Subsequently, enter ‘Amelia’ in the search box. When you find the plugin, click ‘Install Now’.
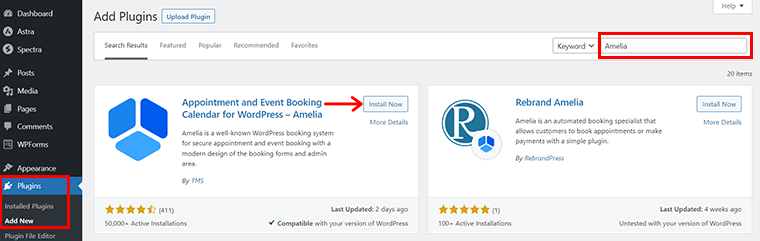
Eventually, you’ll also see the ‘Activate’ option. Click on it.
II) Configuration of Amelia Plugin
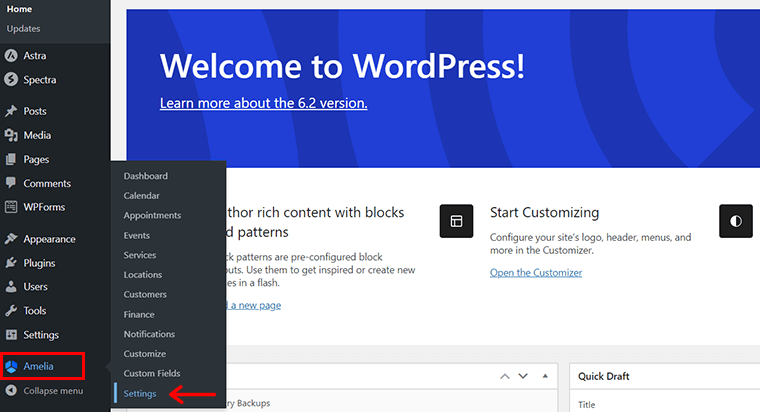
Once your plugin is successfully activated, a new menu i.e. ‘Amelia’ appears on the left navigation.
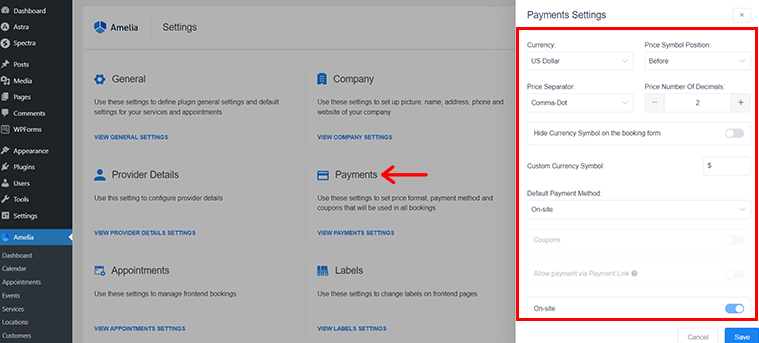
Now, you need to click on ‘Amelia’ > ‘Settings’ to configure the plugin settings.
On this settings page, you can configure the following settings:
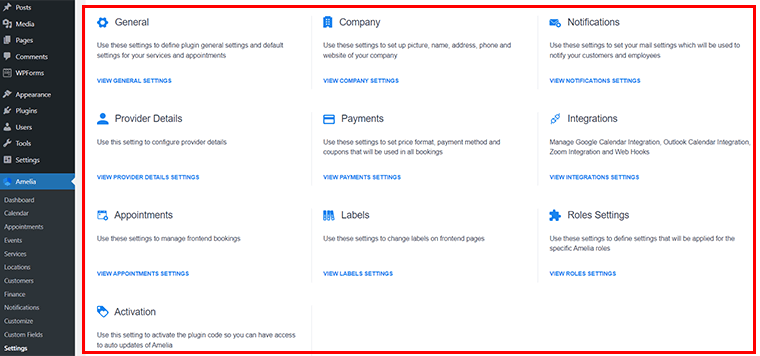
- General: Set parameters like currency, date format, and time zone. You can also set up a Google Maps API key to show location maps on your booking pages.
- Company: Add your company’s logo, name, address, phone number, and website using this setting.
- Notifications: Configure email notifications for when reservations are made or canceled. You can even set up reminders.
- Provider Details: Use this setting to configure provider details such as assigned services, work hours, days off, special days, etc.
- Payments: Set up the payment options for your reservation system. Its free version supports only PayPal payments.
Besides, you can also find other settings like Integrations, Appointments, Roles Settings, and Activation. However, to access these features, you’ll have to upgrade to the premium version of Amelia.
You can check out Amelia’s detailed documentation on configuring settings to know about each setting in more detail.
III) Create & Manage Booking Appointments
Next, you need to create and manage booking appointments. For that, we’ll majorly look it into 2 different sections.
Adding an Employee
When you’re creating a booking website, the first thing to do is to create an Employee.
In other words, you can understand it as the service provider. That includes trainers, coaches, doctors, and other professionals.
Each service provider can offer a customized menu of services. Also, select his or her working hours, and adjust other variables.
To add an employee, simply go to ‘Amelia’ > ‘Settings’ > ‘Provider Details’. Then, click on the ‘View Provider Details Settings’ option.
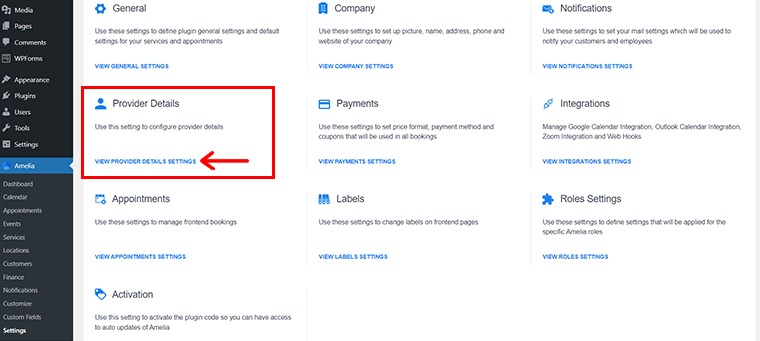
With that, you’ll see a configuration box on the right side. Here, you can enter your service provider details, assigned services, work hours, etc.
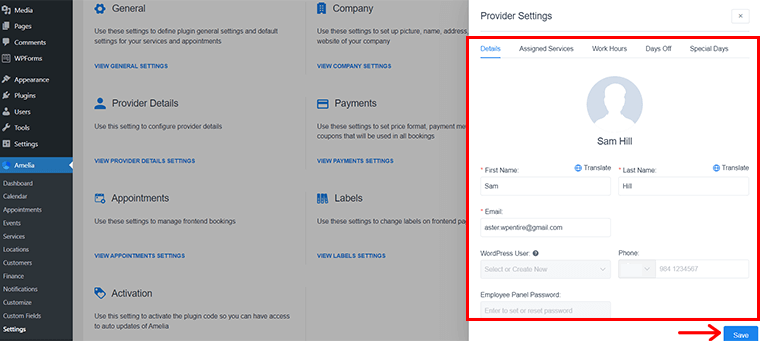
Once done, simply click on the ‘Save’ button just as shown in the above image.
Adding a Service
Once you’ve successfully added your employees, your next job is to add a service. Service is simply the core activity that your clients will book through the website.
To add a service, go to ‘Amelia’ > ‘Services’ from the WordPress admin panel.
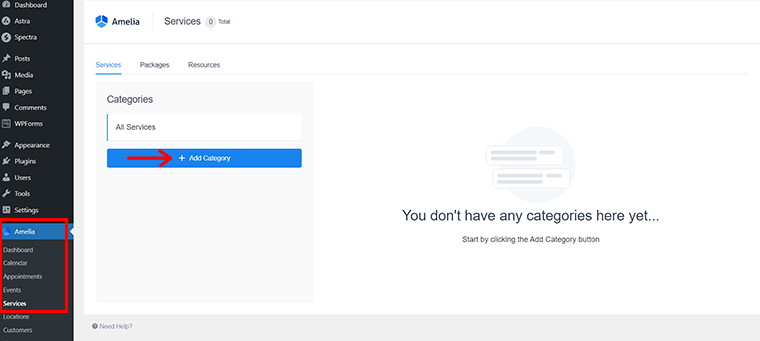
Then, click on the ‘Add Category’ option to add a category.
Give a new name to the category. For example, ‘Sauna’ and then click on the (✓) right icon button just as shown below.
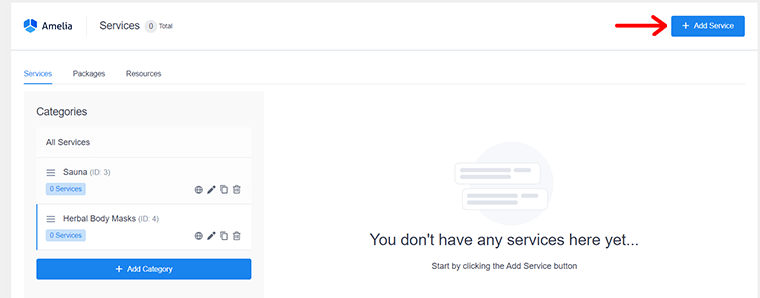
You can add a few more categories as per your business and preference. So, upon adding the category, next, click on ‘Add Service’ from the menu in the top right corner of the screen.
Following that, you’ll see a sidebar. Here, you need to enter your service details like name, category, duration, employee, price, etc. Also, you can specify extra settings, like buffer time, capacity, and so forth.
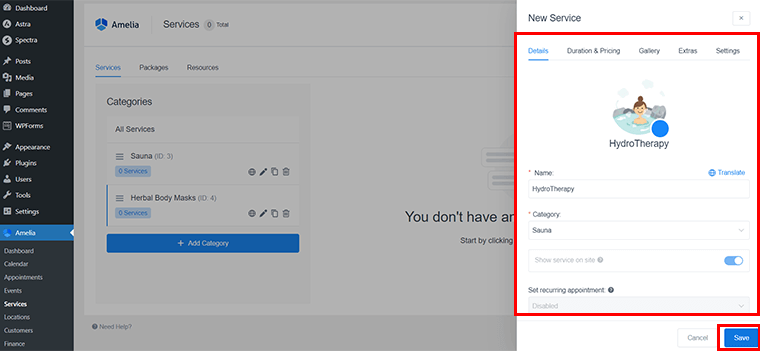
Once done, all you’ve to do is click on the ‘Save’ button.
IV) Integrate Amelia with WordPress
Now, it’s finally time to integrate the Amelia plugin with your WordPress site.
Here, all you’ve to do is integrate the Amelia booking form into your respective booking link. But, since we’re using the free version, you don’t get the Forms tab. For that, you’ve to upgrade to its premium version.
Nevertheless, we’ll teach you another method to integrate the Amelia booking form.
Create a Booking Form Page
For that, you first need to create a new page for a booking form. To do so, navigate to the ‘Pages’ > ‘Add New’.
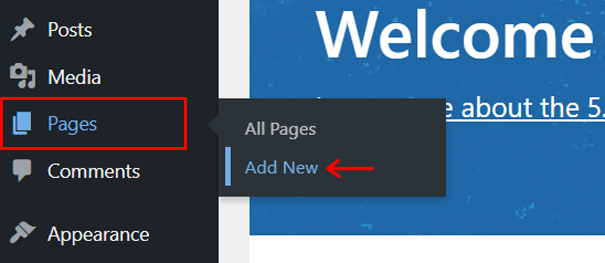
With that, you’ll see a new page editor just as shown below.
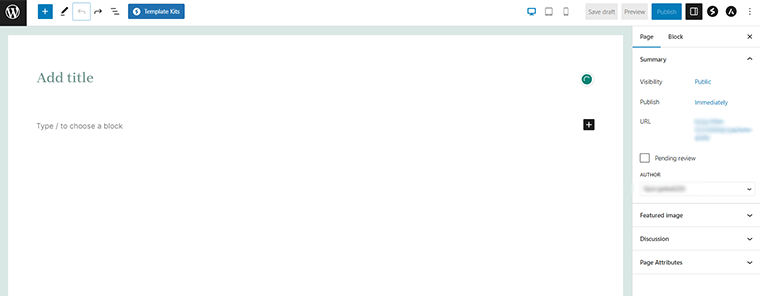
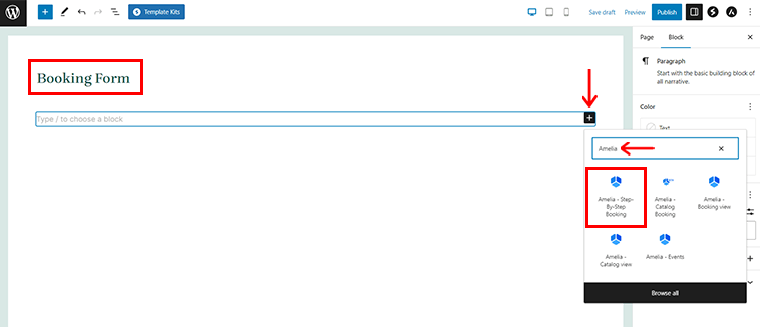
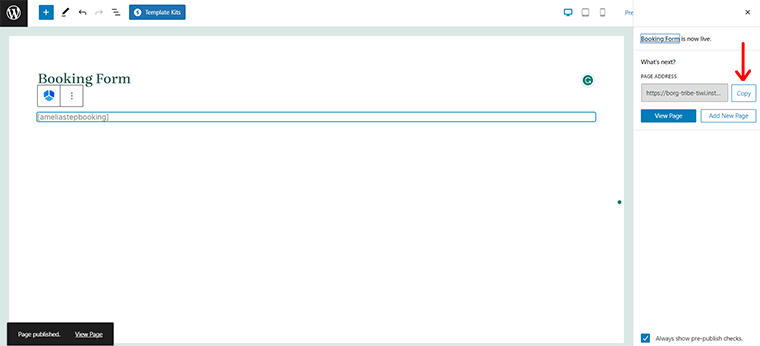
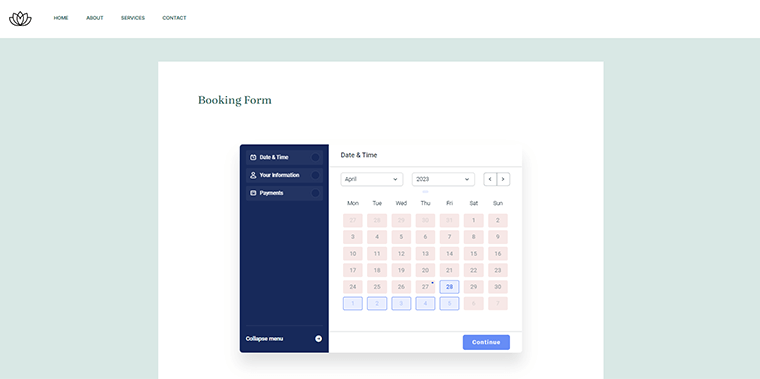
Now, let’s give a suitable title. For example, ‘Booking Form’. Then, click on the ‘+’ icon. And on the search bar type ‘Amelia’. Once you find ‘Amelia – Step-By-Step Booking’, click on it.
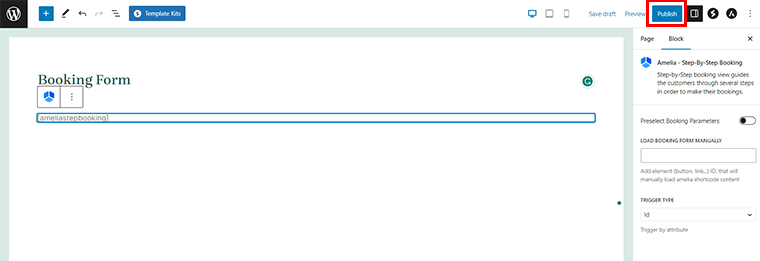
With that, you’ll see that a new Amelia booking form shortcode has been inserted. Now, all you’ve to do is click on the ‘Publish’ button on the top right corner.
Shortly, you’ll see that your booking form page is published. Also, on the right sidebar, you can find the URL address. Just right to it, there is also the ‘Copy’ button. Click on it.
Embed the Created Booking Form Page
Again, you need to come back to your dashboard and navigate to ‘Pages’ > ‘All Pages’.
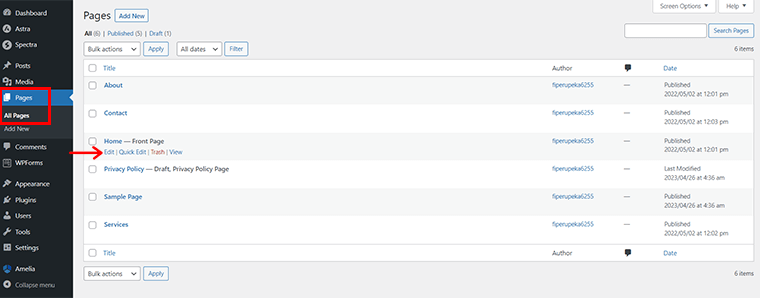
Now, choose the page where you want to integrate the Amelia booking form. Here, we’ve chosen the Home page. Hovering on it, you’ll see various options. Click on the ‘Edit’ option.
That’ll open you to the Home page editor tab. Since we’ve previously imported Astra’s hair salon booking theme template, here you don’t have to do much work.
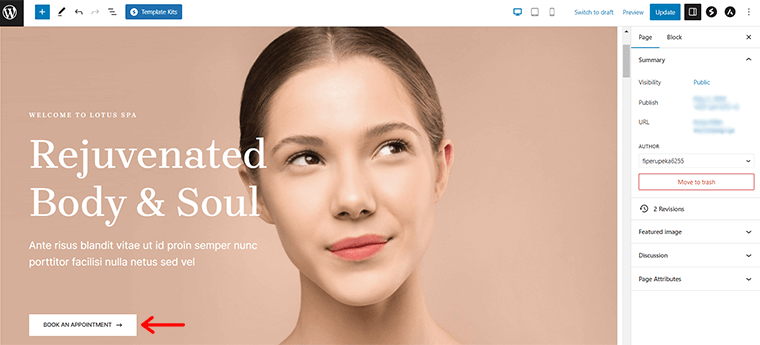
All you’ve to do is click on the ‘BOOK AN APPOINTMENT’ button.
Upon scrolling a bit down in the General settings, you’ll see a Link box. Now, ‘paste the previously copied booking form page link’ here.
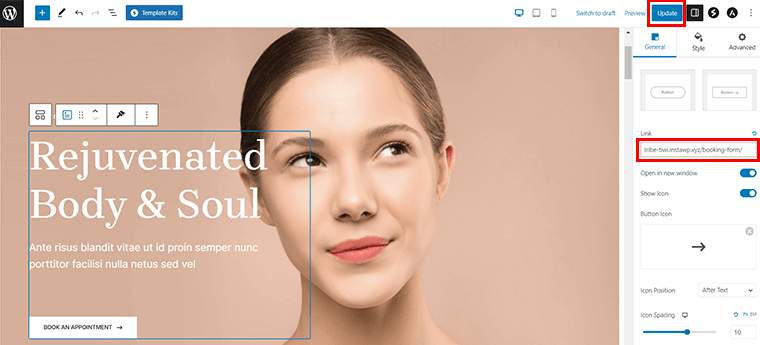
And click on the ‘Update’ button in the right corner.
Now, go and preview the homepage of your website and click on BOOK AN APPOINTMENT. You’ll see that the Amelia booking form with the booking functionality is successfully integrated.
Step 4: Adding Necessary Content
You’ve now successfully integrated the booking capability into your website. So, it’s time to add any further content you want for your website.
For example, writing blog articles related to your product and services is a good idea for conversions.
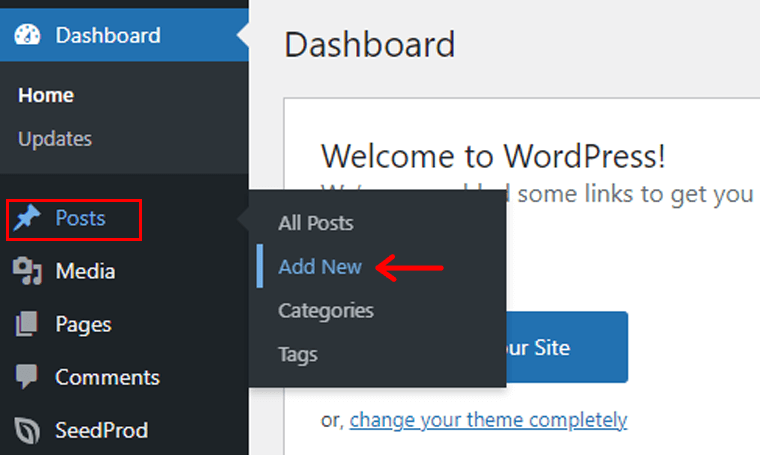
For that, from your WordPress dashboard, all you’ve to do is ‘Posts’ > ‘Add New.’
Following that, you’ll find the Gutenberg editor on the next page.
It has 2 main areas. They are the ‘Main content area’ on the left-hand side to the center and the ‘Settings panel’ on the right-hand side.
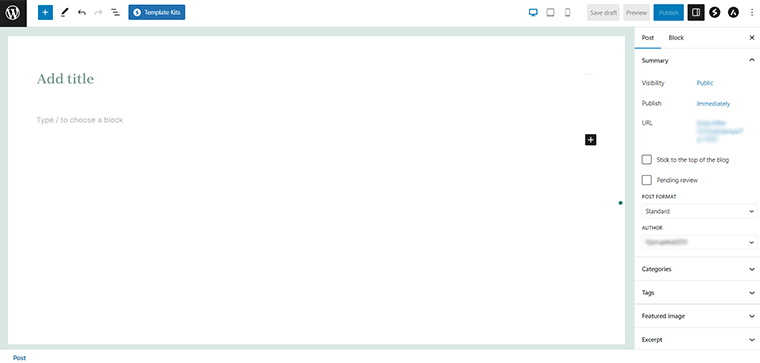
You should include all information, including text and graphics, in the main content area. Meanwhile, the Settings panel on the right allows you to modify and adjust the content.
You can start by adding the title in the ‘Add Title’ section. For example, we’ll create a ‘Benefits of Sauna’ article.
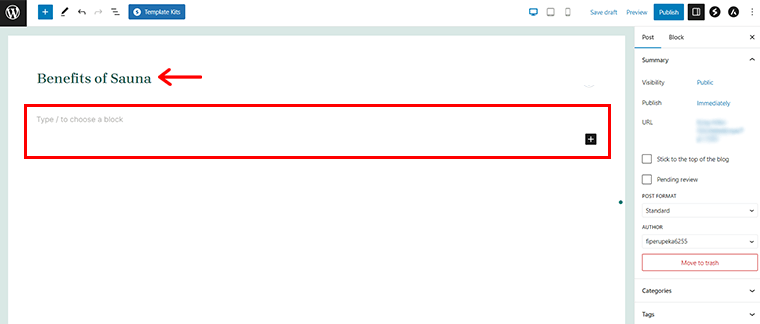
You can see ‘Type / to choose a block’ below the Title block.
For instance, if you add the ‘Paragraph’ block, you can begin typing to put text content there. Plus, adjust the Paragraph block settings in the ‘Settings’ panel on the right sidebar while you type.
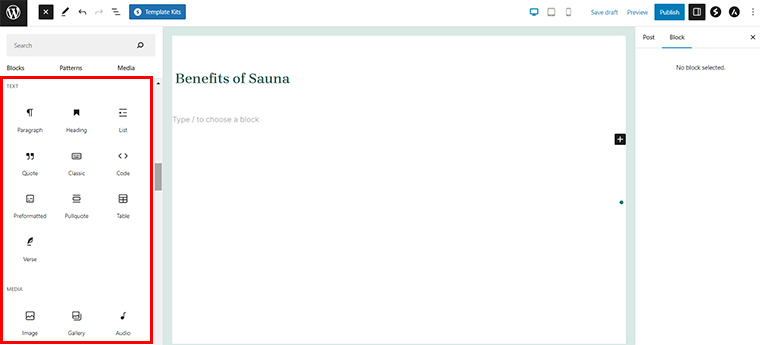
Similarly, you can add several kinds of content elements, such as buttons, a gallery, lists, headings, and images.
Additionally, configure post settings, change the permalink, set a featured image, add a category, enable or disable comments, and more.
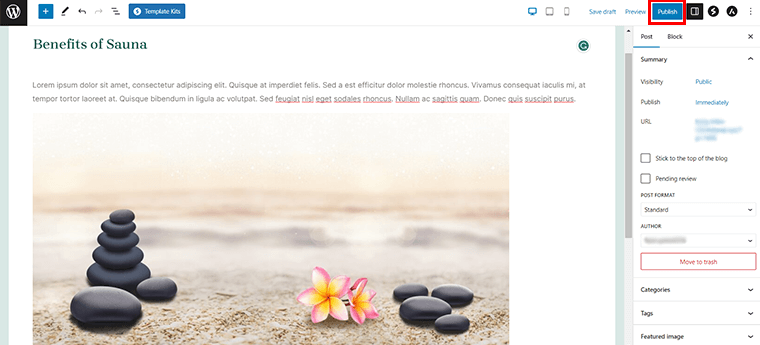
Once everything is ready, click ‘Publish’ in the top right corner to post your article.
Step 5: Adding Other Required Plugins & Tools
Most likely, your initial booking website won’t have all the functionality you want. Nevertheless, you can always add further features using additional WordPress plugins and tools.
Recommended SEO-Optimization and Security Plugins
SEO Optimization Plugins:
Once you’ve created a booking website, you definitely want more people to see your website. One of the best ways to do so is by doing proper SEO on your booking website.
So, here are some recommended plugins for SEO optimization:
Yoast SEO
Yoast SEO is one of the most popular SEO plugins that help you optimize your booking website for search engines. It optimizes your website content and even provides suggestions for improvement. As a result, this helps you gain more traffic to your booking website.
Rank Math
Rank Math is another versatile SEO plugin that offers you a handful of features for enhancing your booking website’s SEO. To be precise, you get features for content optimization, meta tags, creating sitemaps, and so much more.
On top of that, you can also opt for advanced features like tracking keyword rankings, and SEO insights in its premium version.
Security Plugins:
Anything is possible in this era of the internet. There can be a lot of terrible folks attempting to access your personal information. To sell or otherwise abuse it. That’s why, security should be one of your prime concerns.
Thus, here are some recommended plugins for security:
Wordfence

Wordfence is one of the well-liked security plugins for your booking WordPress website. It provides a plethora of capabilities to protect your website from security threats and malware. Precisely, you get features like scanning your website for vulnerabilities and suspicious activity, blocking malicious traffic, etc.
Sucuri
Sucuri is another advanced security plugin for your booking website. Using it, you can check your website for vulnerabilities, stop unwanted traffic, and keep an eye out for unusual behavior. Also, it provides a website firewall for blocking attacks before they even reach your website.
Both the recommended SEO and security plugins are available in both free and paid versions.
You can quickly install the free version right from your WordPress dashboard. Meanwhile, you can also opt for its premium version from their respective official websites.
Setting Up Payment Gateways for Online Payments
In addition to these plugins, you may also need to set up payment gateways for online payments.
Unfortunately, the free version of the Amelia WordPress plugin does not support integration with payment gateways. The free version is designed to provide basic appointment booking functionality without any payment processing features.

So, you must upgrade to the plugin’s paid version, which supports a variety of payment gateways. Including Stripe, PayPal, and others, for payment processing in Amelia. Its pro version also comes with extra features like email notifications, personalized appointment fields, and sophisticated reporting tools.
To sum it up briefly, you can follow the following steps to set up payment gateways for online payments with Amelia’s premium version.
- Install the plugin for the payment gateway you want to use.
- Then follow the instructions provided by the plugin to set up your payment account and configure the payment settings.
- Customize the appearance and functionality of your booking website using the Amelia settings and customization options.
- You can also create and manage your booking services, staff, and bookings through the Amelia dashboard.
- Further, track your bookings and payments using the reporting tools provided by Amelia.
Step 6: Checking Everything & Launching Your Booking Website
It’s time to make your booking website public after you’ve included all the necessary features and content. To make sure your website is all set for visitors, double-check the following:

- Test your booking website on different devices, browsers, and platforms to ensure that it works correctly.
- Confirm that your website loads quickly, all images and text are displayed correctly, and all links work as expected.
- Check your booking form to ensure that it captures all the necessary information from visitors.
- You can test the form by filling it out yourself, and check that you receive a confirmation email after submitting a booking.
- Verify that your payment gateway is working correctly if you’ve integrated one.
- Test the payment process by making a small transaction to ensure that visitors can easily complete the payment process.
- Check all the pages and content on your website to ensure that they are error-free and up-to-date.
- Ensure that all information, including contact details, services offered, and pricing, is accurate and up-to-date.
Done checking? Your booking website is ready to go live! Hurray!
Step 7: Keep Updating and Marketing Your Booking Website
Creating a booking website is not a one-time task. You need to keep it up-to-date and promote it through different marketing channels. To ensure that your website continues to attract visitors and bookings.

Marketing Your Booking Website
Here are some guideline tips for updating and marketing your booking website:
- Update your website frequently with new information and functionalities to keep users interested and engaged.
- Add new services, images, videos, and testimonials to your website. To highlight your offerings and foster trust with potential customers.
- Use social media to post your most recent discounts and promotions and to promote your website.
- Run email marketing campaigns to remind them about your services to encourage customers to make a booking.
- To enhance website traffic and reservation volume, consider carrying out paid advertising campaigns.
- Employ search engine marketing for your business via Google Ads. To attract prospective clients who are looking for services similar to yours.
You can build a successful booking website by adhering to these steps. That draws people, turns them into clients, and helps you expand your business. Certainly challenging, but worth it!
Do you want more comprehensive checklist guidance to make your booking website perfect? Then, be sure to browse our article on the ultimate checklist of what makes a good website.
Frequently Asked Questions (FAQs)
A. Simply put, a booking website is a site that accepts online bookings and payments from customers for various services.
A. They are better administrative efficiency, more convenient customer experiences, and higher revenue for the company.
A. Some prime businesses that benefit heavily from the booking website are hotels, restaurants, spas, salons, tour operators, and more.
A. Consider aspects like ease of use, cost, and available features when picking a platform for your booking website.
A. WordPress.org, Wix, Shopify, Squarespace, and more are some of the best ones to create a booking website.
A. A booking website must have a booking calendar, online payment processing, email notifications, and a user-friendly interface.
Conclusion
And that’s a wrap! This concludes our tutorial article on how to create a booking website.
We believe you’ve learned how to create a booking website. Also, we hope you can now draw in more clients and maximize your bookings. And elevate your booking website to the forefront with a little hustle and perseverance.
Still, unclear about any steps? Or require any kind of help with website building? Then, please comment below. We’ll be glad to help you.
Explore our other similar articles. Such as how to hide the WordPress site until ready and how to create an about me page on WordPress.
Don’t hesitate to share this article with your friends and family looking to make a booking website.
Lastly, follow us on our social media handles Facebook and Twitter for more recent updates.
Some of the links on this article/page are affiliate links. If you click on such an affiliate link and purchase the product, we’ll earn a specific percent commission from the seller. But it won’t at all affect the price you’ll pay.