Are you wondering how to create a multi column form in WordPress? If so, this article provides a detailed guide for adding multiple columns in WordPress form.
Creating a WordPress form with your desired number of columns can be a bit of a hassle. First of all, WordPress doesn’t provide a built-in form for your site, and you must rely on the form builder plugins. Next, not every form builder plugin lets you design your form as per your choice.
But what if we say that it’s not a big deal. Yes, building a multi column WordPress form is not a big issue if you can choose the right form builder plugin with better customization options.
So, read the article till the end to learn to create a multi column form on a WordPress site.
Reasons to Build a Multi Column WordPress Form
A form in any website has a vital role in converting audiences into regular visitors or customers. And more importantly, the form design is another factor that can drive audiences to fill the form. An impressive and good-looking form can lure audiences to fill-up the form and submit their entries.
Among many designs of the form, adding multiple columns is also one of its kind. When you create a multi column WordPress form, it can highly reduce the user’s time to fill the form; because the form fields are side by side, making them easier to navigate.
Next, the design also looks the best in many cases when you use multiple columns instead of a single column.
Likewise, if you create multi column WordPress form, it’s easy for you to group similar kinds of form elements. On the other hand, the multi column WordPress form also compliments the site that uses a WordPress theme with multi column structure.
Additionally, multi column form also reduces the form abandonment rate; when the form is lengthy, users are likely to leave the form halfway and never return. Thus, multi column form allows you to collect all the required information from users without making your form long and complex.
Apart from these, there can be multiple reasons to create a multi column form in WordPress. Hence, let’s find out which form builder plugin can help you create a multi column form in WordPress.
Choose the Best Form Builder Plugin that Supports a Multi Column Form
You’ll find several form builder plugins that let you create a multi column form in WordPress. But what matters the most is whether the plugin you choose is flexible to customize or not.
If you choose a plugin like Everest Forms, you can easily customize the form with multiple columns. Also, your task of creating any forms like multi-step forms, PayPal payment forms, survey forms, and much more are easy. Whether you’re from a non-technical or technical background, the plugin is user-friendly for everyone.

Everest Forms also provides a large number of form fields and numerous addons. It has both the free and the premium versions that you can use as per your site’s requirements.
With that said, let’s jump into the steps to create a multi column form in WordPress using Everest Forms.
How to Create a Multi Column Form in WordPress using Everest Forms?
Step 1: Install and Activate Everest Forms Plugin
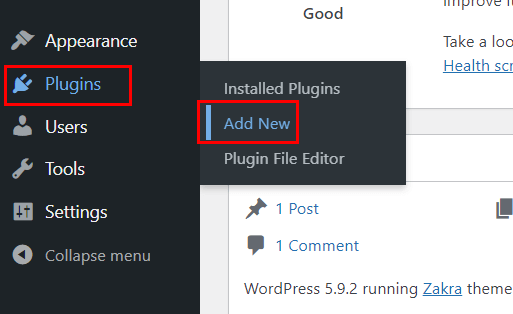
The first and foremost step is to install the plugin on your site. Thus, login into your WordPress site through its login URL and navigate to Plugins >> Add New.
It’ll instantly redirect you to the page which shows featured plugins. You’ll find the search bar on the same page; use the search bar and search for Everest Forms. As soon as you see the search result that shows Everest Forms, click on the Install Now button of the plugin.
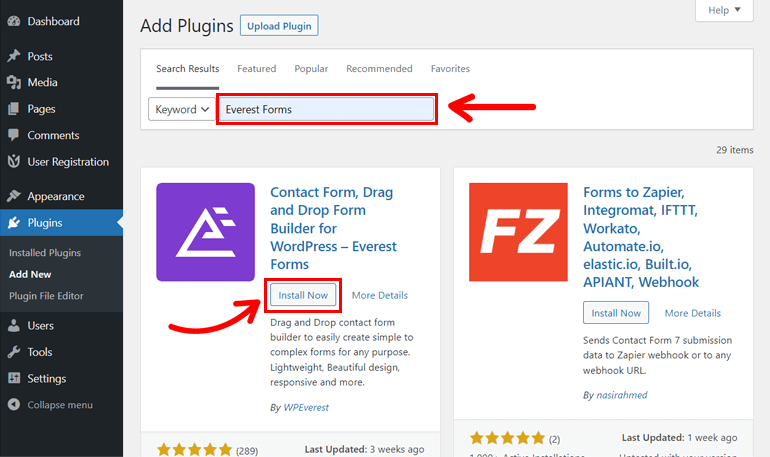
After the installation of the plugin, it shows the Activate button. So, click on the button to activate the plugin.
You’ve now successfully installed the free version of Everest Forms, which is sufficient to create a simple multi column contact form in WordPress. On the other hand, if you want other features like form customizer, form restriction, and so on, you can also buy the premium version of Everest Forms.
Step 2: Create a New WordPress Form with Multi Column
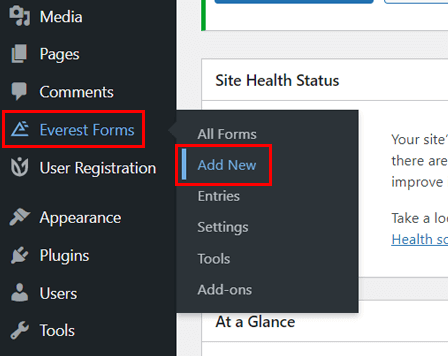
Since you installed the Everest Forms plugin, let’s now create a new WordPress form with multi column. To do so, navigate to Everest Forms >> Add New.
It displays multiple form templates that you can instantly use by importing. Also, you can import those templates and customize the form further to use on your WordPress site.
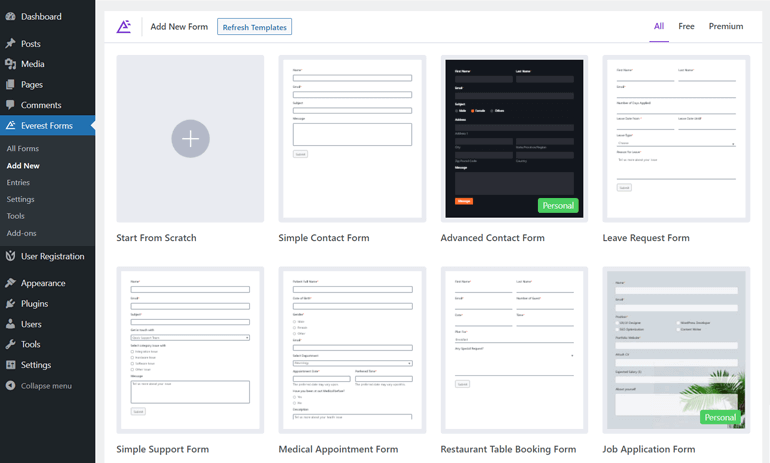
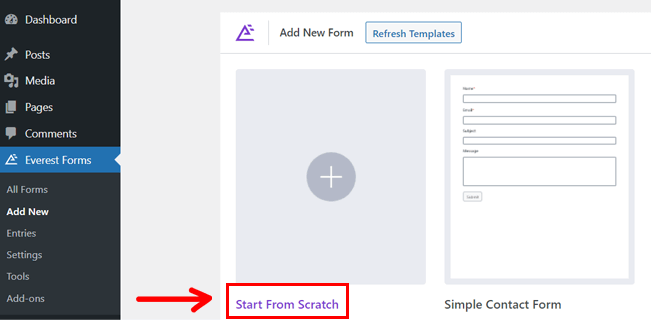
But in this article, we’re creating a form from scratch, so click on the Start From Scratch.
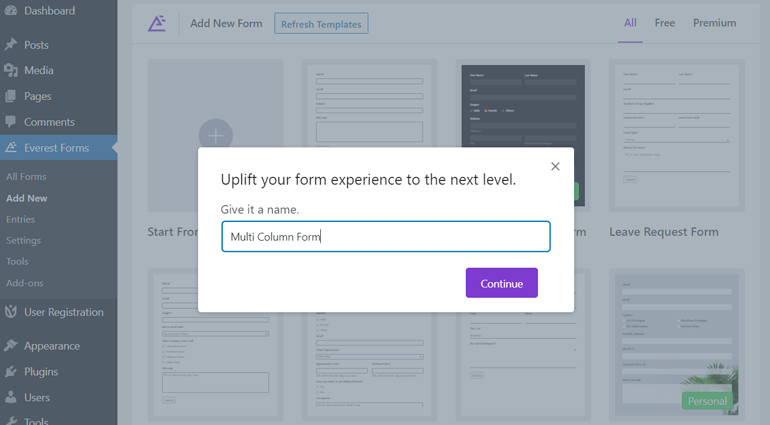
Now, give an appropriate name to the form. For instance, we’ve named it as Multi Column Form here. Then click on Continue.
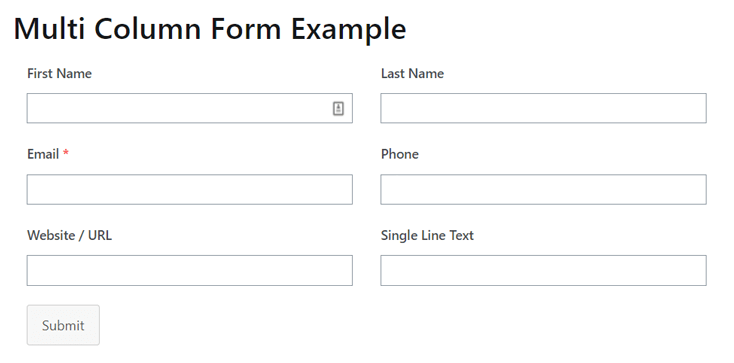
It then redirects you to the new interface for building the form. The form interface looks something like below:
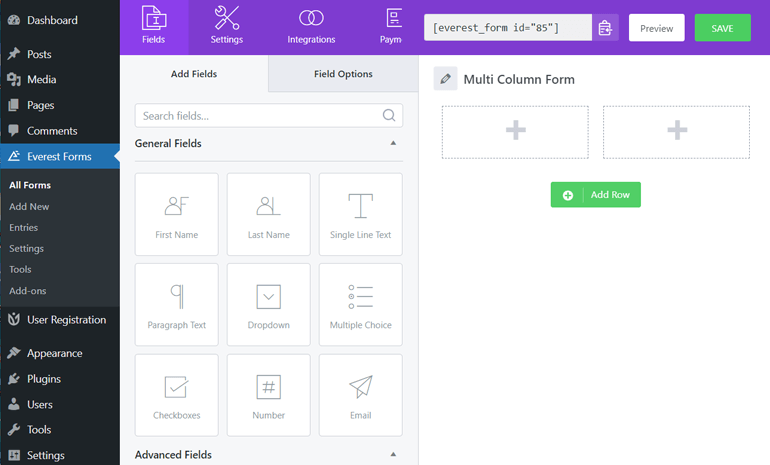
To create multiple columns for the form, hover the form field on the form editor. It’ll show an edit icon like a pencil; click on it.
After clicking on the icon, it displays Row Setting, where you’ll get the multiple column options for the row. So, choose the column options for the row as per your choice.

Now drag and drop the form fields from left to right on the form editor for each column.
Similarly, you can click on the Add Row to add a new row to the form.
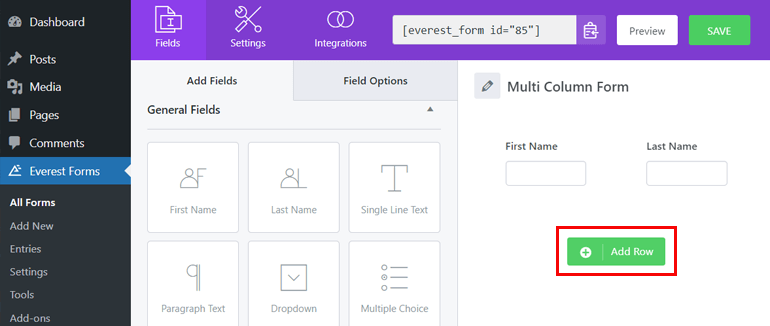
Again, to add multiple columns to the form in the new row, repeat the steps mentioned above and drag and drop the form fields to each column of the new row.
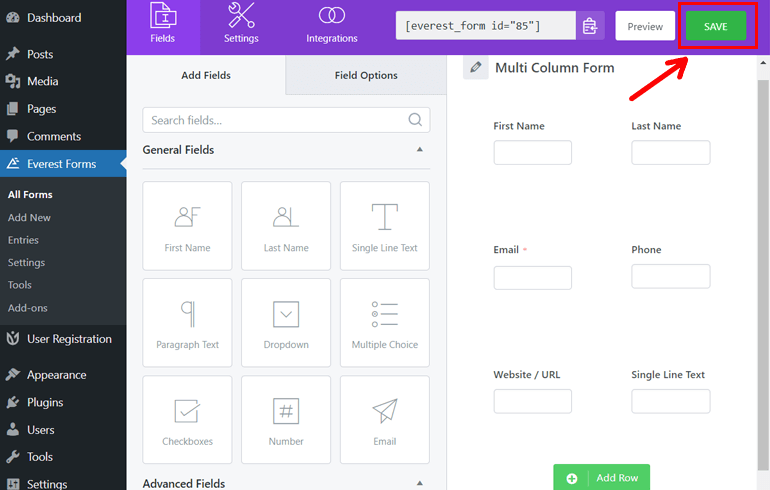
When you complete adding form fields to every column of your form, click on the Save button to save the form.
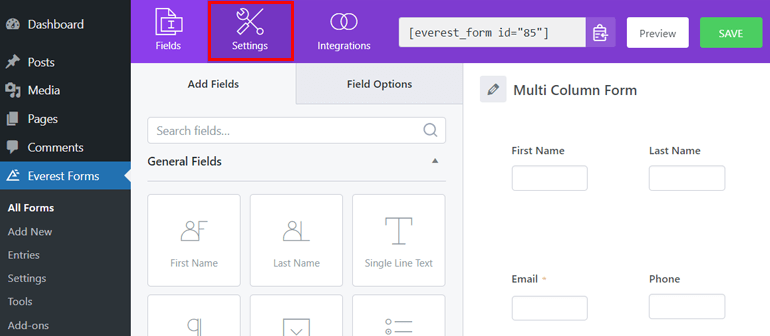
Step 3: Setup and Configure Form Settings
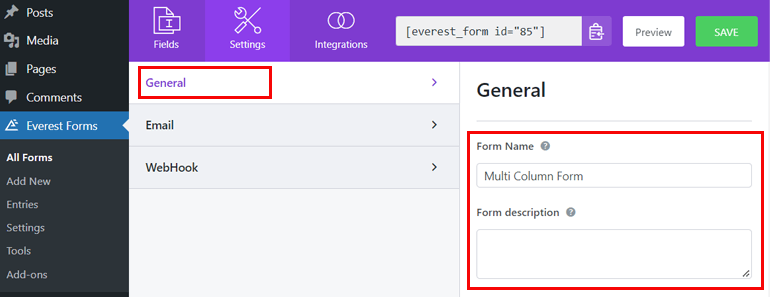
As you’ve already created a multi column form on your WordPress site, let’s configure the form settings. For this, go to the Settings at the top.
It then redirects you to the new page as General. From here, you can change the form name and add a description to the form.
At the same time, you can also add the form disabled message to let the user know that the form has been disabled. Besides, you can customize the Successful form submission message to let users know that their form has been received.
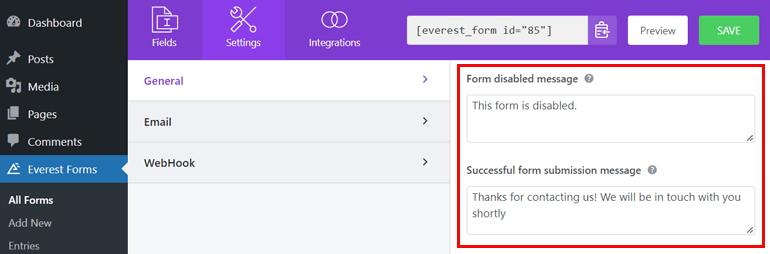
In addition, you can also redirect the user to the page of your interest after the form submission.
Furthermore, to set up an email, go to Settings >> Email.
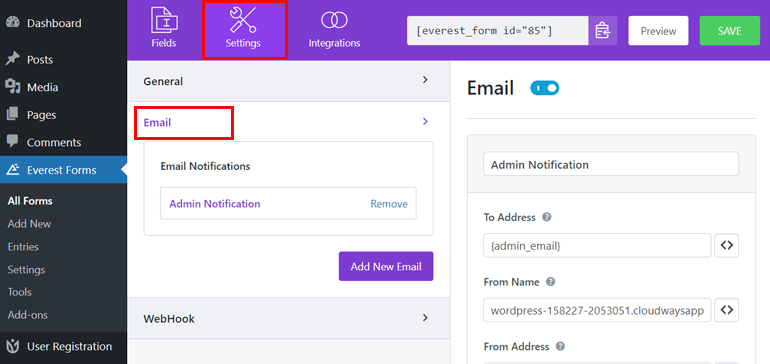
For notifying the admin when a user submits the form, the email is sent to the admin’s email, specified by To Address. However, you can also add other email addresses here.
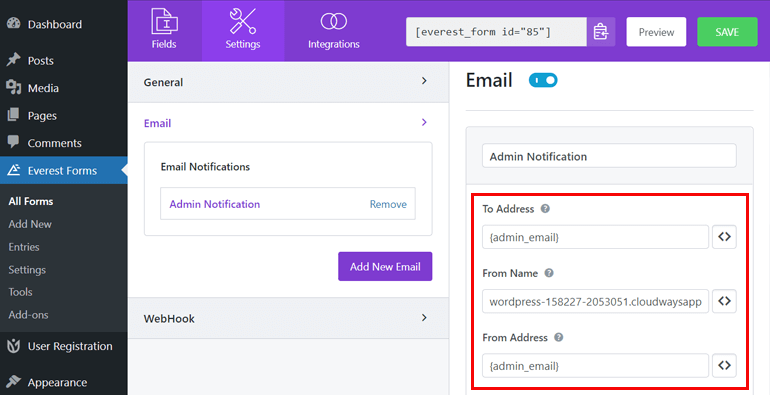
From Name is the desired name displayed when the email is sent to the To Address. You can also dynamically grab the name of the users who submitted the form using the Smart Tags in this field.
Similarly, From Address is the email address from where the forms are sent. Here again, you can use the admin email.
Further, you can also set Reply To for referring email address where you would like to reply. Moreover, you can also add Email Subject, and Email Message from the same page.

If you want to send a file uploaded by the user to the email, you can check the option Send File As Attachment at the bottom. Even here, you can use conditional logic.
Although we guided you to set up the email settings, if you don’t want to receive any emails for the form submission, you can disable it by turning off the Email at the top.
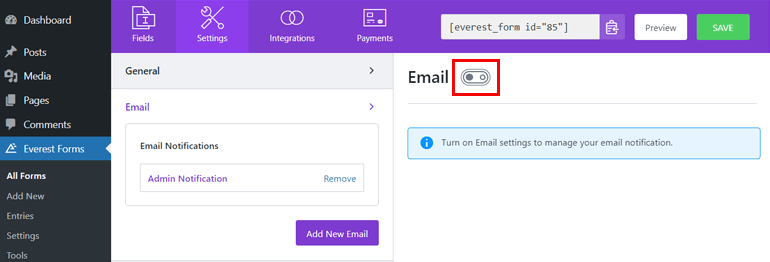
Once you set everything, please don’t forget to save the form by hitting the Save button in the top-right corner.
Step 4: Publish the Contact Form
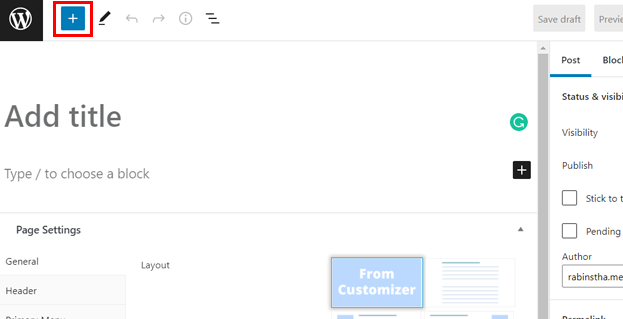
To publish the contact form with multiple columns, go to the page or post where you’ve decided to publish. As you open the page or post of your choice, on the top-left side, you’ll see a block inserter with an [+] icon; click on the icon.
Next, search for the Everest Forms block on the search bar. As a result, it shows you the Everest Forms block. So, click on the block, and the block appears on the page or post editor on the right side.
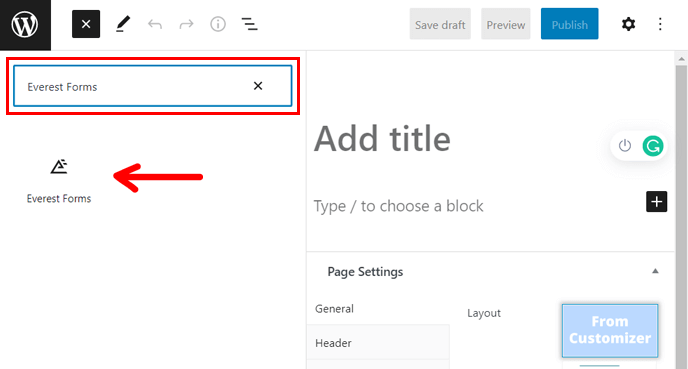
Similarly, use the drop-down menu of the Everest Forms block and choose the multi column WordPress form you just created; this adds the form to your page or post.

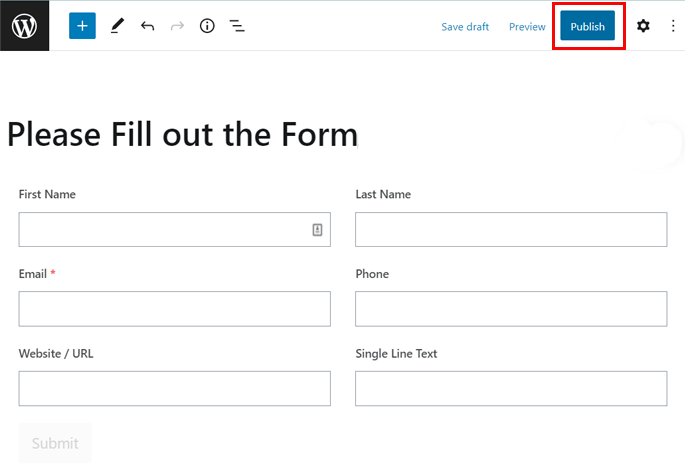
As you’ve added the form, provide a suitable title to your form. If you want to preview the form, you can hit the Preview button.
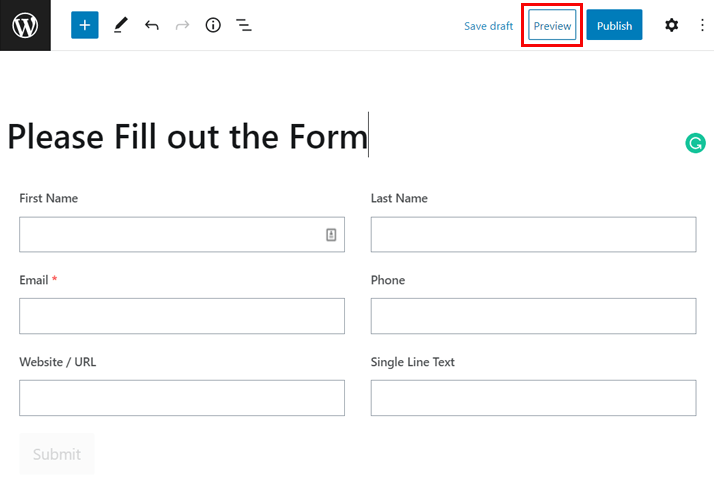
If everything looks up to the mark, you can publish the contact form with multiple columns by hitting the Publish button at the top.
Wrapping It Up!
Well, that’s all from us on how to create a multi column form in WordPress. We’re confident that you’re stress-free after knowing how to create a multi column WordPress form with an easy-to-use form builder plugin, i:e Everest Forms.
Therefore, get your site a multi column WordPress form following our step-by-step guide. If you get confused on any step, please comment below; we’re more than happy to help you.
You can also read our full review on Everest Forms or other comparison articles such as Contact Form 7 vs Everest Forms, Everest Forms vs WPForms, and many more through our blog page.
Lastly, follow us on Twitter and Facebook if you want to get notified of every new WordPress relevant article from us.