Curious to learn about how to create a nonprofit website. Hop in; you’re at the right place.
Do you know? As per Statista, 66 percent of the global population uses the internet.
Thus, your online presence is vital for every business. Also, it’s equally important to streamline the success of your nonprofit projects.
By building a nonprofit website, you can educate users about your cause, share your stories, collect donations, enroll volunteers for your organization, and do much more.
Hence, this guide will show you how to build a nonprofit website. So, please stick with us till the end.
Important Things to Consider while Creating a Nonprofit Website
To create a robust nonprofit website, you need to consider some of the important things as follows:
- State the mission of your organization clearly to educate people
- Explain what services you provide and why it matters in the community
- Add short bios and pictures of your organization’s members, teams, and partners
- Ensure that your site has easy navigation
- Add contact forms to enable people to reach out to you with ease
- Add social media links to extend your reach to wider audiences
- Include newsletter forms to allow people to sign up for your site
- Add donation forms to receive/accept donations for your organization
- Remember to include a Call To Action (CTA) button to prompt users to take action
Apart from the things mentioned above, you should also keep fast speed and responsiveness of your site in mind.
Choose the Best Platform to Create a Nonprofit Website
Deciding on an ideal platform to create a nonprofit website is a crucial and delicate stage as it impacts all your later steps.
So, take your time, think about your organization’s goals, and choose a reliable platform.
Fortunately, several website-building platforms are available to let you build a strong nonprofit website. WordPress, Wix, Squarespace, Weebly, etc., are some platforms, to name a few.
However, we highly suggest using WordPress to create your nonprofit website.
The main reasons why we recommend WordPress are as follows:
- WordPress is open-source software that is free to use.
- It’s a popular Content Management System (CMS) that powers over 42% of the web.
- It’s highly flexible and customizable with several themes and plugins.
- WordPress is beginner-friendly, as you don’t need any coding skills to use this platform. However, knowing how to code is a plus point.
- Most importantly, getting support from WordPress is also easy as it has a worldwide community, huge resources, and active support forums to help you solve your issues.
While we’re talking about WordPress, you need to know that there are two versions i.e., WordPress.com and WordPress.org.
In WordPress.com, the platform will host the website for you. But it’s quite limited, and you don’t get complete control over your site.
Contrarily, WordPress.org is a self-hosted platform. So, you need to find the hosting on your own. However, it’s highly flexible, customizable, and provides full control over your site.

So, in this article, we’ll discuss the self-hosted platform, WordPress.org.
Note: If you’re still confused about which platform to use, you can review our comparison articles on WordPress vs Wix, Weebly vs WordPress, and Squarespace vs WordPress before making a final decision.
How to Create a Nonprofit Website? (Step-by-Step Guide)
Now, it’s time to learn how to create a nonprofit website using the popular CMS platform, WordPress. All you need to do is follow the steps mentioned below.
Let’s begin!
Step 1: Get a Domain Name and Purchase Web Hosting
Though WordPress is free to use, creating a website with it requires you to spend some penny on purchasing a domain name and web hosting.
If you are wondering what a domain name is, then it’s the name of your site via which people will recognize you. In other words, it’s the identity of your site.
For instance, the domain name of our site is ‘ThemeGrill.com.’

You can think of a cool domain name for your nonprofit website and get it registered via domain registrars.
Some of the cheap and best domain registrars to register your domain names are as follows:
Likewise, web hosting is a space where your site is located. It stores all the important files and data of your website.
Thus, your site will be accessible to users via the World Wide Web (WWW).
Some of the best WordPress hosting services to host your nonprofit websites are as follows:
If you are on a budget and want a cheap shared hosting solution to host your site, Dreamhost is a great option. The best part about Dreamhost is that it also includes a free domain for a year.
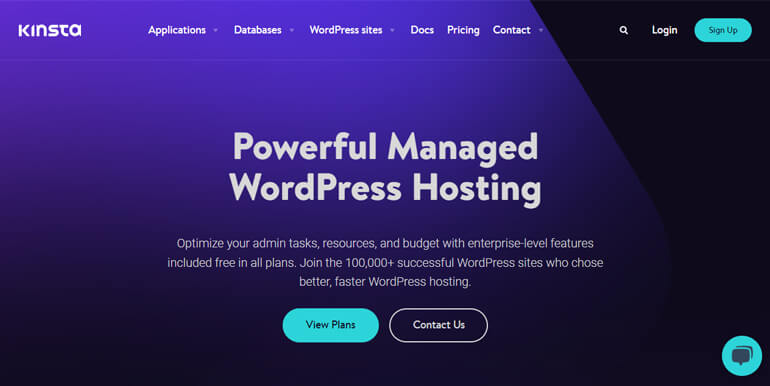
Similarly, if you are willing to spend a few dollars to get managed WordPress hosting for your nonprofit site, we recommend using Kinsta.
Need help with how to choose the best web hosting for your site? Then, we’ve got your back with a comprehensive guide for that.
Step 2: Install WordPress
The next step after purchasing a domain and web hosting is installing WordPress.
Fortunately, most web hosting providers nowadays come with WordPress auto-installation or one-click installer features for your ease.
For example, WordPress comes pre-installed with Dreamhost, and Kinsta has a one-click WordPress installer feature.
So, getting started with your WordPress site isn’t a problem anymore with the right hosting solution.
Once you install WordPress and login to your dashboard, you can manage your site, configure settings, and customize it to your liking.
Step 3: Choose Your Website Theme
One of the perks of using WordPress is that you can make your site look exactly the way you want with the help of a WordPress theme.
However, there is an ocean of options for WordPress themes, and not every theme is suitable for your site. Thus, you must choose your website theme wisely.
Some of the important tips to choose a perfect theme for your site are listed below:
- Choose the theme that perfectly aligns with your site’s niche.
- Check the star ratings and updated date. The theme must be recently updated.
- It should have a responsive design to adapt perfectly to any screen type and size.
- The theme should have reliable customer support to resolve any possible issues promptly.
Check our beginner’s guide for more smart ideas to choose the right theme for your site.
Nevertheless, if you ask us which is a great theme for your nonprofit site, we suggest using Zakra.
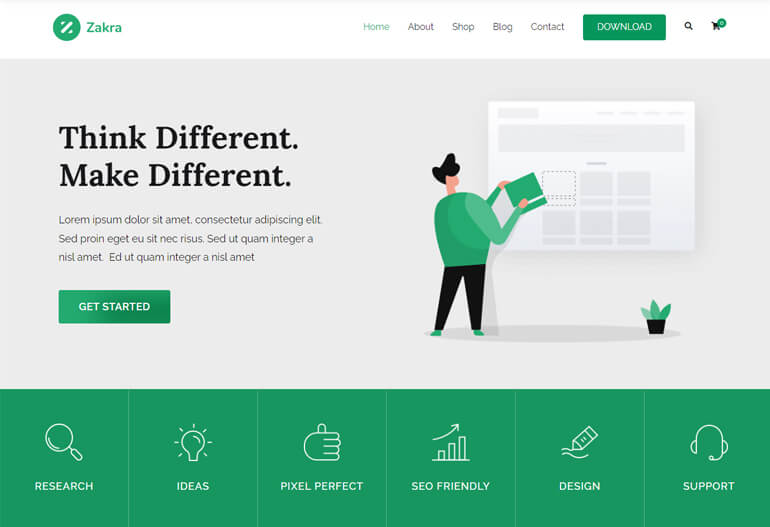
It’s one of the most popular multipurpose WordPress themes loved by over 60K users worldwide. It’s a highly customizable and feature-rich theme developed with much love and care to serve your purpose.
This top-rated theme comes with 80+ pre-built templates that you can import with a click. The best part? It also has a demo called Zakra Charity for your nonprofit website.
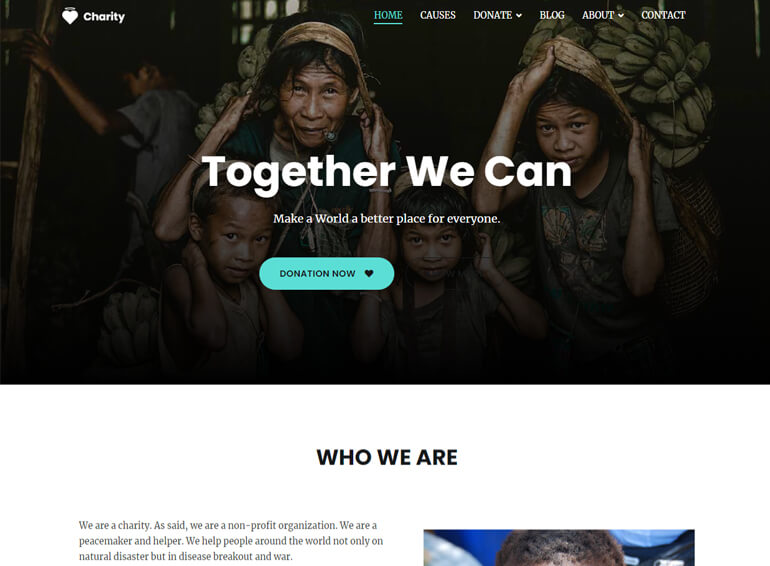
Thus, it eliminates the need to create a site from the ground.
So, in this tutorial, we’ll show you how to create a nonprofit website using Zakra Charity. For this, you need to install the theme first.
Install WordPress Theme
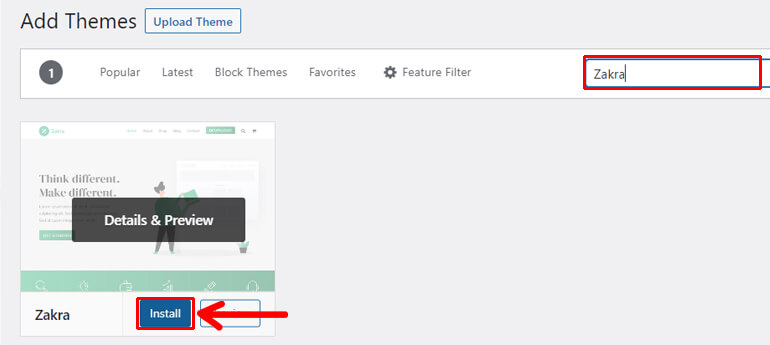
To install a WordPress theme, go to Appearance >> Themes from your dashboard and click the Add New button at the top left corner.
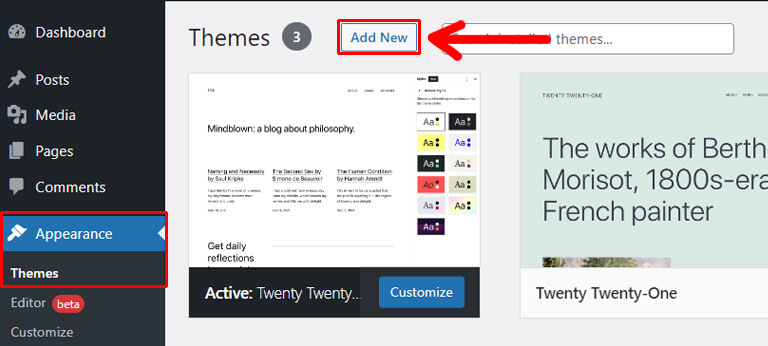
From the Add Themes page, type Zakra in the search bar. Once the theme displays hit the Install button.
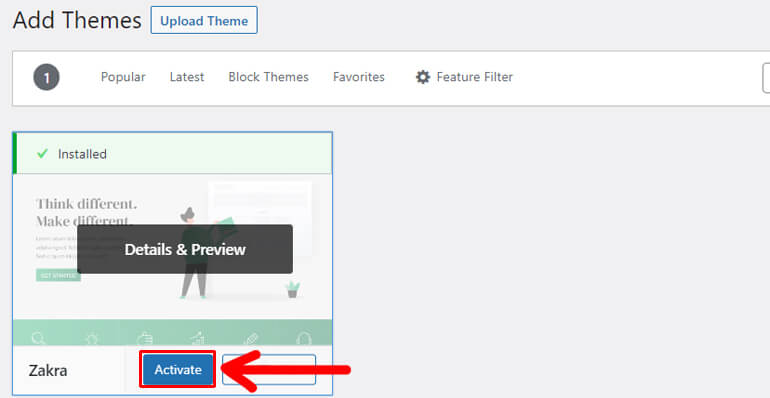
Again, hit the Activate button to activate the theme.
Import Zakra Charity Demo
Soon after the activation, you’ll see a welcome message at the top of the page. Along with the message, you’ll also find the Get started with Zakra button.

Clicking the button will install and activate the ThemeGrill Demo Importer plugin on your site, allowing you to import starter demos with a click. So, we suggest clicking the button.
After that, a Demo Importer page will open up. This page contains several free and premium demos suitable for various website niches.
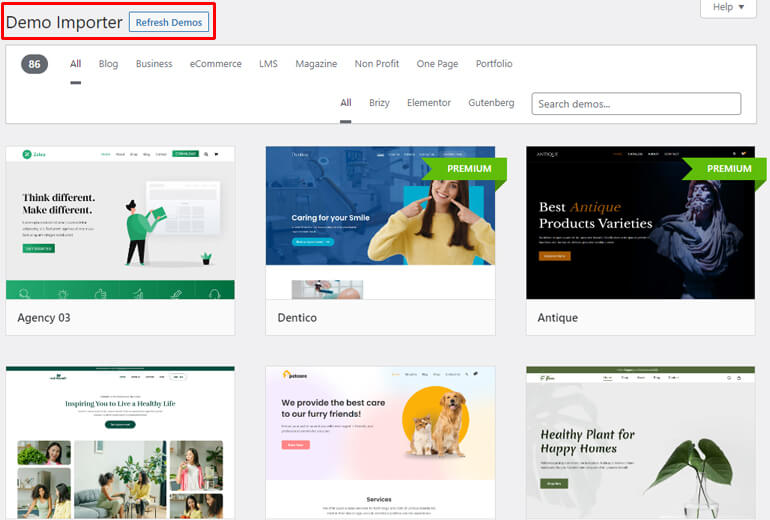
You can also use the filters to choose your ideal theme. Thus, you can choose the one that matches your needs easily and quickly.
However, you should purchase the premium version of Zakra to use premium demo templates.
Luckily, Zakra Charity is a free-to-use template. So, you can use the template to create your site for absolutely no cost.
As you can see, there are two Zakra Charity templates available. While Charity 02 is built on Gutenberg and Charity is built on Elementor. Thus, you can use any of the templates at your convenience.
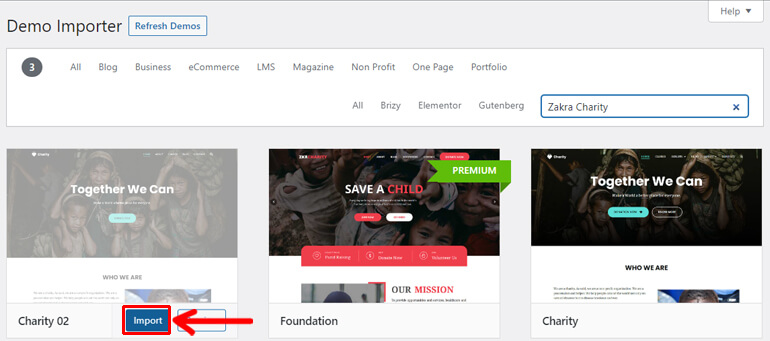
For now, we’ll go with Zakra Charity 02. So, hover your mouse over the template and click the Import button.
Next, hit the Confirm button in the dialogue box.
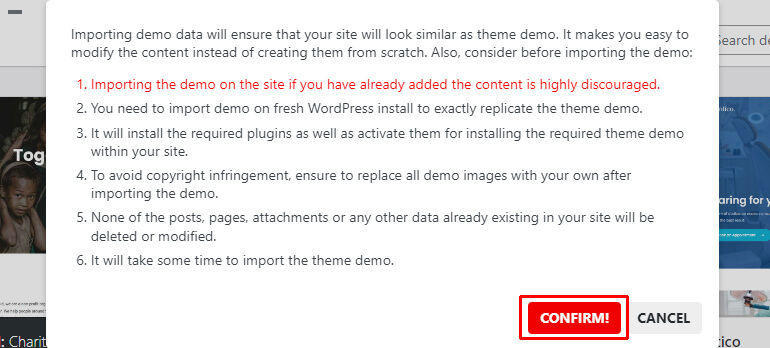
After that, your demo will be successfully imported.
Customize the Theme
The next step is to customize the theme. So, go to Appearance >> Customize to start customizing the theme to your heart’s content.
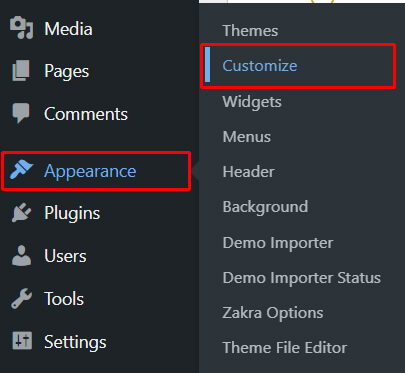
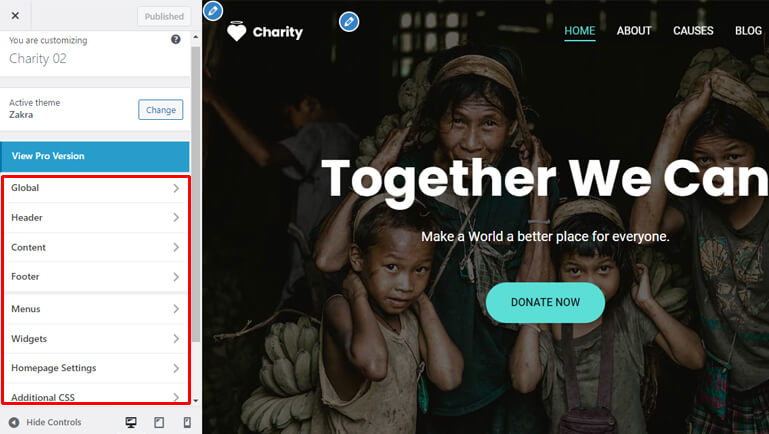
The best part with Zakra is that you can play around with various settings and view the changes in real-time.
Below, we’ll discuss some of the basic customization options of the theme:
- Global: Lets you edit the colors, background, layout, typography, and button of your website globally.
- Header: Enables you to configure different header options like site identity, media, top bar, button, menu, etc.
- Content: Allows you to configure the appearance of your content like page header, blog/archive, single post, etc.
- Footer: Allows you to enable footer widgets, style them, customize the footer bottom bar, enable the scroll to top option, etc.
- Menus: Enables you to create, edit, and remove menus on your site.
- Widgets: Lets you add widgets to your site and modify them as per your need.
- Homepage Settings: Select what your homepage displays.
- Additional CSS: Add additional CSS codes to customize your site further.
Step 4: Add Content to Your Nonprofit Website
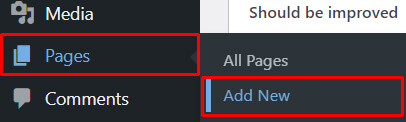
Now, it’s time to add content to your nonprofit site. You can easily add the necessary content with Pages and Posts.
Pages are static content that you don’t need to keep updating or changing. In other words, WordPress pages are content that remains the same for a long time.
For instance, the About Us page, Services page, Contact Us page, etc.
Go to Pages >> Add New from your dashboard to create WordPress pages.
Soon after that, WordPress Page Editor opens up. Firstly, add the page title and then the necessary content.
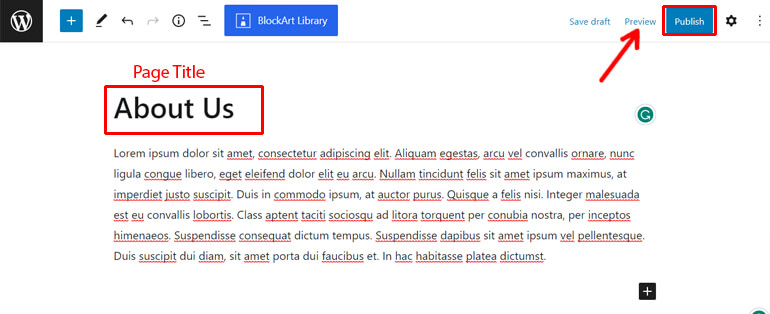
Once you finish adding content, hit the Publish button at the top to publish your content. You can also preview how your page appears by clicking the Preview button before you publish it.
Some of the essential pages that you need to add to your nonprofit site are as follows:
- Homepage: On this page, write about your nonprofit organization. Tell who are your ideal clients and why they should stay on your site.
- About Us: Here, you can write the story behind your foundation, the date of your organization’s establishment, members and partners included with your projects, achievements, etc.
- Services: Here, inform people about the type of services you provide and how it impacts the people.
- Donation: On this page, write about your donors, how you utilize donations for your cause, etc. You can also add a form to collect donations.
- Volunteer: Here, you can explain voluntary works you’ve done, how users can volunteer for your organization, etc.
- Contact Us: On this page, write how people can contact you. You can add your address, email address, phone, etc., and even add a contact form.
Contrarily, posts are dynamic content that is constantly updated. They are usually arranged in reverse chronological order. That means the latest posts are found at the top.
A good example of WordPress posts is blog articles.
You can also create posts similarly. First, go to Posts >> Add New which takes you to the WordPress Post Editor.
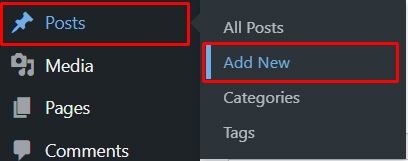
Then, add the post title and content. Once you are satisfied, add the Publish button like before.

Display Pages to Your site’s Menu
Just creating WordPress pages won’t suffice. You also need to display them at the appropriate location on your site so that users can easily access those pages.
And one of the most common places to display the essential pages of your site is in the WordPress menu. It’s the list of the links that appear in the header section for easy navigation.
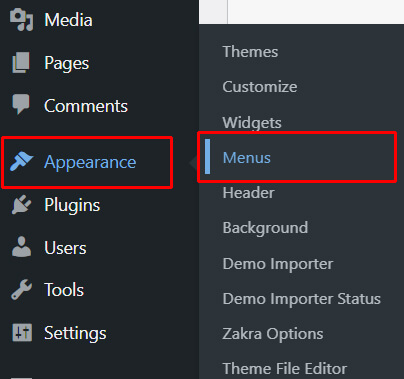
So, navigate to Appearance>> Menus.
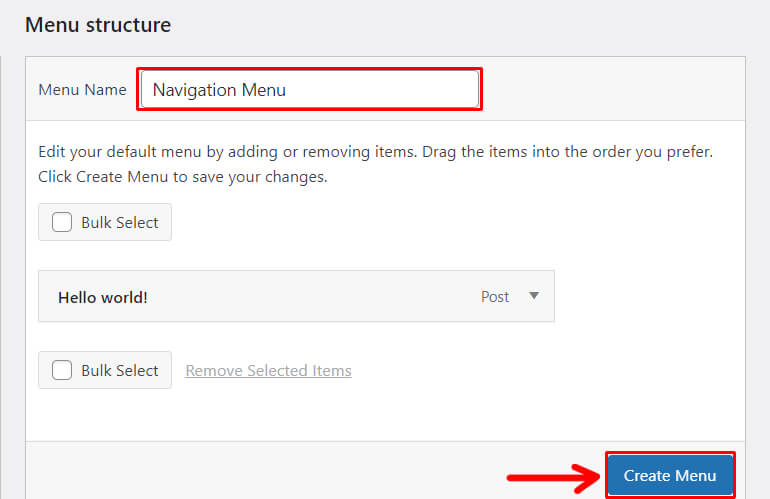
Enter a menu name from the menu editor page and hit the Create Menu button.
Then, from the Add menu items section, click on the Pages tab >> View all, and tick all the pages you want to add to the menu.
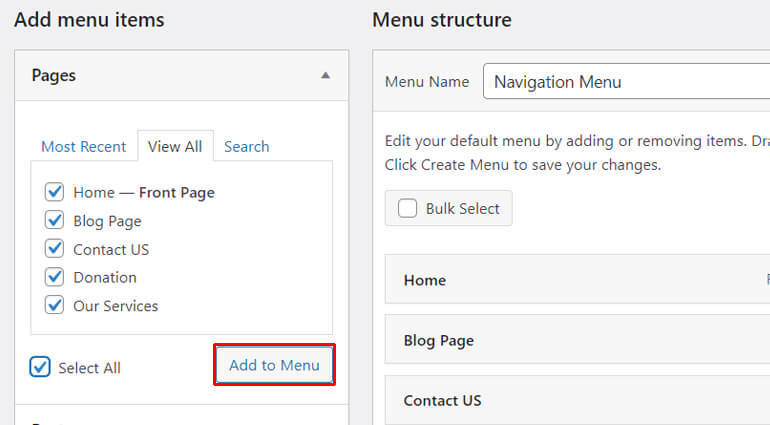
After that, click the Add to Menu button. Now, all the pages will appear on the Menu structure section on the right-hand side. Thus, you can reorder the items as per your preference.
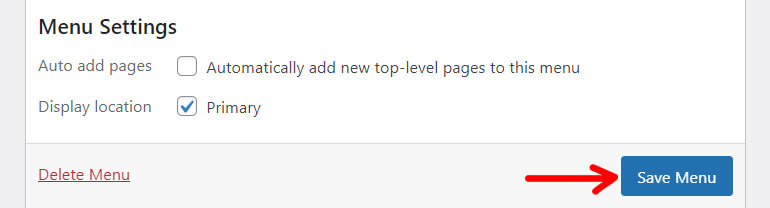
Next, from the Menu Settings options, choose the display location for your menu. Lastly, hit the Save Menu button.
Note: We also have a detailed guide on creating a WordPress menu.
Step 5: Add More Features with WordPress Plugins
Our tutorial on how to create a nonprofit website would be incomplete without talking about WordPress plugins.
Simply put, WordPress plugins are the additional software that you can add to your site to enhance its functionality. They add new features to your site and improve its functionality.
Install WordPress Plugins
Now, if you’re wondering how to install plugins on your WordPress site, it’s quite easy. You can install the WordPress plugins right from your dashboard.
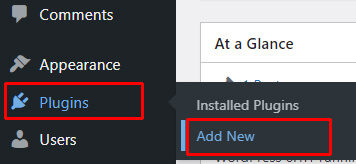
All you have to do is go to Plugins >> Add New.
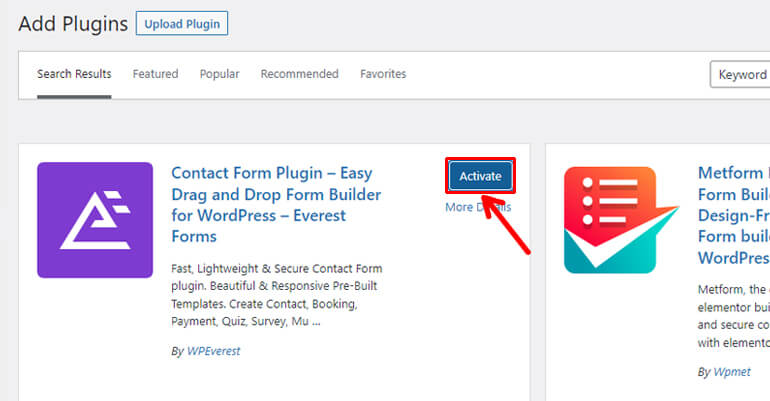
Then, from the Add Plugins page, type the name of the plugin you want to install in the search bar. For example, here we’ll type in Everest Forms.

When the plugin displays, click on the Install Now button.
Once the installation is complete, hit the Activate button to activate the plugin.
You can also check our article on installing WordPress plugins for a detailed guide.
Some Useful Plugins for Your Nonprofit Website
Like the themes, you’ll also find several free and premium WordPress plugins designed for several purposes.
However, here, we’ve mentioned some basic WordPress plugins that will come in handy to build your nonprofit website. So, let’s get to know these plugins in our tutorial on how to build a nonprofit website.
1. Everest Forms (For creating contact forms, donation forms, and subscription forms)
You must incorporate usable forms on your nonprofit site to allow users to take specific actions. These usable forms include contact forms, newsletter sign-up forms, donation forms, volunteer application forms, etc.
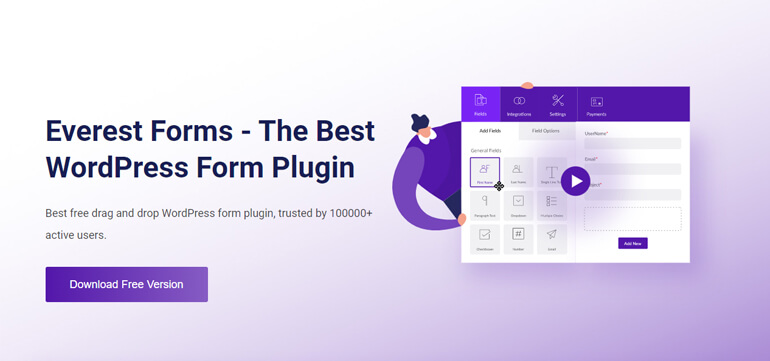
Don’t worry. You don’t need to install multiple plugins to create different forms, as we have a one-stop form builder solution. Yes, we are talking about the incredible plugin, Everest Forms.
You can create simple to complex WordPress forms using this drag-and-drop builder in a few minutes. Absolutely no coding skill is required to use this plugin.
Further, a huge library of free and premium form templates is available with Everest Forms. So, you don’t need to create WordPress forms from scratch unless and until you want to.
It’s just the tip of the iceberg. Besides, Everest Forms also features unlimited form fields, form import/export, spam protection, smart conditional logic, and more.
Key Features:
- Unlimited email notifications and autoresponders like welcome and confirmation messages to the form submitters
- Multi-step form to make long and complex forms simple
- Multiple file upload option
- PayPal and Stripe add-ons enable you to accept payments via your WordPress forms
2. User Registration (For registering users)
Nonprofit organizations must also register volunteers and attendees for various projects and events. So, creating great-looking registration forms is also equally important for any nonprofit organization.
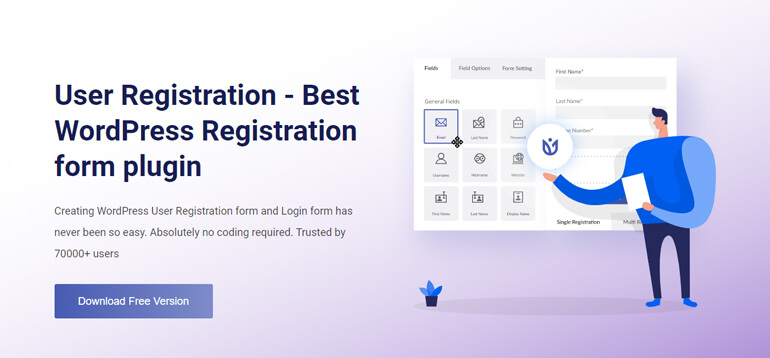
And to create such registration forms, there cannot be a better option than the User Registration plugin.
It’s one of the crowd’s favorite WordPress registration plugins that enable building different types of registration forms without any coding skills. Event registration, employee registration, social registration, you name it!
This plugin also allows you to register only white-listed email domains. Contrarily, you can also register users via invite codes.
Also, with User Registration, you can choose from four different user approval and login options. They are auto approval and manual login, auto approval and auto login, admin approval, and auto approval after email confirmation.
Key Features:
- Drag and drop form builder with a user-friendly interface
- Customizable email notifications for both admin and users
- Enables assigning different user roles upon registration
- Well-designed and beautiful user profile page
3. Elementor (Page builder plugin)
If you want to create a unique layout for your nonprofit website easily, Elementor is a great plugin.
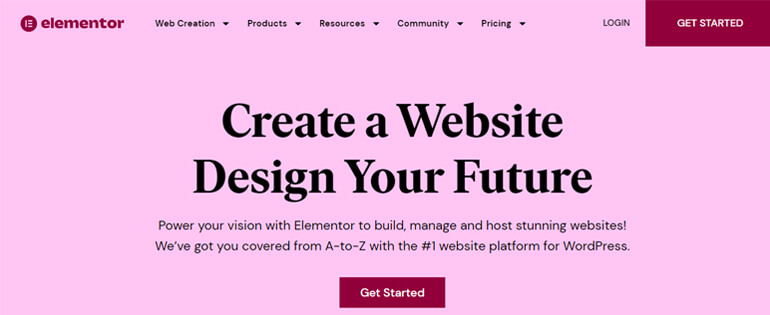
Using this drag-and-drop page builder, you can craft a stunning site without touching a line of code.
Moreover, Elementor comes with 40+ free widgets. So, building engaging websites is a breeze with this plugin. These widgets include: Heading, Image, Video, Testimonial, Icon, Social Icons, etc.
Further, you can customize every aspect of your site like spacing, positioning, padding, margins, etc. The best part? It also enables you to view the changes you make in real-time.
Besides, the plugin is fully responsive to deliver a great user experience regardless of the device they use to view your website.
Key Features:
- 100+ responsive website kits to jumpstart your website creation process
- Freedom to customize everything
- Several third-party add-ons for extending Elementor’s functionality
- Multiple language support (translated into 59+ languages)
4. WP Rocket (Optimizing site’s speed)
Page loading speed is one of the important factors that Google considers for ranking your site at the top of the SERPs (Search Engine Results Pages). Thus, it’s essential to optimize your site’s speed.
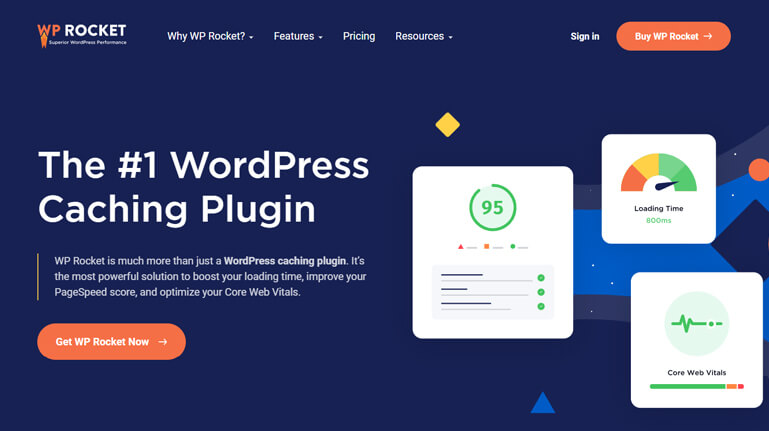
One of the best plugins for optimizing your site speed is WP Rocket. It’s an all-in-one speed optimization plugin with features like page caching options, lazy loading, database optimization, etc.
Most importantly, WP Rocket is also compatible with popular WordPress themes, plugins, and top-managed hostings.
Overall, this speed optimization plugin is easy to set up and use, as its features are applied right after activation.
Key Features:
- Minify and combine the CSS and JS files of your site
- GZIP compression to enable visitors to get your content quickly
- eCommerce optimized to allow the running of your online shop quickly and smoothly
- Helps to improve your site’s SEO
5. Wordfence Security (Keep your site secured)
Just creating a website for a nonprofit organization isn’t enough; it’s also equally essential to protect your site from security malware.
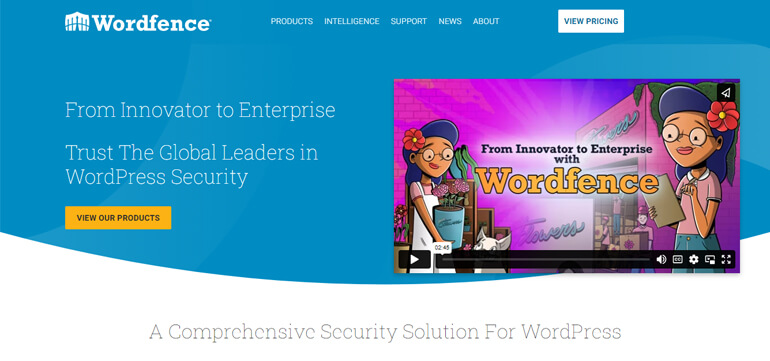
Thus, one of the top WordPress security plugins you can use to keep your site secured is Wordfence Security. It offers a high level of website security with a comprehensive suite of security features.
The WordPress firewall blocks malicious traffic and protects the brute force attacks by limiting login attempts. Also, the malware scanner checks for malware, bad URLs, code injections, etc.
Moreover, it’s possible to block attackers by IP, and you can also build advanced rules based on IP Range, Hostname, User Agent, etc.
Key Features:
- Two-factor authentication (2FA) for login security
- Checks your site for security vulnerabilities and alerts you about the issues
- Scans your site for suspicious URLs and content
- Login page CAPTCHA prevents bots from logging in
Step 6: Optimize Your Nonprofit Website for Search Engines
Search engines like Google, Bing, Yahoo, Baidu, etc., are significant sources of traffic for websites. So, it’s vital to prepare your nonprofit site for search engines.
Optimizing your site enables search engines to crawl your site content easily and make it rank higher on SERPs, thereby increasing the number of visitors.
The good news is WordPress itself is an SEO-friendly platform. It offers a well-organized content structure, HTML Markup incorporation, allows the creation of good-looking URLs, etc.
Besides, several SEO plugins are available to improve your site’s search engine optimization (SEO).
Some popular SEO plugins are Rank Math, Yoast SEO, All in One SEO, Premium SEO Pack, etc.
These plugins let you add keywords and meta descriptions in WordPress to make your content SEO-friendly.
Additionally, they also offer a complete set of SEO features to improve your ranking and boost traffic.
Conclusion
Creating and setting up a nonprofit website is a walk in the park when you choose the right platform, like WordPress, to build it.
You can follow simple steps as follows to create a website for a nonprofit organization with WordPress. They are:
- Get a Domain Name and Web Hosting
- Install and Log into WordPress
- Choose a Perfect Website Theme
- Add Content to Nonprofit Website
- Add More Features with WordPress Plugin
- Optimize Your Site for Search Engines
We hope you know how to create a nonprofit website using WordPress now. If you have any confusion or suggestions, please feel free to write to us in the comment section below.
You can visit our blog for similar articles on creating business sites, online magazine sites, LMS sites, and so on.
Also, don’t forget to follow us on Facebook and Twitter for recent WordPress article updates.
Disclaimer: Some of the links in the post may be affiliate links. So if you purchase anything using the link, we will earn affiliate commission.
