Do you want to learn how to create a registration form with payment in WordPress? If your answer is yes, then this article is just the thing for you.
In today’s context, payment can be entirely made online. So, receiving or sending payment is easily possible with a tap of a few clicks.
Thus, you can also create a registration form on your WordPress site using the same online payment methods.
But before we show you how, let’s learn about the best way to create your registration form with payment.
Best Way to Easily Create a Registration Form with Payment
The best method to create a registration form in WordPress with payment is via user registration plugins. Such plugins let you create and add custom user registration forms to your site without fuss.
One such best plugin is none other than WPEverest‘s User Registration plugin. It’s a user-friendly plugin with convenient features to customize and manage forms.

Further, it has various add-ons for different usage like a multipart add-on, WooCommerce integration add-on, payments add-on, and so on.
With that said, the payment add-ons PayPal and Stripe let you integrate simple payment getaways into your registration forms. You can create a form and enable payment options in it.
So, now let’s learn to create an online registration form with payment using these payment add-ons!
How to Create a Registration Form with Payment in WordPress? (2 Methods)
If you’re wondering how to create a registration form with payment in WordPress, then there are two different methods to do so. All you need to do is follow the simple steps below. So, let’s start with the first method.
Method 1: Create a WordPress Registration Form with PayPal Payment
Step 1: Install and Set Up User Registration Pro Plugin
Your first step is to install and activate the plugin on your WordPress site. But the payment add-on is available only in User Registration’s premium version; thus, you need to install the Pro version.
For that, please go to User Registration’s pricing page on their website. Next, choose a plan among Professional and Plus, as you can access the PayPal add-on only in these plans.

After purchasing the plugin, you must log in to your WPEverest account. So, after logging in, you’ll be directed to your account’s Dashboard.
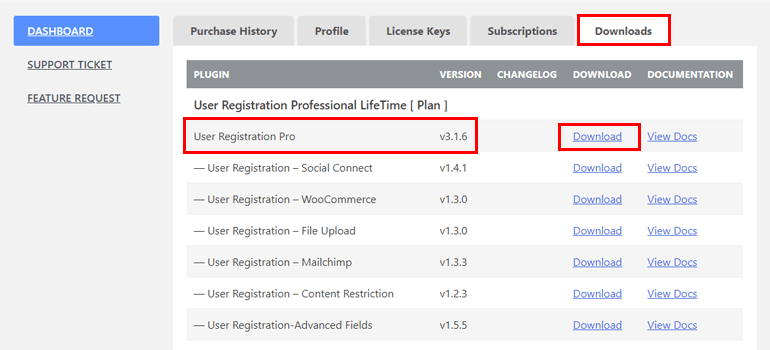
Here, navigate to the Downloads tab, where you can see User Registration’s Pro version. So, download it by clicking on the Download button beside it.
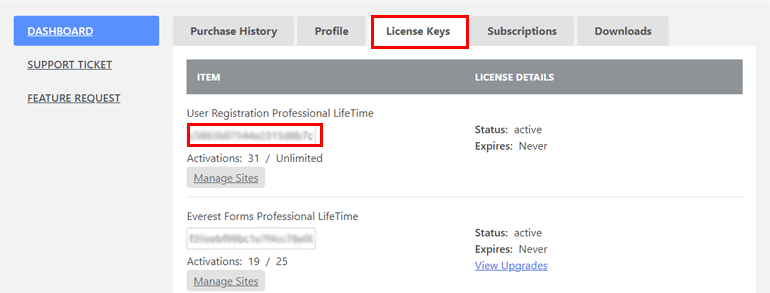
You’ll also require the license key for auto-updates, so go to the License Keys tab to copy it and keep it safe!
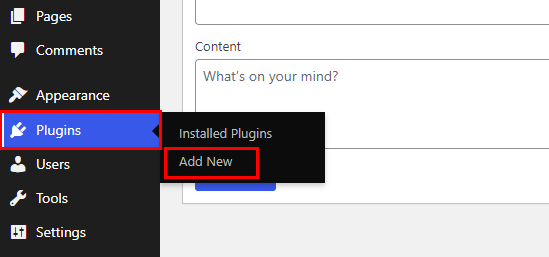
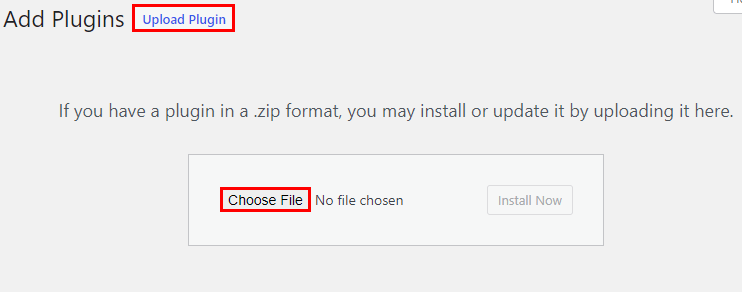
Your next step is to go to your WordPress dashboard. Here, navigate to Plugins and click on Add New.
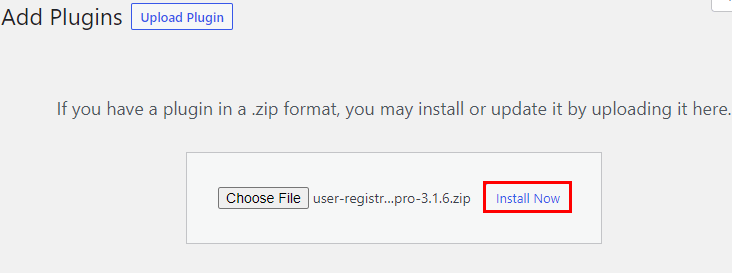
Next, click on Upload Plugin and upload the zip file from your local device that you downloaded earlier from the WPEverest account.
Then, click on Install Now to start the installation process.
And finally, press on Activate Plugin button.
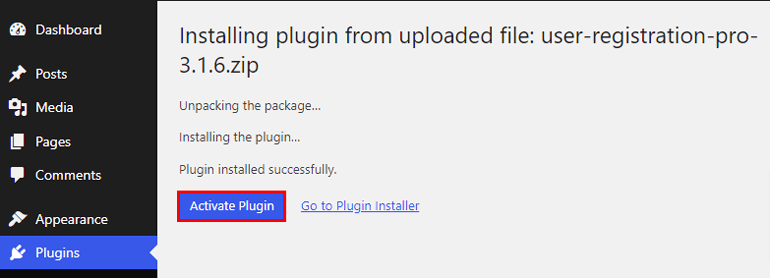
When you activate it, you’ll see a welcome message! From here, you can either complete the setup, start creating the first form or choose to Skip to Dashboard.
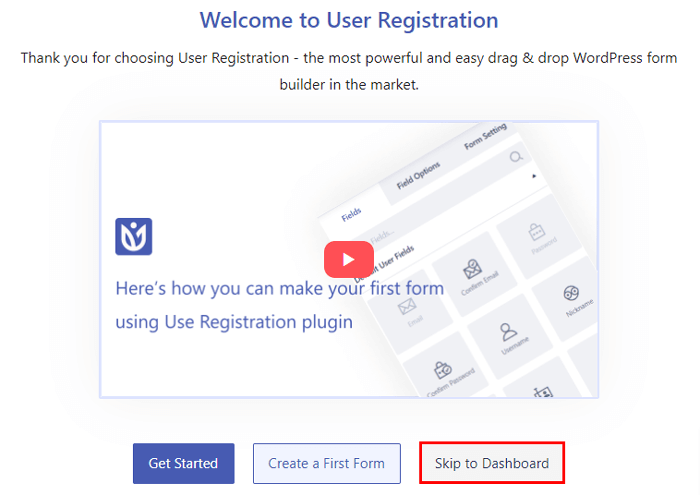
You can always set up your plugin later when you finish creating a registration form. So, we’ll choose to skip to the dashboard for now. When you skip to the dashboard, you’ll see a notification asking you to fill in the license key. Hence, paste the license key that you copied earlier.
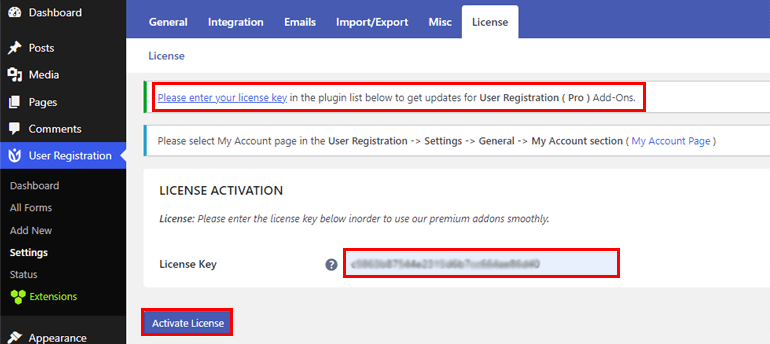
After you enter it, remember to press the Activate License button.
That’s it! You’ve successfully installed and activated the User Registration’s premium version!
Step 2: Install and Activate the PayPal Add-On
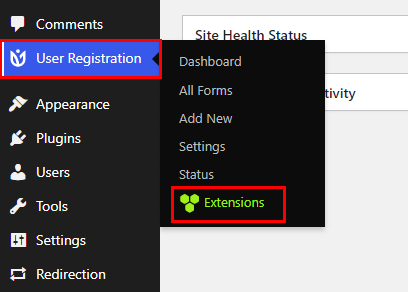
The next step is to install and activate the PayPal add-on on your site. So, navigate to User Registration >> Extensions.
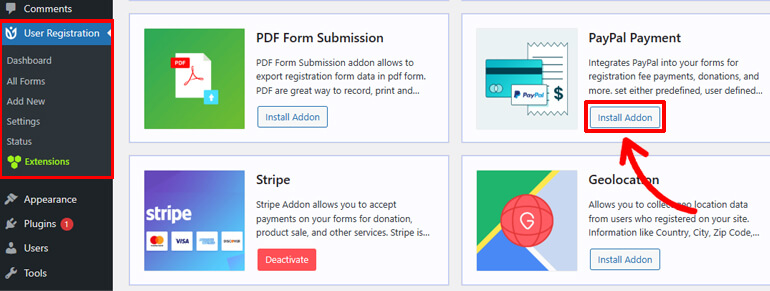
Now you’ll be redirected to a page with all the available add-ons. So, look for the PayPal Payment add-on and click the Install Addon button.
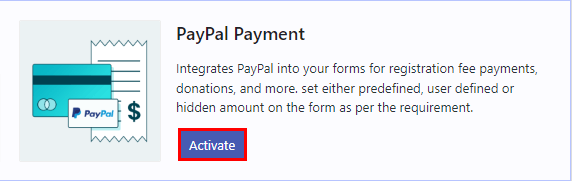
When it’s installed, you’ll see the Activate button. So, hit that button to activate your add-on.
Now, you can move to your next step!
Step 3: Create a Registration Form
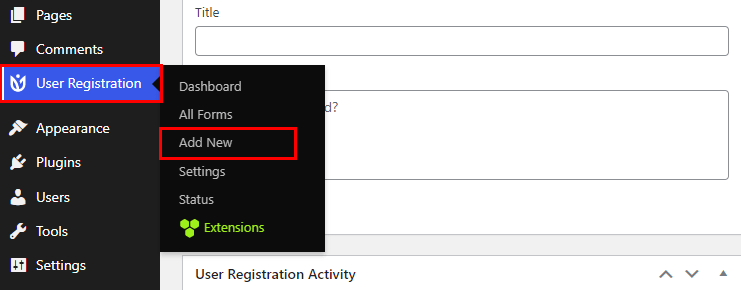
Next, to create a registration form with PayPal, in your WordPress dashboard, go to User Registration and click on Add New.

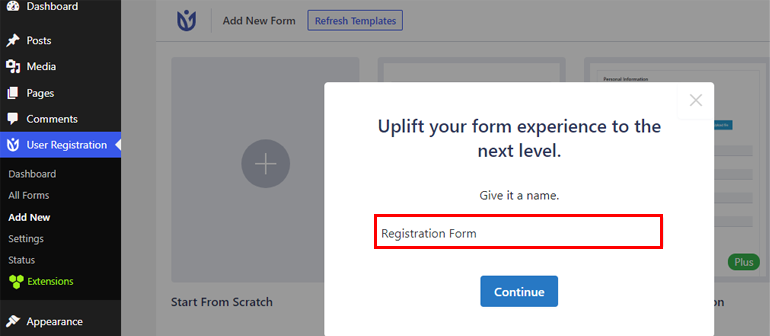
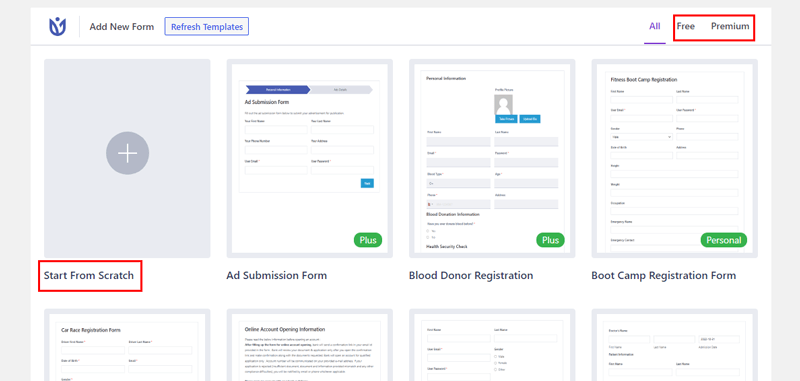
User Registration offers several free and premium templates to let you create different types of registration forms in no time. Alternatively, you can also fully create your form on your own. Here, we’ll show you how to create a form from the ground. So, click on the Start From Scratch option.

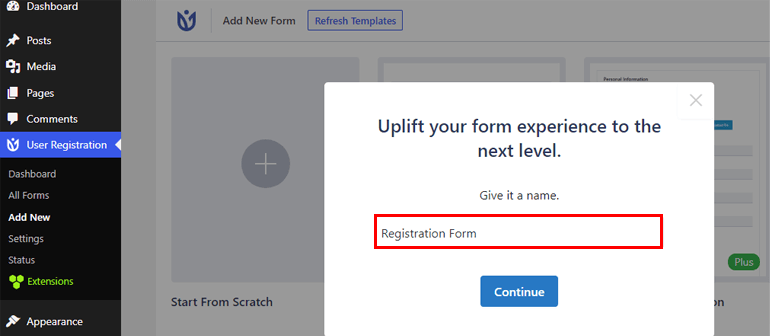
Now, name your form and move into the form builder.
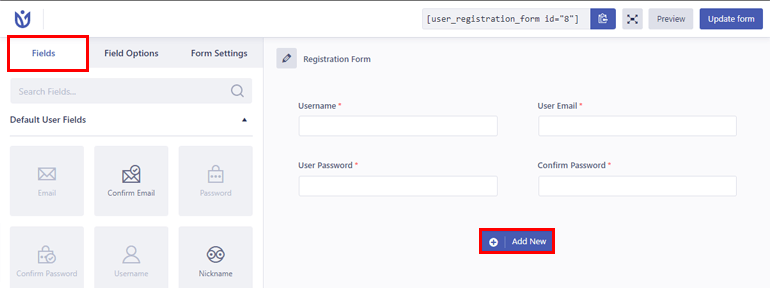
The form-building process is pretty simple with User Registration, as all you need to do is drag and drop your required fields.
So, press the Add New button to add a new row first.
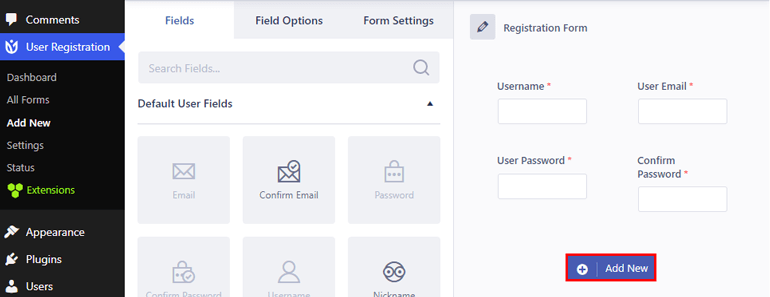
After that, drag the required field from the Fields option, and drop it on the right-hand side.

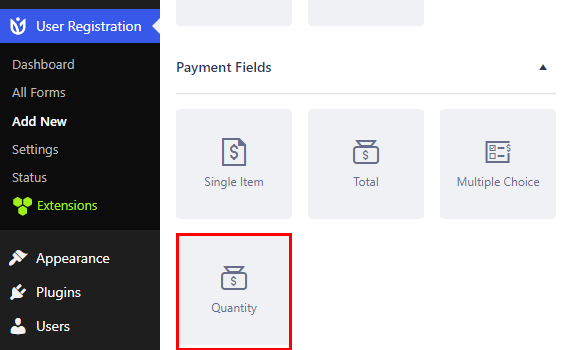
Next, you can scroll down to see Payment Fields with four form fields.
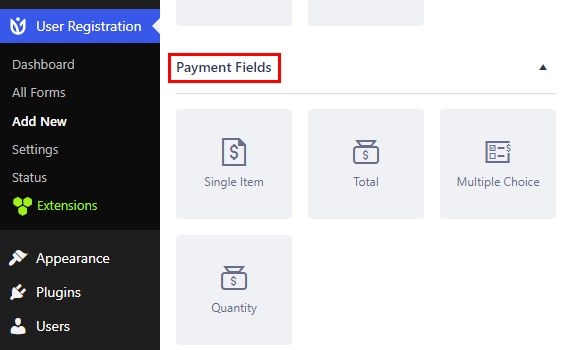
The four Payment Fields include:
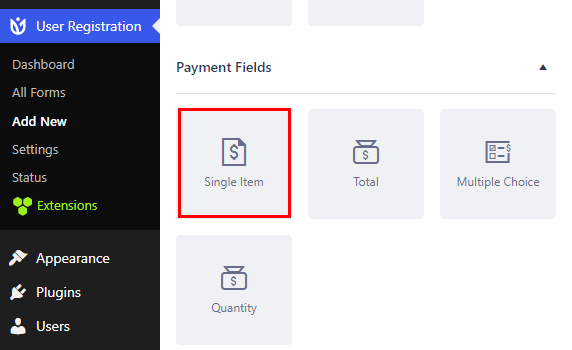
- Single Item: The field lets you add a Name, Description, and Price for a single item on your form.
- Multiple Choice: The field lets you add various items and their prices. The buyers can choose more than one item from it.
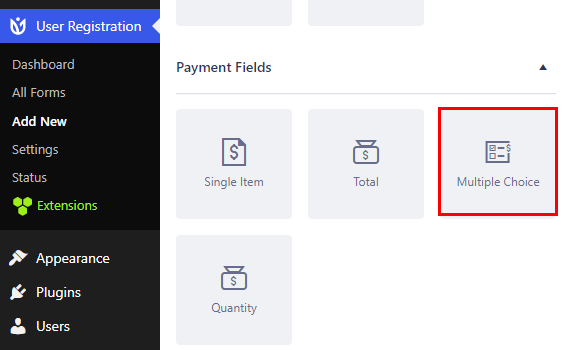
- Total: The field shows the total price of all items your user selects.
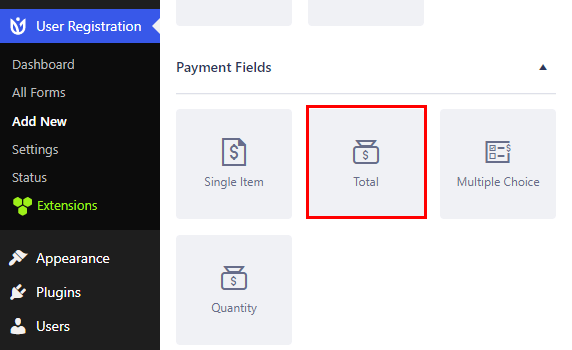
- Quantity: The field can be integrated with a single item or multiple-choice field. With this, users can pick the number of items they want to purchase.
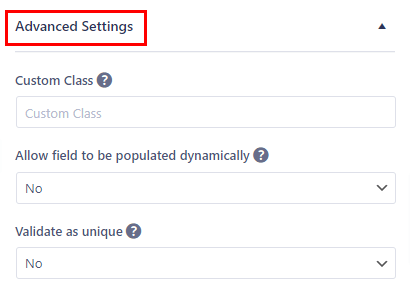
Now, for each field, you can customize different General Settings like Label, Description, Tooltip, etc.
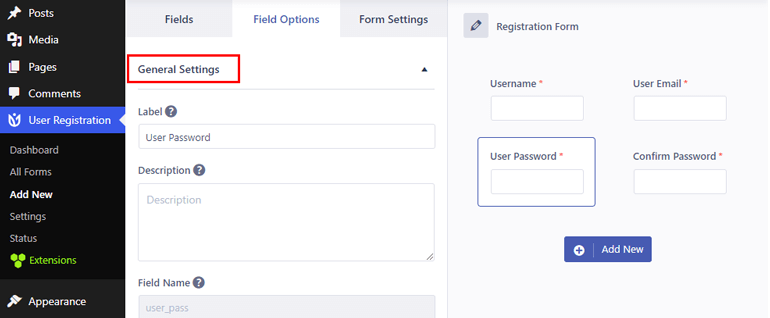
Further, you can also configure Advanced Settings, including Custom Class, Conditional Logic, and more as per your requirement.
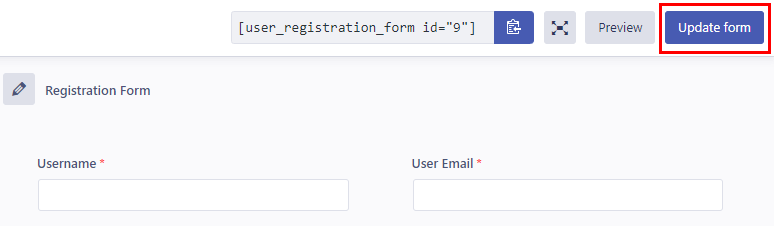
When you’re done, remember to press on Create Form/Update Form at the top-right corner of your form.

Step 4: Enable PayPal Payment and Configure PayPal Settings for the Form
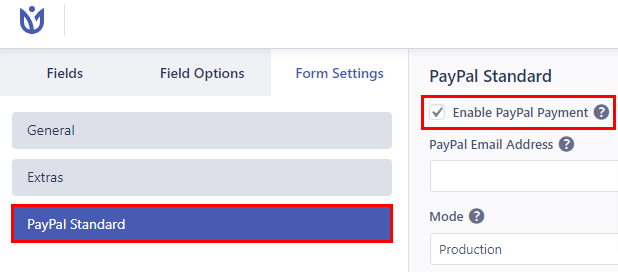
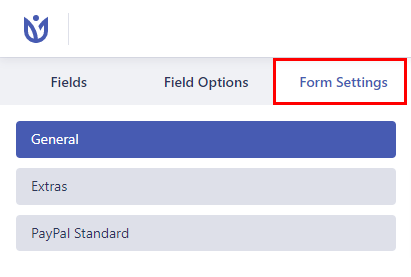
After creating a form, your next step is to enable PayPal payment. To do so, navigate to your Form Settings tab.

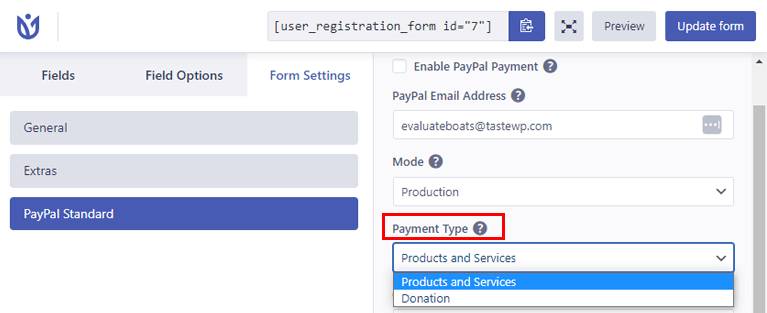
Here, you’ll see a tab called PayPal Standard. So, click it. From the same tab, check off the Enable PayPal Payment box to enable and disable the option.
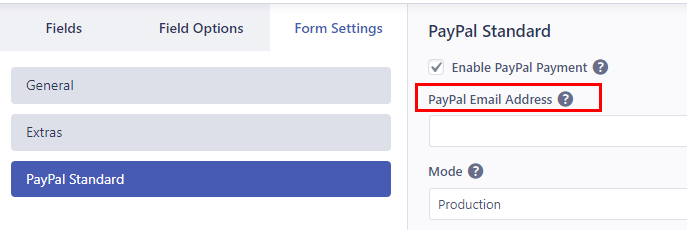
Next, in the PayPal Email Address, enter the email address associated with your PayPal account or the email address of the payment receiver. This must be a business email!
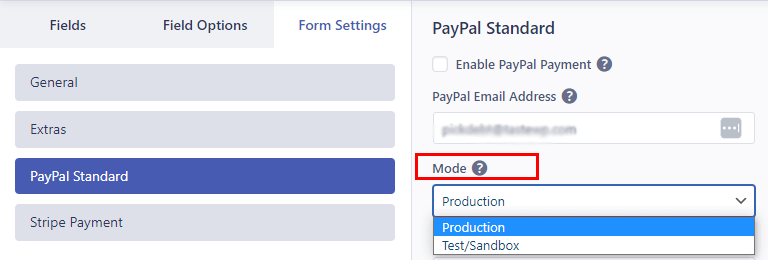
Under that, there’s an option called Mode, where you can choose Production. But if you wish to use the form for testing purposes at first, you can go with Sandbox.
Then, you can choose the Payment Type from two opinions,i.e., Products and Services or Donation.
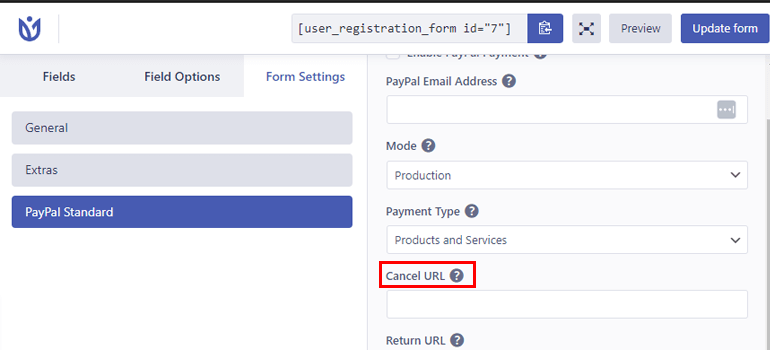
Next, there’s the Cancel URL option. You can enter a redirection URL for users who cancel their PayPal payment.
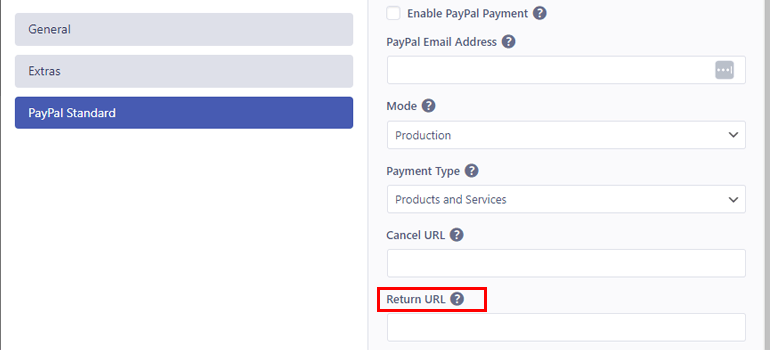
Similarly, there’s a Return URL option to add a URL to redirect users to a page after the payment process.
Now, under Subscription Settings, you can check off the box Enable Recurring Subscription Payment. This lets you enable the user’s subscriptions periodically so that they can automatically renew their registration after a certain period.
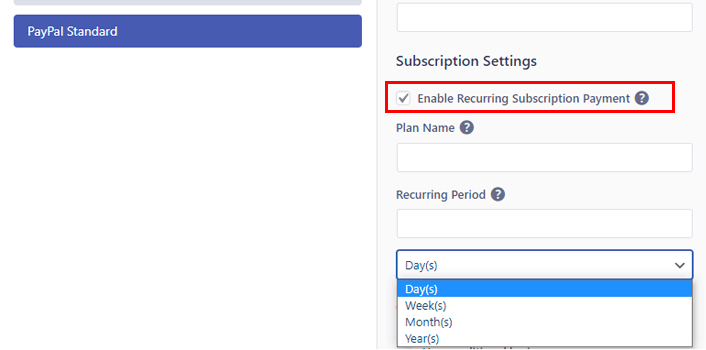
You can now add a Plan Name for the recurring plan.
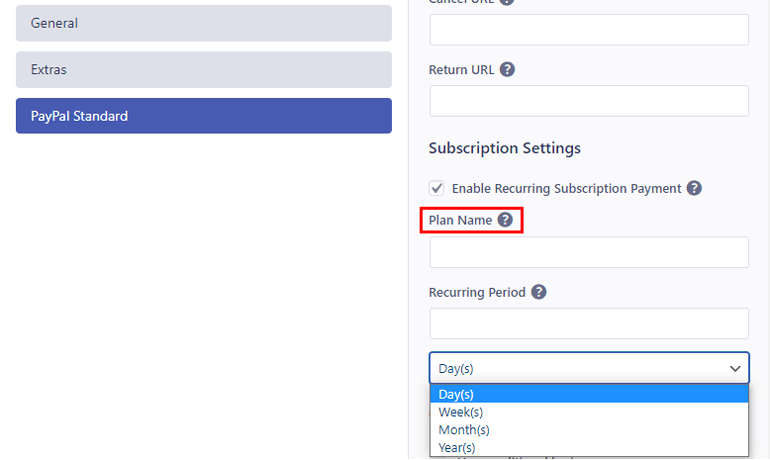
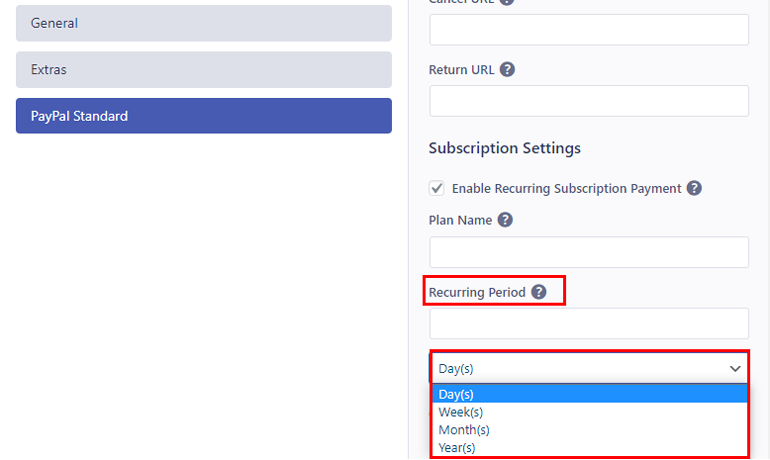
After that, you can choose the suitable Recurring Period option. It can be days, weeks, months, and years.
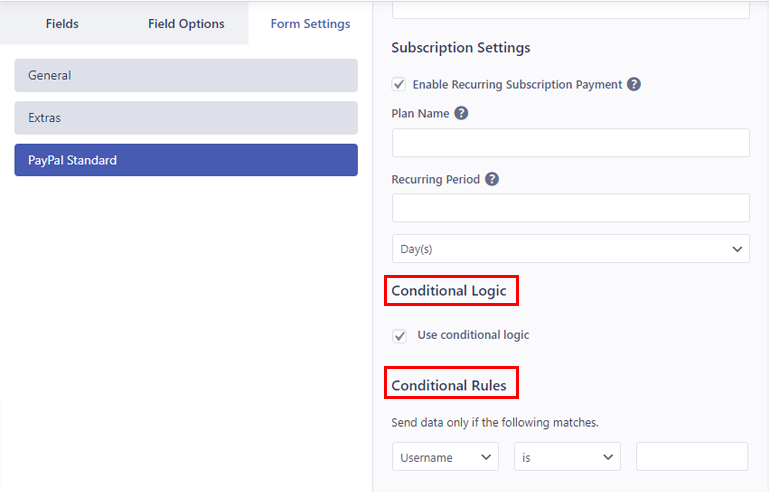
Not to mention, you can also set conditional logic to use the conditional rules on your form.
Lastly, when you’re done making the changes, hit the Update Form button at the top right corner to save the changes.
Step 5: Configure Global and Registration Form Settings
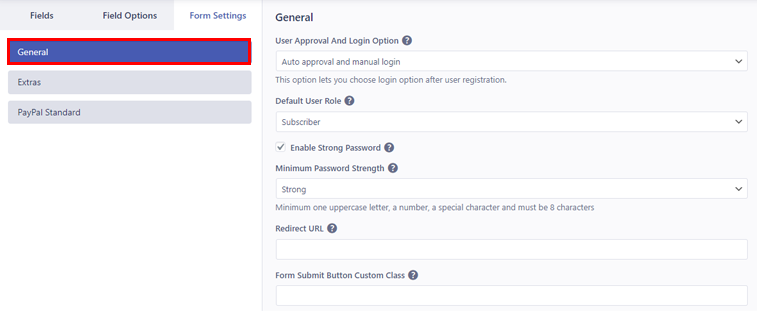
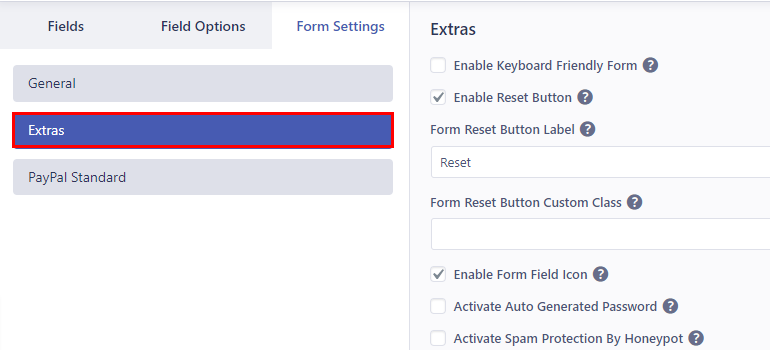
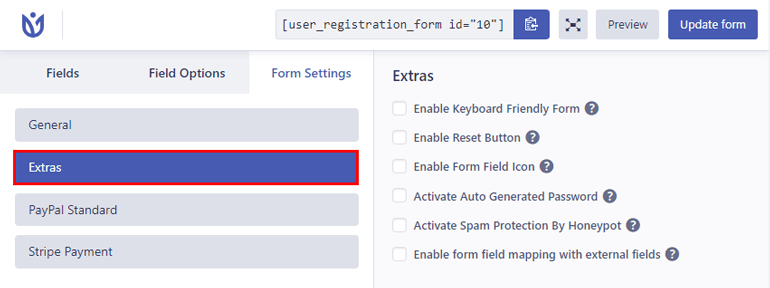
To configure the registration form’s settings, you need to go to the Form Settings tab. From here, you can configure the General and Extras settings of the form.
Under the General tab, you can configure Default User Role, Redirect URL, Enable Captcha Support, and more.
And from Extras, you can enable Activate Form Field Icon, Activate Auto Generated Password, Enable Spam Protection, etc.
After that, hit the Update form button to update the changes!
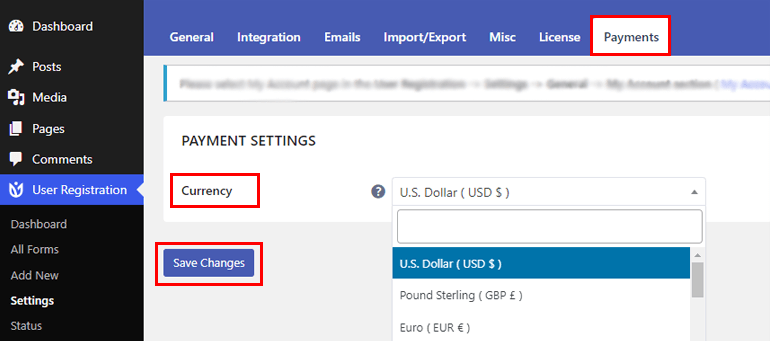
Also, using the User Registration plugin, you can configure the global settings of your registration form. So, for this, navigate to User Registration >> Settings from your dashboard.

Next, click on the Payments tab to configure Global Payment Settings. Here, you’ll see the option to tweak the currency used for payment. The currency is in US dollars by default, but you can change it by clicking on the dropdown. Then, hit the Save Changes button to save changes.
Now inside the same Settings option, you can see the General tab. Thus, from the General Options, you can easily customize your user login options.
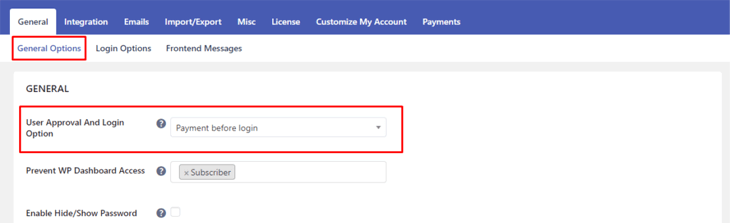
From the User Approval And Login Option, you can select the suitable login options for your users. You can choose the option Payment before login in from the drop-down if you don’t want to allow the users to log in until the payment process is complete.
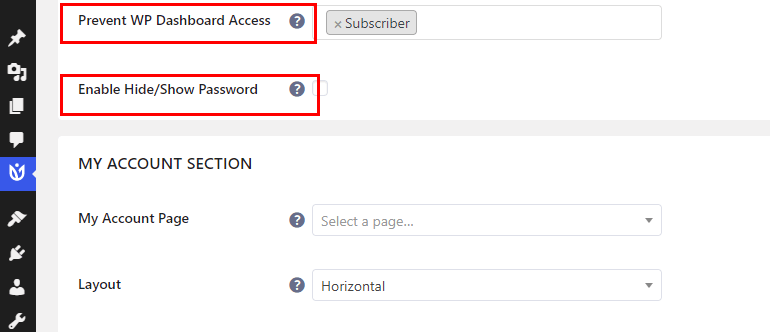
Further, you can customize settings that include Prevent WP Dashboard Access, Enable Hide/Show Passwords, and many more.
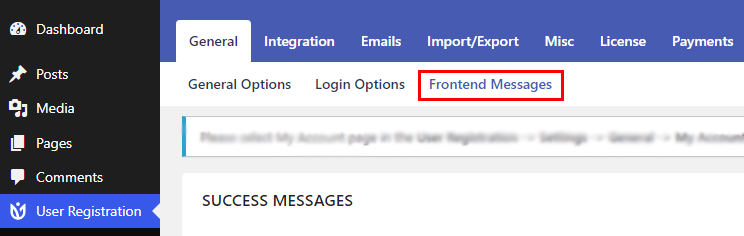
You can also configure the frontend message for the user’s payment status by clicking on the Frontend Messages tab.
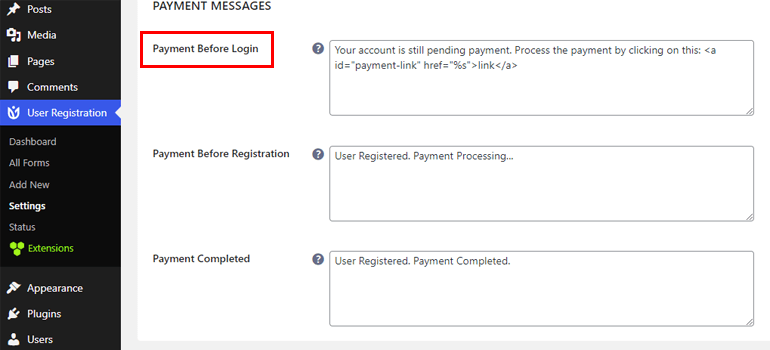
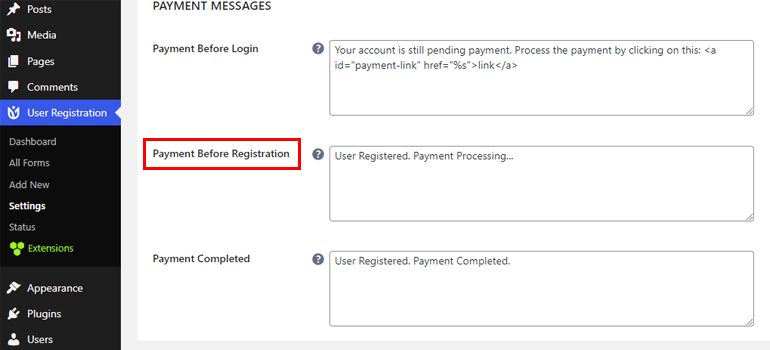
So, you can scroll down to Payment Messages to add and edit the message on different boxes like Payment Before Login, Payment Before Registration, and Payment Completed, as per your need.
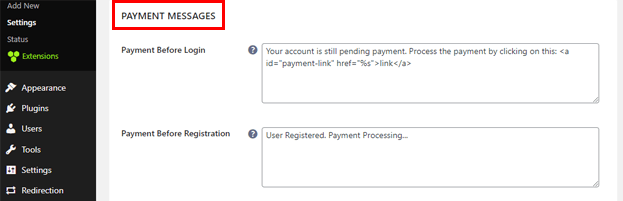
In the Payment Before Login, you can add a message to display when users try to log in before the payment.
In the Payment Before Registration, you can add a message to show users if their payment is still pending.
And finally, in Payment Completed, you can write the message to display when the user’s registration is complete after payment.
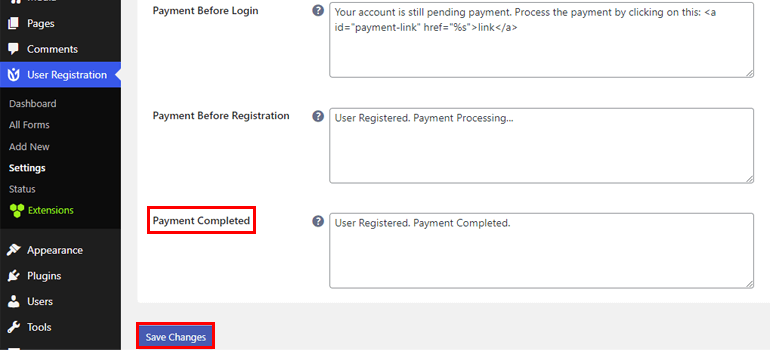
Also, click on Save Changes when you’re done adding the message.
Step 6: Display Your Form on the Site
After completing all the above steps, it’s time to display your registration form on your site.
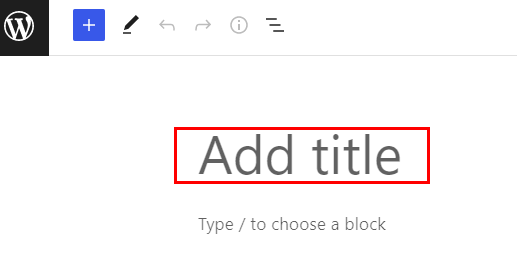
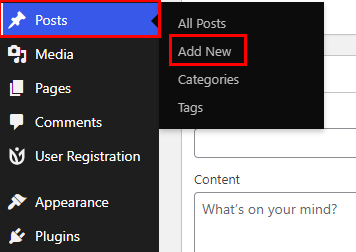
Open the Add New button under the page or post in your dashboard.

Next, give it a title per your preference.
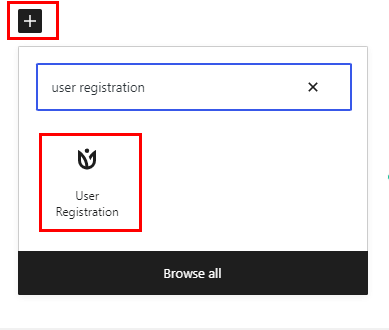
Next, click the “+” icon and search for the User Registration block. After you see the option, click on it to insert the User Registration block on your page/post.
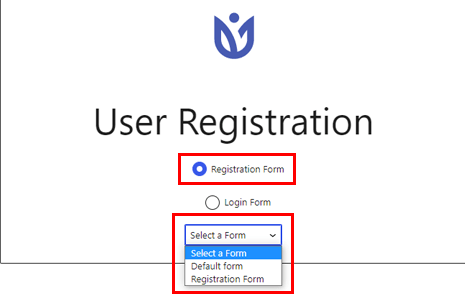
Now, choose the registration form integrated with PayPal from the drop-down menu.
Before publishing, you can Preview the form and finally click on Publish to display your form on your site!

Method 2: Create WordPress User Registration Form with Stripe Payment
Now, let’s know how to create a registration form with payment in WordPress using the stripe payment method.

Step 1: Install and Set Up User Registration Pro Plugin
Again, your first and foremost step is to install and set up the premium version of the User Registration Plugin, as mentioned above in the same article.
You can refer to the installation and set-up guide above to learn it!
Step 2: Install and Activate the Stripe Add-On
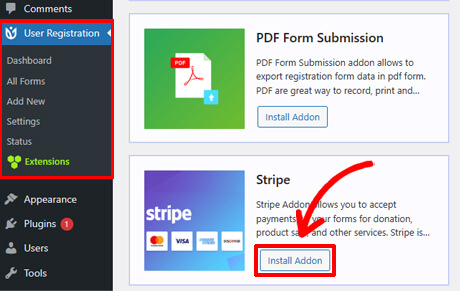
Next, you need to install and activate the Stripe add-on on your site. For this, navigate to User Registration >> Extensions.

Now you’ll be taken to a page with all the available add-ons. So, search for Stripe add-on and click on the Install Addon button.
When it’s installed, you’ll see the Activate button. So, hit that button to activate the Stripe add-on on your site.

Step 3: Configure Global Stripe Settings
After activating the add-on, you’ll now require to configure Stripe on your site.
So, on your dashboard, click on User Registration>> Settings >> Payments. Here, under Payments, you can configure Stripe setup and settings.
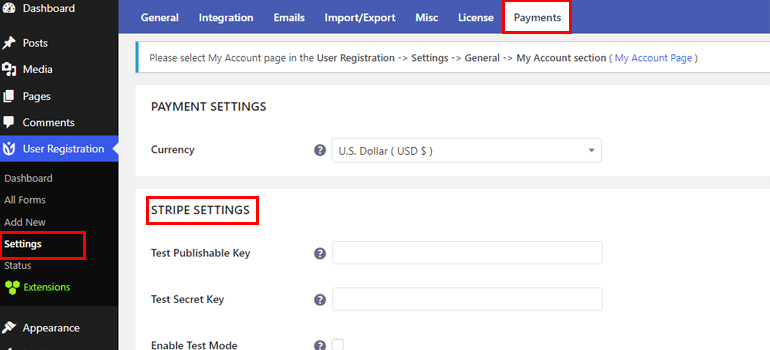
You need to use your Stripe account’s API keys to get started with the Stripe setup.
So, to retrieve the API keys, you need to go to your Stripe dashboard. Next, open the API keys page under the Developer tab on the dashboard’s sidebar.
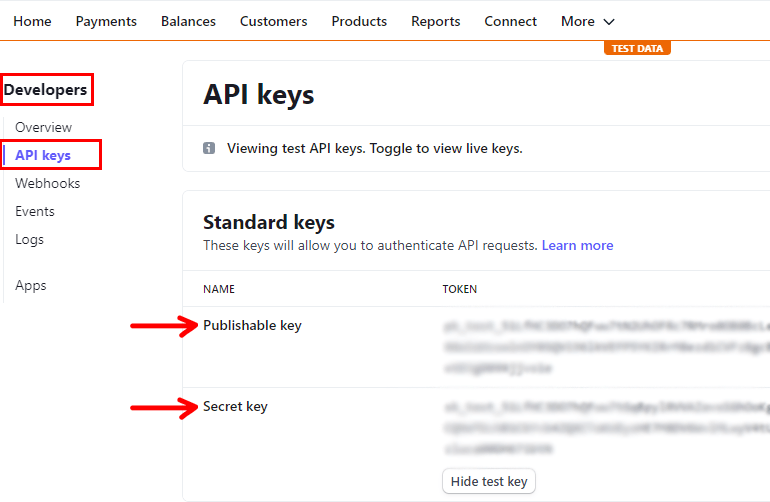
You must create API keys and copy your Publishable key and Secret key. If you want to learn about this in detail, we suggest you go through Stripe’s documentation.
Now, go back to your Payments section in your WordPress dashboard and paste the keys to the appropriate fields. And click on Save Changes to save the changes.
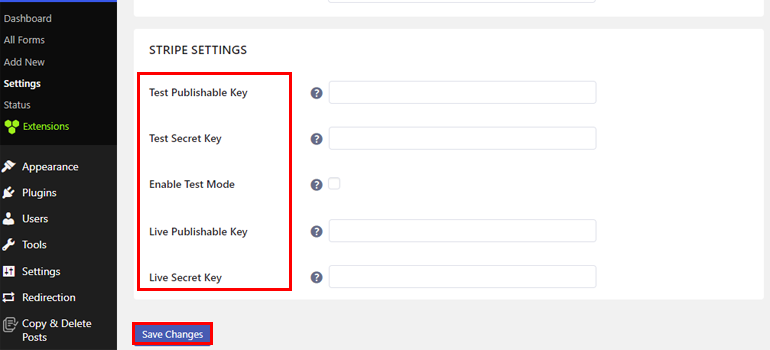
Remember, you can also test the payment system before going live with the Test Secret Key you receive from your Stripe Dashboard.
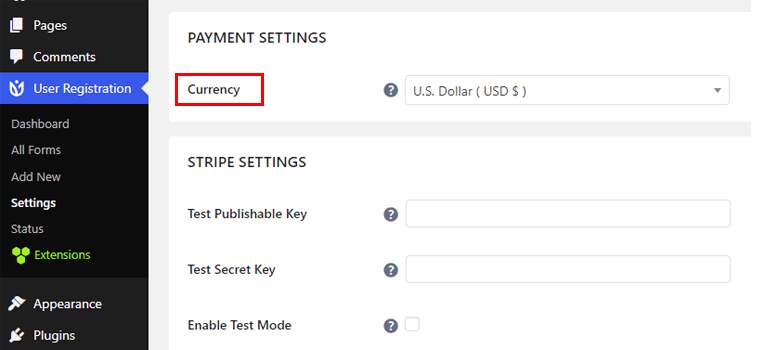
Moreover, you can also set the currency for your payments with the Currency option under the same Payments tab.
Step 4: Create a Registration Form
When you’re done with configuring Stripe’s Global Setting, your next step is creating a registration form.
So, from your WordPress dashboard, go to User Registration and click Add New.
Next, you’ll see an option to create your form from scratch or use free and premium templates. You get different types of templates for a registration form that you can use for your site. As for now, we’ll Start From Scratch.
Now, you can get started by naming your form.
After that, all you need to do is click on the Add New button, drag the field from the Fields option, and drop it on the right-hand side as we’ve mentioned in method 1.
Step 5: Enable Stripe Payments for the Form
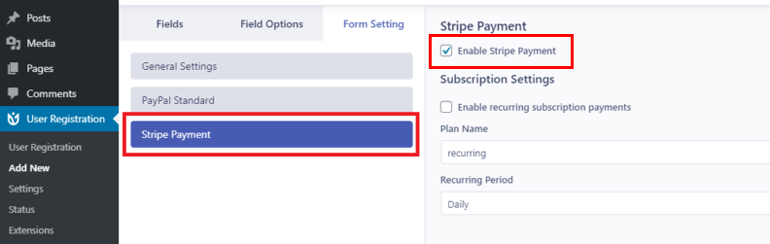
After creating your form, you need to enable Stripe payment. So, go to the Form Settings of your registration form.
Here, you can see an option called Stripe Payment. Click on it and then check the box Enable Stripe Payment.
This will enable Stripe on your form. Hence, you can also add the Stripe Gateway field from the Payment Fields now.
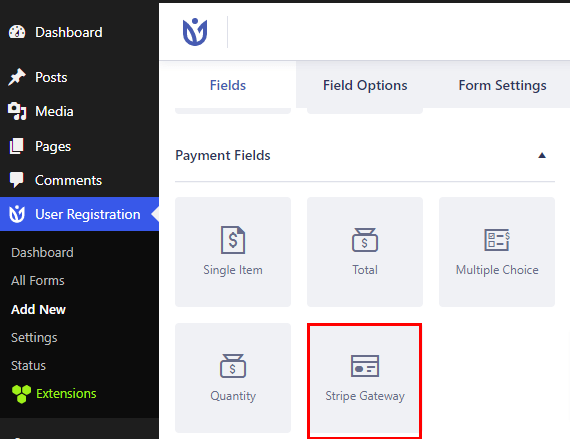
Besides, you can also add the Single Item, Total, Multiple Choice, and Quantity from the same Payment Fields to your form.
After adding necessary form fields, you can also customize the field’s setting with the Field Option, where you can edit the Label, Description, Advance Settings, and so on.
Also, for the Stripe Getaway field, there’s an option to add Credit Card, iDEAL payment, or both.
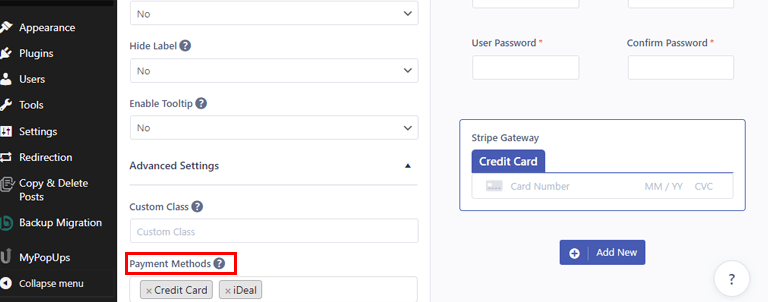
An iDeal payment is an e-commerce payment system used in the Netherlands that’s backed up by online banking.
So, pick your preference and hit on the Update form button!

Step 6: Add an iDeal Payment Option to Your Form
As we mentioned earlier, there’s an option to choose iDeal payment for Stripe Getaway’s payment method.
If you add an iDeal payment option, you’ll have to set a few things.
To do that, navigate to Field Options of Stripe Getaway. Scroll down, and you’ll see the Payment Methods option.
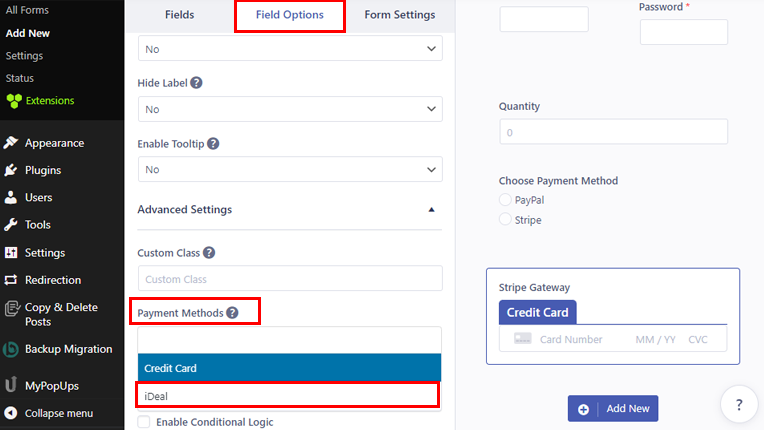
Select the iDeal payment option and choose the bank from which you want to make the payment.
Also, remember that any other currency than Euro is not accepted in iDeal payment.
And that’s all to add an iDeal payment option to your form!
Step 7: Configure Individual and Registration Form Settings
Next, head to the Form Setting tab to configure your form’s settings.
You can see the General and Extras tabs here.
Under the General setting, you can configure the User Approval And Login option, set Default User Role, Enable Strong Password, and so on.

Now for the Extras setting, this lets you Enable the Keyboard Friendly Form, Enable Reset Button, Activate Auto Generated Password, etc.
Likewise, if you’ve enabled Stripe Getaway, you can configure more settings from Stripe Payment tab. Under Subscription Settings, you can check off the box to Enable Recurring Subscription Payment.
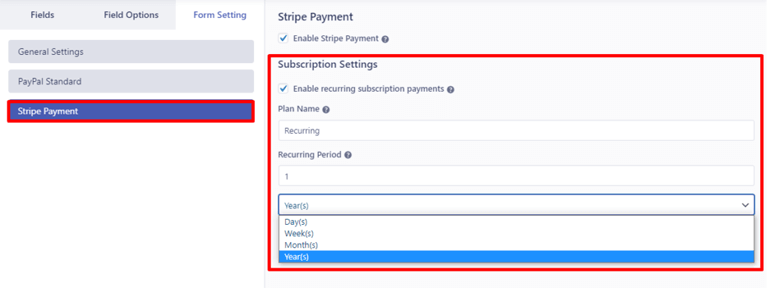
Besides, you can add the Plan Name for the recurring plan and the interval between recurring payments in the Recurring Period option. The recurring period can be added within days, weeks, months, and years.
Also, remember to click on the Update form button at the top when you’re done making the changes!
Step 8: Display Your Form on the Site
Finally, it’s time to display your registration form on your site.
From your dashboard, open the page or post.
First, give it a suitable title.

Now, click on the “+” icon, and search for the User Registration block. Once it displays, click it to insert the User Registration block on your page/post.

Next, select the registration form integrated with Stripe from the drop-down menu.

You can Preview the form to see how it looks in the front. And if you’re satisfied with your form, click on the Publish button to display your form on your site!

Step 9: View Payment Details as Admin or User After Registration
As Admin:
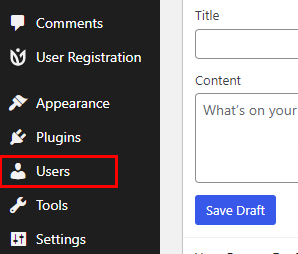
To view the payment details of registered users as admin, open your WordPress dashboard and click on the Users tab.
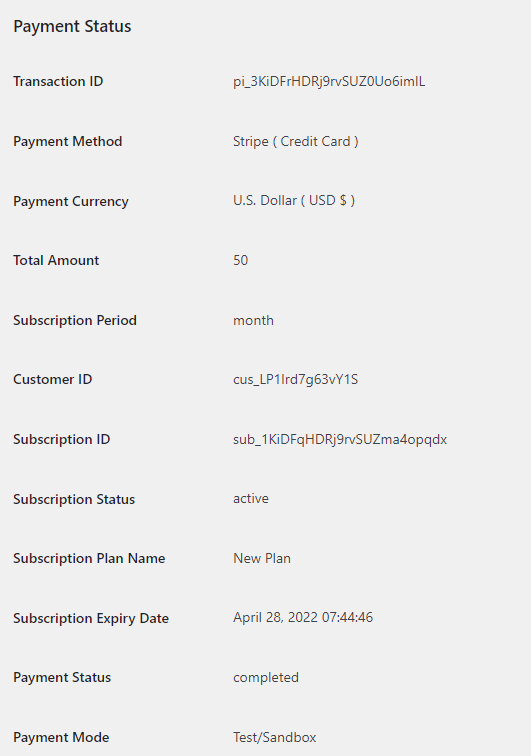
Click on the particular username of the user to look at all the information of Payment Status like Transaction ID, Payment Method, Payment Currency, and Total Amount will be shown.
As User:
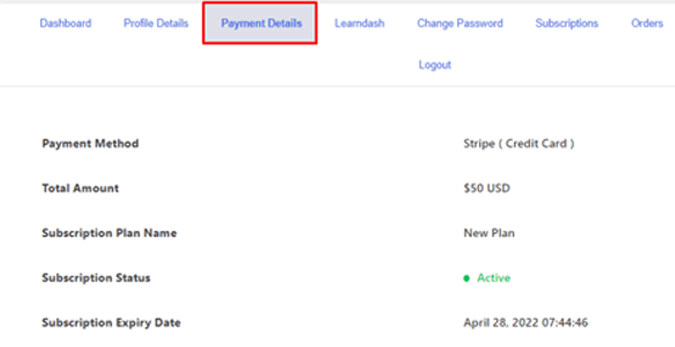
Users need to log in to their account and visit their Account Dashboard on the site. Then, they can view their payment information under the Payment Details tab.
The information will be displayed in the following format, as shown below.
How to Allow Users to Choose Between PayPal and Stripe Payments?
Except for integrating just one payment method, you can add both PayPal and Stripe add-ons and set options to choose between them for your users.
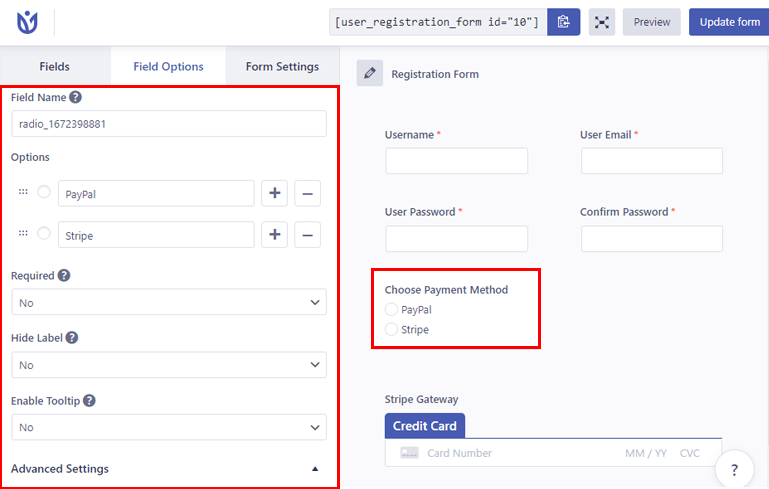
To do this, open your form and add the Radio Button field on your form.
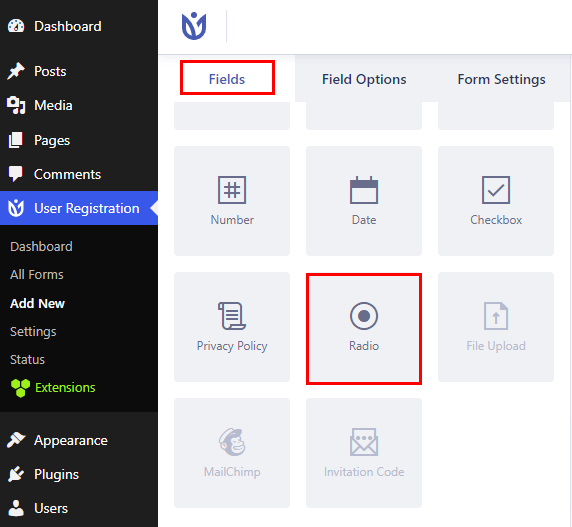
Here, you can add both option PayPal and Stripe as available options for your users.
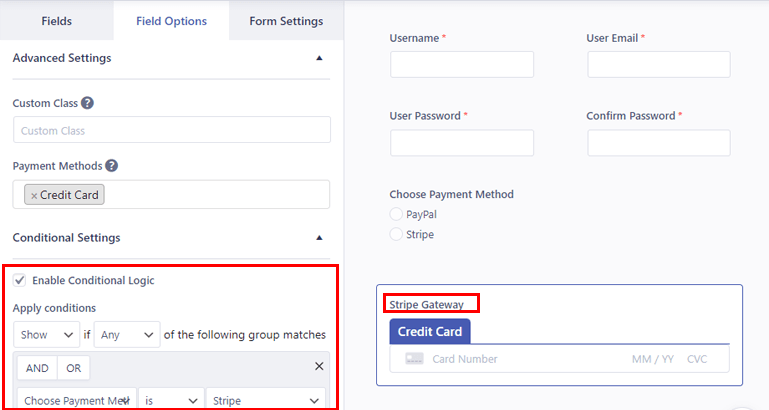
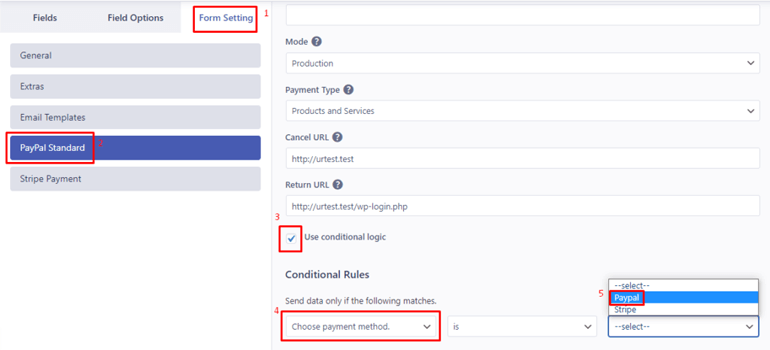
But if you want to hide one payment option, for example, Stripe, you need to apply conditional logic as shown in the image below.
Next, go to Form Settings and select PayPal or Stripe that you want to hide for your users.
When you click on any of the options, you’ll see an option called ‘Use conditional logic.’ So, check that option and apply the conditional logic.
If you apply the condition for PayPal, it should look like as shown below
And, if you use the condition for Stripe, it should look as shown below.

Conclusion
And that’s how you can create a registration form with payment in WordPress. All thanks to the top-notch feature of the User Registration plugin.
The plugin’s capability doesn’t end here; it also lets you add a limit submission number on your form, custom fields, and much more.
We’ve made it to the end, and we hope you can now create a registration form with payment easily. You can choose between the PayPal or Stripe method as per your requirement.
If confused, you can always review User Registration’s resourceful documentation or contact their super-friendly support team.
Lastly, if you want to get all the updates, follow us on Twitter and Facebook!
Happy Reading!