Want to add a PayPal registration form to your WordPress site but don’t know how to do so? Don’t worry; in this article, you’ll learn how to create a registration form with PayPal integration.
PayPal lets you easily receive the amount users pay for registration on your WordPress site. And integrating the PayPal payment option into your user registration form takes only a few minutes with minimal effort. All you require is an account with PayPal and a form builder plugin that supports PayPal payment.
So, let’s begin by looking at the best user registration plugin that allows you to create a registration form with PayPal payment.
Choose the Best User Registration Plugin that Supports PayPal Payment– User Registration
User registration plugins let you create and add user registration forms to your WordPress site. One such plugin is the User Registration plugin by WPEverest. It has all the essential features you’d need to design custom registration forms.

User Registration is a drag-and-drop form builder plugin that requires no coding knowledge to create, manage, and customize forms. From a simple contact form to a multi-column form, you can build various registration forms in no time.
For further customization, it provides several add-ons such as Payments (PayPal), WooCommerce Integration, Content Restriction, and so on.
Thus, you can integrate the PayPal payment gateway into your registration form using the Payments (PayPal) add-on. It’s as simple as creating a form and enabling the PayPal payment option for it!
Therefore, let’s learn to create a PayPal registration form with User Registration.
How to Create PayPal Registration Form in WordPress?
We’ve explained the entire process step-by-step below:
Step 1: Install and Activate the User Registration Plugin
The first step is to install and activate the plugin on a WordPress site. Since the Payment add-on is available in the premium versions of User Registration, you’ll require to install User Registration Pro.
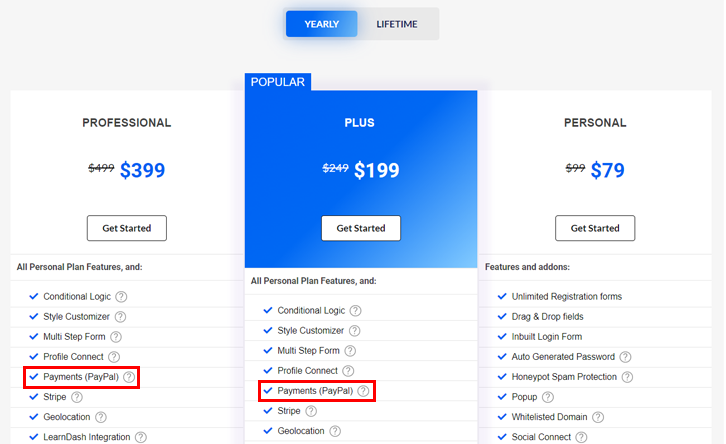
To do so, visit the pricing page of User Registration and buy anyone among the Plus and Professional plans; the Payments (PayPal) addon is available only in these plans.
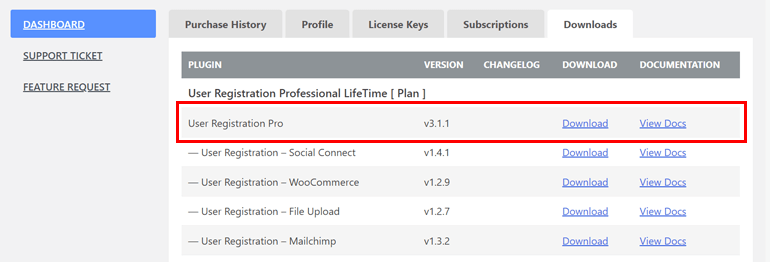
After you purchase the plugin, you can log in to your WPEverest account. So, log in and it takes you to your account’s Dashboard. From here, navigate to the Downloads tab and download User Registration Pro.
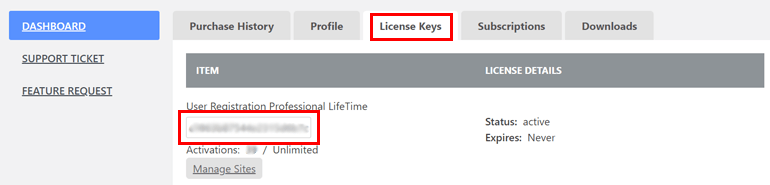
From the License Keys tab, copy the key and keep it safe. You’ll require it later
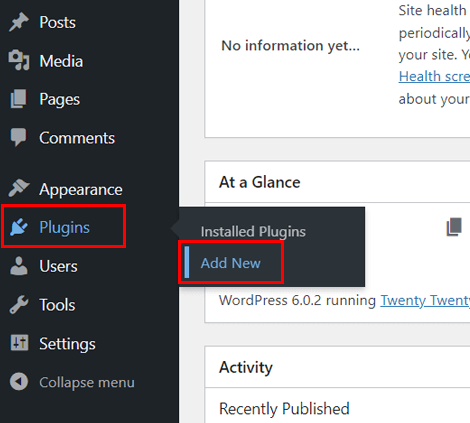
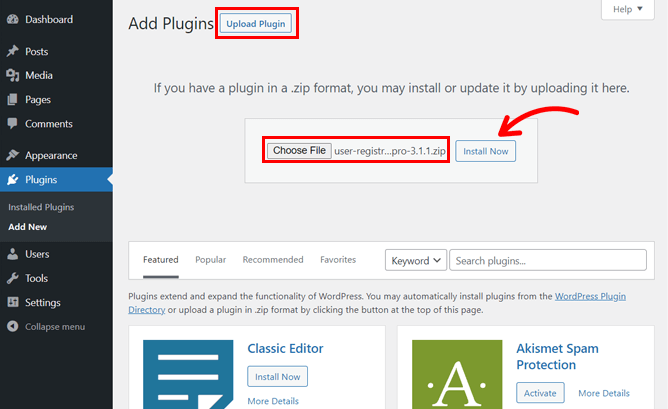
Next, visit your WordPress dashboard and navigate to Plugins >> Add New.
Now, click the Upload Plugin and upload the zip file you downloaded from your account in WPEverest. Hit the Install Now button as you see it and then the Activate Plugin button.
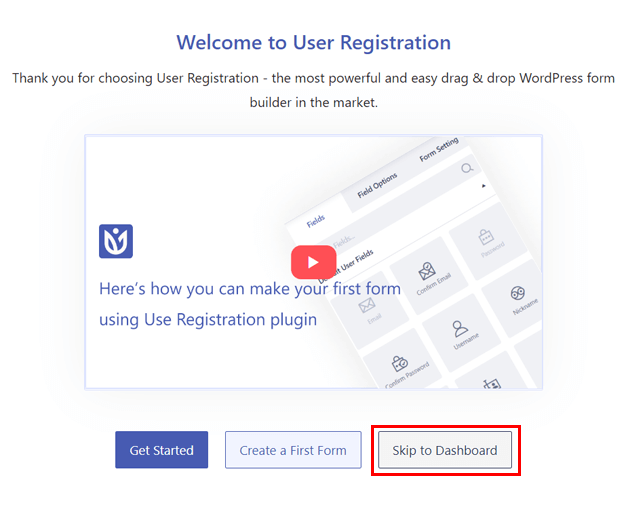
As you activate the plugin, it displays a welcome message like below. You can either complete the setup or choose to skip to the dashboard from here.
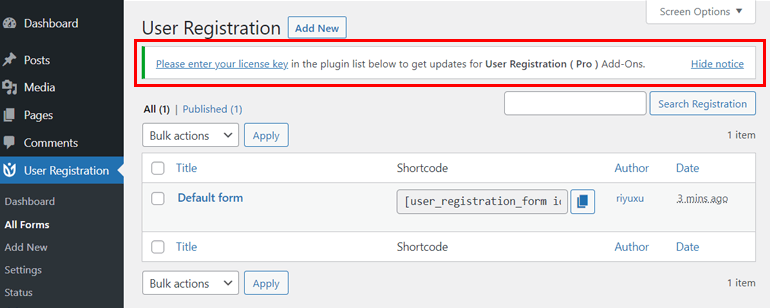
Once you’re back on the dashboard, you’ll see a notification asking you to enter the license key.
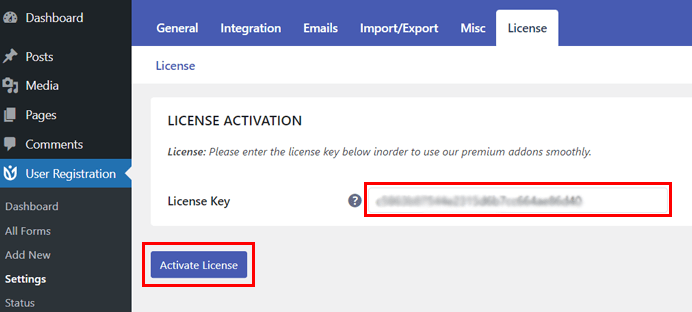
So, click on the link and paste the license key that you copied previously. As you enter the key, hit the Activate License button.
That’s all! You’ve successfully installed the User Registration Pro plugin on your WordPress site.
Step 2: Install and Activate Payments Add-on
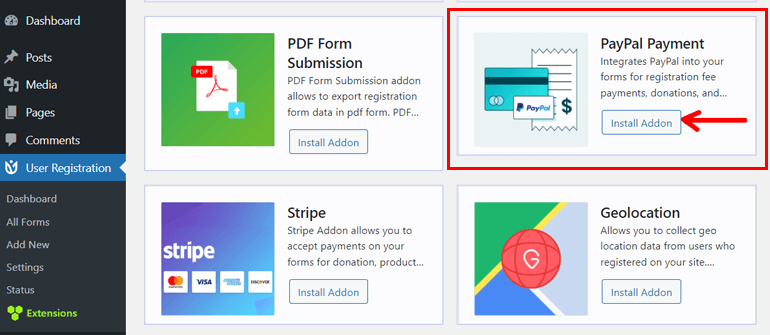
Let’s now install and activate the Payments add-on on your site. To do so, navigate to User Registration >> Extensions.

It’ll take you to the page displaying all the available add-ons. So, scroll until you find the PayPal Payment add-on. As you see the add-on, hit the Install Addon button. Immediately, you’ll see the Activate button, so click on it as well.
The add-on is now fully activated and ready to be integrated into your WordPress form.
Step 3: Create a PayPal Registration Form in WordPress
Your WordPress site now has a plugin that lets you create a user registration form with PayPal integration.
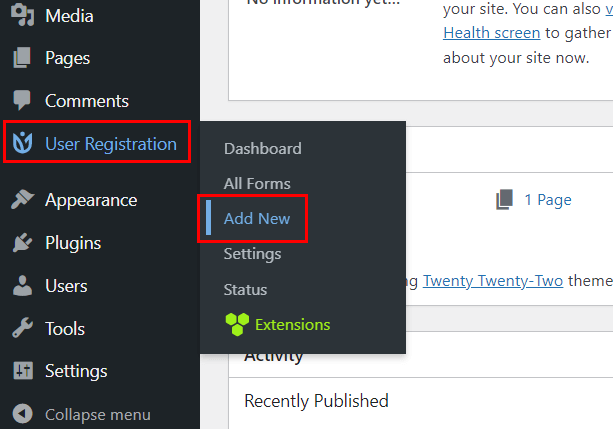
So, let’s create a PayPal registration form. For this, visit your WordPress dashboard and go to User Registration >> Add New.
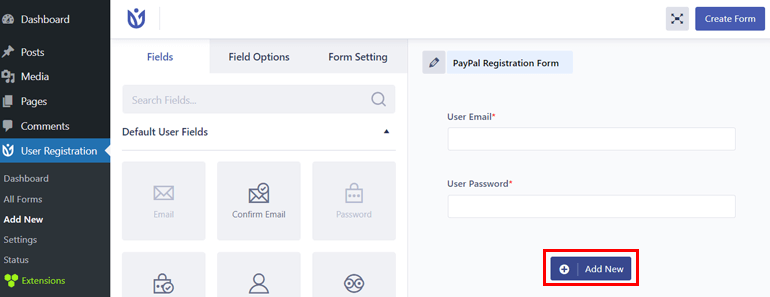
As you see the form builder screen, click on the pencil icon and give a name to the form.
You can now drag the field you want to have in your form and drop it into the form by clicking on Add New button.
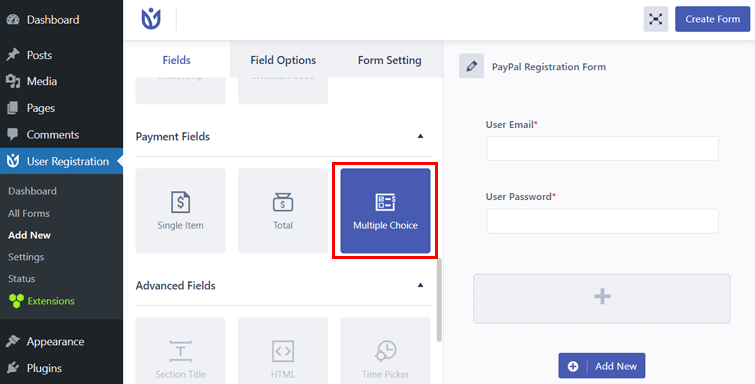
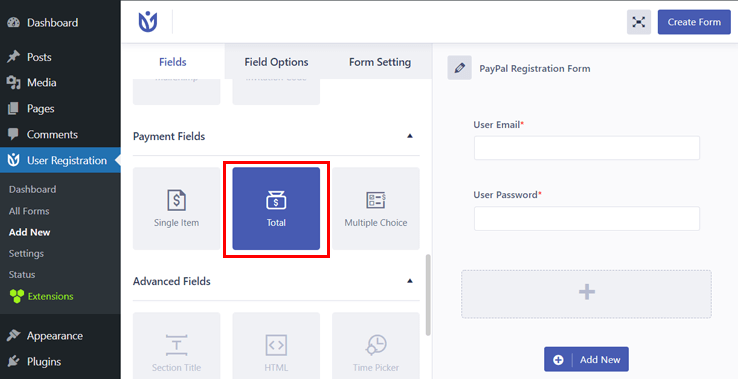
Next, scroll down to find the Payment Fields on the Fields tab. It has three form fields that you can add to your user registration form.
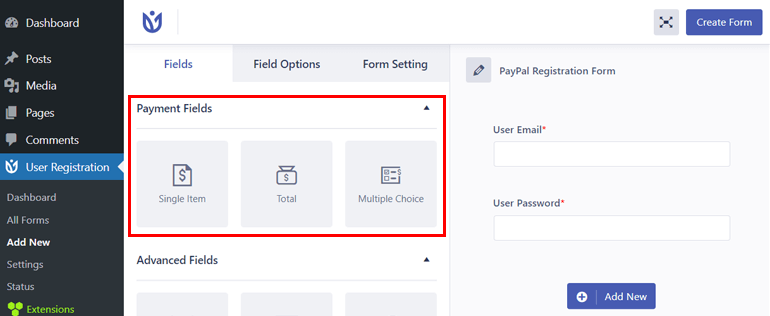
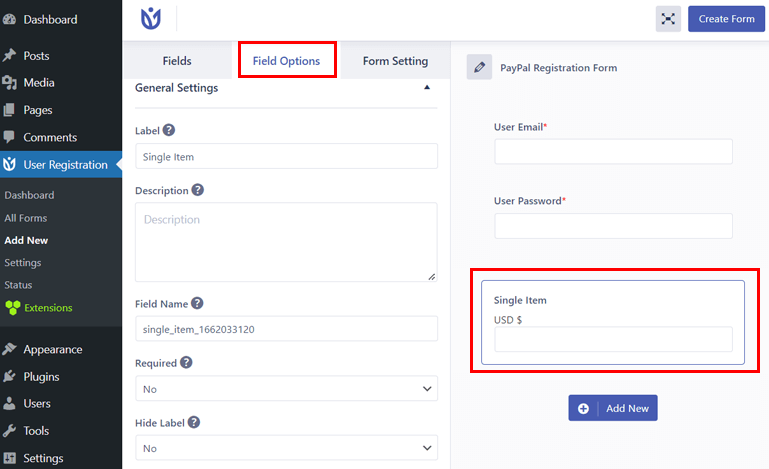
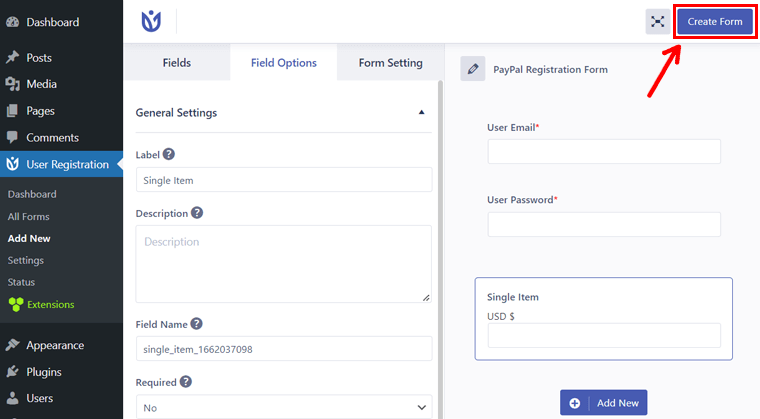
1. Single Item: This field is for a single item on your form and its price. For more settings, click on the field, and it’ll redirect to the Field Options tab on the left.
You can add a label, description, and field name from here.
The next option, Required, lets you set whether or not the user can submit the form unless the field is filled.
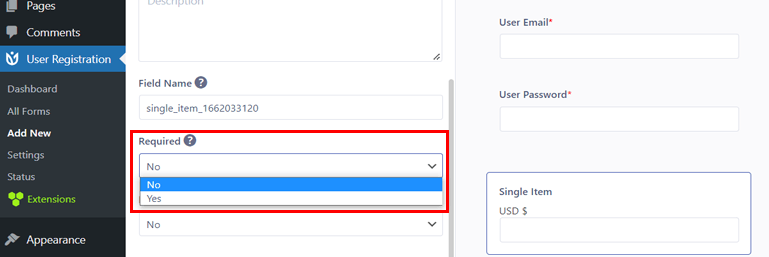
For example, if you’re using the user registration form without making the payment compulsory, you can go with the No option. Otherwise, choose Yes and proceed on.
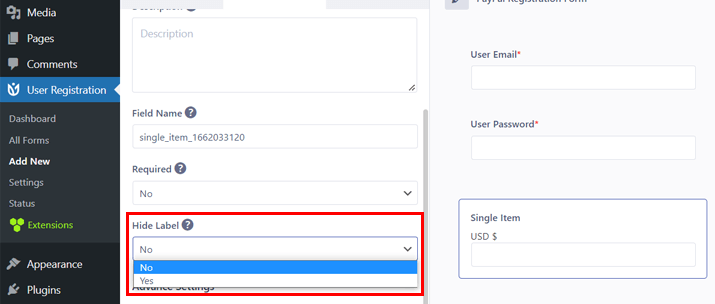
Similarly, the Hide Label allows you to hide the form field’s label for a single item.
Under the Advance Settings, you can add the price for the item below the Item Price. And the next option, Item Type has three options:
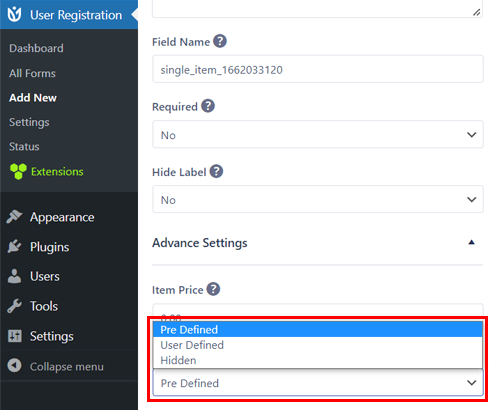
- Pre Defined: Choose this option if you want the price to be pre-defined by you so that users can’t change it while making the payment.
- User Defined: This option allows users to decide the amount themselves. It’s useful if you want users to pay as per their choice in the form of a donation.
- Hidden: From here, you can hide the amount in the form so that it won’t be visible while viewing the form.
2. Multiple Choice: It’s for adding multiple items and their respective price. Users can choose more than one option from here.
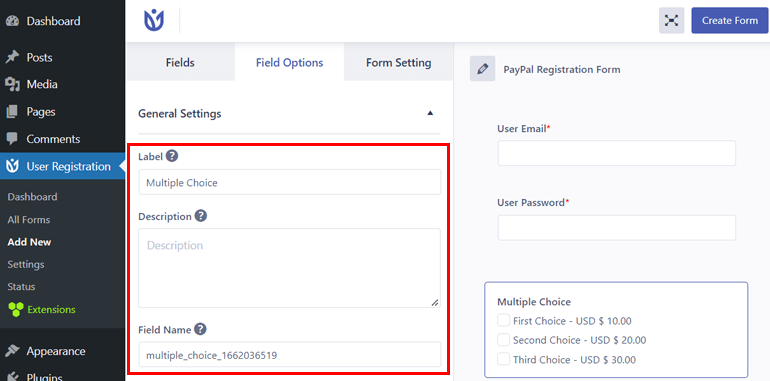
You can set the Label, Description, and Field Name from the General Settings for multiple choice options.
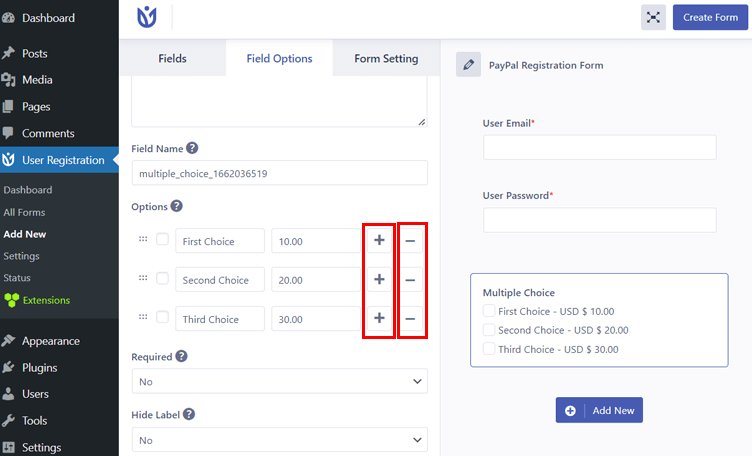
Also, the Options lets you add other items and set their price. Click on the ‘+’ sign to add an item and the ‘-’ sign to remove the item.
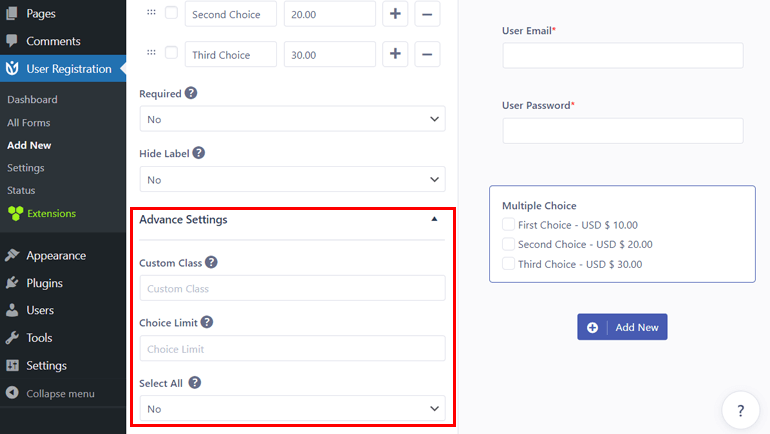
The Advance Settings allows you to use custom classes, set multiple choice limits, and specify whether or not a user can select all options.
3. Total: It displays the total price user has to pay for the selected item or service. It also has similar general settings options like that for a single item.
Meanwhile, you can also add multiple single items in the user registration form and give them separate prices. The Total field will display the sum of all item prices.
Hence, set all the options for your payment fields and hit the Create Form button at the top-right corner.
Step 4: Enable PayPal Payment
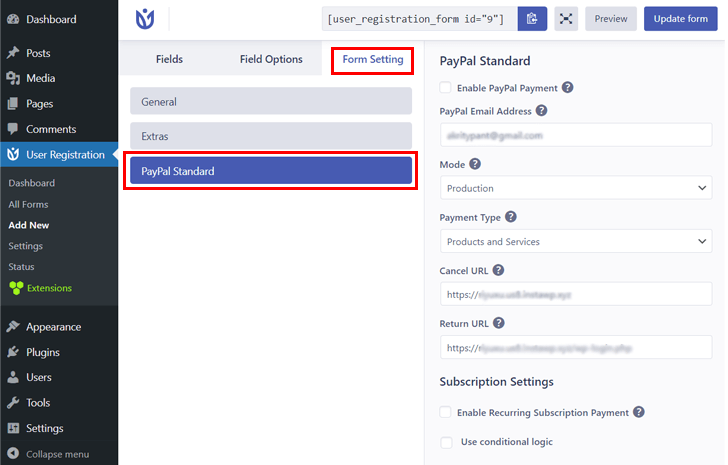
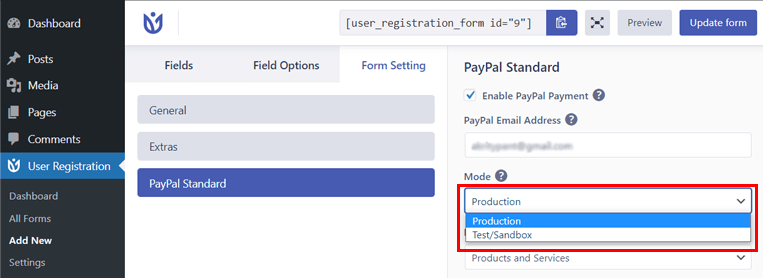
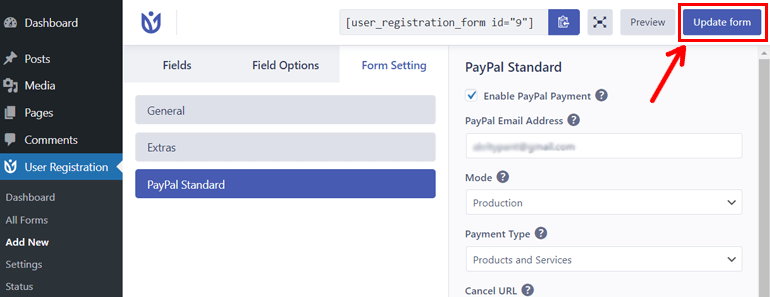
As you’ve created the registration form with payment fields, you must enable PayPal payment. For this, click on the Form Setting tab and go to PayPal Standard.
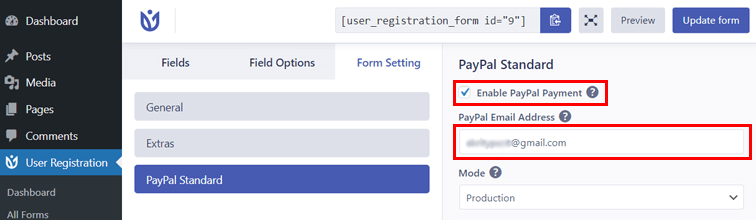
Next, check Enable PayPal Payment option. After that, enter the email address associated with your PayPal account or the email address of the payment receiver.
Under Mode, you can select Production; however, if you want to use the form for testing purposes, choose Sandbox.
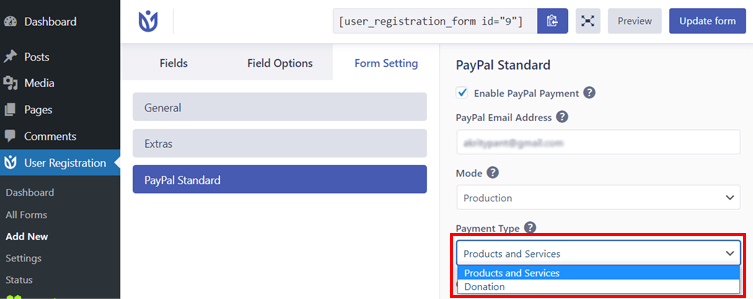
You can then choose the Payment Type between Products and Service or Donation.
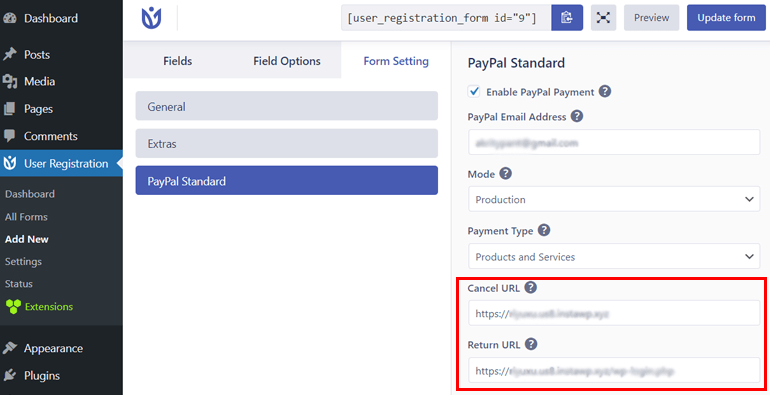
Next is Cancel URL, where you can provide a redirection URL for the users who cancel their PayPal payment. Similarly, Return URL is to redirect users to some page after the successful payment.
Likewise, under the Subscription Settings, there’re two options to choose from:
Enable Recurring Subscription Payment: From here, you can enable the users’ subscriptions periodically so that they can automatically renew their registration after a specified period.
You can give a Plan Name to the recurring plan and specify the interval between recurring payments under the Recurring Period.
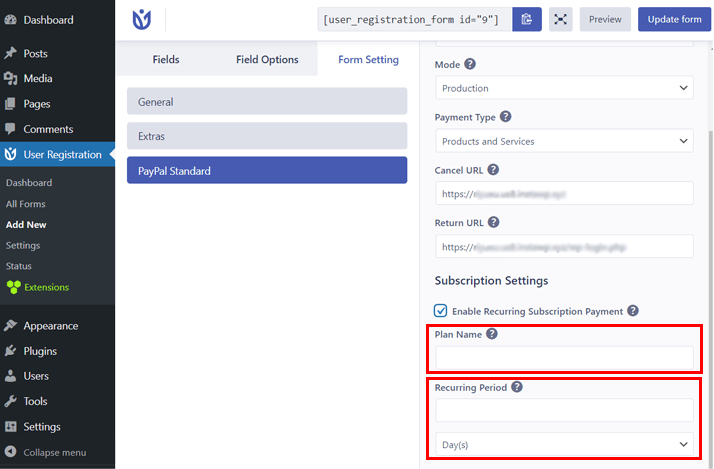
The interval for the recurring period can be in days, weeks, months, and years; you can specify yourself.
Use conditional logic: You can also use conditional logic to use the conditional rules on your form.
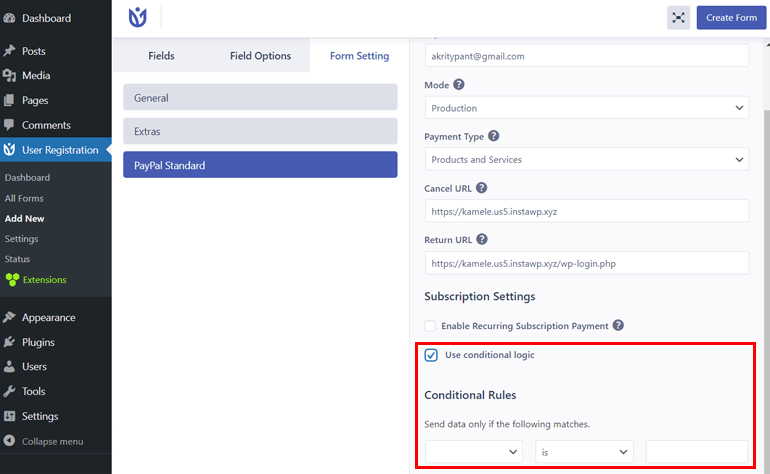
Using the rules, you can send data only when the specified condition matches. However, to use the conditional logic, you’ll need to install the Conditional Logic add-on.
After performing all these steps, click on the Update Form button in the top-right corner.
Step 5: Configure Additional PayPal Settings
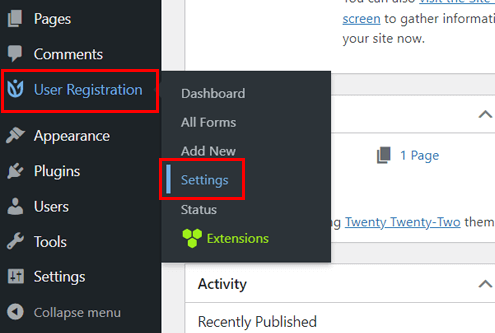
Similarly, the plugin also provides some login options that you can configure. For this, navigate to User Registration >> Settings
On the General tab, you’ll see the General Options to set User Login Options.
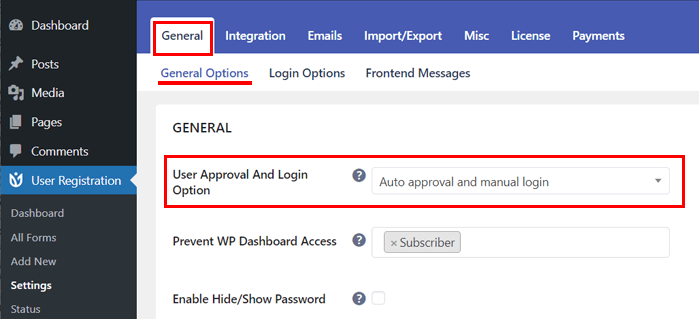
Now use the drop-down menu and select the Payment before login option to let users log in only after the successful payment.
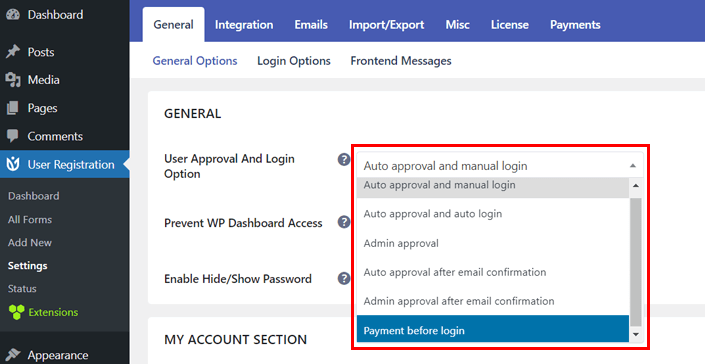
The other options allow users to log in even without payment completion.
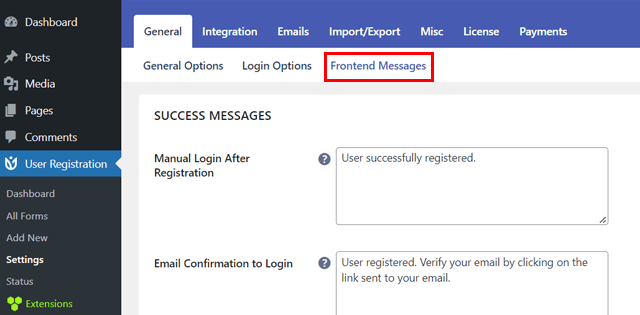
Besides, to let users know about their payment status, you can set the frontend message. For this, click on the Frontend Messages tab and scroll down to find Payment Messages.
Now, you can edit the message on each of the following boxes to display on the frontend:
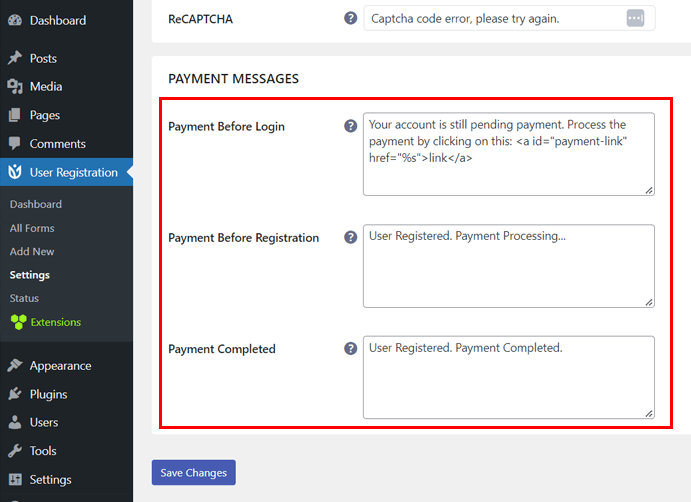
- Payment Before Login: Here, you can add a message to display when users try to log in before the payment.
- Payment Before Registration: Write a message here, and it’ll be displayed to users if their payment is still pending.
- Payment Completed: You can write the message here to display when the user registration is successful with payment.
Hit the Save Changes button when you’re done with the settings.
Step 6: Publish PayPal Registration Form on WordPress
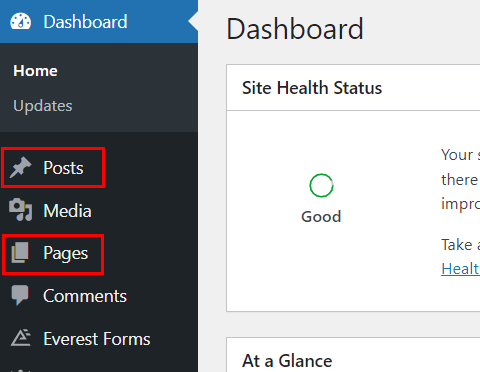
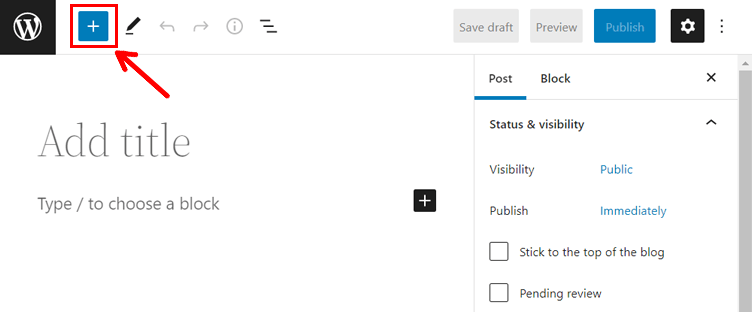
At this point, you have your PayPal registration form ready to be published. So, decide where to publish the form – page or post. Now, open the page or post and give a suitable title.
Next, hit the [+] icon and search for User Registration. As you see the option, click on it, and the User Registration block will be inserted on your page or post.
Then, select the Registration Form and choose the form you created with PayPal integration using the drop-down menu.
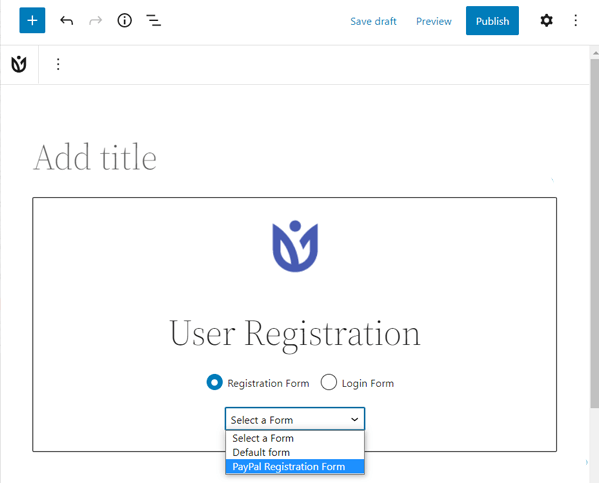
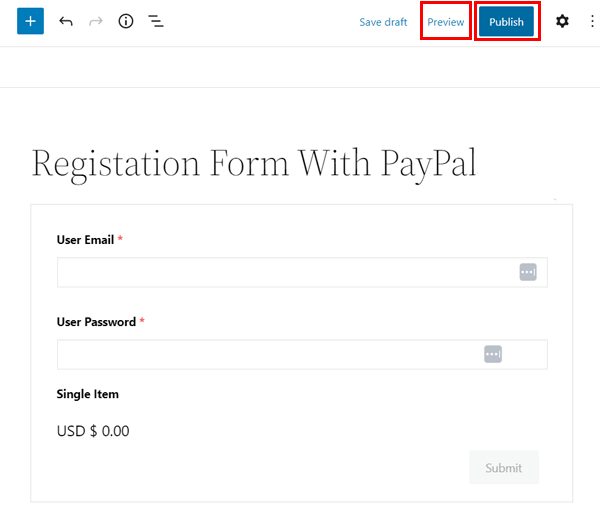
Immediately, the form will be inserted into your post or page. You can now Preview and then Publish the form on your site.
Wrapping Up!
That’s how you create PayPal registration form in WordPress. Easy right? All thanks to User Registration and its powerful features.
Apart from creating PayPal registration form, you can also add custom fields, limit the number of submissions, and do many other things on your form using the plugin.
Now that we’re at the end of our article, we hope you can easily create a registration form with PayPal integration. You can use the comment section below if you’re confused about any of the above steps. You can even contact the User Registration support team if you face difficulty setting the form; they’re quick at responding.
Liked the article? Why not read more WordPress-related articles from our blog page?
Also, you can follow us on Twitter and Facebook to receive a notification every time we publish a new article.