Want to create a WordPress invitation code on your registration form but don’t know how? Well, you’re in the right place. This article is all about creating a WordPress registration form with invitation codes.
WordPress core doesn’t allow you to create invitation codes for your registration form. But some plugins take care of this feature. All you need to do is install a plugin that lets you create invitation codes and use them for user registration.
Thus, read the article until the end to find which plugin to use and how to create a WordPress registration form with an invitation code.
Why Use a WordPress Invite Code to Register Users?
WordPress invitation code is a combination of letters and numbers that you can use to allow users to perform some specific action on the WordPress site. Adding a WordPress invitation code to your user registration form allows users to register themselves only if they enter a valid invite code.
Below, we’ve mentioned some benefits of using invitation codes for user registration in WordPress:
- Defined Users: By creating an invitation code, you can send invitations to specific individuals and allow them to register. So, you don’t need to remove or filter the unrequired users after registration. It also helps increase the conversion rate since only your target audience receives the code.
- Spam Protection: The WordPress invitation code effectively protects you against spam registration. It ensures that no other users except those with whom you have shared the invite code can register on your site.
- Reputation: The user feels a sense of privilege when they get the invitation code. Also, using an invite code shows the genuineness of your site and the form; this can positively benefit building a good reputation for your site.
- Security: A WordPress invitation code creates a two-step verification for the user willing to register and eventually increases the level of trust among them. As a result, they feel secure registering through your form.
That being said, let’s learn how to create a WordPress registration form with an invitation code now.
How to Create WordPress Registration Form with Invitation Code?
Among various user registration plugins, only a few provide features to add or create invitation codes. So, after analyzing some of the popular plugins, we’ve chosen User Registration as the best user registration and invitation codes plugin for WordPress.

User Registration is truly a unique and must-have plugin for any WordPress site. With its advanced features, it has everything to offer for creating varieties of user registration forms. And its Invite Codes add-on is the key to restricting user registration with invite codes.
Hence, in this article, we’ll be showing you how to create a WordPress invitation code using User Registration. Follow the steps below, and you’ll get the job done effortlessly.
Step 1: Install and Activate User Registration Pro
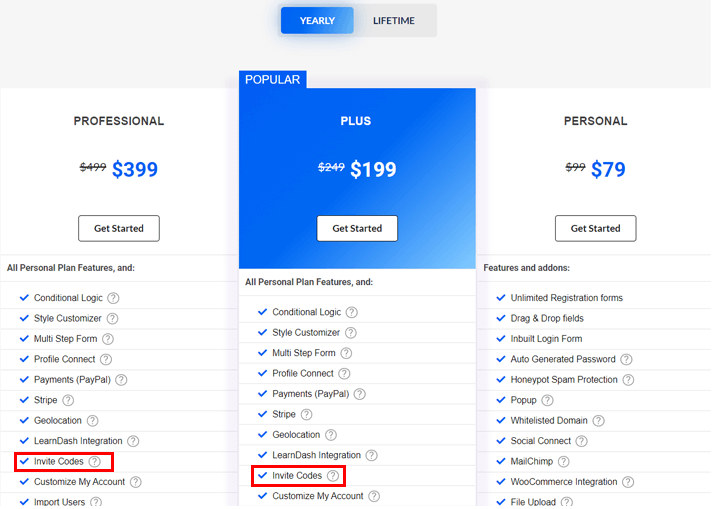
To get started, you must install the plugin. So, visit the official site of WPEverest and go to its pricing page. There are three plans on the pricing page, among which the Professional and Plus plan offers the Invite Codes add-on. So, buy any plan among these two per your requirements and budget.
After you purchase the plan, you’ll receive a confirmation email with login details in the email address you used during the purchase. So, you can log in to your account using the provided details.
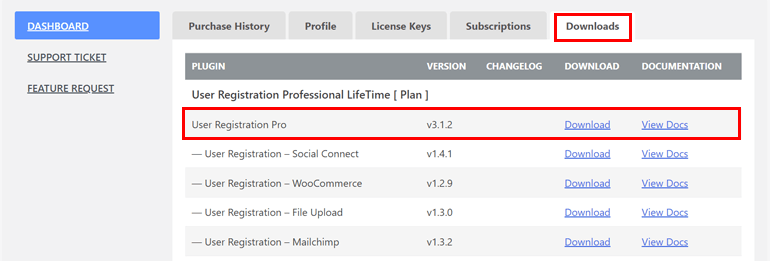
As soon as you log in, it redirects you to the Dashboard. Click on the Downloads tab from here and then download the User Registration Pro file.
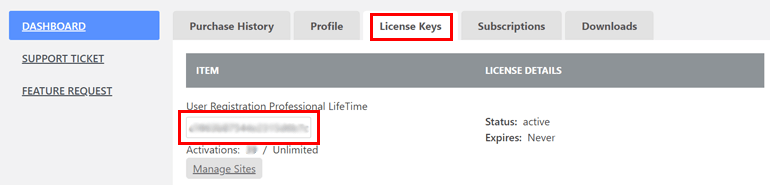
At the same time, from the License Keys tab, copy the license for the plugin and keep it safe with you; you’ll be asked to enter it later.
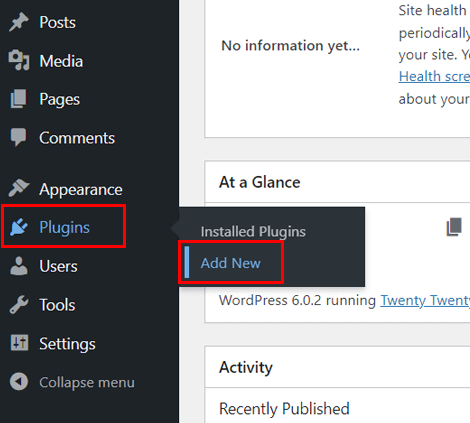
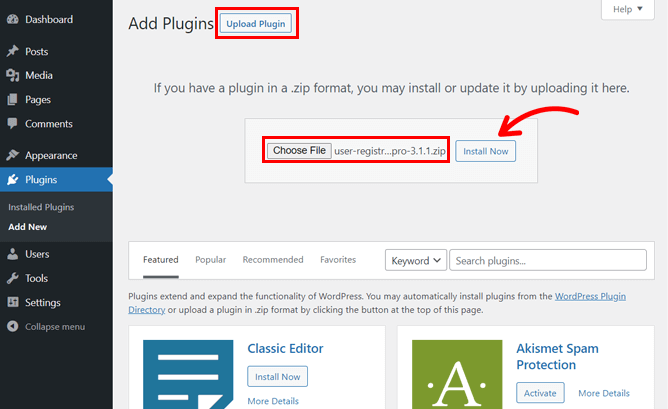
Now, visit your WordPress dashboard to install the plugin on your site. First, navigate to Plugins >> Add New.
Here, click on the Upload Plugin button at the top and upload the zip file you downloaded for User Registration Pro. Next, hit the Install Now button to install the plugin, and finally, click on the Activate Plugin button.
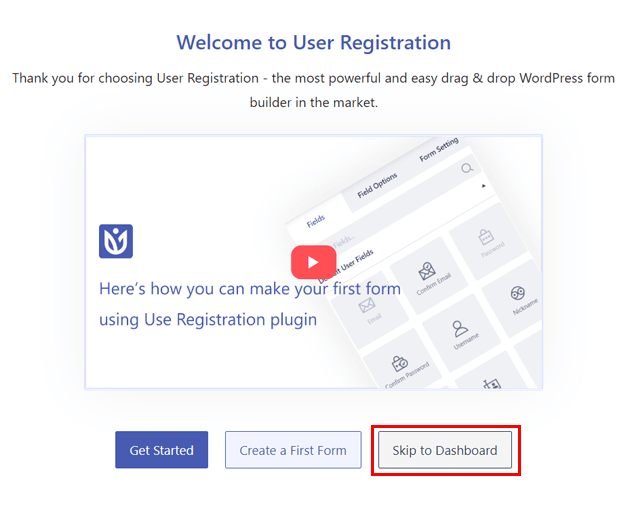
Immediately after the activation, you’ll see a new interface with the welcome message from the plugin. You can choose to Skip to the Dashboard for now.
On the top of your dashboard, you’ll see the message asking for the license key for the plugin. So, click on the link that says Please enter your license key.
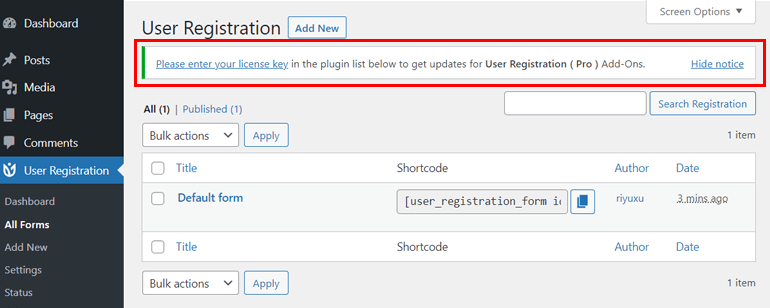
It directs you to the page where you can enter the license key, so paste the key you copied from your WPEverest account.
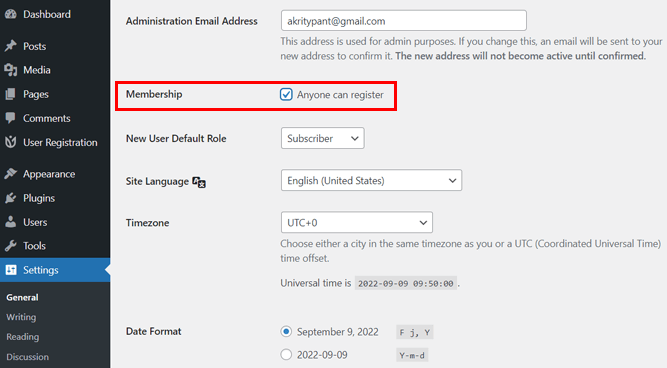
Please remember that to enable user registration on your WordPress site, you must go to Settings >> General and check on the Membership that says Anyone can register.
That’s how you install the User Registration Pro plugin on your WordPress site.
Step 2: Install and Activate Invite Codes Add-on
It’s time to install and activate the Invite Codes add-on on your site. Without this add-on, you can create a registration form but not a WordPress invitation code.
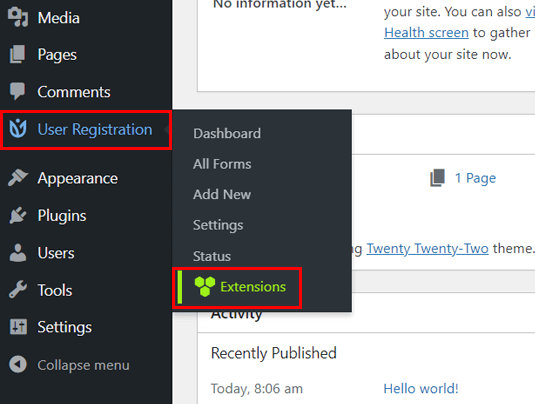
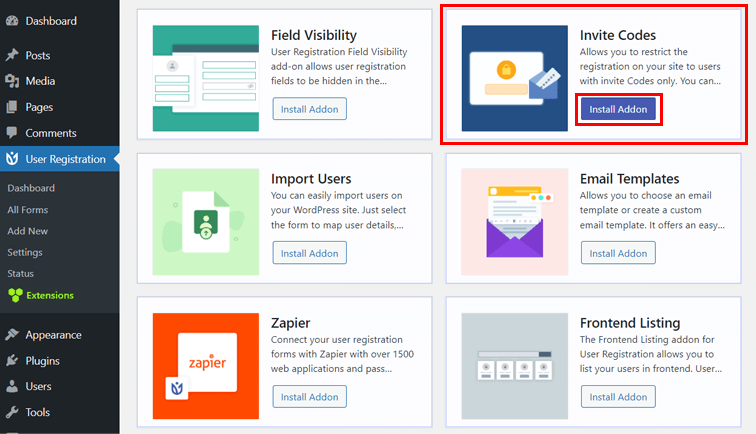
So, from your WordPress dashboard, go to User Registration >> Extensions.
A new page shows up with all the available add-ons from the plugin. Now, look for the Invite Codes. Once you find the add-on, hit the Install Addon button and then the Activate button.
Your site now has a WordPress invitation code plugin and an add-on to create a registration form with an invitation code.
Step 3: Create a Registration Form with Invitation Code Field
To create a WordPress invitation code, you’ll first need to create a registration form with the invitation code field. That’s the field where users can enter the WordPress invite code.
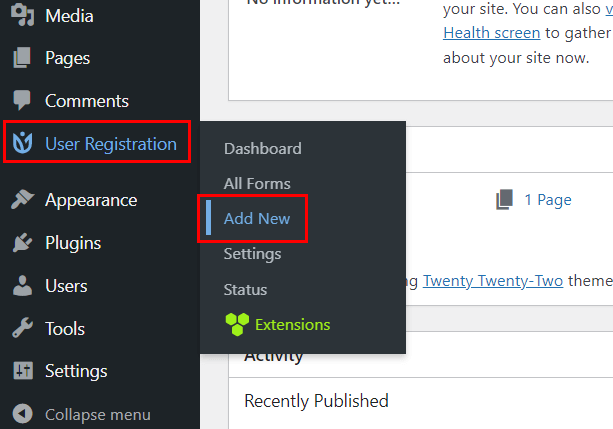
Thus, from your WordPress dashboard, navigate to User Registration >> Add New.
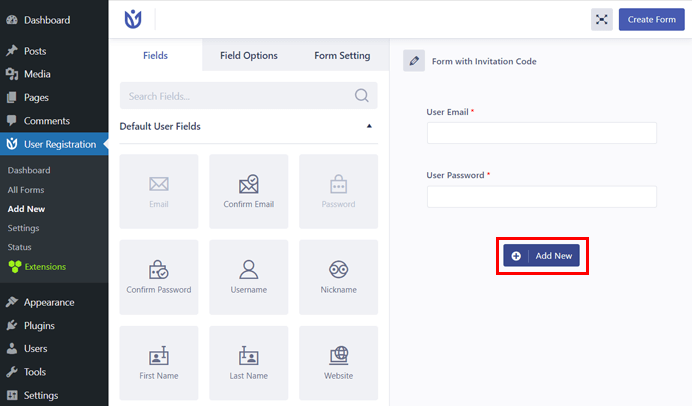
A new form builder interface appears on your screen as shown below:

Click on the pencil icon at the top and give a suitable name for your form.
Now, you can drag the form fields from the left and drop them into your form on the right. Remember that you should click on the Add New button for every new field you want to add.
Meanwhile, if you already have a form built for adding invitation codes, you can open the form and continue with the steps mentioned below.
Next, to add a field for invite codes, scroll down under the Fields option. You’ll see the Invitation Code field; it’s under the Extra Fields section.
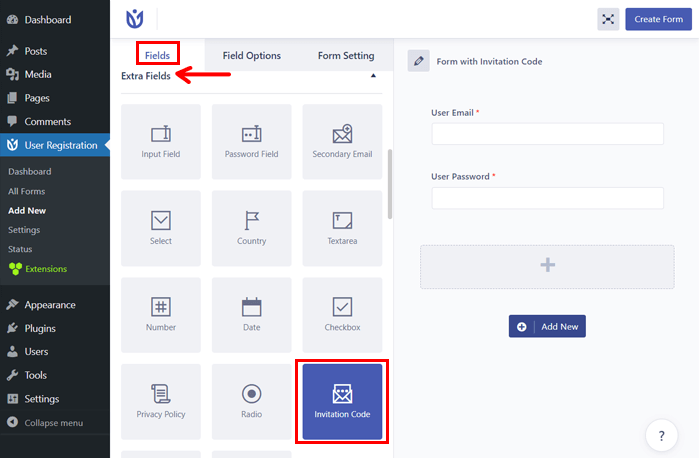
Drag and drop the field on your form when you find it. Thus, users can now enter the invitation code in this field.
For further settings, click on the Invitation Code field on the form, which displays the Field Options on the left.
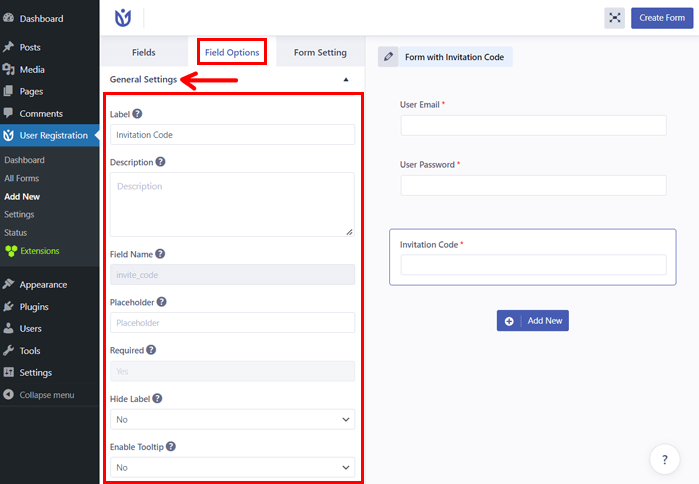
From here, you can change the label from “Invitation Code” to something else of your choice.
Also, you can give a brief Description of the field and add a Placeholder. The field is marked as Required by default. You can also hide the label if you want to. To do so, use the drop-down menu of Hide Label. Once you finish these settings, click on the Create Form button in the top-right corner.
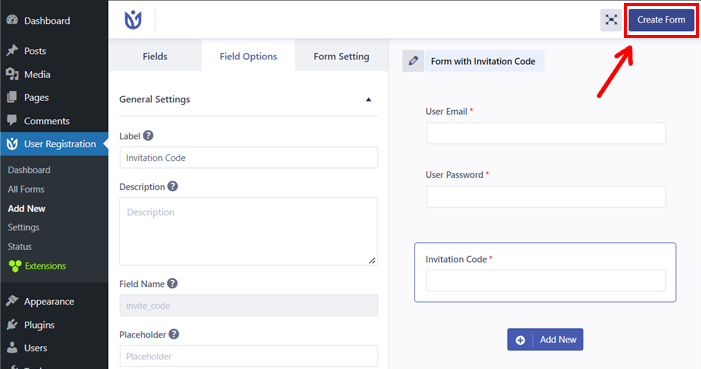
If you’re making the changes to the existing form, you’ll see the Update Form button.
Step 4: Create a WordPress Invitation Code
Now that your form has an invitation code field, you’ll require to create an invite code so that users can enter the same code to register.
For that, navigate to User Registration >> Settings and click on the Invite Codes tab.
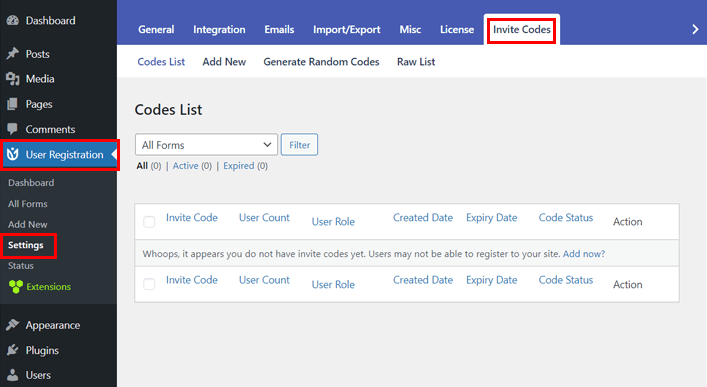
That’s the Codes List page where you can view, edit, and manage the existing codes.
As you might not have any invite codes right now, create new registration invitation codes by clicking on the Add New option. From here, you can add a new code manually and set the user limit and expiry date for the code.
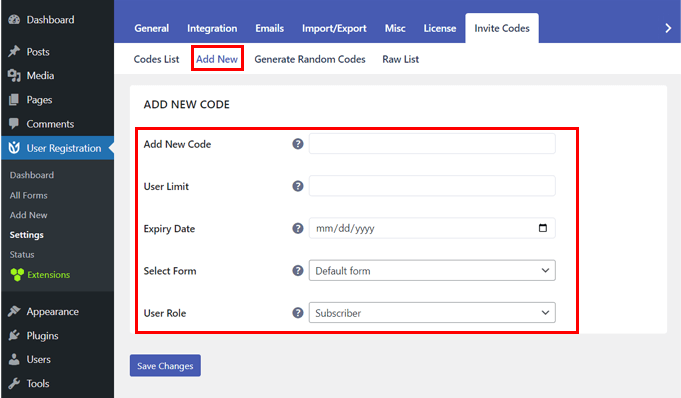
To specify for which form you’re creating the invitation code, choose from the Select Form option. And finally, select the User Role for whom the code is created. Below is a sample of the WordPress invitation code.
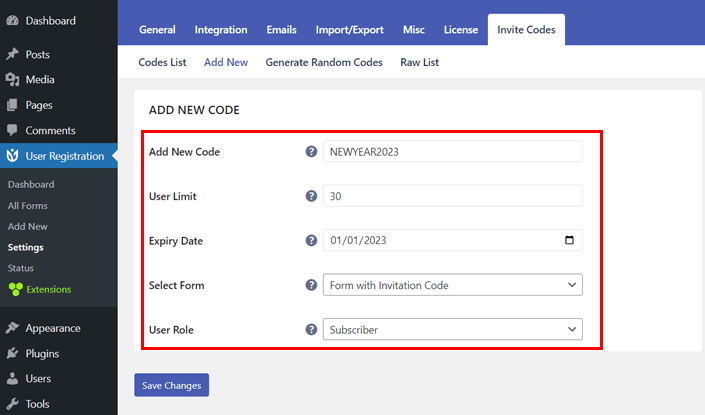
Don’t forget to hit the Save Changes button, when you’re done. You’ll then see a message saying “Code successfully generated.”
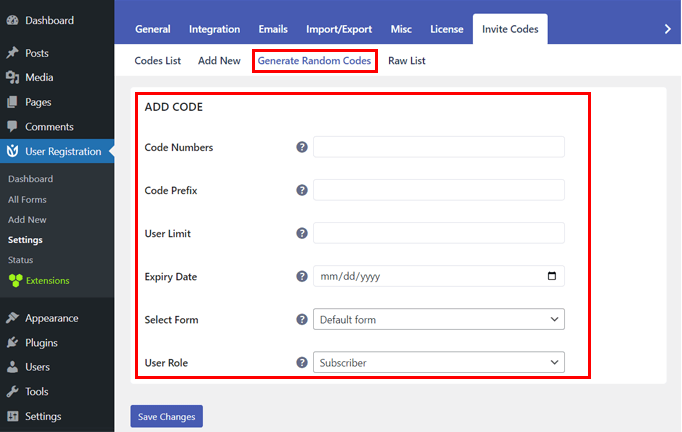
And for the random code generation, click on Generate Random Codes tab. To specify the amount of code you want to generate, enter the Code numbers. Next is Code Prefix, where you can add a prefix to make your code recognizable. The other settings are similar to adding new code.
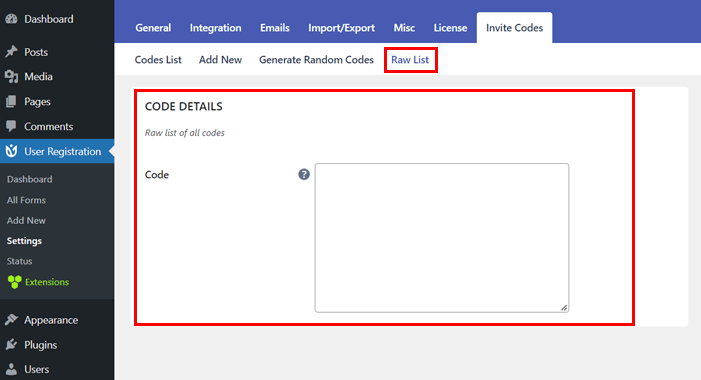
The last tab for the Invite Codes setting is Raw List which consists of Code Details.
Now that you have created a WordPress invitation code for your form let’s configure some registration form settings next.
Step 5: Configure Settings for the Registration Form
Open the form and click on the Form Settings tab for form settings.
To configure general settings, click on the General tab. On the left side, you’ll see the various options for the form.
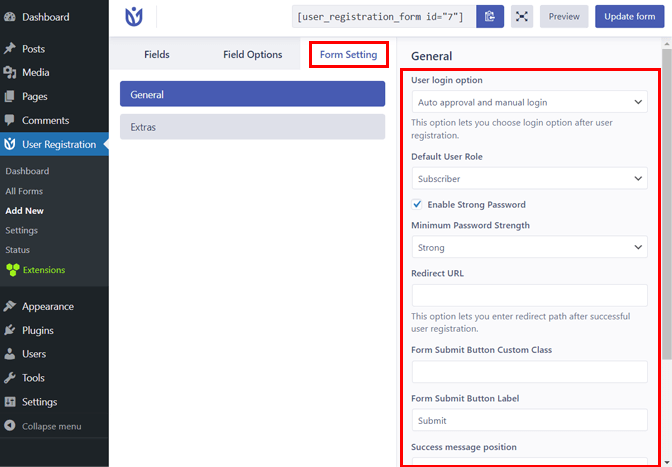
You can set the User login option, assign Default User Role, Enable Strong Password, add Redirect URL, and set many other settings.
Further, under the General tab, it also has an Extras setting option. From here, you can Enable Reset Button so the user can restart filling the form, Enable Form Field icon, activate Auto Generated Password, and Honeypot.
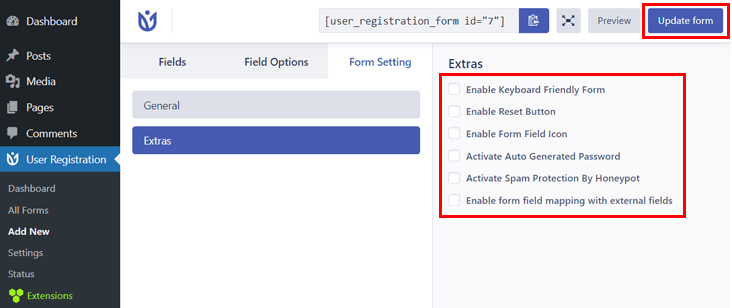
Once you finish configuring the settings, move on by clicking on the Update form button at the top.
Step 6: Publish the Registration Form with the Invitation Code
Finally, it’s time to publish the registration form on your site so that users can enter the WordPress registration invitation code to get registered.
You can add the form to your chosen post or page. So, open the preferred page or post; you can also create a new page or post on your site to publish the form.
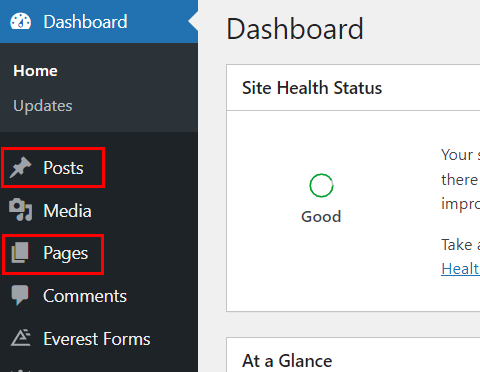
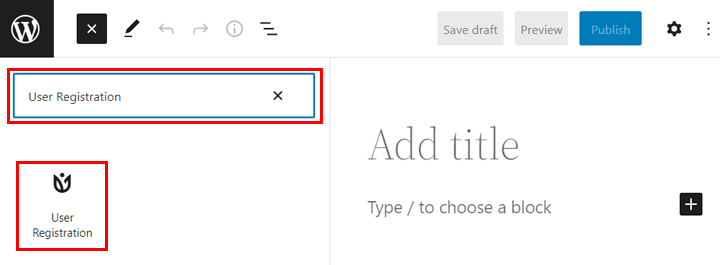
At the top of your page or post, click on the ‘+’ icon, which is a block inserter.
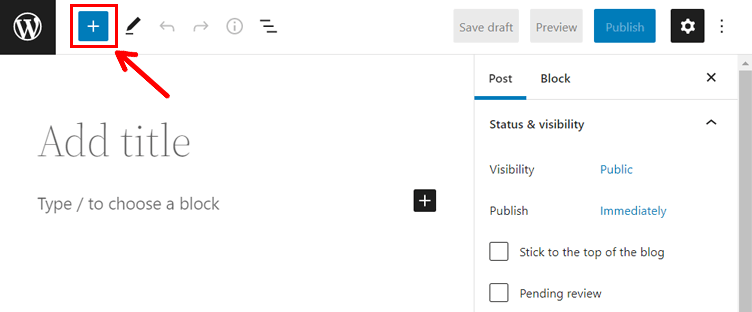
Now, search for User Registration block. As you see the User Registration block, click on it, and the block appears on the right side of the editor.
From here, choose the Registration Form and from the drop-down menu, select the form you created with the invitation code field.
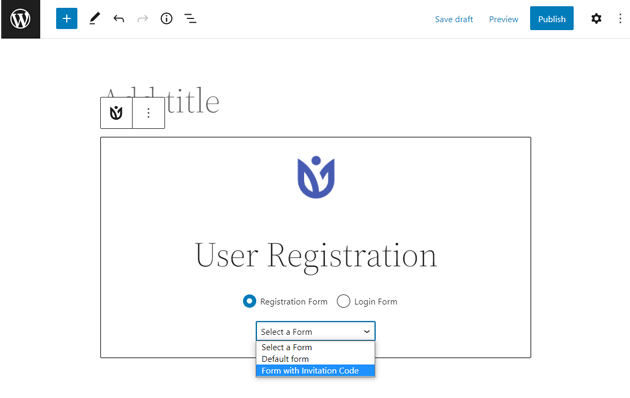
You can give a proper title to the form and click on the Publish button to get the form on your front end. Or, you can also hit the Preview button and see how the form appears on your site before publishing.

Now you can easily register users with the invitation codes.
Step 7: Manage Your Invitation Codes
After your WordPress registration form with the invitation code is live, you can view its code details. For that, go to User Registration >> Settings >> Invites Codes.
On the Code List page, you can view the details of the invitation code created for your registration form. Some details include User Count, User Role, Created Date, Expiry Date, and Code Status for each invite code.
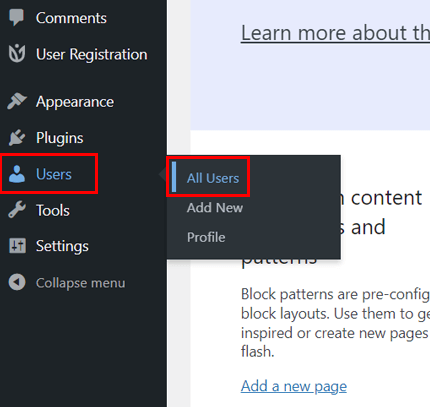
And to view the users with the invite code, go to the Users >> All Users on your admin dashboard.
Similarly, you can create other invitation codes and manage them.
Wrapping It Up!
That’s how you create a WordPress registration form with an invitation code. Easy, Isn’t it? All thanks to User Registration and its amazing add-on – Invite Codes.
Apart from creating a WordPress invitation code, you can also use User Registration to create PayPal payment forms, stop spam registration, add custom fields in registration forms, and many more.
With that, we’re at the end of the article. If you liked our article, please share it in your circle.
For more WordPress-related articles, you can visit our blog page. We have some amazing articles that guide you through creating multi-part forms, stopping user registration spam, and more.
Also, you can follow us on social platforms: Twitter and Facebook, to get a notification on every new article we publish.