Want to learn how to customize a WordPress theme? We can help you!
If you’ve installed a theme for your WordPress site but still want to make changes to it, then you can customize it.
Even after finding the best theme, you might want to change some parts of it to fit your site’s requirements.
And when you customize a theme for your site, you can set a tone and identity to differentiate your site from others.
So, in this article, we’ll teach how you can customize a WordPress theme via four methods. But, before that, let’s briefly discuss why to customize a WordPress theme.
Why Customize a WordPress Theme?
WordPress themes have various niches to fit the particular style of the website. But, even after choosing a theme based on your site’s niche, some elements might not fit your site.
Hence, you can modify the theme to your preference.
Customizing a theme can benefit your site in the following ways:
Makes Your Site Stand Out from Others
As we mentioned earlier, not all but some themes are built to fit a specific niche.
But even such themes tend to look and feel similar to one another. So, you can customize it to differentiate your site from your competitors.
Gives your Site More Structure
To make your site top-rated, it must have an excellent user experience and managed structure in terms of design. This is possible when you customize your site to enhance the user experience.
So, customizing a site can boost your site’s effectiveness and also adds more structure!
Attracts Visitors
While customizing a theme, you can modify colors, fonts, layout, and more to match your site’s brand. So, with the proper customization of elements, you can influence your site’s audience and attract more visitors.
You can even set a trademark to leave an impact based on your site’s visuals!
How to Customize a WordPress Theme?
You can customize your WordPress theme using different methods. Here, we’ll be discussing the four most common and effective methods.
You can use any of the methods explained below, depending on which suits you the best!
1. Using Full Site Editor
Full Site Editing (FSE) is a new and magnificent feature of WordPress that lets you create and edit your entire website using blocks.
It’s a whole new type of editor introduced in the WordPress 5.9 version. You need the 5.9 or later version of WordPress and a ‘block theme’ to use this.
Block themes are a new type of WordPress theme that enables full site editing and are fully customizable with blocks.
With that said, let’s learn how to customize your theme with Full Site Editor.
So, make sure you have installed a block theme.
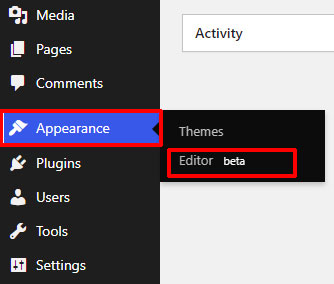
First, log in to your WordPress admin and navigate to Appearance >> Editor.

Clicking on that tab will open the Full Site Editor.
The FSE lets you customize the WordPress pages’ layout in blocks. Also, all parts of the page are under block elements.
Here, we’ll be customizing one of the best block themes eStory. This modern blogging theme lets you customize your site using the Full Site Editor.

eStory has a free and premium version. However, in this tutorial, we’ll use the premium one to customize a site!
i) Customizing Your Colors with FSE
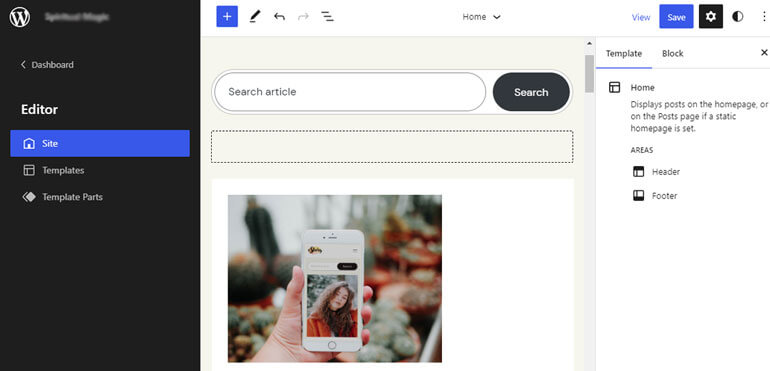
Navigating to Editor will open the Site Editor from where you can customize your site.
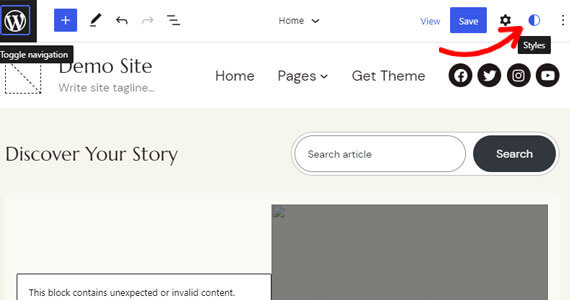
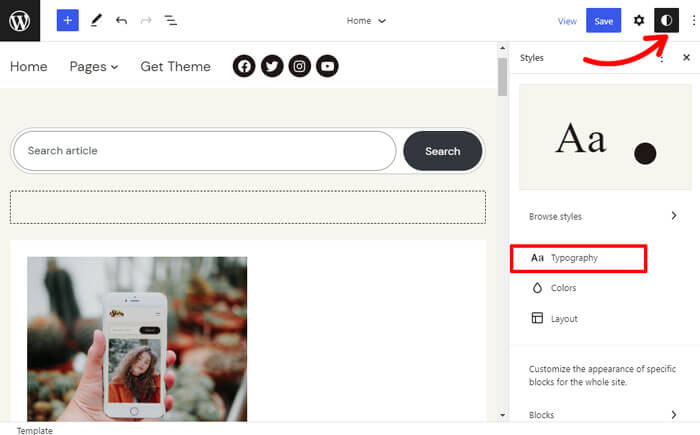
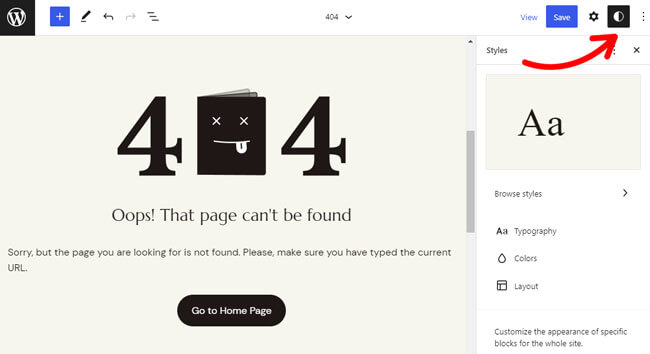
You can customize colors and typography via Styles on the Site Editor. Click on the Styles icon in the top-right corner, which opens the Styles settings.
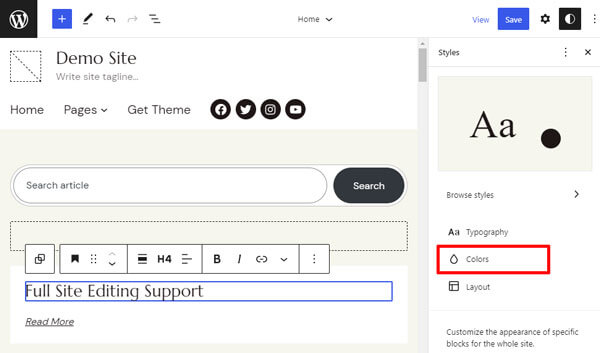
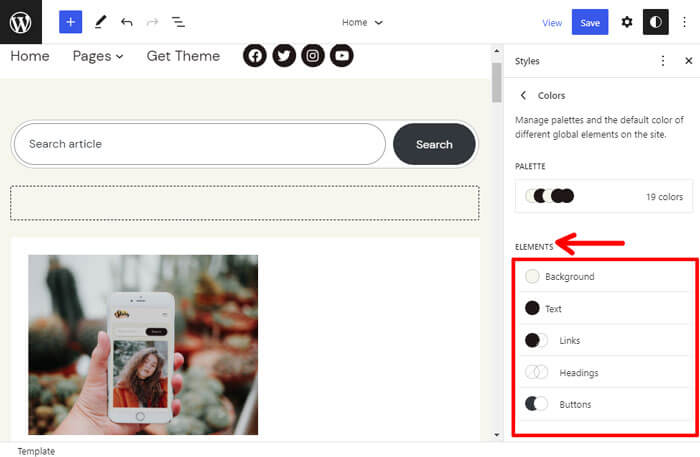
Here, you can edit the theme’s color palettes and fonts. Click on the Colors option to start customizing the colors of your theme.
Now, you can edit the theme’s Color, Duotone, and Gradient palettes. You can also add a custom color palette.
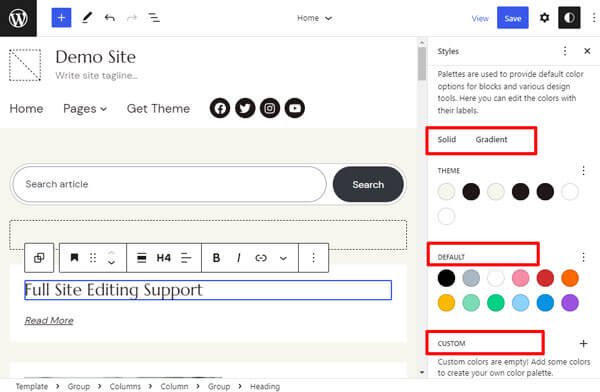
Not to mention, you can also customize colors for different elements like Background, Text, Links, Headings, and Buttons.
Here, we’ve selected a color for a Heading from the color palette, as shown below.
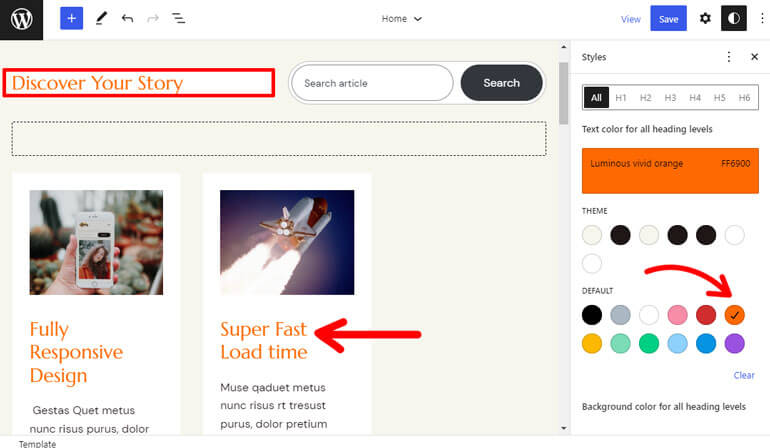
Also, your changes in Styles will be automatically reflected in patterns that use colors. Further, it’ll be reflected everywhere you’ve used the color already.
So, you should use colors from the color palettes rather than custom colors when you customize colors on the blocks of your page and post.
ii) Customizing the Typography
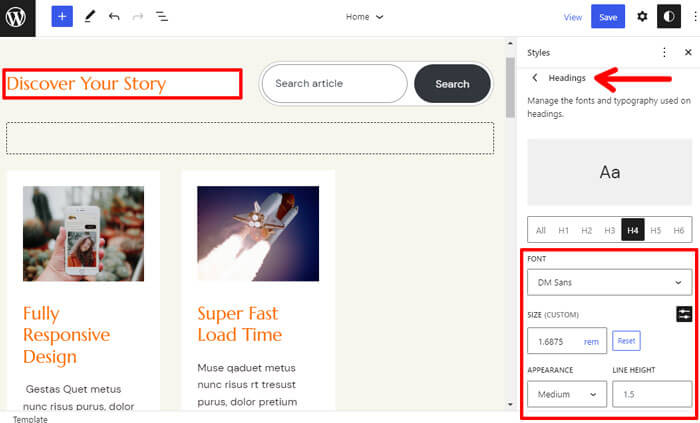
Next, to customize the fonts, click on the Typography option under Styles.
You can now set fonts for your Text, Links, Headings, and Buttons.
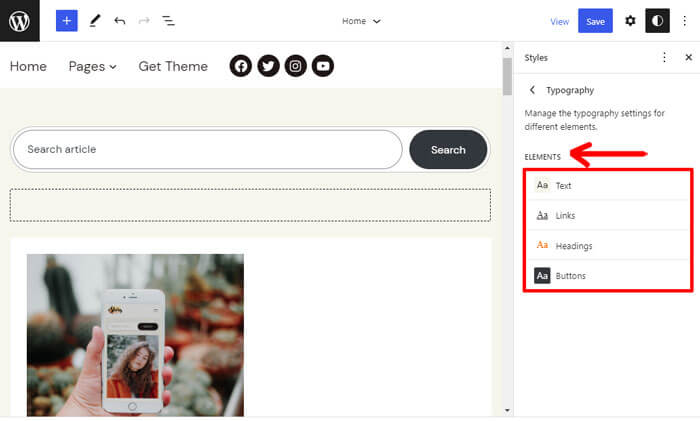
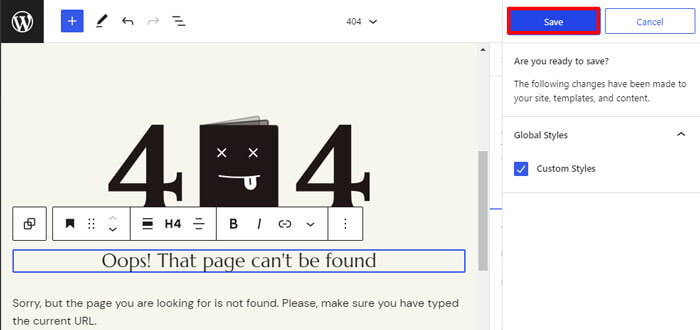
Here, we’re changing the font for a Heading, as shown below. You can set the font among available options and choose size, appearance, and line height as per your requirement.
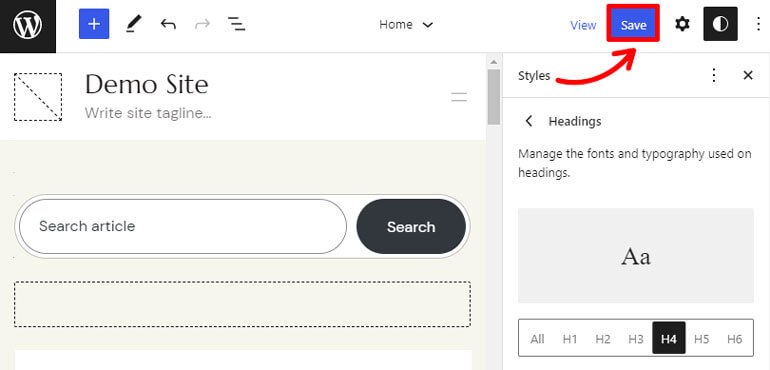
After customizing the colors and typography, don’t forget to hit the Save button to save the changes.
iii) Customizing Your Site’s Header with FSE
Now, you can see the WordPress logo button at the top left corner.
Click on it to open the Editor.
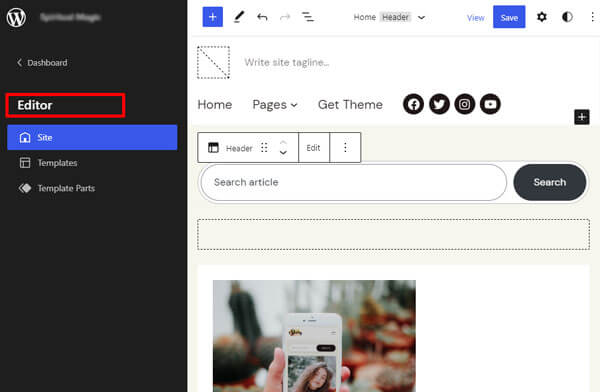
Here, you can see three tabs: Site, Templates, and Template Parts. So, click on the Template Parts to customize your site’s header.
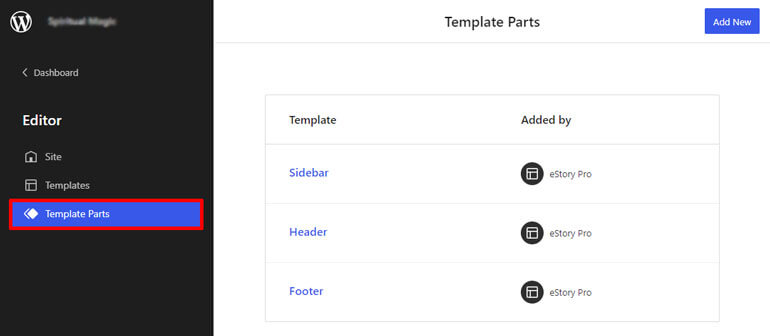
Here, you can see the Header option. Next, click Add New to edit the existing header or create a new one.

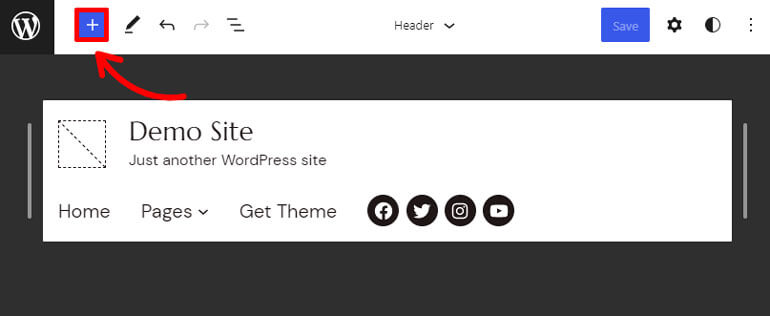
Now, you can design your header’s appearance and layout. You can customize your header with the help of blocks. Click the “+” button to search and choose the blocks you want in your header.
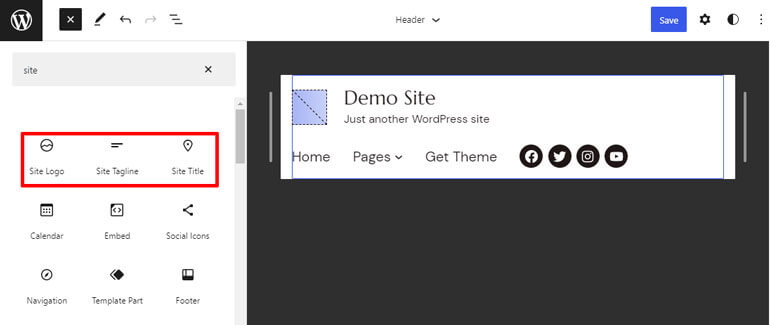
In the header area, you can add blocks like Site Title, Site Logo, Site Tagline, etc.
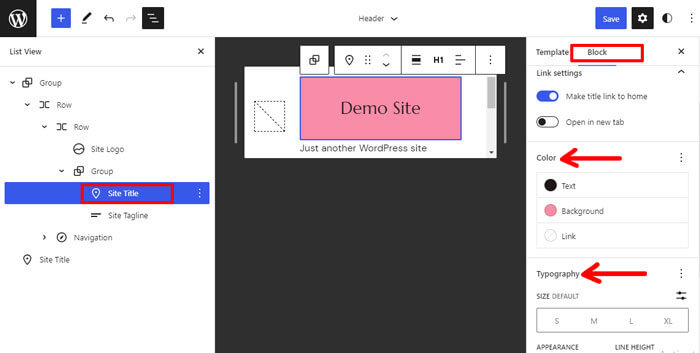
After adding your desired block, you can customize it with the settings in the sidebar. Click on the button shown below to open the sidebar and click Show more settings.

For example, we’ve added the Site Title block and customized it as per our preference.
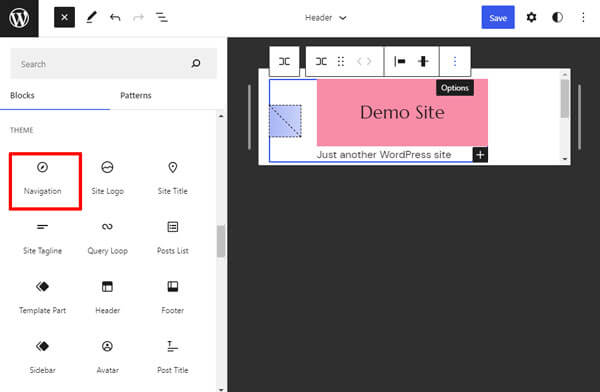
Another essential block on your header is the Navigation block. It’s because the blocks help to set up your site’s menu.
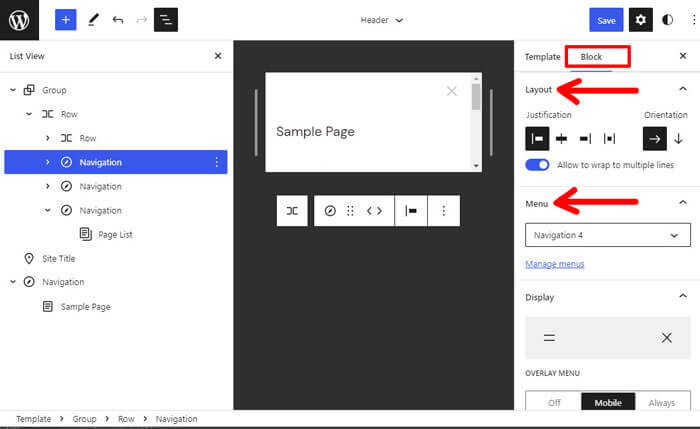
After adding the Navigation block, you can select menus and customize them on the toolbar. Also, you can see a three doted option beside each menu. Click on it to see an option called Show more settings.
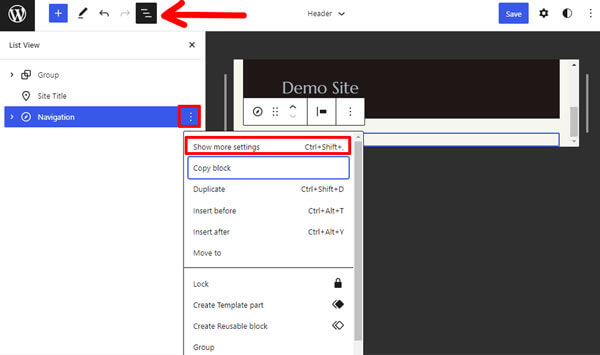
Clicking on Show more settings will open another set of customization options. Here, you can customize the layout and menu you want to feature in navigation.
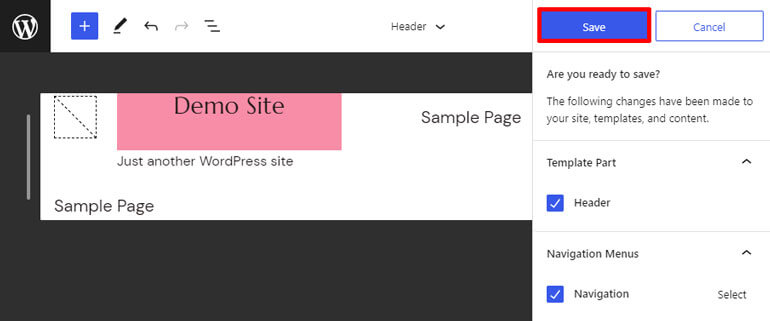
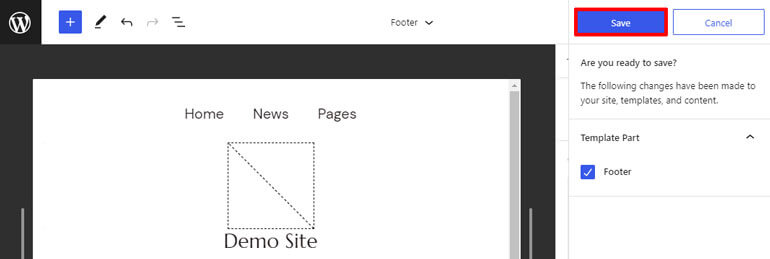
So, when you’re done designing your header, you can simply save it by clicking on the Save button.
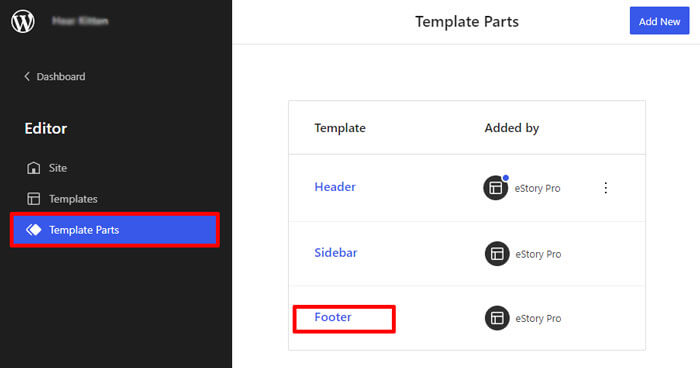
iv) Customizing Your Site’s Footer with FSE
You can customize your site’s footer similar to the header. Click under the same Template Parts tab of the Editor, and now you can see an option to customize the footer.
To add the blocks, click the “+” button and add the blocks you want to your footer.
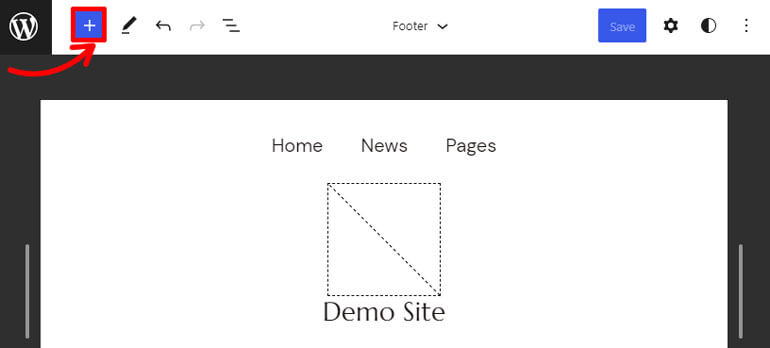
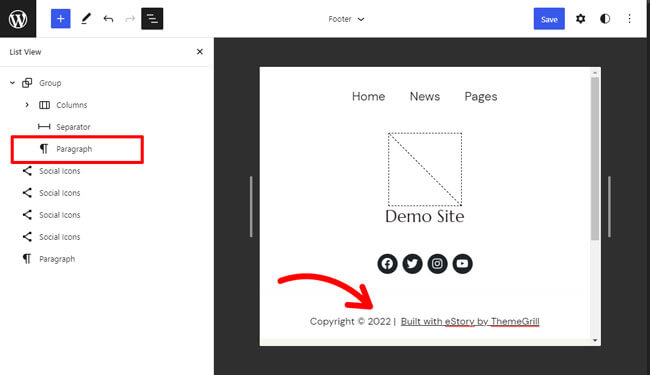
You can add blocks like social icons on your footer.
Here, we’ve added the Paragraph block to add a copyright message for a site.
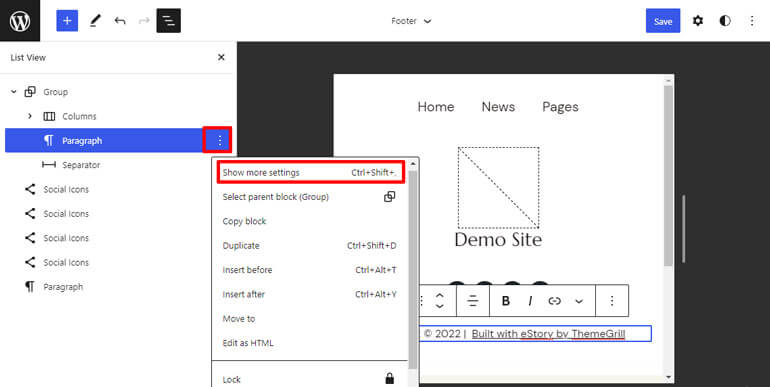
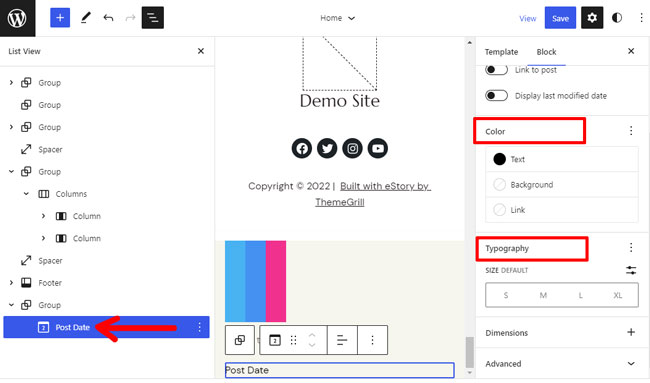
Similarly, click on the three-dotted option on the sidebar of the block to show or hide more settings options.
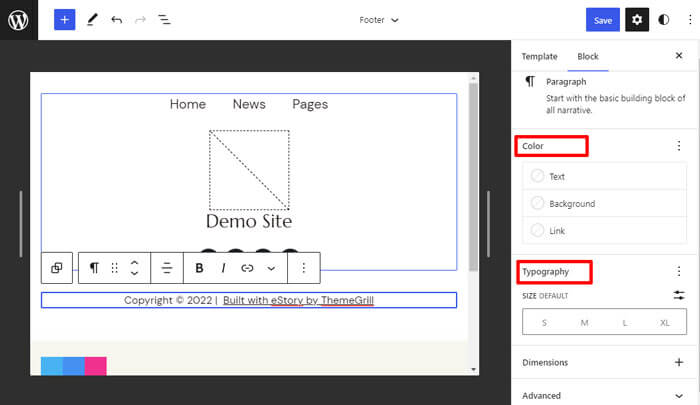
You can change and customize the color, typography, dimensions, etc., of the blocks from here.
And finally, don’t forget to click the Save button on top to save the changes on your footer.
v) Customizing Your Home Page with FSE
Your homepage is the first thing visitors see when they land on your site. So, before customizing your homepage, you need to choose the homepage option between Latest Posts or Static Page.
Simply put, if you choose Latest Posts, your homepage will display all your latest posts. So, every time you post a new blog post, it’ll be shown on your home page alongside past posts.
And as for Static Page, if you choose this option, it’ll let you create and display specific content like adding buttons to redirect visitors to another page, additional information, etc.
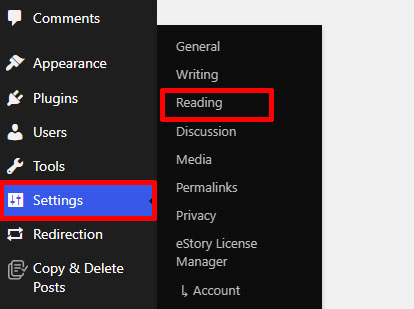
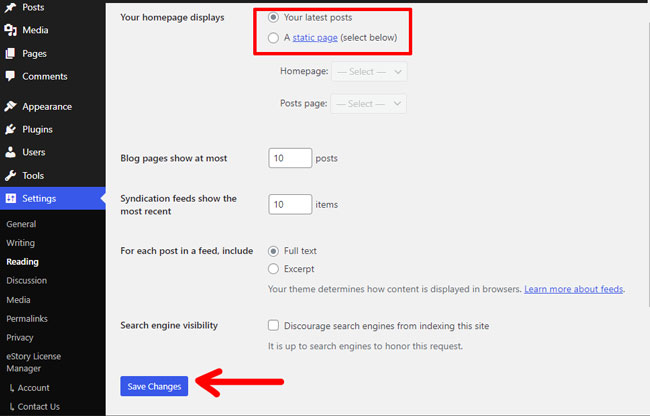
So, to choose between Latest Posts and Static Page, go to Settings and navigate to Reading on your dashboard. You’ll see an option called “Your homepage displays.”
Choose between “Your latest posts” or “A static page” as your preference and hit the Save Changes button.
Next, go to Appearance>>Editor.
In the Editor, click on the WordPress icon at the top left.
And click on Templates.
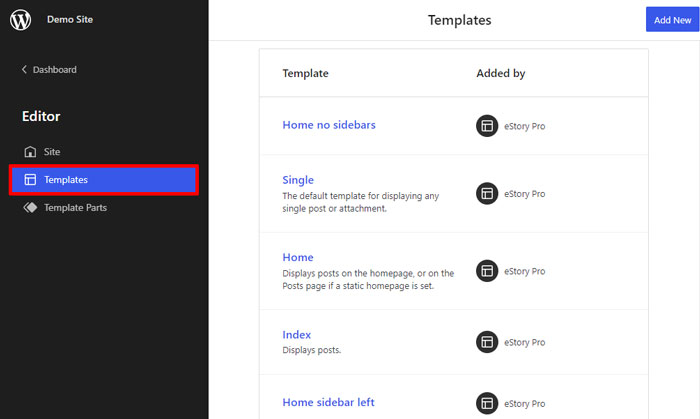
You should also know that in most cases, the home page templates load by default in the Site Editor.
After clicking Templates, you can see template options like Page, Search, Home, Index, etc.
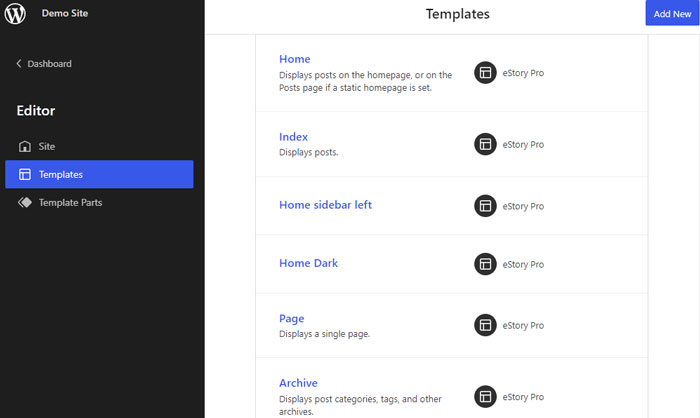
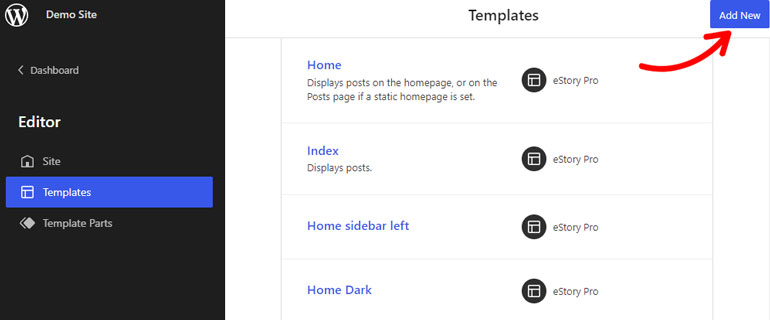
And if you don’t see the required templates, you can always click on Add New and add the templates.
Back to Templates, open the Home options to customize your home page.
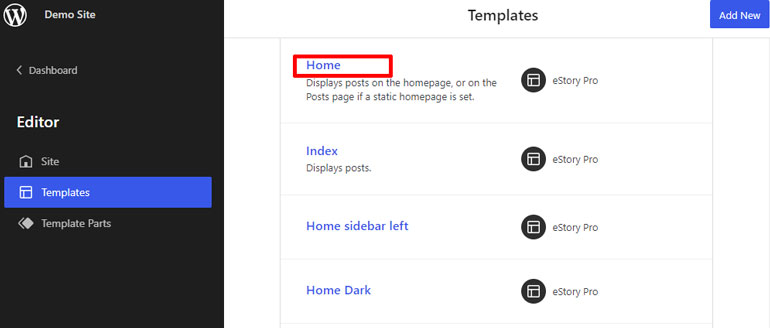
Now, to add a new block to your homepage, click the “+” icon on the top left and scroll down to find the theme block.
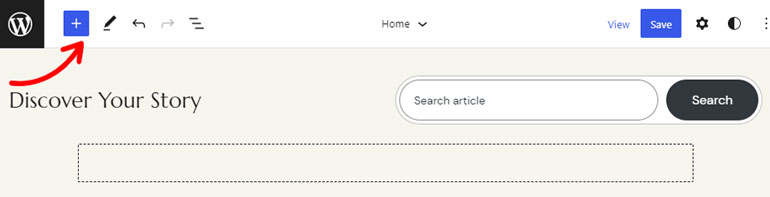
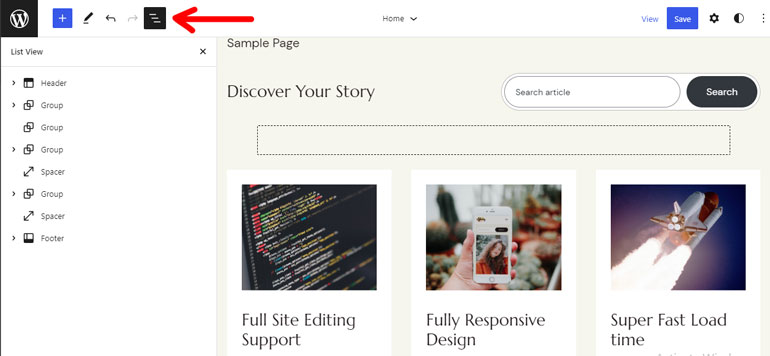
Next, click on the 3-lined icon to open the List View. Here, you can modify the alignment of your Home Page’s header, footer, image, etc.
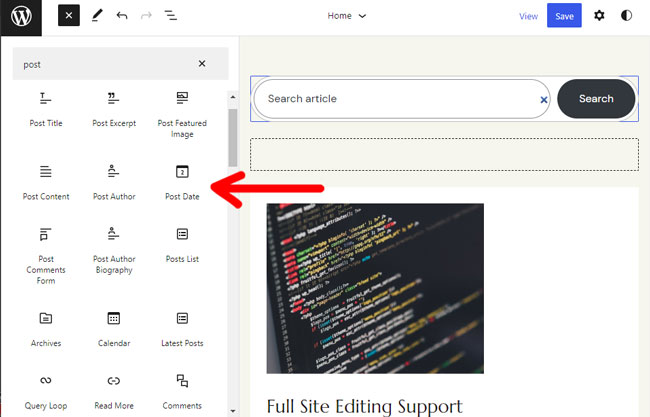
Here you can find blocks like Post Date, Posts Lists, Post Content, Post Featured Image, etc., that can be useful on your site’s Latest Posts home page.
Here, we’ve added those blocks to create a home page and customized colors, typography, images, etc.
Add the block you want to customize your home page and hit the Save button to save changes on your Editor.
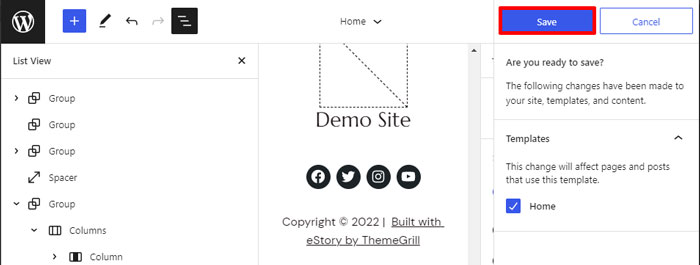
vi) Customizing the Layout of Internal Pages
Next, internal pages are also as important as the site’s home page.
So, your internal pages include elements like Search Results Page, 404 error page, Single page, etc.
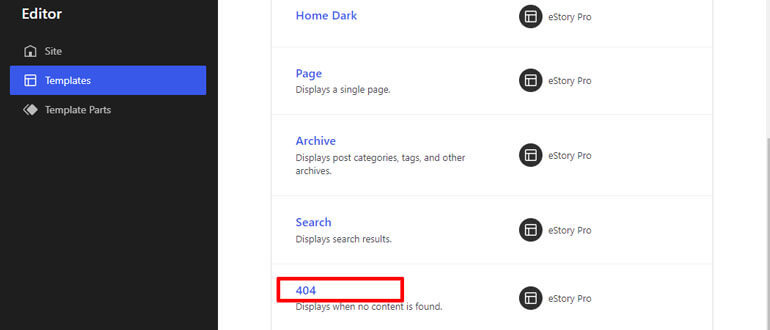
Open the Templates tab inside Editor to customize your internal page with the eStory theme. You can see the template for Search, 404, and more here on your site’s internal pages.
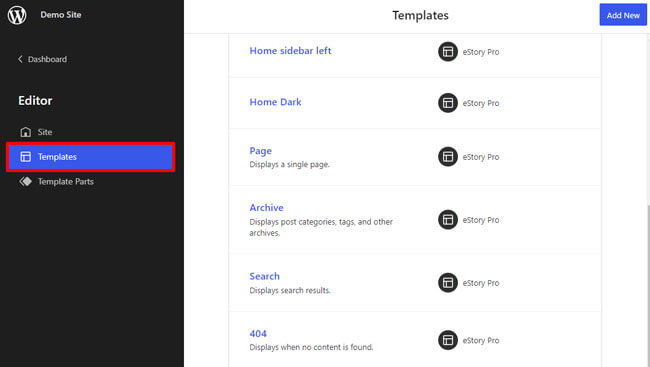
For example, we’ll be opening the 404 page for customization.
In the List View, you can see different blocks like Header, Spacer, Footer, etc. You can add more blocks to display on the 404 page or customize the existing blocks in the template.
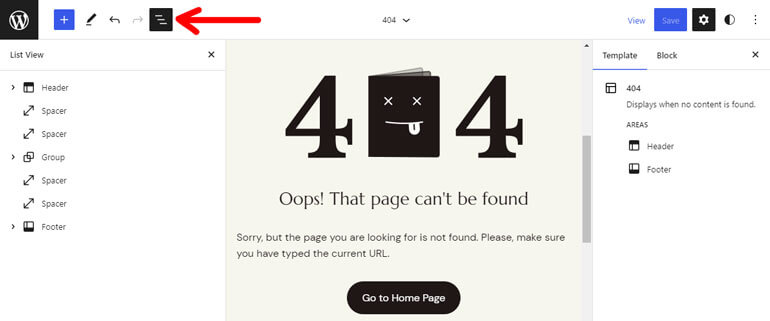
You can modify the page’s colors, typography, and layout via Styles on your top right corner.
Similarly, you can customize other internal pages and save changes by clicking the Save button.
2. Using Theme Customizer
The WordPress customizer is the easiest solution to customize any WordPress theme. If your theme doesn’t support the Full Site Editor yet, you can use this method to customize your theme.
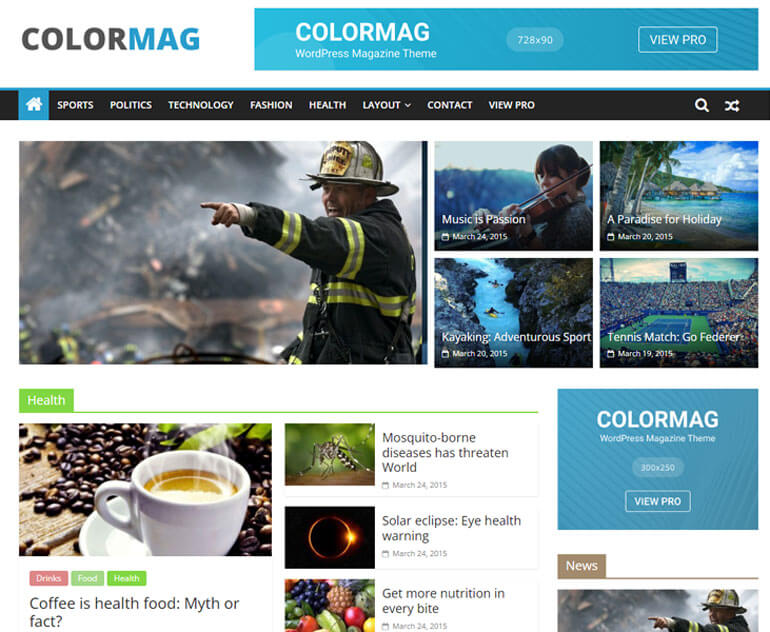
Here, we’ll customize the best magazine WordPress theme – ColorMag.
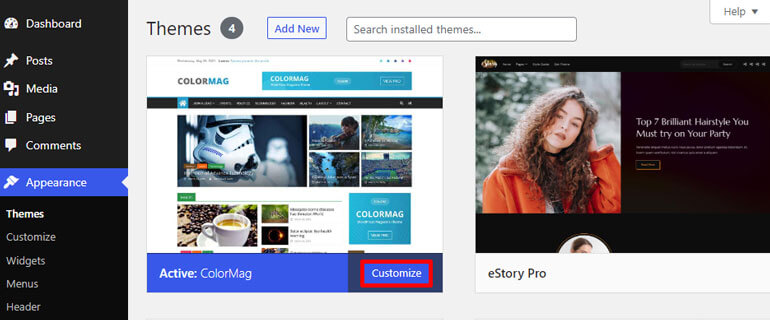
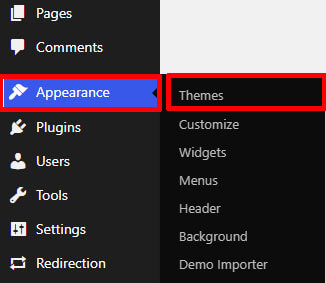
Firstly, navigate to Appearance >> Theme.

Next, click on Customize button of the active theme you want to customize.
You’ll now be redirected to the Customizer. On the left sidebar, you can see various customization options below:
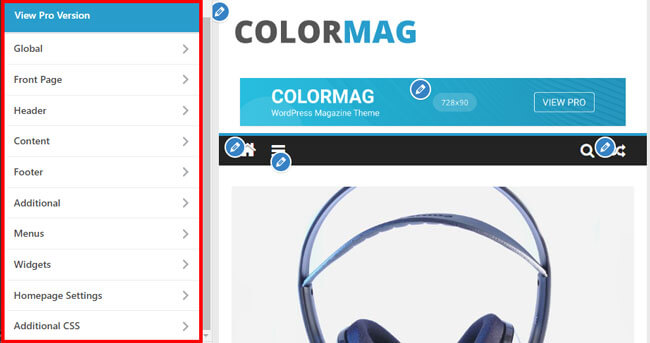
- Global: With Global settings, you can customize the width of your site’s content area, change the site’s primary and heading colors, and change the link’s color text.
- Front Page: You can enable or disable the latest blog posts or static page content from here. You can also set a unique post system and customize the width of the front page!
- Header: It allows you to change the site logo, icon, title, and tagline alongside header media. You can also customize the date and news ticker in the header.
- Content: You can set the layout, include feature images for a single post, and much more from the Content setting.
- Footer: It lets you customize design, typography, and also the footer bottom bar. Further, you can add buttons like scroll to the top from the footer setting.
- Additional: The additional setting lets you customize more, like adding social icons, integrating external API, and more.
- Widgets: You can add different advertisements on your site using the widget settings. It’s best suited for areas like Header, Footer, and Sidebar.
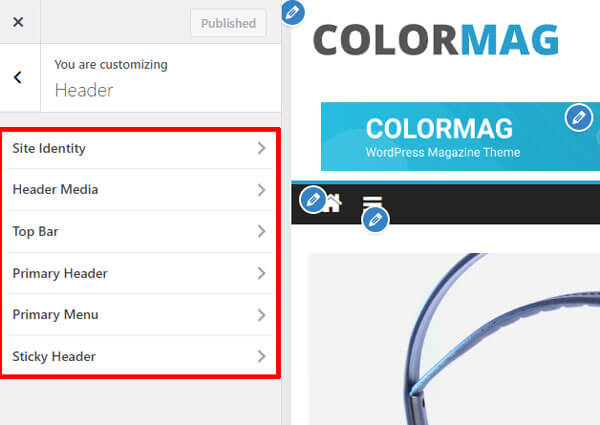
So, with that said, we’ll show a simple example of how you can customize the Header settings of the theme.
You need to navigate to Appearance >> Customize >> Header. Inside Header settings, you can customize header media, primary menu, site logo, icon, title, sticky header, and more.
For example, let’s see how you can customize the header layout and style.
After you navigate to Header, you need to open the Primary Header option. So, you get 3 header styles with ColorMag’s free version.
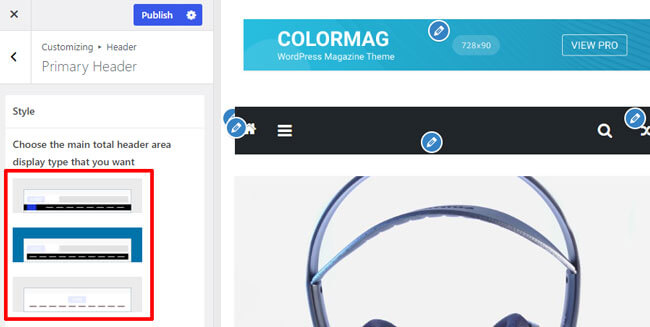
The different styles include elements like primary menu full/container width with light/dark background alongside different placement of site identity.
You can also modify the header elements like Site Identity. You can choose from 3 types, including different placements of header text, logo, and header sidebar.
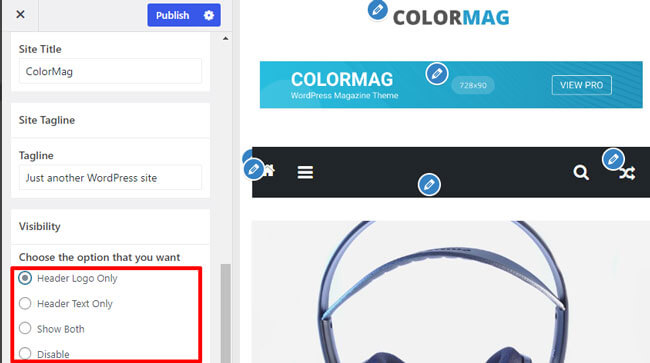
Further, you can change the color, background, and layout under the Global setting.
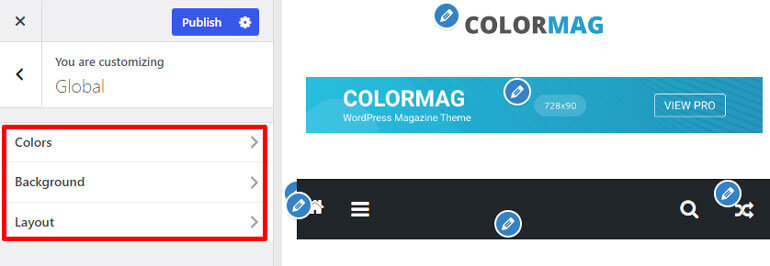
Similarly, you can customize other options for the ColorMag theme using the customizer!
3. Using Page Builder Plugin
You can also customize your WordPress theme with page builder plugins. There’re various page builder plugins like Elementor, Brizy, etc.
One of the most popular ones is Elementor. It’s a drag-and-drop visual editor plugin with an advanced design to build any site. So, for this tutorial, we’re going to use Elementor.

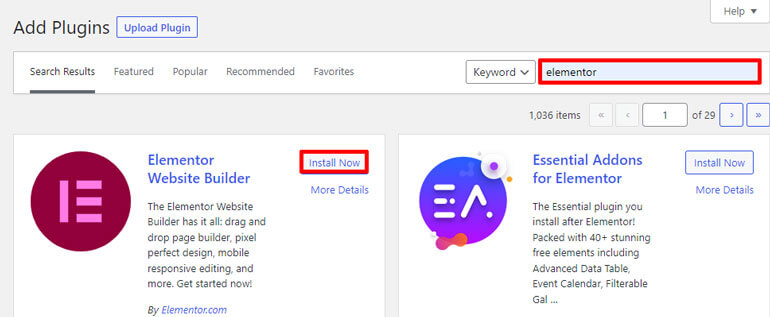
Your first step is to install and activate Elementor. For that, go to Plugins and click on Add New from the sidebar of your WordPress dashboard.

Now search for Elementor on the search bar, and it’ll appear in your search results. Click on the Install button.
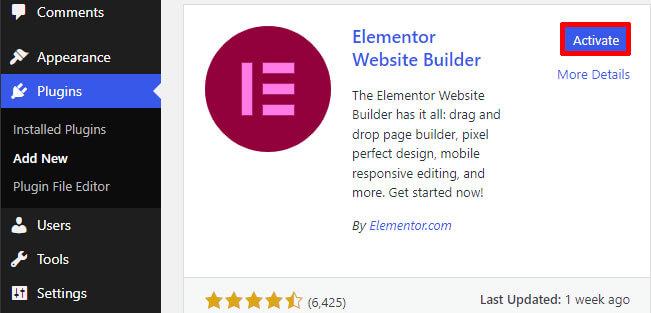
And finally, Activate the plugin.
So, your site’s main page is your home page that users see when they land on your website. It’s a landing page, so creating a great-looking homepage for your site is essential.
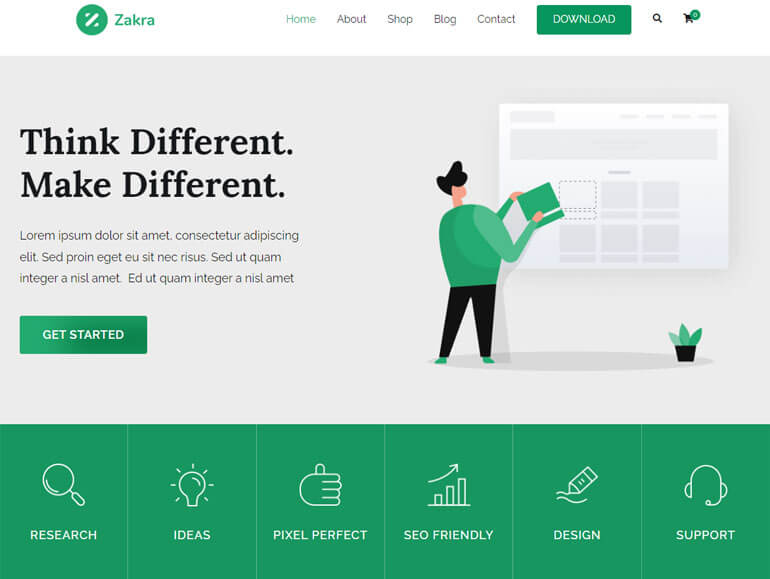
Zakra is the best multi-purpose theme that offers several demos to create any niche website. So in this tutorial, we’ll show how you can customize your home page with the Zakra theme and Elementor.
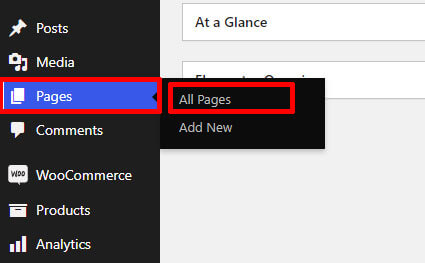
In your WordPress dashboard, open Pages and click on All Pages. Here, you’ll be taken to a page with various titles.
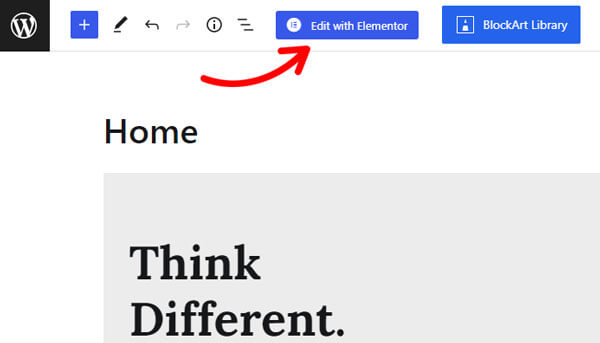
Search for “Home,” If you’ve imported a demo created with Elementor, you can see an option called “Edit with Elementor.” Click on it to start customizing your homepage.
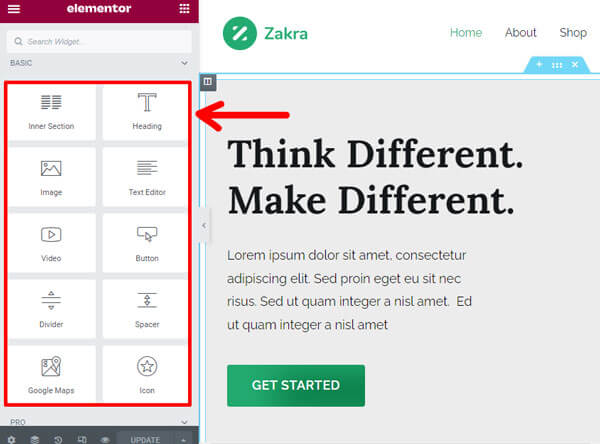
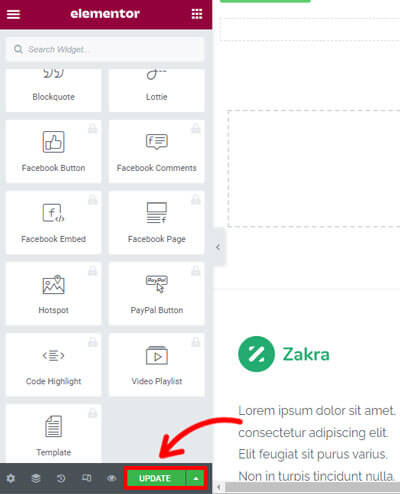
Now on the left side, you can see widgets like Text, Buttons, Images, Social Media, etc. Further, you can use Elementor’s WooCommerce widgets if you’re an online store site.
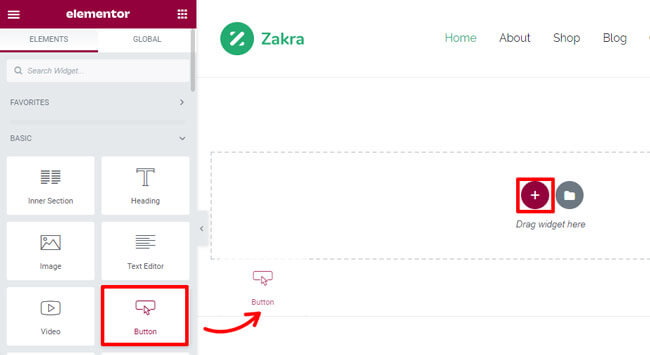
Click on the “+” icon to add new widgets, and drag and drop the widget you want on the right side. Elementor lets you add as many widgets as you wish.
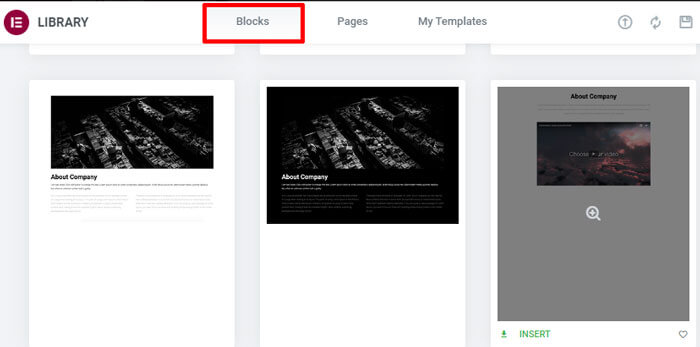
You can also import pre-made page templates and blocks. To do that, click on the Add Template button.
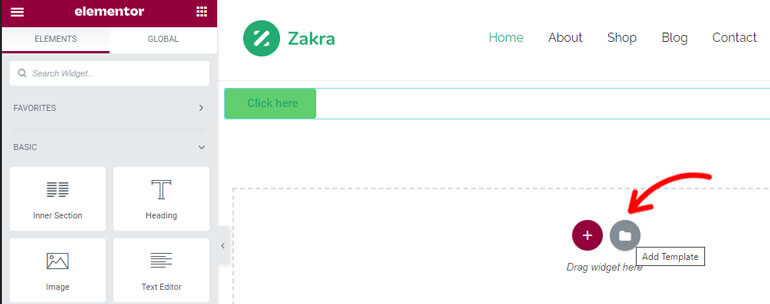
When you do that, a pop-up appears where you can find in-built pages and blocks.
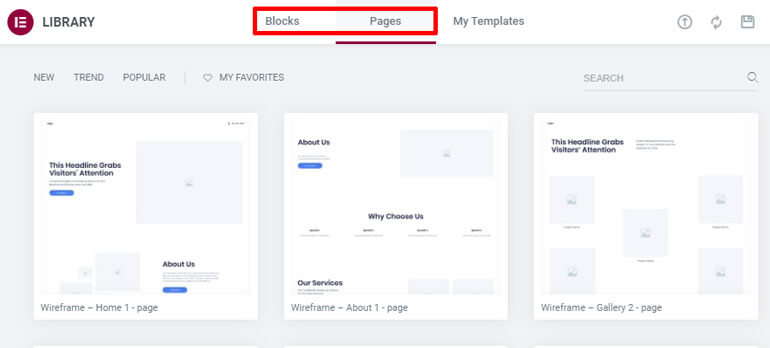
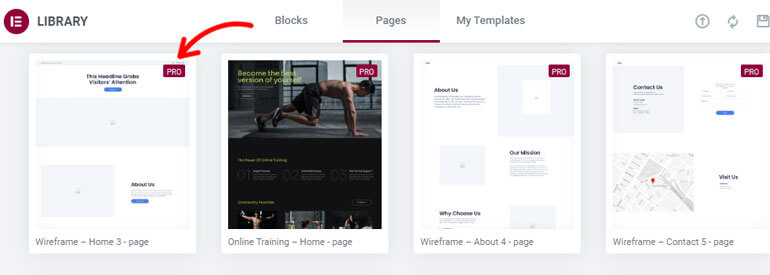
You can also see premium templates here. To access it, you can upgrade to Elementor’s pro version.
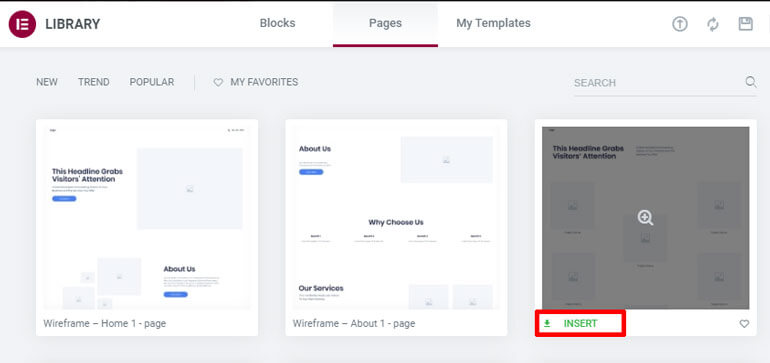
Next, choose a template you like, hover over it, and press the Insert button.
Further, you can add different Blocks to design your homepage.
Lastly, click the Update button to save the changes!
4. Using Theme Framework and a Child Theme
If you don’t want to use a page builder plugin, you can also use a theme framework to customize your WordPress theme.
There’ll be one parent theme that’s considered a framework and a child theme that can be used to customize the main theme.
Child themes let you customize your theme without changing the parent theme file. So, instead of modifying theme files directly, you can simply override them with the templates in the Child theme.
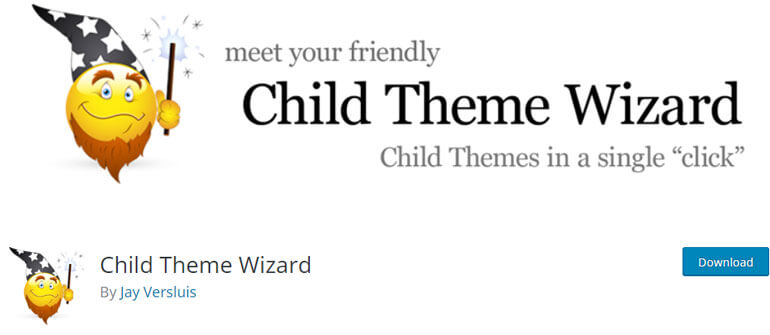
You can create a child theme if you’re familiar with Style.CSS and PHP. Or, if you want to avoid engaging yourself with coding, you can use a plugin called Child Theme Wizard that lets you create a child theme.
How to Create a Child Theme?
We’ll teach you how to create a Child Theme using the best multipurpose theme Zakra.
You can do it using a Manual Method and a Shortcode Method.
To learn the manual method, you can follow our easy tutorial for creating a Child theme.
Shortcut Method
There’s another method to create a Child theme within a few steps.
As the name suggests, creating a child theme is a simple shortcut.
You can download the starter zip file of the Zakra Child theme from here: https://themegrill.com/blog/wp-content/uploads/2014/08/zakra-child.zip
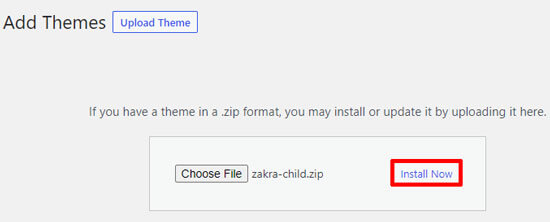
After downloading it, open your WordPress dashboard and navigate to Appearance >> Theme. Then, click on Add New and press Upload Theme to upload your downloaded file.
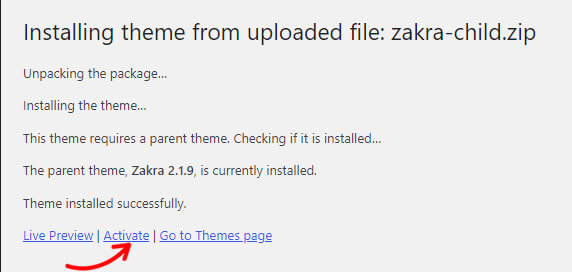
Lastly, click Install Now to get it installed.
Now, hit the Activate button to use the Zakra child theme.
After creating and activating your Child Theme, you can fully customize it as your preference!
Best Customizable Themes
1. Zakra
Zakra is a modern multipurpose theme that’s the ultimate solution to creating any site. You can choose from Zakra’s 80+ starter templates to build any niche site.

You get starter templates for blogs, eCommerce, business, agency, portfolio, etc. It’s a highly customizable theme with many customization options like Header, Footer, Homepage Settings, Menu, and much more.
Key Features
- Integrated with WooCommerce to create an online store.
- Pre-built demos can be imported with a single click.
- Compatible with major page builders like Elementor, Brizy, etc.
- Offers 100+ customization options.
- Offers 30+ page settings options.
Price: Zakra has both free and premium versions. You can download the free version from WordPress.org. As for the premium version, Zakra has the following plans:
- Personal: $58.65 for a Single Site
- Personal Plus: $66.75 for 3 Site License
- Developer: $209.30 for Unlimited Sites License
2. ColorMag
If you’re searching for a highly-customizable magazine theme, ColorMag is the one. The theme is best for creating news, magazine, and blogs related sites. It’s a top-rated theme with over 1250 5-star ratings with 100,000+ active installations.

You can choose from its 25+ starter sites that can be imported with a single click. The theme has everything you need to customize your site. You can customize typography, widgets, and everything else with ColorMag!
Key Features
- Super-fast speed with proven results in different speeding tools.
- Starter sites to fit various kinds of magazine sites.
- Offers Unique Post System.
- Integrated with page builders- Elementor, Gutenberg, and more.
- Clean-coded to maintain safe security.
Price: It’s a freemium theme. You can purchase the premium version for $59 for a Single Site License.
3. eStory
eStory is a WordPress block theme for any WooCommerce site. It’s entirely designed with Full Site Editing in mind. With eStory, you can use 25+ block patterns alongside more than five starter sites.
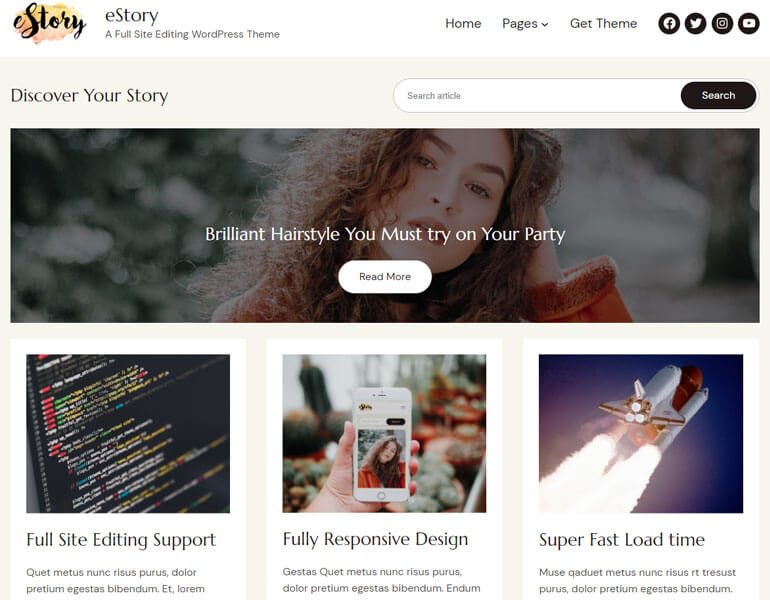
To add more, the theme offers 5+ pre-built templates with various layouts. The theme allows you to customize it based on color options, widgets, typography, and more.
Key Features
- Site Editor for customization.
- Offers header and footer layouts.
- Fully compatible with WooCommerce and YITH WooCommerce Wishlist plugins.
- Responsive design to fit different screen sizes.
- 100% compatible with page builders like Elementor, Brizy, etc.
Price: Free
Conclusion
Finally, we’ve reached the end of the article on how to customize a WordPress theme. We hope you can choose one of the four methods we described, depending on your site and theme.
While choosing and searching for a theme, you may like another website’s theme and wonder how to find out the site’s theme.
We can also help you with that with our article on finding a WordPress site’s theme. Further, if you’re searching for themes, we can help you pick one with our list of the best multipurpose WordPress themes.
Want to read more? Check out our informative blog that has everything related to WordPress.
Also, if you want to stay updated, follow us on Twitter and Facebook!
Happy Reading.
Disclaimer: Some of the links in the post may be affiliate links. So if you purchase anything using the link, we will earn affiliate commission.
