Do you want to learn how to delete pages in WordPress? Well, stick with us till the end to find out how.
WordPress is a powerful platform for creating websites, and also very easy to manage pages using the WordPress dashboard.
However, there may be a time when you need to delete a page for one or more reasons.
Hence, this article will guide you through the steps to delete a WordPress page and redirect it to stop the 404 error.
But first, let’s find out why you need to delete pages in WordPress.
Why You Might Want to Delete Your Pages in WordPress?
You’ll need to delete pages in WordPress simply if it’s no longer in use. However, there can be several other reasons which we’ve listed below:
- If the content on the page becomes outdated or irrelevant.
- When two or more pages have similar content.
- To reorganize the website’s layout.
- To improve the website’s performance.
- To simplify the user experience by merging contents.
- When a page contains sensitive information, it’s better to delete it for the website’s security.
These are the reasons why you should delete your page in WordPress. Now, without further delay, let’s start our guide on how to delete pages in WordPress.
How to Delete Pages in WordPress? (Step-by-Step)
Deleting a page in WordPress is pretty easy. Just follow the simple steps below, and you’re good to go.
Deleting from the ‘Pages’ Menu on WordPress Dashboard
The first and straightforward method to delete pages on WordPress is by deleting them directly from the Pages menu on your WordPress dashboard.
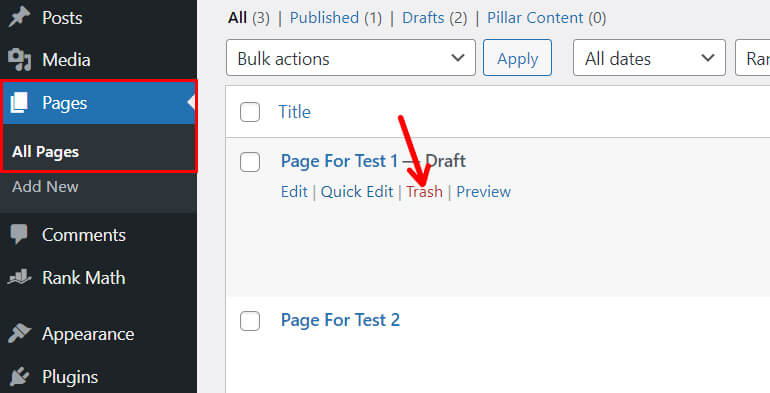
For this, navigate to Pages >> All Pages from your dashboard. Next, Trash the page you want to delete.
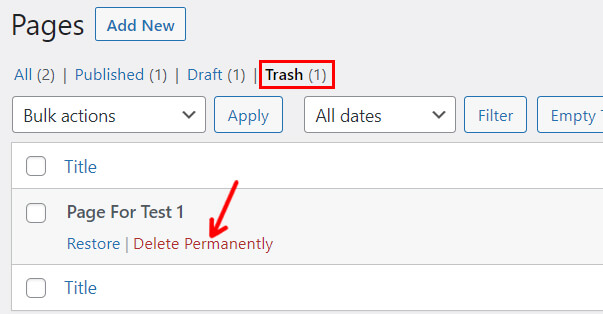
Now, to permanently delete the page, click on the trash link at the top. Next, click on delete permanently to delete it from your WordPress website and Trash folder.
Deleting Multiple Pages at Once
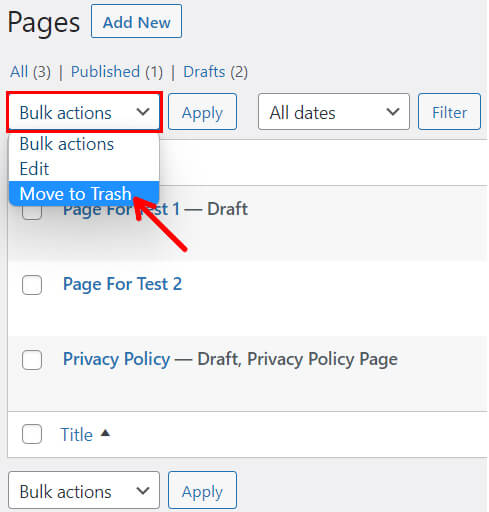
Similarly, you can also delete multiple pages at once. For that, click on the Bulk action; now, select Move to Trash from the drop-down.
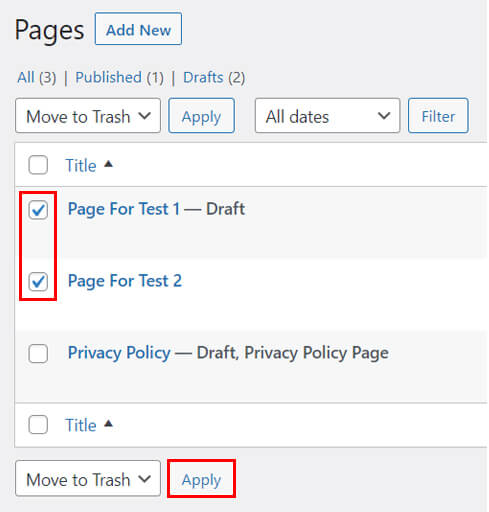
By doing so, you can select multiple pages at once. So, just choose the pages you want to delete and click on Apply. You can also select all the pages by checking the Title box.
Again, you can use the method mentioned before to permanently delete multiple pages.
Deleting a Page from the WordPress Page Editor
Now the second option you can use to delete a WordPress blog is from the WordPress page editor.
Go to Pages >> All Pages and Edit the page you want to delete.
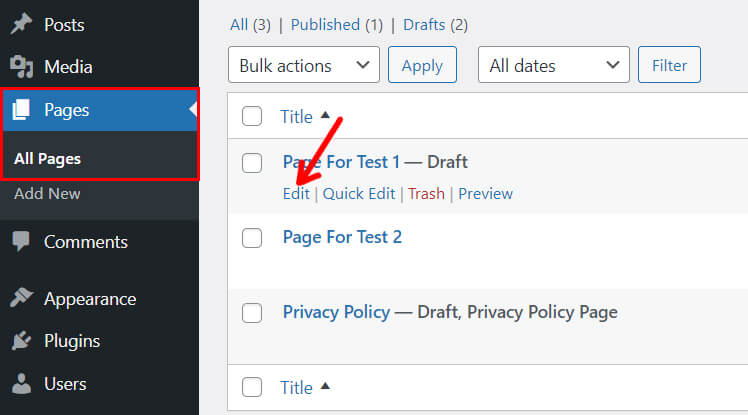
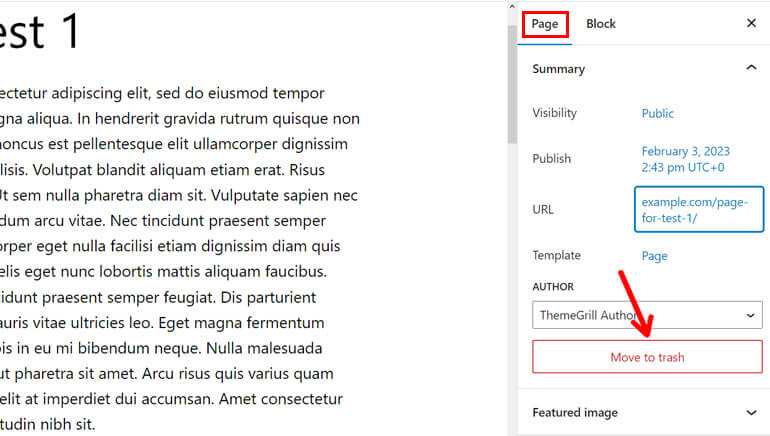
It’ll take you to your WordPress editor. On the right side of your screen, under the Page tab, you’ll see a huge red Move to Trash button. You need to tap the button.
And to permanently delete the page you just trashed; you can follow the same method we followed before.
That’s it; these are the two effortless methods to delete your WordPress pages.
Redirect Deleted URLs to Stop 404 Errors
Like we said before, even after permanently deleting your pages, links to those pages might still be available elsewhere on your site. This can lead you to a 404 error. So, to stop that, you should always redirect deleted URLs.
There are several ways to redirect deleted URLs to stop 404 errors. Here we’ve listed three of them:
1. Using Rank Math SEO
If you’re using Rank Math SEO to optimize your content, here’s the good news you don’t require an additional redirection plugin.
Rank Math also offers a simple and easy way to redirect your URL. Hence you don’t need another plugin.
First of all, log in to your WordPress dashboard. Then, go to the Rank Math Dashboard.
Now various modules will appear on your screen. All you need to do is search for Redirection and enable it. Right after doing this, the Redirections option will appear in your Rank Math dashboard. Click on it.
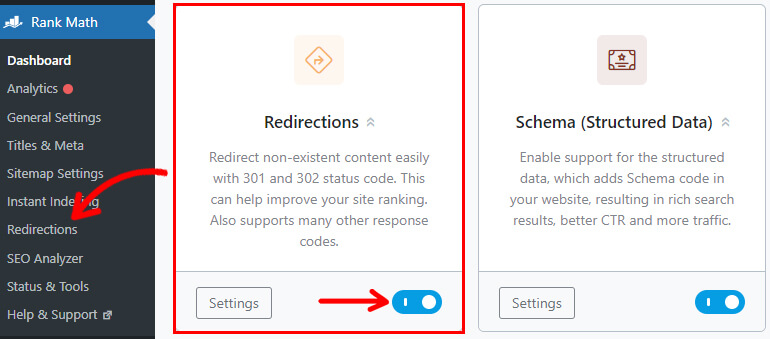
Next, tap on Add New Redirection to create a new redirect.

Here, you’ll see different fields, which are listed below:
- Source URLs: Enter a URL you want to redirect.
- Destination URL: Add a target URL where you want to redirect to.
- Redirection Type: Select a redirection type according to your need, like 301 Permanent Move, 302 Temporary Move, or 307 Temporary Redirect.
- Status: Simply select between Activate and Deactivate.
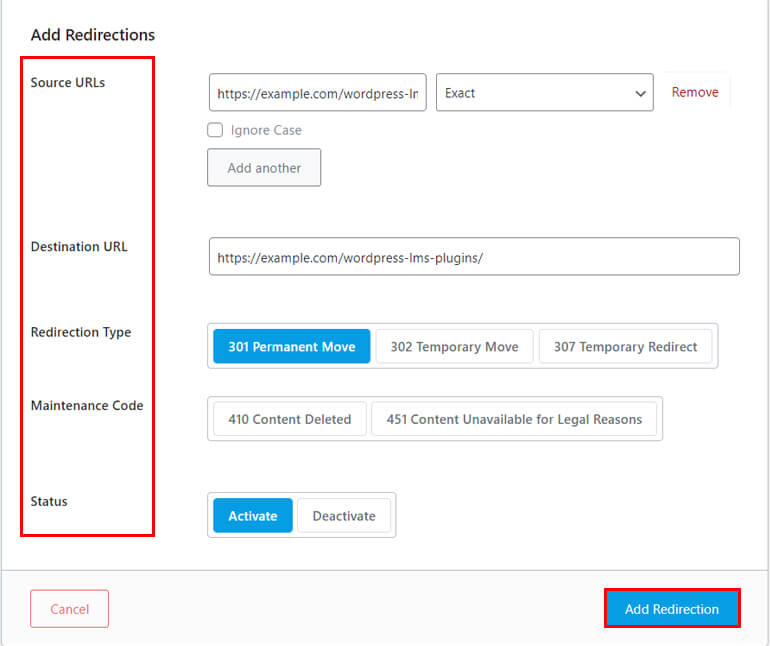
Finally, click on the Add Redirection button. The redirect will now be in effect, directing visitors from the source URL to the target URL.
2. Using Yoast SEO
You can also redirect your URL if you’re using Yoast SEO to optimize your content.

However, you must get the premium version of Yoast SEO to proceed with the process. We feel this documentation might be helpful for you.
3. Using the Redirection Plugin
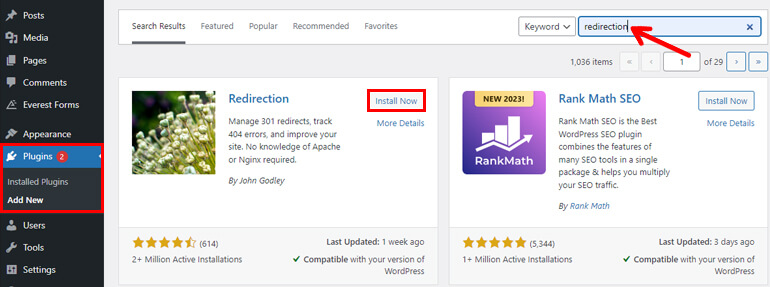
Another way to redirect deleted URLs to stop 404 errors is by using the Redirection plugin.
Simply install and activate the Redirection plugin on your dashboard.
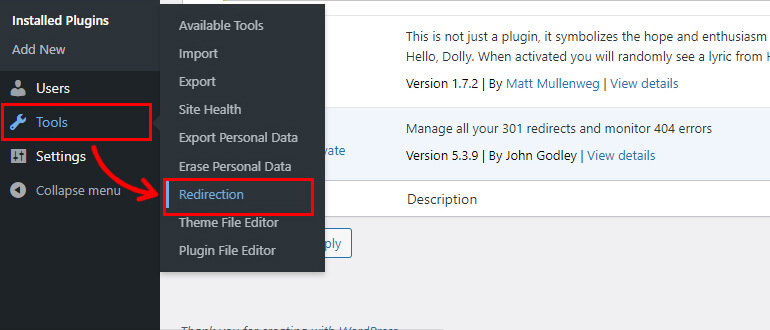
After successfully installing and activating the Redirection plugin navigate to the Tools tab on your dashboard. Here you’ll see different options including Redirection. So, simply click on it.
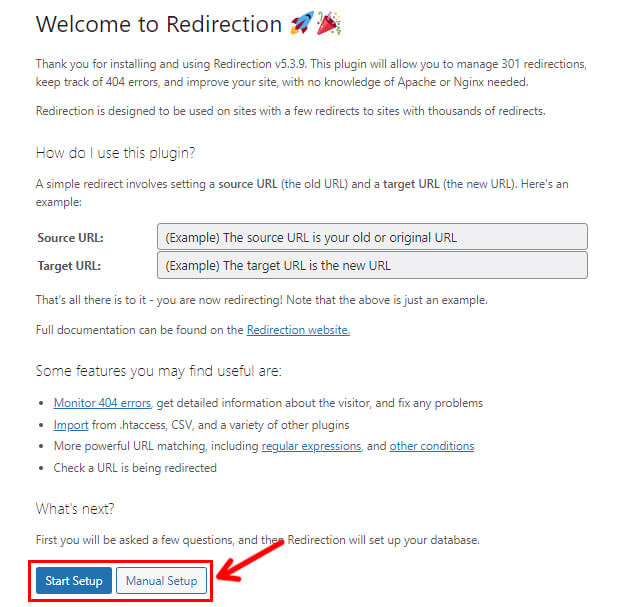
Next, you’ll be given a guide and asked a few questions, after that Redirection will set up your database. You can either click on Start Setup or Manual Setup to move on with the process. Carefully read the instructions and set up the plugin.
After setting up the plugin, you can now add new redirection by pressing the Add New button at the top. Or you can directly add a new redirect by filling in all the similar areas like in the Rank Math SEO.
Here you’ll see the following options:
- Source URL: Enter the URL you want to redirect.
- Query Parameters: Helps you to set criteria for an incoming URL request to redirect it. So, choose the option from the dropdown according to your requirement.
- Target URL: Enter the URL you want to turn to.
- Group: Select between Redirections and Modified posts.
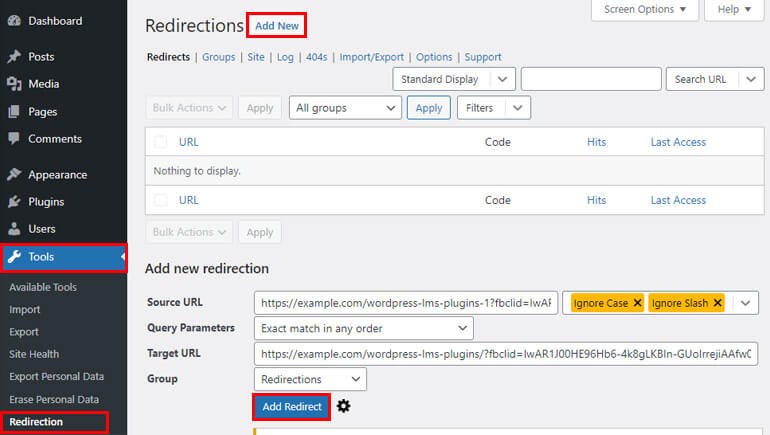
Finally, click on the Add Redirect button to save the redirect.
Wrapping It Up!
Finally, that’s a wrap for our guide on how to delete pages in WordPress without making 404 errors. We’ve mentioned various methods to delete and redirect your pages. So, choose from any of the methods you feel is favorable for you.
We’re positive that you could follow along and understand our provided details.
Please check our other articles that might also be helpful for you, like how to delete a theme in WordPress. You can also read more WordPress-related content on our blog.
You can reach out to us through our social media for any support. We’re available on Facebook and Twitter.
Disclaimer: Some of the links in the post may be affiliate links. So if you purchase anything using the link, we will earn affiliate commission.
