Do you want to release your content at a scheduled time instead of offering them simultaneously? Curious to learn how to drip feed content in WordPress easily?
If your answer is yes, we must say that you’re in for a treat.
In this article, we’ll show you the most convenient way to drip-feed content in WordPress. So, make sure to read the article till the end.
What is Drip Content?
Drip content is simply a process of releasing content over time rather than providing them all at once.
In other words, it’s the concept of providing content to your audience at a scheduled time interval.
For example, in the case of an online course, you might want to release one module after the student’s enrollment.

After that, you can schedule the release of the subsequent modules at fixed time intervals like two weeks, one month, and so on, at your convenience.
It creates a win-win situation for both. While you can deliver your courses in a structured and organized manner, students can go through the courses at their own pace and return for more afterward.
Benefits of Adding Drip Content on Your Website
There are many advantages of drip-feeding content on your website. So, let’s look at some benefits of adding drip content to your site.
1. Boosts Engagement and Keep Users Committed to Your Site
Gradual release of content makes the users curious about the new content you have to offer. It triggers users’ interest and keeps them engaged with your site for a long time.
Besides, releasing the content periodically makes the users devoted to your content, thereby improving the retention rate.
2. Protects Your Content
Drip feeding content also protects your content from possible theft and customer fraud.
For instance, if you offer all course content at once after a user sign-up, fraud customers may download them all and cancel their membership.
It’s even worse when you have a money-back policy, as they might steal all your content and ask for a refund.
Thus, drip-feeding content can avoid all these problems as they might not want to steal the partial content.
3. Develop Trust
Releasing the content regularly and consistently convinces your users that you’re committed to providing quality information over a long time.
Likewise, it builds trust and liability among your audience by providing transparency on the process and approaches to deliver your content.
4. Enhances User Experience
Delivering all courses at once might be overwhelming to the audience. It’ll be difficult for them to go through and understand lengthy content and even make them quit.
Thus, the drip content makes the courses more approachable and understandable as the audience can focus on a specific content unit at a time.
Besides, drip-feeding content also enables you to tailor your courses to the audience’s needs and their extent of knowledge. Thereby improving the user experience.
What’s the Best Plugin to Drip Feed Content in WordPress?
Now that you know about drip feed content and its benefits, you might wonder what’s the best plugin.
Thus, we have a list of suggestions for the best plugins to drip feed content in WordPress. So, let’s discuss them in detail.
1. Masteriyo LMS
First on our list is Masteriyo LMS – a revolutionary learning management system (LMS) plugin for dynamic eLearning websites.
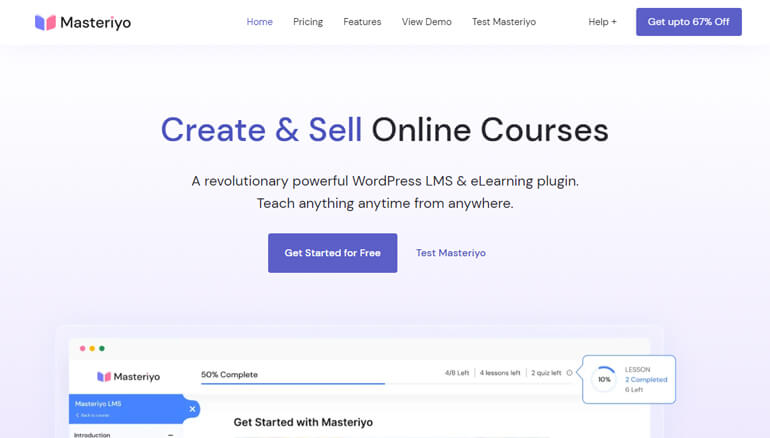
With an easy setup wizard and course builder, creating practical courses is a breeze with the plugin.
To add to that, it offers a single-page interface. So, you can create a complete course from the same page without switching between different pages.
Apart from enabling you to create structured content and interactive quizzes, the availability of a drip-feed content addon also allows content release gradually.
You can set time or action-based conditions to drip-feed content to your learners.
Besides, the other features of the Masteriyo are a distraction-free learning page, a progress bar, a dedicated question & answer section, and more.
Major Highlights of Masteriyo LMS
- Built on React JS for a fast performance
- In-built order system to accept payments via PayPal, Stripe, and more
- Create interactive quizzes with various question types
- Option to add multiple instructors to a single course with premium addon
Cost: $99/year for 5 Sites after a heavy discount of 67% (Normally costs $299/year)
2. Tutor LMS
Tutor LMS is a powerful and feature-rich WordPress LMS solution for creating full-fledged online education sites.
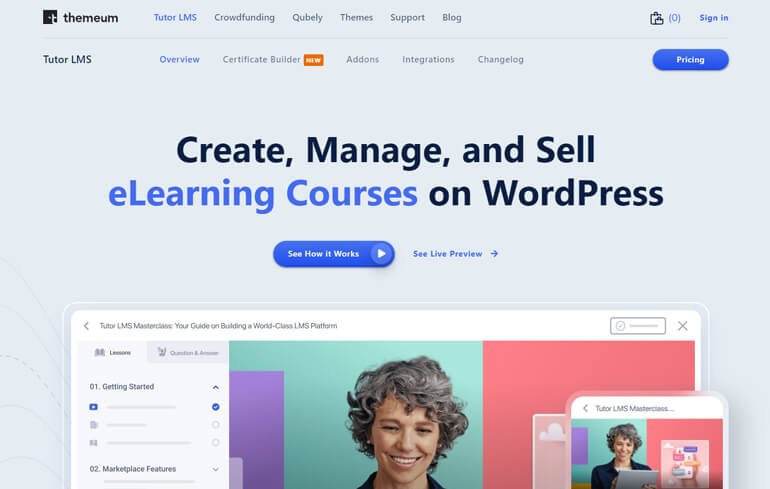
Using this plugin, you can create, manage, and easily monetize your course content without writing a single line of code.
Further, it comes with several addons to enhance the functionality of the core plugin. And one such high-quality addon is the Course Content Drip addon.
This powerful addon gives you complete control over learning path management as it lets you release lessons, quizzes, and assignments at scheduled times.
Moreover, it has a personalized dashboard for both students and teachers for easy access and management of the LMS site.
Besides, students can easily keep track of their assignments and be up to date with their learning plans with the event calendar.
Major Highlights of Tutor LMS
- Create stunning course catalogs and course details with built-in designs and layouts
- Advanced analytics and reports to test the effectiveness of your course
- Enable learners to access your courses through mobile devices
- Support Gutenberg and other page builder plugins
Cost: $199/year for 1 Site
3. LearnDash
LearnDash is a premium WordPress plugin with advanced LMS features. So, if you want to create professional and unique courses on your WordPress site, it’s a perfect choice.
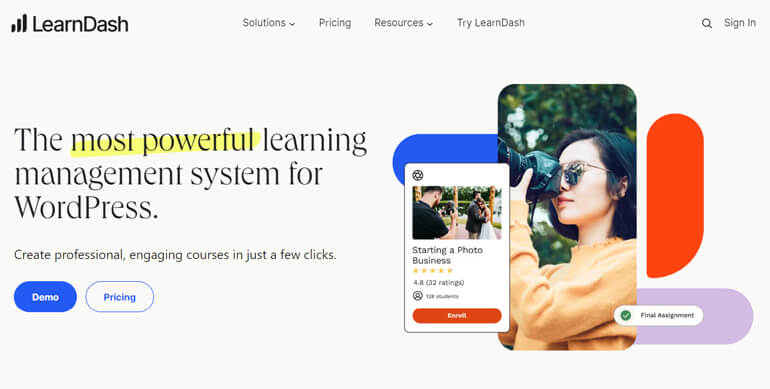
This plugin enables you to use your favorite page builder to edit and customize your course content as per your liking.
Moreover, LearnDash also makes it possible to sequentially drip-feed your lesson content. Thus, you can determine when you want the lessons to become available.
LearnDash also perfectly works with any WordPress theme and supports multimedia content like images, videos, audio, HTML5, SCORM, etc.
Above all, the plugin also comes with several eCommerce options to sell courses. Such choices include subscriptions, one-time payments, course bundles, memberships, etc.
Major Highlights of LearnDash
- Intuitive drag-and-drop course builder
- Focus mode to eliminate possible distractions
- Badges and certificates to offer to learners for their achievements
- Easy assignments management
Cost: Starts at $199/year for 1 Site
Our Verdict: Out of the three LMS plugins, our ultimate choice is Masteriyo, as it’s a modern LMS plugin built on React JS for fast performance. Also, it’s powerful, feature-rich, and easy to use.
Thus, this tutorial will use Masteriyo LMS to show how to drip feed content in WordPress.
How to Drip Feed Content in WordPress? (Step-by-Step)
Content drip feeding becomes a walk in the park when you have a plugin like Masteriyo LMS. So, here’s how you can drip feed content with Masteriyo.
Step 1: Purchase Masteriyo Pro
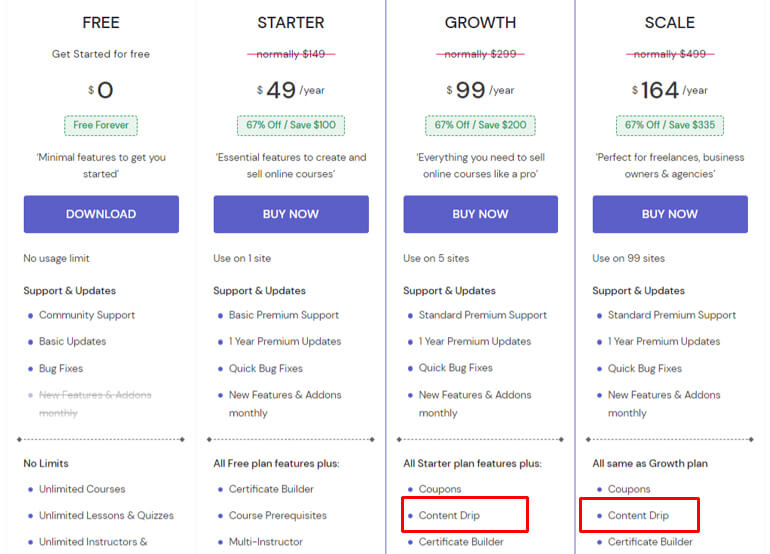
A free version of Masteriyo offers adequate features to get started with your LMS site. However, the Content Drip addon is only available in premium plans like Growth and Scale.
So, you must visit the plugin’s official page and purchase the suitable plan that meets your need.
The best part is that Masteriyo is offering huge discounts of 67% on all its plans. Thus, you can save plenty of dollars and also get the best value for the money, with every feature you need to create and sell courses online.
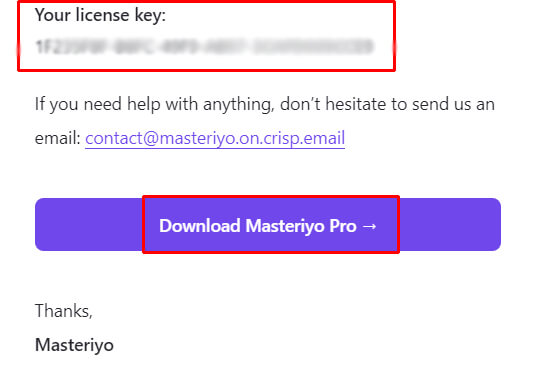
Once you purchase the ideal plan for your site, you’ll receive an email with a downloadable link and license key. Thus, click the Download Masteriyo Pro button.
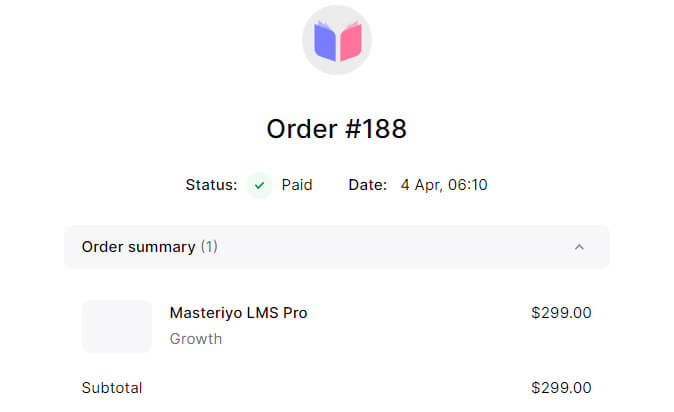
It’ll redirect you to the Order page.
On this page, you’ll see a series of downloadable zip files of the plugin with the oldest version at the top and the newest at the bottom.
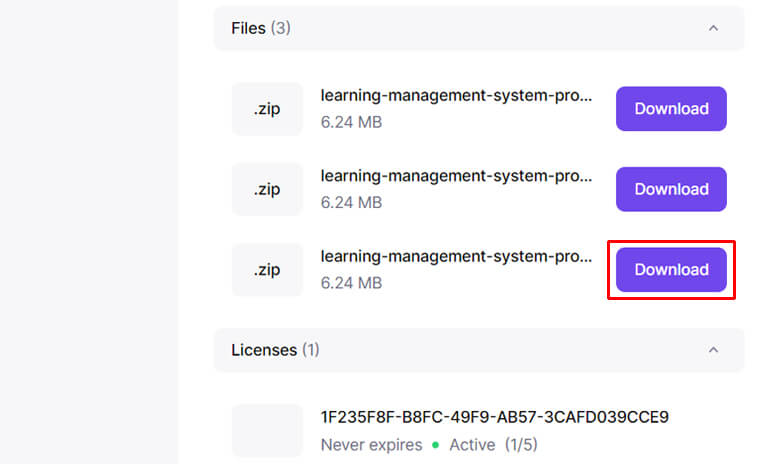
So, download the latest version of the plugin by clicking the Download button. Also, don’t forget to copy the license key. You’ll require it later to activate premium features.
Step 2: Install and Activate Masteriyo LMS
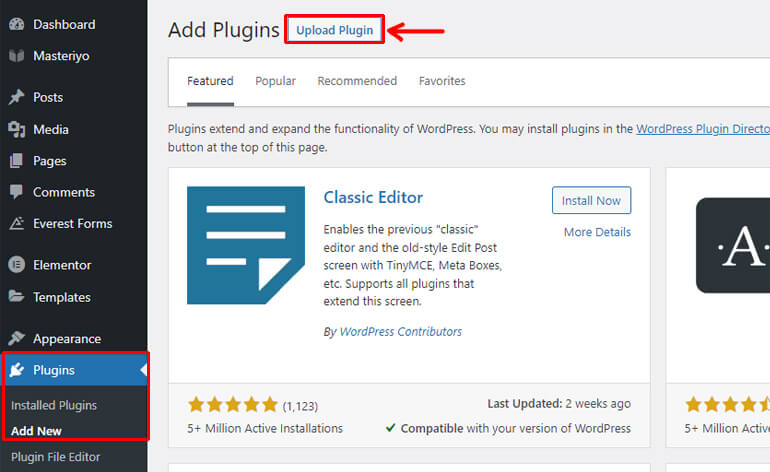
To install Masteriyo, go to Plugins >> Add New from your dashboard, and click on the Upload Plugin button.
After that, hit the Choose File button and select the latest Masteriyo zip file you downloaded.
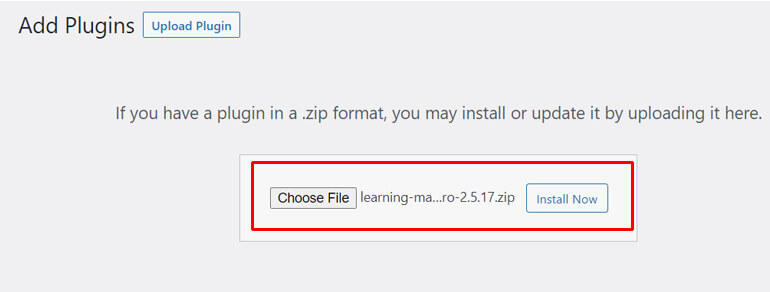
Then, click on the Install Now button.
Once installed, press Activate Plugin for the plugin activation.
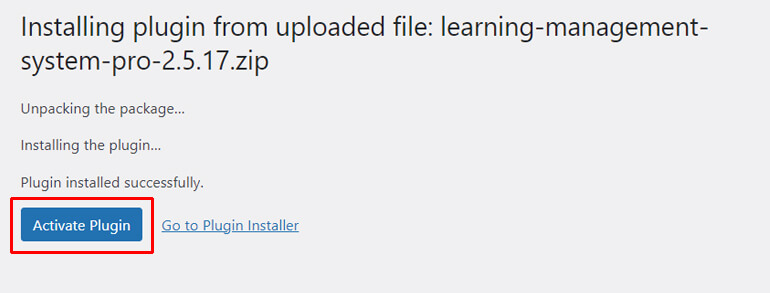
After the plugin activation, you’ll be directed to a set-up wizard page from where you can configure the plugin’s settings.
You can learn how to set up Masteriyo LMS from here.
Again, go back to your dashboard and navigate to Masteriyo >> License.
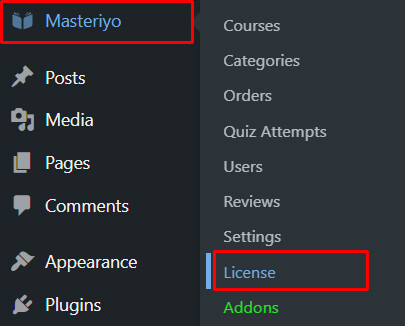
Now, paste the license key you copied before and hit Activate button.
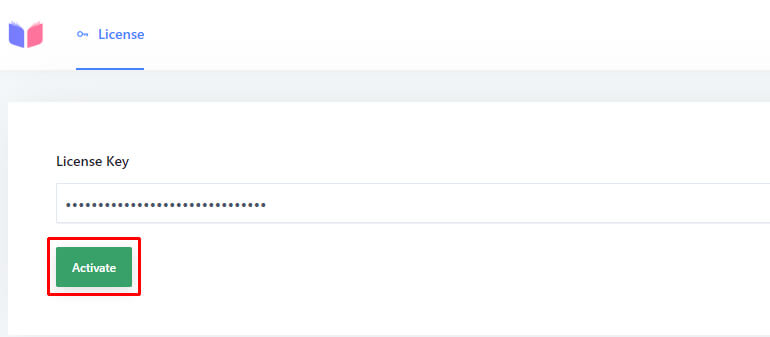
With this, you’ve successfully installed and activated Masteriyo Pro on your site.
Step 3: Enable the Content Drip Addon
Since you’ve activated Masteriyo Pro, you can now easily enable the Content Drip addon from your dashboard.
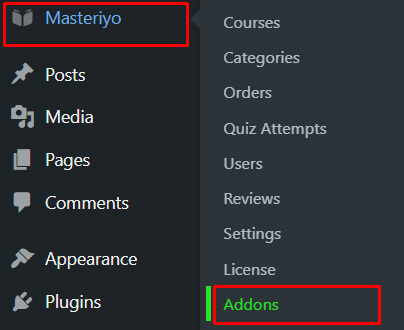
For this, navigate to Masteriyo >> Addons.
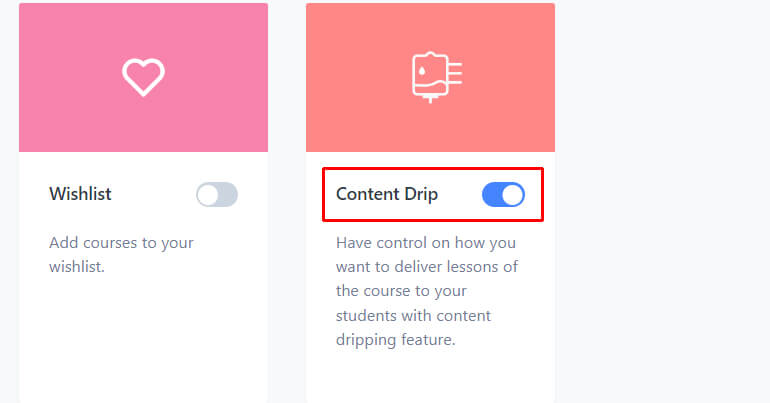
Then, search for the Content Drip addon and toggle on the button to activate it.
Step 4: Create Courses, Lessons, and Quizzes
Before you learn how to drip feed content in WordPress, you must first create the content.
One of the perks of using Masteriyo is that it enables the creation of unlimited courses. On top of that, a single-page interface is a feature unique to Masteriyo that you won’t find in any other LMS plugins.
This feature lets you create a whole course from a single interface without switching between pages. Thus, saving your time and energy.
Create a New Course
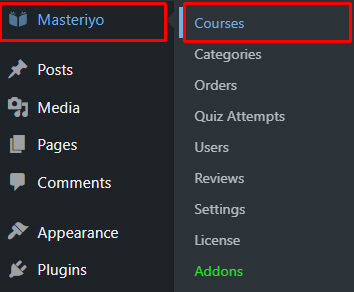
To create a new course, go to Masteriyo >> Courses.
Then, click on the Add New Course button.
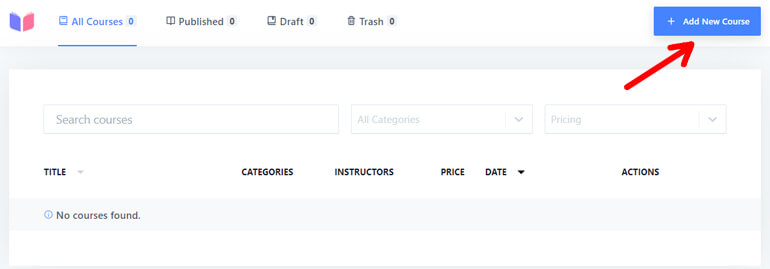
It’ll open up an Add New Course page under the Course tab. You can add a Course Name, Description, Highlights, Categories, Featured Image, and Featured Video from this page.
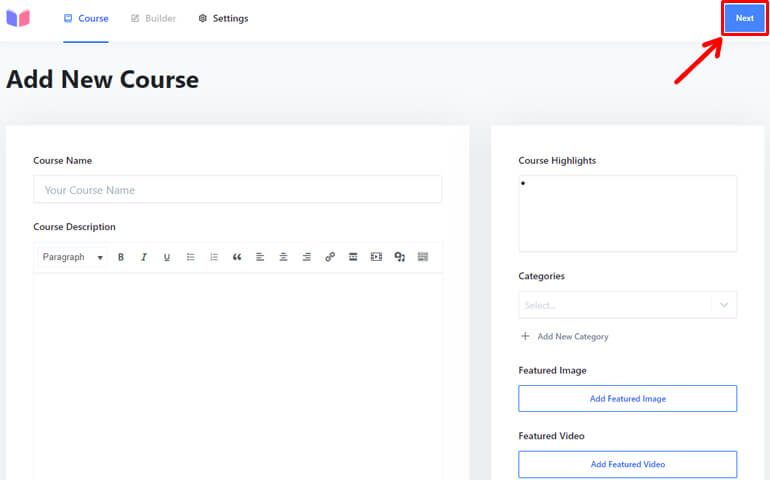
Once you finish adding everything, click on the Next button.
This takes you to the course Builder tab, from where you can Add New Section to your content.
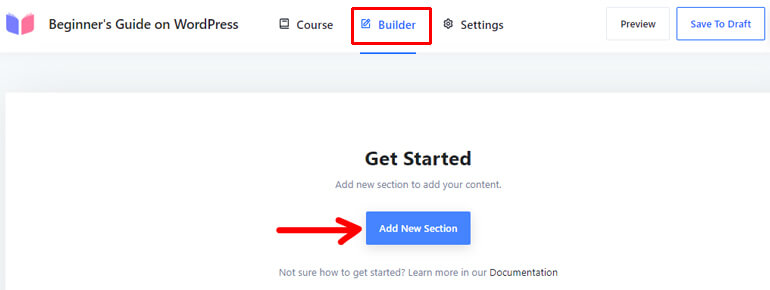
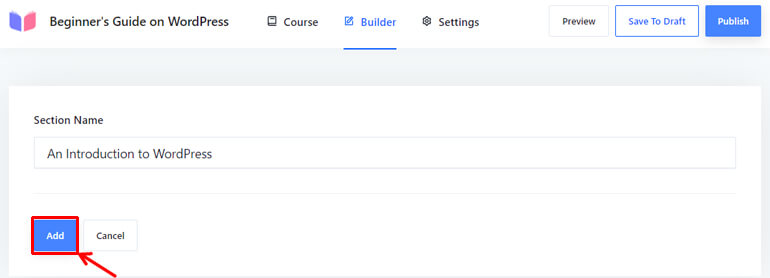
So, click the button, provide it with an appropriate name, and hit the Add button.
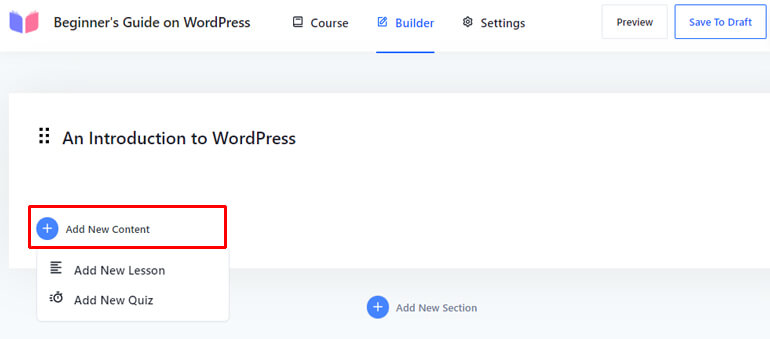
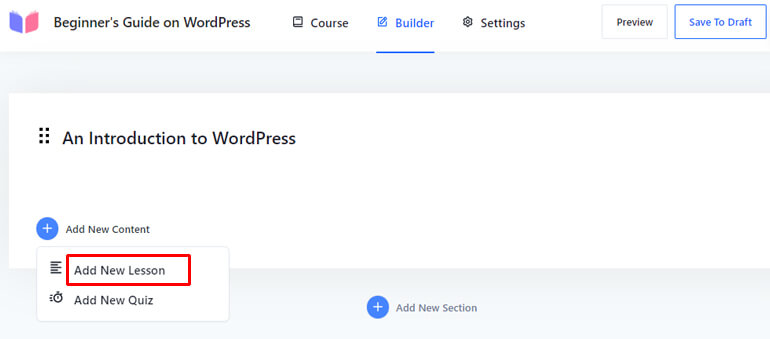
Again, click on the Add New Content option and it’ll enable you to add new lessons and quizzes.
Add New Lesson
Pressing the Add New Lesson option lets you create a new lesson for your LMS site.
You can add a Lesson Name, Lesson Description, Featured image, and even videos from various sources (YouTube, Vimeo, and Self-hosted).
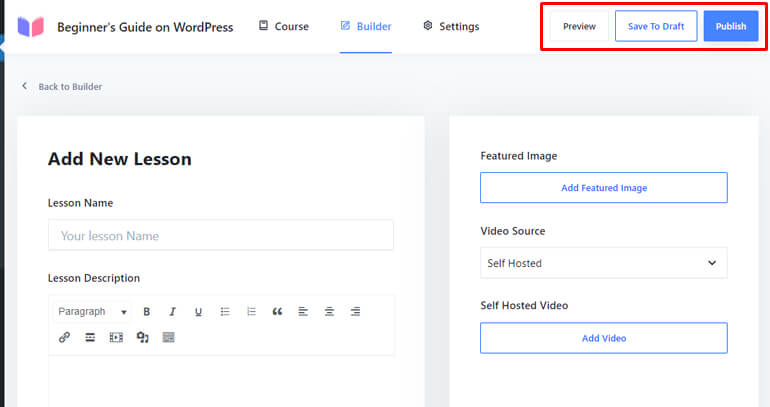
Once you finish adding the lesson, you can preview it, save it as a draft, or publish it immediately.
For a detailed guide, refer to our article on adding lessons in WordPress with Masteriyo.
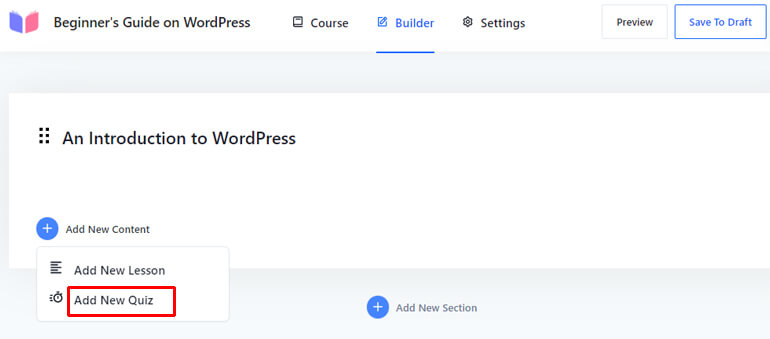
Add New Quiz
Likewise, if you want to add a quiz, click the Add New Quiz option.
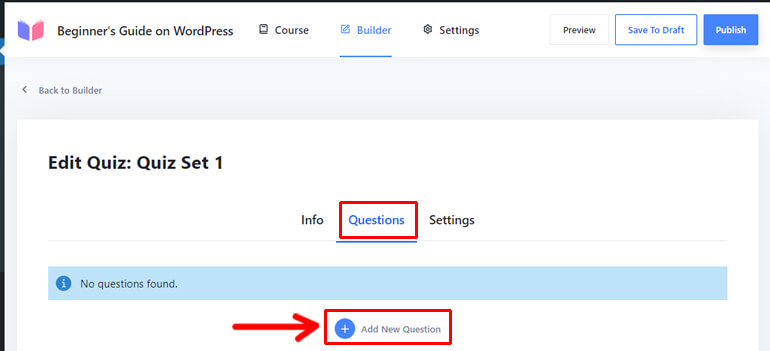
The Info tab of the Add New Quiz page lets you add a quiz name.
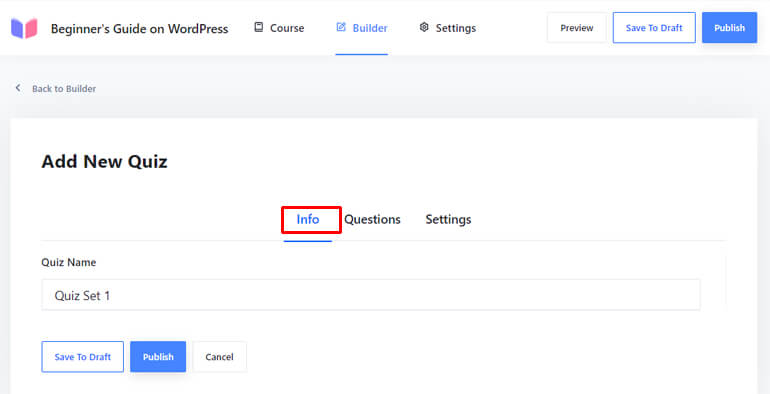
Similarly, the Questions tab enables you to add new questions.
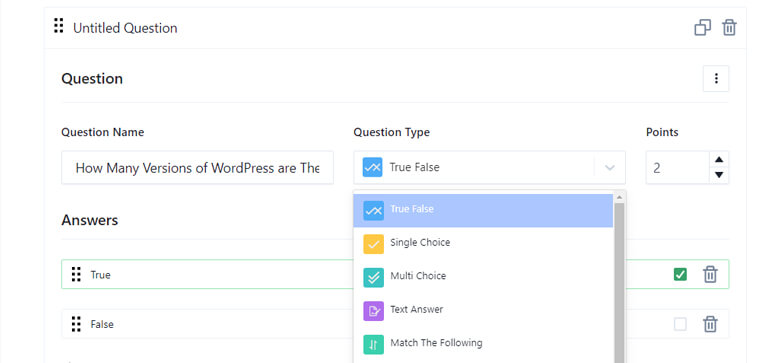
You can add a question name and choose from different question types like True False, Single Choice, Multiple Choice, Match the Following, etc. You can also assign points for each quiz question.
Further, you can manually add the answers for the question types like Single Choice and Multiple Choice. Also, don’t forget to tick the right answer.
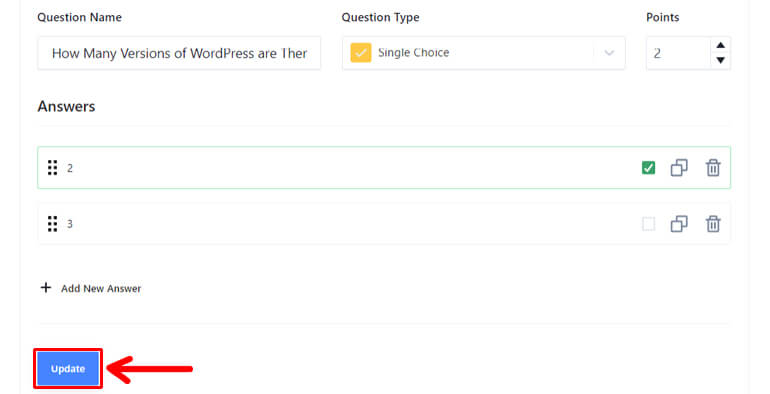
After you complete adding a question, click on the Update button to save the changes you’ve made.
You can also easily add other quiz questions by clicking the Add New Question button.
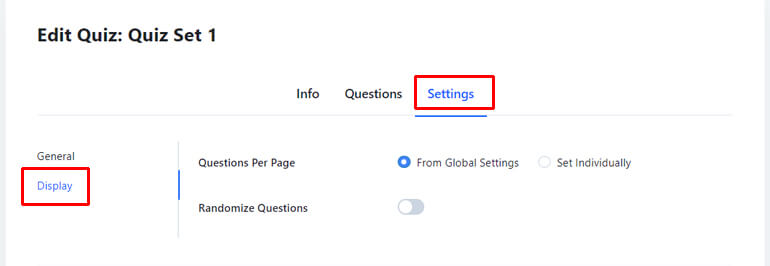
Again, the Settings tab provides the General and Display options for the quiz.
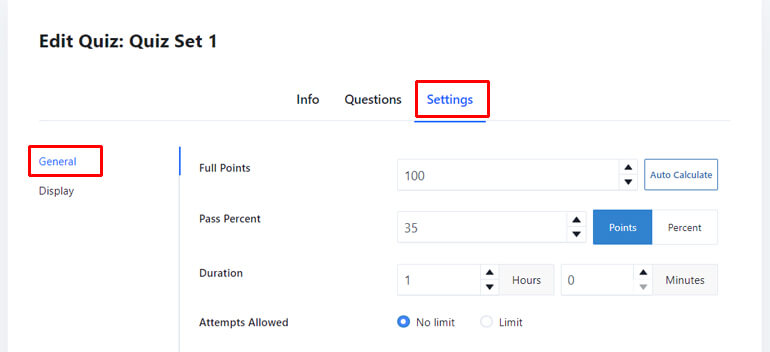
You can specify the Full Points, Pass Points, Time Duration, and Attempts Allowed from General.
And you can determine the Questions Per Page and choose to enable/disable questions from the Display option.
Note: You can also learn how to add quizzes in WordPress in detail from here.
Configure Course Settings
Basically, there are three options to configure your individual course settings. They are General, Display, and Pricing.
But since you’ve Content Drip addon activated, you can also configure its settings from here. However, we’ll discuss it in the next section in detail.
For now, let’s discuss the three major course-setting options:
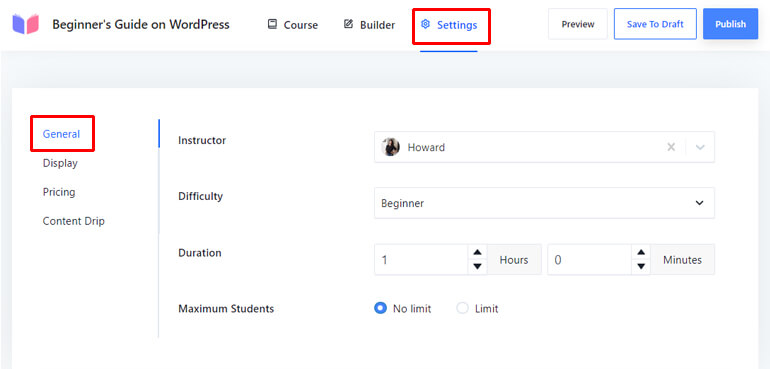
- General: This tab lets you select the course instructor, define the course difficulty level, and duration, and choose whether to limit the maximum number of students for the course or not.
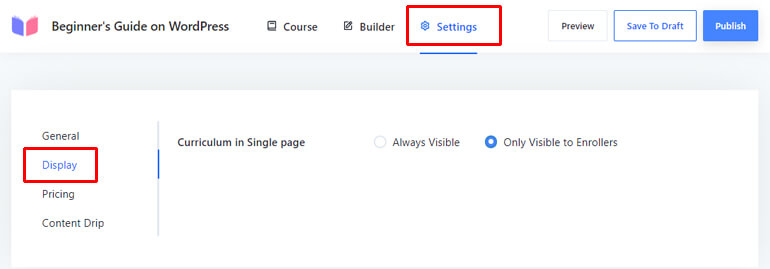
- Display: From here, you can set the visibility of your curriculum on a single page. You can make it always visible so anyone can access it or limit it to enrollers only.
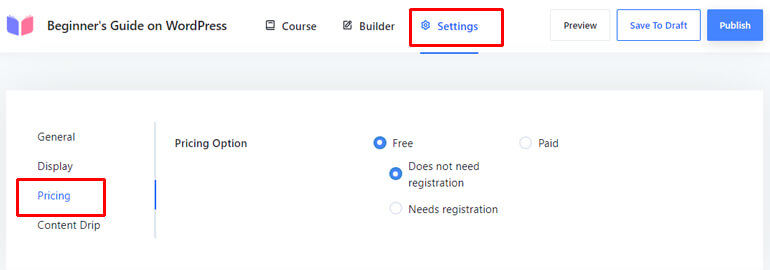
- Pricing: The pricing option allows you to choose whether you want to make your courses free or paid. If you want to make it free, you need to decide whether registration is required. And for the paid option, you should define the one-time fee.
That said, it’s time to know how to drip feed content in WordPress easily.
Step 5: Setup and Configure Drip Feed Content
You can configure the content drip option from the same Settings tab.
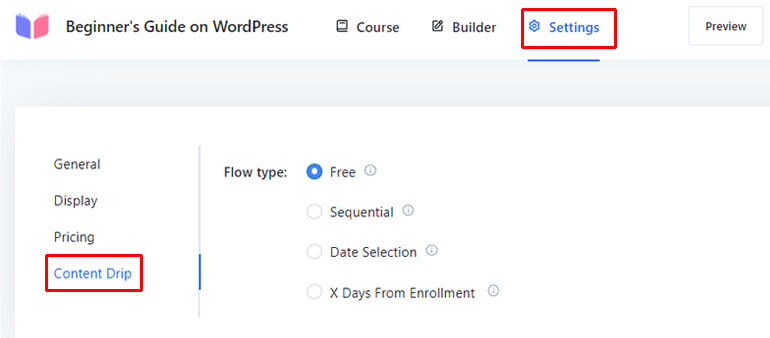
There are four different options that determine the flow of your content. So, you can select anyone depending on your need.
Now, let’s discuss these options in detail.
Free
The very first option is Free. As the name suggests, this option allows users to jump from the first lesson/quiz to any other lessons/quizzes.
In other words, the flow of the content is random in this option.
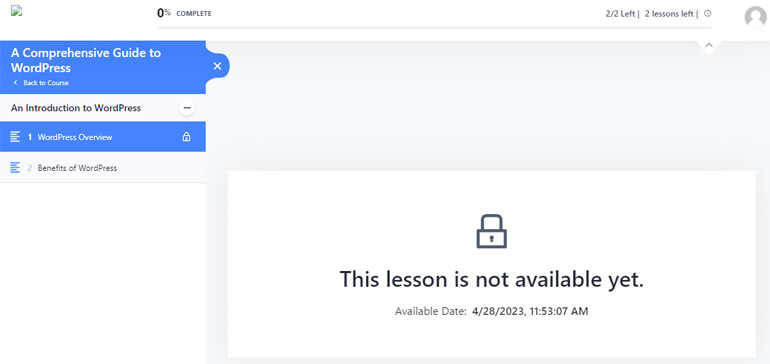
Sequential
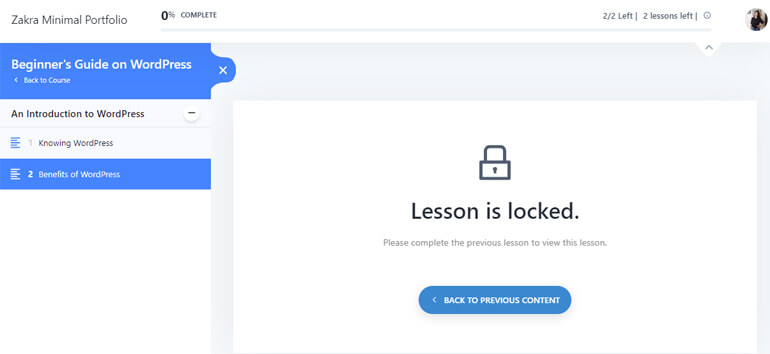
Users need to move from the lessons/quizzes sequentially in this option. That means one must complete the first lesson/quiz before accessing the second lesson/quiz.
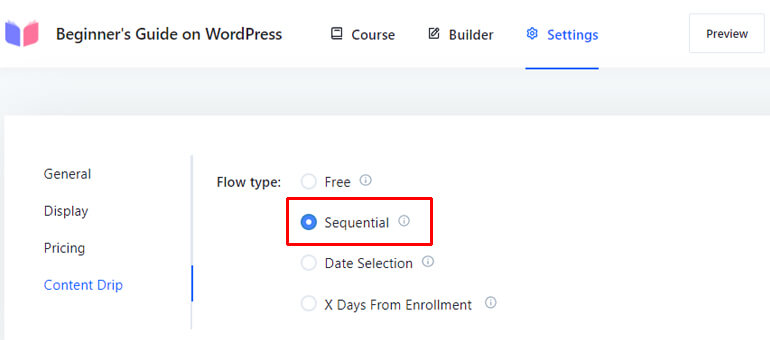
Otherwise, the lesson will appear locked.
Date Selection
The next option is Date Selection, where you can select the desired date to unlock the lessons/quizzes.
To enable Date Selection, choose this option first.

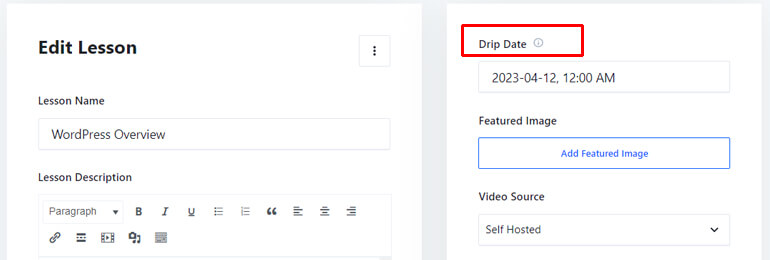
After that, go back to the Builder tab and hit the edit icon of the desired lesson/quiz.
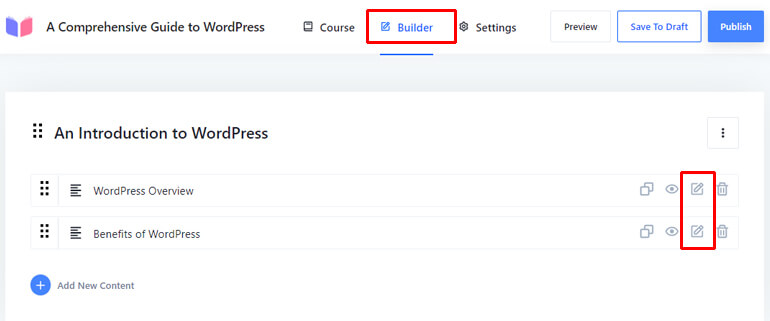
Now, you’ll be able to set a specific date and time from when the lesson will be unlocked for the students. You can do this from the Drip Date option at the top right.
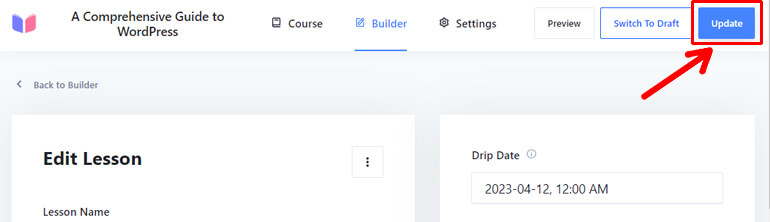
Once done, don’t forget to hit the Update button to save your changes.
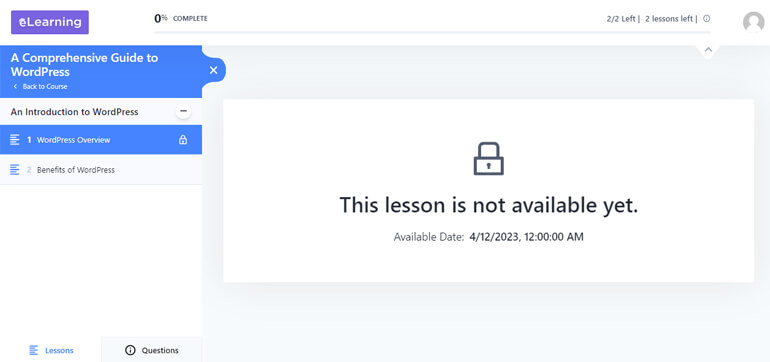
Hence, the lessons/quiz will appear locked if the students try to access it before the date you’ve set.
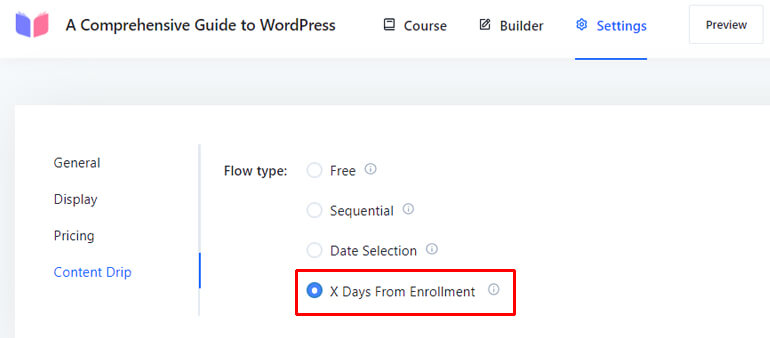
X Days From Enrollment
Last but not least, we’ve X Days From Enrollment option. It allows you to make the content available to your students after the X days from their enrollment.
To enable it, first, select this option.
After that, go back to the Builder page and click on the edit icon for the desired lessons/quiz like before.
Now, in the Drip Days option, specify the exact number of days after which your students can access your course once enrolled.
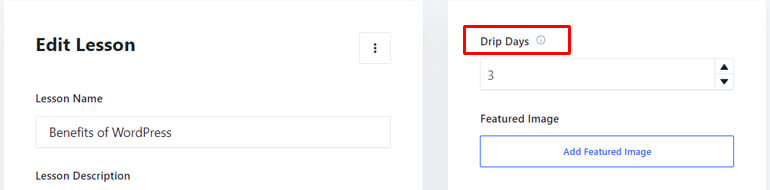
Also, don’t forget to Update the changes you’ve made.
Thus, the courses will appear locked before the number of days you’ve specified.
So, this is how you can drip feed content in WordPress.
Summing It Up!
Drip content is a powerful feature that enables content release at a scheduled time. Thus, it offers more managed and structured learning experiences for your students.
Above, we’ve provided a detailed guide on how you can drip content in WordPress using Masteriyo.
We hope this guide has been helpful to you. If you think it is helpful, please share this with your friends. Our social handles are right in front of you.
Are you new to the WordPress world and also need a guide to create an LMS site in WordPress? No worries, we’ve got your back with a comprehensive guide.
For more such articles, you can also check our blog page. Our blogs are full of easy-to-understand and knowledgeable WordPress articles.
Lastly, follow us on Facebook and Twitter to stay updated about our latest blog posts.
Disclaimer: Some of the links in the post may be affiliate links. So if you purchase anything using the link, we will earn affiliate commission.
