Are you wondering how to make a drop-down menu in WordPress? If that’s the case, then you’ve come to the right place.
Adding a good navigation feature is important when creating a website. Especially if you have a website with many pages and posts, then proper navigation is crucial.
Because your visitors should be able to access anything on your website easily. So, creating a drop-down menu is the way to go.
But how can you create a drop-down menu in WordPress? Don’t worry! In this article, we’ll walk you through all the steps to creating a drop-down menu easily in WordPress.
Let’s get started!
Before moving on, you might want to know why to add a drop-down menu on the WordPress website.
There are many benefits of using a drop-down menu on your website. First, it’ll make navigating your website easier for users.
For example, if you’re creating an eCommerce website, then a drop-down menu will help to categorize the products and services appropriately.
Below are some of the benefits of a drop-down menu:
- You’ll be able to add as many items as you want to your menu.
- Easy to add menu items in a small space.
- Drop down menu adds an easy navigation experience for your visitors.
- Easily manage the items as per the category.
Now that you know the benefits of a drop-down menu on a WordPress website, you may want to create one.
So, without further ado, let’s go through the steps.
Able to add a drop-down menu in WordPress is a useful feature that can come in handy for your website visitors.
Moreover, you can use different methods to create a drop-down menu in WordPress. Let’s look at them in detail.
First of all, we’ll share creating a drop-down menu in WordPress full site editing. It’s the latest site editor offered by default. You can use this editor when using a WordPress block theme.

Here, we’ll be using the Twenty Twenty-Two theme, which is the first default block-based theme for full-site editing.
So, let’s start!
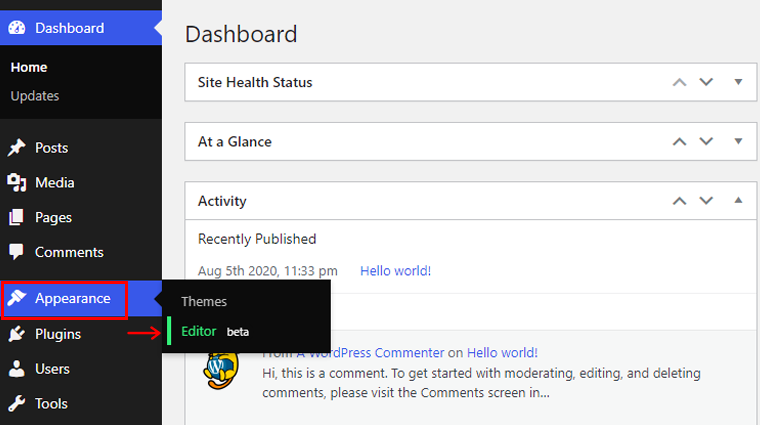
Step 1. Navigating to Header
To start, go to Appearance > Editor. And, you’ll be prompted towards the editor page.
You can also go to the editor’s page via customizing or site editing.
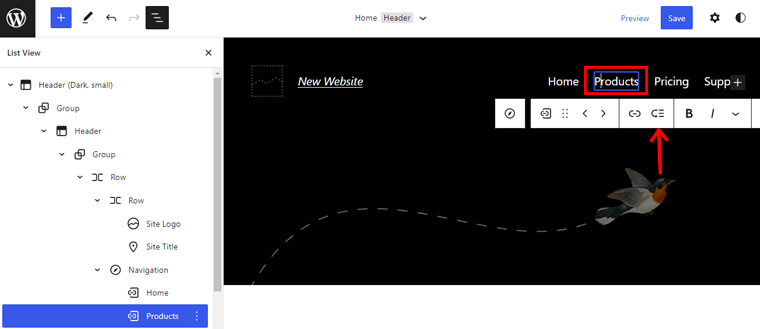
After this, click on the List View option on the top toolbar. Then you’ll see the Header option. You must select the Navigation option to create or manage the menus. It’s nested inside the header depending on the number of groups in the header.
And if you hover over the Navigation option, it’ll highlight your menu with a blue outline.

Under the Navigation option, you can find the items present in the menu. Here, you’ll see Page List. Also, it’s auto-populated with the published pages. So, if you click on the Edit option, you’ll see a notification saying you’ll need to change the Page List to a Single Link to start editing.
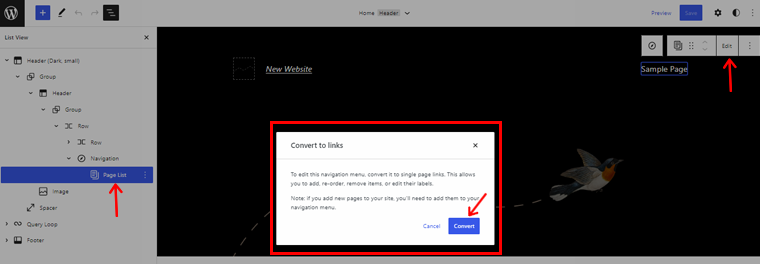
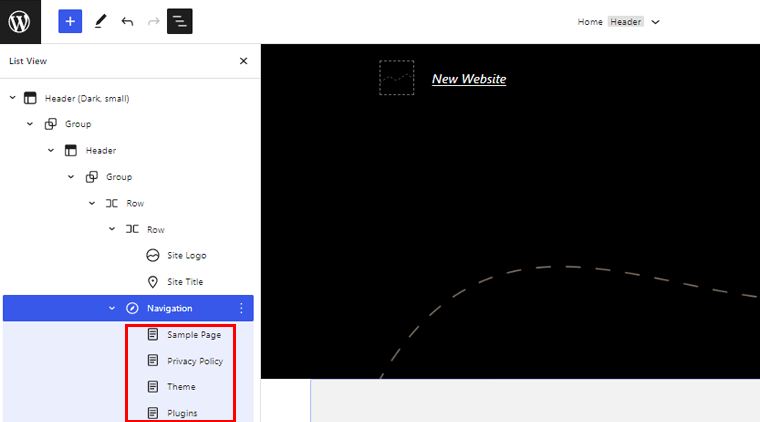
So click on the Convert option and look at the list view option. You’ll see the Page List option is replaced by the individual page links.
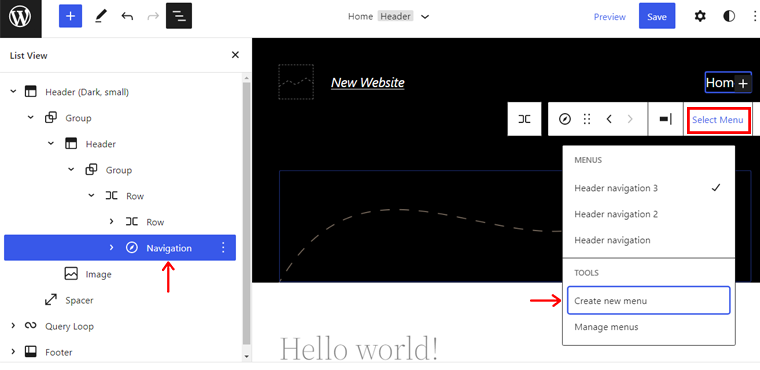
Step 2. Create a Menu
The navigation block also allows you to create the menu. Simply click on the Navigation block in the list view and click Select Menu. Following that, click Create a new menu.
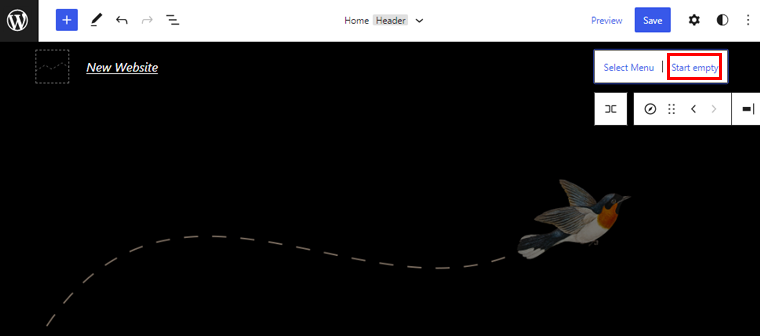
After that, click on the Start Empty option. A new menu will be added to the list.
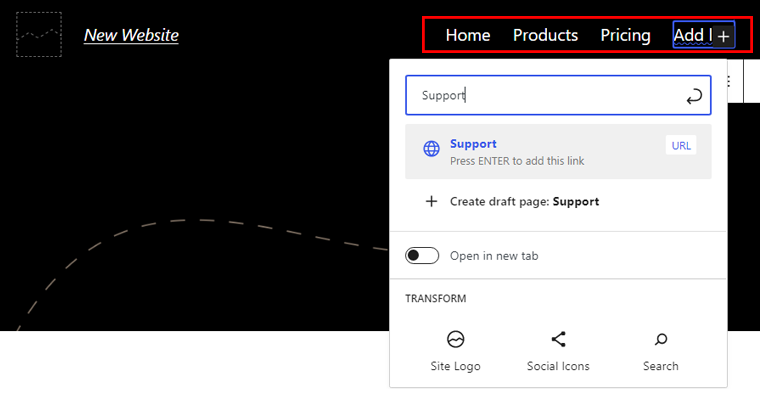
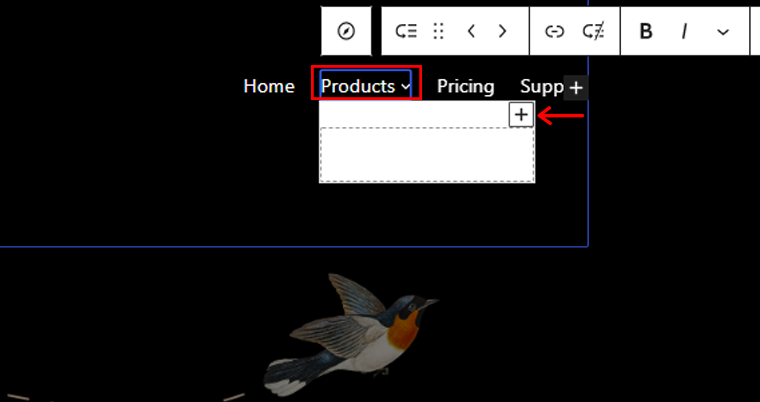
Now, click on the “+” to start adding menu items. You can see the process of adding menu items in the image below.
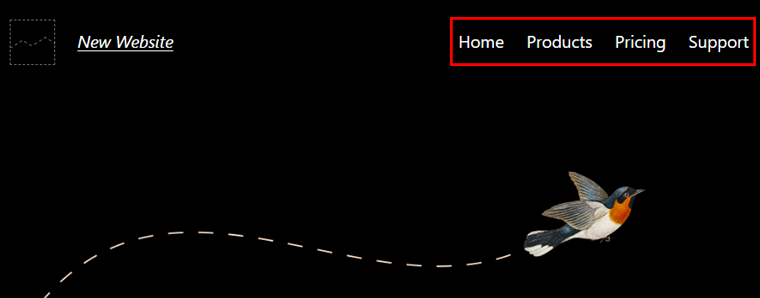
Here, you can see the Preview of all the menu items we’ve added earlier.
Click on the desired menu item and click on add submenu option on the toolbar. In the image below, we’ve created a submenu for the Products menu.
You’ll see a “+” icon below the menu item where you can add submenu items.
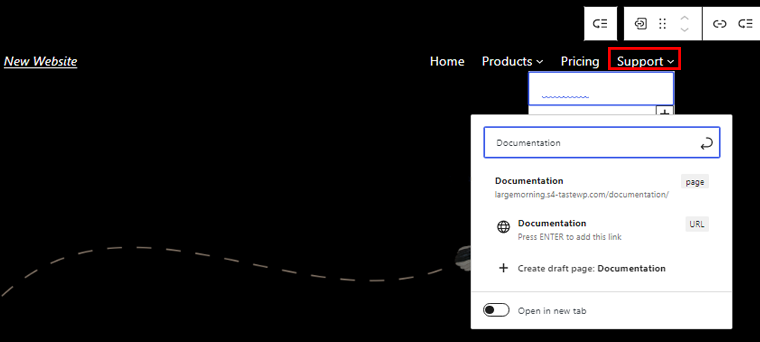
Similarly, you can add submenu items to any menu item. For example, we’re going to add submenu items to the Support menu as well.
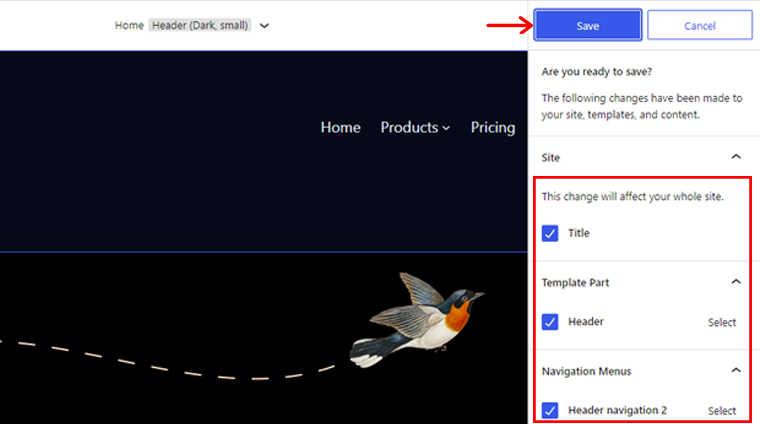
Click on Save to make all necessary changes. Before clicking the Save button, make sure to check all the boxes of Title, Template Part, and Navigation Menus name before saving.
Step 3: Preview and Publish the Menu
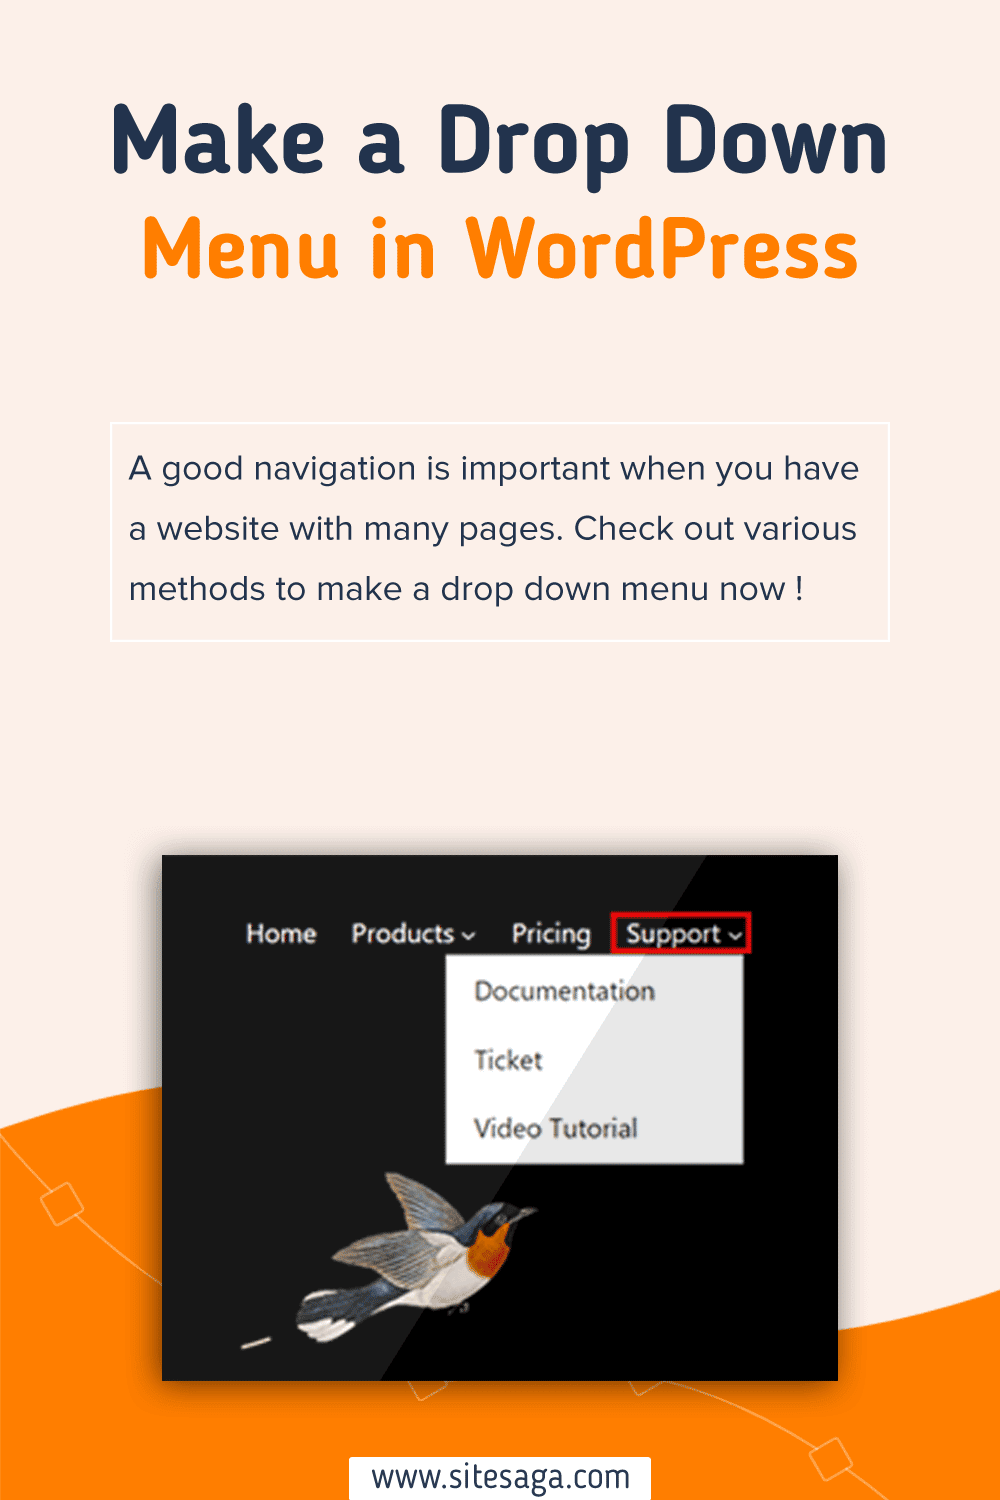
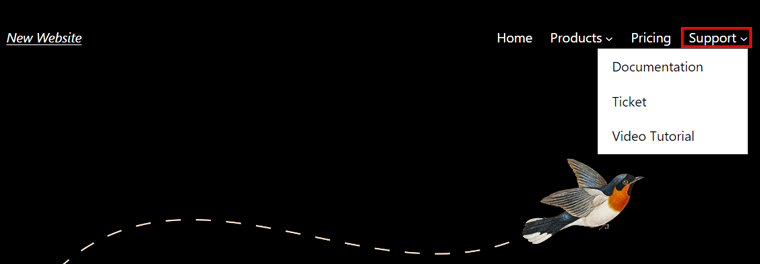
Now, preview any of the existing posts or create one to see the created drop-down menu. You’ll see a drop-down menu as in the examples below.
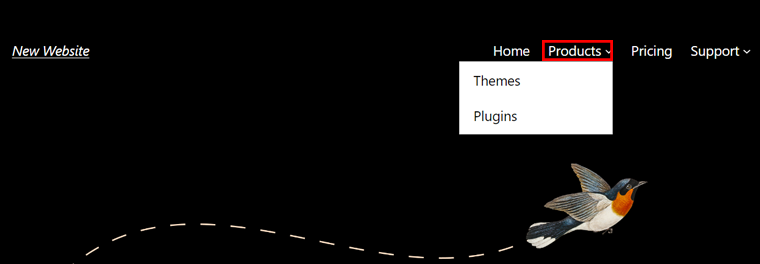
Here, we have an example of a drop-down menu for the Products and Support menu.
Creating a drop-down menu is quite different if you’re using a classic theme (non-full site editing theme).
To show that process, here we’re using the free version of the Kadence theme as an example.
Let’s check how to create a drop-down menu in WordPress using the Kadence theme.
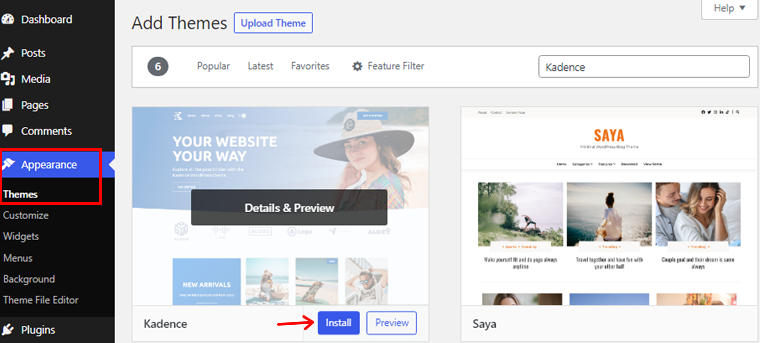
Step 1: Install and Activate Kadence
First, install and activate the Kadence theme from Appearance > Themes.
To get more insights, check our article on how to install a WordPress theme.
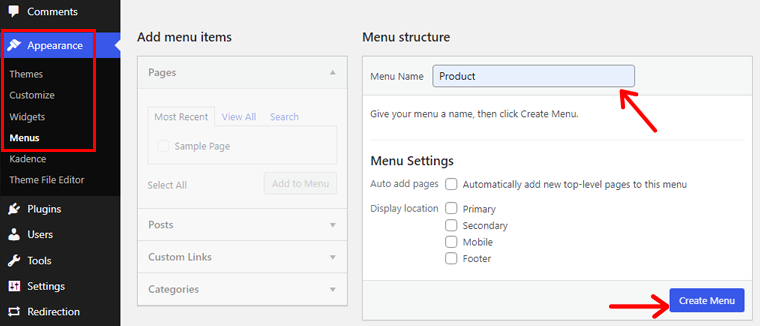
Step 2: Create a Menu
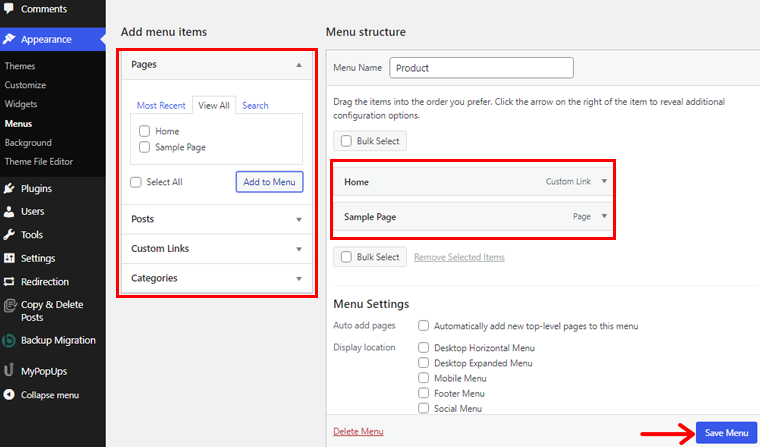
To create a menu, go to Appearance > Menus. After that, give your menu a name and click Create Menu.
Step 3: Add Elements to Your Menu
You can add different menu items like pages, links, posts, and more. For example, you can create secondary navigation for selected pages. Or, you can create an editor’s choice list via a drop-down menu from top-performing blogs.
Select the menu items of your choice and click Add to Menu. Following that, click on the Save Menu button.
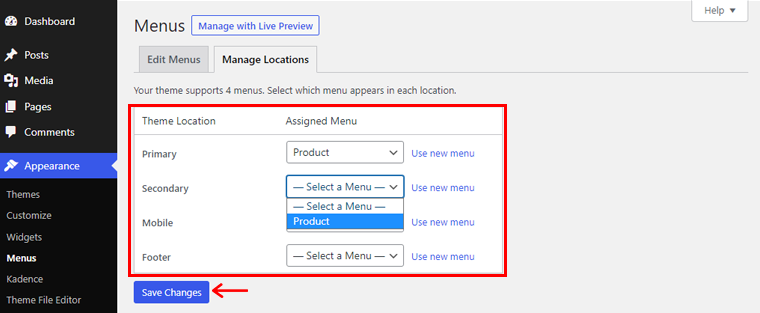
Step 4: Select Menu Location
Click on Manage Locations and assign the location of your menu. Here you can assign menus as Primary, Secondary, Mobile, or Footer menus.
Primary refers to the main menu at the top of the site, also called the header. Similarly, secondary refers to the menu below the header. Mobile refers to the mobile version of the site, and the footer is the bottom part of the website. Besides, there can be a variety of menu locations depending on your theme.
Click on Save Changes after choosing your desired locations.
Step 5: Add CSS to the Menu
To enable custom CSS, click Screen Options and check the CSS Classes. Now, you can create custom CSS drop-down menus. Also, click on Save Menu to save all the changes.
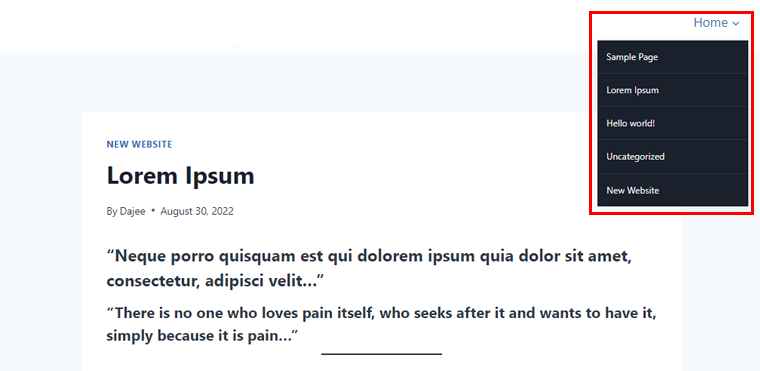
Step 6: Preview and Publish Your Menu
Now, preview any of the existing posts or create one to see the drop-down menu. You’ll see a drop-down menu as in the example below.
Congratulations, you’ve successfully added menus to the website.
This method allows you to create a drop-down menu in WordPress using a plugin. There are many plugins you can choose to create a drop-down menu. Here, we’ll be using the Max Mega Menu plugin.
Step 1: Install and Activate the Plugin
Before you start, you’ll need to install and activate the plugin. Simply go to your WordPress dashboard and click Plugins.
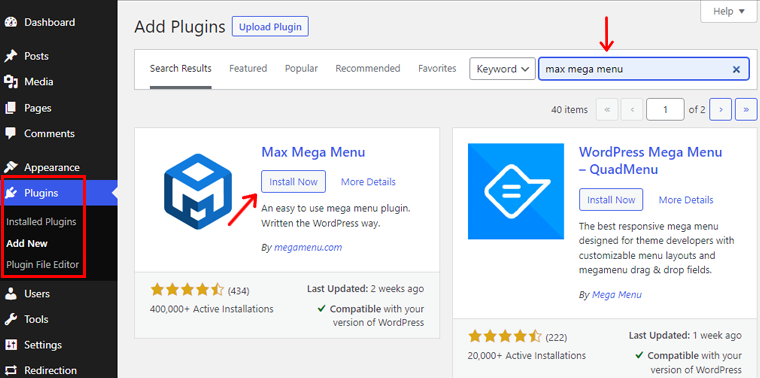
After that, click the Add New button and search for the plugin. Following that, Install and Activate, and you’re done.
You can also check our article on how to install a WordPress plugin to get more insights.
Step 2: Set up Drop-Down Features
After that, you’ll find the Mega Menu plugin on your WordPress dashboard, click on it.
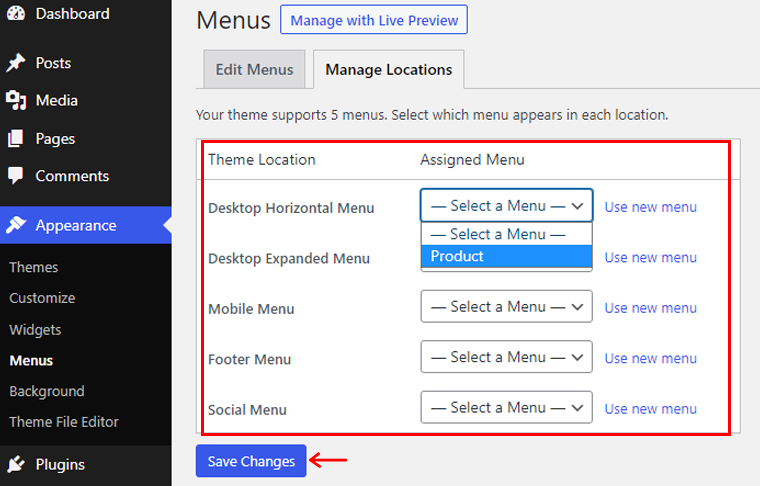
Now, choose the location in the Menu Location option and click the Assign a Menu option.
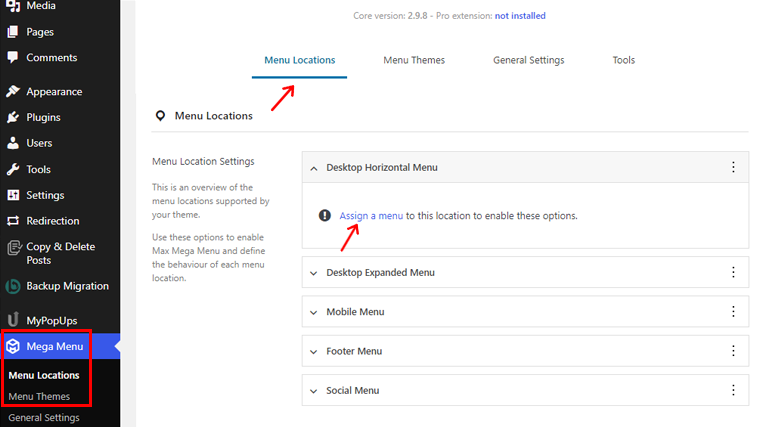
Following that, you’ll be directed towards a page where you can select a menu on different theme locations. Once you’ve selected the location and menu, click the Save Changes button.
Now go to the Mega Menu option on the Dashboard, and inside the Menu Location, click on the locations you’ve assigned your menus. There, click on the Enable option, this will enable the drop-down functionality to your menus.
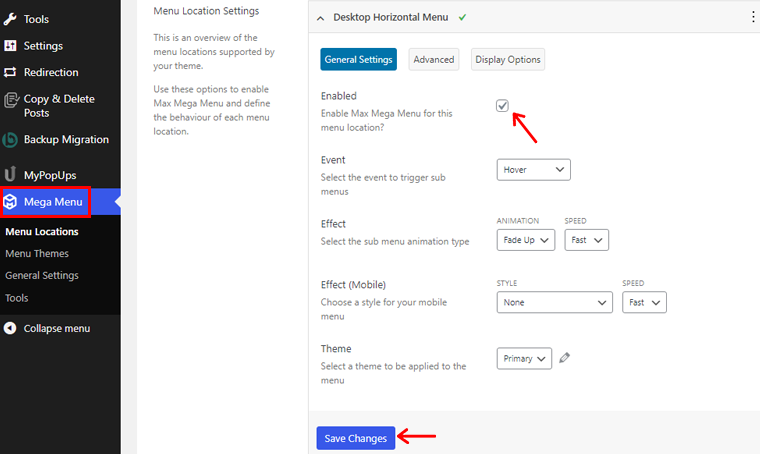
Also, your plugin will automatically adapt to your theme style. So, go to the Mega Menu > Menu Theme option if you want to change the menu style, animation, etc.
There, you can change the theme title, arrow styles, line height, shadow, etc. After making the changes click on the Save Changes button.
Step 3: Create Drop Down Menu
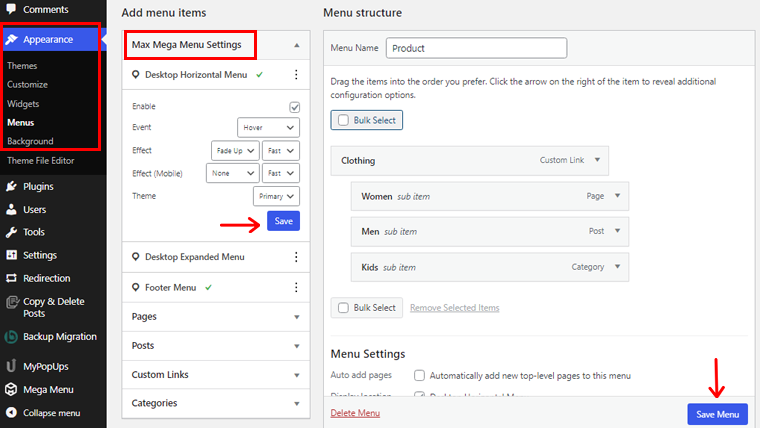
Now, the final step is to create a drop-down menu.
To do so, navigate to Appearance > Menus, then add items to your menu using Max Mega Menu functionality enabled. Don’t forget to click on the Save Menu button once you’re done.
Now, your drop-down menu is ready to display on the posts and pages of your website.
Following any of these above methods, you can easily create a drop-down menu on your website’s content. Also, it’ll help to keep your website’s menu bar clean and user-friendly.
Are you planning to create a site of your own? Then, check our comprehensive guide article on how to make a website from the scratch.
Conclusion
Well, that’s all for now! In this article, we’ve mentioned how to make a drop-down menu in WordPress. We hope that’ll help you know all the methods of creating a drop-down menu in WordPress.
So if you’ve any queries or suggestions regarding this article, then let us know in the comment below. You can also share your experience of creating a drop-down menu in WordPress.
You can also check out our article on the best WordPress survey plugins for your site and how can a business benefit from using analytics on their website.
Also, don’t forget to follow us on Facebook and Twitter for more useful articles.
Some of the links on this article/page are affiliate links. If you click on such an affiliate link and purchase the product, we’ll earn a specific percent commission from the seller. But it won’t at all affect the price you’ll pay.