Shopify is good at ecommerce, but so-so at content management. WordPress is good at content management but many people prefer Shopify to WooCommerce for online selling. If you’re adamant about using Shopify for ecommerce, but WordPress is a crucial part of your content management process, it’s essential to learn about the Shopify WordPress integration.
An integration like this makes sense for bloggers and content creators who want to start selling products. It’s also nice for online store owners who need a stronger blogging system (i.e. WordPress).
Regardless of your needs, this guide will show you everything necessary to add a Shopify WordPress integration!
Shopify WordPress integration: how it works
The Shopify WordPress integration works by adding a Shopify Buy Button to your WordPress site. This way, you maintain every aspect of your website (blog, site design, SEO) on WordPress, but you can also sell products and process payments with a simple button from Shopify.
👉 Here’s how it works:
- Create a product in Shopify (images, product description, and price).
- Copy the embed code for the Shopify product.
- Paste that code anywhere on WordPress to embed Shopify products on the site.
- Then, customers go to your WordPress site to see the Shopify products. But to purchase, they’re sent through a Shopify checkout module.
How to create Shopify Buy Buttons and add them to WordPress
To begin, you must have both a WordPress website and a Shopify account.
Every Shopify pricing plan 💰 provides access to the Buy Button Channel app (which is necessary for the Shopify WordPress integration). That means you only need to pay for the Starter plan ($5 per month) to get this feature.
If you don’t have a WordPress site or a Shopify store yet, check out these two tutorials and then come back to this post:
If you’re struggling with a name for your store, you can use a Shopify store name generator.
Once you have your WordPress website and Shopify store going, here’s how to set up the Shopify WordPress integration:
- Install the Buy Button sales channel in Shopify
- Add a product in Shopify
- Create the embeddable Shopify product
- Embed the Shopify product on WordPress
- Test the Shopify WordPress integration
- Don’t forget to set up payment processing in Shopify
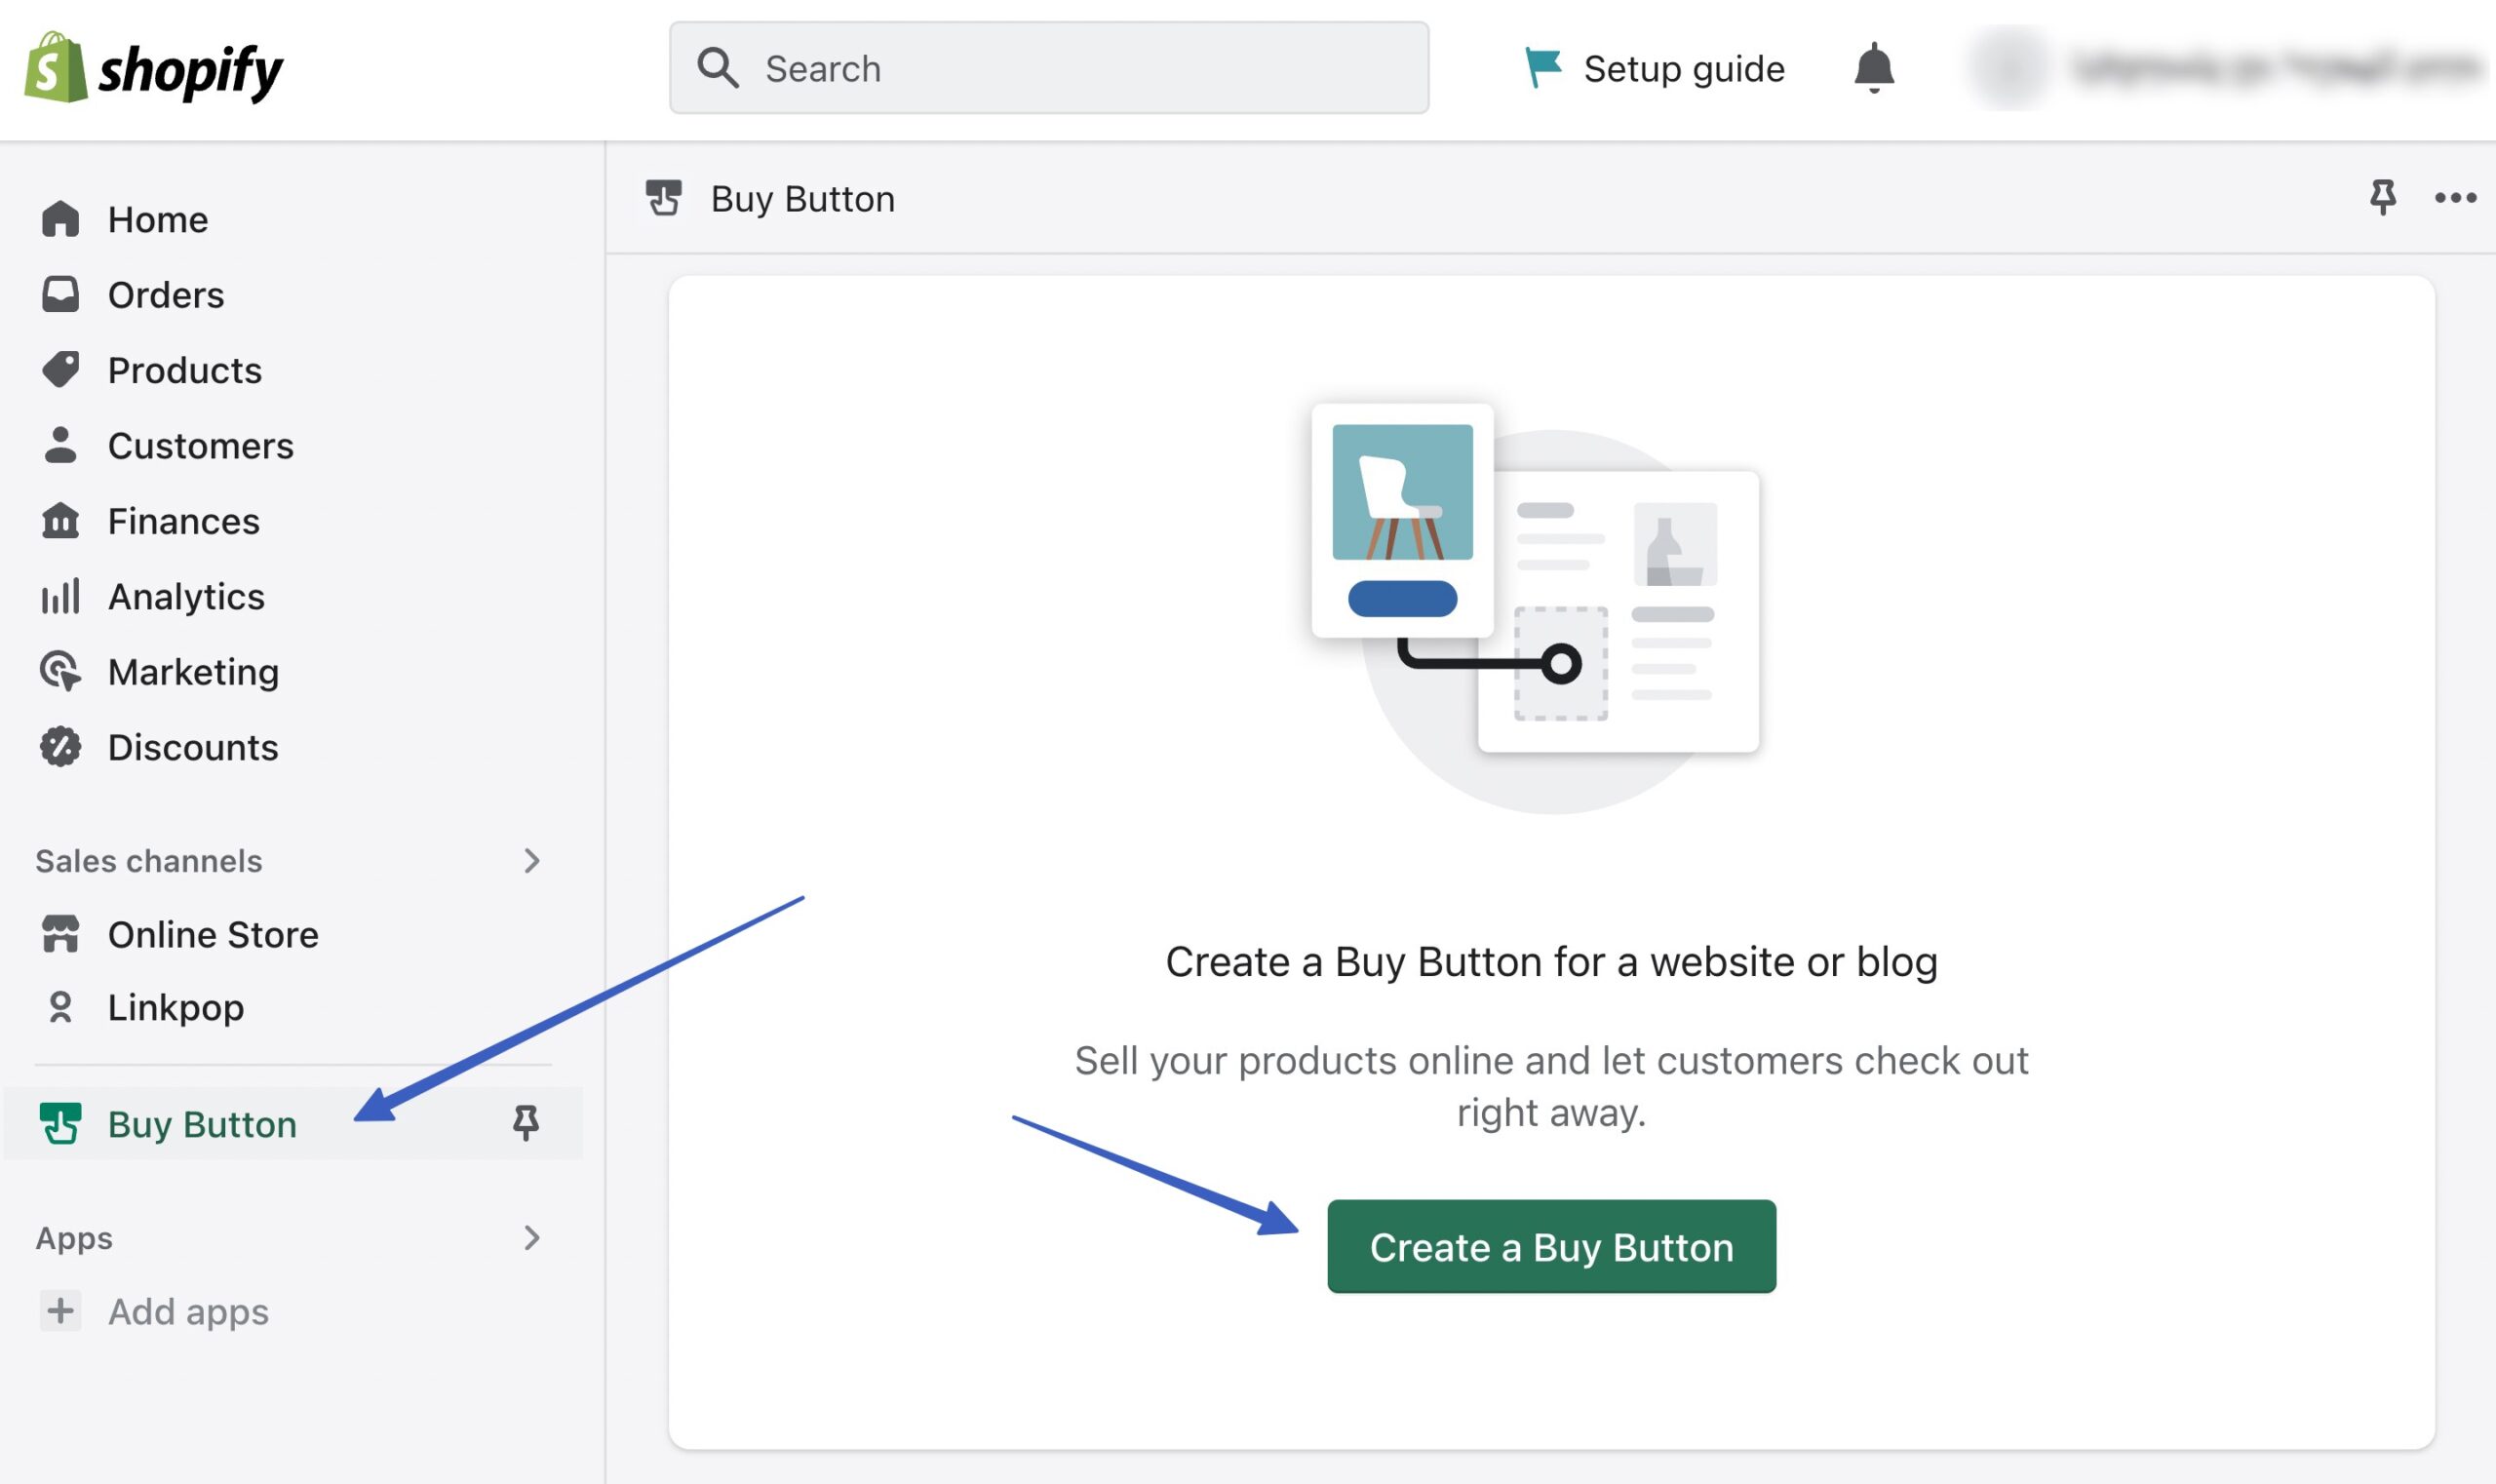
1. Install the Buy Button sales channel in Shopify
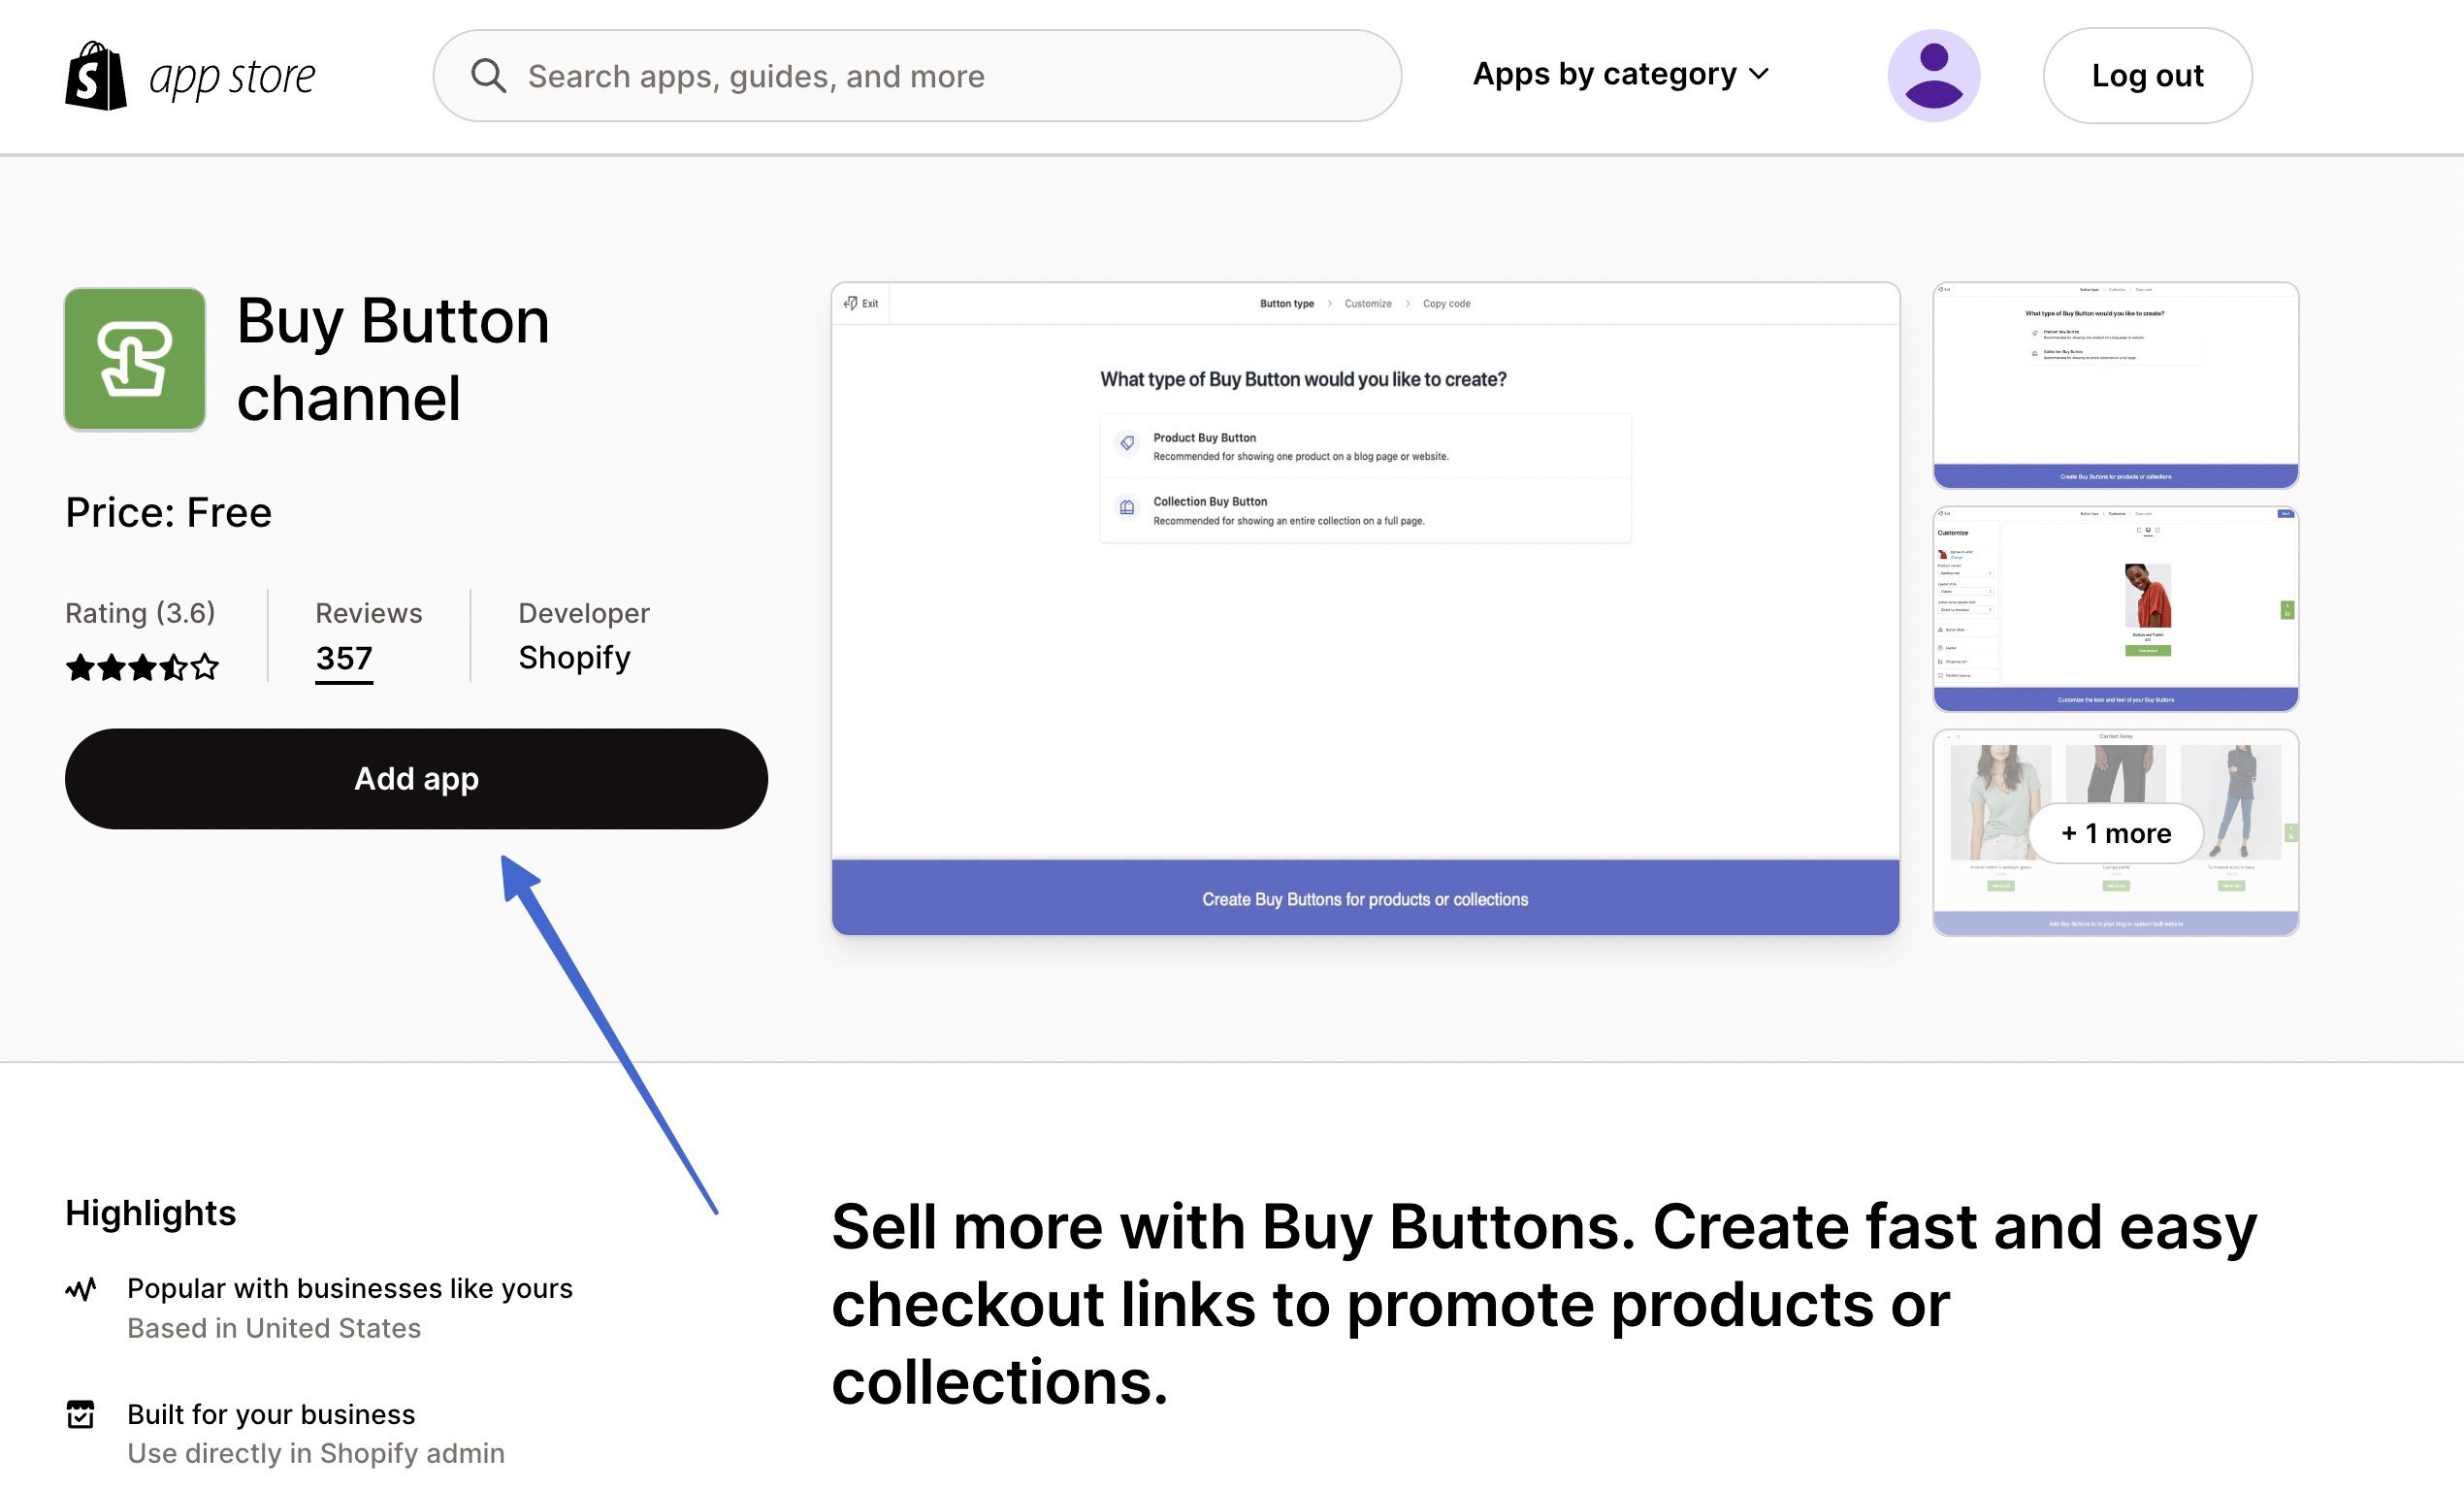
After logging into your Shopify account, go to the Buy Button channel page in the Shopify App Store. You can also browse for this in the search bar in Shopify.
Click the Add App button to install it on your store (the Shopify store you’re currently logged into):
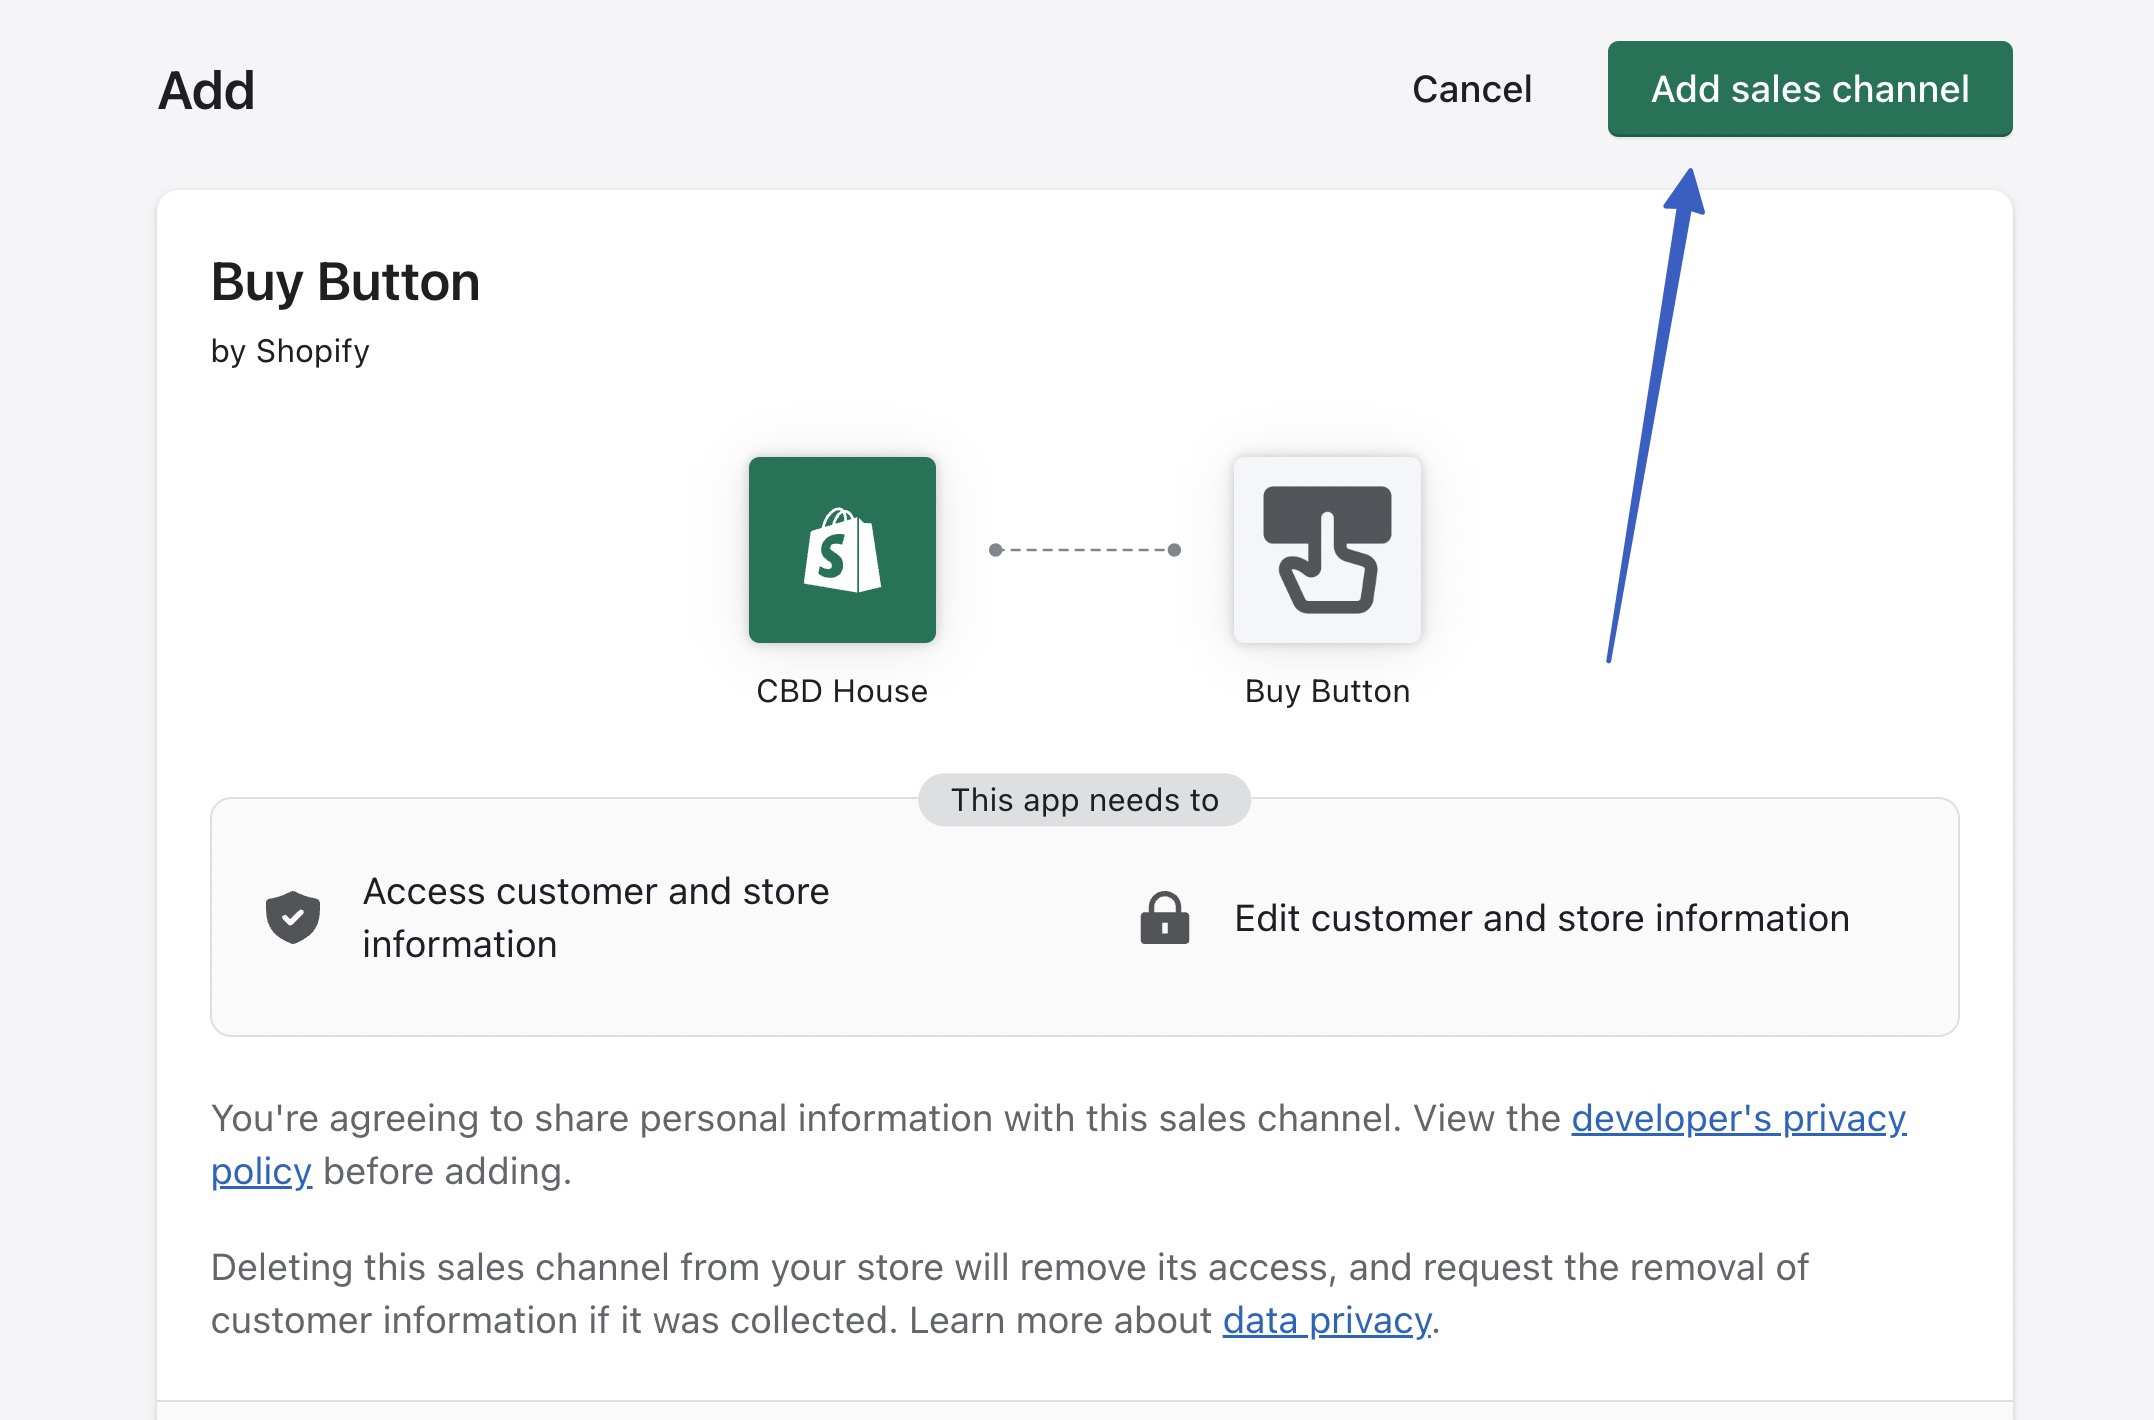
After getting redirected back to Shopify, click the Add Sales Channel button to complete the process:
💡 Note: This page explains privacy and permissions information before installing the app.
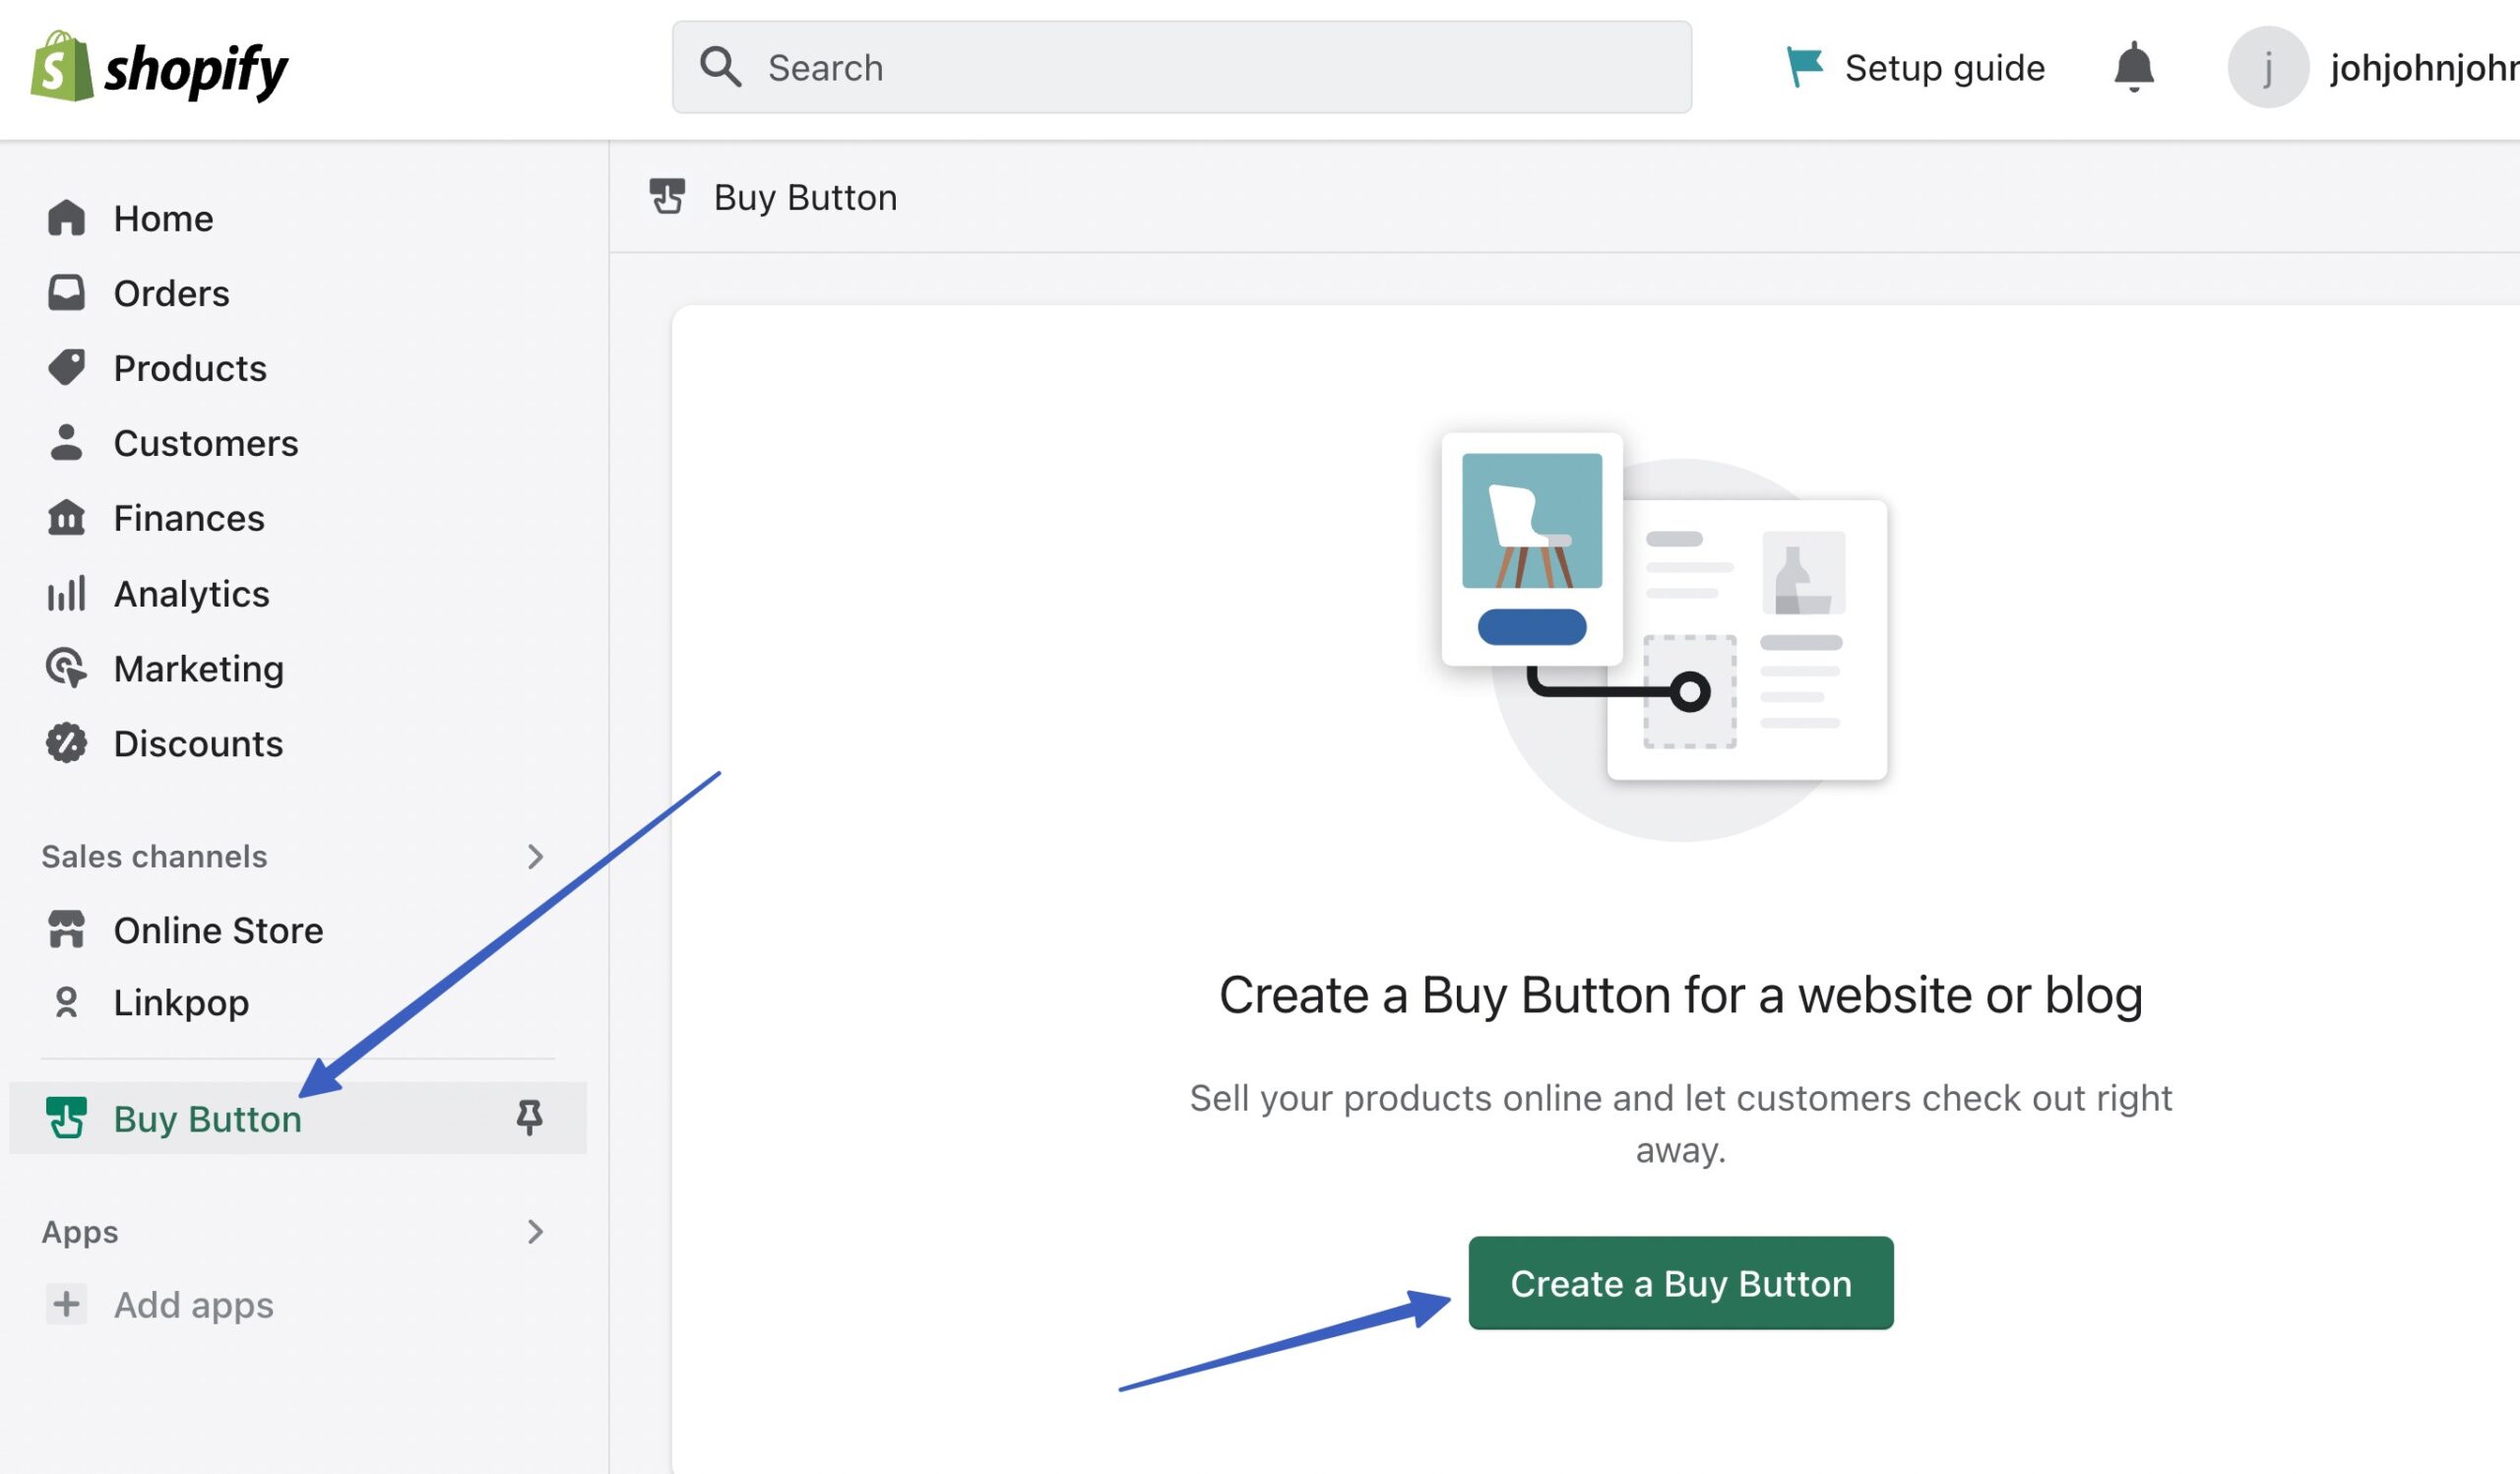
You should now see a Buy Button option in the Shopify menu, along with a button to Create A Buy Button:
2. Add a product in Shopify
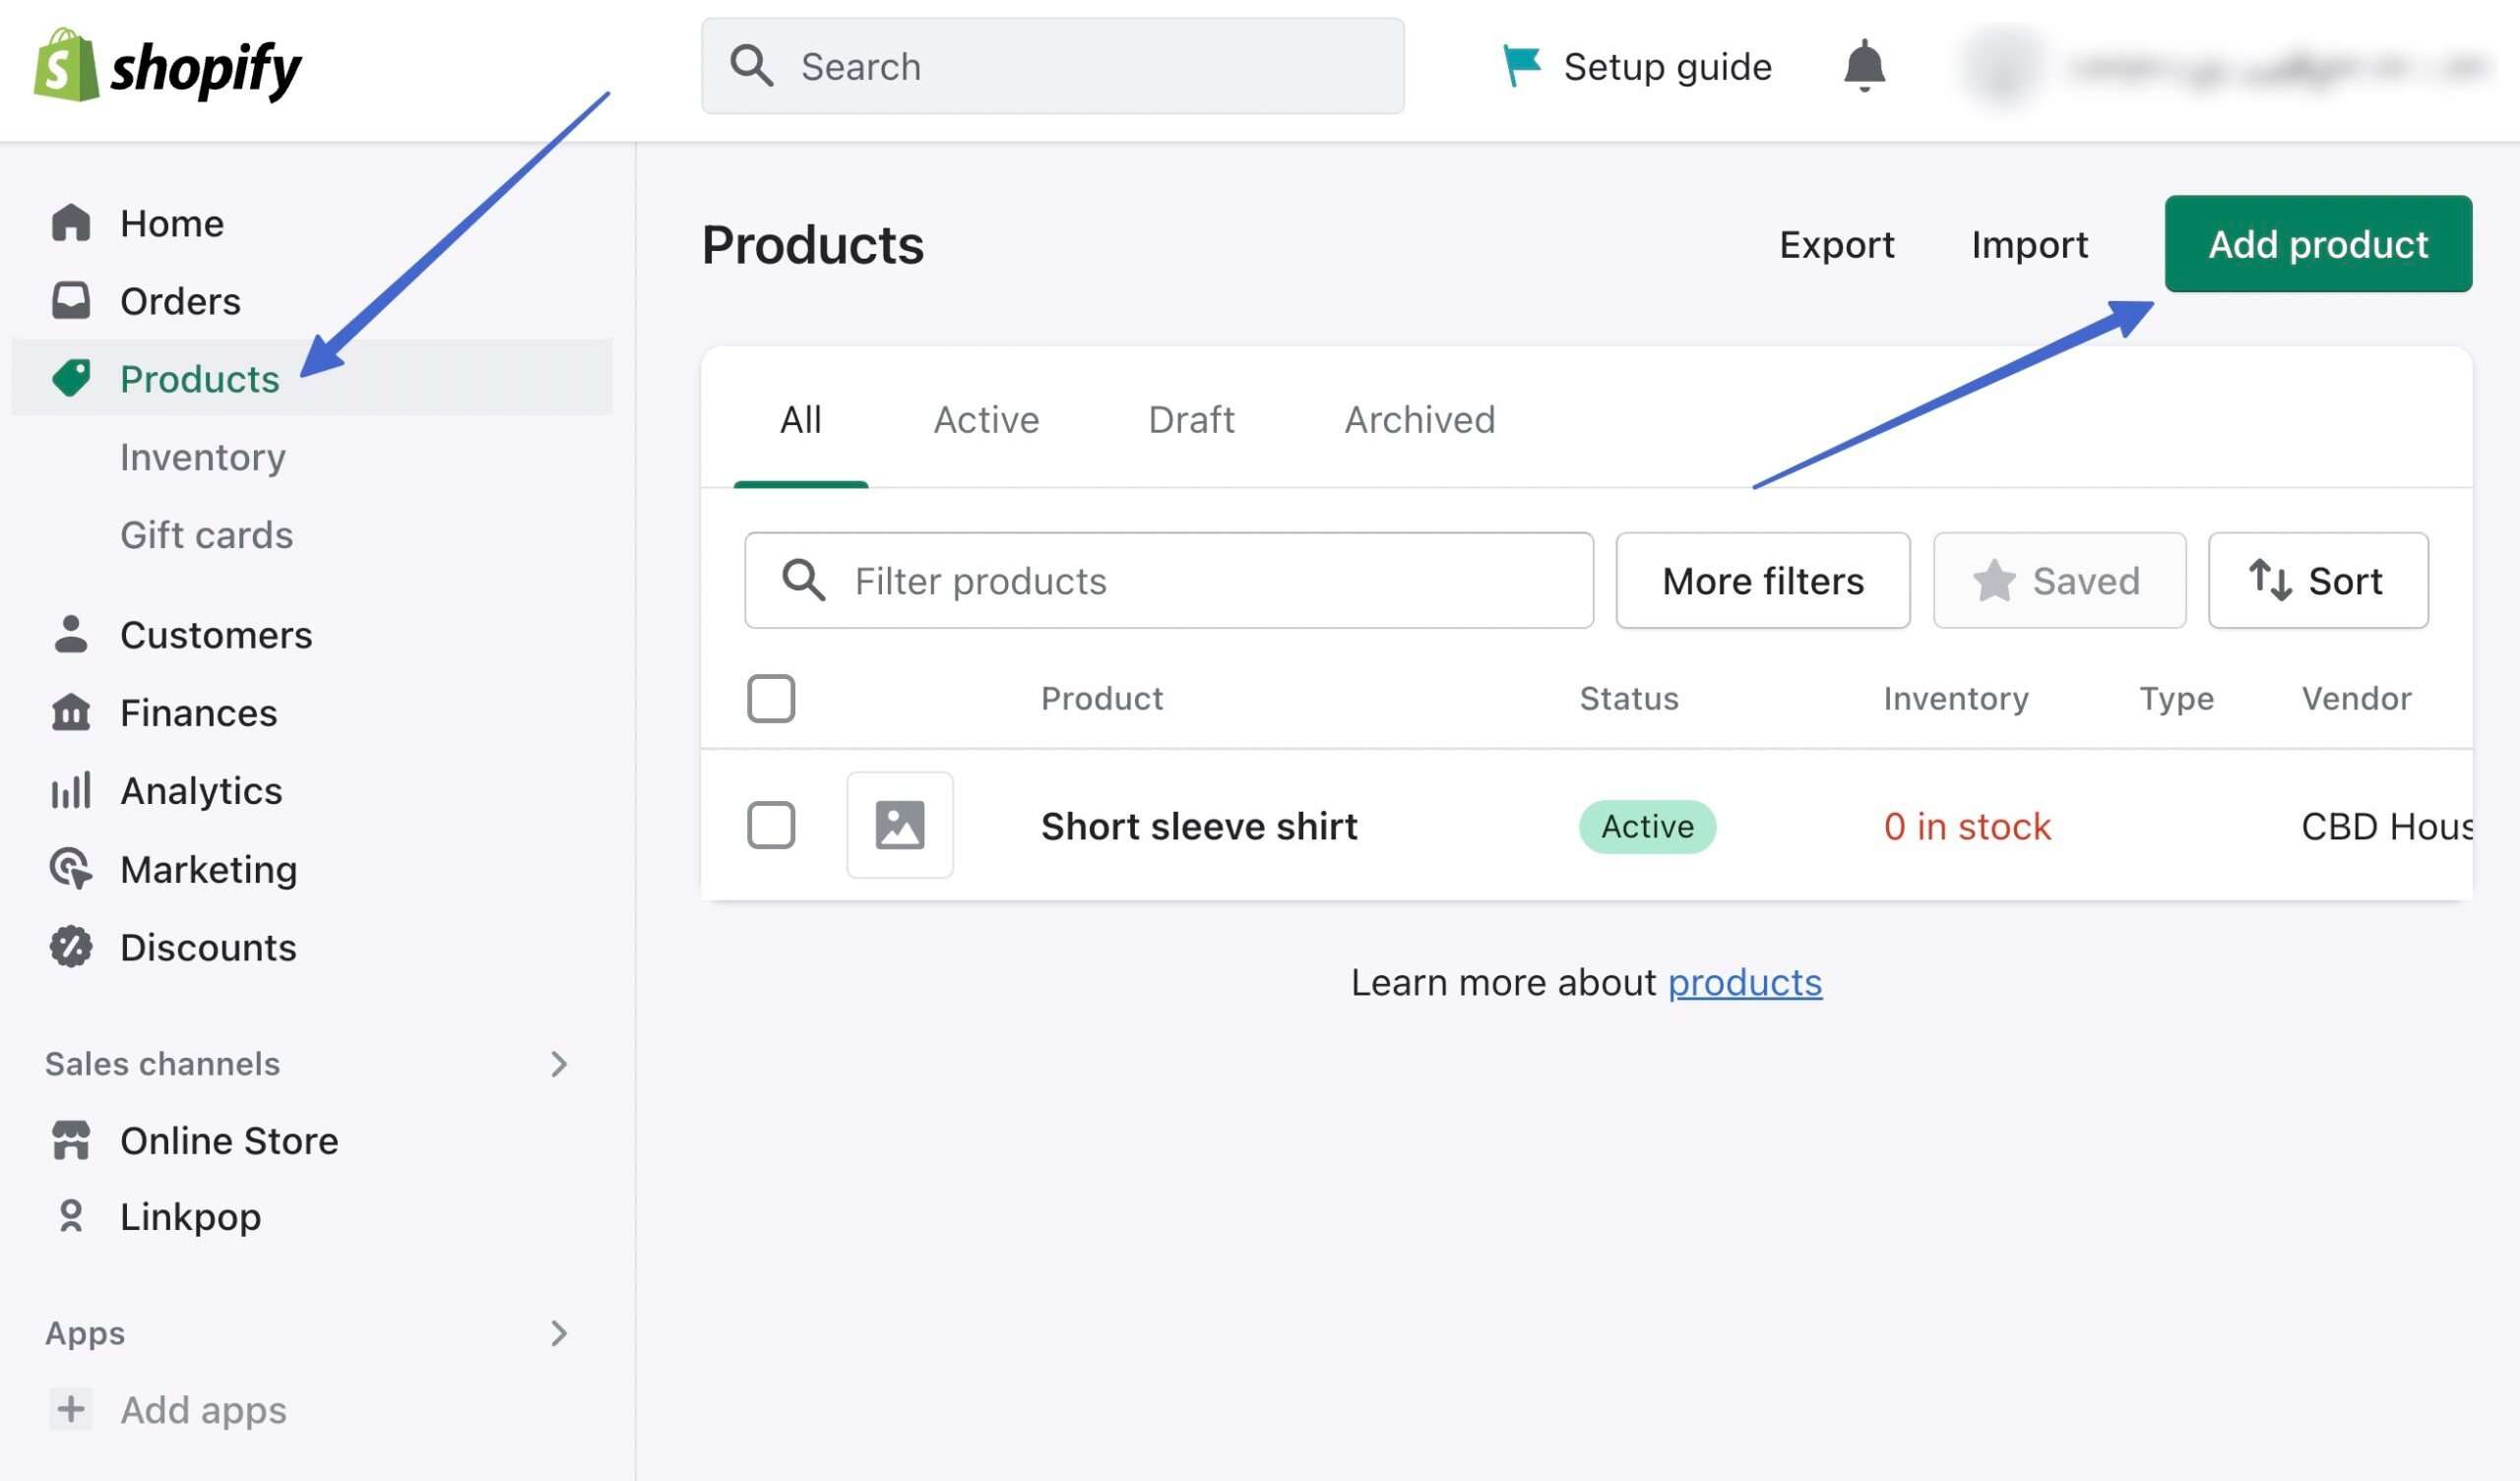
With the Buy Button channel installed, it’s time to add products that you can sell through the Buy Button sales channel.
Go to Products > Add Product in the Shopify dashboard:
Fill in product details like:
- Title
- Description
- Media (images)
- Pricing
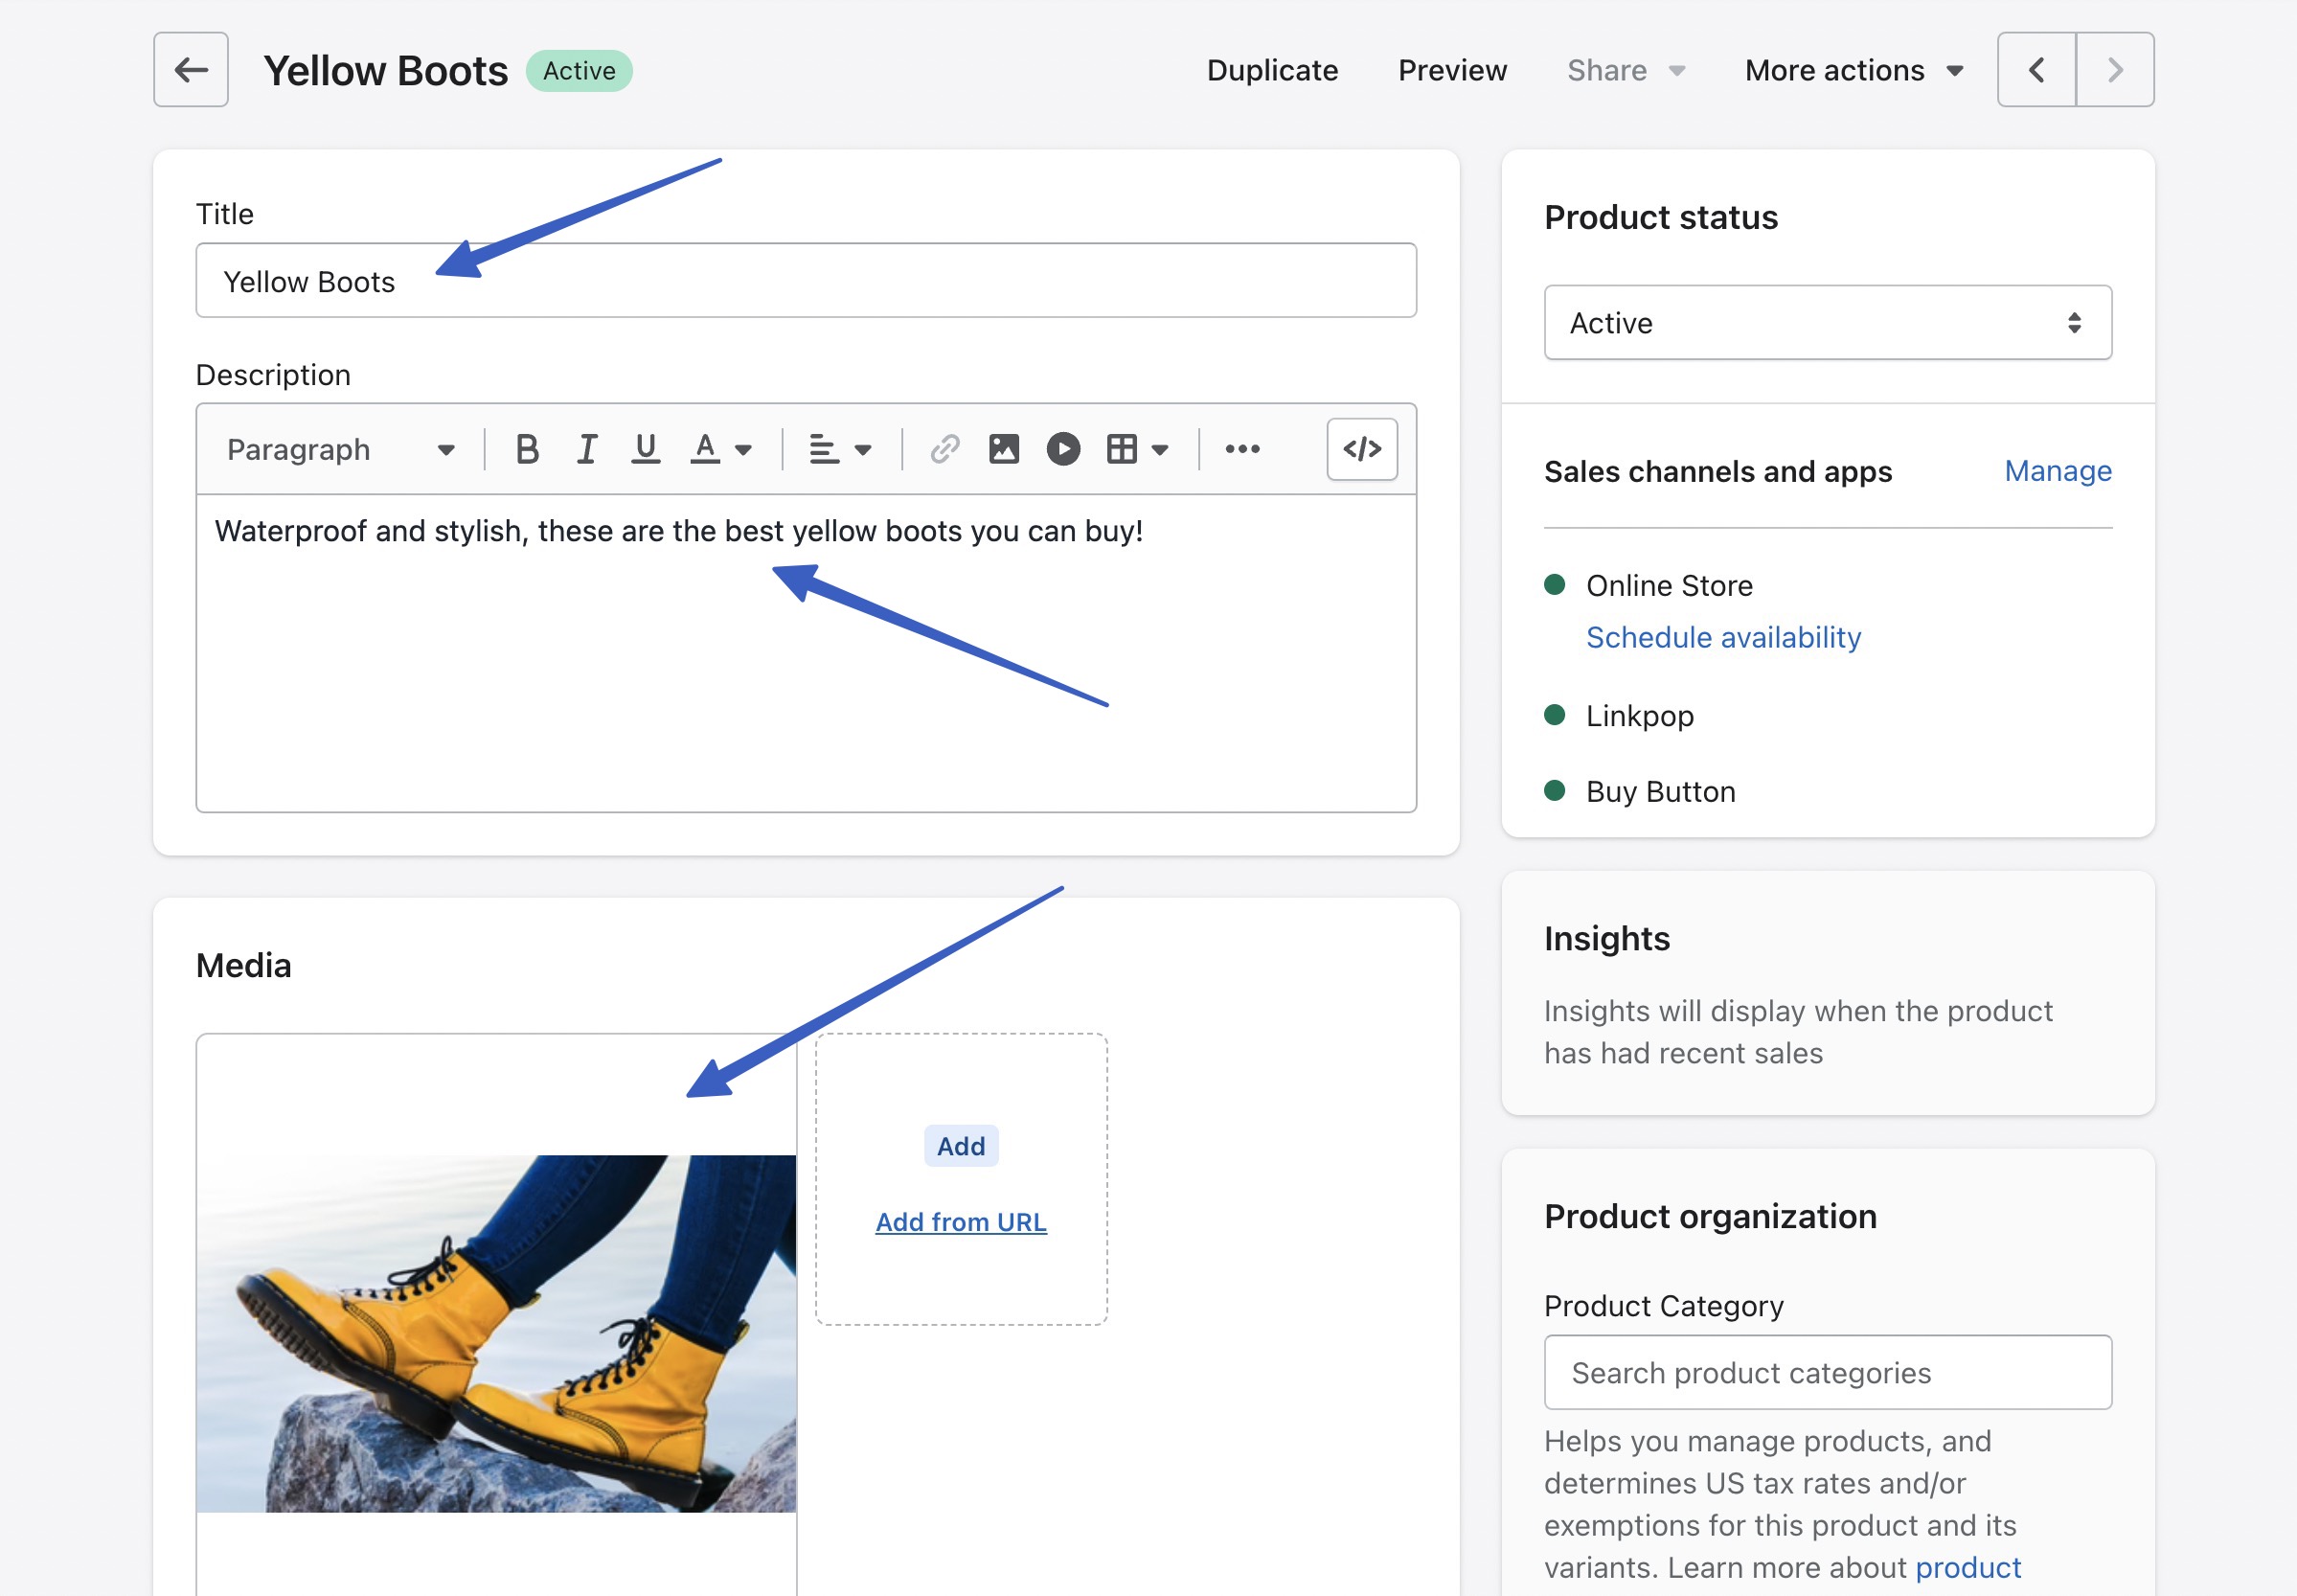
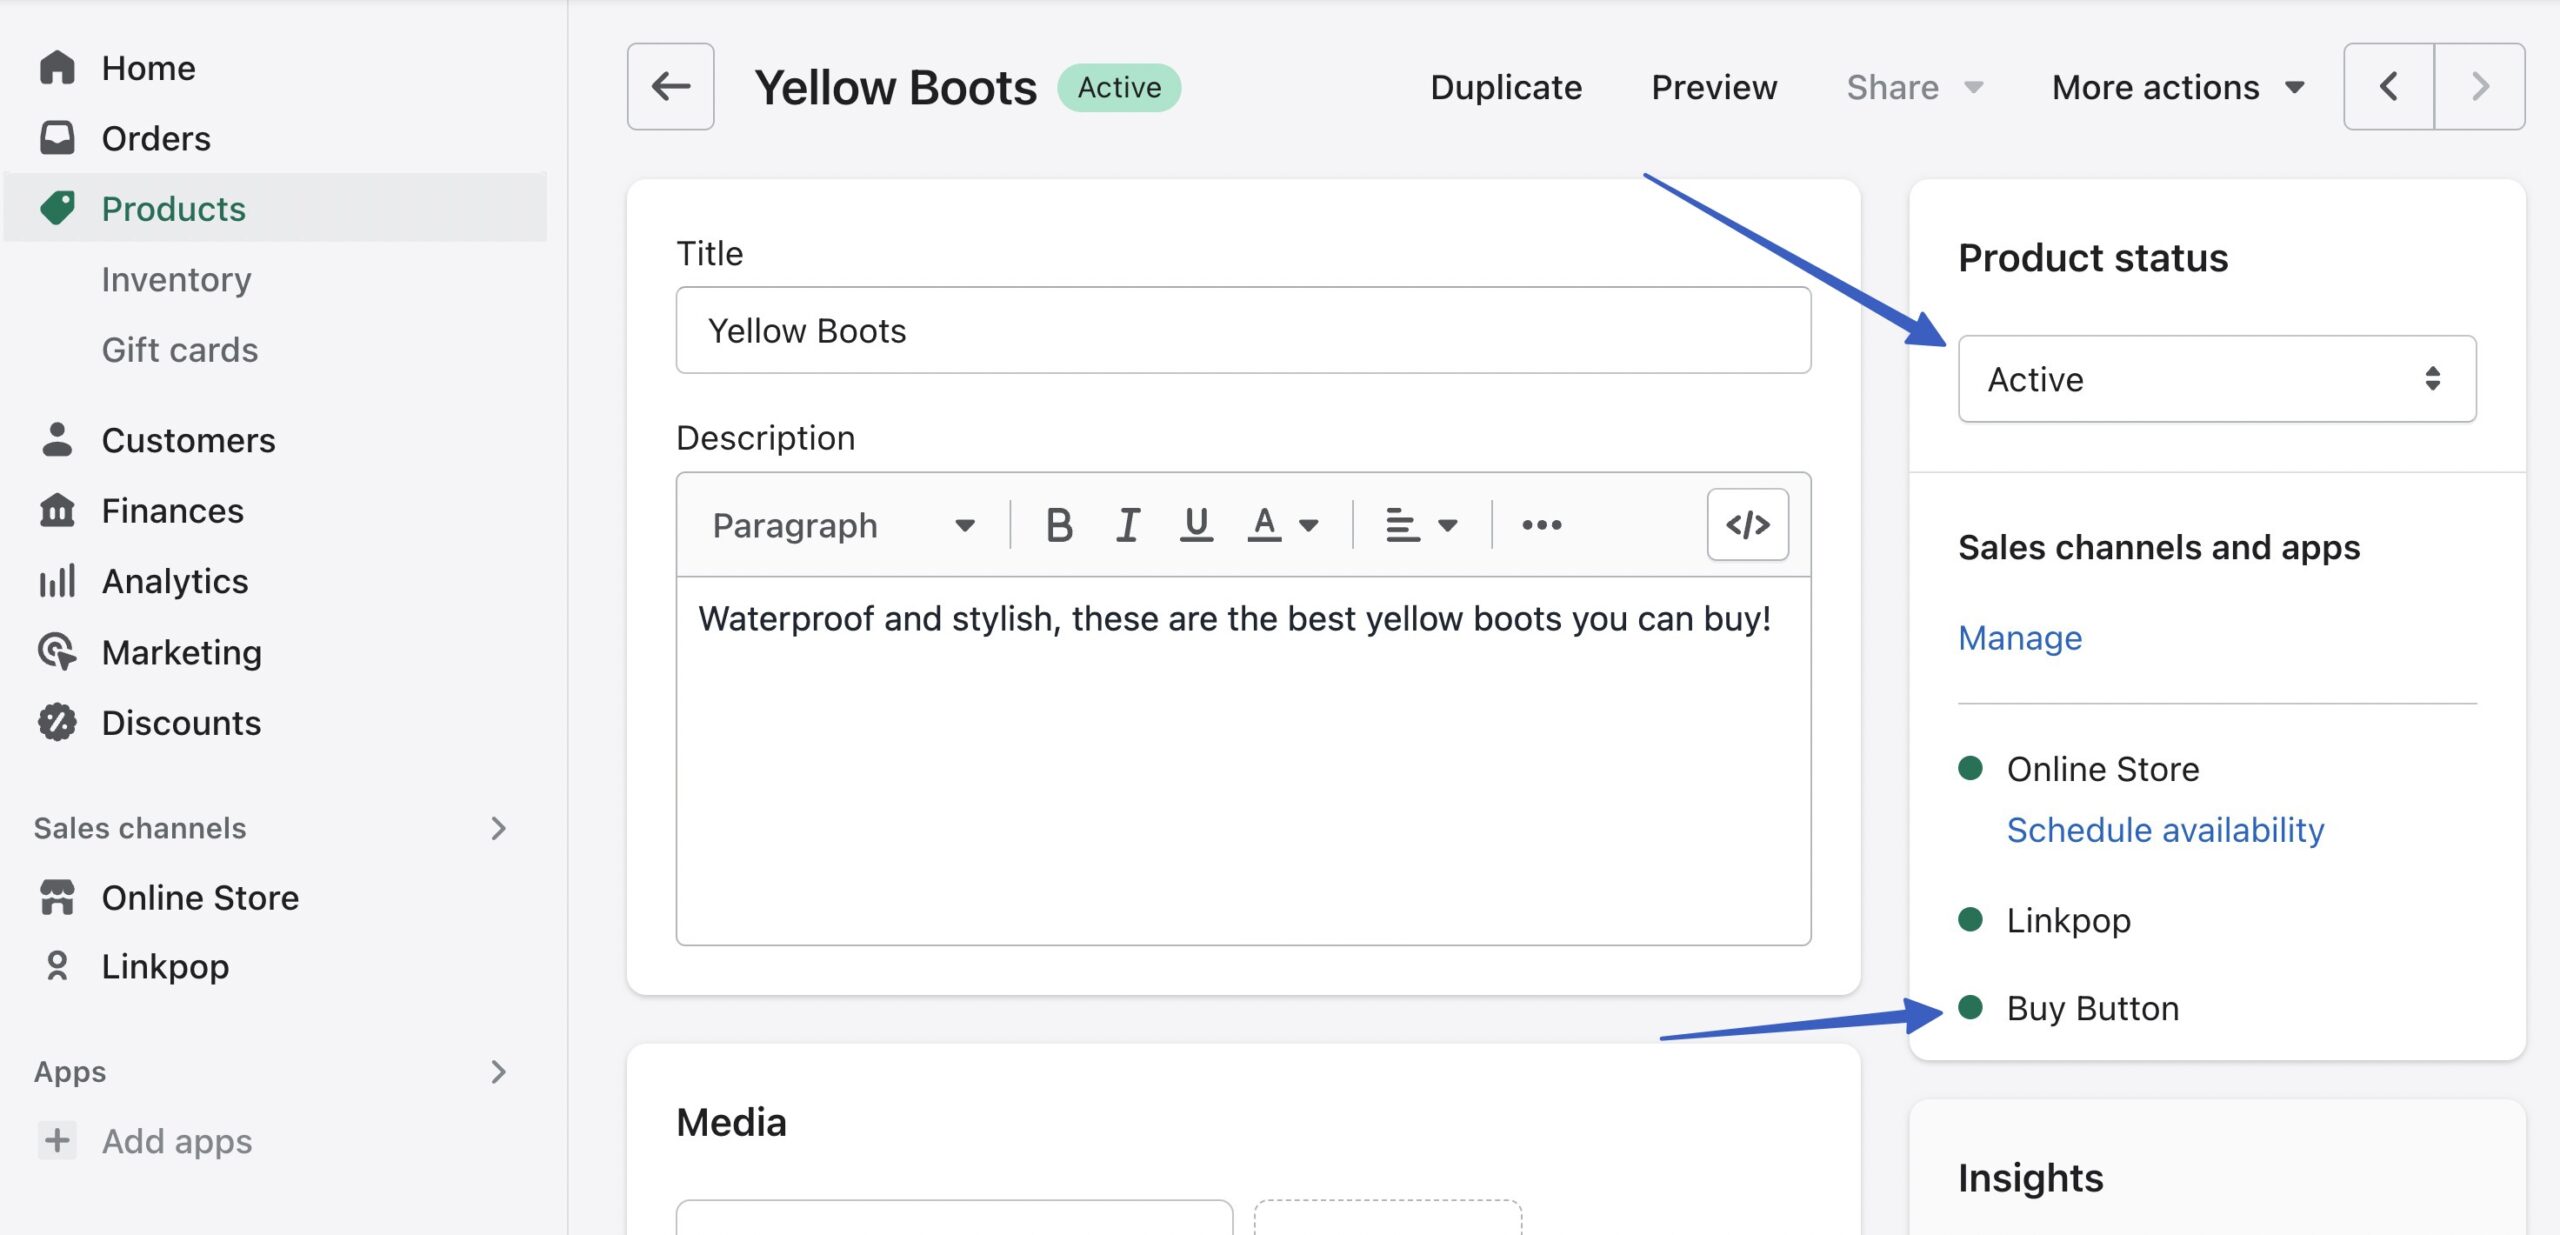
Make sure the Product Status field is set to Active. Moreover, ensure the Buy Button Sales Channel is shown with a green marker next to it. You can click the Manage link to add or remove sales channels.
💡 Note: You must install the Buy Button Channel app from Step 1 to see it within a product page.
Click the Save button to add this product to your catalog.
3. Create the embeddable Shopify product
In Shopify, remain on the product you intend to embed into a WordPress site. Click the More Actions dropdown, and choose the option to Embed On A Website:
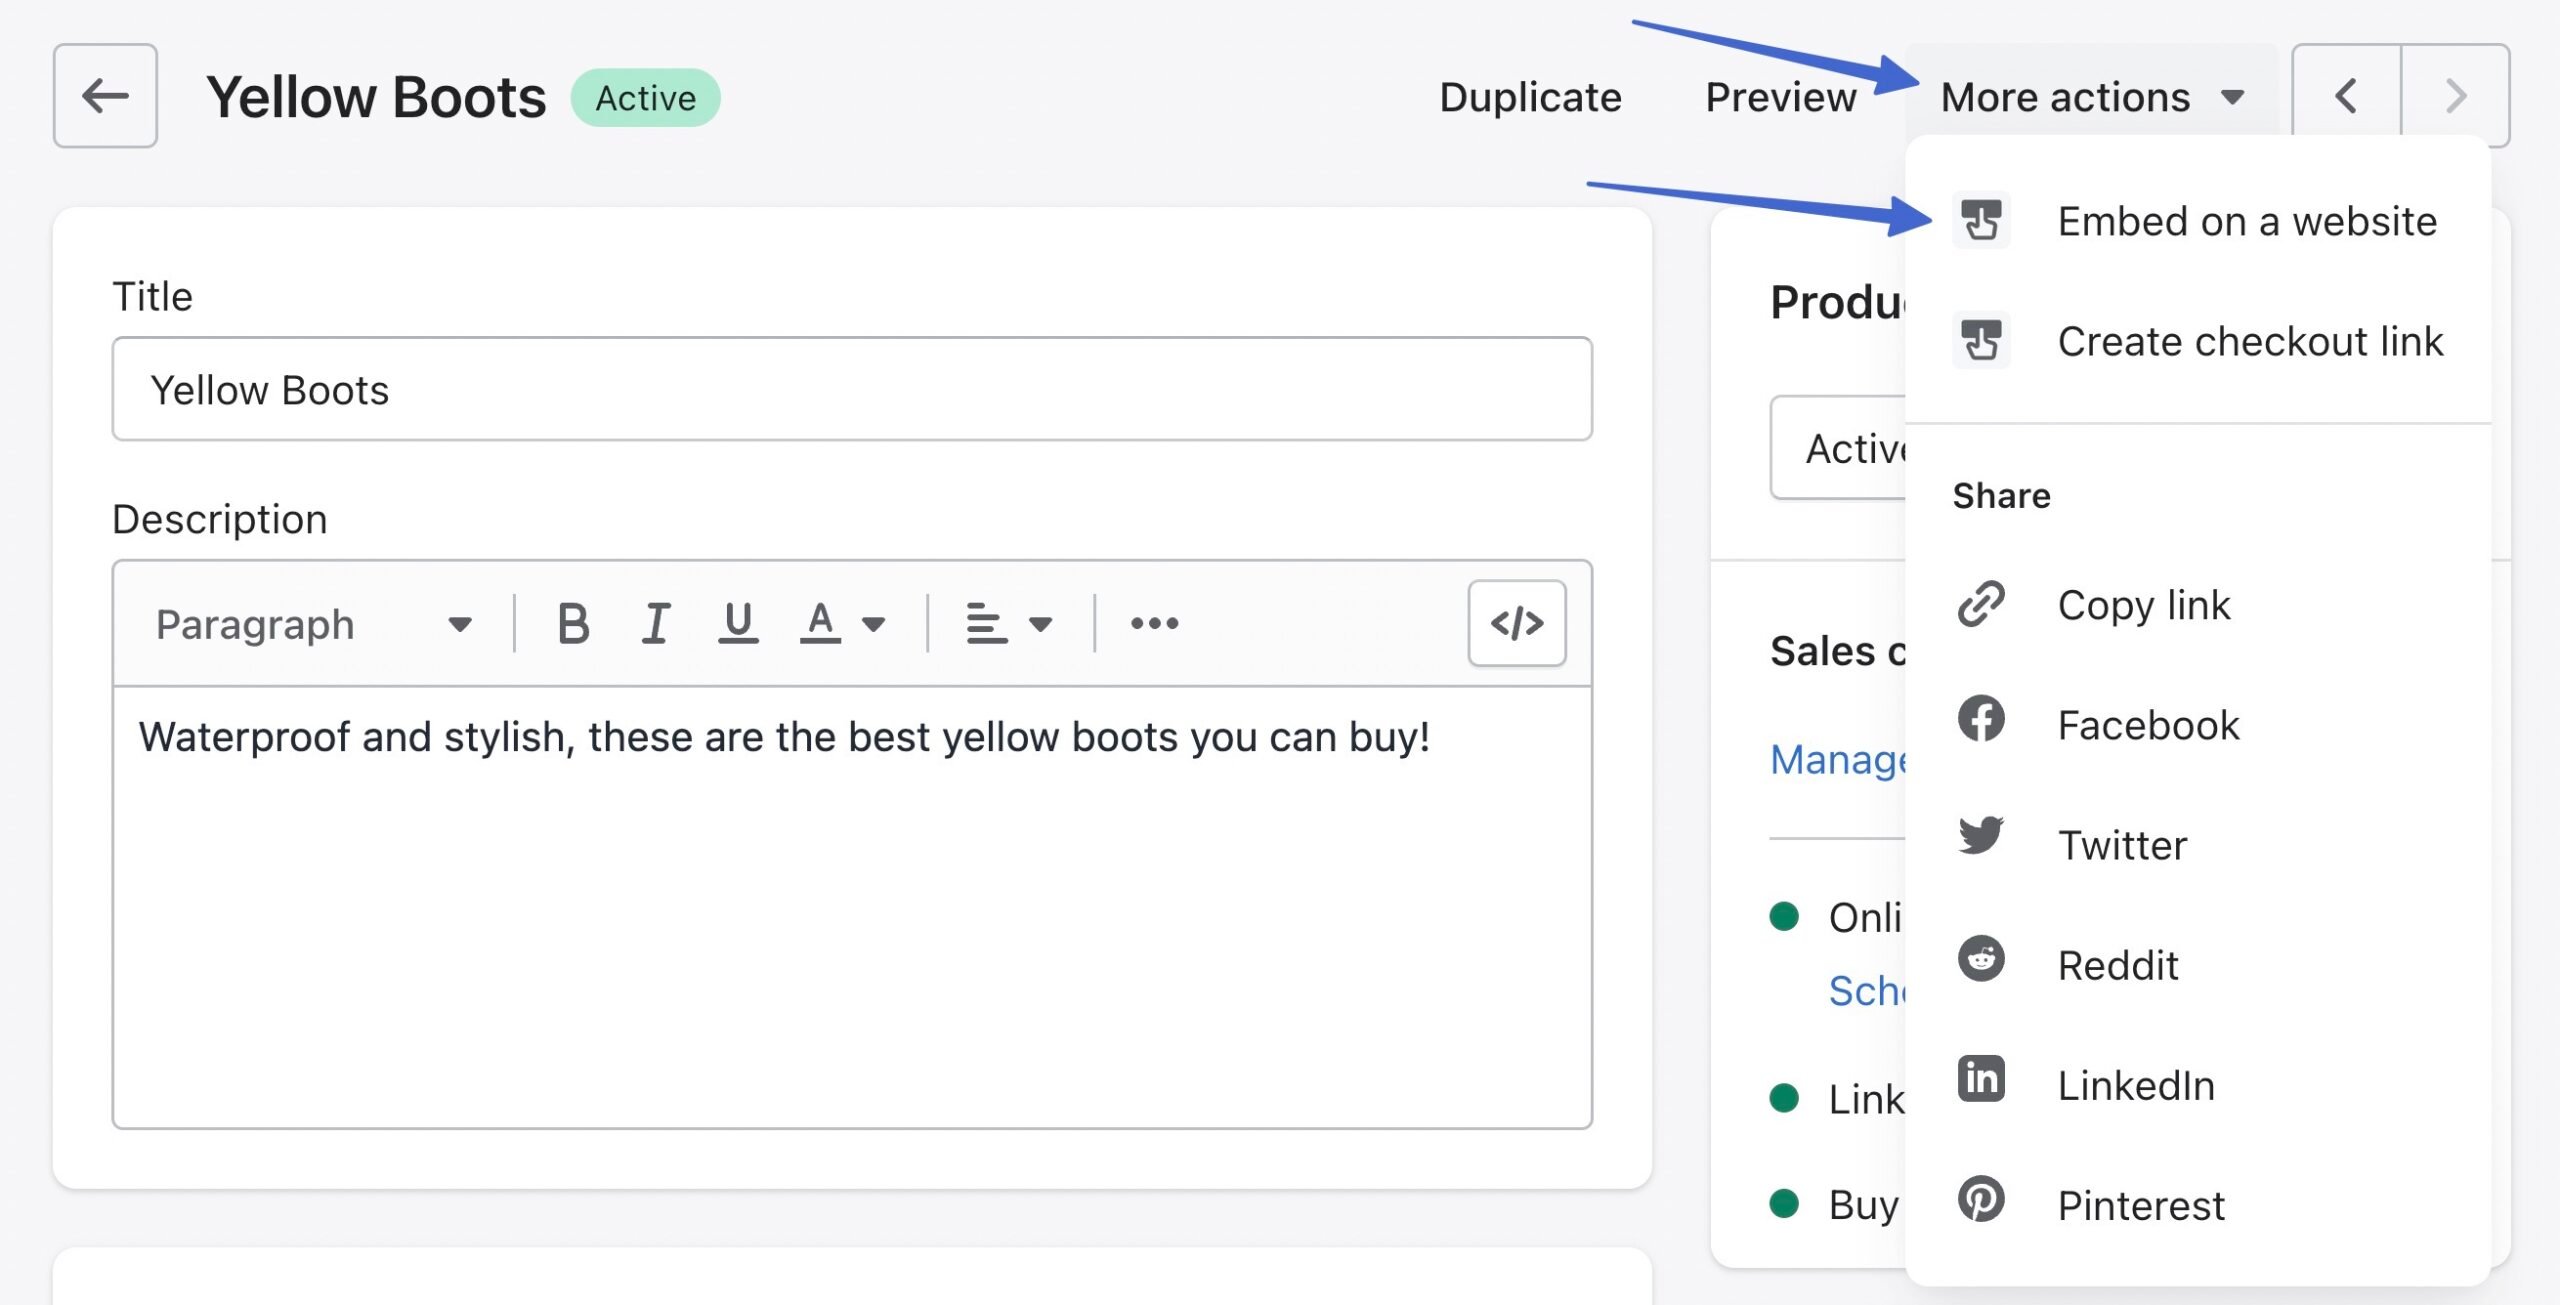
This brings you to the Embed On A Website page.
💡 Note: As an alternative, you can click the Buy Button tab in the Shopify main menu; this offers more advanced Buy Button customization settings, which we’ll outline further in the article.
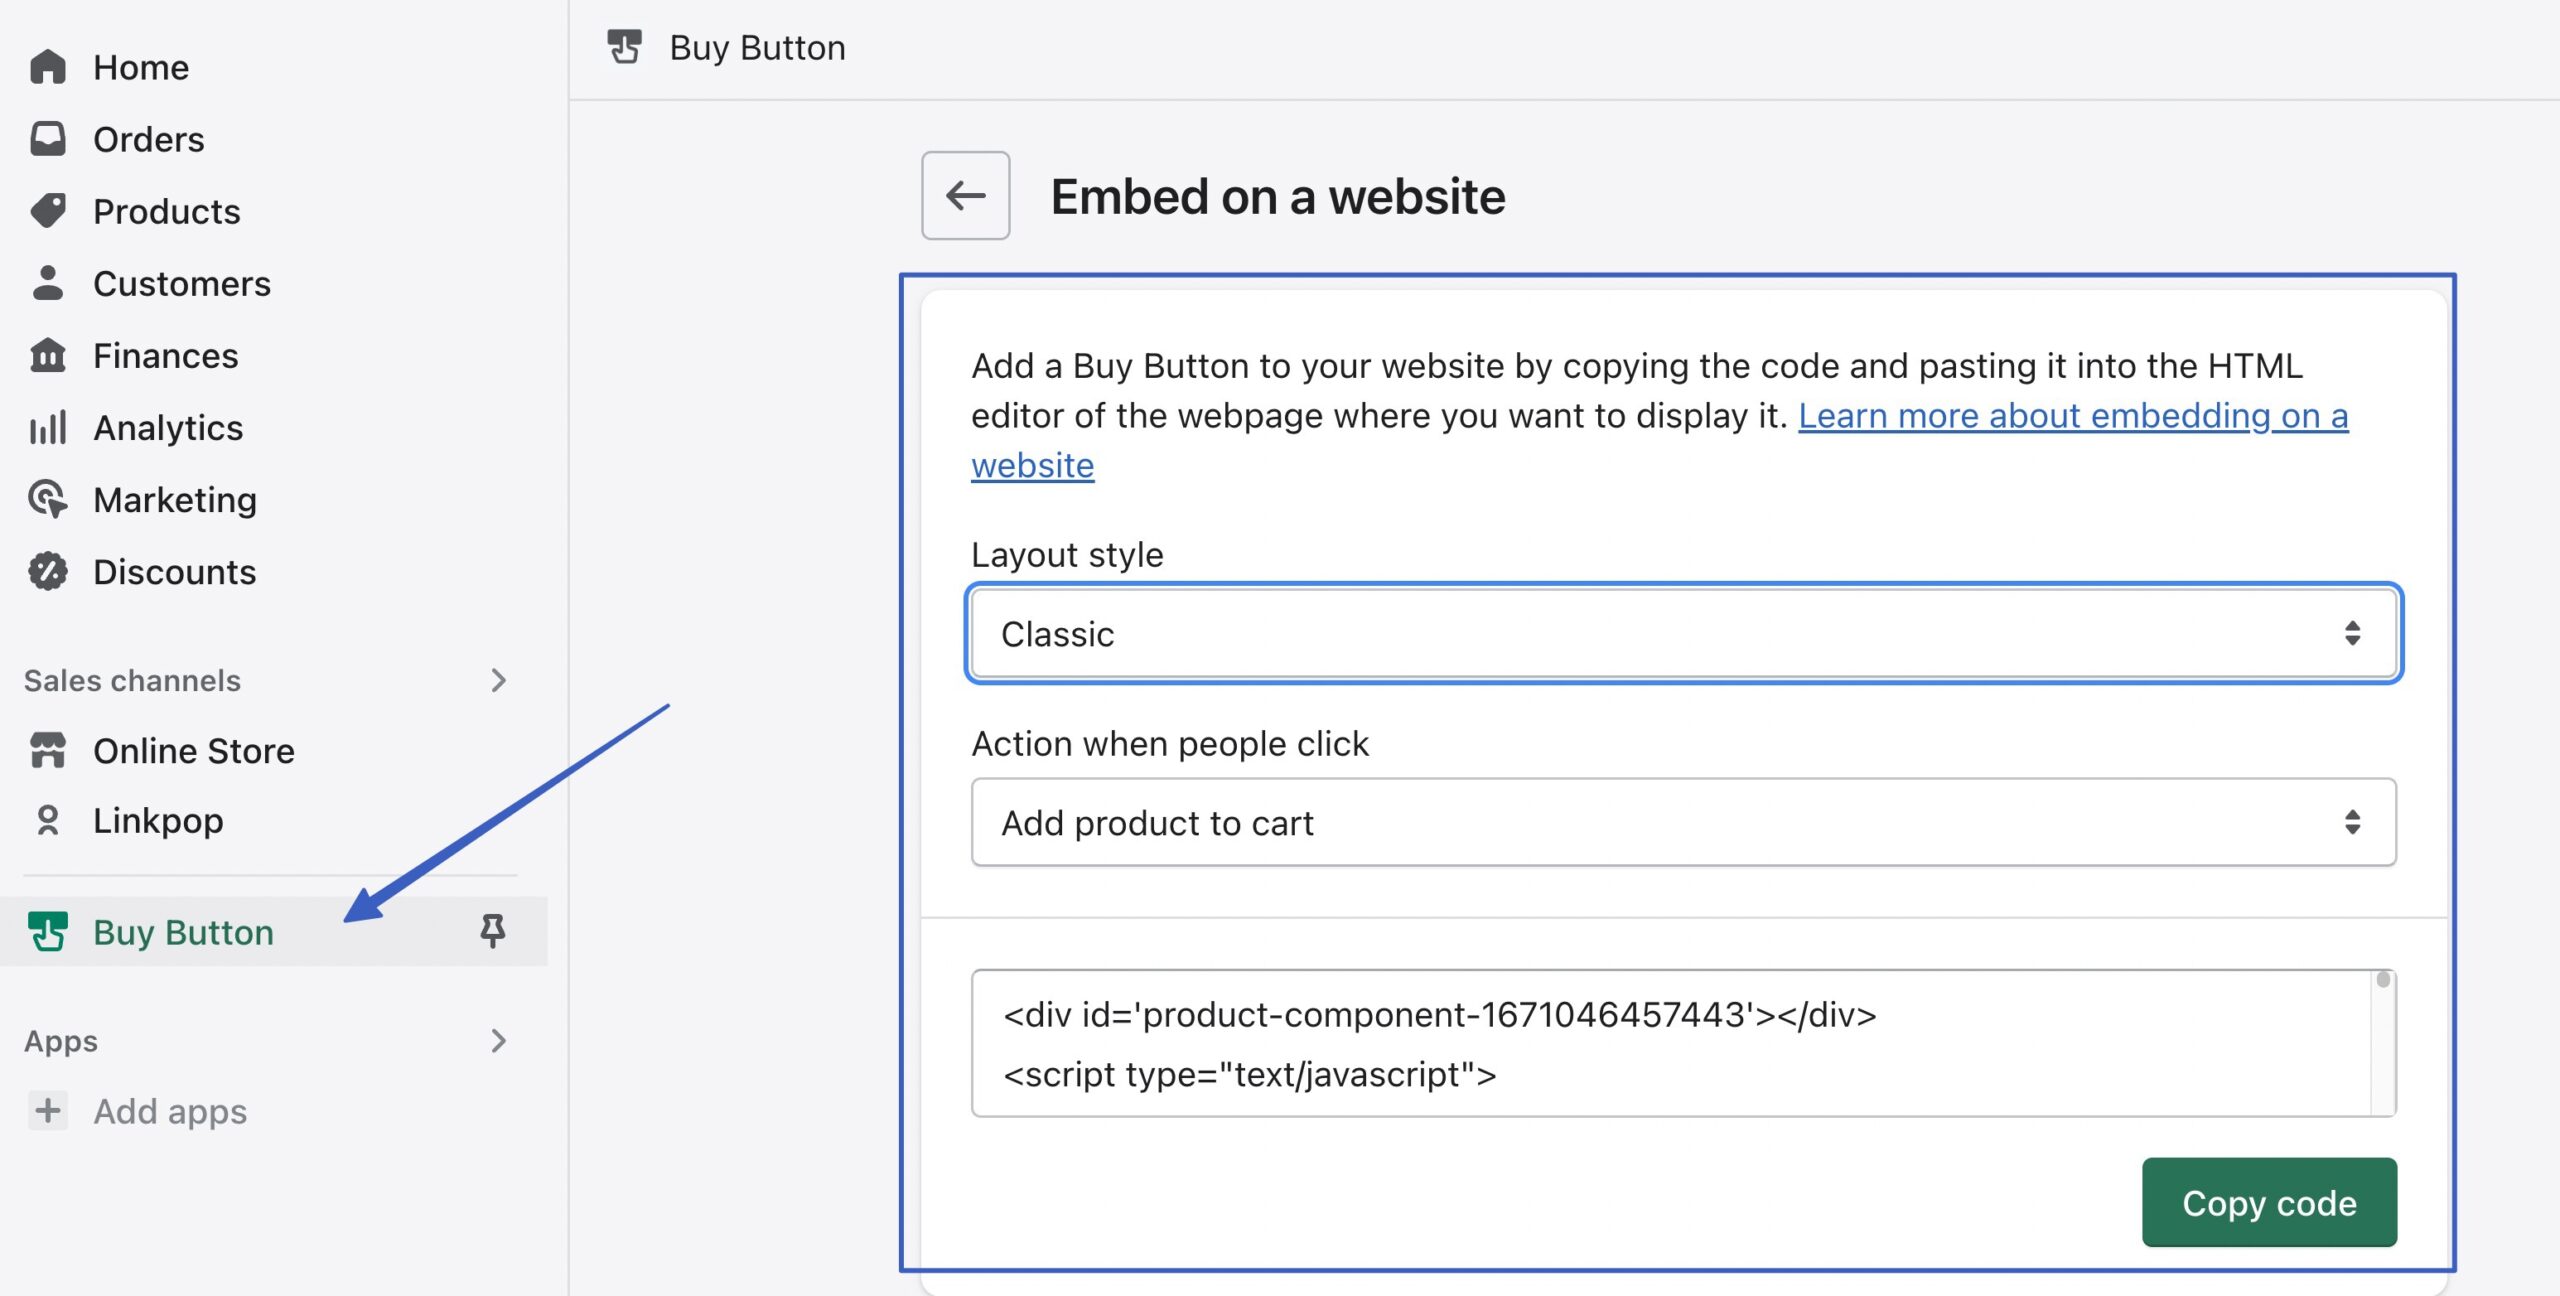
Configure the styling settings so that your buttons look nice when presented on the WordPress site. For the Layout Style field, pick Basic, Classic, or Full View:
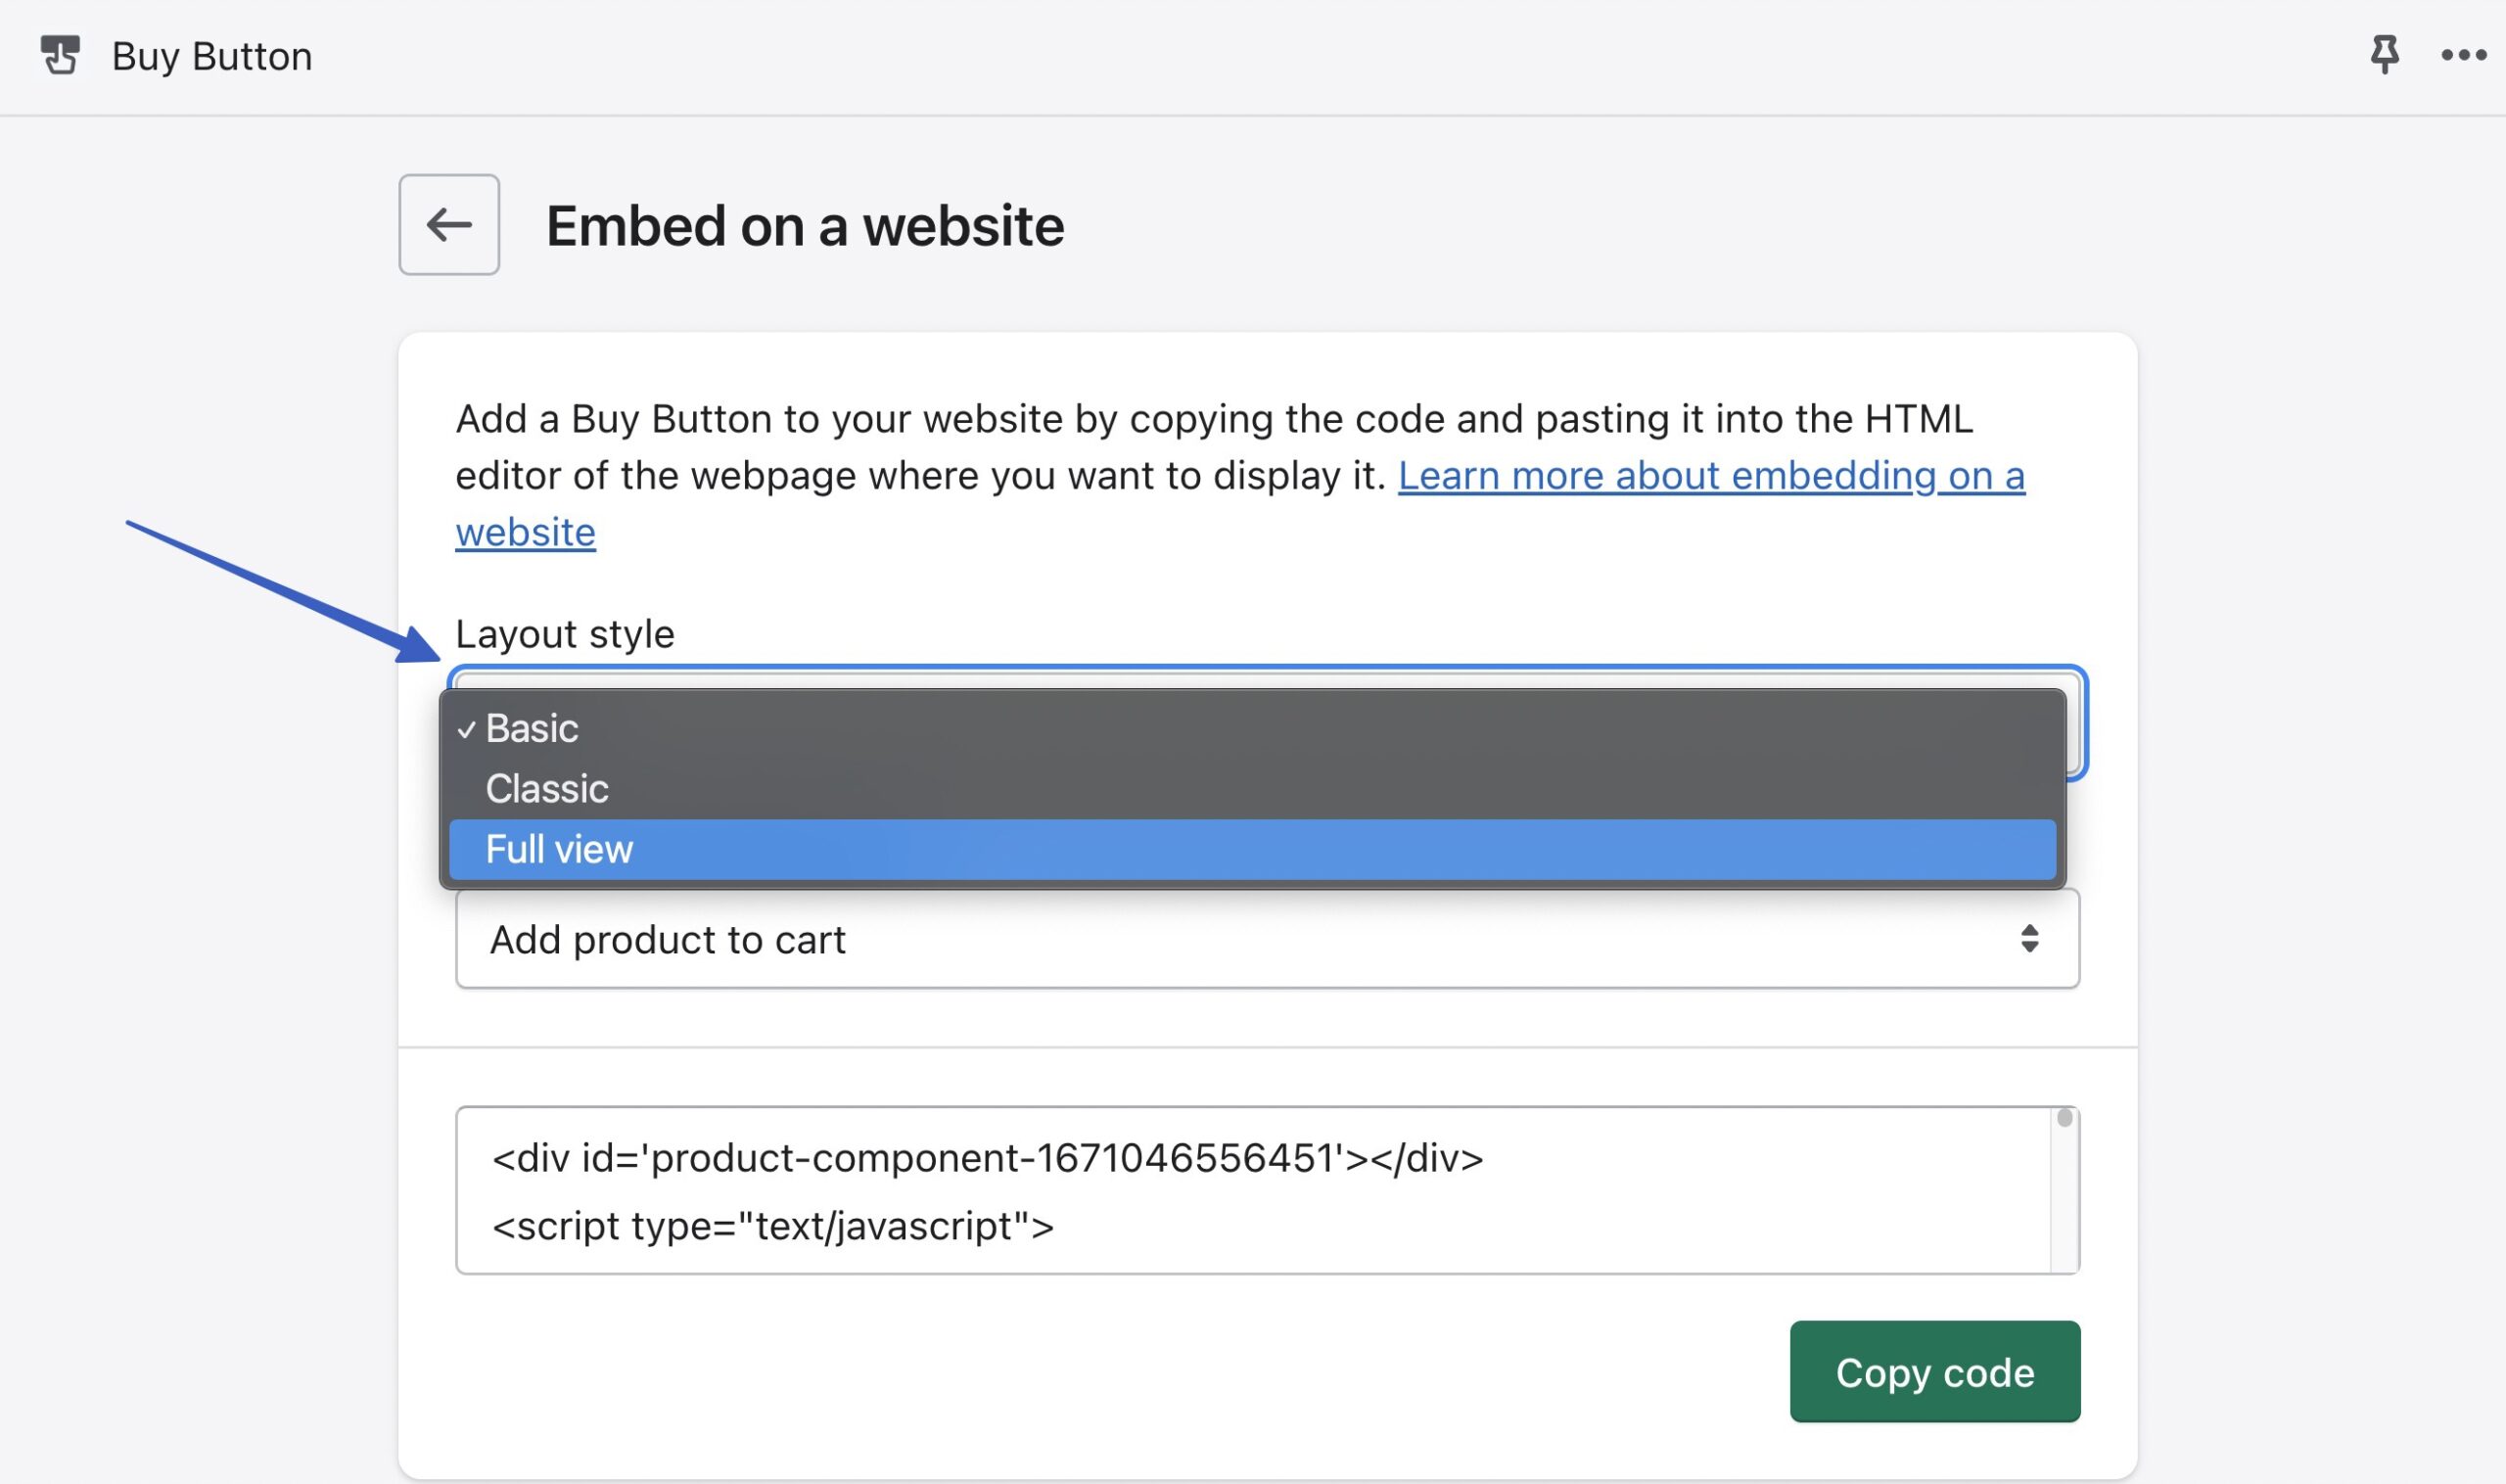
The Basic layout adds a simple button and nothing else. You can customize further to make it a cart, checkout, or product detail button.
The Classic layout includes additional details like the product title, image, and price.

The Full View layout provides the closest thing to an actual product page, with a product image slider, title, price, checkout/cart button, and the product description.

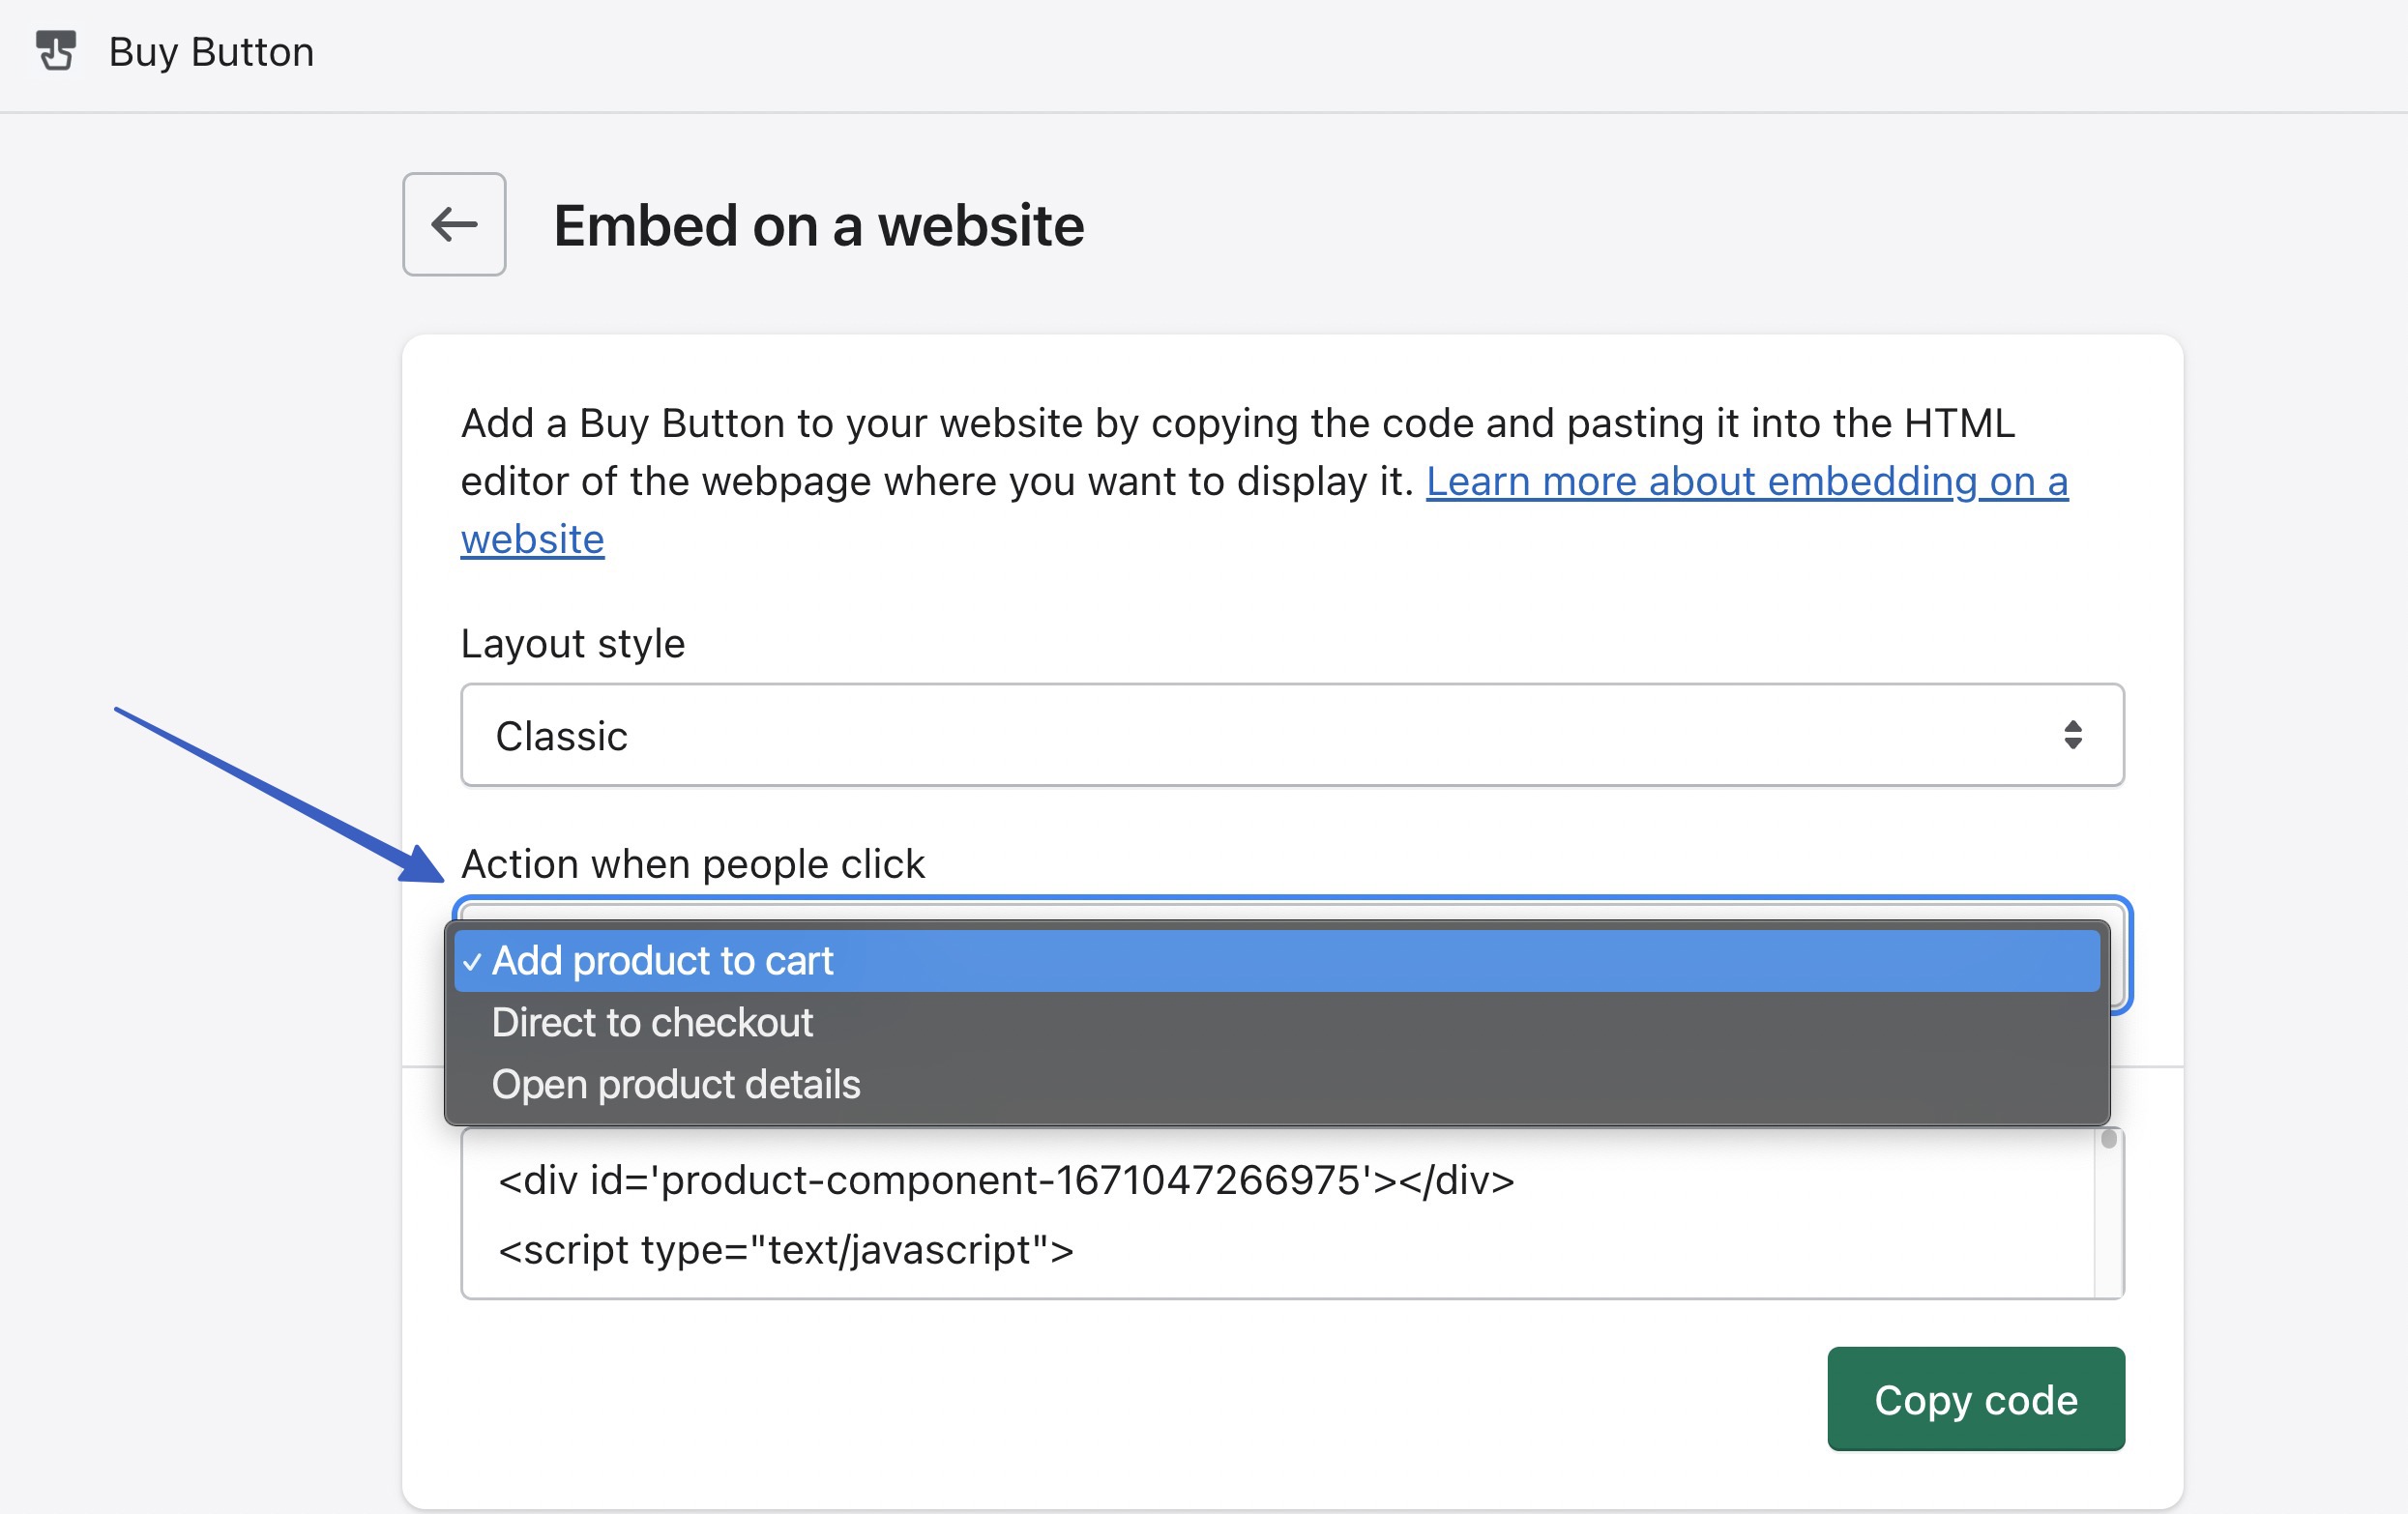
The next option is to set the Action When People Click field. This dictates what happens after someone clicks on the embedded product button.
Here are the options (and what they do):
- Add product to cart: the items get placed in a slide-in shopping cart that the customer can view while on your website
- Direct to checkout: this places the item inside the shopping cart but doesn’t show the cart to the customer; instead, they’re sent right to the checkout to type in payment information
- Open product details: the user gets redirected to a more content-rich version of the product page to further their research on the item; the item is not added to the cart, and the checkout remains hidden
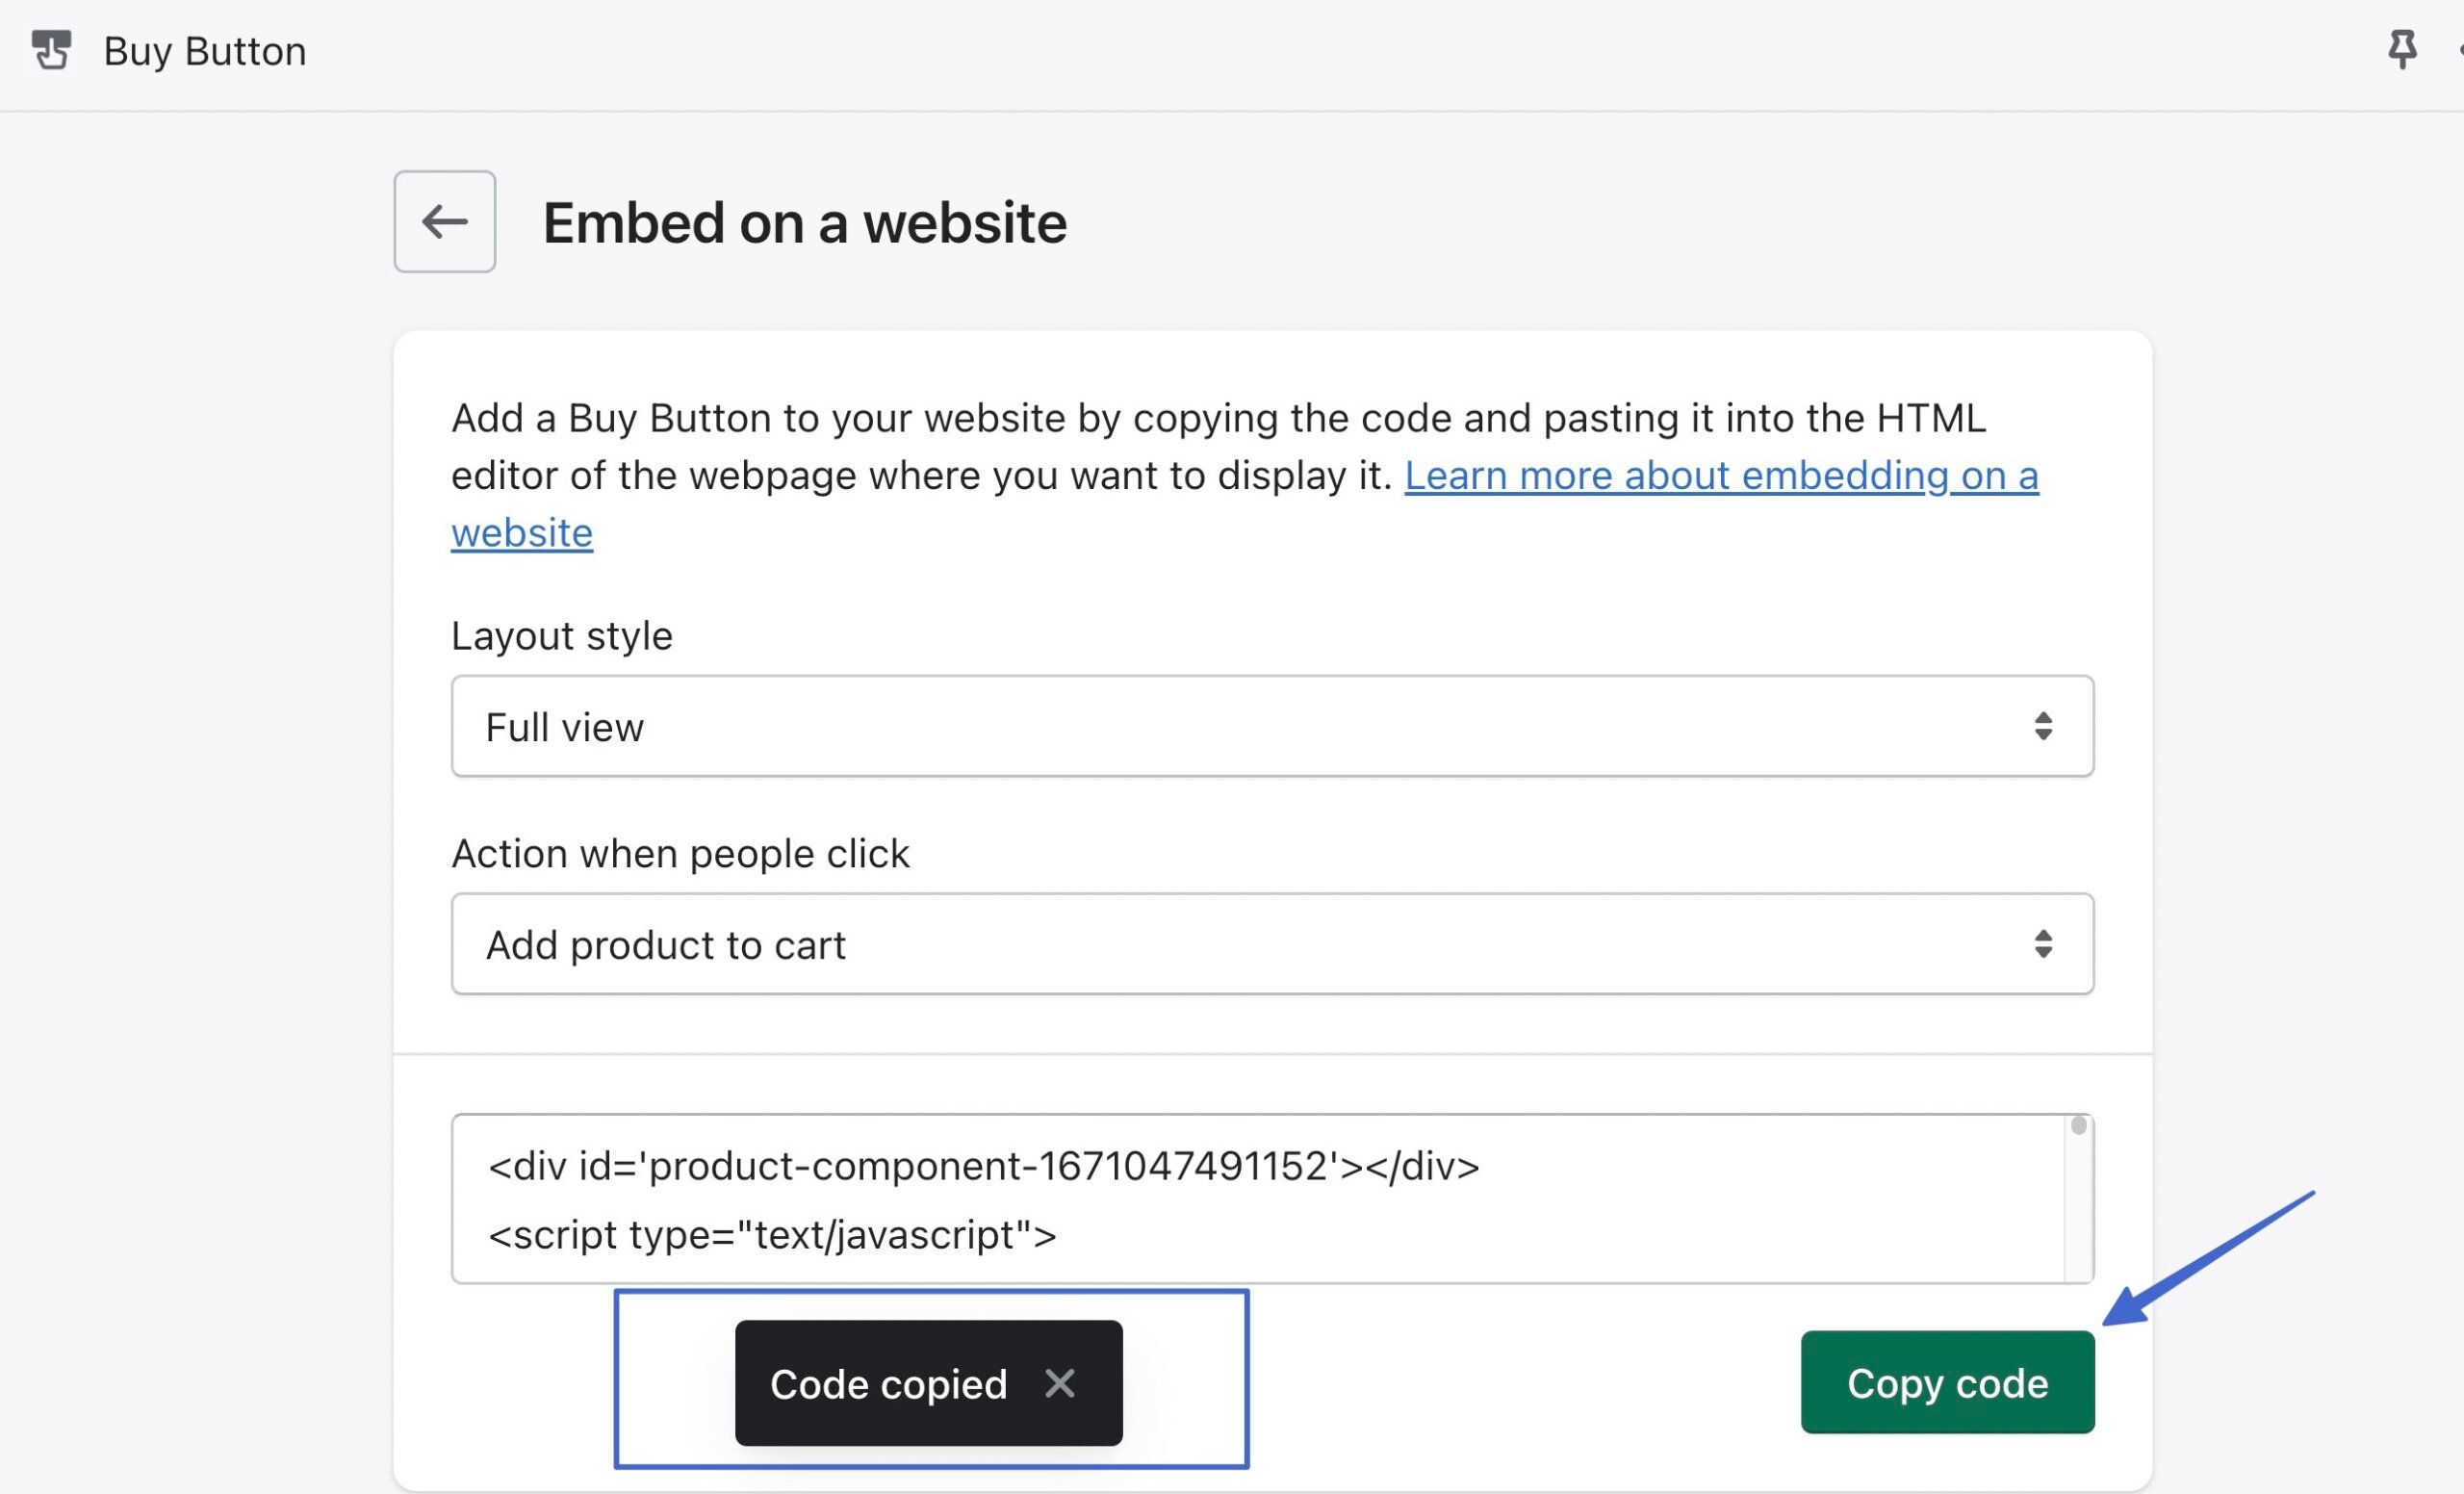
💡 Note: You’ll notice that every change of a Layout Style or Action setting adjusts the embed code, so you should transfer the new code to your website whenever changing the Buy Button settings.
4. Embed the Shopify product on WordPress
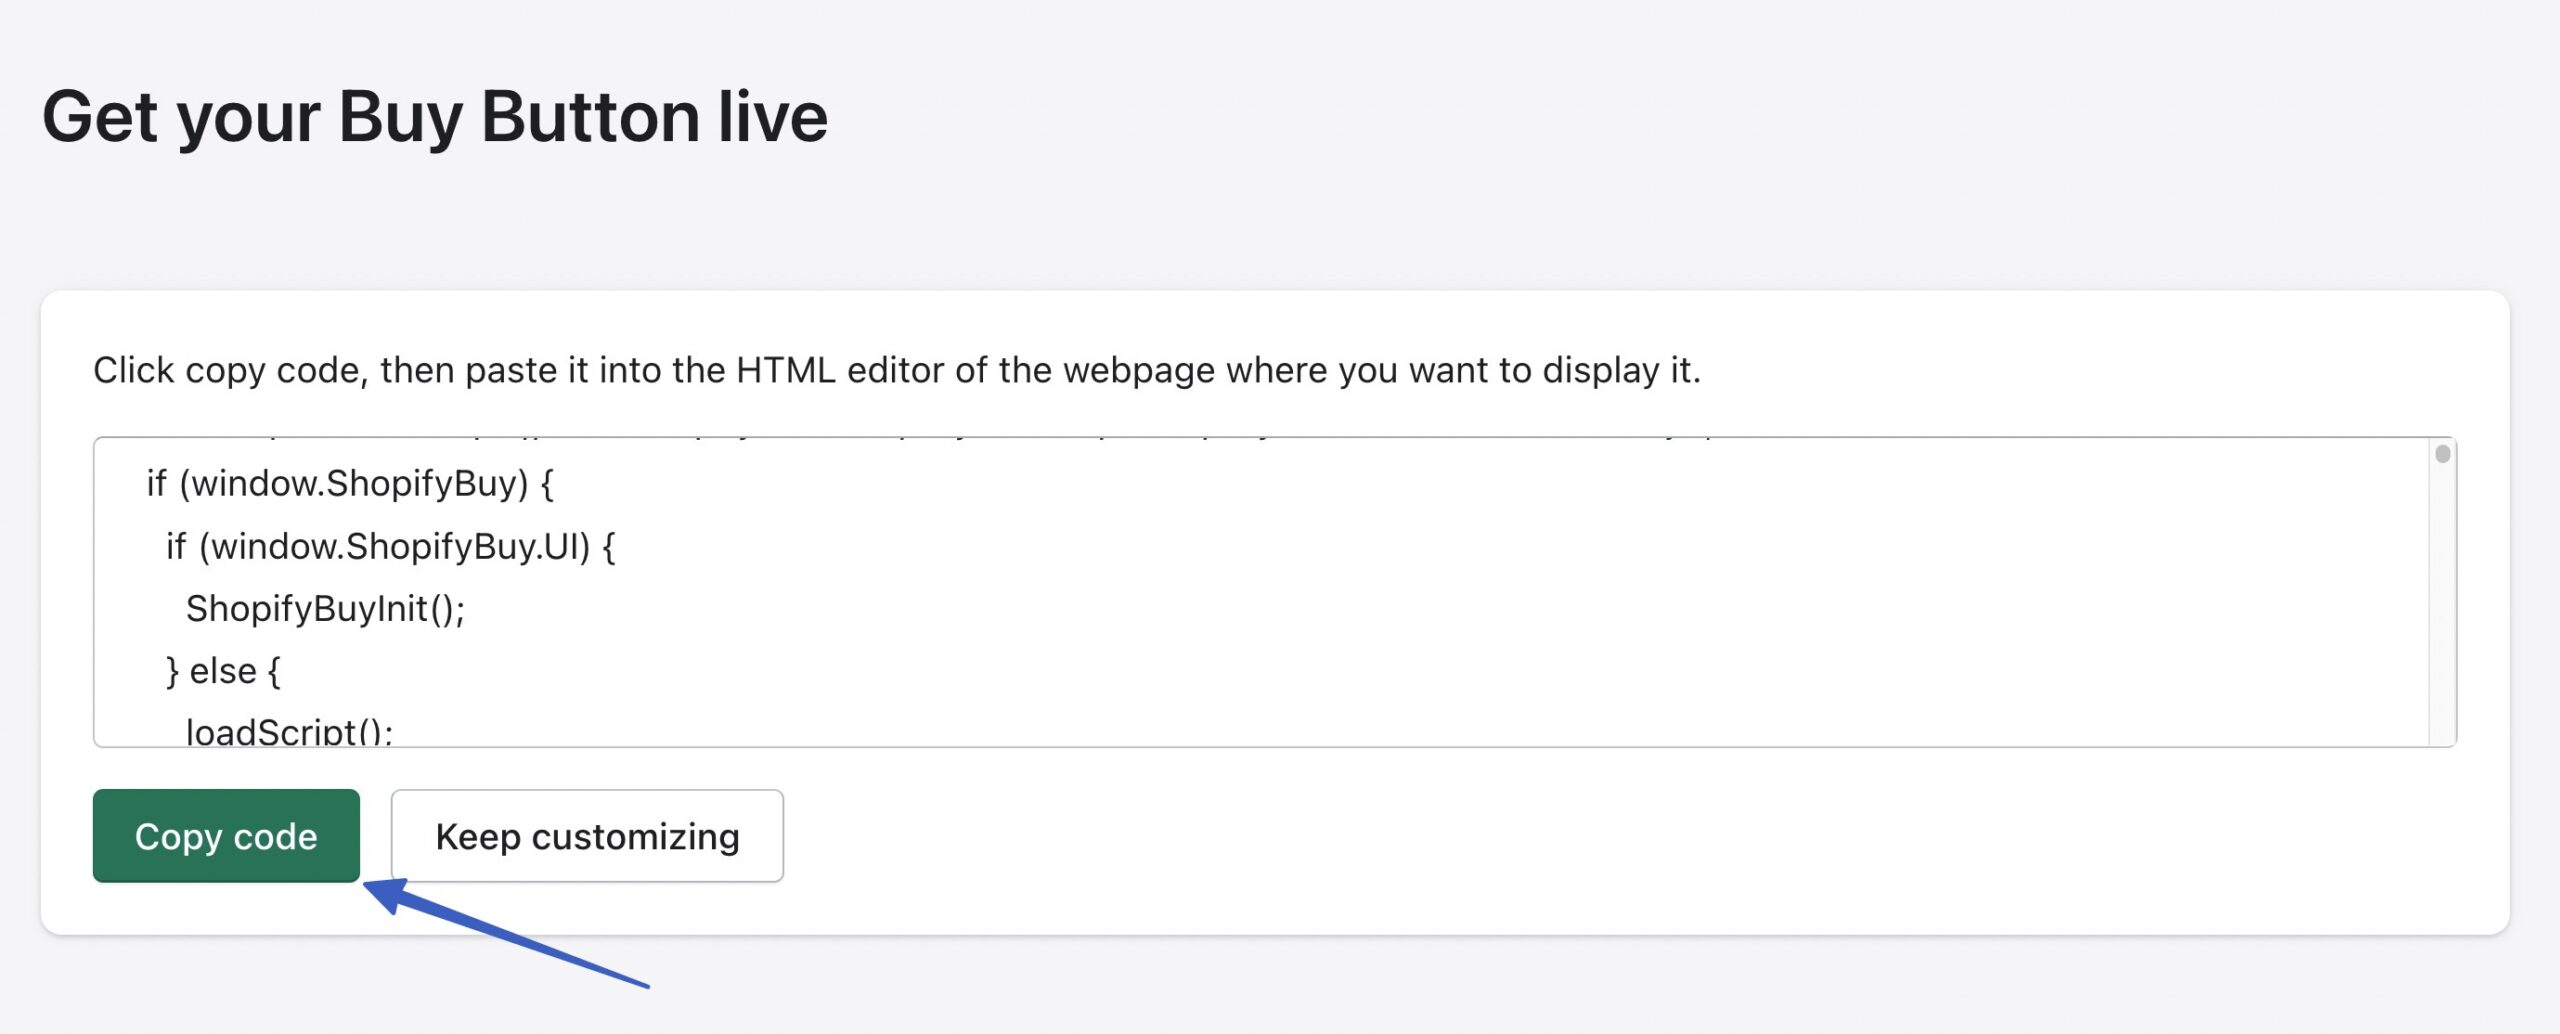
Once done with your customization, click on the Copy Code button. Wait until you see the “Code Copied” message; this way, you know it’s added to the clipboard:
An advantage of WordPress is that you can embed code in several places, like:
- Pages
- Posts
- Widgets
- Your site files
Open the area in which you’d like to embed the product, like a new/existing page or post.
Click the Add Block button and search for the Custom HTML block. Click to add that to the content area:
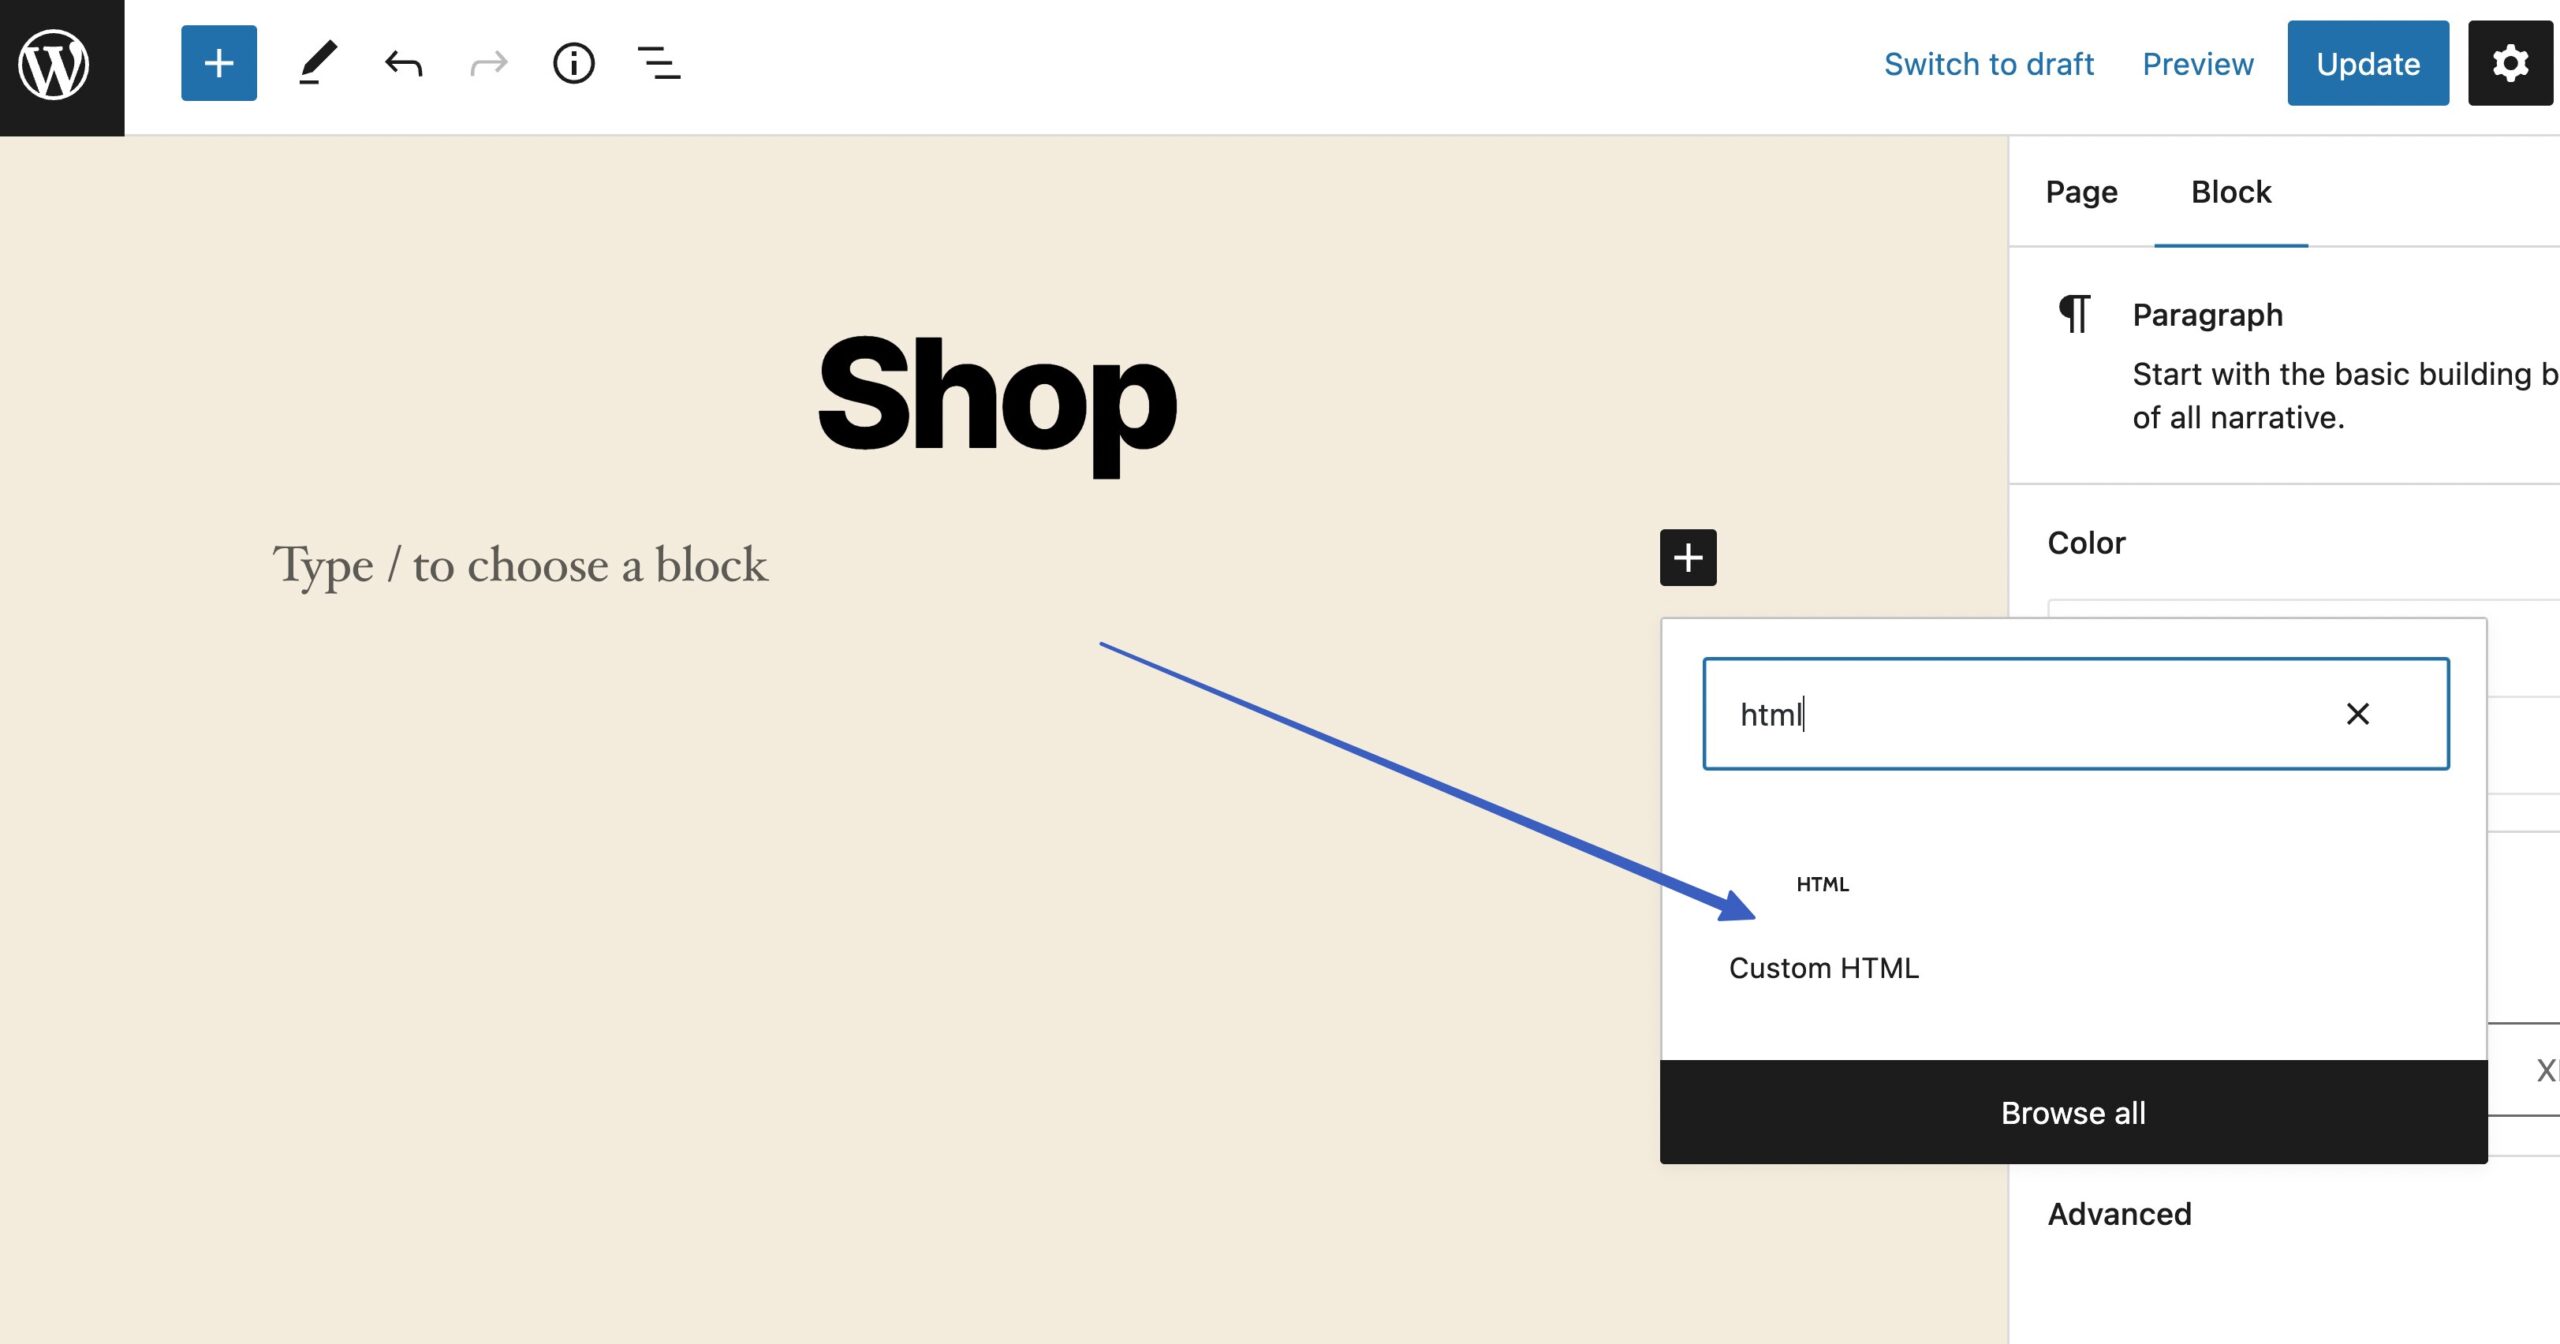
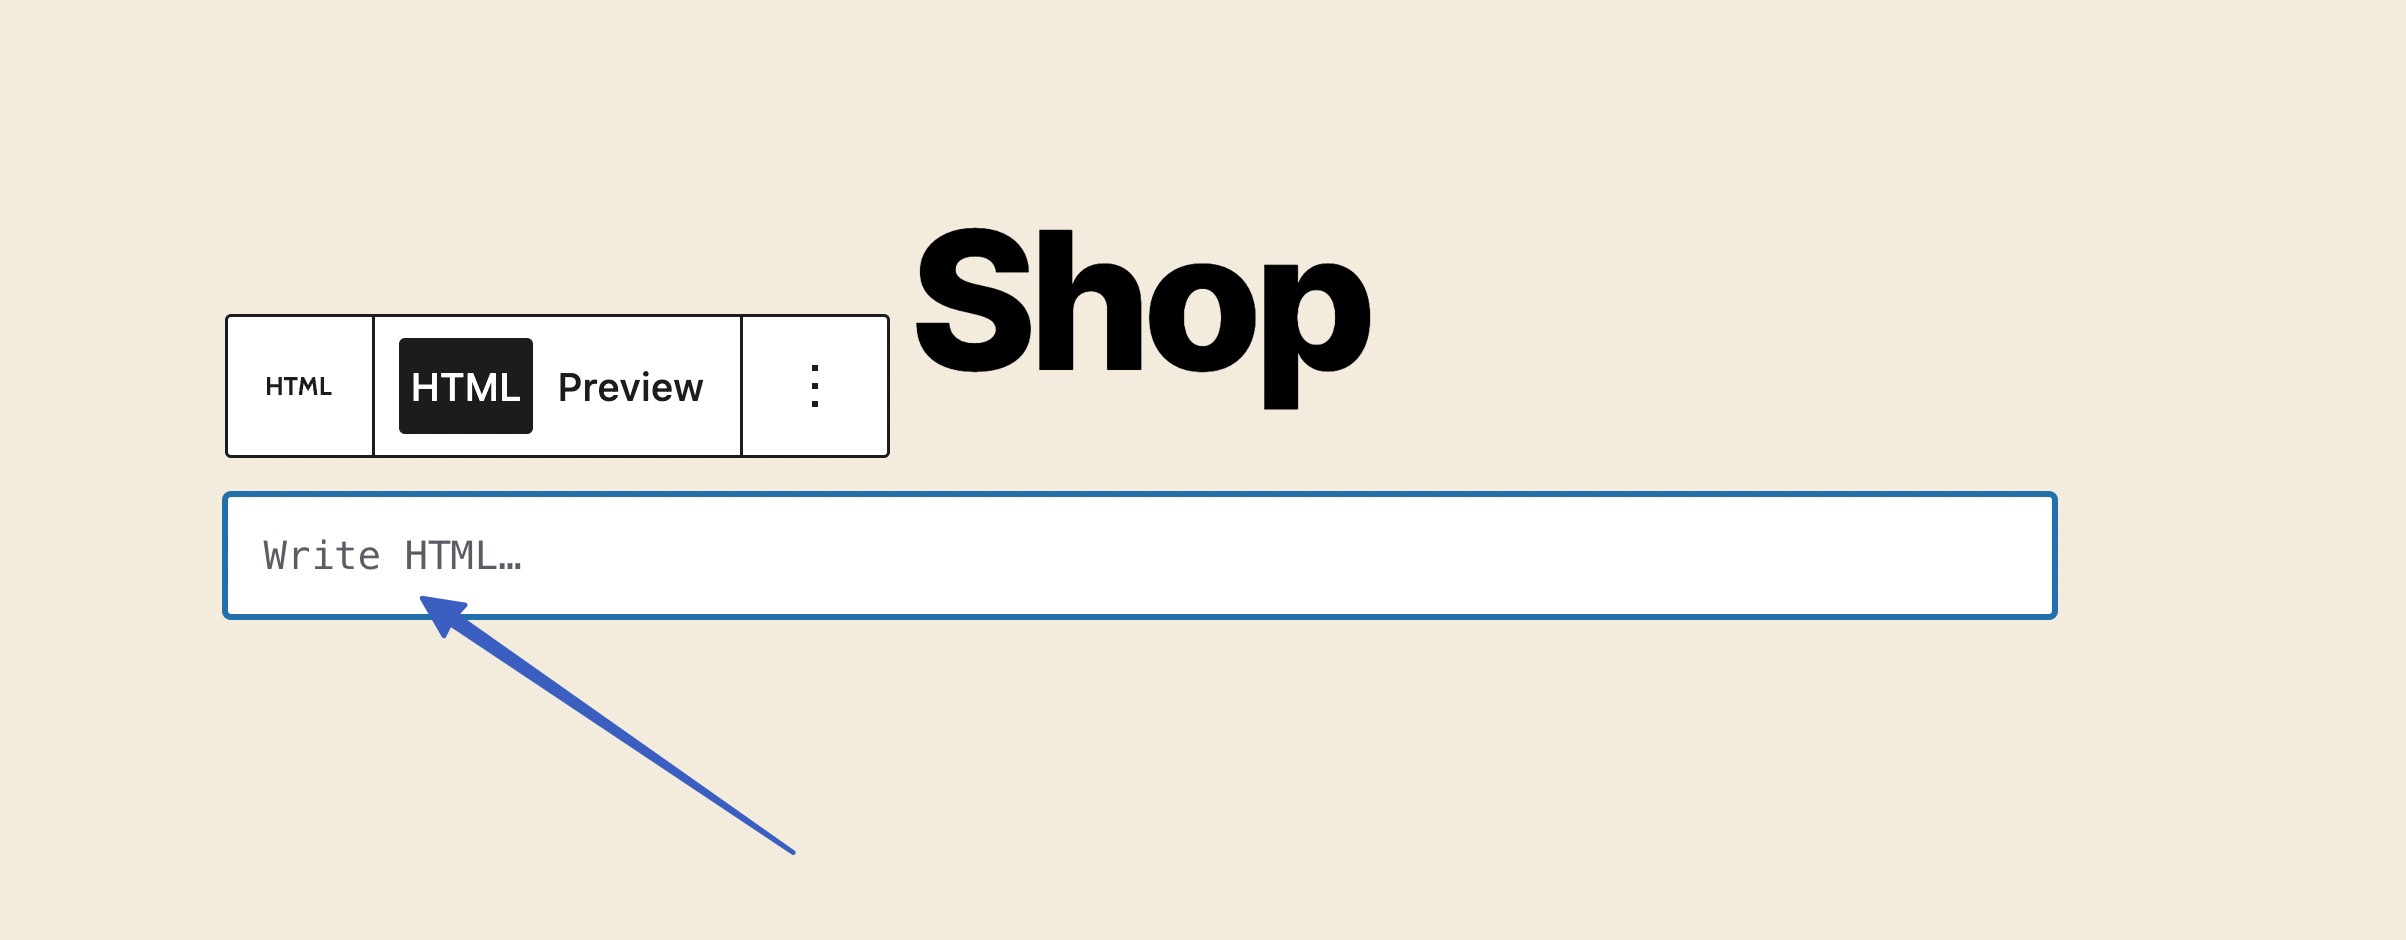
Paste the previously copied code (the product page code from Shopify) to the field where it says, “Write HTML…”:
Click the Publish or Update button for the page.
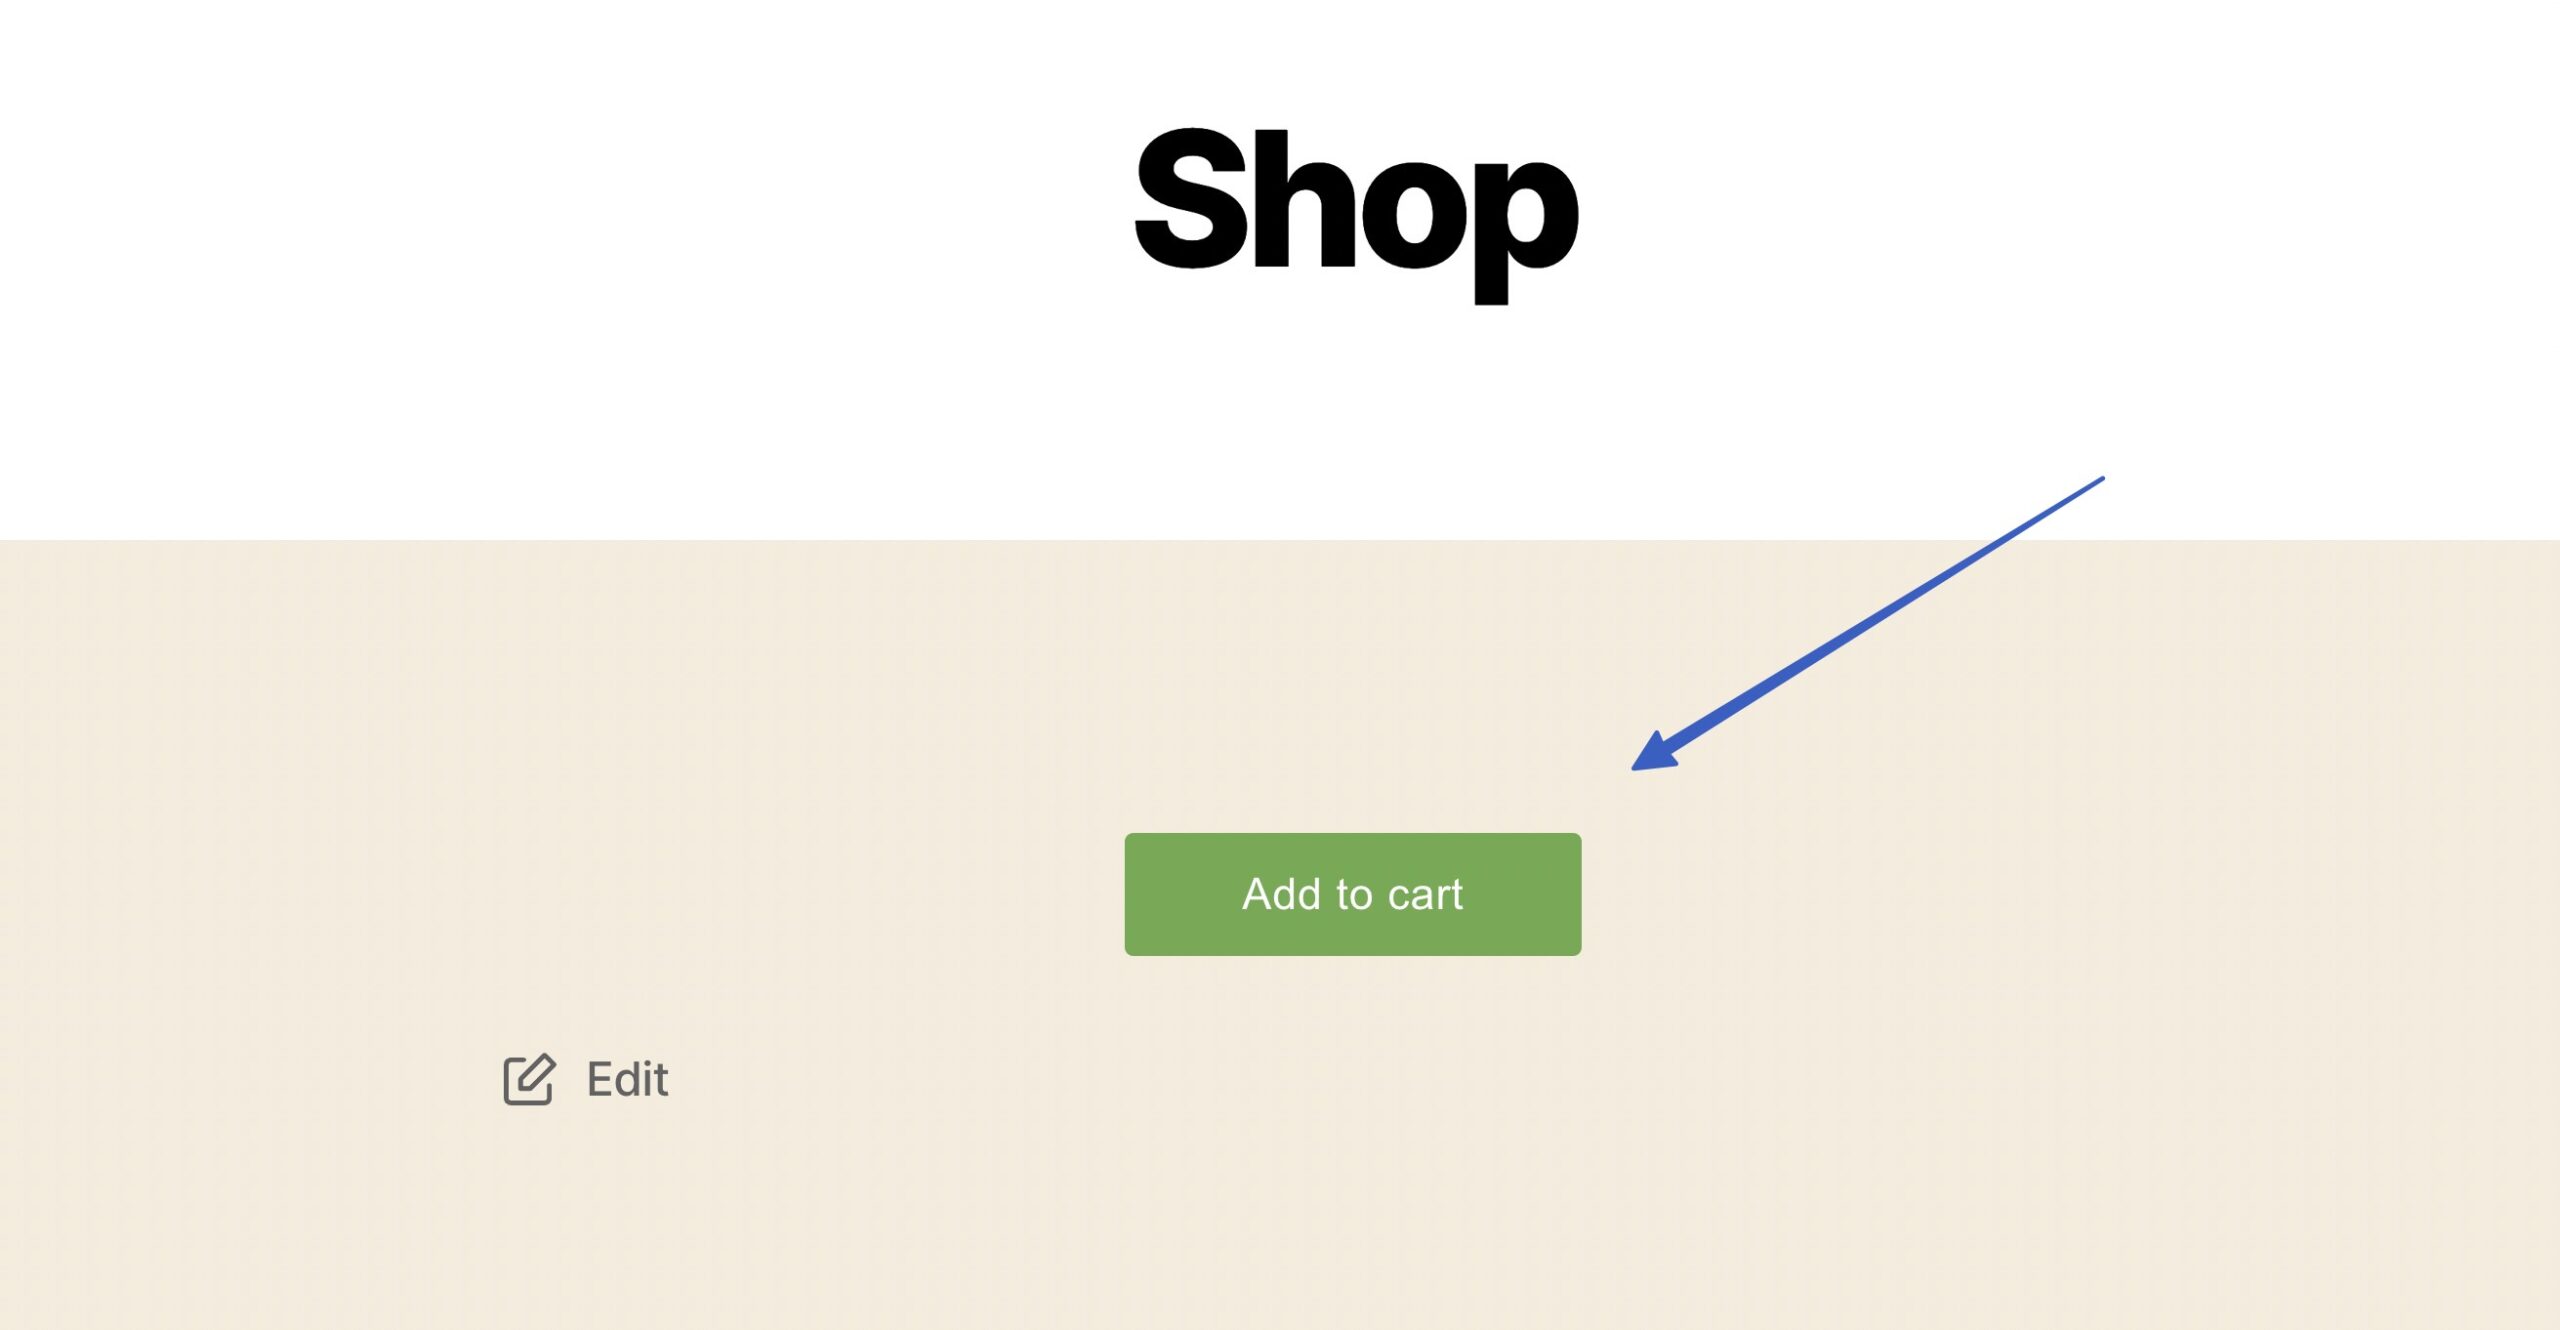
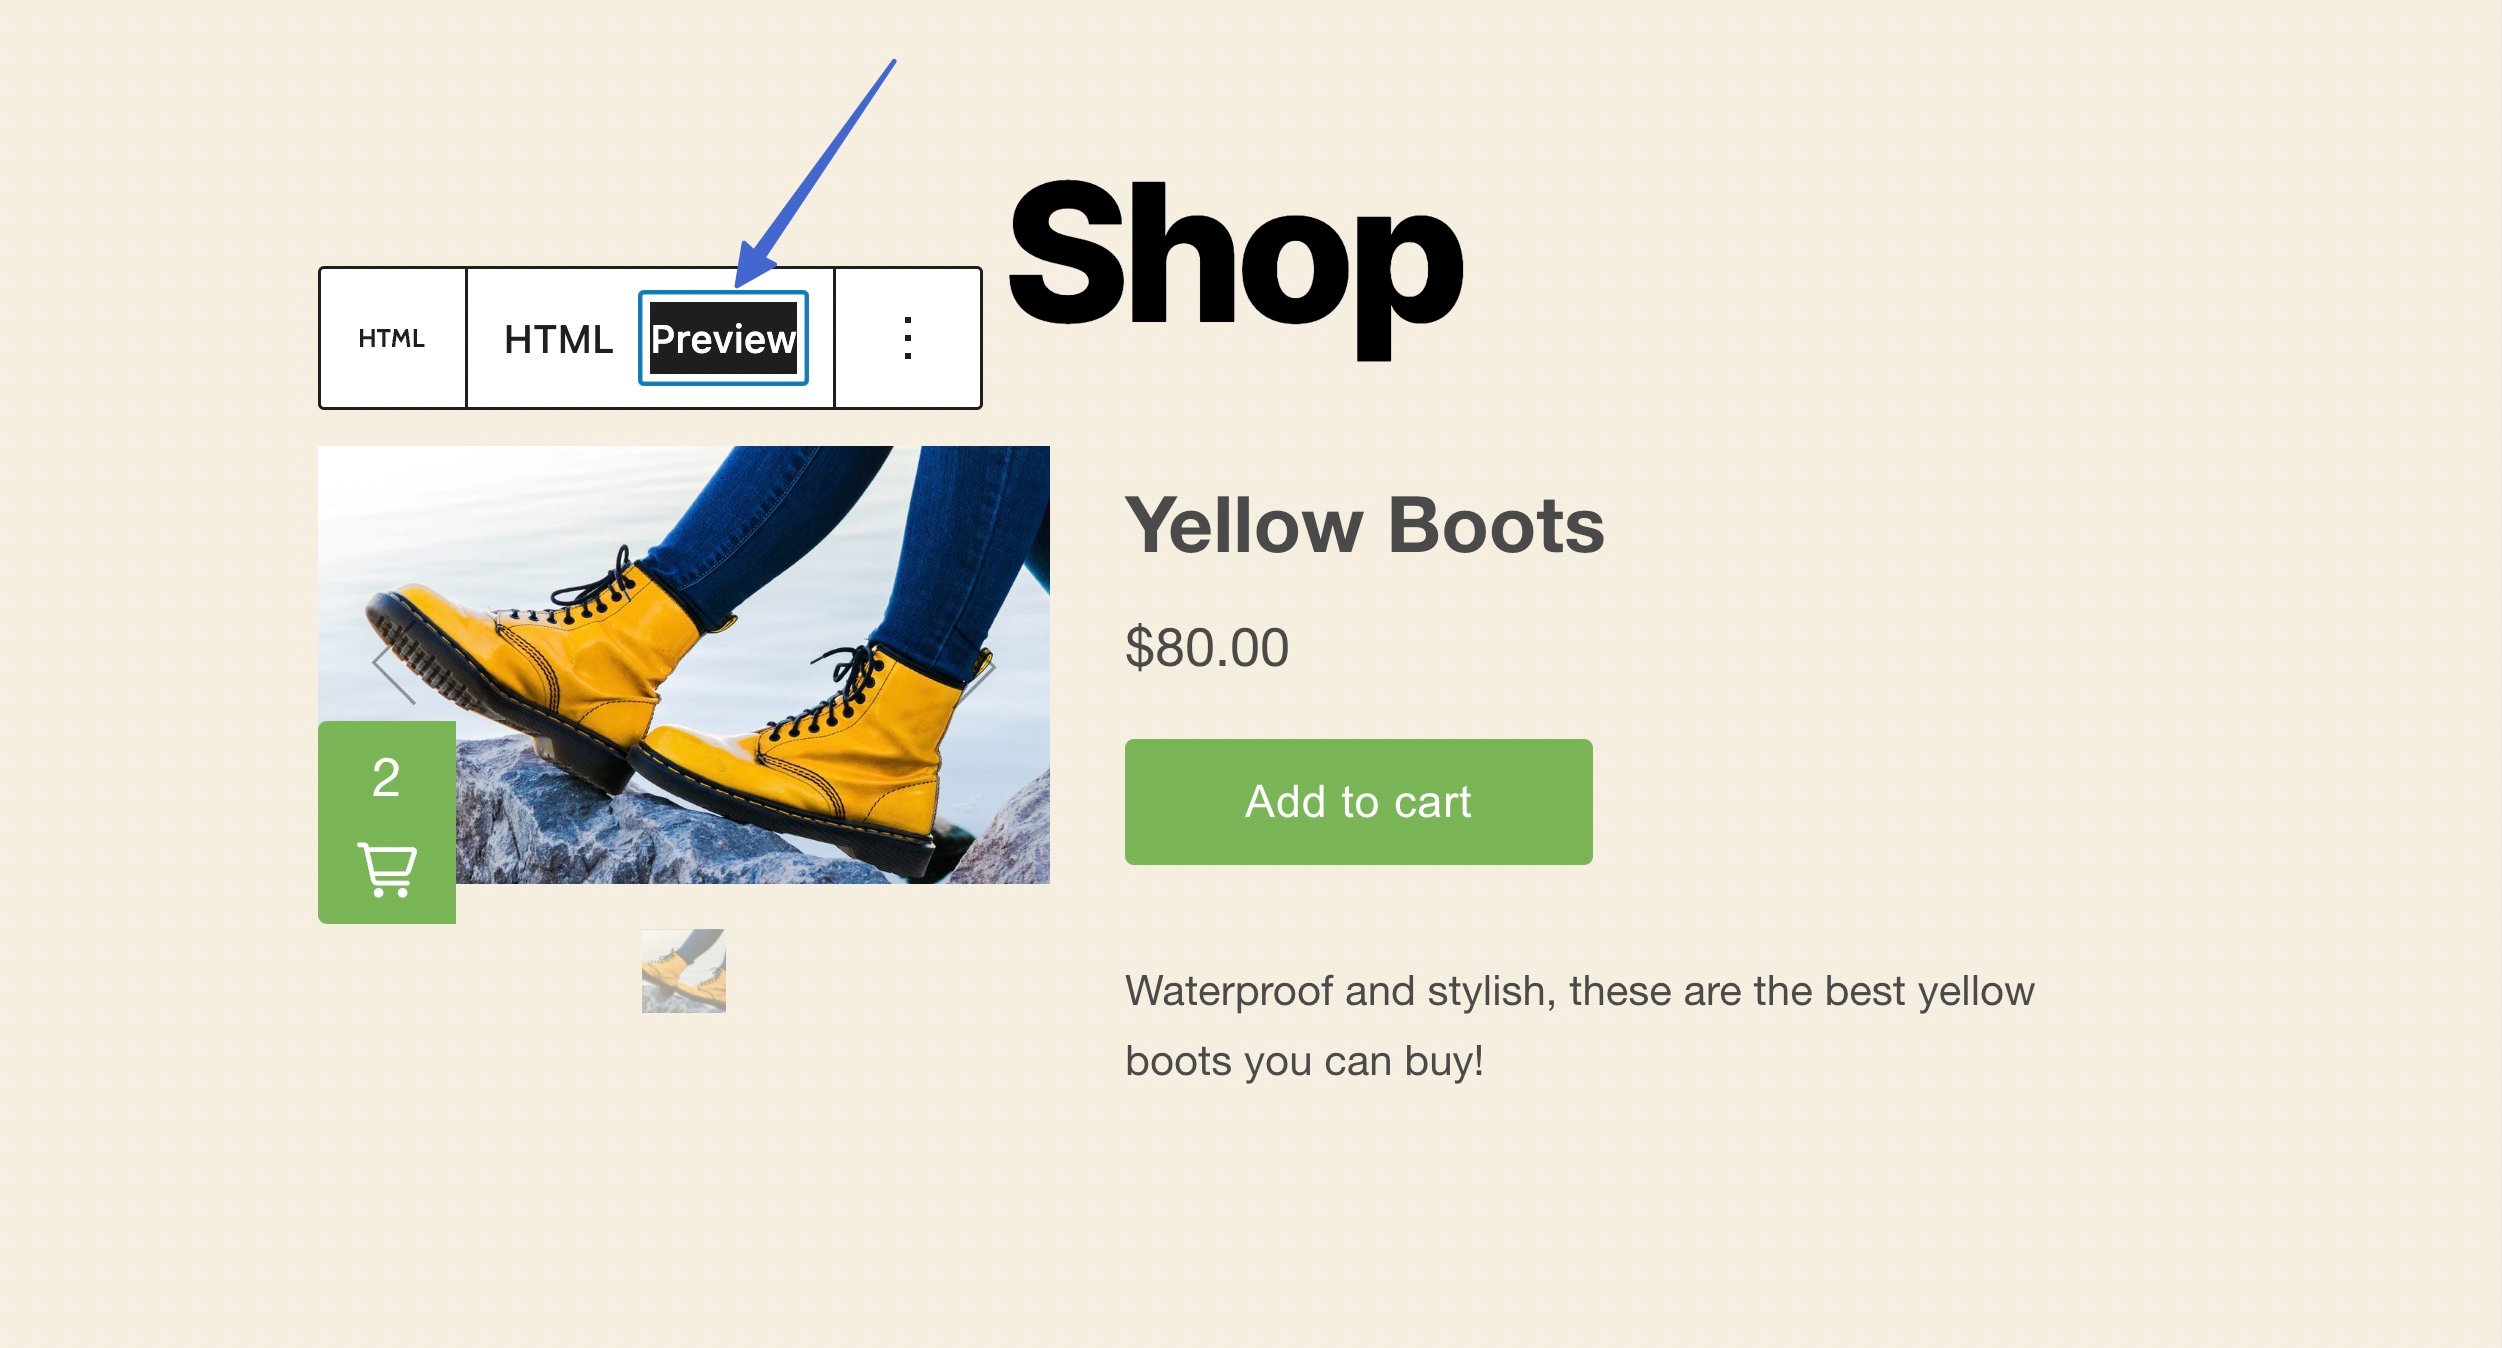
There are two ways to preview the embedded Shopify product on WordPress. The first option is to click the Preview tab for that HTML block:
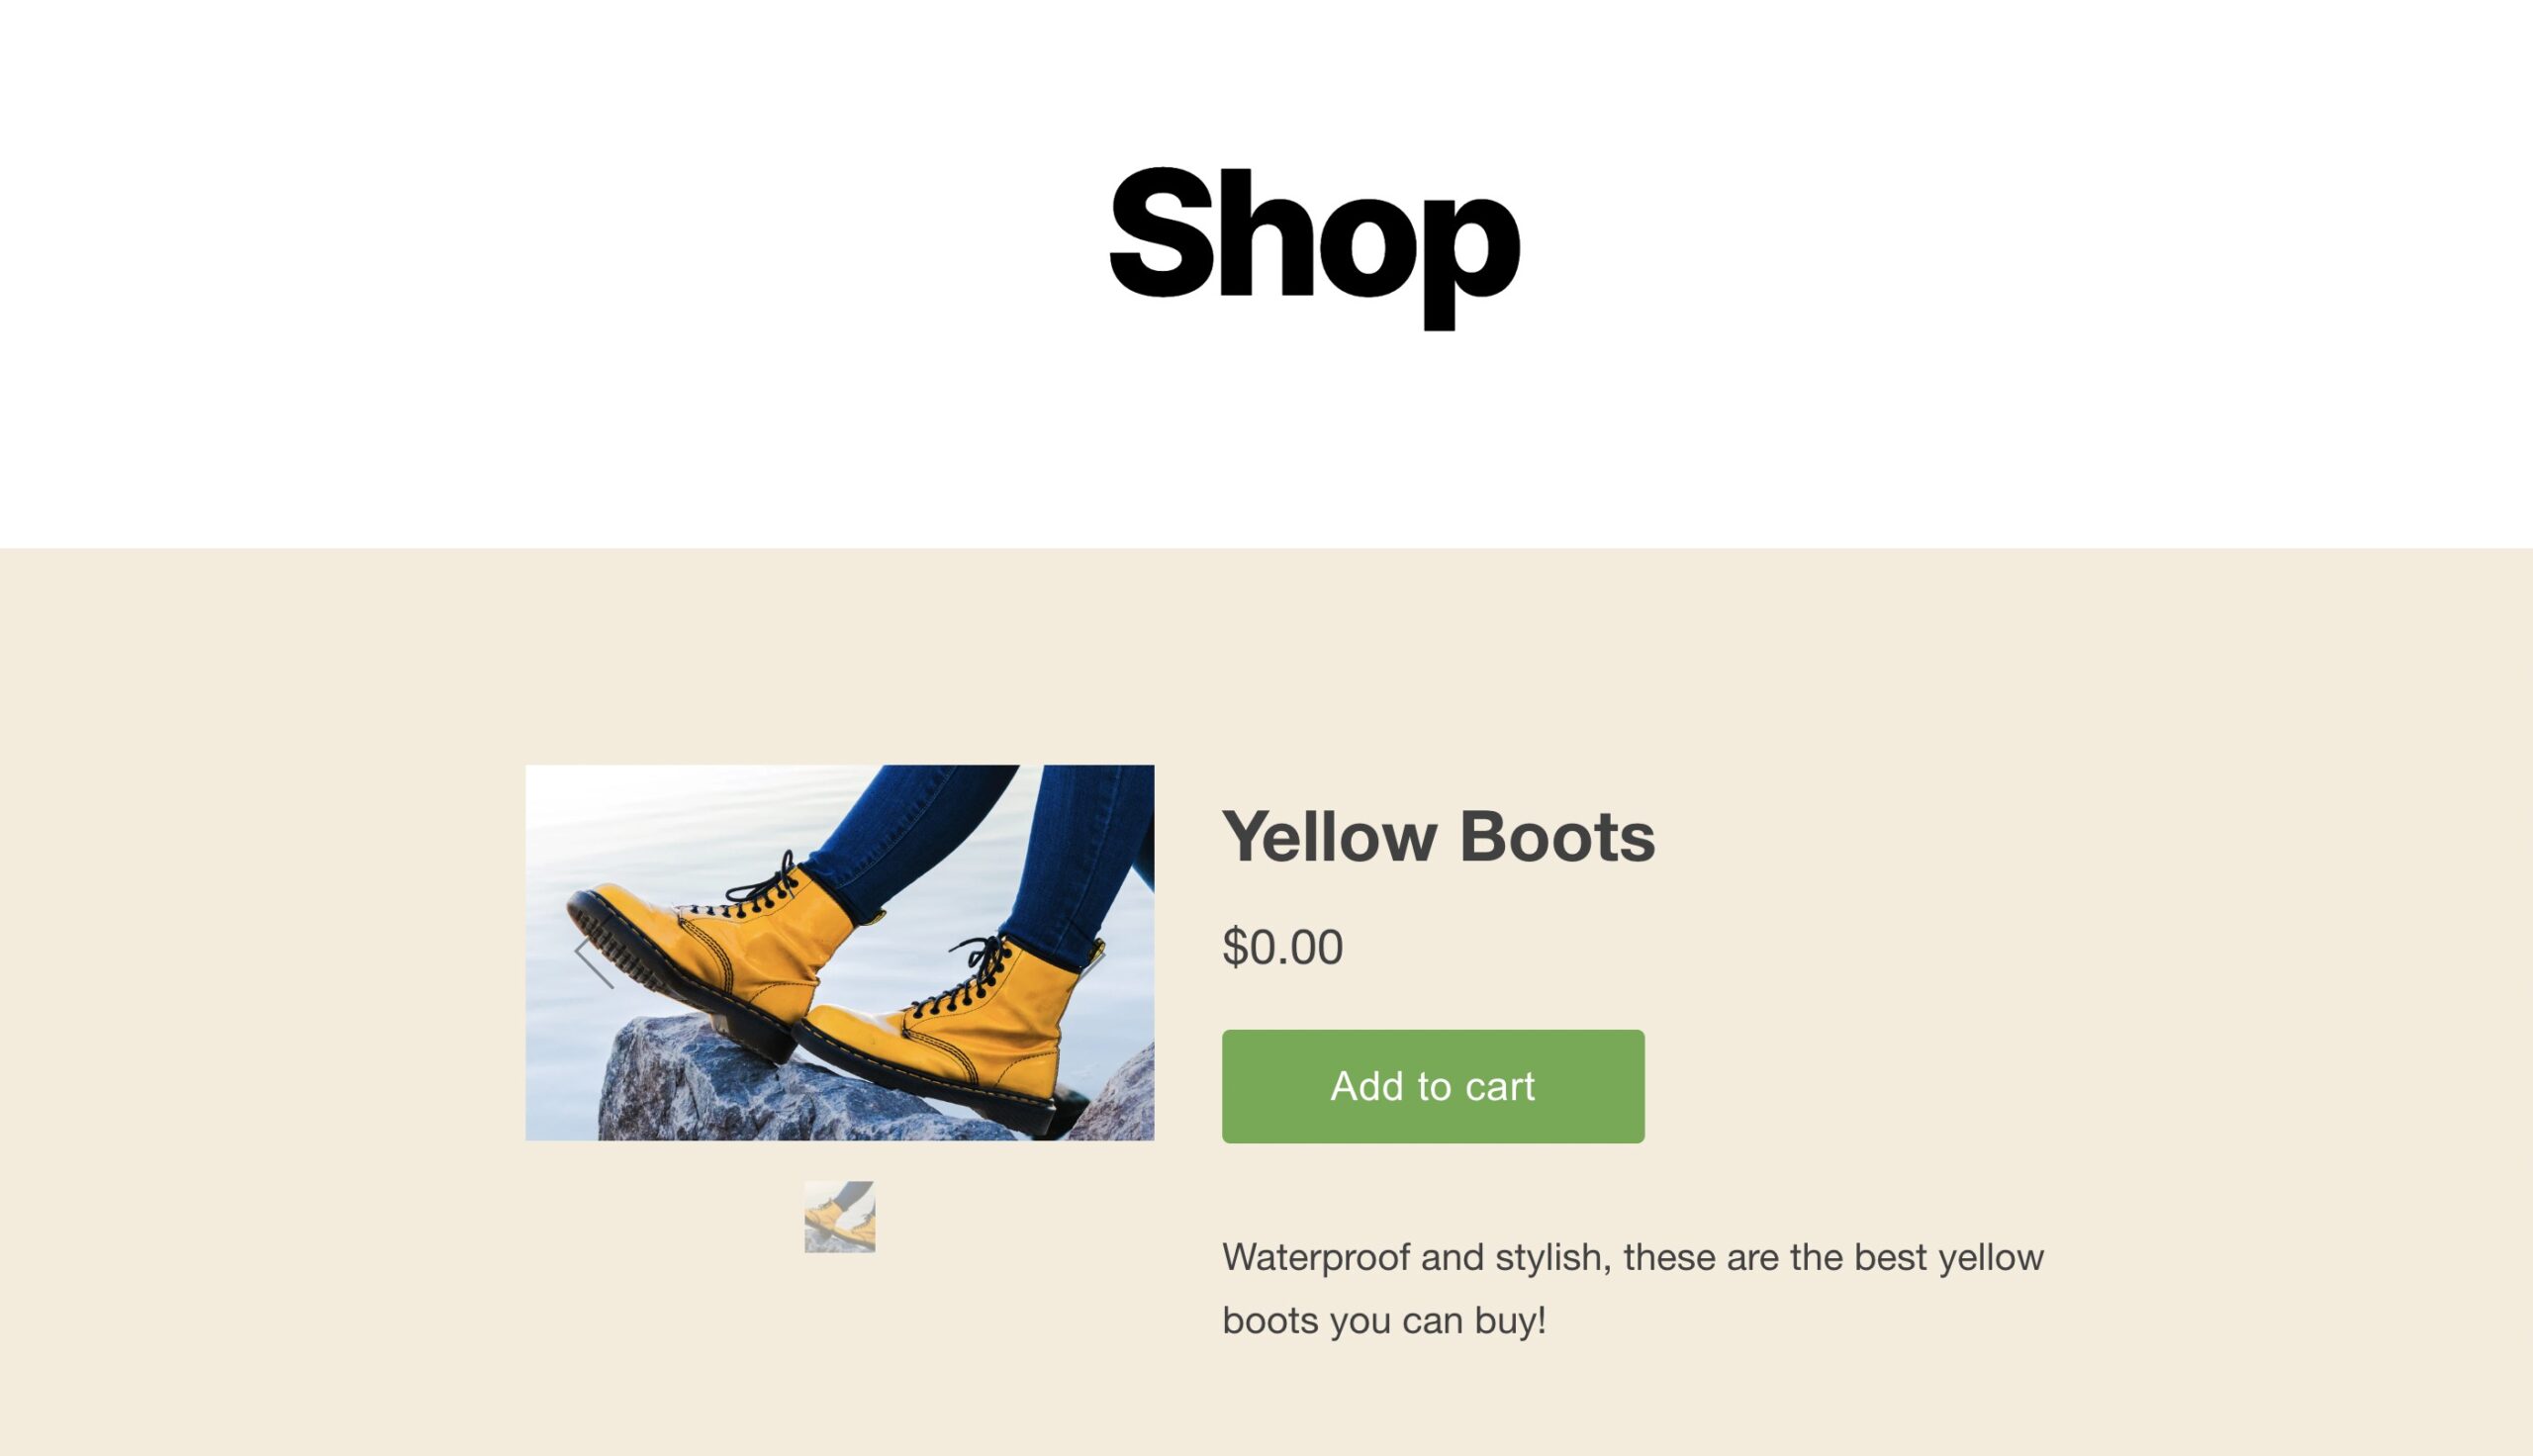
You might also consider going right to the frontend of that page or post to see the results exactly how customers do:
5. Test the Shopify WordPress integration
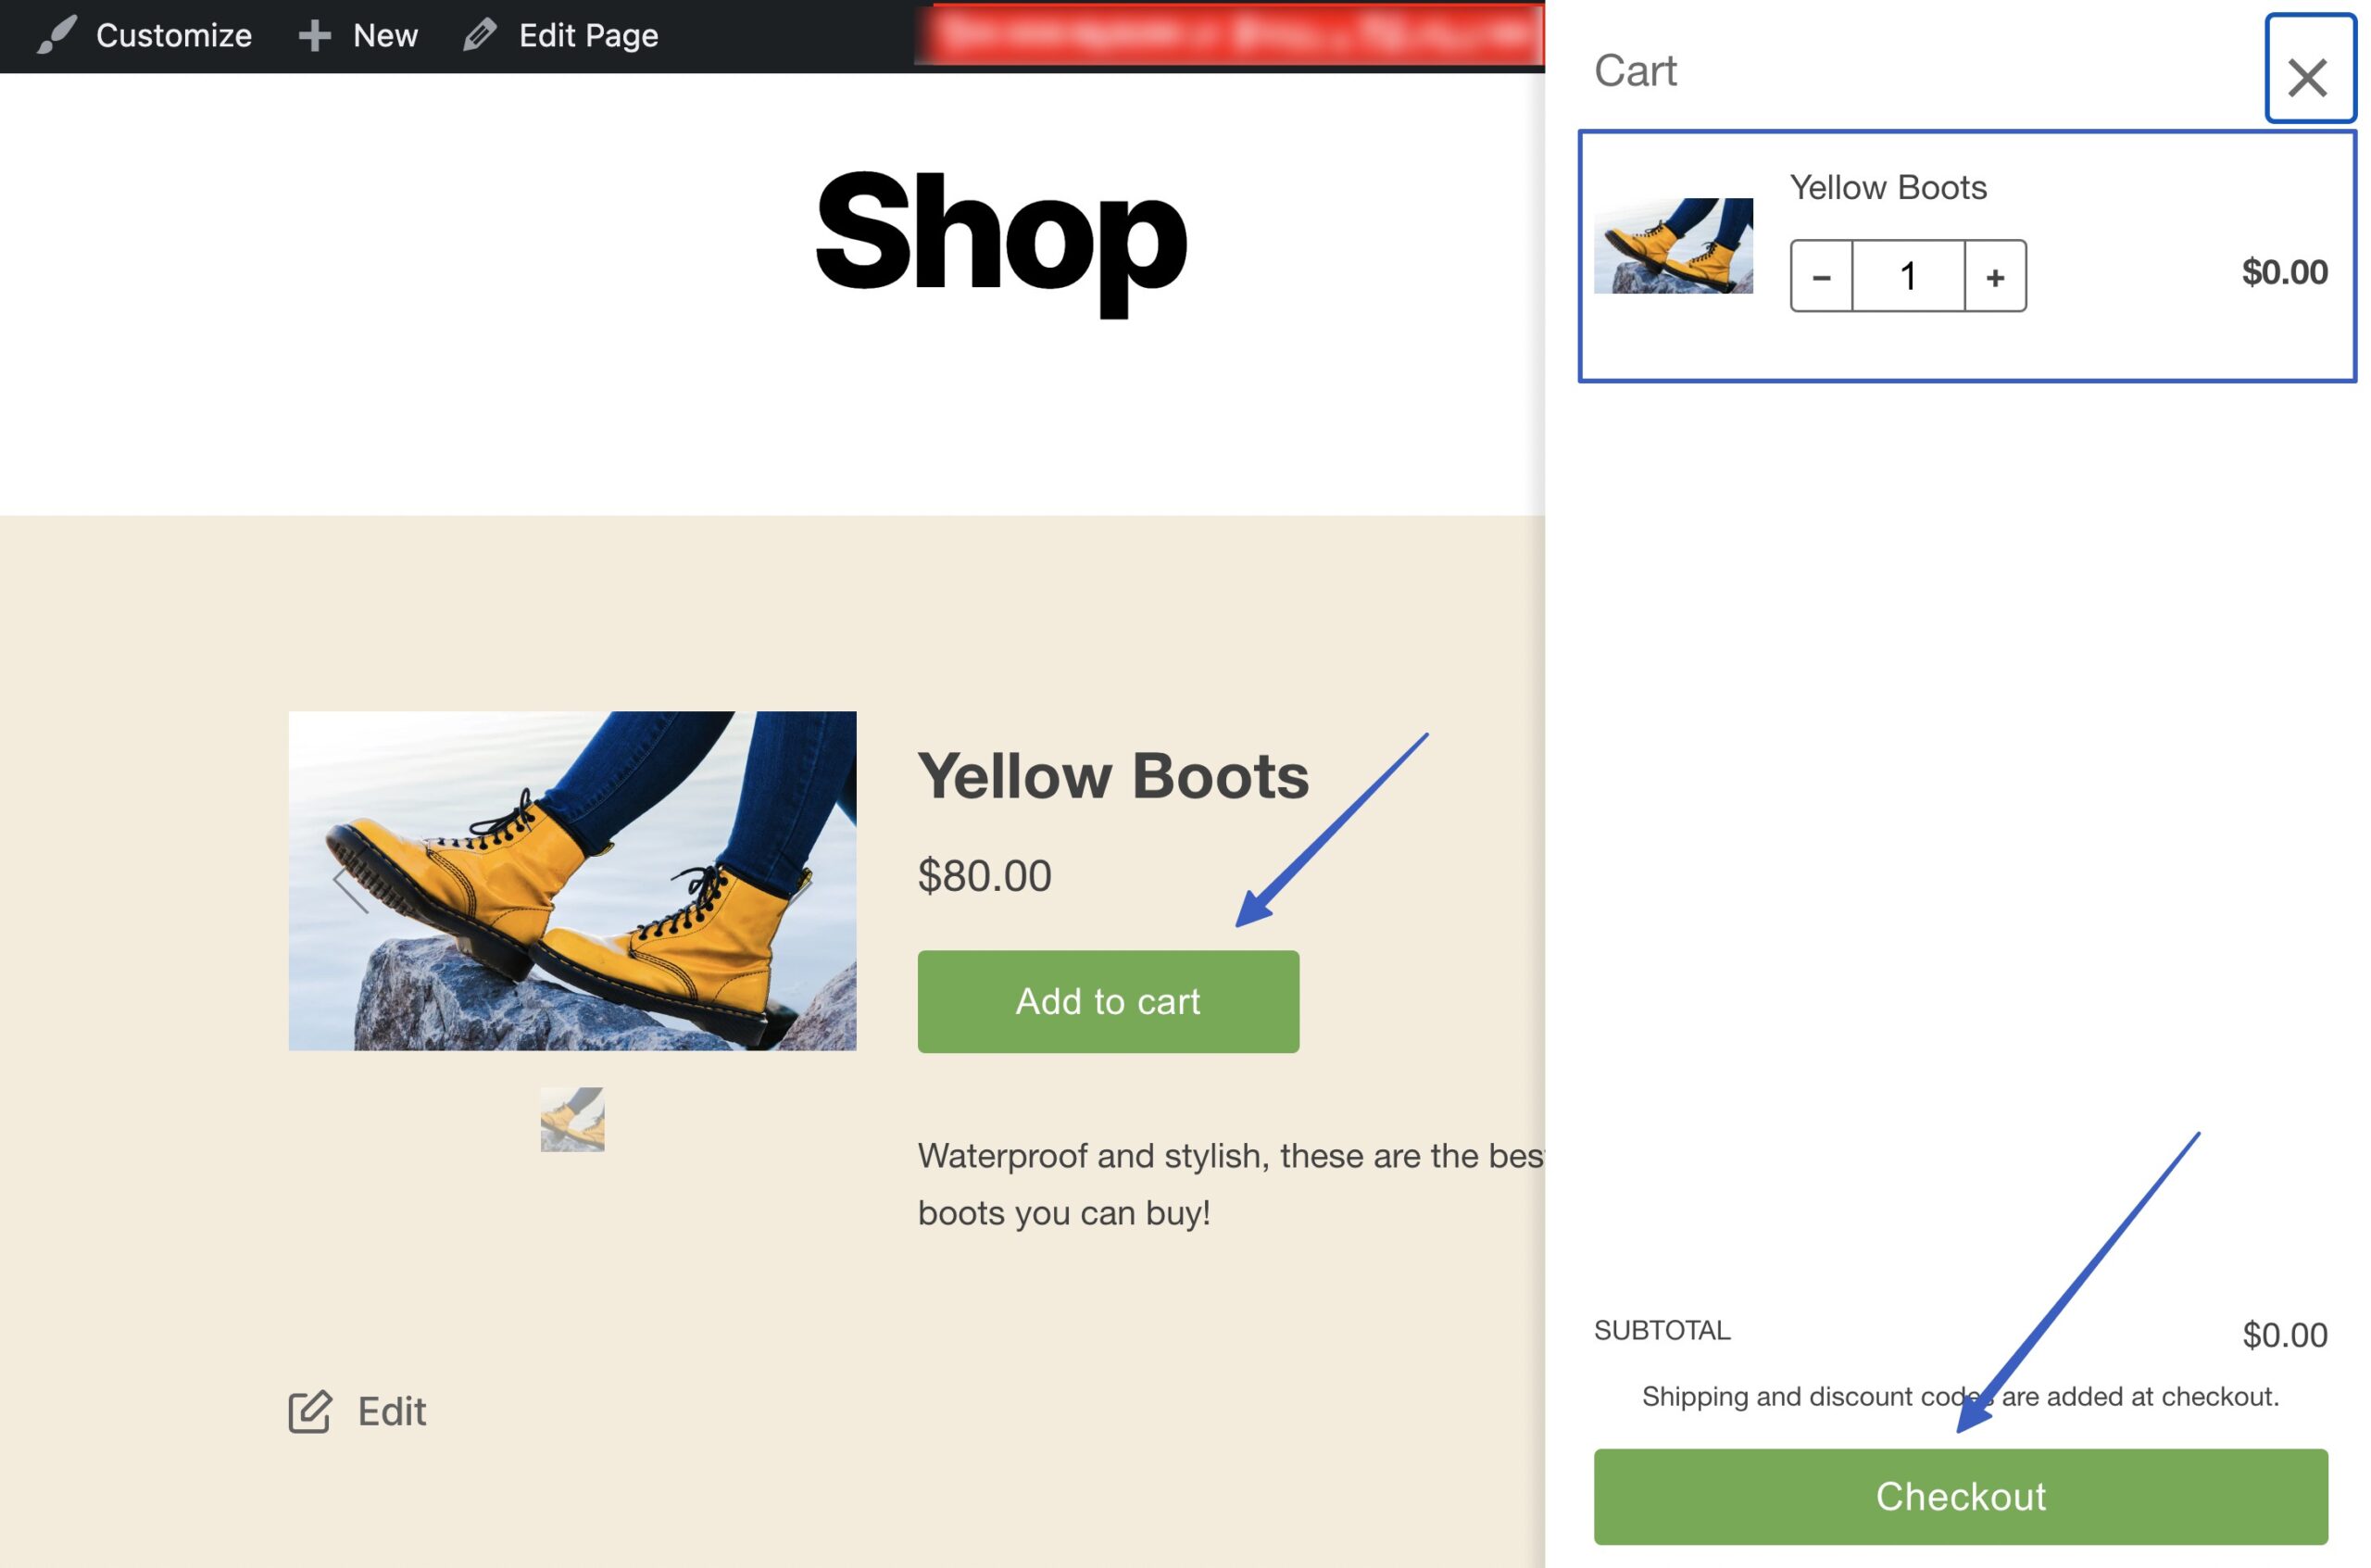
You’ll want to check that the integration actually adds items to the cart and allows for payment processing.
To do so, act like a customer by purchasing one of your products (you can set the pricing to $0 for testing purposes).
It depends on the type of button action you selected but, for this example, we can click Add To Cart, which shows the product within a slide-in cart module. Next, select the Checkout button to finish shopping:
💡 Note: You must sign up for a Shopify plan for your website to reveal the Checkout module and process payments. A free trial blocks the checkout from appearing.
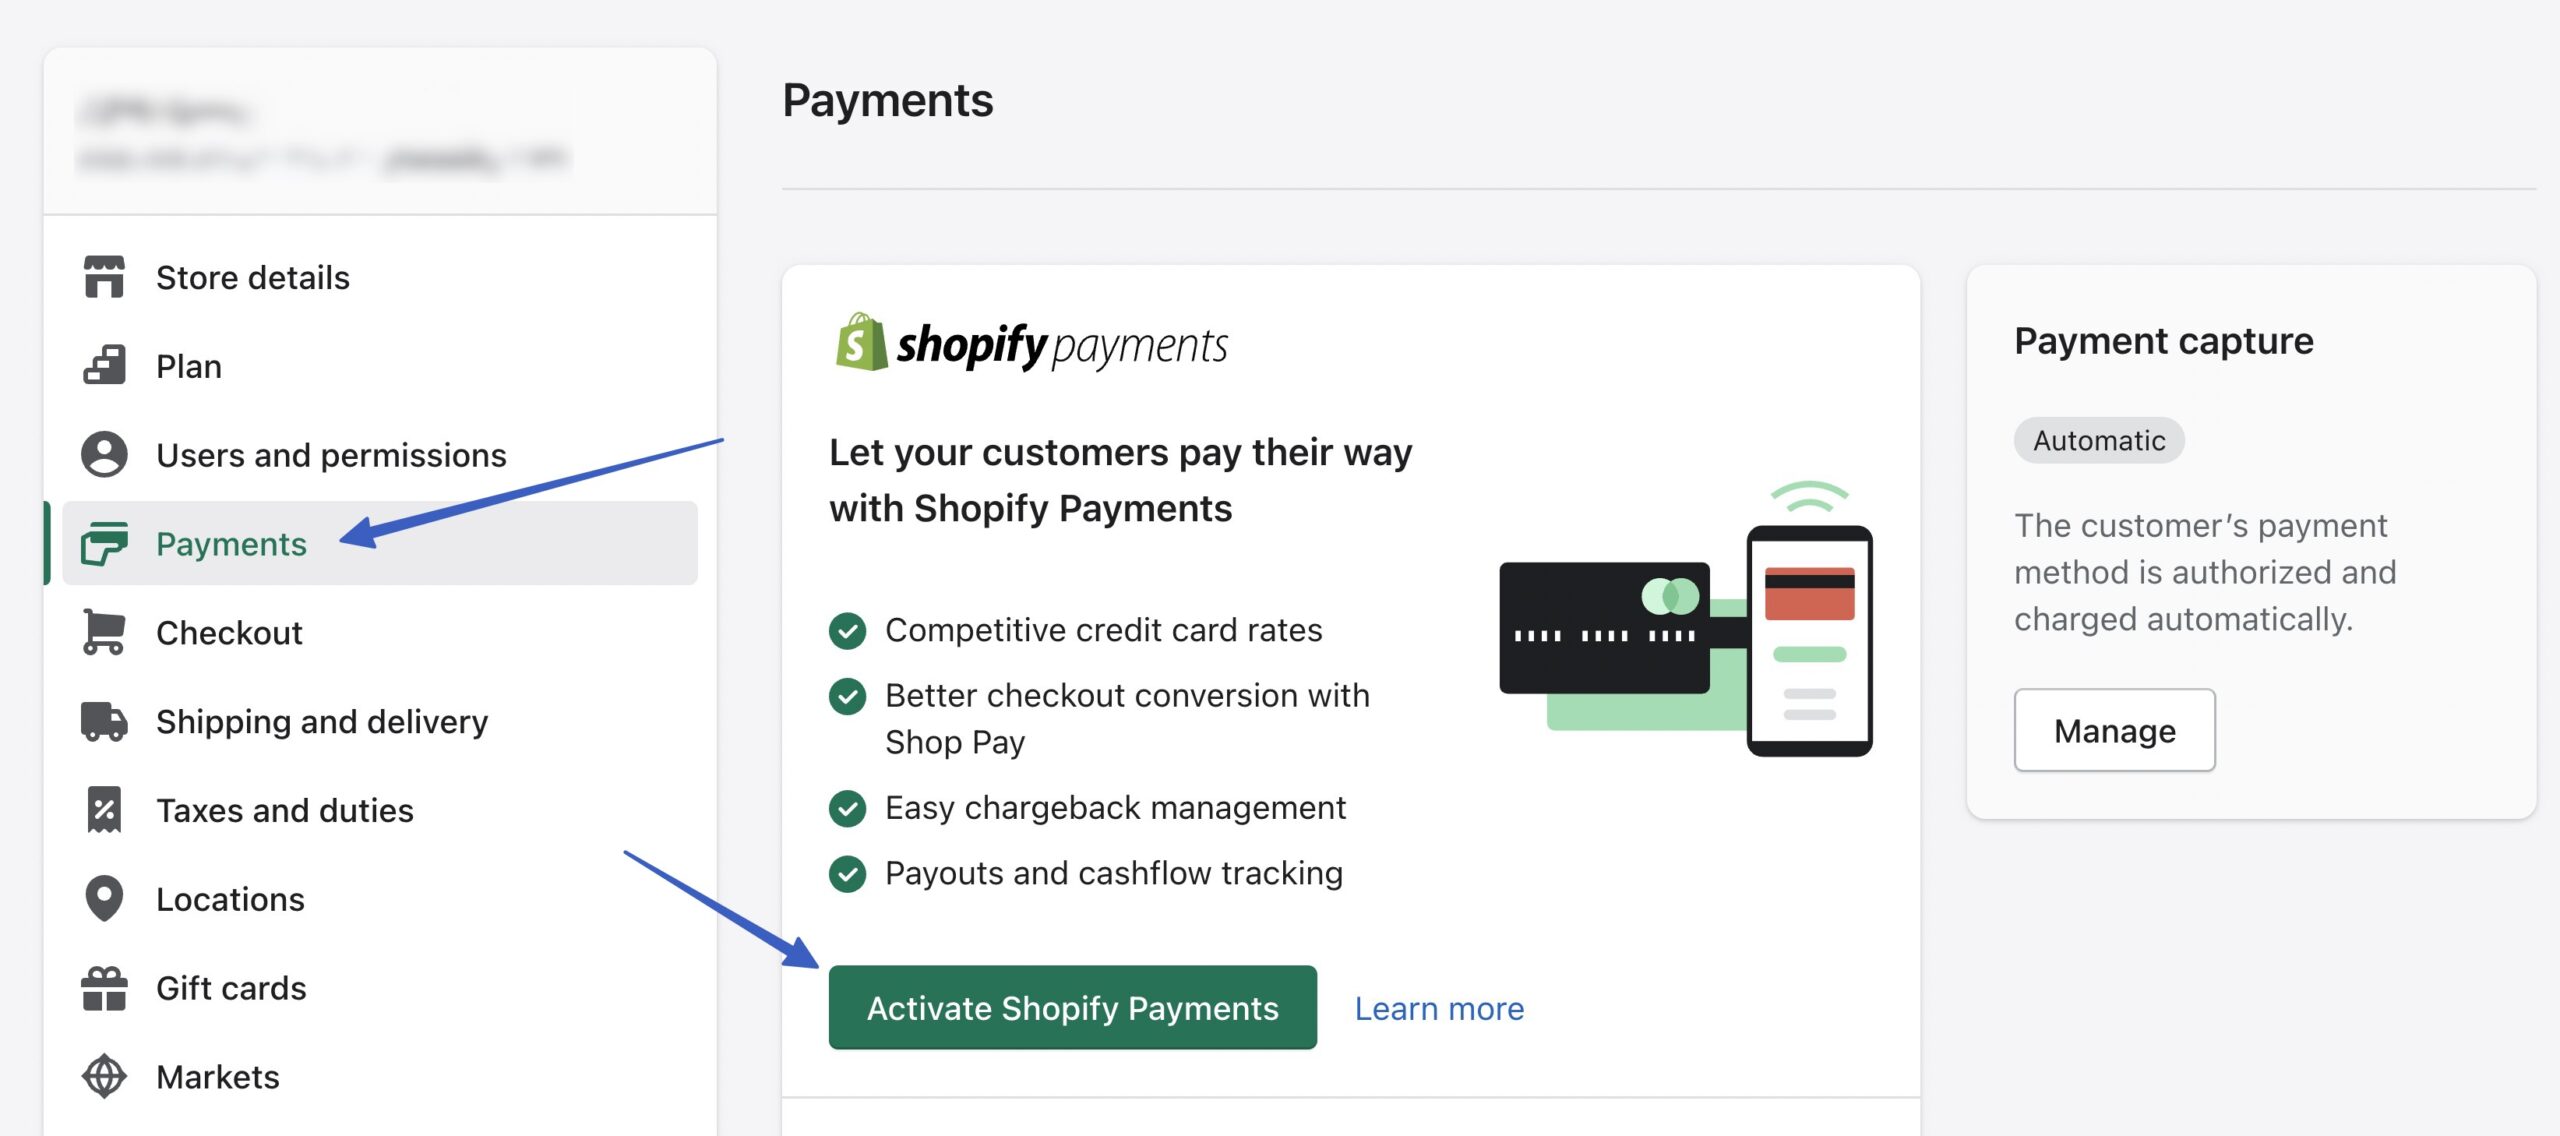
6. Don’t forget to set up payment processing in Shopify
To accept payments, you must have an active payment processing account turned on in Shopify. Luckily, Shopify has a built-in processor called Shopify Payments for easy transactions. You need to, however, activate a Shopify Payments plan (free to use, but it does have credit card processing fees).
To make that happen, go to Settings in the Shopify dashboard.
Open the Payments tab. Click Activate Shopify Payments, then walk through the process of turning on your account. They’ll ask for details like name, business, address, and social security number to verify your identity and ensure you’re a viable merchant. This is also where you type in your banking account details to receive payments.
With Shopify Payments activated, the Shopify products embedded on WordPress can be added to a cart and sent through the entire checkout process!
Advanced settings for embeddable Shopify products
The previous method involved quickly creating a Shopify Buy button from a product page. However, the Buy Button channel includes more advanced features for those interested in further customizing their items before adding to WordPress.
To gain access to the entire collection of Buy Button settings, go straight to the Buy Button sales channel tab (instead of using the Embed On A Website feature on a product page).
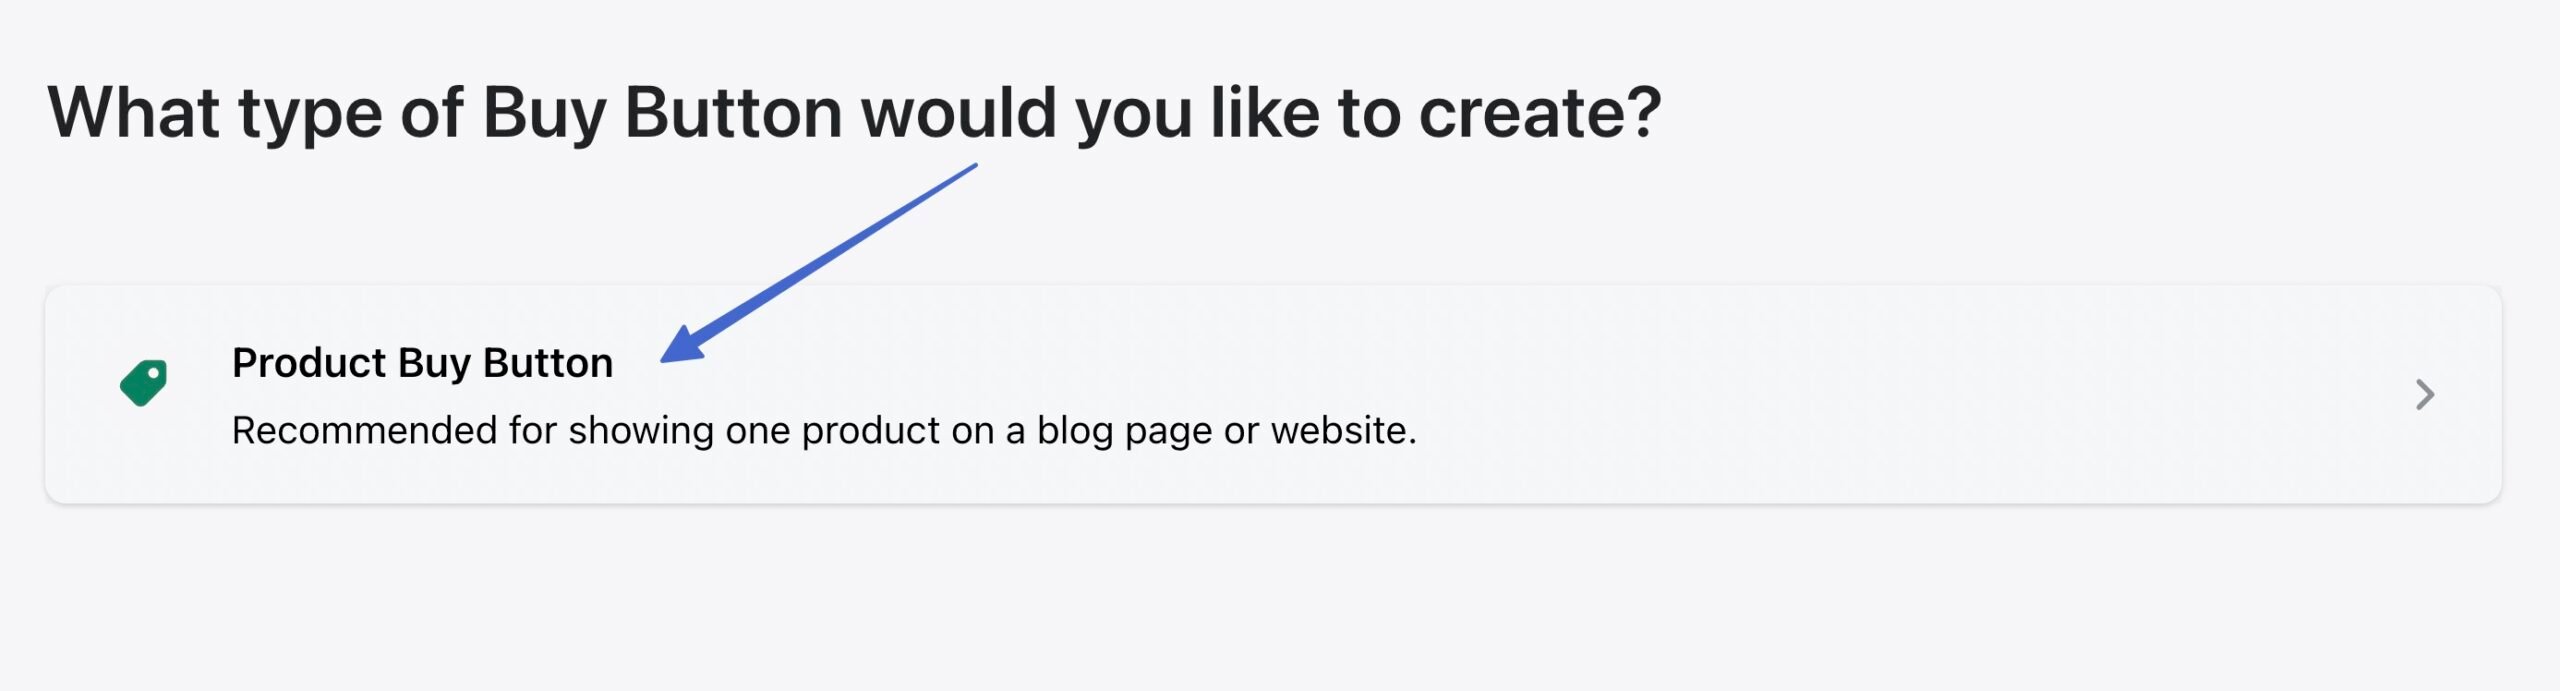
Click to Create A Buy Button:
Choose the Product Buy Button option:
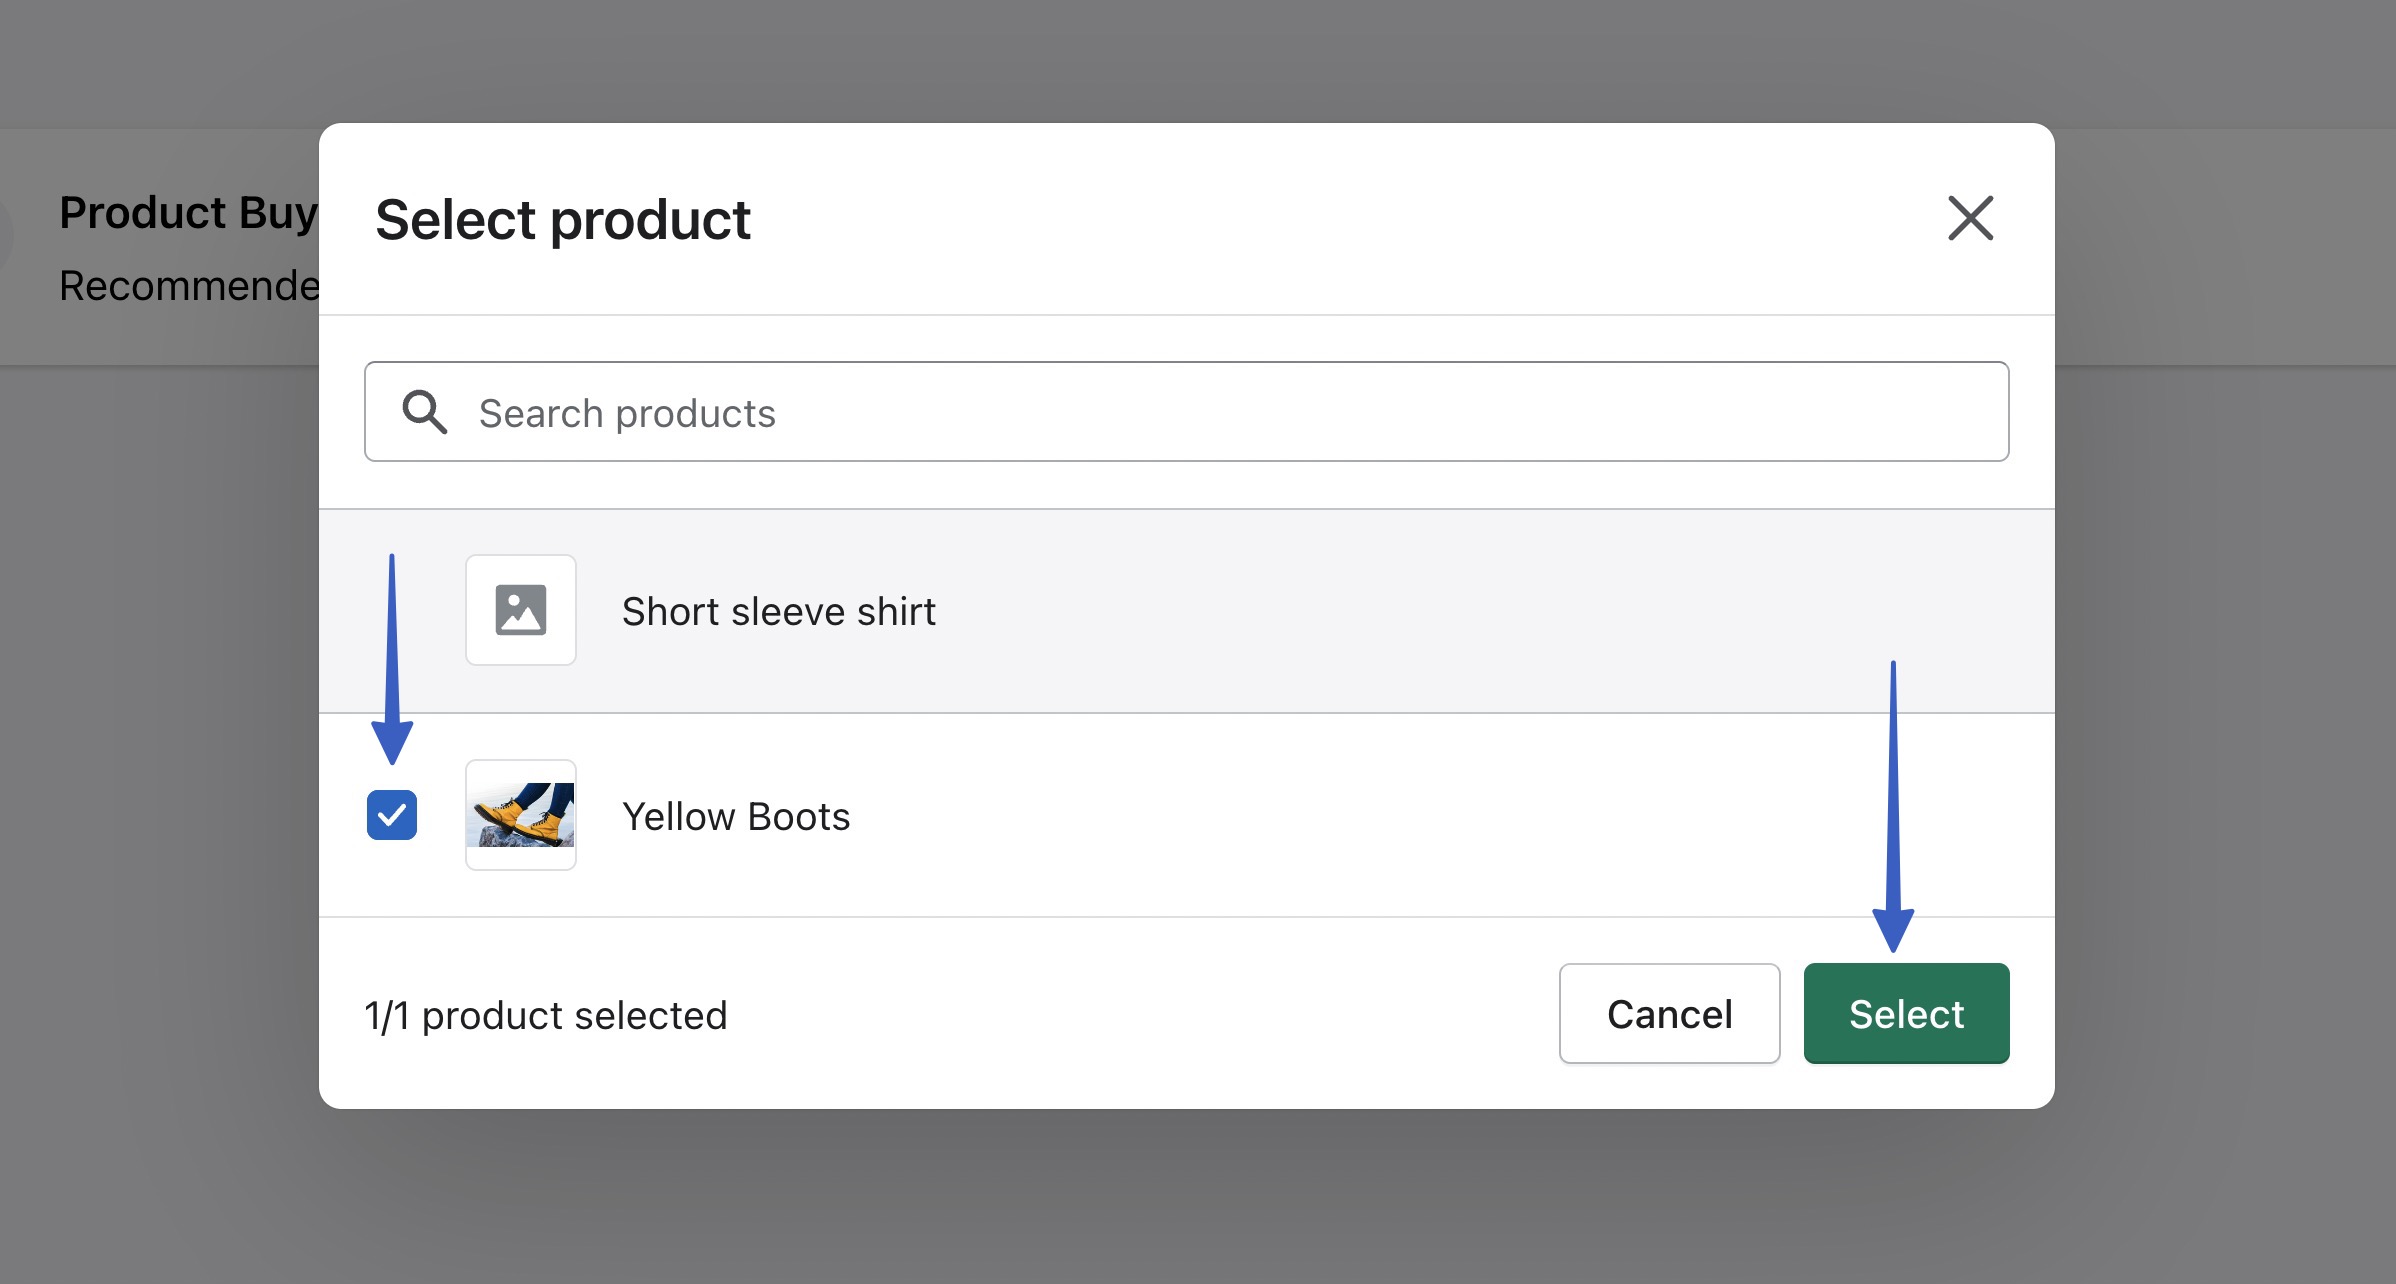
Search for the products you want, then select them. Click the Select button to proceed:
Here’s where you add advanced customizations to Shopify Buy Buttons. To begin, click on the Button Style tab:
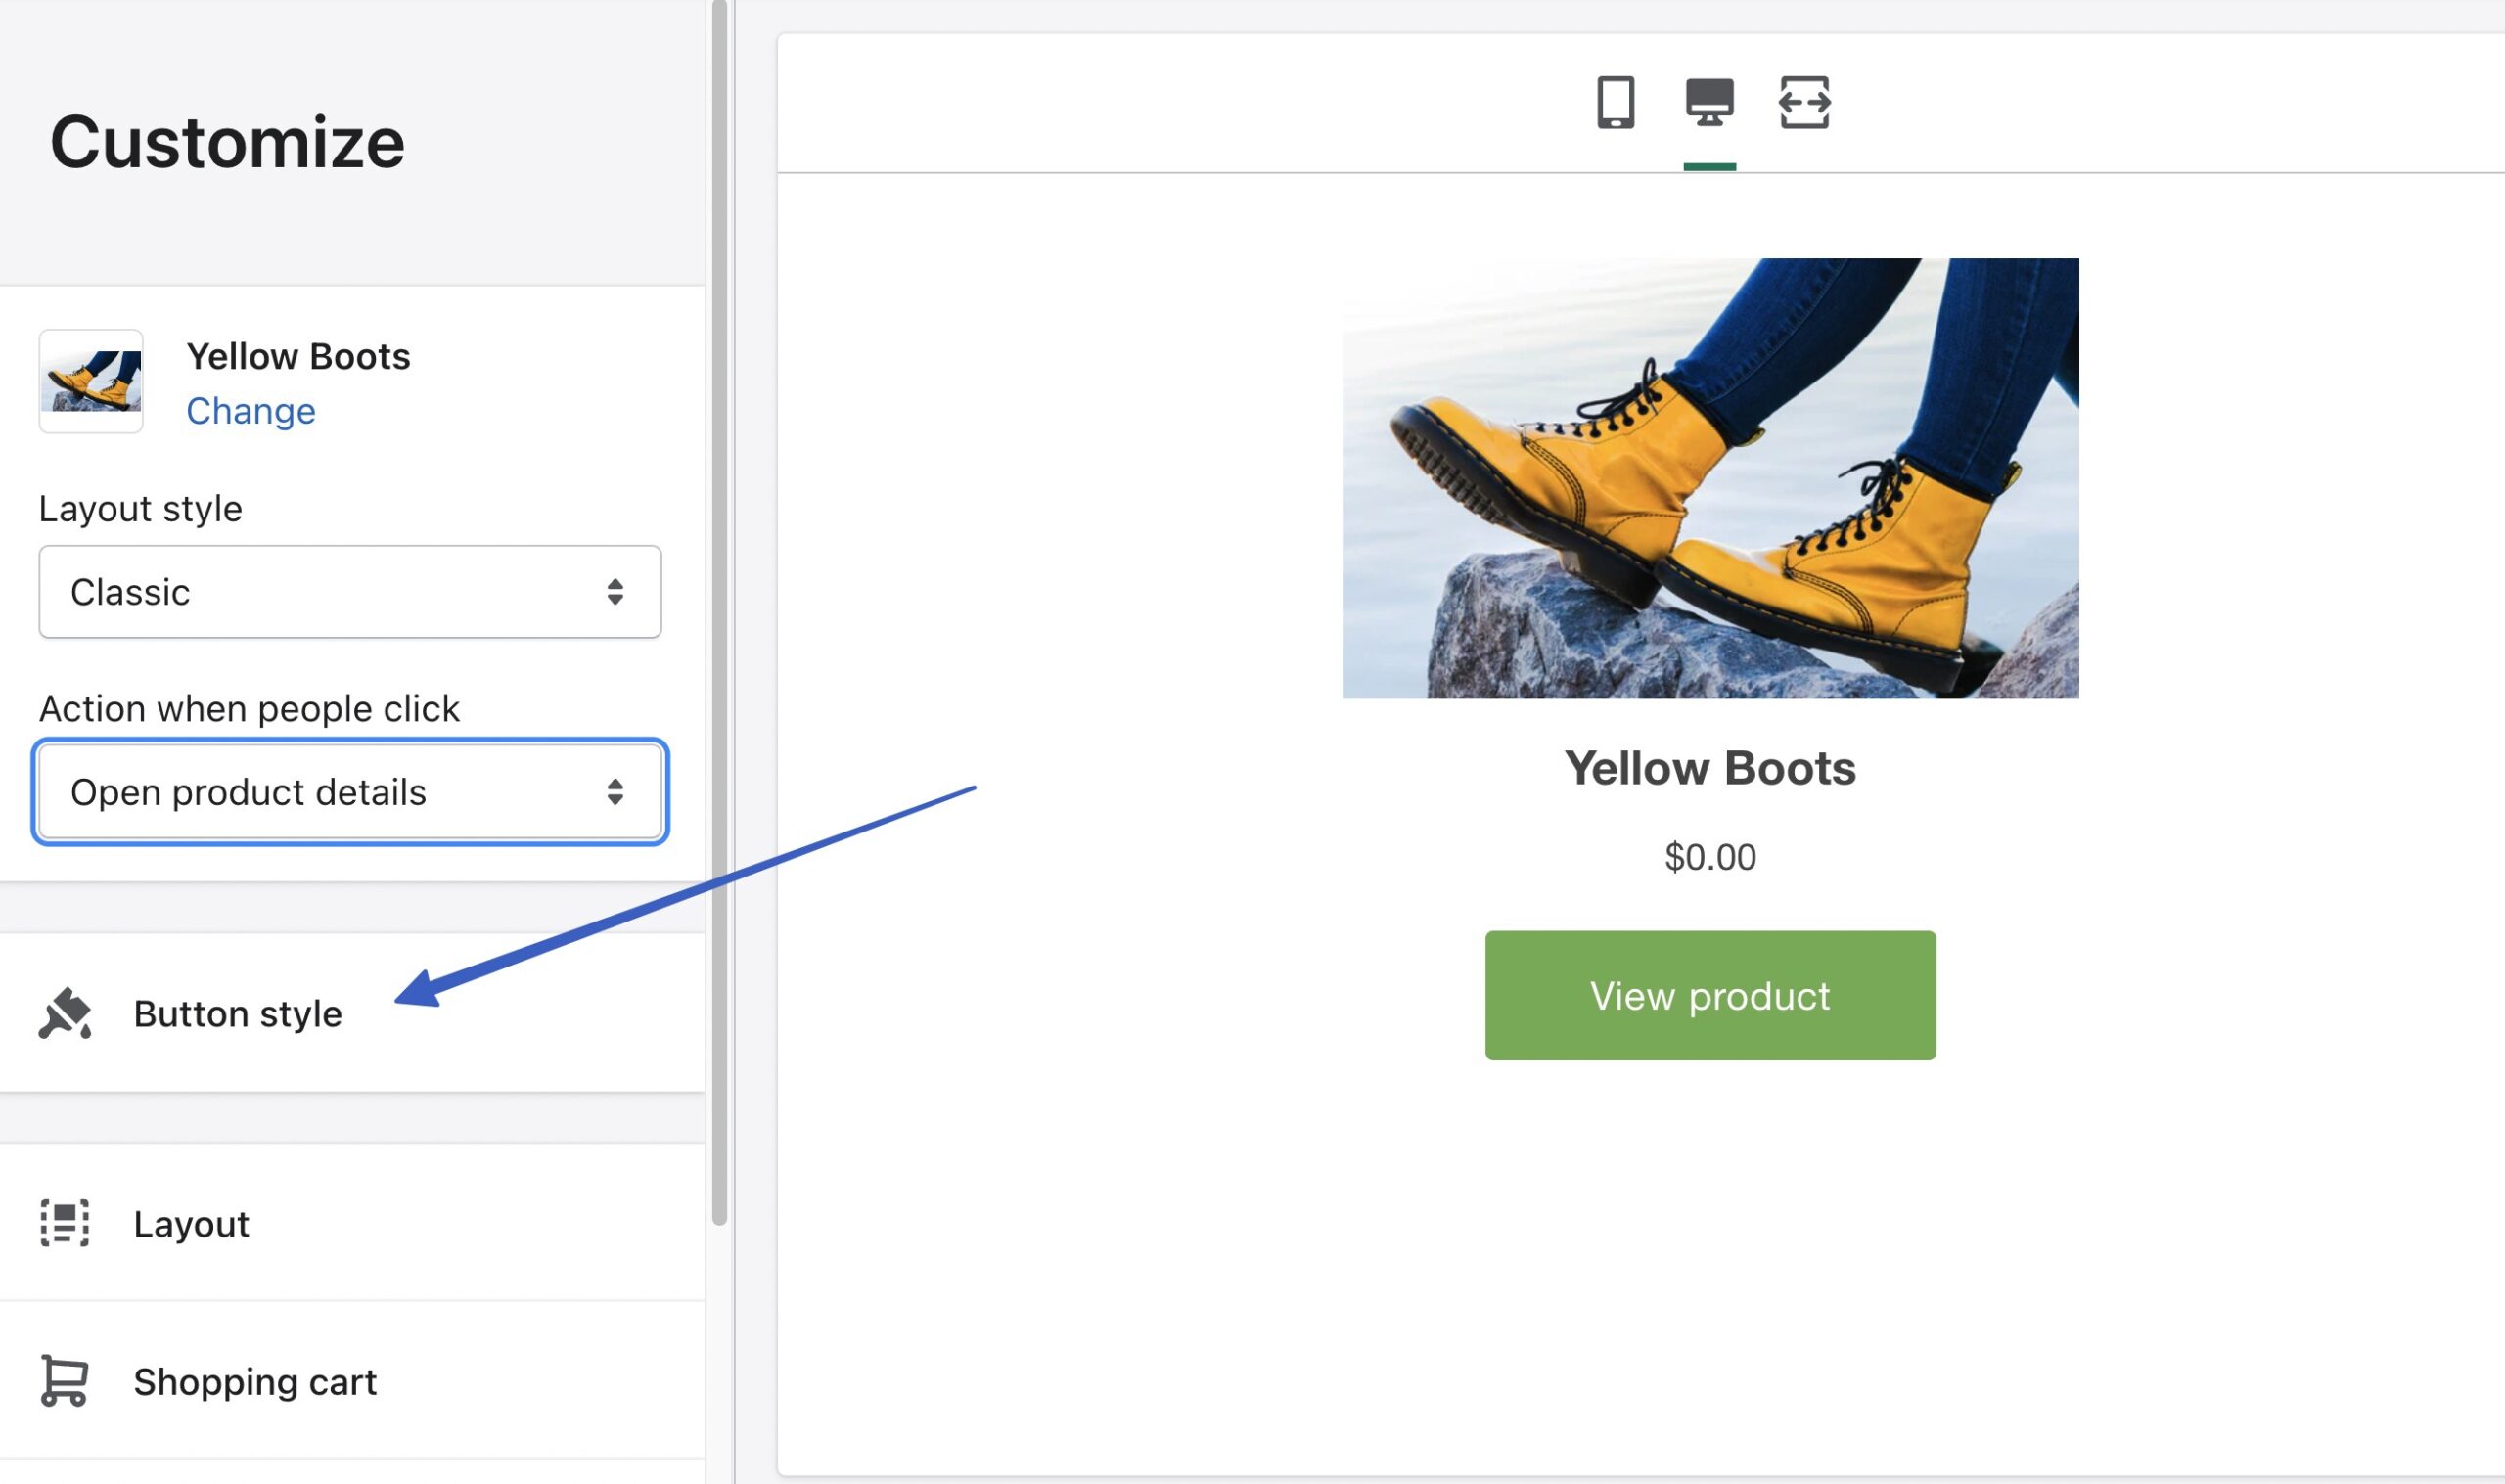
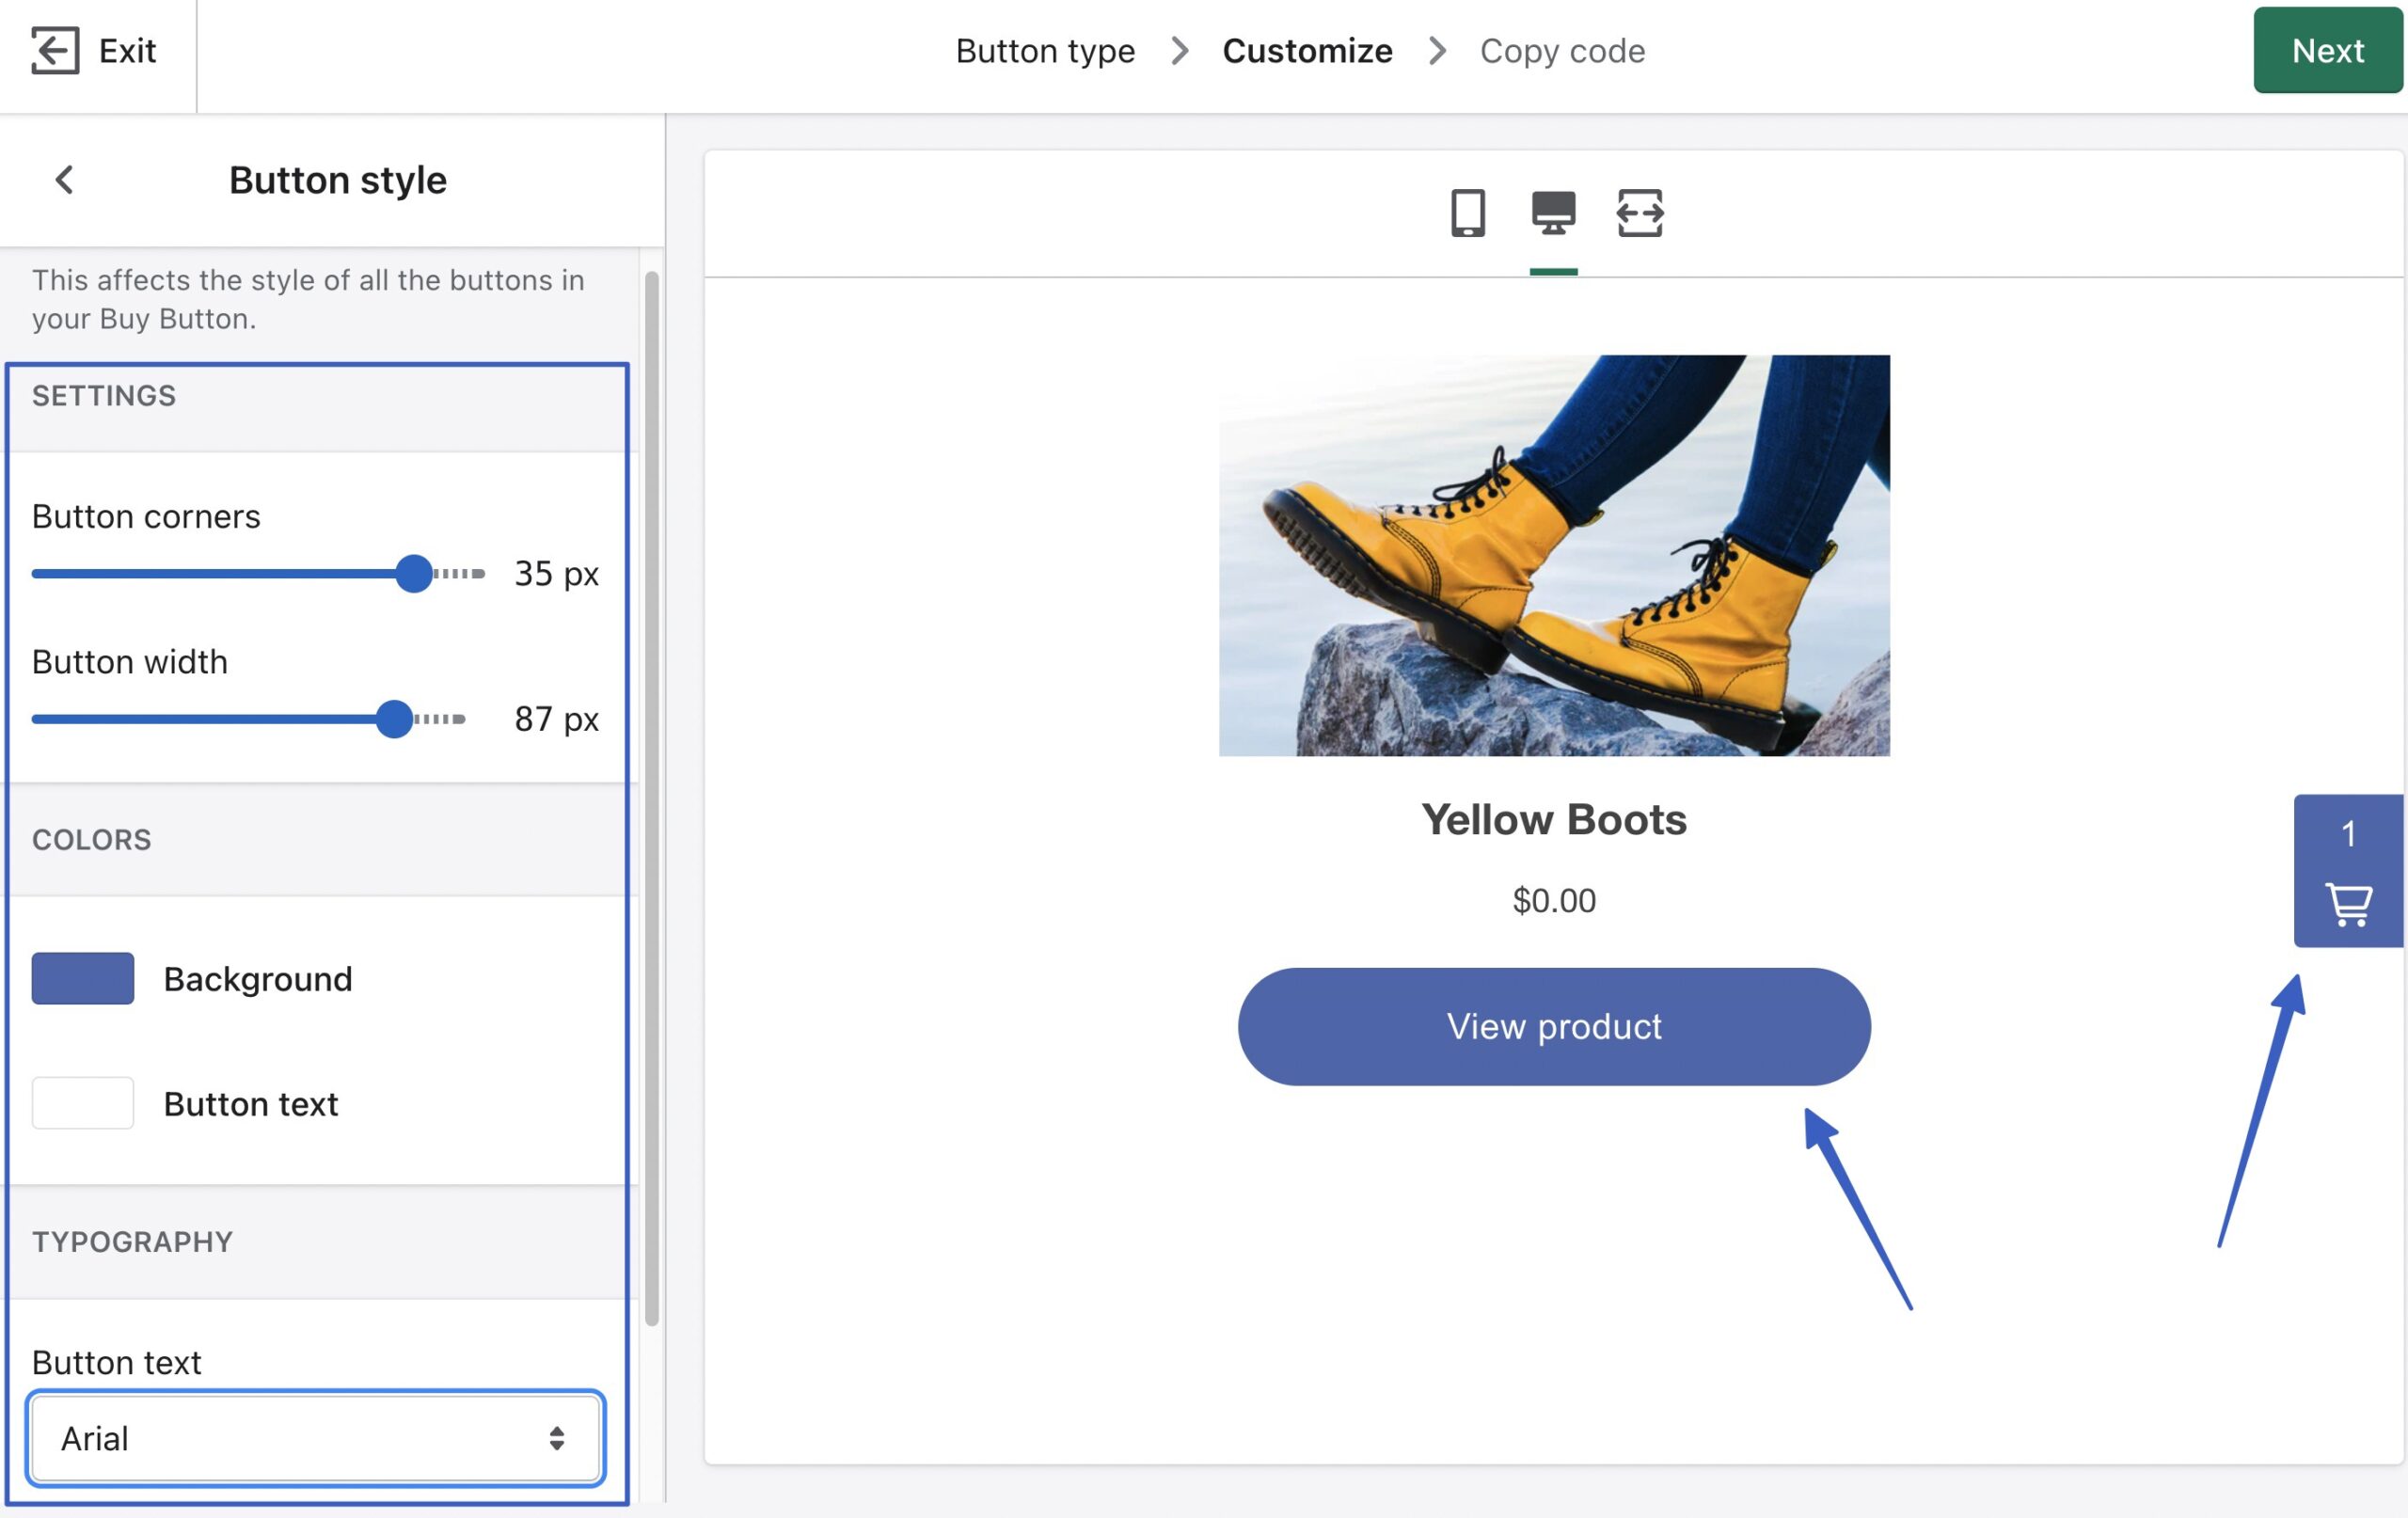
Here, you can adjust:
- Button corners
- Button width
- Colors
- Typography
- Button text
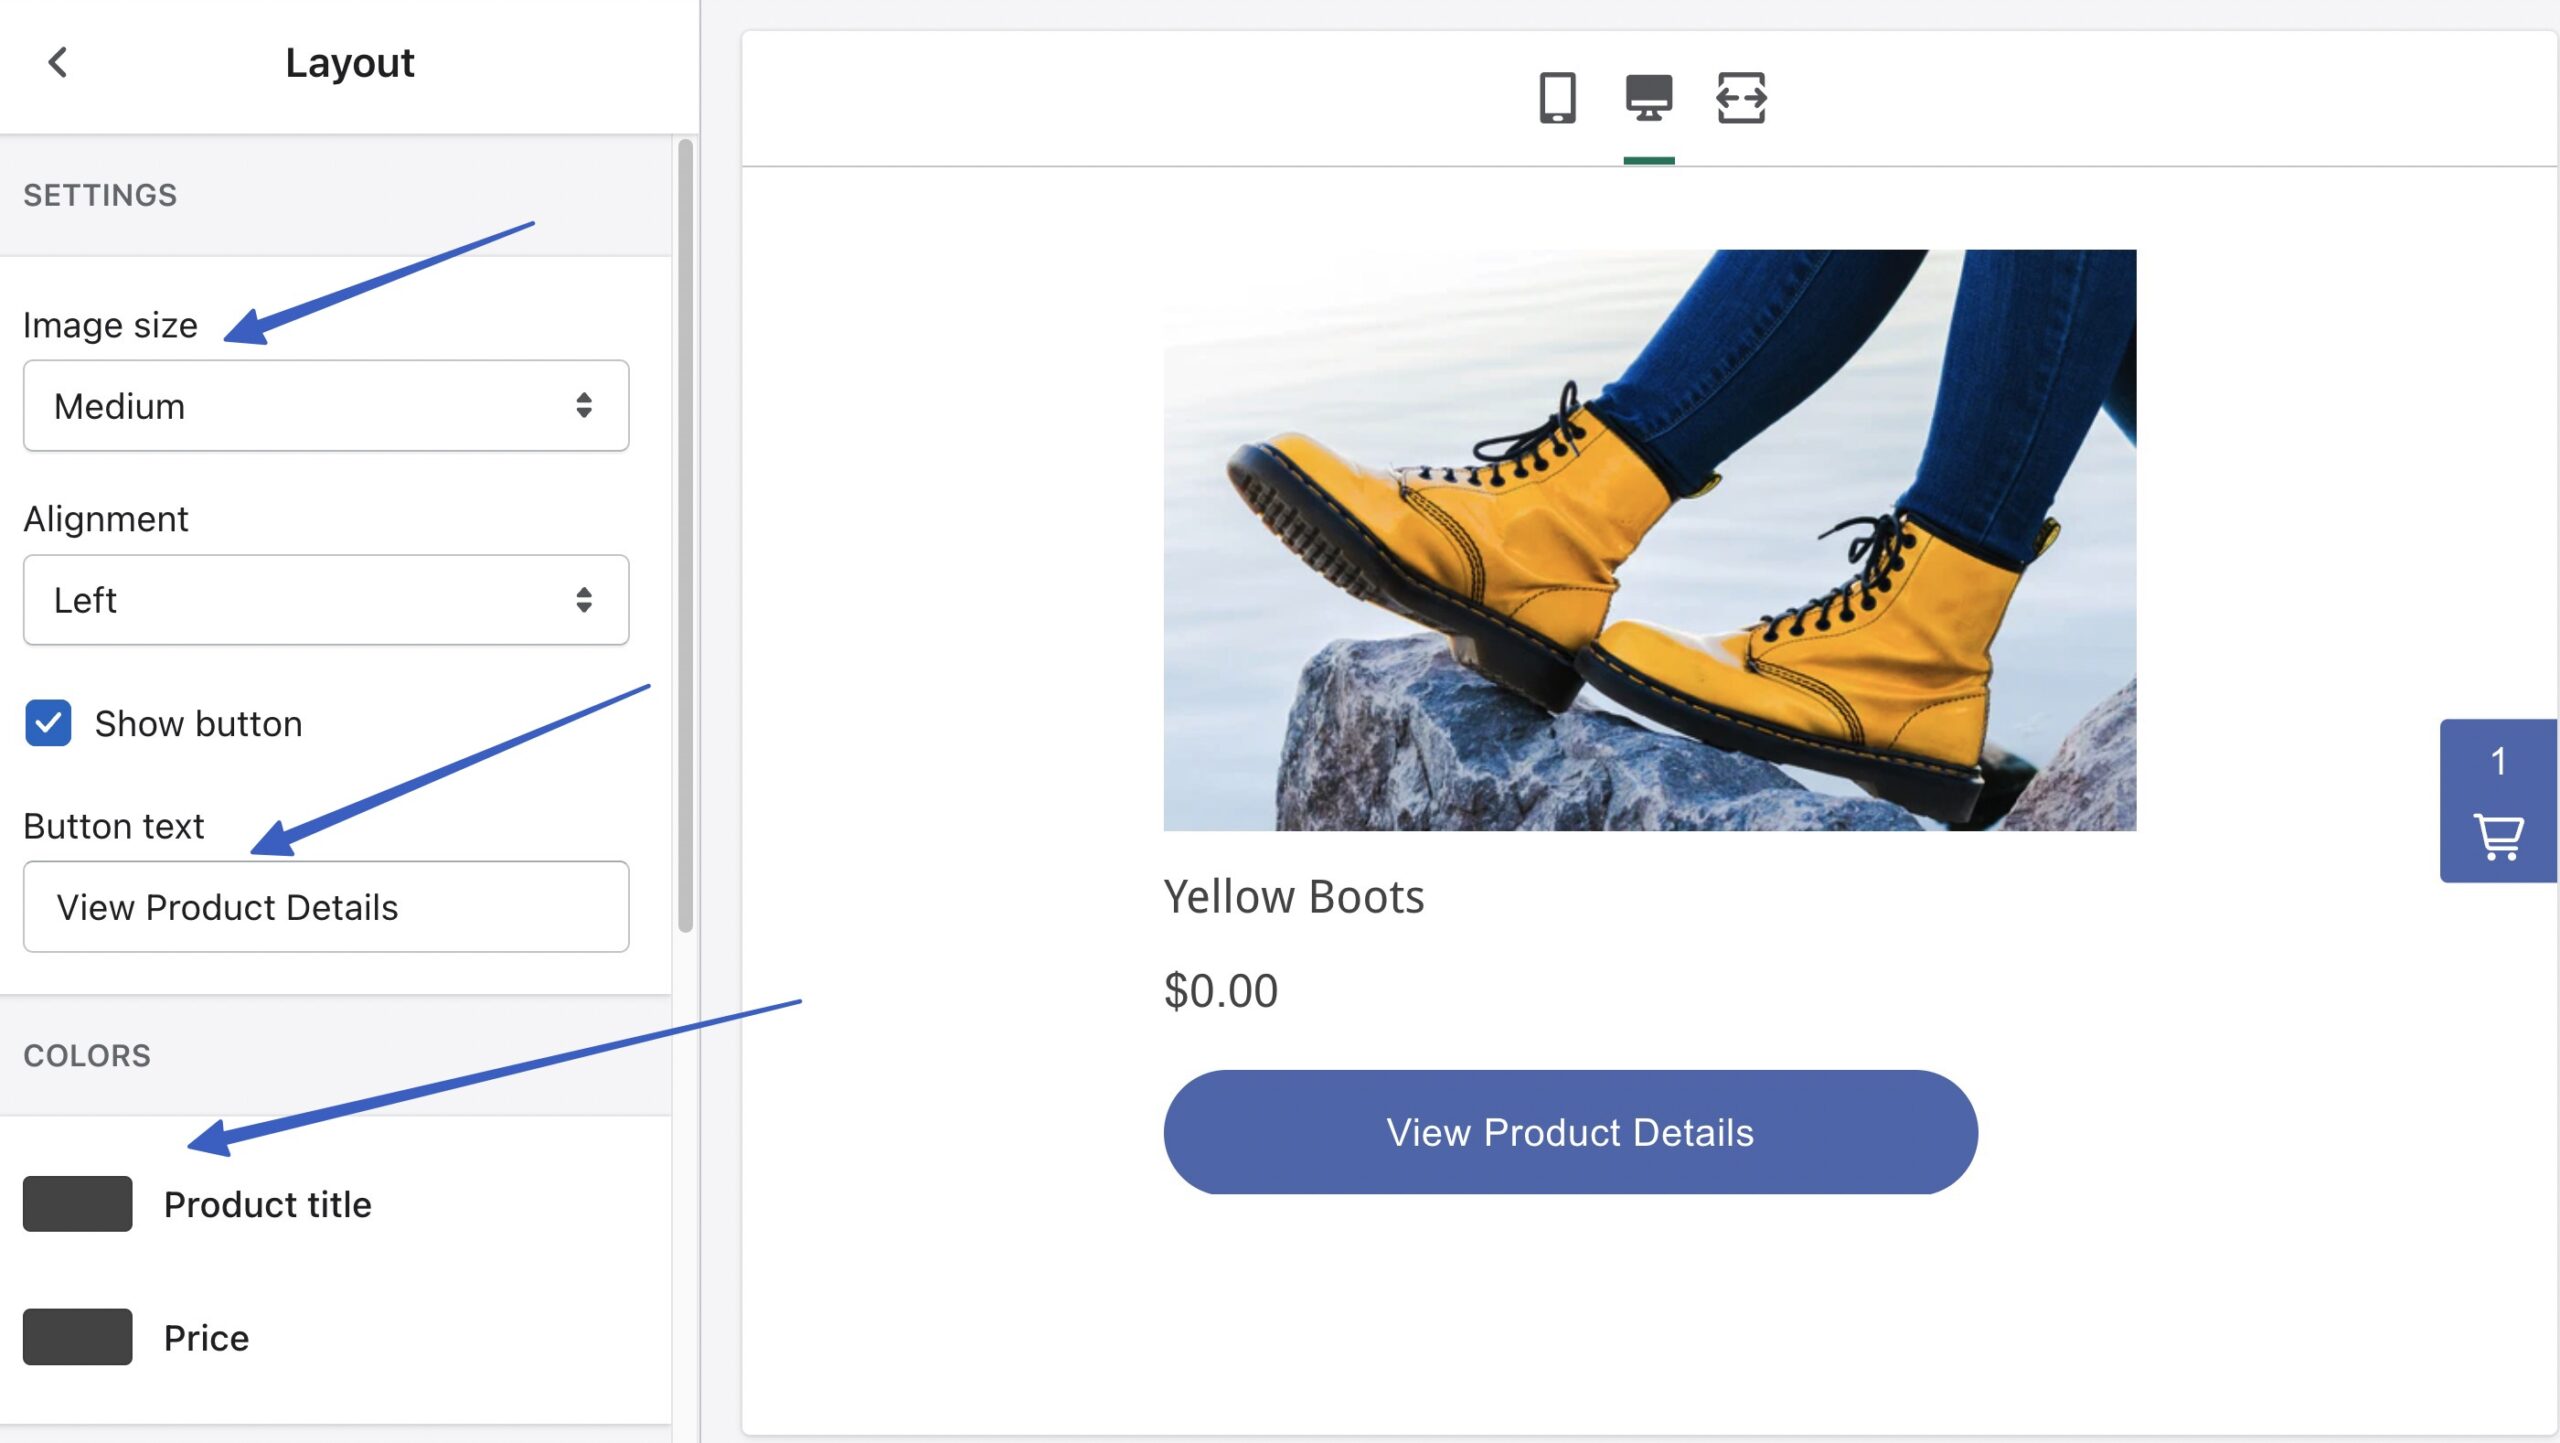
Next, go to the Layout tab:
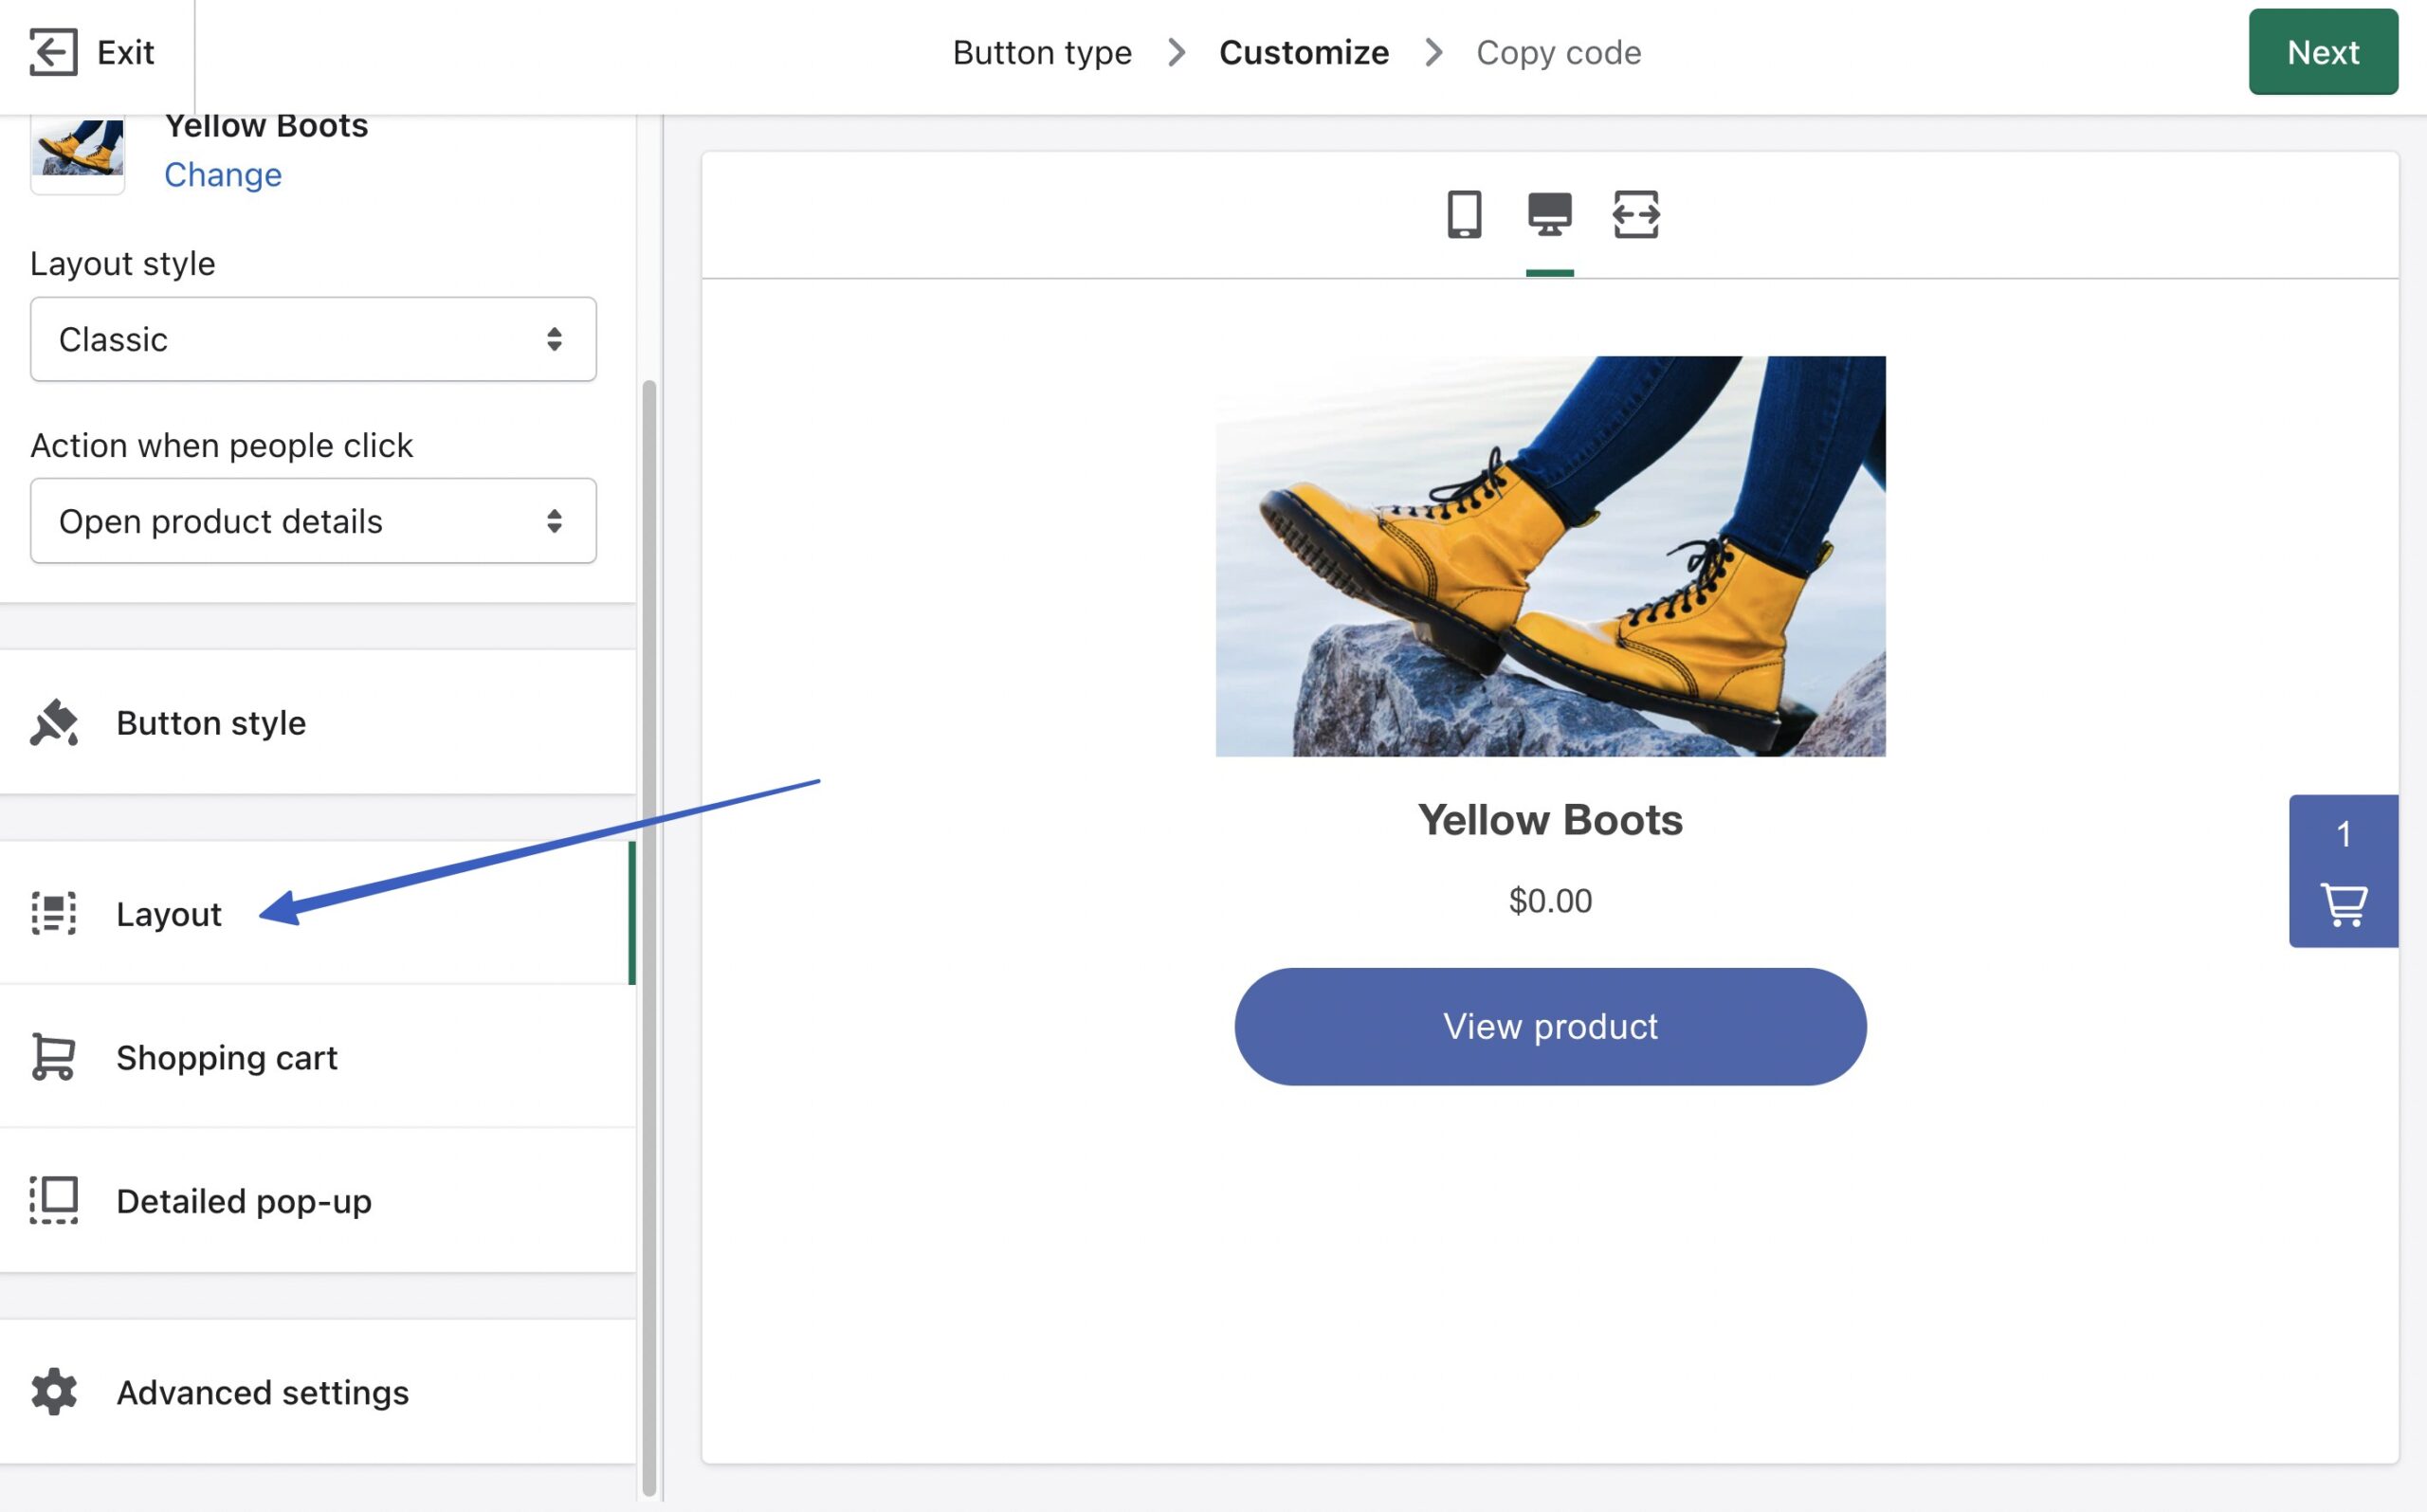
The Layout page offers settings to change the image size, button text, text colors, and more:
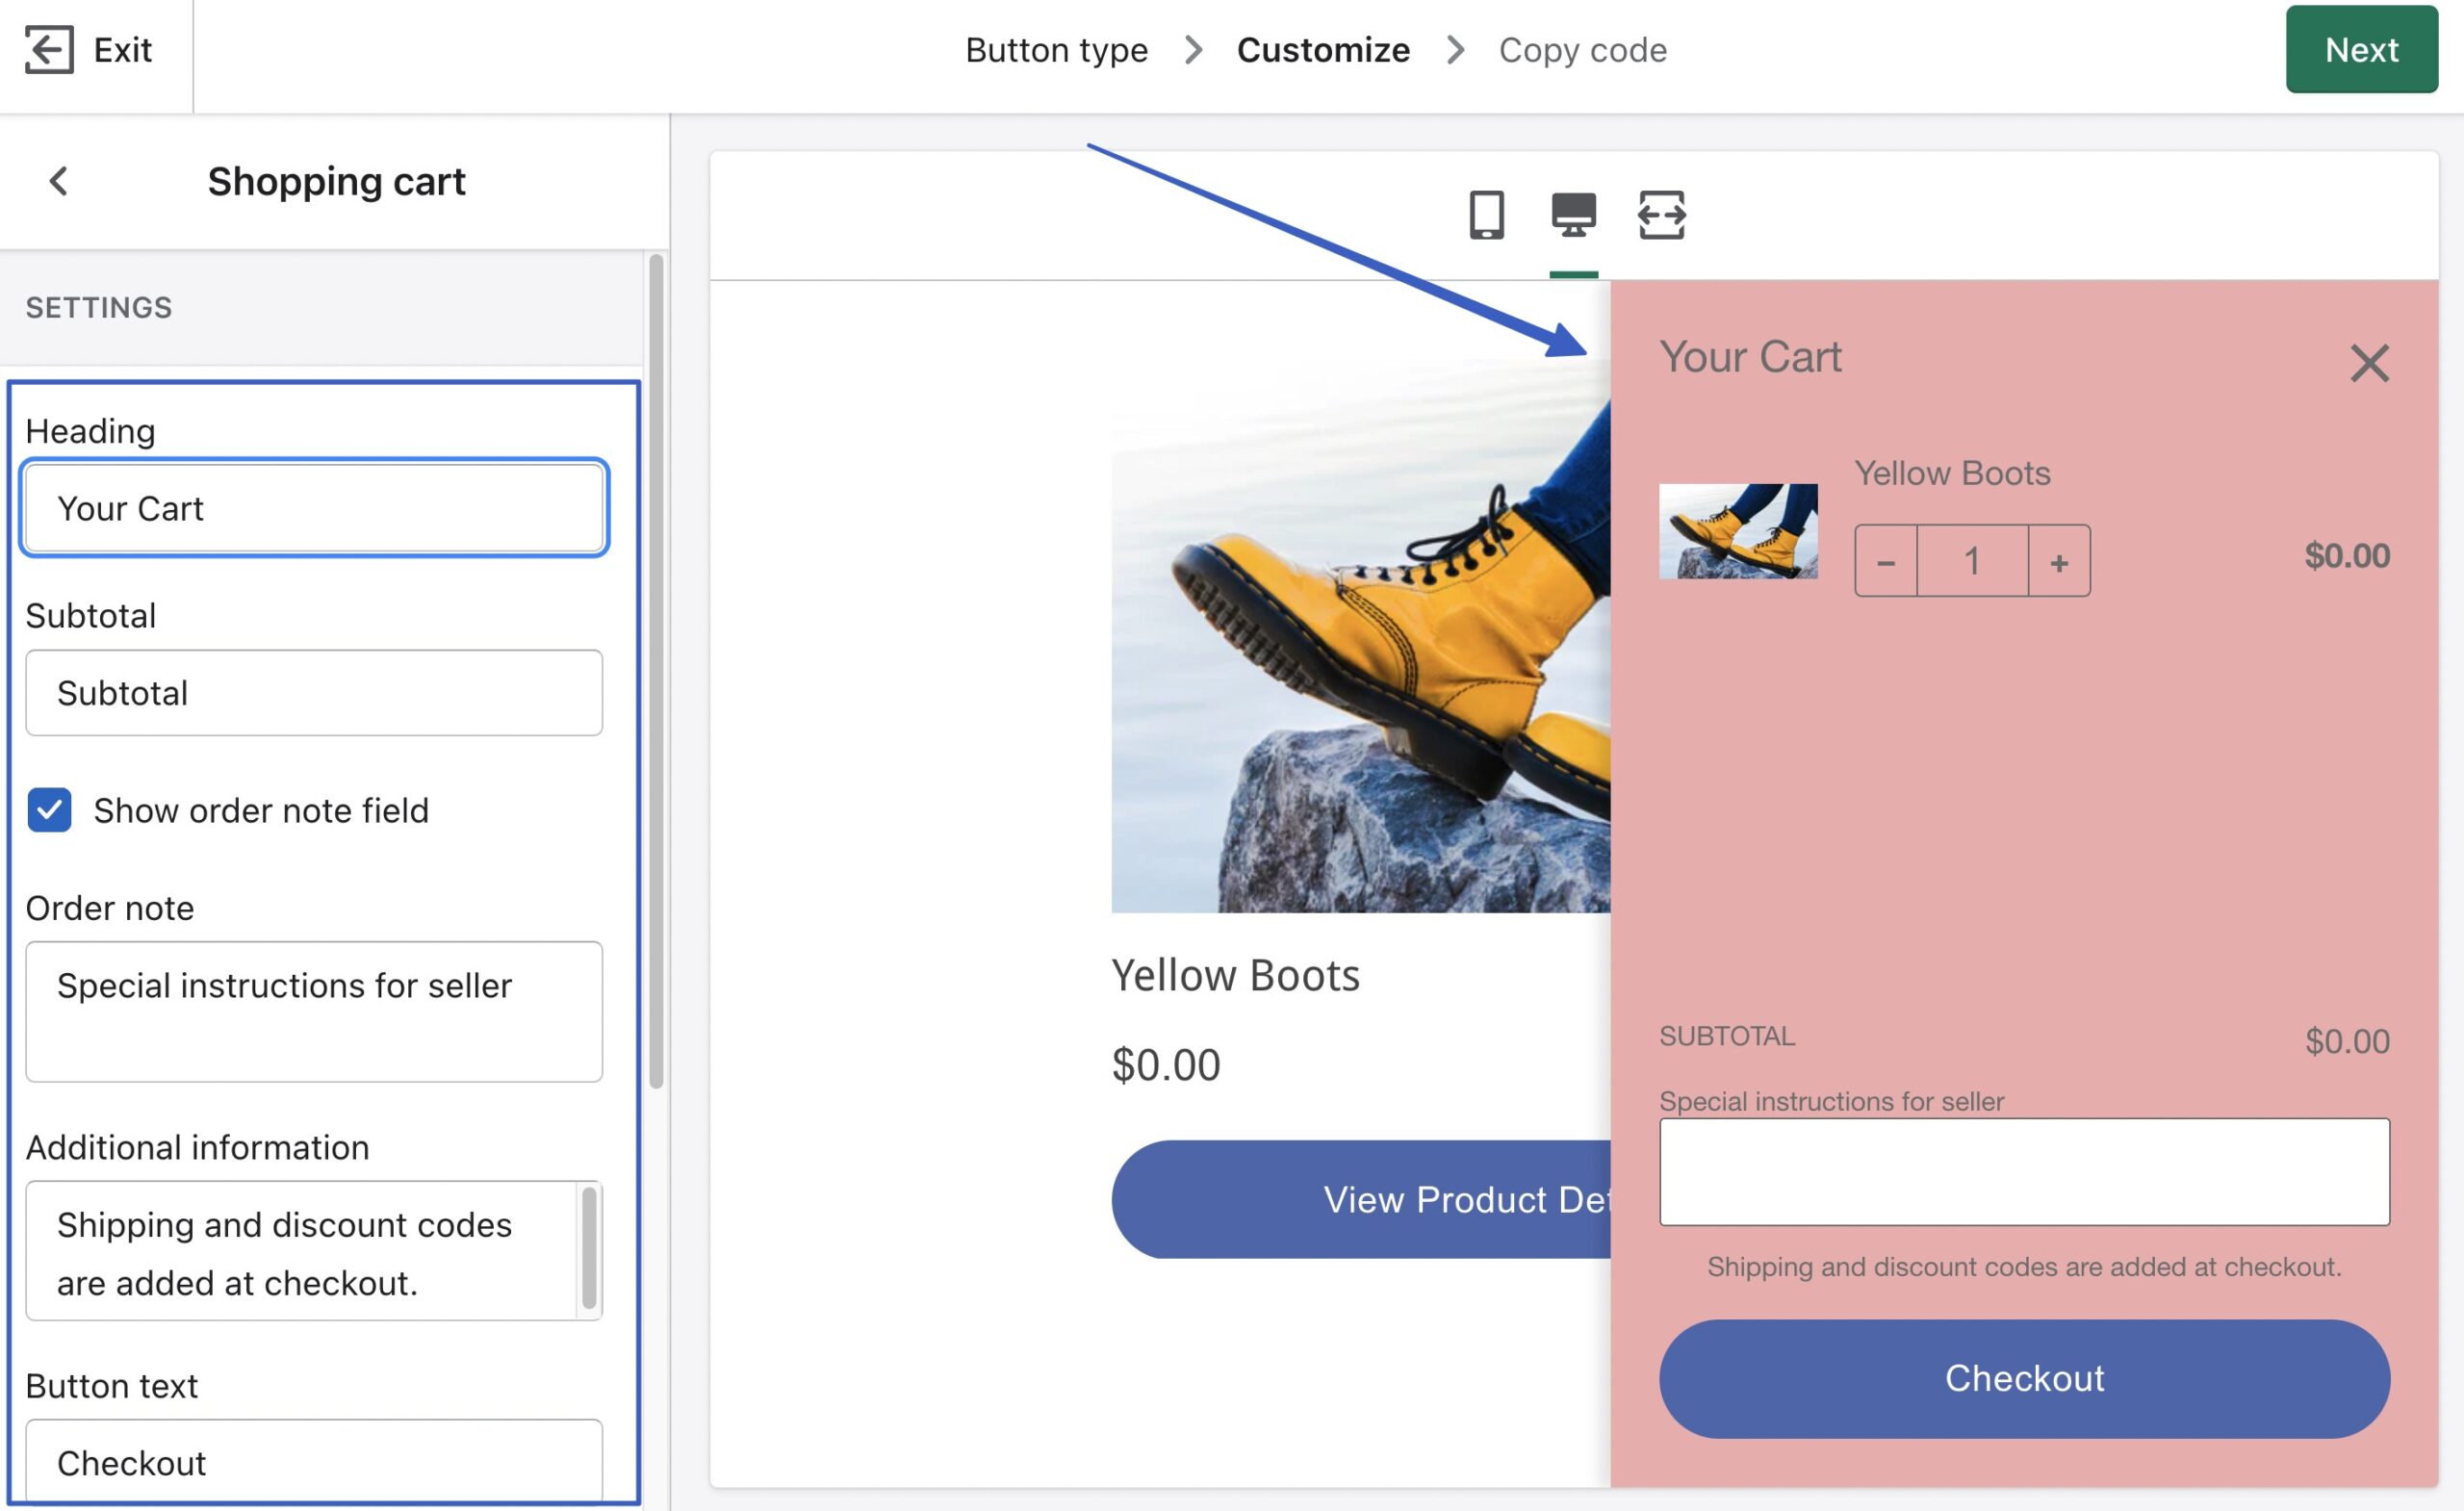
Click the Shopping Cart tab to modify settings for the slide-in cart:
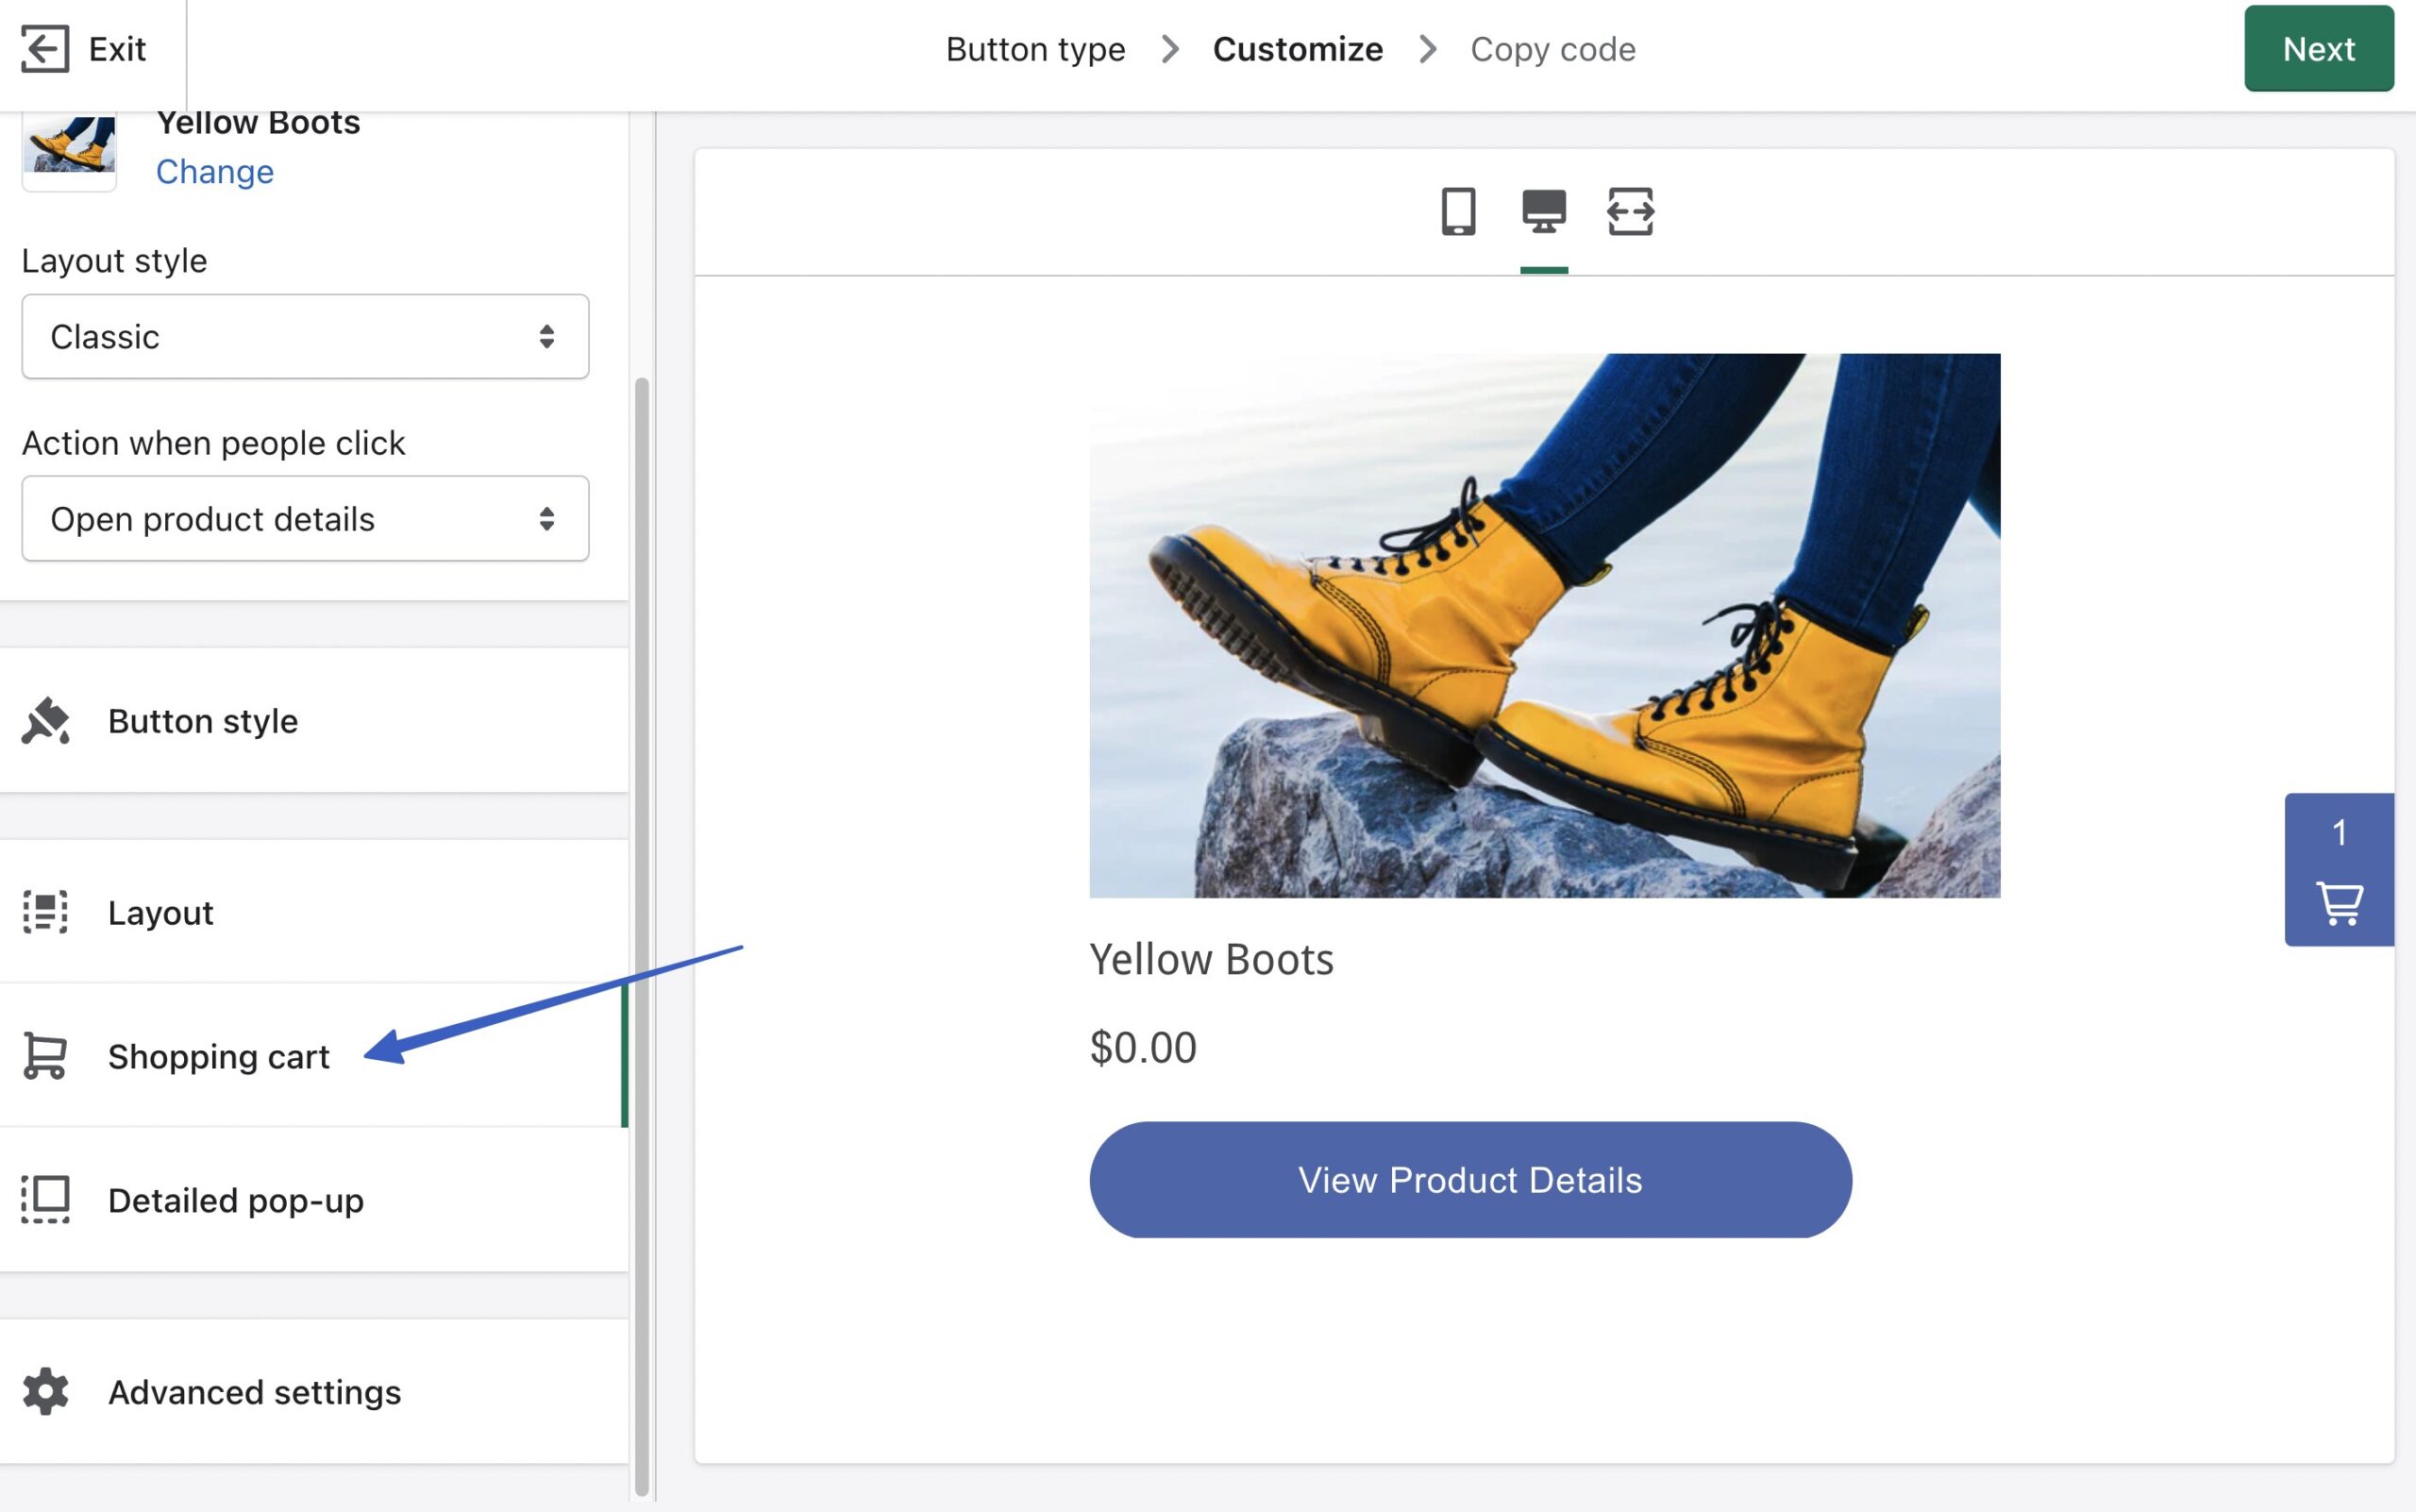
This one is rather powerful with options to adjust the cart’s colors, add an order note field, and switch the button text.
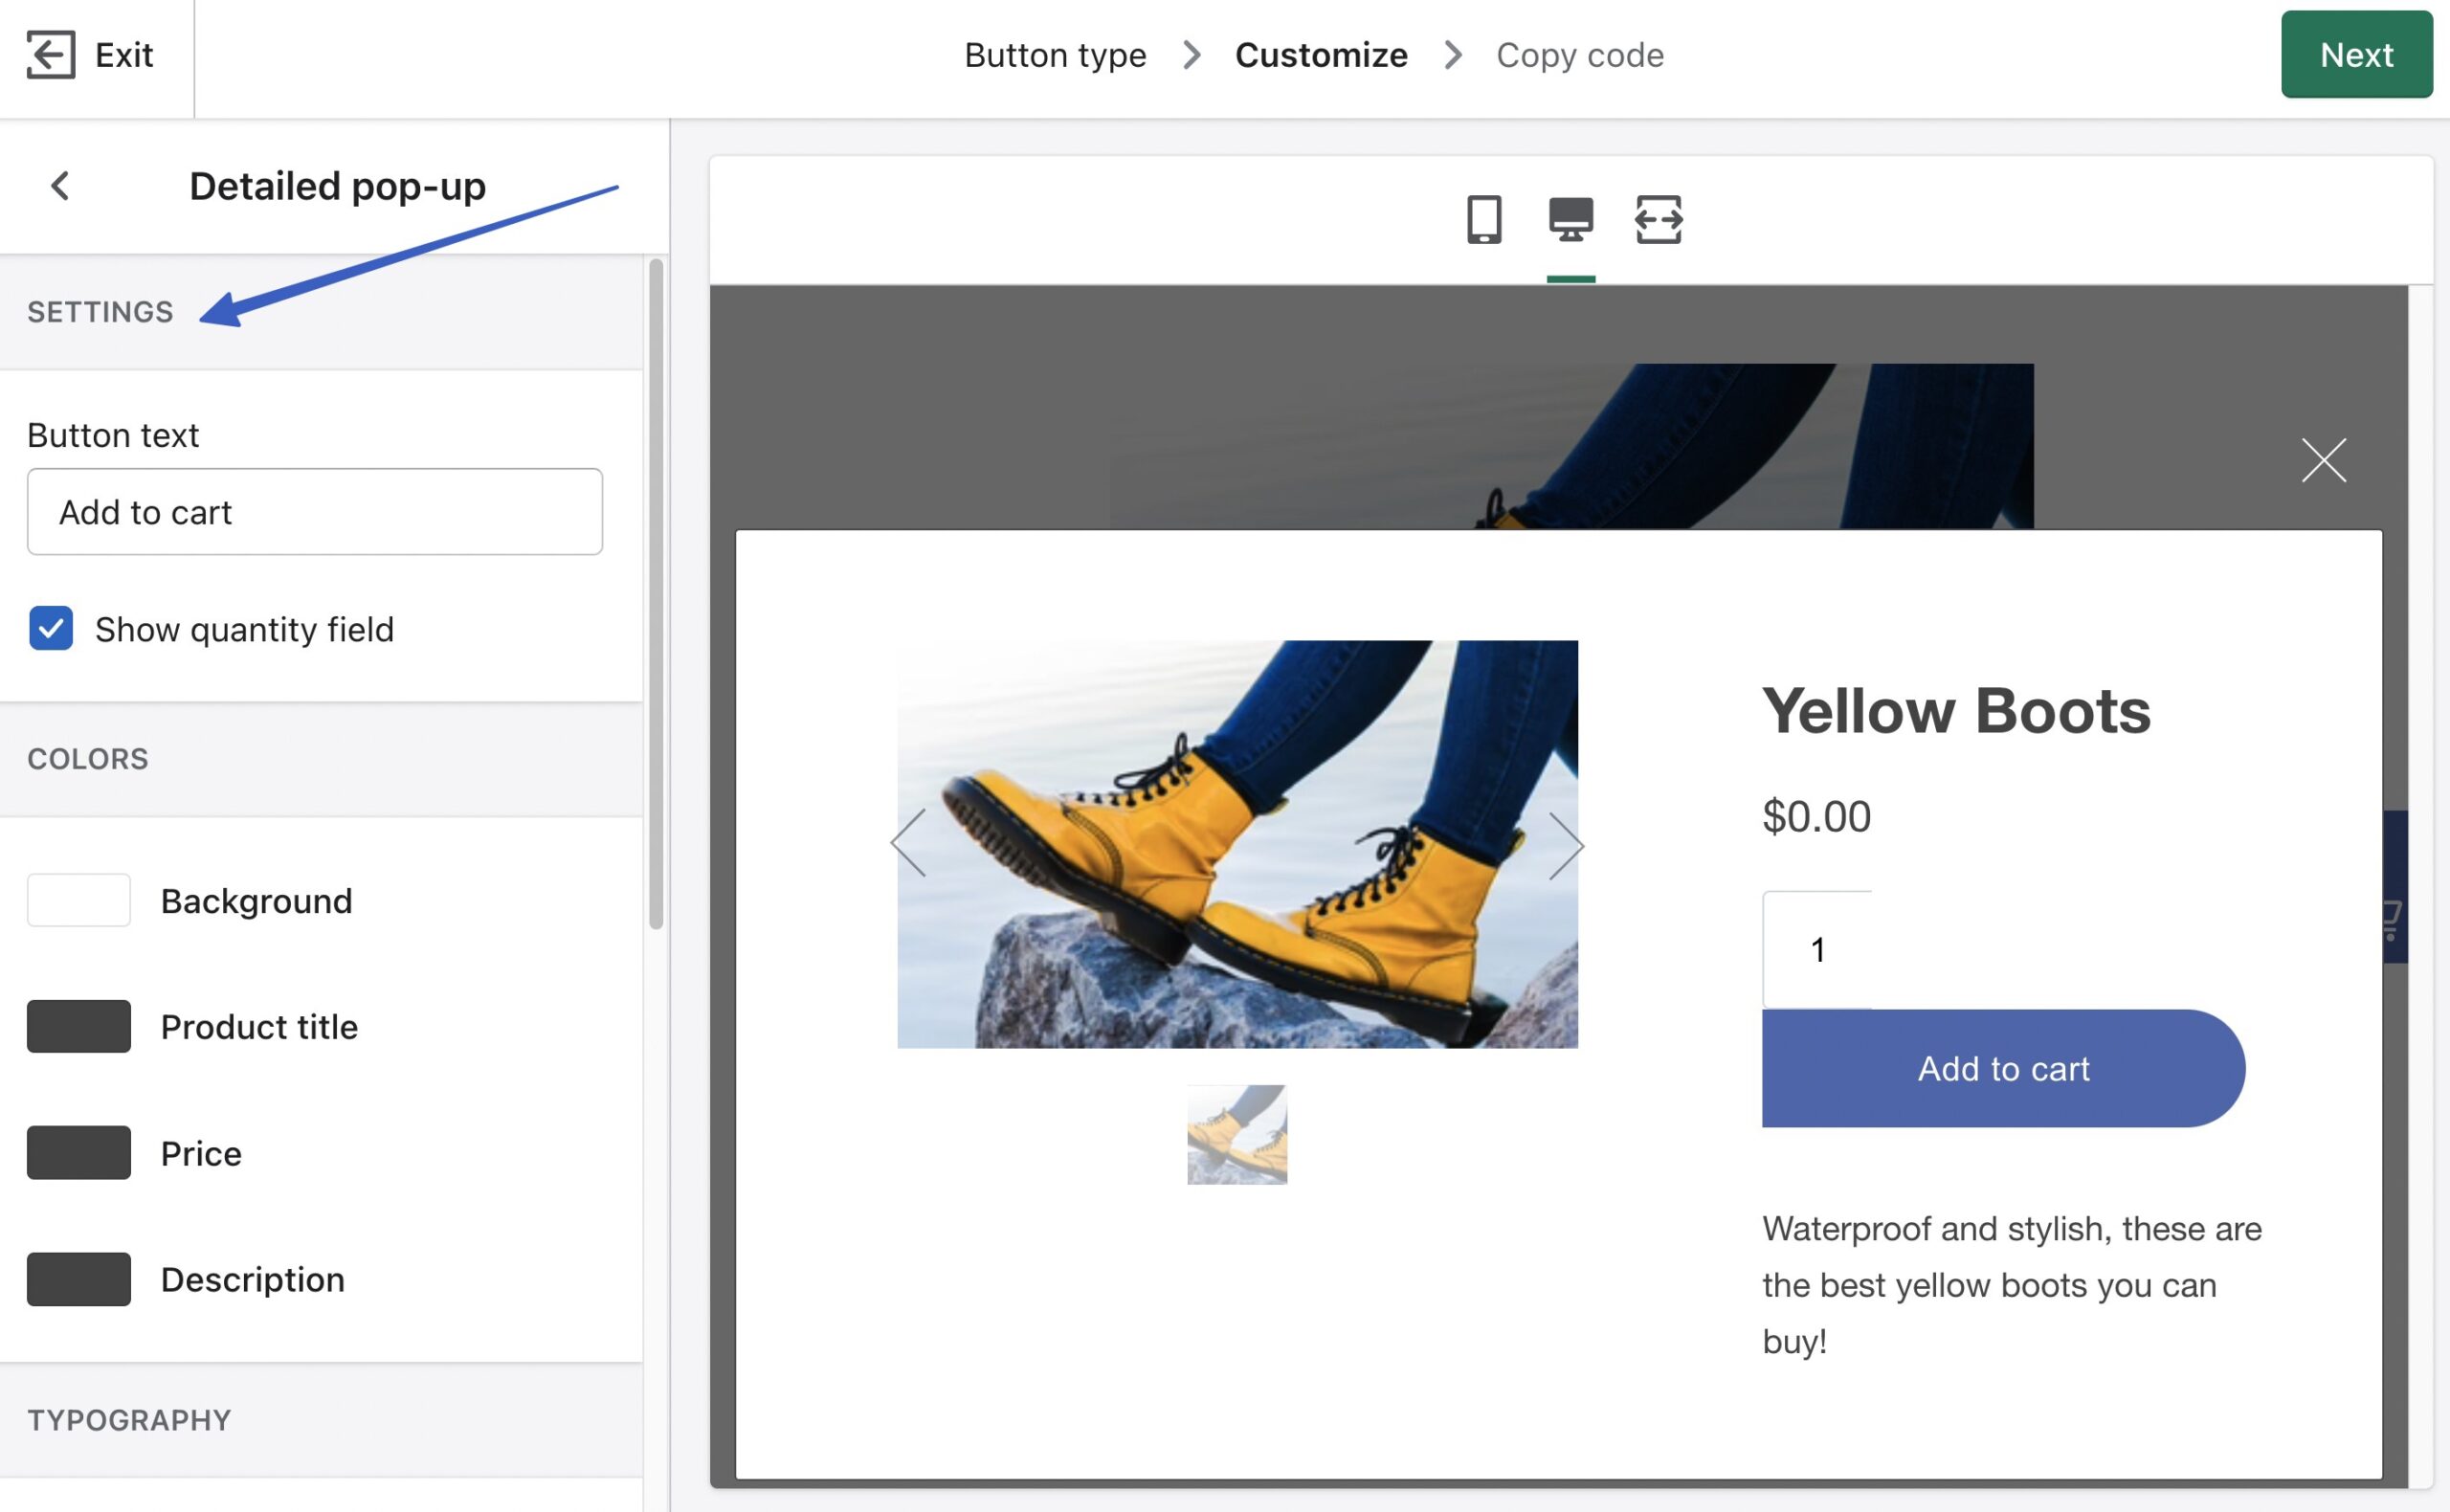
The Detailed Pop-up module lets you make a pop-up for “View Details” buttons:
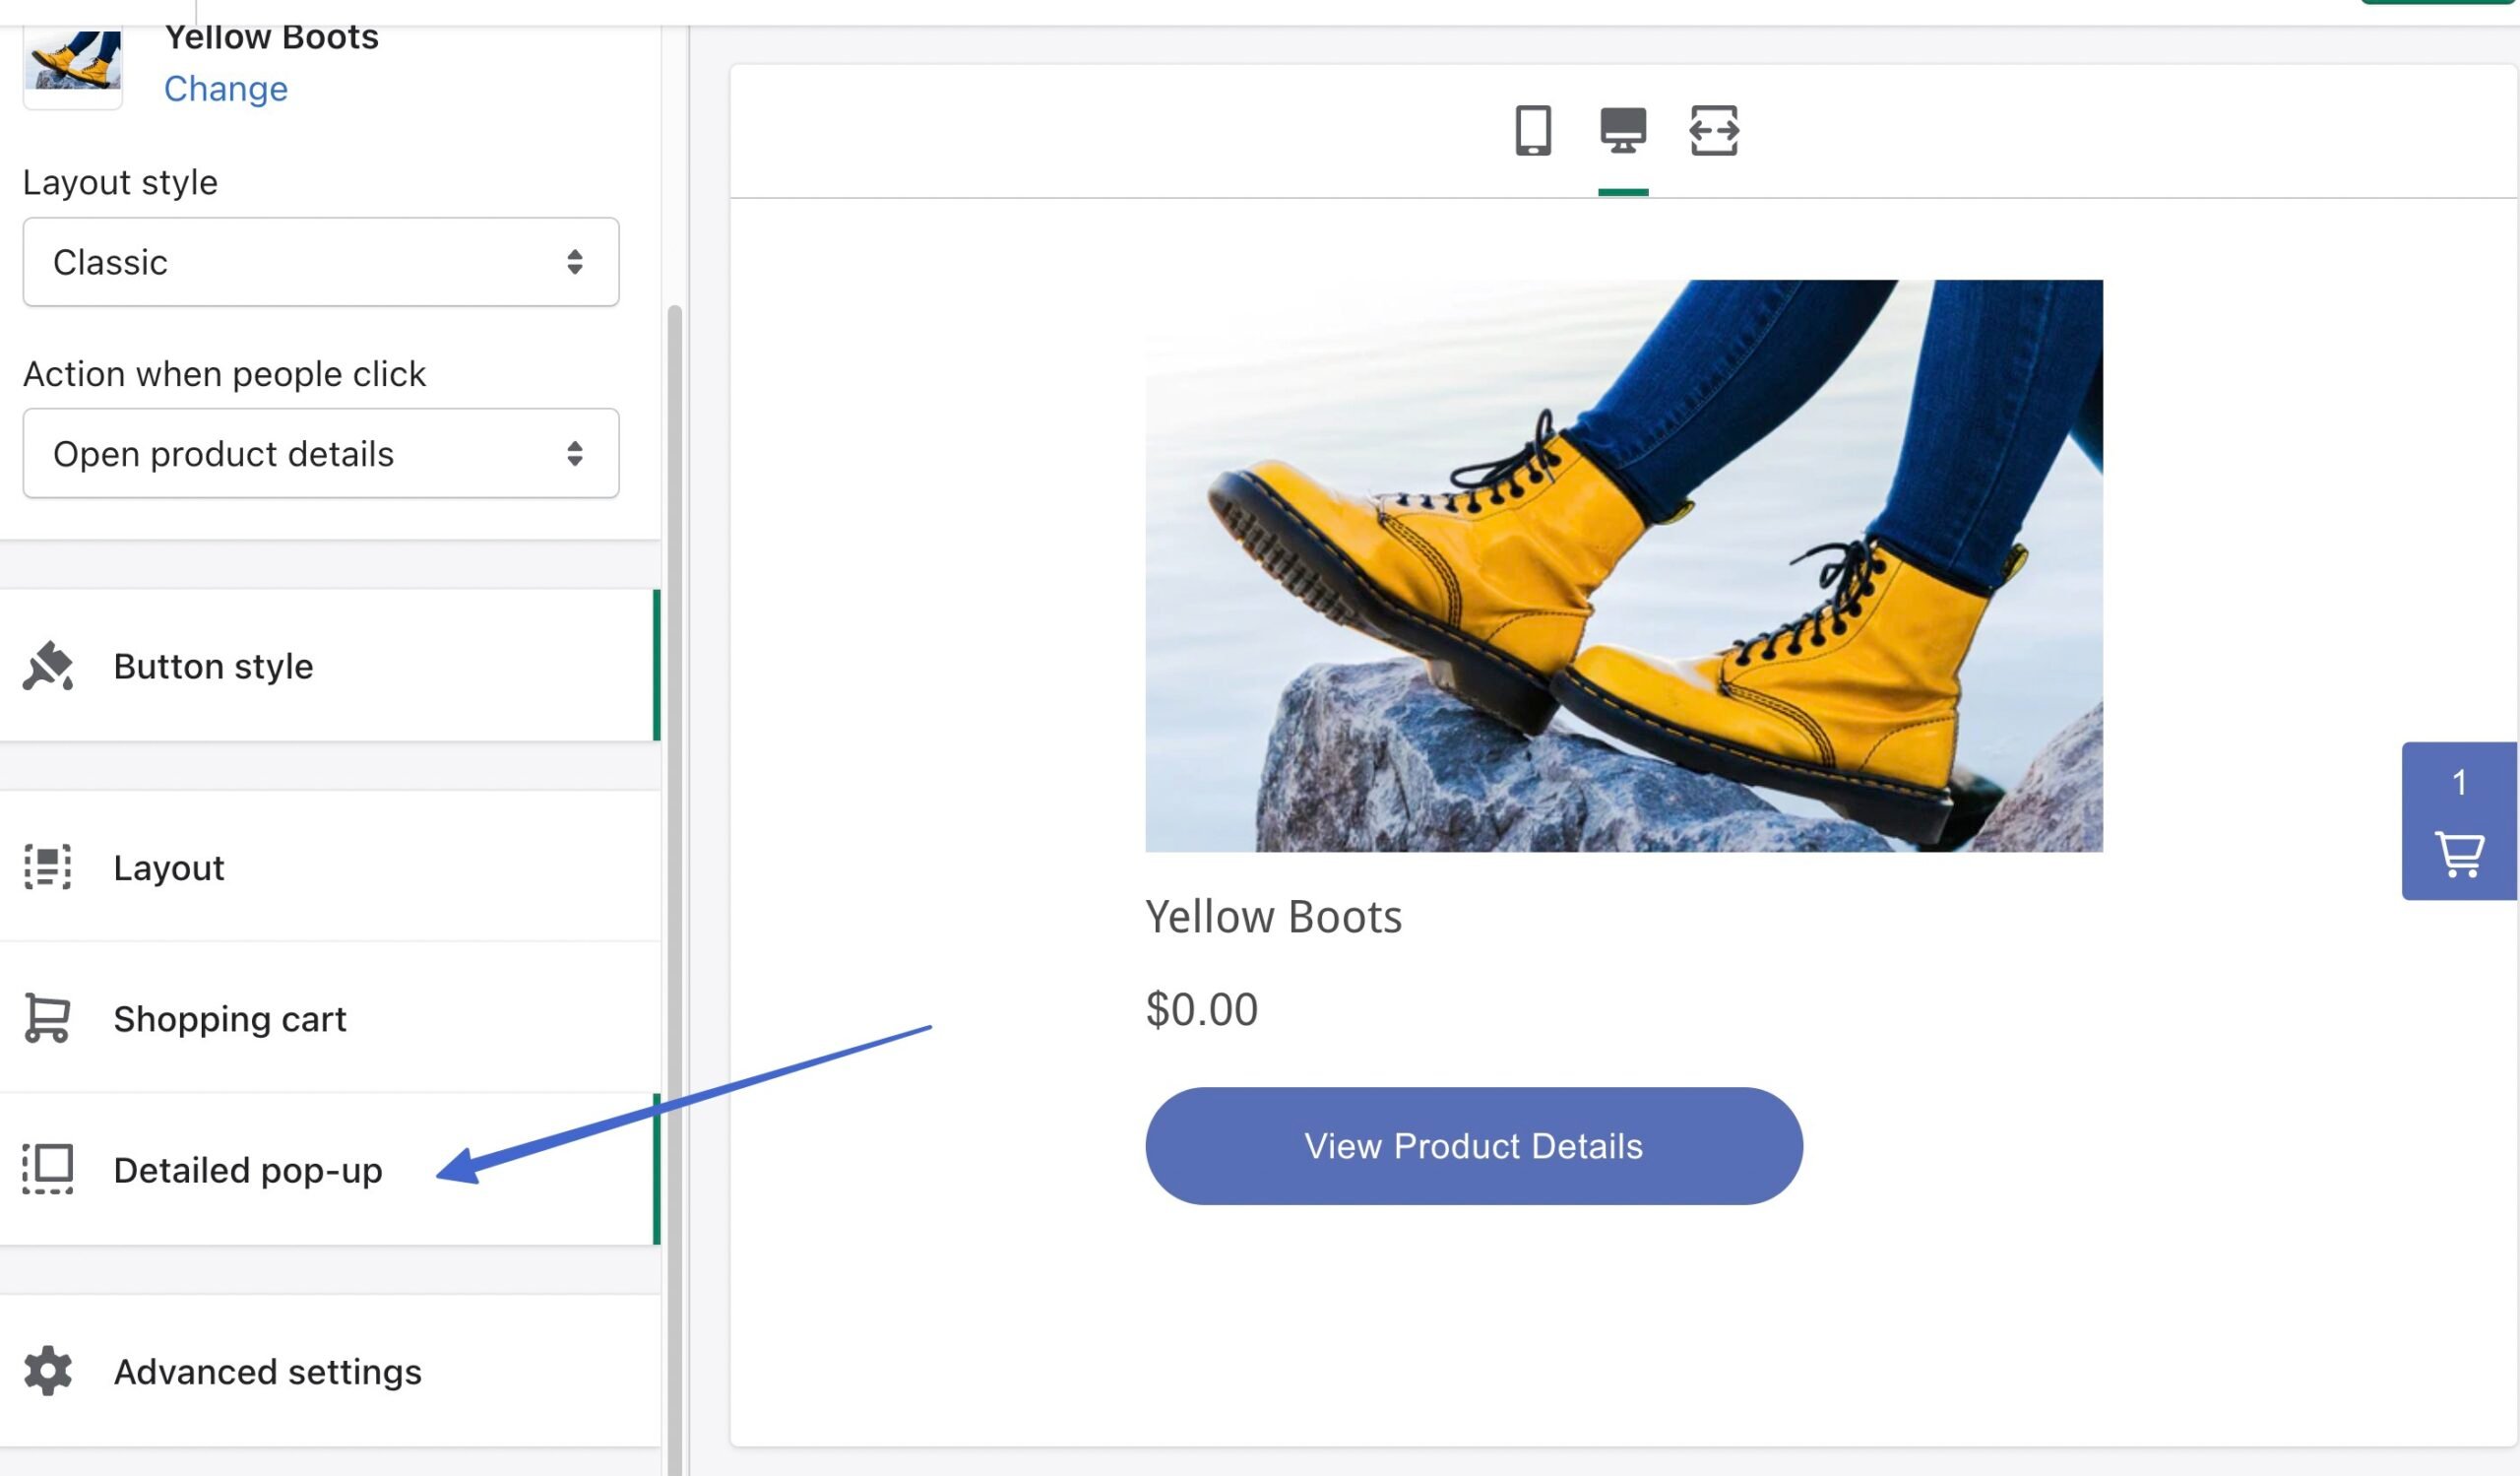
Change around the settings for the pop-up, and see what it looks like when active:
Finally, use the Advanced Settings area to change the checkout behavior:
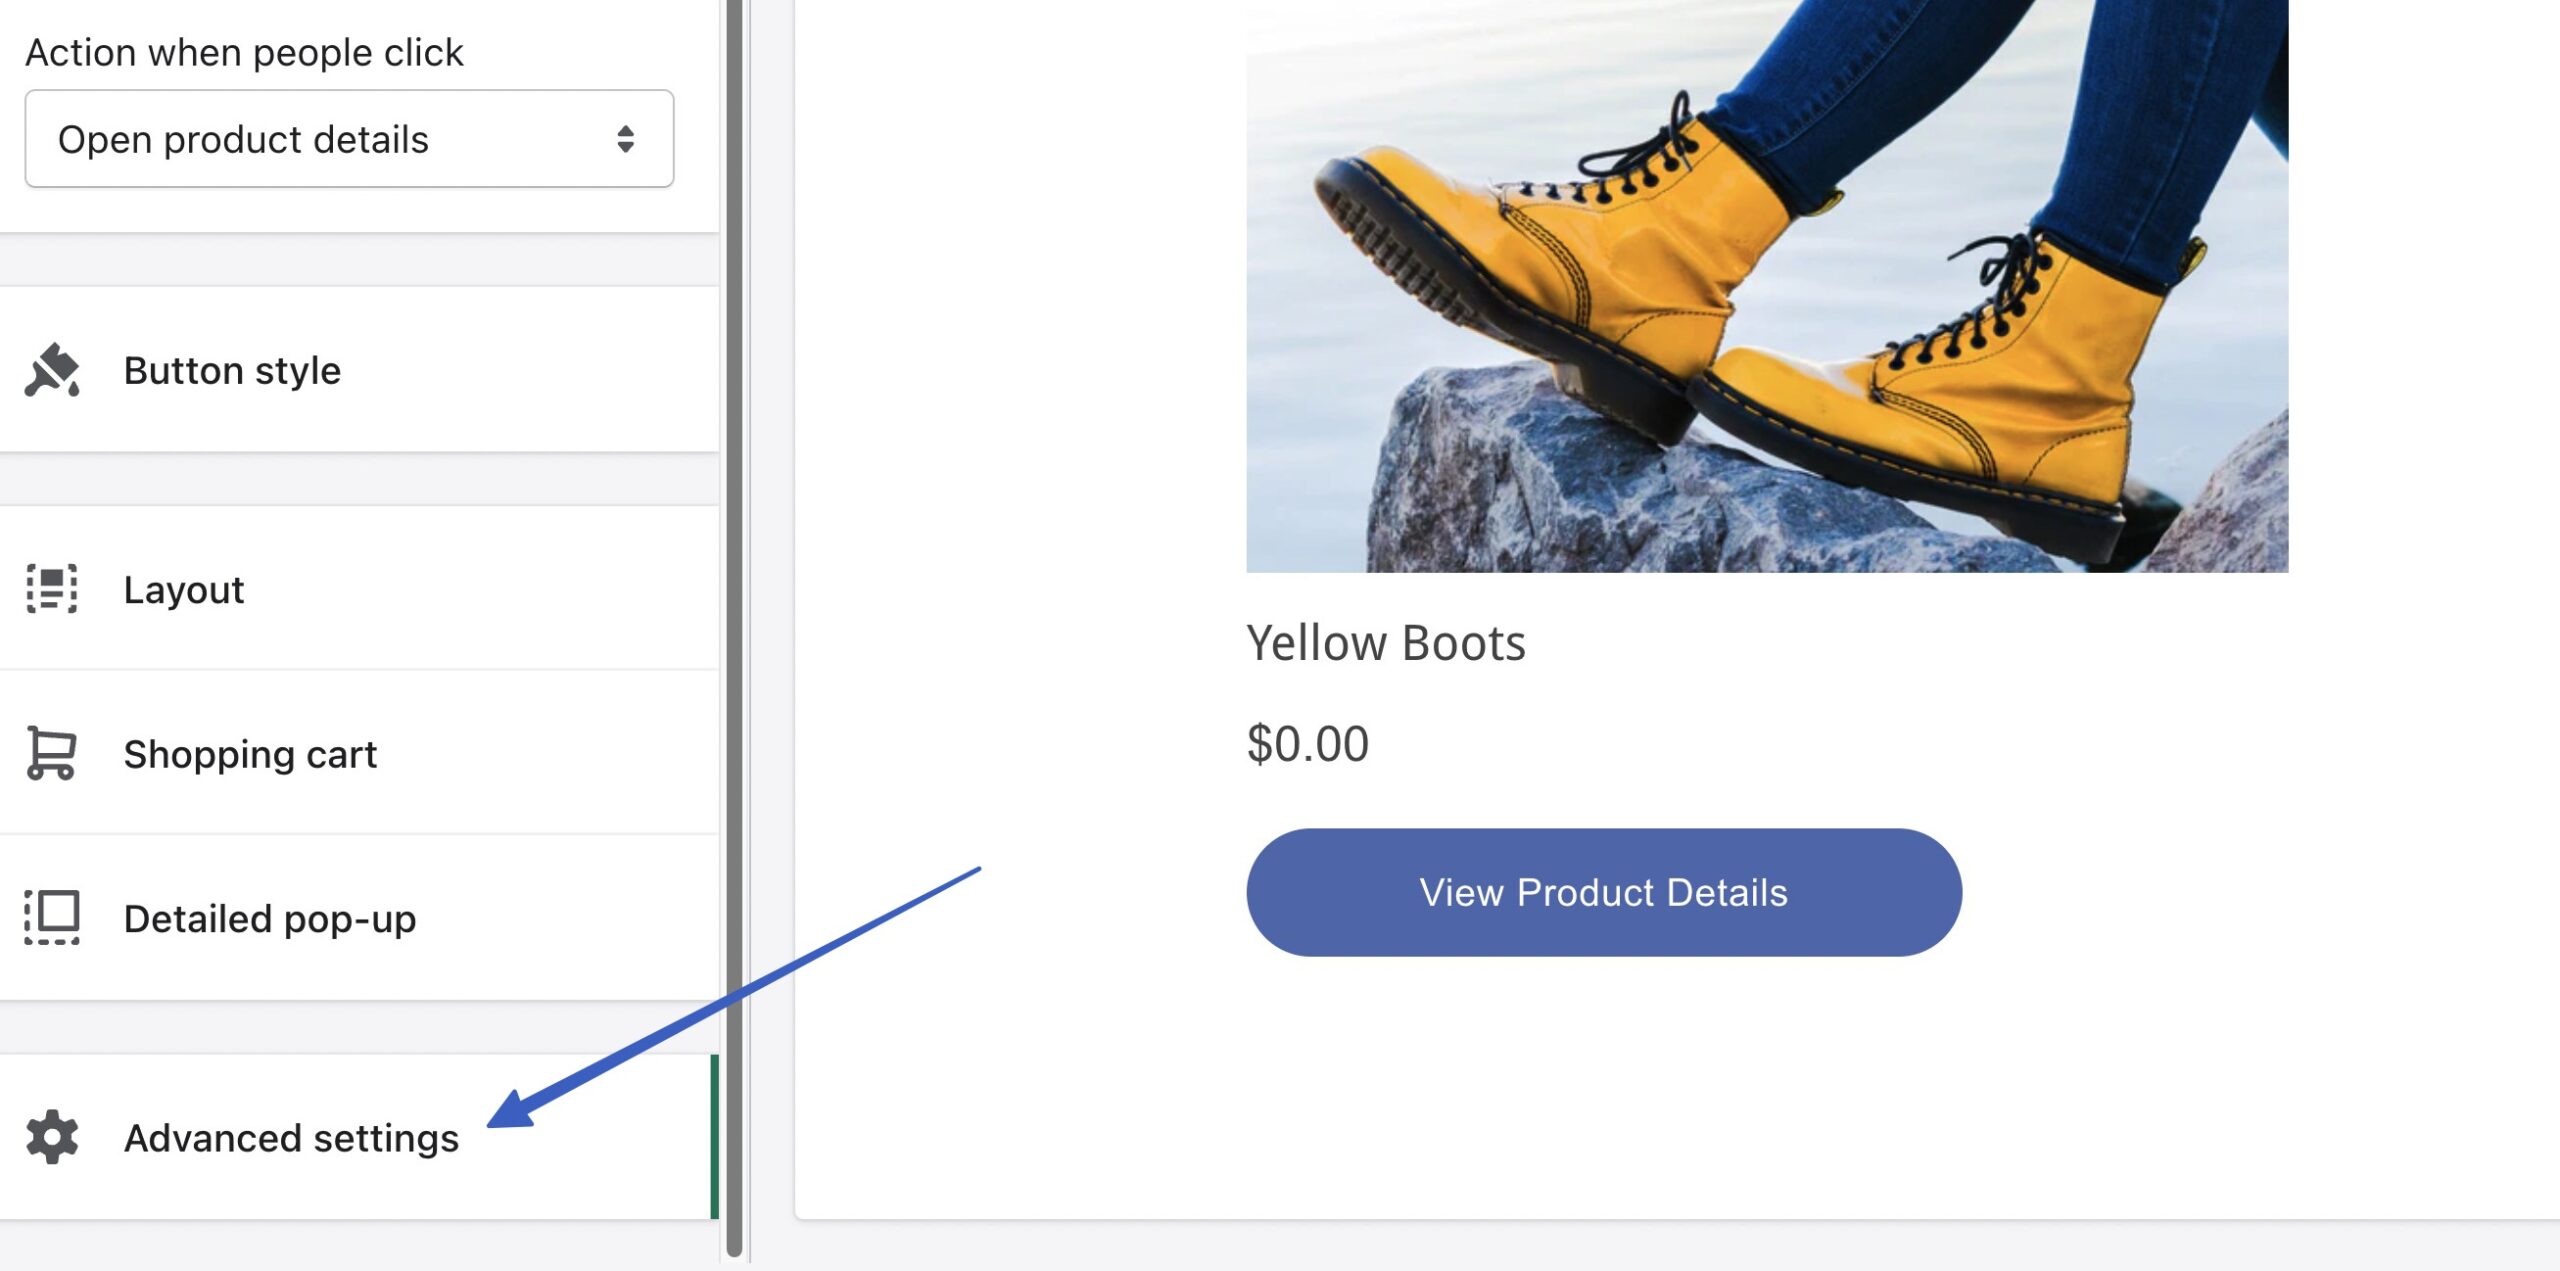
The Open Pop-up Window option reveals a separate checkout window from your WordPress site. The Redirect In The Same Tab setting keeps the checkout on your site, in the same window.

Click Next to see the button’s code. Use the Copy Code button to copy that snippet and place it anywhere on your WordPress site, like a post, page, or widget:
What about Shopify WordPress integration plugins?
You might ask yourself, doesn’t Shopify offer a WordPress plugin? Why must I mess with embed code?
Shopify has done its best to create embeddable product pages for all site building platforms (not just WordPress). As such, it eventually got rid of its WordPress plugin in favor of its Buy Button app (with embeddable code).
There are, however, some third-party WordPress plugins to integrate with Shopify.
Pros and cons of using a Shopify WordPress integration plugin (instead of the Buy Button method)
Plugins make life significantly easier with a plug-and-play integration between Shopify and WordPress. With that said, there are some downsides.
Here are the pros and cons of using a Shopify WordPress integration plugin:
Pros 👍
They can help you understand the market and typical values for businesses like yours.
There’s no need to mess with coding. Although the Buy Button method only requires you to copy and paste coding (not actually know how to code), that’s still an extra step. Plugins remove the need for copying and pasting. You often don’t even have to look at any code.
Many of the basic integration features are free with plugins.
You gain access to features that may be missing from the Buy Button method. For instance, some plugins offer product filters and listing pages, much like a real online store. The Buy Button method only lets you embed products, without many of the online shop features you know and love.
Cons 👎
Shopify doesn’t endorse any of these plugins, and has occasionally shut down 3rd-party integration plugins. This means you take a risk that the integration disappears without notice.
Some plugins are smaller projects with limited development, ratings, and users.
You don’t get the same Buy Button styling controls as you would with Shopify.
Some Shopify/WordPress integration plugins reserve their best features for premium plans. The Buy Button method from Shopify is completely free.
So, if you’re keen on building a complete online store with Shopify and WordPress, and you like the idea of working from one dashboard (WordPress), we recommend downloading the ShopWP plugin for the best results.
👉 ShopWP offers:
- Options to build a complete online store with Shopify products on WordPress
- Quick Buy Buttons
- Syncing of products and collections between Shopify and WordPress
- Filtering and sorting
- Product carousels
- Subscription products
- A direct checkout option (in the premium version; the free version sends you to the external Shopify checkout)
- A built-in shopping cart
- Product and collection management on WordPress
- Product variants
- Shortcodes for putting products anywhere on a WordPress site
Using the Shopify WordPress integration successfully
The WordPress Shopify integration has three advantages:
- It allows you to still use the best blogging system in the world: WordPress 🥇
- You receive perhaps the most streamlined, user-friendly ecommerce tool on the market: Shopify 🛒
- You can still manage most of your site design on WordPress 🖱️🎨
Those who create content and sell products should find success with this setup, especially considering you’re not spending much extra money with the $5 per month Starter plan from Shopify.
As an alternative, you might consider migrating from Shopify to WooCommerce to run ecommerce and content management on WordPress. And for more features, look into the WPShop plugin to add a complete online store experience to WordPress (using your Shopify products).
If you need any clarification about the Shopify WordPress integration, please let us know in the comments!