Are you looking for a perfect guide on how to sell video courses on WordPress? Well, you’ve landed on the right web page.
Video courses have become a new trend for people who want to scale up their skills. So, without a doubt, this type of online business has become a profitable niche over the years.
So, using the best website creating a platform like WordPress, you can create a website to sell your video courses online with ease. So, in this article, we’ve included every detail that’ll help you sell your video courses on WordPress.
So, let’s start by understanding why to sell video courses on WordPress.
Why Sell Video Courses on WordPress?
You’re probably wondering why we’re considering WordPress to sell video courses. To give you a glimpse, WordPress started as a blogging platform. However, over the years, it has evolved into a full-blown CMS (Content Management System) platform for creating any website easily and quickly.
Similarly, WordPress also comes with LMS (Learning Management System) plugins for creating a fully functional online course website. Using these plugins, you can conduct virtual classes, create quizzes/certificates, track students’ engagement, progress, enrollment, receive payments, etc.
Furthermore, some of the major benefits of using WordPress to sell video courses are explained below:
- User-friendly: With WordPress, you can effortlessly design and create online courses with a simple and straightforward drag-and-drop interface.
- Extensive customization: You can use WordPress customizer to customize every aspect of your LMS site. For example, your site’s logo, header/footer, typography, layouts, color, etc.
- Easy to set up payment system: Integrating a payment gateway system in WordPress is handy. It allows you to receive payment through any medium easily.
- Flexibility in creating and publishing content: Even if you’re a complete novice, creating, editing, and publishing intuitive and engaging content is simple with WordPress.
- Affordability: WordPress allows you to create a full-fledged LMS website at a low cost. All you need to get is a domain, hosting, LMS theme, and plugin, and you can start your journey right away.
- Easy to add functions with the plugins: Plugins are software that adds new functionality and extends features of your site. And you can find countless plugins in the WordPress repository.
So, in the next section, we’ll discuss the best way to sell video courses on WordPress.
Best Way to Sell Video Courses on WordPress
To be precise, there are a handful of WordPress LMS plugins that are feature-rich, user-friendly, and cost-effective. So, getting one that truly satisfies all your LMS website needs is quite difficult and confusing.
So, we recommend you to use one of the finest WordPress LMS plugins, Masteriyo. It allows you to create and sell online courses without any hassle.
Moreover, some of its prominent features are explained below:
- Easy to create unlimited courses and lessons: With Masteriyo’s drag-and-drop builder, you can create and manage unlimited courses and lessons.
- Create an advance quiz section: You can create quizzes in different formats like true/false, multiple-choice, or single choice – making your quizzes fun and engaging for your audiences.
- Progress navigation: Masteriyo offers a unique feature for your students or audiences to analyze their progress in real-time.
- Distraction-free mode: It has a unique learning page to ensure that learners can focus on their reading without any distractions.
- Payment gateway integrated: To receive payments from your audiences, it’s integrated with a payment gateway like PayPal and Stripe.
- Fast loading speed: Masteriyo is one of the fastest LMS WordPress plugins based on React JS. Therefore, you don’t have to worry about your site’s speed anymore.
Remember that you can create a professional website to sell online courses and make money with Masteriyo for free.
However, if you want extensive features like a certificate on course completion, Stripe integration, and WooCommerce integration, then you need to switch to its premium plans.
That being said, now let’s understand how to create and sell video courses on WordPress with Masteriyo.
How to Create and Sell Video Courses on WordPress with Masteriyo?
Step 1. Install and Set Up Masteriyo
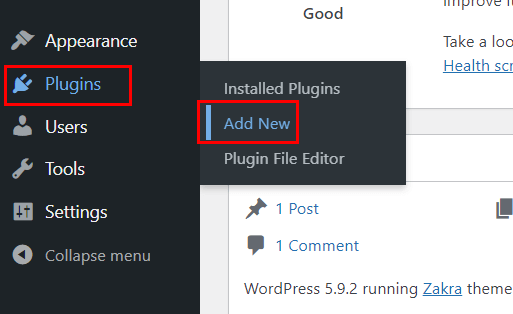
To install Masteriyo, first, go to your WordPress dashboard and navigate to Plugins >> Add New.
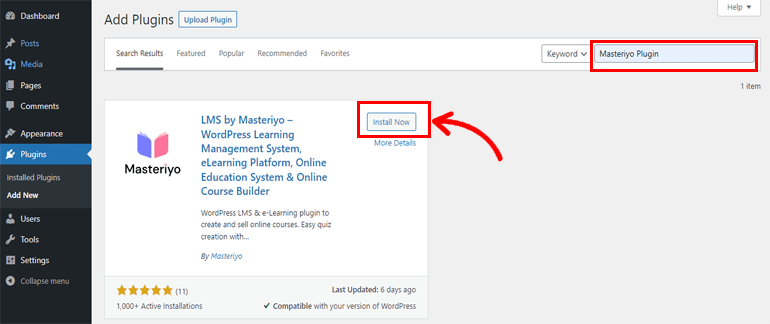
After that, on the add plugins page, the search bar will appear where you need to type Masteriyo Plugin. As the results show you the plugin, click on the Install Now button.
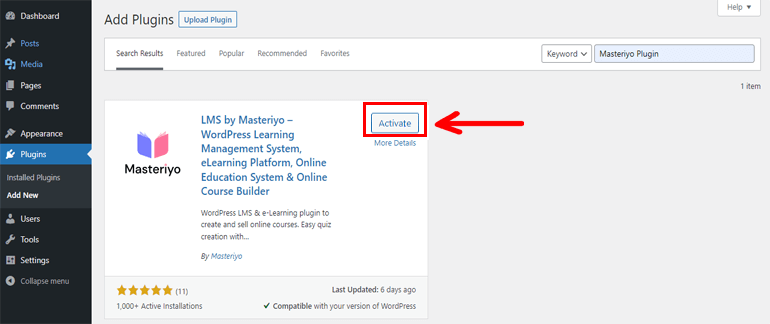
After installing the plugin, press Activate button. And that’s it; you’ve successfully installed and activated the Masteriyo LMS plugin on your site.
Step 2. Configure Set Up Wizard
As you activate Masteriyo, you’ll be directed to its setup wizard page. Here you’ll see the Welcome page and thank you note.
Then, at the bottom, there are options like Start Now and Skip to Dashboard.
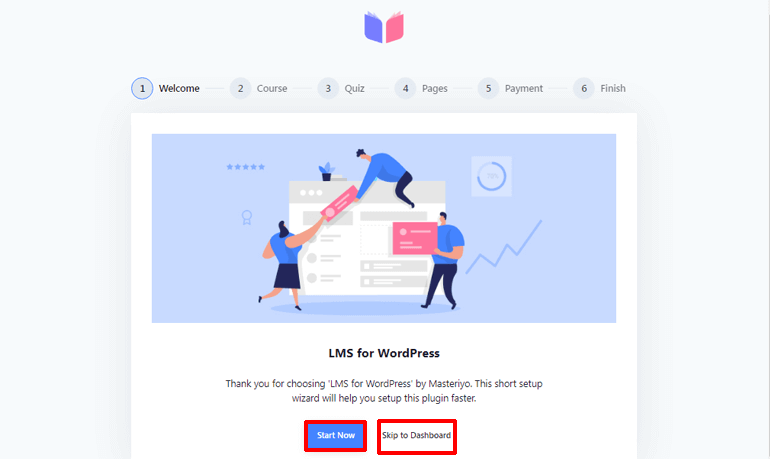
Clicking on the Start Now button allows you to start the setup right away.
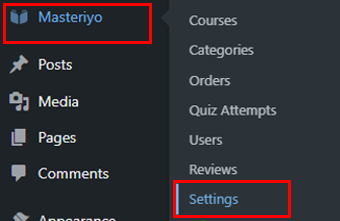
Or, if you want to set up the plugin later, click on Skip to Dashboard option. And whenever you want to configure set up, go to the Masteriyo >> Settings from your WordPress dashboard.
Here, we’ll start by clicking on the Start Now button.
As you click on the Start button, you can see two options. First is Course Per Row – allowing you to show up to four courses per row on the course page. Another is Course Per Page, which allows you to show up to 24 courses on the course page.
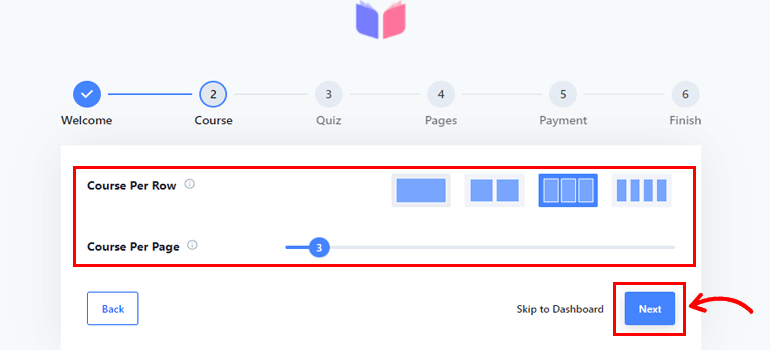
After setting it up, hit the Next button.
The next page is for Quiz settings. You can set Question Per Page. And Masteriyo offers to set up to 100 questions per page.
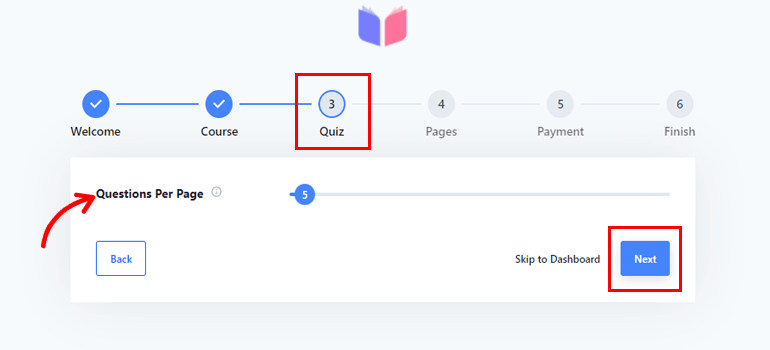
And as you finish this setup, click the Next button.
After clicking next you’ll direct to page settings and here you can see different options with drop-down menus.
- Course List: For displaying the list of available courses.
- Learning: To run a distraction-free page for any courses.
- Account: Allow to set account page for both instructors and students.
- Checkout: Set up a checkout page when the students want to purchase the course.

After that, click on the Next button.
The next page is for Payment setup, where you’ll see two options. First is Currency, where you can choose the preferred currency for your LMS site. And another option allows you to set up a Currency Position.
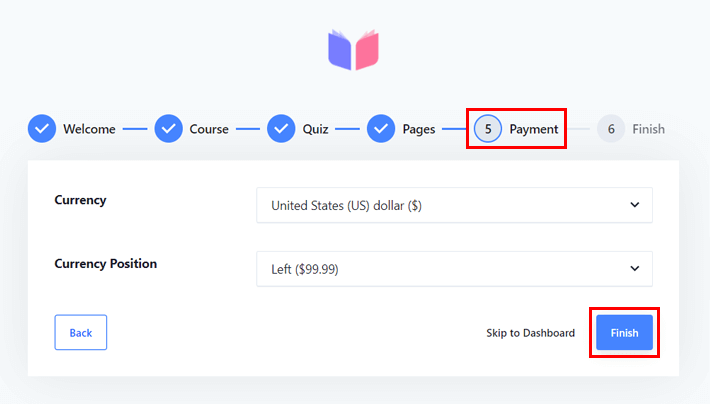
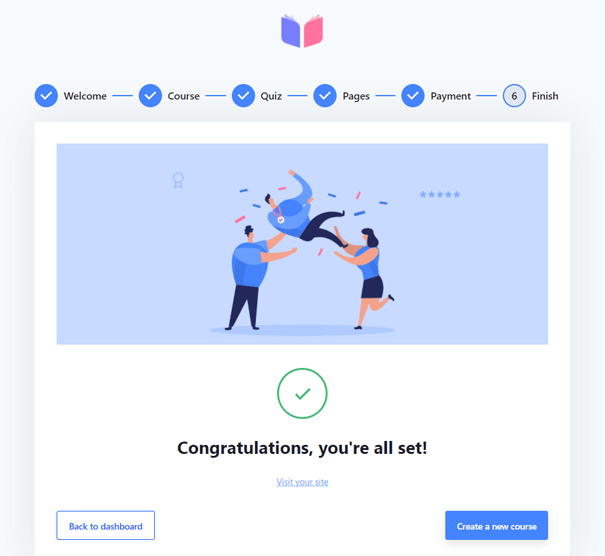
After pressing the Finish button, you’re all set to Create New Course.
Step 3. Create a New Video Course
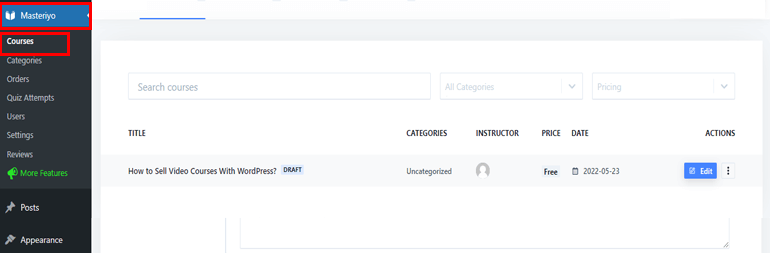
Now, you can start to create video courses for your site with Masteriyo LMS.
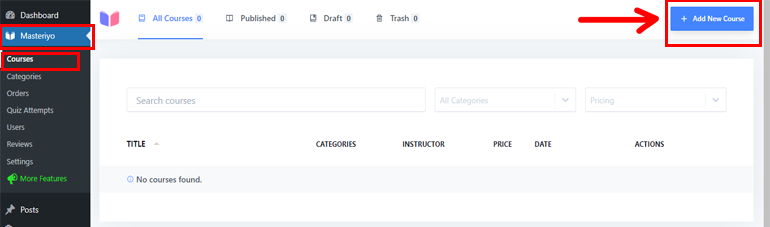
However, if you’ve skipped to the dashboard, you can go to Masteriyo>>Courses and click on the Add New Course button.
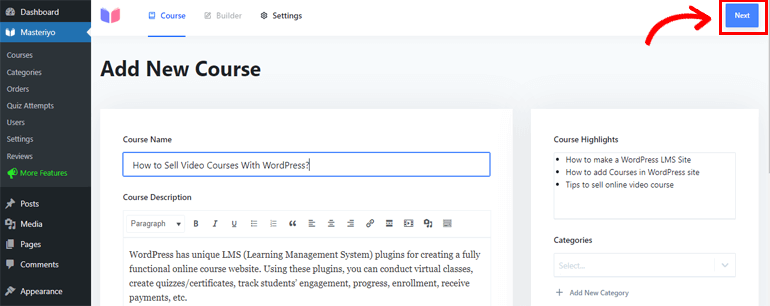
From the Add New Course page, you can add the Course Name and give a brief Course Description.
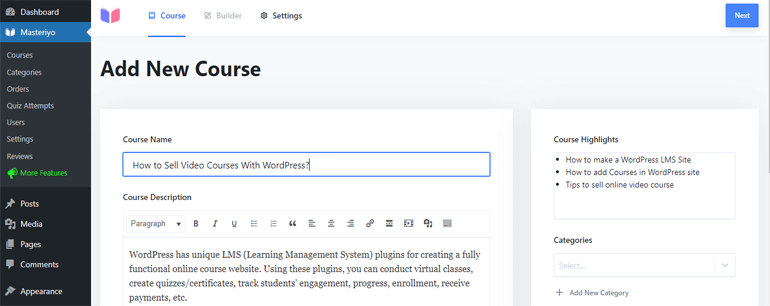
As you can see on the right-hand side, it’s also possible to add Course Highlights, Categories, and Featured images for your course.
Then, press the Next button at the top of the right-hand side after completing the setup.
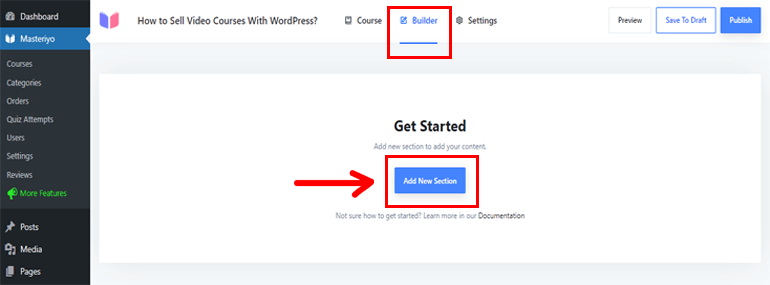
Pressing the next button directs you to the Builder page, where you can add a new section. And you can start by hitting the Add New Section button.
So first, you need to give a name to your new section and hit Add button.

Now, you can add the content to your course. Hit the Add New Content button, and you’ll see two different options in the drop-down menu. The first one is Add New Lesson, and another is Add New Quiz.
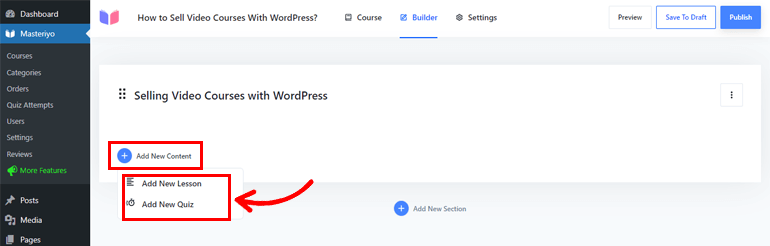
Since we want to add the video lessons, click on the Add New Lesson option. After that, a new page will appear where you can add Lesson Name and Lesson Description.
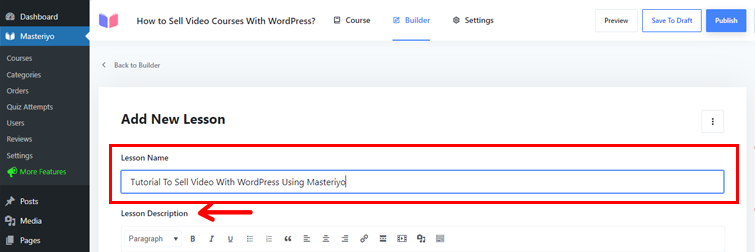
Besides that, you can also add Featured Image for your course from here.
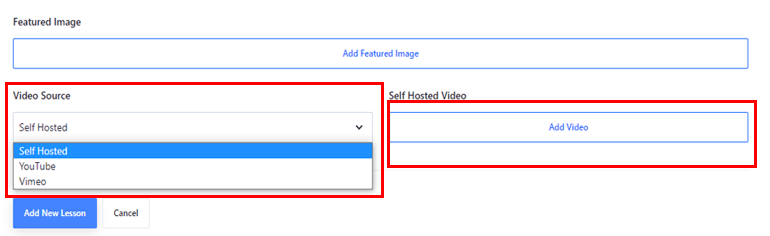
The best part with Masteriyo is that it lets you upload video content from platforms like YouTube and Vimeo. Just click on your desired platform from the drop-down menu on the right side and paste the video URL on the left sidebar.
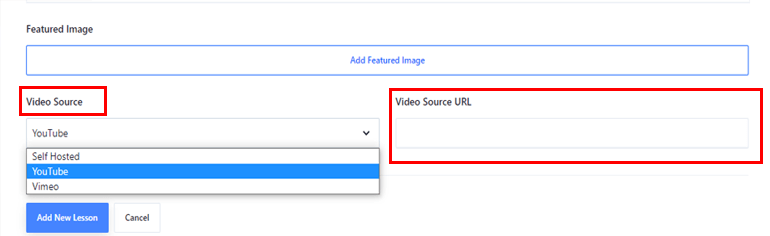
Contrarily, if you want to upload your self-made video, click on the Self Hosted Video option from the drop-down menu on the right side; then, hit Add Video on the left and upload the video from your computer or use the one from your media library.
Once you’re done, click on the Add New Lesson button at the end of your page.

Step 4. Configure Course Settings
Now that you’re done with adding video courses, it’s time to configure different course settings. For this, click on the Setting tab at the top. Here you’ll see three different options as below.
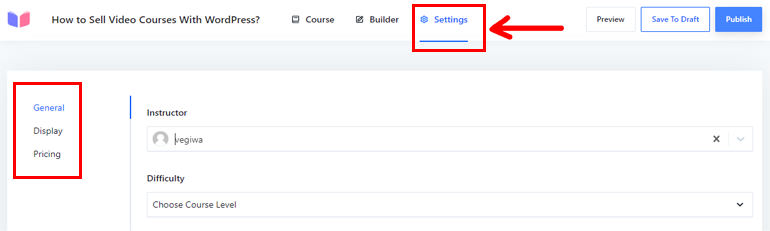
- General: It allows you to set instructor identity and course duration. Plus, you can also set student limits for your course.
- Display: It enables you to make the course visible to the enrollers only, or you can set your course in a visible mode for all.
- Pricing: This option allows you to set your course price or set it as free.
Step 5. Configure Payment Settings to Sell Video Course
In this section, we’ll guide you to set up a payment method for selling your video course. So, navigate to Masteriyo>>Settings>>Payments.
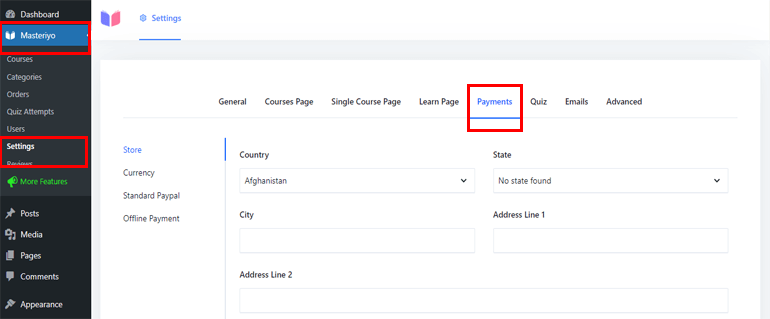
Under the payments tab, you’ll see four options; Store, Currency, Standard PayPal, and Offline Payment on the left side.
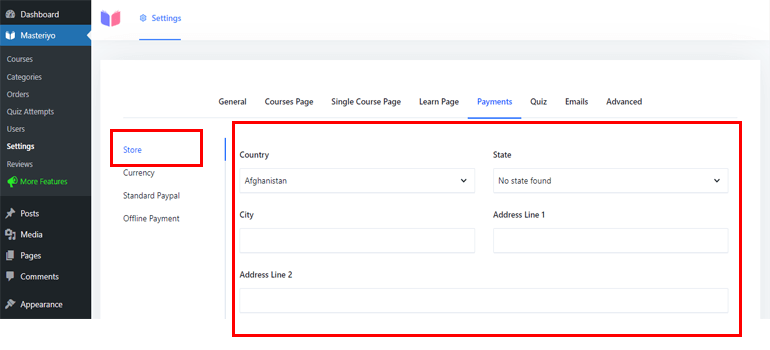
i. Store
This option lets you add Country, State, City, and Address Lines.
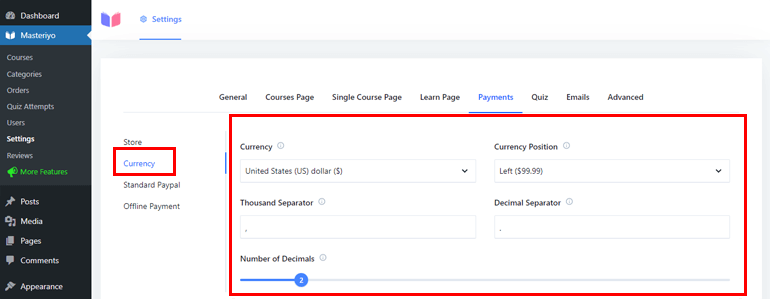
ii. Currency
If you haven’t configured the currency option before then you can easily set it up from here. Masteriyo’s default currency option is USD. However, you can set your preferred currency from the drop-down menu of its Currency section.
Also in this section, you can set Currency Position, Thousands Separator, and Decimal Separator. Plus you can set the Number of Decimals to show on the fractional part.
iii. Standard PayPal
In the Standard PayPal section, first, you need to press Enable button that allows you to receive payment through PayPal. As you enabled it you’ll see the following options.
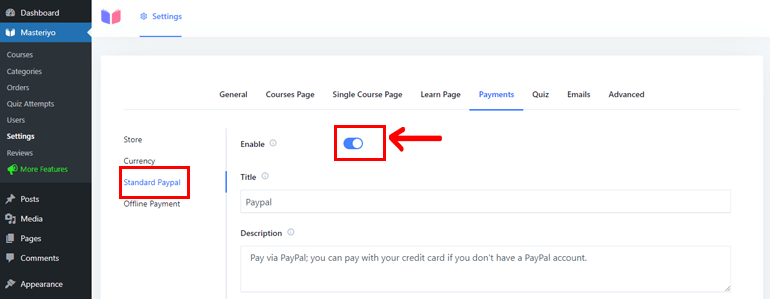
- Title: It lets you add a name that users see during payment.
- Description: You can give a short intro regarding your payment method.
- IPN (Instant Payment Notification): By enabling it you’ll get notifications related to PayPal transactions.
- PayPal Email: Here you need to enter your PayPal email address to take payments.
- Receiver Email: It validates IPN requests if you are using two different PayPal emails.
- Identity Token: It verifies payment without the PayPal IPN.
- Invoice Prefix: If you’ve used your PayPal account in more than one installation, then this option helps separate those installations with prefix.
- Payment Action: This option allows you to capture payment immediately or authorize payment for an order after creation.
- Image URL: By entering the URL here, you can display your logo on the checkout page.
- Debug Log: It’s for debugging purposes which enables to delete the logs.
- Sandbox: By enabling it you can test and simulates the live PayPal production environment.
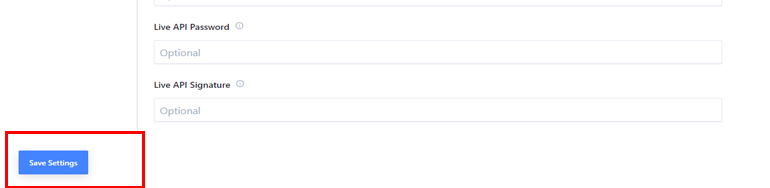
- Live API Username: Enter a username to get an API credential from PayPal
- Live API Password: Enter a password to get an API credential from PayPal
- Live API Signature: Add a signature to get an API credential from PayPal
After setting up don’t forget to press the Save Settings button from the left side.
iv. Offline Payment
It lets you receive payment offline from your audiences. So, press the Enable button and after that, you’ll see three options.
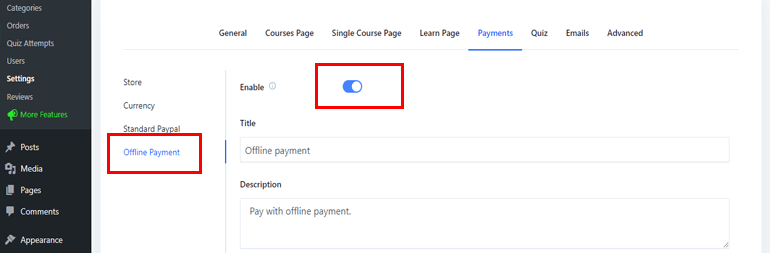
The Title is where you can name your offline payment. Another one is a Description for giving information about your payment method. The last one is Instruction to guide your users while paying offline.
Here, we’ve presented to set up PayPal to receive payment from selling video courses. However, you can also use a Stripe payment gateway to accept payments but for this, you need to opt into Masteriyo’s premium version.
Step 6. Publish Your Video Course
Once you’re done with creating your video course and configuring a payment option for selling it, you need to publish your video course to make it live.
So, go to the Masteriyo>>Courses and click on the course that you created.
Now, press the Preview button on the top to see how your course looks before publishing your content.
Or, in case you want to change anything, click on the Builder section from the top. You’ll see three vertical dots on the right side that allows you to edit or delete the section you’ve created.

Finally, click on the Publish button at the top right corner to publish your video course.

Notably, in this tutorial, we’ve created only one video course with Masteriyo. However, you can add unlimited courses, lessons, sections, and quizzes with this revolutionary LMS plugin.
For that, all you need to do is go back to your course and click on Add New Content >> Add New Lesson.
Tips to Enhance the Sale of Your Video Courses
This section is like a bonus because we’ve accumulated proven ways to sell your courses more.
- Market your course: To reach out to your potential customer, you need to market your courses. For example, you can run ads on Facebook, Instagram, Google, Pinterest, etc.
- Write blogs: Writing a blog is the cost-effective and easiest way to drive traffic. Plus, ranking your blogs on search engines helps reach a new market.
- Include upsells in your course: Adding a limited-time offer, showing a comparison between premium and cheap courses, and giving a discount to a new customer are some of the best ways to upsell your online course.
- Create free courses: Offering free courses allows your audience to learn about your courses. And if they feel your courses provide great material and knowledge, they are likely to return and buy your courses more.
- Showcase testimonials and reviews: Reviews and testimonials are the best ways to convert a lead into a customer. It’s a way to display how your service has satisfied others which eventually attracts new customers.
Conclusion
So that’s it for our article on how to sell video courses on WordPress. With a platform like WordPress, you can create full fledge LMS site and sell your courses without any hassle.
For instance, the WordPress LMS plugin Masteriyo offers every single feature to help you create, manage and sell your video course without any hassle.
If you want to know how digital magazines make money or want to learn how to create a PayPal payment form in WordPress, check out our blogs. You can find a variety of articles related to WordPress on our blogs.
Lastly, you can follow us on Twitter and Facebook to get more updates.