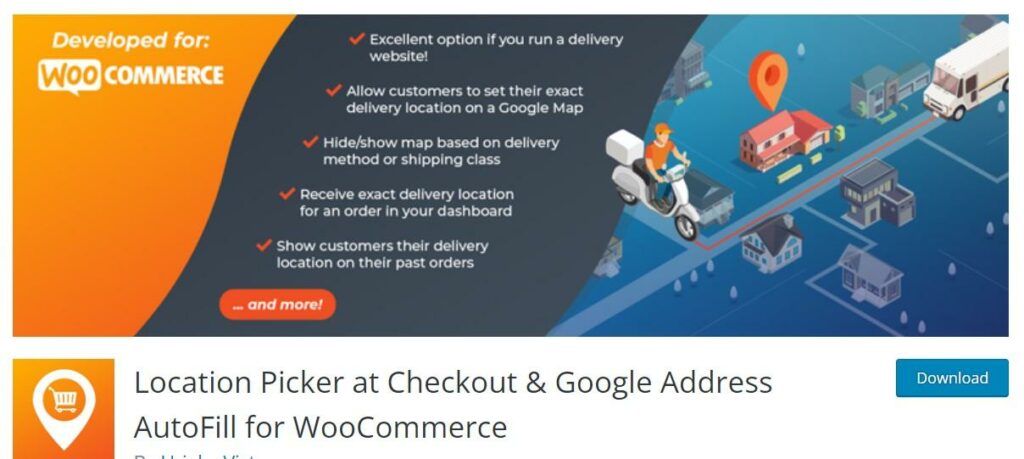
Location Picker at Checkout (LPAC) is a powerful WordPress plugin that works with WooCommerce to give your customers more freedom and flexibility over pickups and delivery.
If you’re running a taxi or rideshare business, for example, and your usual geo-location tool only gives customers a rough geographical area to arrange where they’re collected from, that’s not only frustrating for your passengers but can also make the driver’s life difficult.
Running a food delivery service and cannot quite pinpoint the exact address, building, or floor where your hungry customers are waiting for their food?
That’s the exact problem Location Picker at Checkout aims to solve.
The plugin, available in both free and premium options, makes use of customizable Google Maps, which blend in effortlessly with your website’s branding, and multiple shipping workflows so that you can figure out precise costs by distance, region, and store location.
LPAC enables store owners to get more accurate location details without having to ask customers for directions or location information by calling, emailing or texting them. That makes it ideal for many businesses, including:
How to Use Location Picker at Checkout to Optimize Customer Deliveries
1. Download and Install the Plugin
Most of what we need to do for this process can be done with the free version of Location Picker at Checkout, which can be downloaded from the WordPress plugin directory.
So start here, download the plugin, then head to your WordPress dashboard and go to Plugins – Add New and install the plugin from your desktop.
2. Opt-in to Updates
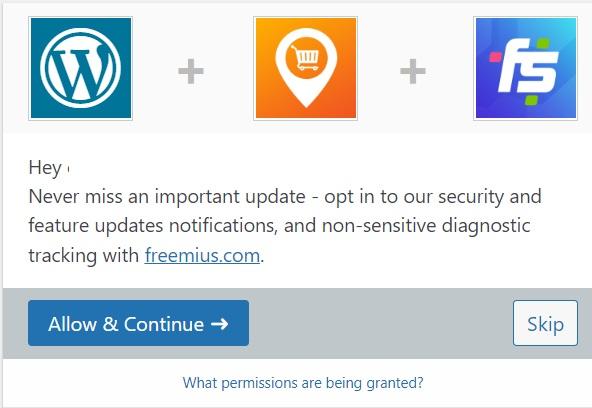
Once activated, you’ll be asked to opt-in to important security and feature updates. This is worthwhile doing as it ensures you’re always using the best version of the plugin whenever its developers make changes.

Article Continues Below
3. Get Your Google Maps API Key
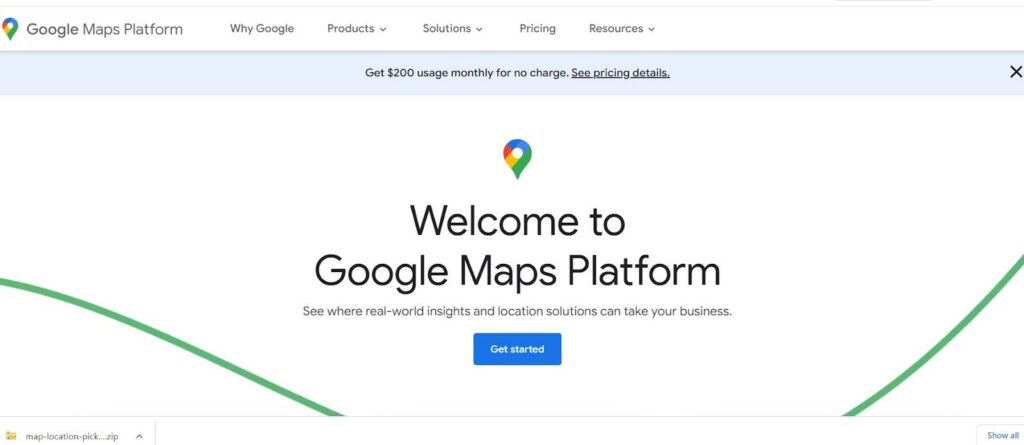
Before you can do anything with Location Picker at Checkout, you’re going to need a Google Maps API key, so your next task should be to head to the Google Maps platform and sign in with your usual Google account.
If you’ve never used Google Maps Platform before, you’ll have to complete a quick on-boarding process, after which you’ll be presented with an API key like so:
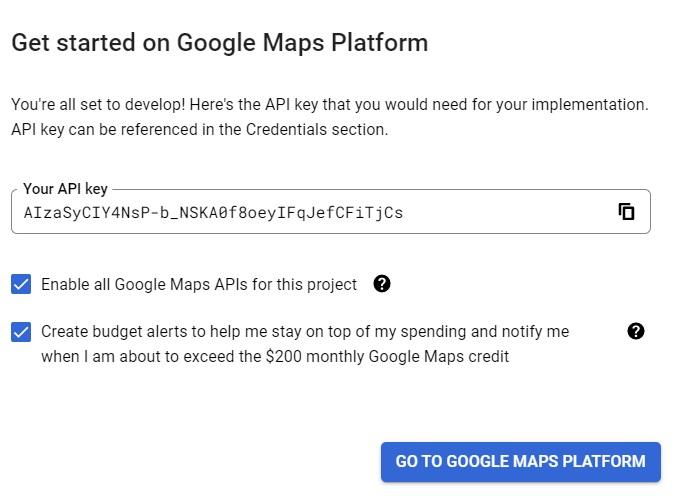
Once you have your key, you can return to WordPress and go to WooCommerce – Settings.
At the end of the settings menu, you’ll find the Location Picker at Checkout settings.

Scroll down to this page of settings until you find the box to place your API key.

Enter it, then hit the save button at the bottom of the screen. Adding the API key is important as without it the plugin will not function.
4. Set the Maps Options

Make sure the “Enabled” checkbox, located directly above the Google Maps API Key entry area, is selected for this plugin to function.
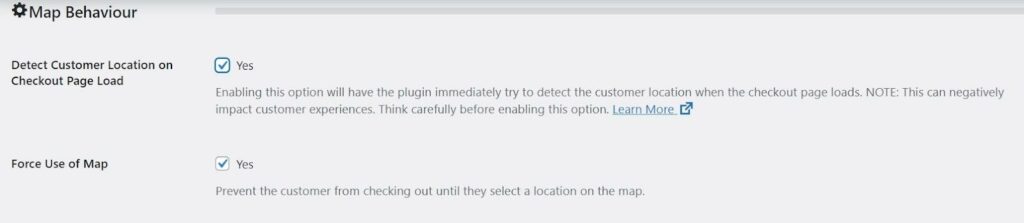
Below that, you’ll have some map behavior options to configure, two that you should take note of are the “Detect Customer Location on Checkout Page Load” option and the “Force Use of Map” option:
Detect Customer Location on Checkout Page Load
With this option switched on, Location Picker at Checkout will automatically attempt to pinpoint the customer’s location when they land on the checkout page..
If customers initially block your site’s attempt to locate them, they’ll receive a notification asking them to enable it and explaining how it helps.
Customers who are concerned about their privacy may find this feature efficient and responsive as they might immediately prefer to block any tracking tool without knowing how it helps them.
Force Use of Map
It is recommended to turn on this option because it ensures that you will always receive a location from the customer. If a customer doesn’t select their location on the map, then a verification notice will show on the checkout page informing them to select their location:

5. Set Places Autocomplete Options (Optional)
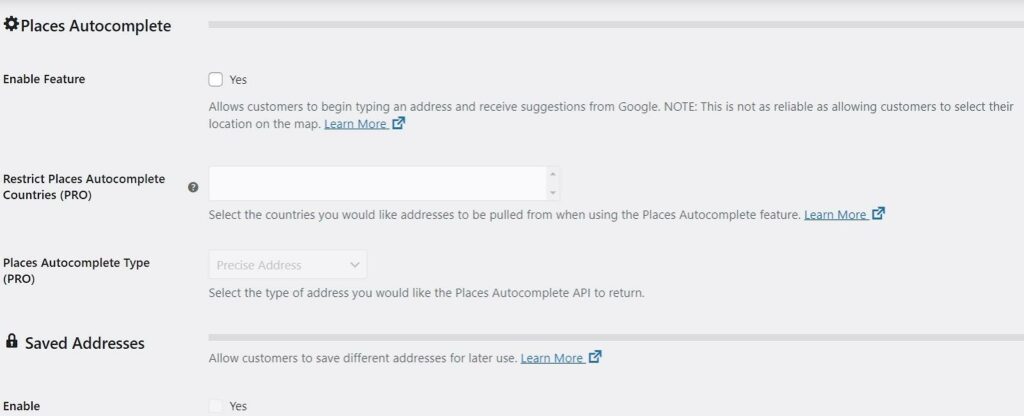
Store owners can enable Google’s autocomplete feature that allows customers to begin typing in their address and select one of Google’s automated suggestions; also called Google Places Autocomplete/Autofill. However, this proves not to be as accurate as selecting an address from the map since addresses in Google’s database might be missing or not always accurate for your country. Pro users can also determine which type of addresses the Places Autocomplete feature returns.
A handy feature for repeat customers is the ability to save addresses for future use by enabling the “Saved Addresses” feature, think of it as an “Address Book” for WooCommerce allowing customers to save the different locations they order from.
6. Other Useful Options
Location Picker at Checkout is one of the most customizable apps of its type. Along with all the features listed above, you can also have options that allows you to:
- Set the default coordinates for your map. For example, you can set the map to show your town, city, or even the local area surrounding your business.
- Remove the Plus Code, which is automatically generated when a user selects their address. The plus code is a string of digits generated by Google Maps, which shows next to their address. This can be confusing for customers, so it’s best to switch it off.
- Show the customer selected location on the order received page, past orders and in the order confirmation email.
- Determine WHERE the map should appear; whether in the Billing address area or shipping address area, customer order received page, customer past orders page or customer and admin order emails.
- Using the “Visibility Rules”, the store owner can have LPAC determine WHEN the map should appear; whether it should be:
– Hidden for guest orders
– Hidden for certain shipping methods
– Shown only when a certain coupon is used
– Shown when the cart reaches a certain minimum, or hidden when it reaches a certain maximum and more. - Export your store orders to a CSV file with a link to the customer’s location.
- Change the colors, style, height, and width to ensure the map fits better with the design of your website.
7. Store Locations
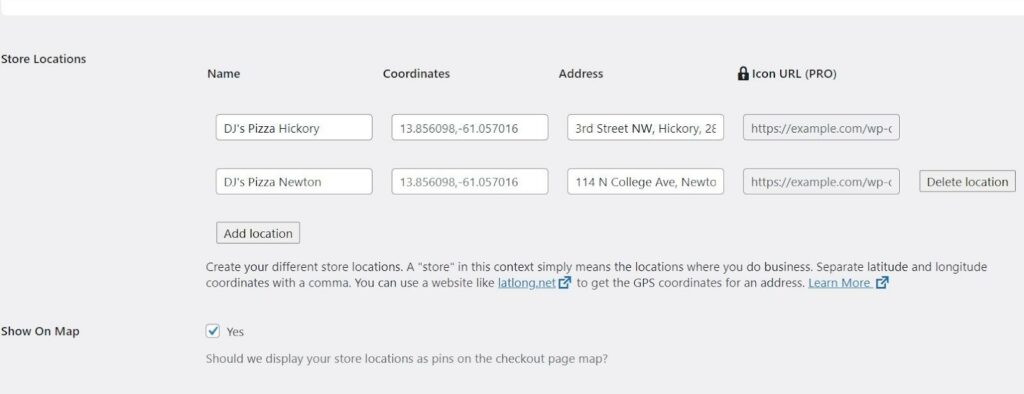
If you run your business from multiple locations, you’ll find the Store Location feature incredibly helpful.
This allows you to add each one of your locations to the map and give customers the option to order from their nearest location, it’s also useful in showing your customers where your store’s are located (if you decide to enable that option).
8. Shipping Options
In the Pro version of LPAC, store owners can set up shipping workflows to fit their delivery/pickup needs. The workflows currently present in the plugin at the time of writing this article are:
– Shipping Cost by Region
– Shipping Cost by Distance (fixed)
– Shipping Cost by Distance Range (range)
– Shipping Cost by Store Distance (for stores with multiple locations)
– Shipping Cost by Store Location (for stores with multiple locations)
The LPAC feature that fascinated me the most is Cost by Region. You can create custom regions on the map and set a rate for all deliveries/pickups within that area. Plus, you can give a name and custom color to each region.
With the plugin’s Cost by Distance features, you can create your own calculations to automatically adjust the shipping price according to how far the customer is situated from your store. For instance, you could charge $0.20 per km in distance; or, with the Cost by Distance Range feature, you can charge $0.20 per 0-10km and then $0.30 per 10-15km and so on.
The Shipping Cost by Store Distance feature lets you set the price per Kilometer/Mile it would cost you to ship from the particular store that the customer selects at checkout, based on their distance away from that particular store, a powerful feature if you need fine tuned shipping prices.
The last shipping workflow presented in the plugin at the time we reviewed it was the Shipping Cost by Store location which lets store owners with multiple locations set a fixed price to ship from the store that customers selected at the checkout.
Using Location Picker at Checkout
Once you’ve gone through all the options and set up things to your liking, it’s time to put Location Picker at Checkout to work for your business.
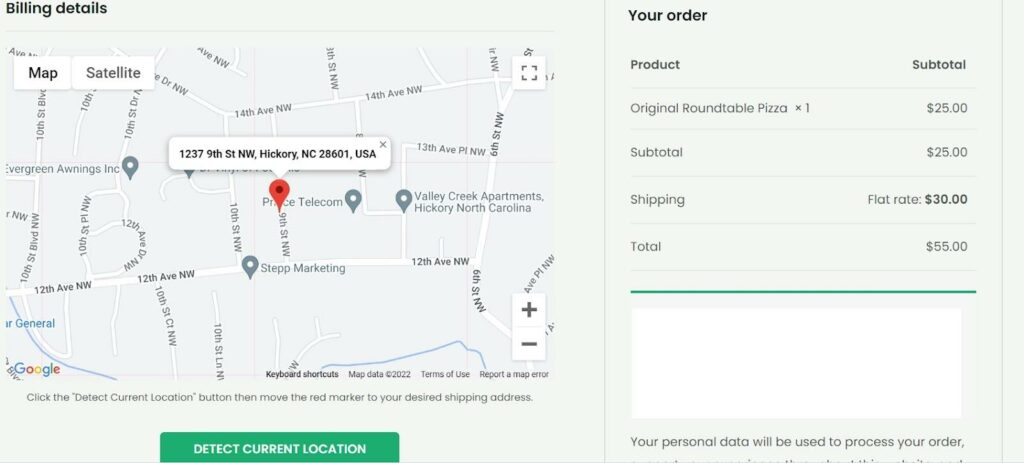
Customers can place their order, review their shopping cart, and then, once they reach the checkout page, the Google Map will appear, showing the region, town, or location you entered in the “Display” settings of the plugin earlier.
Customers can then hit the Detect Current Location button, and the plugin will pinpoint the address while still giving customers the ability to move things around to the most precise location if the browser didn’t accurately detect their location, or if they denied the site access to their location.
The shipping costs you set earlier will all be factored into the equation, and, if you selected that option in the set-up process, the map will also appear on the customer’s order receipt.
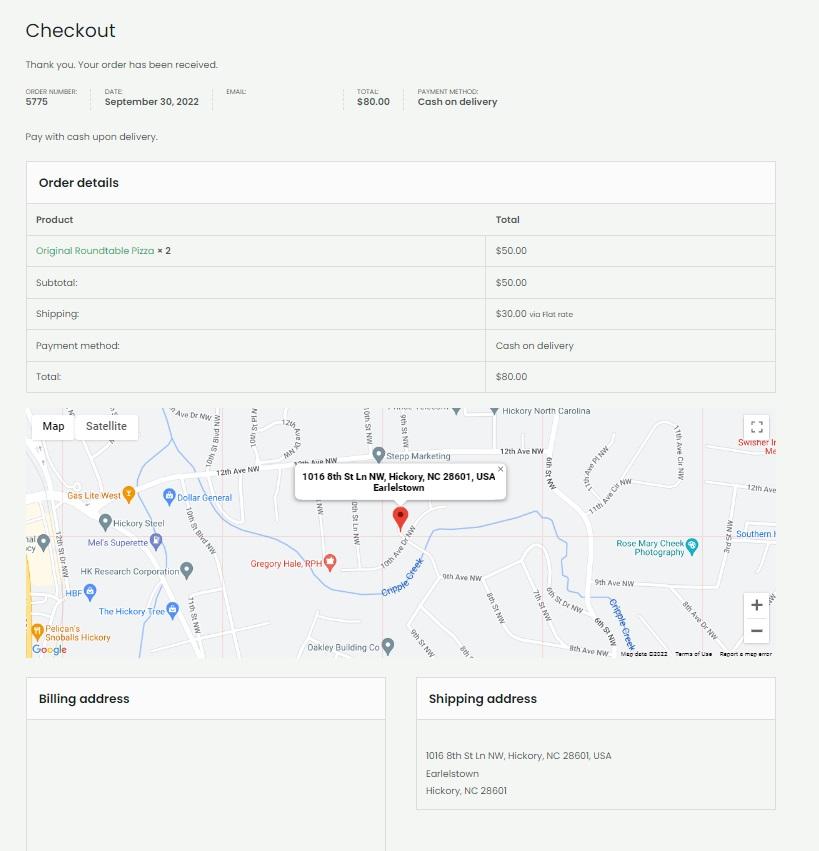
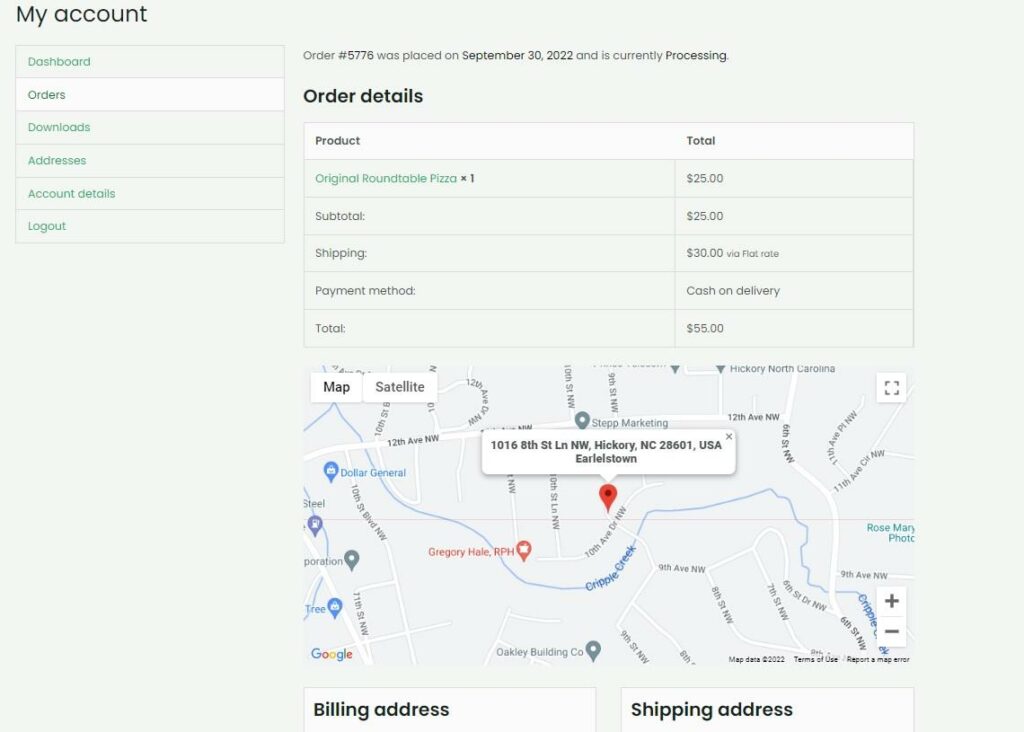
Elsewhere, the map will also appear when the customer views their order history.
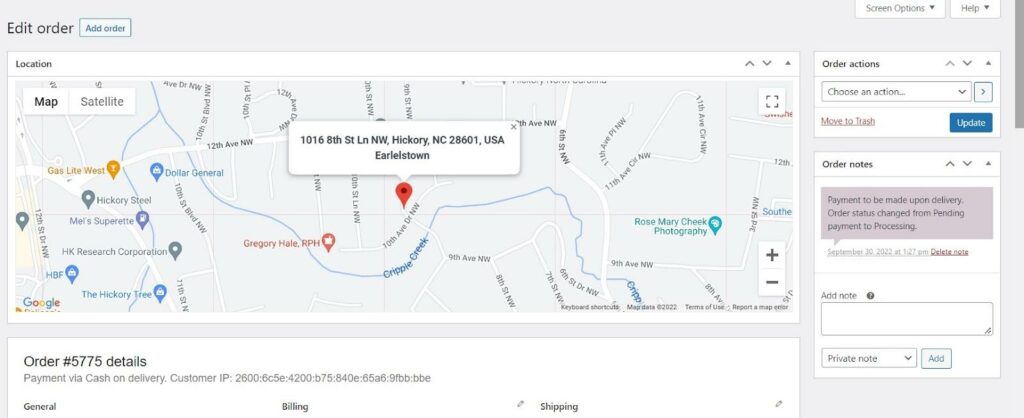
Behind the scenes, you can view the customer’s location on the map in the order processing section of WooCommerce, making it easier to locate them if you handle your own deliveries.
It really is that simple:
Add the Location Picker at Checkout plugin to your WooCommerce website, configure the settings, and your customers will not only have more control over their chosen delivery address, but your delivery drivers will also have an easier time getting to the right location.
Location Picker at Checkout Pricing
One of the things we love about this plugin is that everything can be done using the free version of the plugin. For many small businesses, that should be more than enough to improve your checkout and delivery processes.
However, if you do want to take advantage of additional features, you can upgrade to one of the following three plans (at the time of this article).
- Single Site License- $39.99 p/y
- Five Site License – $89.99 p/y
- Unlimited Site License – $59.99 p/y
All premium plans include all free features plus:
- Custom Google Maps
- Customer Map Markers
- Customer Saved Addresses (Address Book)
- Shipping workflows (Cost by Region,distance, Store Location etc.)
- Export order locations
- Extra visibility rules
- Restrict places autocomplete to country
- Support and updates.
Location Picker at Checkout – The Most Convenient Way to Improve Your Shipping Process
If the idea of configuring Google Maps, using API keys, and fine-tuning a bunch of different shipping options sounds just a little too complicated for you, we’ve got some good news for you:
From the moment we installed Location Picker at Checkout to the moment we got the map up and running on our checkout page, the whole process took less than 30 minutes, and that included time we spent taking notes for this review.
Given that you can use almost all of the essential features for free, and that even the pro plans are fairly priced, that’s a small investment of time and money to make a significant difference in your business.
The easier it is for customers to ensure your products are going to reach their precise location, and the easier it is for your drivers to reach that location, the happier those customers are going to be, and, as we all know, a happy customer is a loyal customer.
What’s more, when your drivers can further easily pinpoint the exact location they need to reach, they will spend less time attempting to locate your customers by calling or texting them. Eventually, they will have more time to deliver orders in a timely and efficient manner that will assist you in growing your business.
Looking for more ways to optimize the checkout process of your online store? Here’s our comprehensive guide to the top 9 best WooCommerce checkout plugins to use in 2022.