Are you looking for an honest review on StoreBuilder? Or want to know if StoreBuilder by Nexcess is a good platform to start an eCommerce store? If yes, then you’re on the right page.
Nexcess is a popular hosting provider that offers managed hosting solutions for WordPress, WooCommerce, and other platforms like Magento. With their expertise in managed web hosting, they’ve also launched a user-friendly but powerful online shop builder called ‘StoreBuilder’.
StoreBuilder is an AI-powered eCommerce builder that makes creating and customizing an eCommerce site really easy. It gives you full freedom to own your store design and content.
So, wondering if StoreBuilder is a good platform for your online store? Don’t worry! This review includes the features, pricing, pros, and cons of StoreBuilder to help you know that.
Now, let’s dive right into it!
A) StoreBuilder – An Overview
StoreBuilder is a flexible eCommerce builder to easily create a fully-functional online store. You can use it to build a site of any niche and sell any kind of product. That too without the need to write a single line of code.
Moreover, it’s built by Nexcess, a popular web hosting platform that offers managed hosting services. It includes Nexcess WordPress, Nexcess WooCommerce, Nexcess Magento, Nexcess Drupal, etc.
Combining their eCommerce expertise and the popular managed WooCommerce hosting, the Nexcess team designed StoreBuilder. It’s a fully hosted (on Nexcess) eCommerce site platform which lets you quickly set up an eCommerce store with WooCommerce.
Further, if you already own an online store, then you can also migrate it to Nexcess. And by using StoreBuilder, you can manage and design your store with much ease. Indeed, it’s the easier way of creating a WooCommerce store when using managed WooCommerce hosting.
Moreover, StoreBuilder is also defined as an AI-powered (Artificial Intelligence) store builder.
It means that it asks you some questions about the level of your site-building experience and some details about your store. Accordingly, it gives you templates and design options that match your needs. Hence, you can easily build your desired store without any difficulty.
Now, let’s jump into the features section. There, you’ll get to know more about StoreBuilder.
B) Key Features/Advantages of StoreBuilder
In this review section, we’ll state all the key features of Nexcess StoreBuilder. By going through them, you’ll also have a clear idea about the advantages of StoreBuilder.
1. Easy-to-use Web Design Tools
StoreBuilder offers web designing features to set up an eCommerce website easily. First, it contains multiple fully customizable templates to help you begin your store design.
Moreover, it comes with the premium Kadence theme and Kadence blocks package. Kadence theme offers beautiful site templates with exciting features to kick-start your store. And for more advanced sections, you can use the Kadence blocks.
Now, you can edit the entire look of your store using Kadence following the steps in the guide here. Also, here’s the link to the guide on using the Kadence blocks.
Further, editing and customizing the front-end of the store doesn’t require coding knowledge. In addition, it contains many WordPress plugins and tools for you to get noticed and make money online.
2. Easily Manage Your Store
Nexcess StoreBuilder is a fully managed website creation platform. So, it’ll be responsible to take care of all the technical configurations. Plus, all the other aspects of your store like speed, security, etc.
Some incredible functions in StoreBuilder that shows how easy it is to manage the store are:
- StoreBuilder manages the updates and maintenance of the core and plugin itself.
- Offers free SSL (Secure Socket Layer) and CDN (Content Delivery Network) service.
- The Plugin Performance Monitor tool checks the changes on the store before/after using a plugin.
- Includes daily backups, a good amount of storage, and bandwidth capacity.
- Delivers 24/7/365 support by contacting the eCommerce experts.
3. Smart Features and Tools for Sales Growth and Monitor
There are many features and tools in StoreBuilder that grow your brand alongside your online store. First, you can share your product catalog with other online marketplaces.
On top of that, you get to share your online store or products on your social media accounts. With that, you can convert your followers into buyers.
Not only that, but StoreBuilder comes with a Sales Performance Monitor tool. Using this tool, you can check the performance insights of your store right from your inbox.
4. Powerful Online Marketing Tools
The next feature on this list is the powerful online marketing tools in StoreBuilder. Using them will help you get your products right in front of your customers’ eyeballs.
Some of them are:
- With detailed product pages, you can write everything about a product. Also, you get to add eye-catching designs, videos, and images to receive more attention.
- Abandoned cart recovery auto-sends emails to the users about the remaining products on their carts. So, this may convert the missed opportunities into sales.
- Customers can give quick reviews and star ratings on your products. And you and your visitors can monitor them.
5. Sell Unlimited Products
There isn’t any restriction on the number of product items you can sell in your store with StoreBuilder. So, you can add as many as you want without any effect on the performance.
However, don’t forget that there’s a limitation on the storage space. But that can be upgraded. That means you can sell unlimited products in your store.
Additionally, you can sell items of any kind. It can be a physical or digital product or even a service.
6. Multiple Payment Options
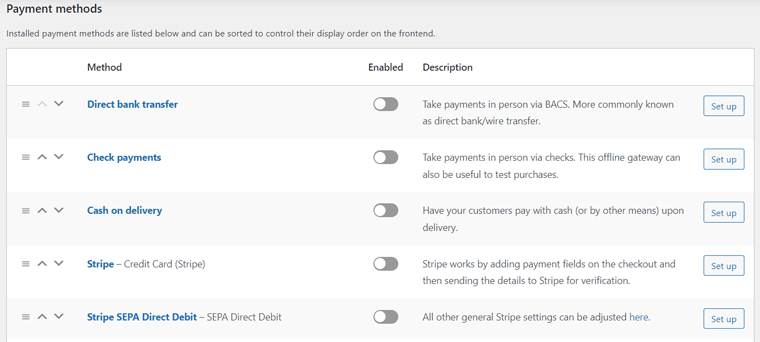
For any eCommerce site, considering the payment options is one of the most important factors. And Nexcess StoreBuilder allows you to choose from many payment gateways for your store.
The ideal online payment platforms to work with StoreBuilder for your store are Stripe and PayPal. So, it includes integration to WooCommerce Stripe Gateway and WooCommerce PayPal Payments for that.
7. Other Managed Hosting Features
There are many features/tools that the Nexcess managed hosting solution provides. And so does StoreBuilder. So, other than the above-mentioned features, some of the extra features are:
- Create 1-click staging and development sites to test the new StoreBuilder features.
- Visual regression testing compares 2 versions of your store to choose the best one.
- Automated image compression and lazy loading result in better store performance.
- WooCommerce Automated Testing detects every possible store issue and fixes them.
- The instant auto-scaling function allows your store to handle sudden traffic spikes.
8. Integration to Plugins, Themes, and Tools
Some of the extra WordPress themes, plugins, or tools that StoreBuilder offers are:
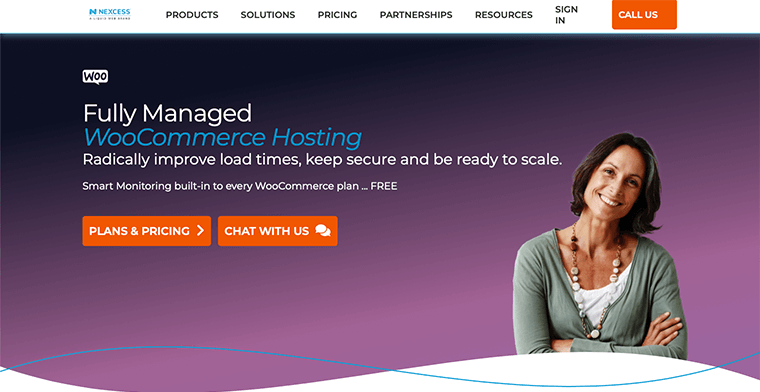
Want to know more about the Nexcess WooCommerce hosting features?
StoreBuilder is an easier way for the Nexcess managed WooCommerce hosting solution. So, to know the features in detail, check out our full review of Nexcess from the guide below.
With that, let’s move ahead into our next StoreBuilder review section!
C) How to Get Started with StoreBuilder for Your WooCommerce Website?
In this review section, we’ll show you the steps for using StoreBuilder. By doing that, you can use it for building your WooCommerce website. So, let’s start it immediately!
Step 1: Purchase the Nexcess StoreBuilder Plan
First, you’ve to purchase the Nexcess StoreBuilder plan. For that, follow the steps below:
Step i: Click the Nexcess StoreBuilder Option
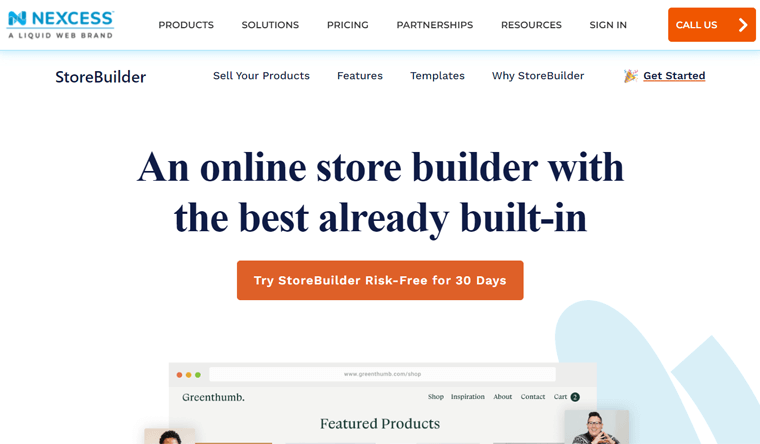
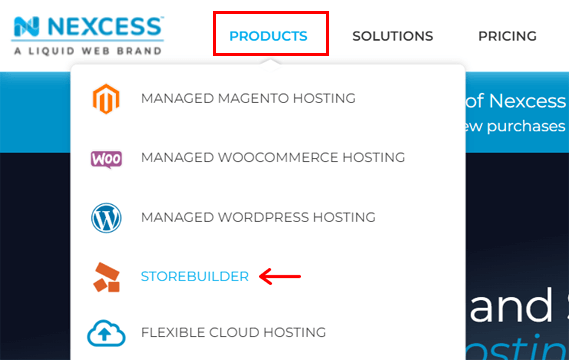
Open the original website of Nexcess and then hover on the Products menu. There, click on the StoreBuilder option.
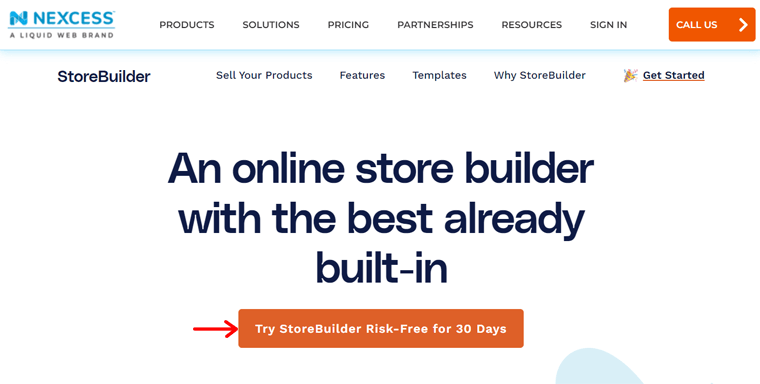
Now, the StoreBuilder page will open up. Next, you need to click on the ‘Try StoreBuilder Risk-free for 30 days’ button. Or, you can also click the Get Started option.
Step ii: Enter the Information About Your Store
Once you click on that button, you’ll be redirected to a page to fill out a short form. And that’s just a small step for the StoreBuilder by WPQuickStart.
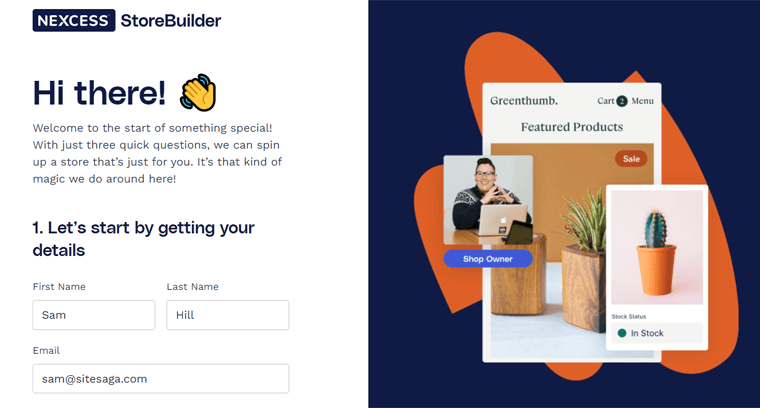
So, you need to fill in the answers to the questions that include:
- First, write down your first name, last name, and email address.
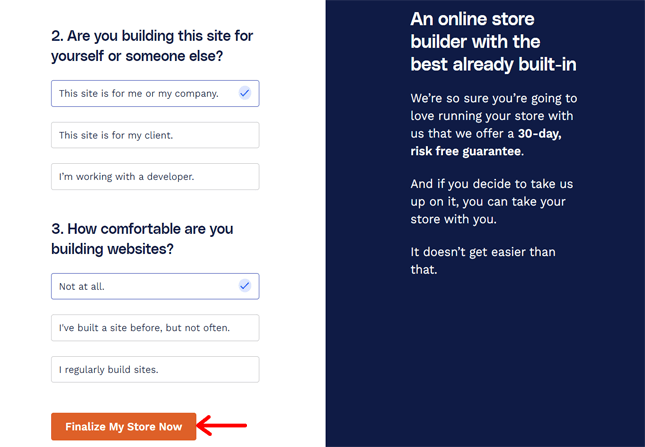
- Specify if you’re building this store for yourself/company, a client, or as a developer.
- Choose if you haven’t created sites before, have but not often, or regularly created.
Lastly, click on the Finalize My Store Now button that redirects you to the checkout page.
Step iii: Choose the StoreBuilder Plan
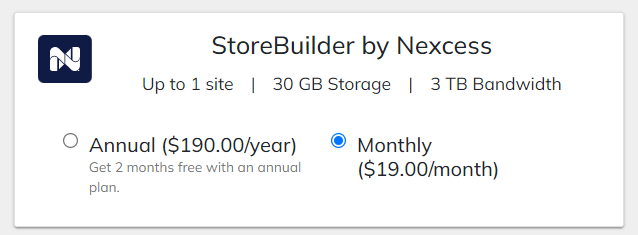
On the checkout page, you need to first choose the annual or monthly plan of StoreBuilder. So, select the radio button of the one that’s your preference.
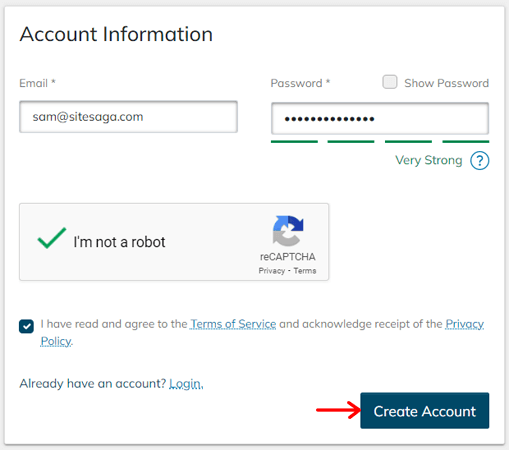
Step iv: Make an Account in Nexcess StoreBuilder
After that, you must create a Nexcess account in the Account Information section. So, fill up your details and click on the Create Account button right away.
Step v: Fill up the Billing and Payment Forms
Next, you’ve to fill up the Billing Information form with your details. And then click on the Save Billing Information button.
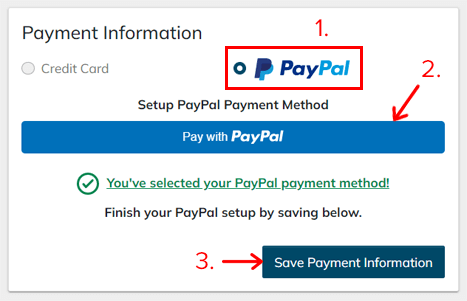
Then, there’s a Payment Information section to choose your payment option between credit card and PayPal. For example, here we chose the PayPal option, so, you need to click the Pay with PayPal button.
After that, you need to set up PayPal for the payment. Once you do that, click on the Save Payment Information button.
Then, you can choose the server location in the Plan Information section.
Step vi: Complete the Order
Lastly, check the overall order details in the Order Confirmation section. When everything seems fine, click on the Purchase button.

In a while, the order will be complete, and the Nexcess dashboard will show up.
So, let’s move to the next step.
Step 2: Important Nexcess Dashboard and Site Dashboard Menus
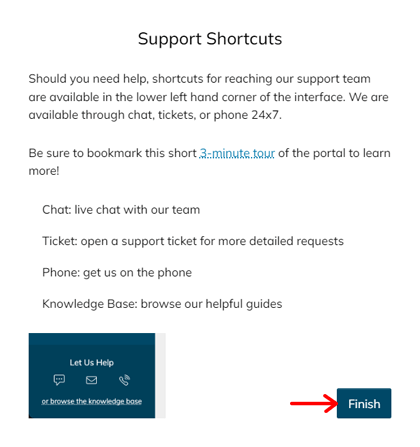
First of all, you can see a few pop-ups on the dashboard to get started with the hosting. And that’s for the welcome message, adding extra users, and support shortcuts.
So, you can go through them and then move forward at last by clicking the Finish button.
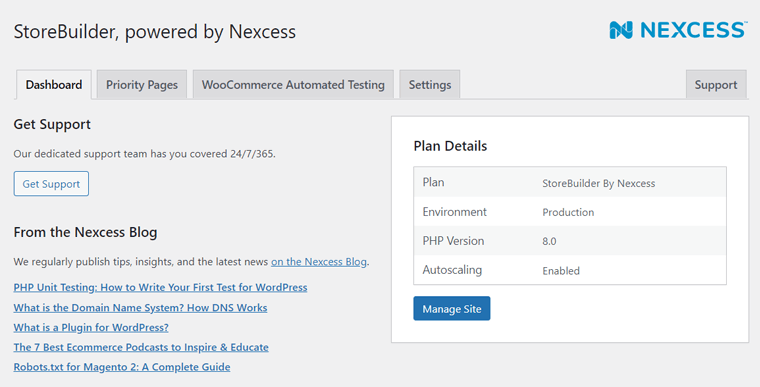
Now, you can see your Nexcess dashboard that looks like this:
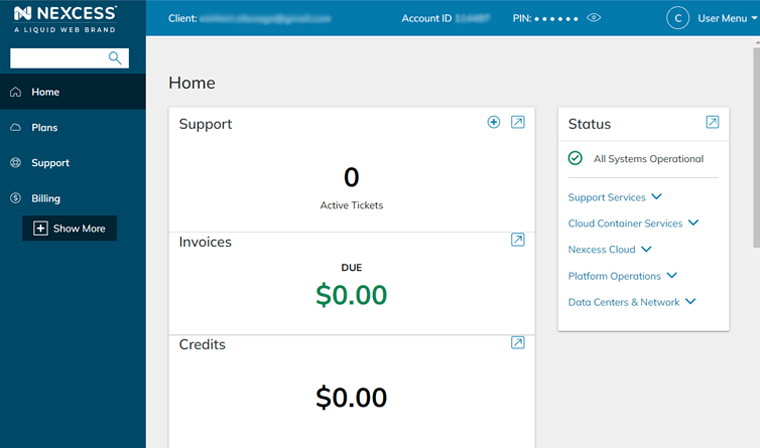
However, it takes a few minutes for your StoreBuilder plan to work on the hosting platform.
Nexcess Dashboard
After the setup is completed, look into some of the important menus on the Nexcess dashboard to be familiar with.
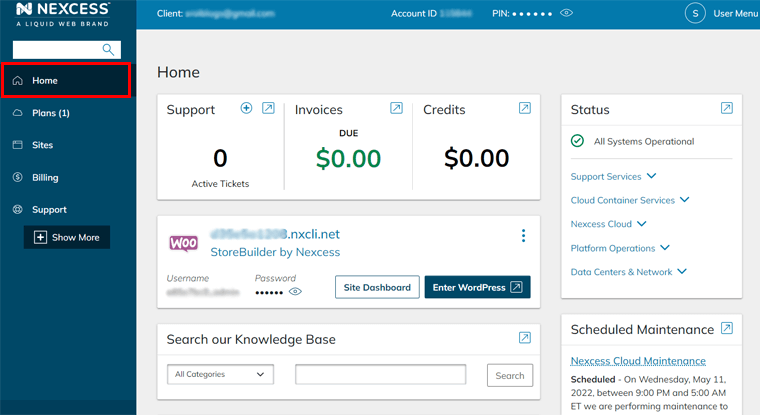
1. Home
Home is the first menu on your dashboard that gives the summary of your Nexcess account. Some of the necessary sections here are:
- Support: You can open a new support ticket and view the existing support tickets.
- Invoices: It displays the amount due on your account. The green, orange, or red color denotes there’s no due, there’ll be due soon, or the amount is overdue.
- Credit: This shows the present amount of unapplied credits on your account.
- Status: Here, you can see the working status of your system under multiple sections.
- Site Info: This shows the login information of your auto-built online store.
2. Plans
Next is the Plans menu with a number inside parenthesis. And it actually states the number of plans you have on your Nexcess account.
On this page, you can see the list of all the Nexcess plans on your account. You can see that the StoreBuilder by Nexcess is also added.
Moreover, you get to configure certain settings of each plan here such as:
- Get support
- Upgrade/cancel the plan
- Alter the plan name, etc.
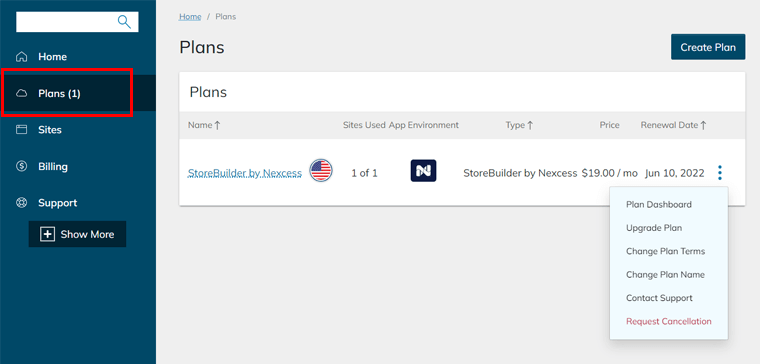
Not to mention, you can also add a new plan by clicking on the Create Plan button.
3. Sites
In the Sites menu, you can view the sites you have on your Nexcess platform. Since we’re using StoreBuilder, you can see that a site is already added to the list here.
Similar to Plans, here you get to also configure some settings of each site. Such as:
Similar to Plans, here you get to configure some settings of each site such as:
- Alter the site name
- Get support
- Make a staging/dev environment, etc.
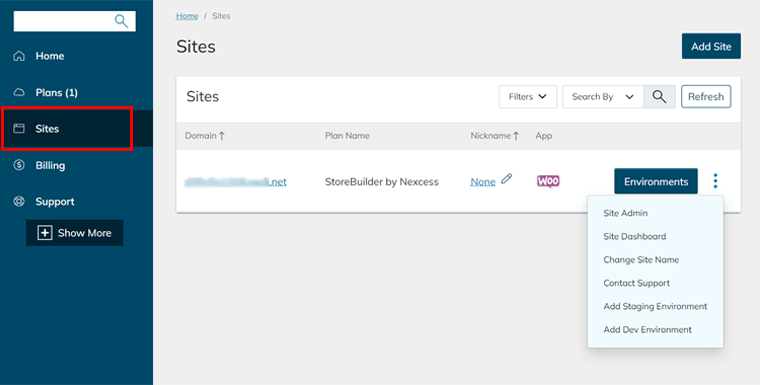
In addition, you can also add a new site here by clicking the Add Site button. For that, go through this article on adding a new site on Nexcess.
Site Dashboard
After going through the Nexcess dashboard, it’s important to check out the Site Dashboard of your eCommerce site. Here, you can configure the settings of that site.
So, go to the Sites menu and then click the default domain of your StoreBuilder site. Or, you can also click the triple-dot setting and then click the Site Dashboard option.

Now, look at some of the menus on your Site Dashboard.
1. Backups
Nexcess takes daily backups of every site. So, in the Backups menu, you can check all the backups of your online store. Also, you can take manual backups whenever you need them.
Further, you can restore the backups of your files, databases, or both if you want.
2. Analytics
In the Analytics menu, you can know some statistics about your site. Such as disk space, bandwidth, CDN usage, etc.
For example, the disk space denotes the free and used disk space of your site. While the bandwidth depicts the bandwidth usage of your site.
Other than them, there are several other menus such as SSL, Databases, Domains, etc.
Now, let’s move into the next review step and know how to set up a WooCommerce store with StoreBuilder.
Step 3: Setting up a WooCommerce Store with StoreBuilder
In this review section, we’ll show you how you can set up a WooCommerce store using StoreBuilder by Nexcess. So, follow the steps below.
Step i: Go to WordPress Dashboard
First, you need to go to the Sites menu on your Nexcess dashboard. There, click on the Site Admin option present on the triple-dot settings.
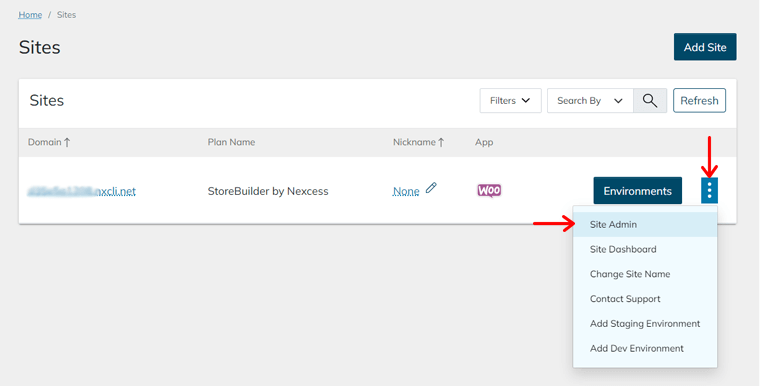
By clicking on the Site Admin option, it’ll open the WordPress login form of your website. There, you need to log in to the WordPress dashboard. The login credentials are present on the Nexcess dashboard itself.
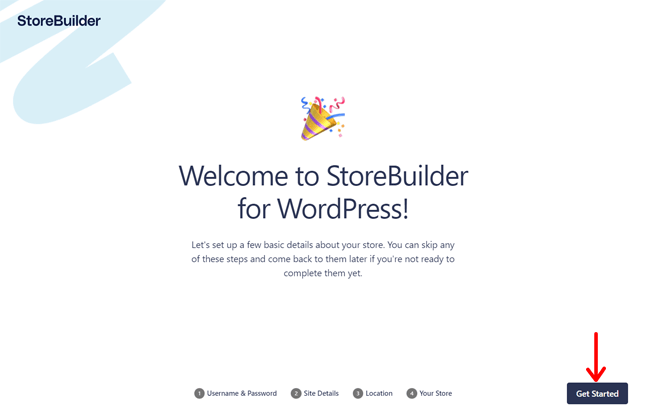
Step ii: Set Up Your Store with StoreBuilder Wizard
Instead of opening the WordPress dashboard, the StoreBuilder wizard directly opens up for you to start the configuration. If you’re sure enough about your store details, then you can start it right away!
First, you’ll see the welcome message by StoreBuilder where you need to click the Get Started button.
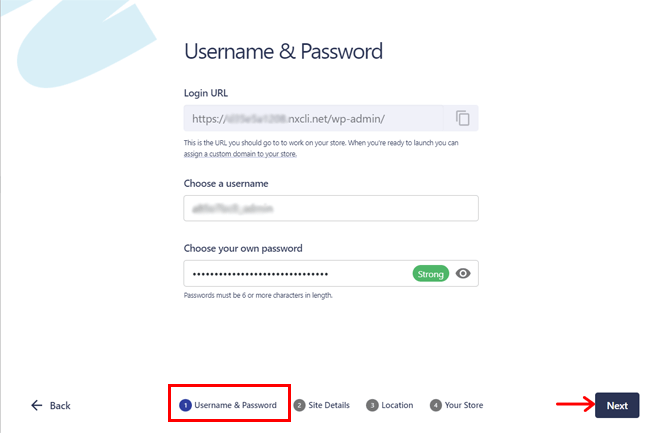
Then, you’ll be redirected to the Username & Password step. There, you can choose the username and password for your store and then click on the Next button.
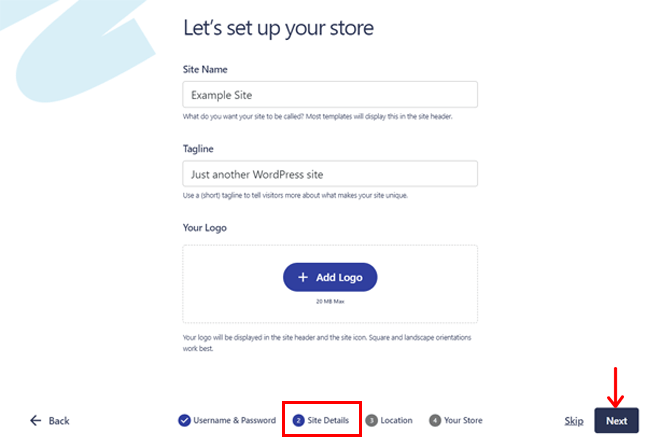
After that, the Site Details section will open up. Here, you can add your store details like site name, logo, and tagline. Then, move to the next step by clicking on the Next button.
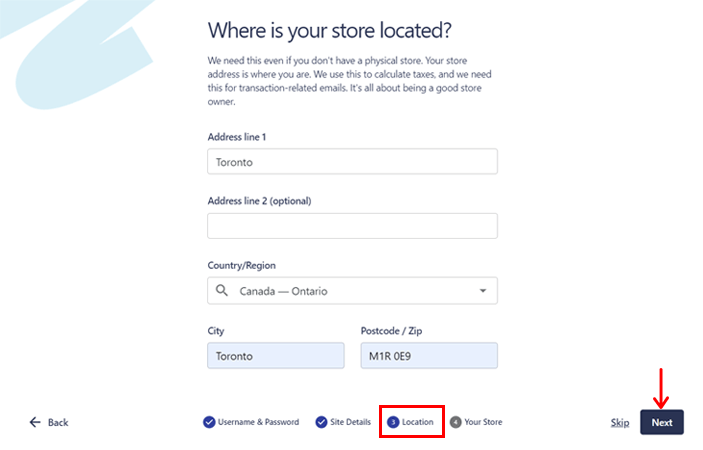
Now, it’s time for the Location section that allows you to add the location of your physical store in case you have one. Then, click on the Next button.
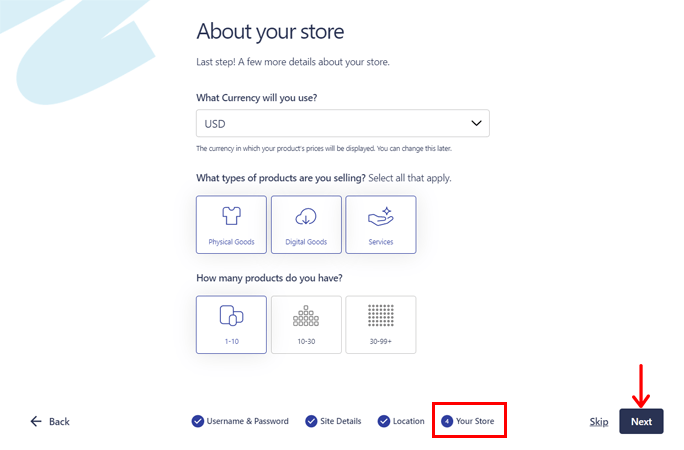
Lastly, there’s a Your Store section where you can include more details about your store. That includes the currency, product types, and the number of products your store prefers having. With that, click on the Next button again.
After completing all these steps, click on the Save & Continue button.
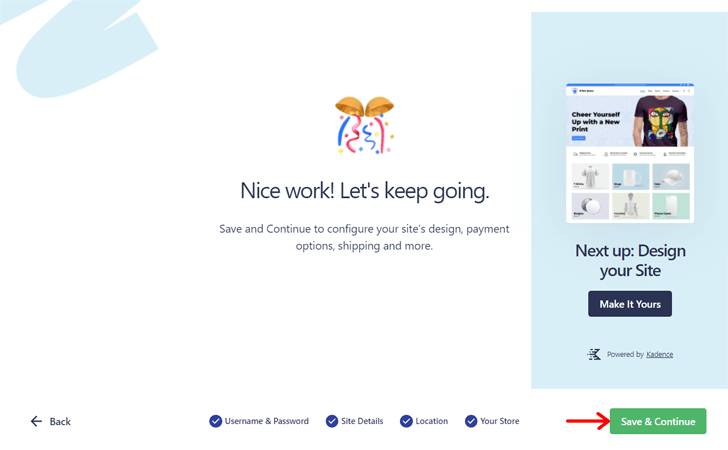
Step iii: A Quick Glance at the new WordPress Dashboard
Now, the WordPress dashboard of your WooCommerce store opens up. And you’re on the Set up menu, with the first step ‘Set up your site’ marked as completed.

Before moving to the other steps of the StoreBuilder wizard, you should check out your dashboard. Since there’s a completely new look to it.
You can see that there’s a Nexcess menu with some submenus with the following functions:
- Dashboard: To get support, set priority pages, enable/disable store functions, etc.
- Page Cache: Configure the cache settings from the Page Enabler plugin.
- Installed Plugins: Displays the list of plugins installed or recommended to install.
Other than that, you can see some grouped menus with the following options:
- Content: Includes Posts, Media, and Pages options for adding the content to the site.
- Store: Contains the WooCommerce menus i.e. Products, Analytics, and Settings.
- Site: Consists of other options for the site i.e. Appearance, Plugins, and Users.
To get back to the previous dashboard, you can click the Show Full Menu option. While moving back to the new menu options, there’s a Streamline menu option.
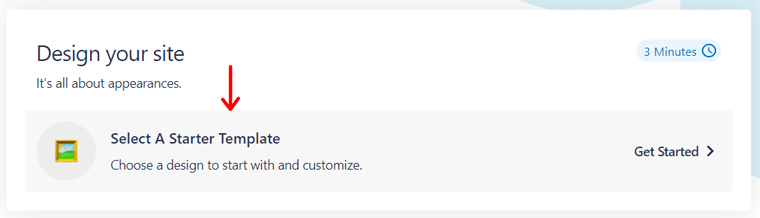
Step iv: Design Your Site
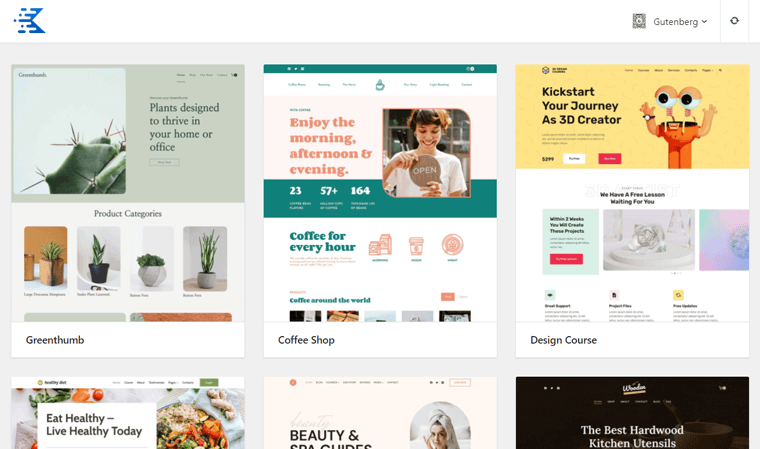
Now, continuing the configuration, the next step is ‘Design Your Store’. For that, you need to click on the Select A Starter Template option.
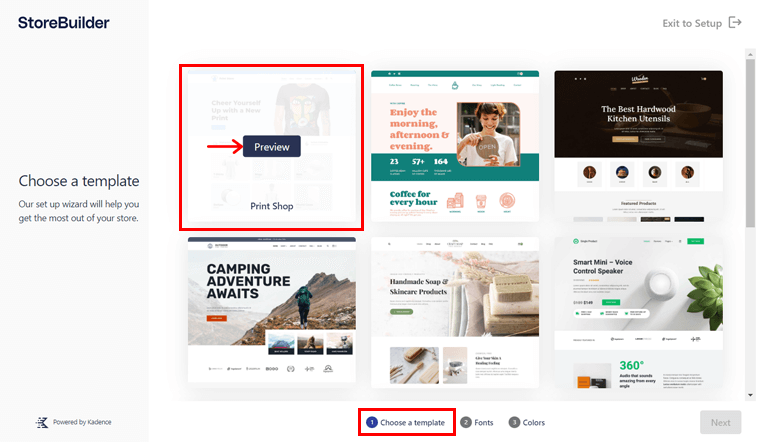
That’ll take you to another page with Choose a template section. Here, you can choose your desired template for the store that’s powered by Kadence. All you need to do is hover on a template, then click on the Preview button to check the template design.
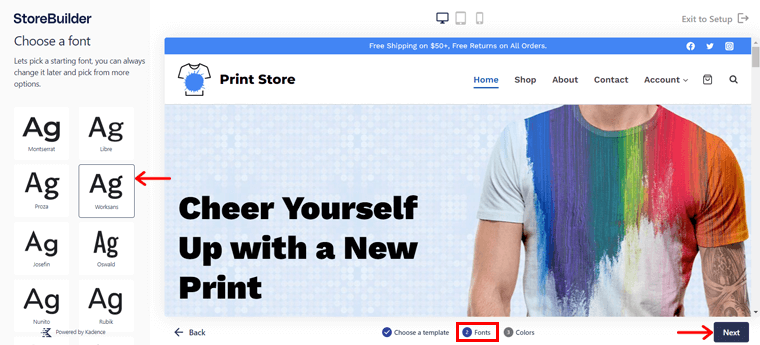
Now, the Fonts step will open, where you can choose the font style of your site among the given options. Just click on your desired font, and click on the Next button to move ahead.
The next step is Colors, where you need to select your preferred color palette among the given options. For that, click the radio button of the color palette and then the Next button.
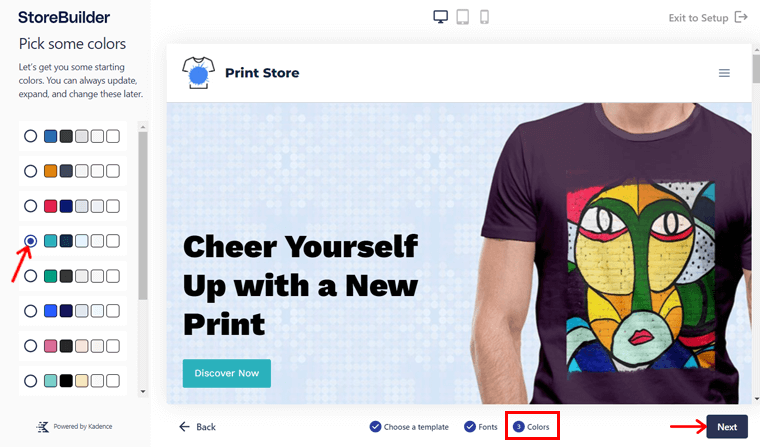
Finally, you can have a preview of the store on different screen sizes of mobile devices. If you want to change the choices, then just move to the previous step by clicking the Back button. Else, click on the Save & Continue button.
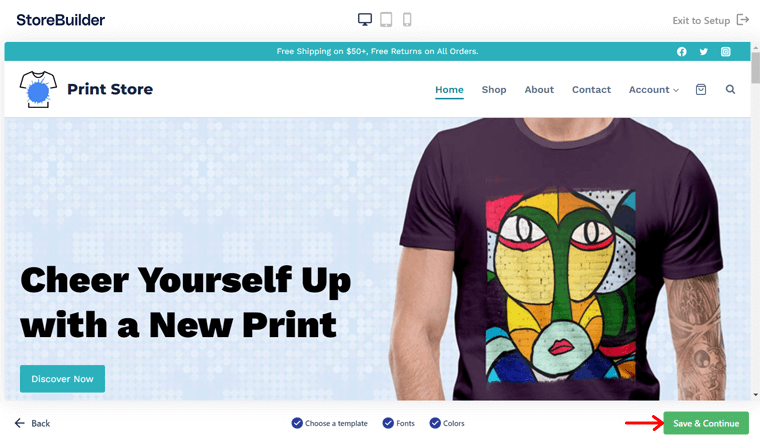
This will take a certain time to integrate the template, colors, and fonts into your store. Once it’s completed, you’ll move back to the dashboard.
Step v: Configure Payment
After that, you can move to the next step i.e. ‘Configure Payment’. There are 2 options for payment setup, that are Stripe and PayPal.
The Stripe payment option is already activated in your store. So, you can click on the Connect Stripe button and directly connect to your Stripe account.
To know how to do that, click on the WP 101: Stripe option for a complete tutorial.
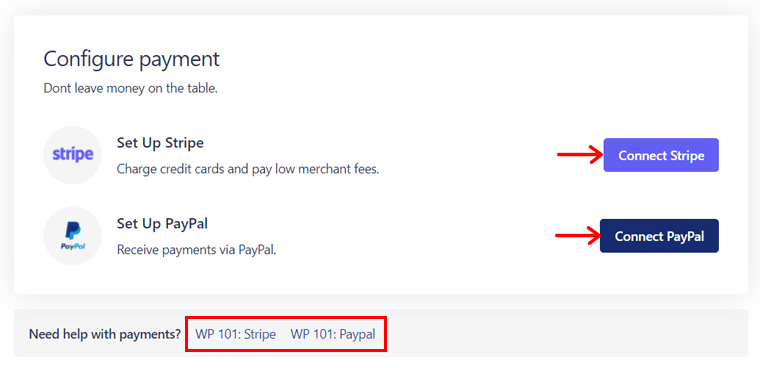
Whereas for PayPal, you need to first activate the payment gateway. For that, click on the Connect PayPal button first. Then, you need to click the Activate PayPal button on the payment settings.
To connect PayPal to your store, you can click the WP 101: PayPal option for guidance.
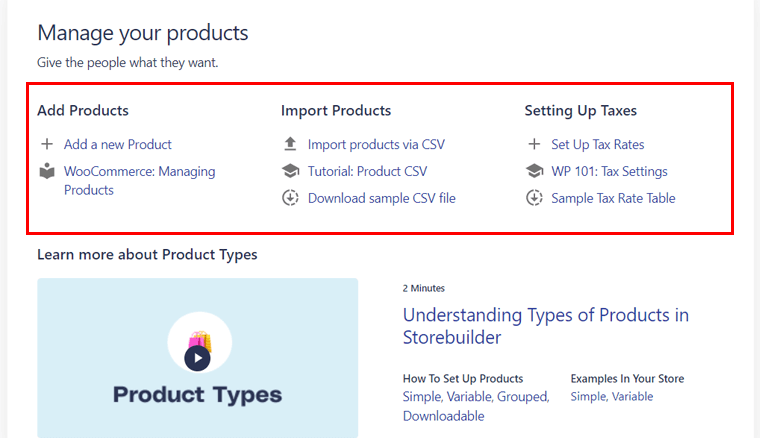
Step vi: Manage Your Products
In the Manage Your Products step, you can add your products. Also, you get to set up tax rates on them. So, let’s know them briefly.
For adding a new product, click the ‘Add a new product’ option. To learn how to add a product in detail, click the WooCommerce: Managing Products option.
To import the products instead, click the ‘Import products via CSV’ option. Then, work according to the Tutorial: Product CSV option.
Similarly, for the tax rates, click the Set Up Tax Rates option. And if you need the guidance, then click the WP 101: Tax Settings option.
Now, let’s take an example by importing the products. Just click the option, then upload the CSV file by clicking on the Choose File button. After that, click the Continue button.
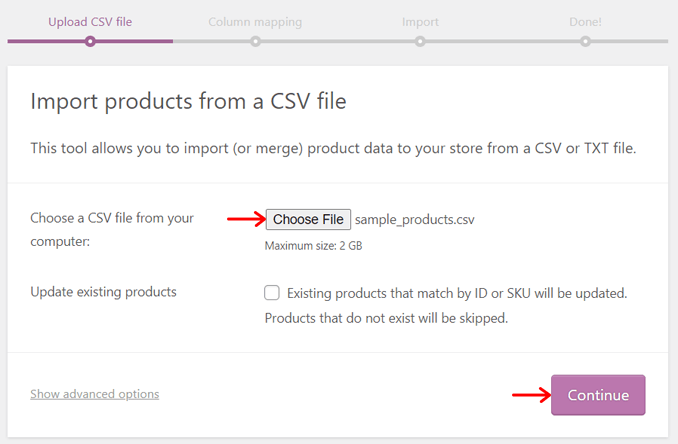
Next, in the Column mapping section, you can map the CSV fields to the products. Lastly, click on the Run the Importer button.
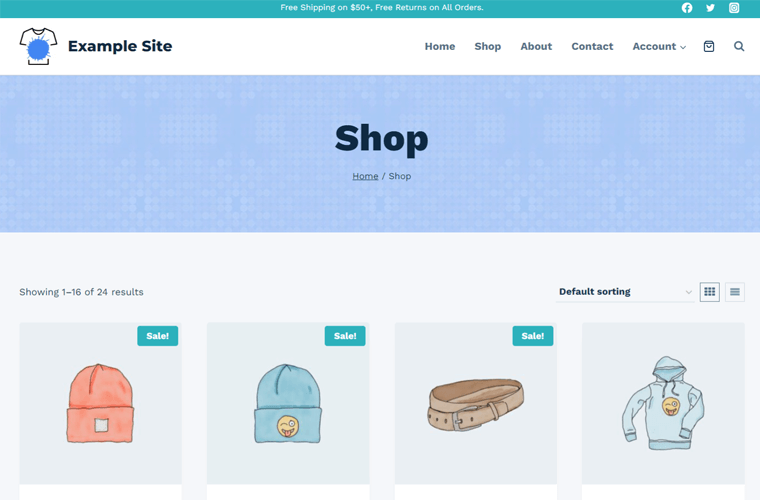
After a while, the import will be completed. Then, you can check the preview of your store.
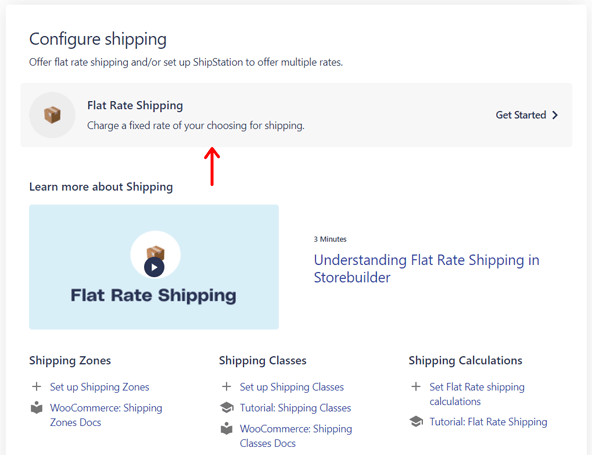
Step vii: Configure Shipping
The final step is Configure Shipping, where you can set up the shipping zones, shipping classes, and shipping calculations. You can find tutorials to set up each of them down below on the StoreBuilder wizard.
For example, let’s create a shipping zone. So, click on the Flat Rate Shipping option.
That’ll redirect you to shipping settings, where you can find 3 sections for shipping zones, classes, and options (or calculations).
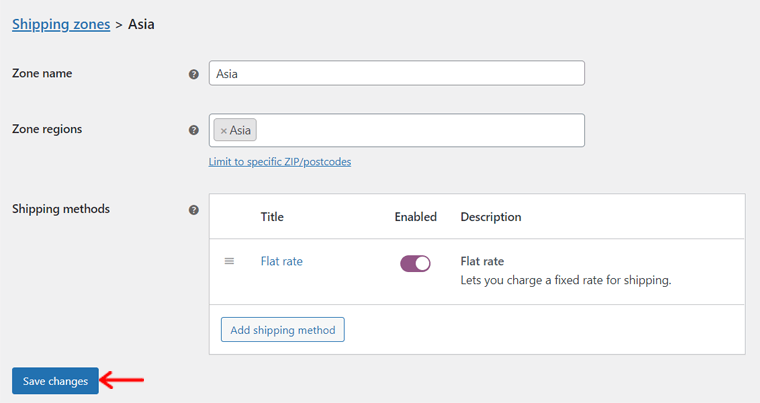
On the Shipping zones section, click the Add shipping zone button.
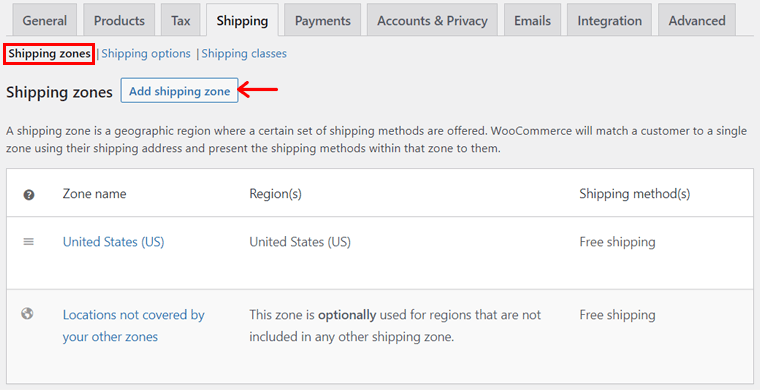
Now, you need to enter the zone name and zone region. Also, choose the shipping method and configure it. Lastly, click on the Save changes button.
That’s it for the StoreBuilder wizard configuration steps! You can find various other options in the general WordPress dashboard with the WooCommerce plugin for further options.
So, let’s move into the next StoreBuilder review section.
D) StoreBuilder Pricing Plans
You can try StoreBuilder using its free trial. But, alongside other details, you need to also enter your payment information. Then, you can decide to continue or discontinue the service.
Here are the pricing plans on Nexcess StoreBuilder:
- Monthly Plan: This monthly plan costs $19/mo and offers a 30-days free trial.
- Annual Plan: The annual plan costs $190/year and gives a 2-months free trial.
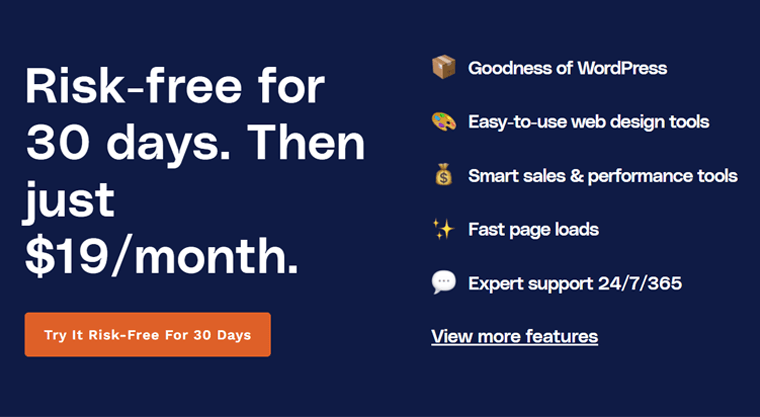
Note that both plans offer 30 GB of storage and 3 TB of bandwidth. Also, you can use it for 1 website.
With that, let’s jump into the customer support options section of this StoreBuilder review!
E) StoreBuilder Customer Support Options
Nexcess is one of the best web hosting providers out there. In fact, it also gives good support to its customers.
When using StoreBuilder, you’ll get live expert support from the team. So, you’ll get access to world-class eCommerce support by phone, email, and chat 24/7/365.
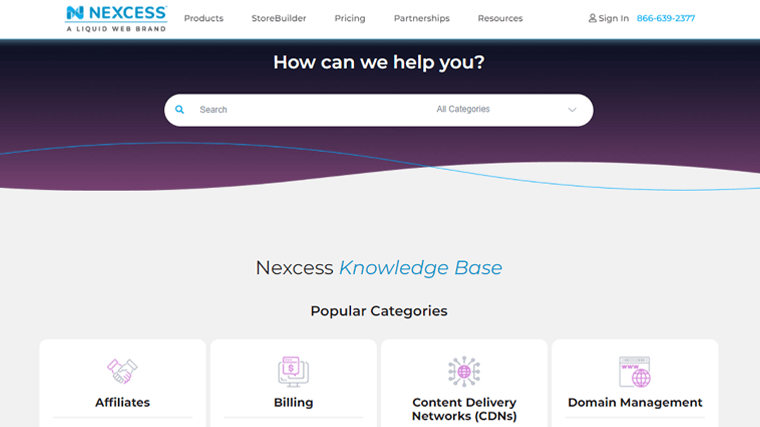
In addition, it has a comprehensive Nexcess knowledge base with full guides on multiple categories. That also includes the complete guide on using WPQuickStart and StoreBuilder.
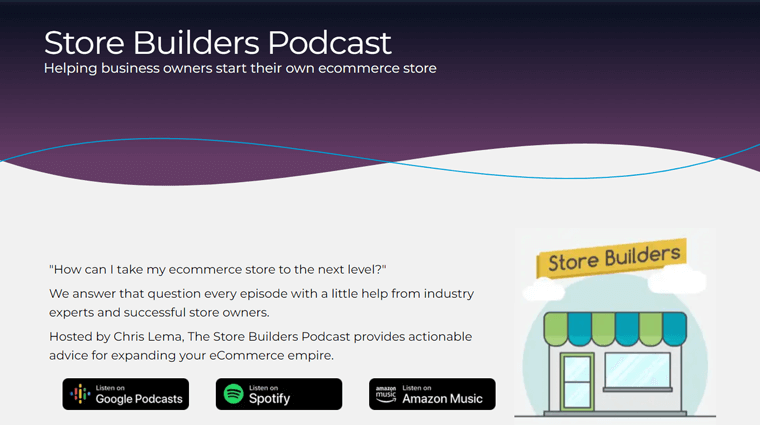
Not only that, but you can go through the blogs, the Store Builders Podcast, webinars, and lots more. Also, you can check the Support page to find the FAQs.
That’s all! Now, let’s move ahead to our next section of this StoreBuilder review.
F) Pros and Cons of StoreBuilder
To sum up this entire review, we’ll be looking at the pros and cons of StoreBuilder. So, let’s see them!
Pros of StoreBuilder
- Within a few minutes, you can set up an online store with StoreBuilder.
- Easy-to-use eCommerce site builder with no need for coding skills.
- Uses AI technology that gives you highly customizable template options.
- Offers free trials of 30-days on the monthly plan and 2-months for the annual plan.
- Able to build a site of any niche to sell unlimited products of any type.
- Includes multiple payment gateways including Stripe and PayPal.
- Gives 24/7/365 customer support from eCommerce experts.
- Comes with multiple plugins and tools for better marketing, design, and more.
- No hidden transaction fees or expensive add-ons are included.
Cons of StoreBuilder
- Need to be careful when filling the questions by StoreBuilder for a better outcome.
- Limited 30-days money-back guarantee policy.
- Doesn’t include in-built marketplace features.
G) Customer Reviews on Nexcess StoreBuilder
Now, let’s look at the customer review on the Nexcess StoreBuilder solution. We’ll be viewing the Nexcess user reviews on 2 legitimate online review sites. So, here we go!
User Reviews and Ratings on Trustpilot:
Nexcess scores a perfect 4.6 out of 4 stars on Trustpilot according to 311 users. Great! Plus, 87% of the users state that it’s excellent.
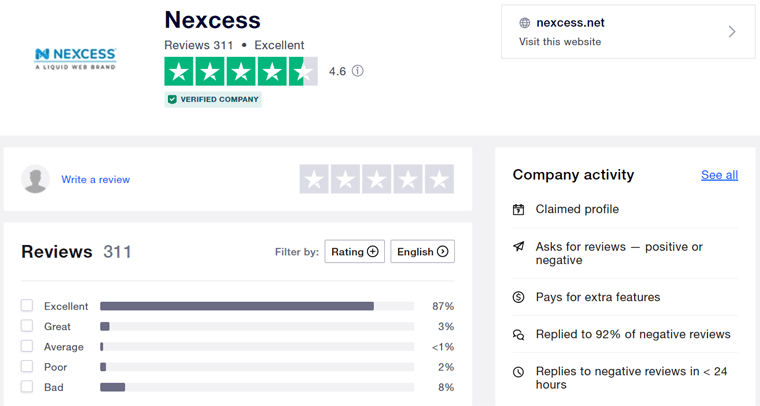
Overall, the reviews seem to be great. However, improvements can be done in customer support. Nevertheless, check out the recent reviews for more information.
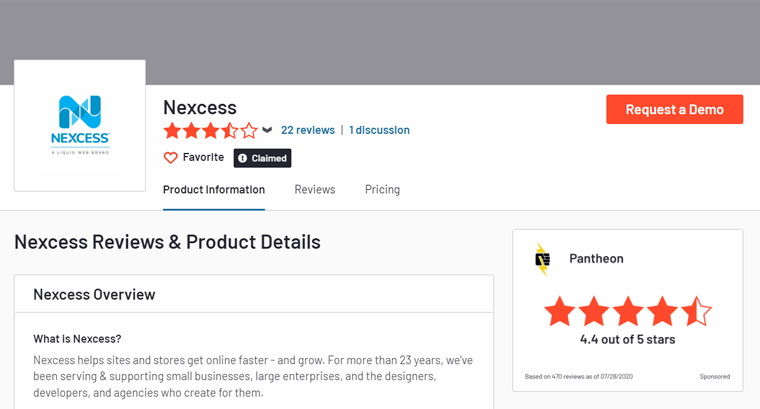
User Reviews and Ratings on G2:
While looking at the G2 reviews, the rating on Nexcess by 20+ users is 3.7 out of 5. That’s average!
We can see that the storage and bandwidth limits are some loved features on Nexcess. Although, database support and the control panel are some low-rated features of it.
Now, check out the average scores out of 10 for these categories on Nexcess:
- Ease of Use: 7.9
- Quality of Setup: 8.1
- Ease of Setup: 8.5
For updates, have a look at the recent scores on G2.
With that, let’s move ahead to our next StoreBuilder review section!
H) Alternatives to StoreBuilder
By now, you may have decided to try StoreBuilder for your eCommerce site. If StoreBuilder didn’t match your requirements, then don’t worry!
Here’s a list of the top StoreBuilder alternatives. All of them come under the list of the best website builders for eCommerce sites.
1. Shopify

The first one on the list is Shopify, an all-in-one eCommerce platform using which you can easily build an online store. It comes with tons of tools and features for your store. Using them, you can create, sell, manage, grow, and market your eCommerce business.
Further, it offers web hosting and domain name registration services. As a result, this makes it preferable for store owners who want to focus on their business.
Here’s a comprehensive review of Shopify that you should check out.
2. BigCommerce
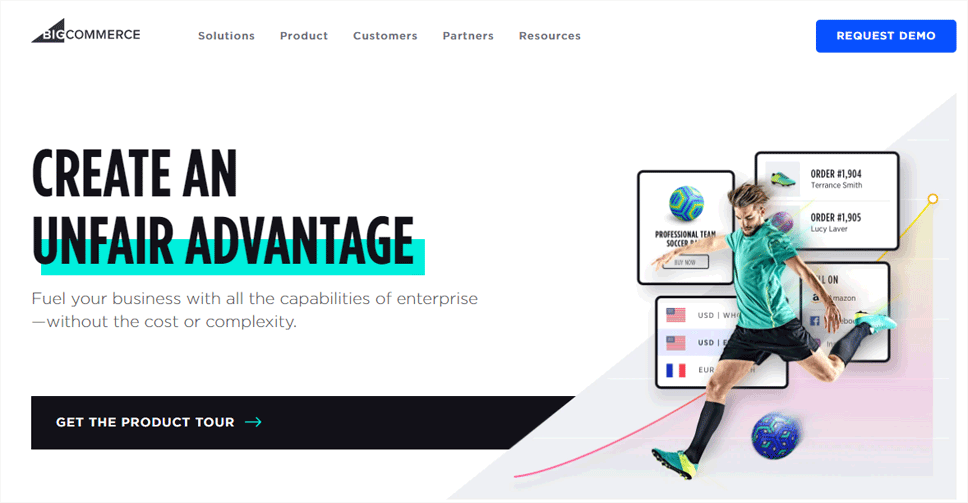
Another popular eCommerce solution best for growing eCommerce sites is BigCommerce. Some of its remarkable features include integration to WordPress, digital wallets, coupons & discounts, and more.
Further, you can also use BigCommerce to create a marketplace or multi-storefront website. With that, you get to sell multiple brands across the globe.
Make sure to look into our full comparison between BigCommerce vs WooCommerce.
3. Wix eCommerce
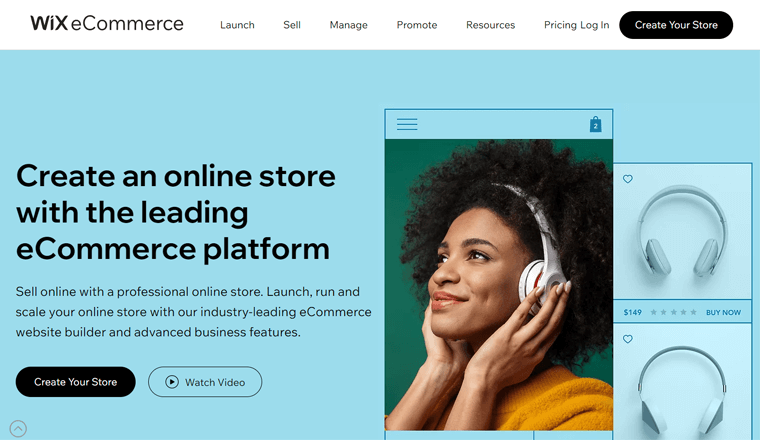
Lastly, Wix eCommerce is a beginner-friendly drag-and-drop store builder with advanced features. It’s so flexible that you can use it to easily create, run, and scale your eCommerce site.
Moreover, it offers 500+ free templates for easily designing an online store. Also, you get to customize it to match your brand. Not to mention, it provides free tools like Wix Logo Maker, Business Name Generator, etc. to build your brand.
Check out the comparison article on Wix vs WordPress to know their differences.
I) Final Thoughts – Is it the Right WooCommerce Site Builder?
That’s it! This section is a recap of this review on the StoreBuilder eCommerce site builder.
Nexcess is a popular web hosting provider, offering managed hosting solutions. One of which is managed WooCommerce hosting. But if you want to build your online store faster, then you can use StoreBuilder by Nexcess.
StoreBuilder is an alternative way by Nexcess to easily build an eCommerce site using WooCommerce. Also, it uses its popular managed WooCommerce hosting service for a better outcome.
Moreover, it also comes with multiple premium plugins and tools to easily design the store. That includes the amazing Kadence Theme Pro and Kadence Blocks Pro.
Further, it works as an AI assistance that’ll give template options based on your needs. Thus, configuring and customizing the store as per your needs has never been this easy!
So, we recommend trying the 30-days free trial of StoreBuilder by Nexcess. If you’re unsatisfied with the service, then you can discontinue it with the 30-days money-back policy.
Do you want to try the risk-free 30-days trial of StoreBuilder?
To get started with the easiest StoreBuilder eCommerce builder, go ahead and try its risk-free 30-days trial right now from the link below.
J) Frequently Asked Questions (FAQs) on StoreBuilder
StoreBuilder comes with many free and premium customization features. There are no transaction fees or costly add-ons in StoreBuilder, so it’s quite profitable for anyone. As these features aren’t present in Shopify, BigCommerce, or Wix, StoreBuilder is a better option.
You can use StoreBuilder to make an eCommerce site with a dedicated URL. However, it can’t be a marketplace. To build a marketplace, you need to integrate it with a marketplace plugin. And StoreBuilder will allow you to manage your store or marketplace easily.
StoreBuilder by Nexcess costs $19/mo with the monthly plan giving a 30-days free trial. When you choose the annual plan, it costs $190/year with a 2-months free trial.
Yes, of course! StoreBuilder is not only for those who want to build a new store. But also for those who own one already. With the free migration option by Nexcess, you can easily use StoreBuilder for your online store.
No, StoreBuilder will give you a temporary domain for your online store. So, you can decide and change it later.
Conclusion
Yipee! You’re at the end of our StoreBuilder review article. This means you’ve thoroughly gone through our blog and learned many things on StoreBuilder.
Moreover, we hope that you liked our blog. Also, you were able to state whether it’s the best website builder for your eCommerce site or not.
If you’re in a dilemma when using StoreBuilder, then let us know. You can post down a comment stating your query. We’ll try to get back to you as fast as possible.
Further, we’ll be delighted if you could check some of our recent articles. So, look at the best managed WooCommerce hosting services and how to change product page layout in WooCommerce using ProductX.
Lastly, follow us on our Twitter and Facebook profiles to get the updates.
Some of the links on this article/page are affiliate links. If you click on such an affiliate link and purchase the product, we’ll earn a specific percent commission from the seller. But it won’t at all affect the price you’ll pay.